
There are many different solutions available to load balance applications. It can be based on separate hardware appliances, virtual appliances or system inbuilt method such as NLB (Network Load Balancer). However, there are few common challenges on these environments.
• If its third-party solution, additional cost involves for licenses, configuration and maintenance
• Applications or services not always use all of the allocated resources. It may depend on demand and time. Since its fixed number of instance, infrastructure resource will be wasted in non-peak time. if its cloud service, it going to waste money!
• When the number of server instances increase, it makes it harder to manage systems. Too many manual tasks!
Azure virtual machine scale sets answers all above challenges. It can automatically increase and decreases number of vm instances running based on demand or schedule. No extra virtual appliances or licenses involves. It also allows to centrally manage, configure large number of instances. Following points are recognized as key benefits of Azure virtual machine scale sets.
• It supports Azure load balancer (Layer-4) and Azure Application Gateway (Layer-7) traffic distribution.
• It allows to maintain same VM configuration across the instance including VM size, Network, Disk, OS image, Application installs.
• Using Azure Availability Zones, if required we can configure to distribute VM instances in scale set to different datacenters. It adds additional availability.
• It can automatically increase and decrease number of vm instances running based on application demand. It saves money!
• It can grow up to 1000 vm instances, if its own custom images, it supports up to 300 vm instances.
• It supports Azure Managed Disks and Premium Storage.
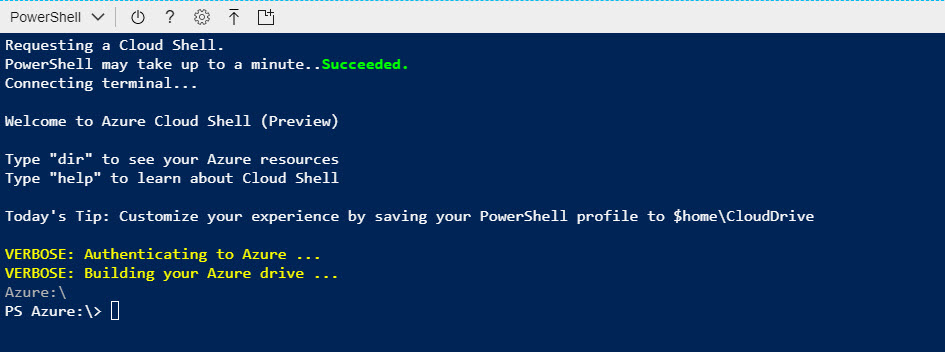
Let’s see how we can setup Azure virtual machine scale set. In my demo I am going to use Azure PowerShell.

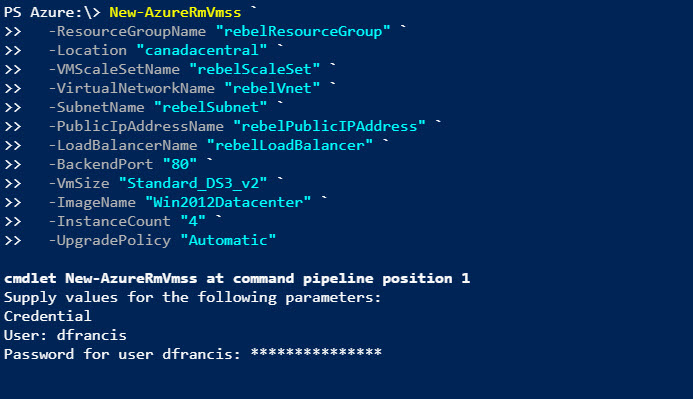
New-AzureRmVmss ` -ResourceGroupName "rebelResourceGroup" ` -Location "canadacentral" ` -VMScaleSetName "rebelScaleSet" ` -VirtualNetworkName "rebelVnet" ` -SubnetName "rebelSubnet" ` -PublicIpAddressName "rebelPublicIPAddress" ` -LoadBalancerName "rebelLoadBalancer" ` -BackendPort "80" ` -VmSize "Standard_DS3_v2" ` -ImageName "Win2012Datacenter" ` -InstanceCount "4" ` -UpgradePolicy "Automatic"|
Parameter |
Description |
|
New-AzureRmVmss |
This is the command use to create Azure Virtual Machine Scale Set |
|
-ResourceGroupName |
This define the resource group name and it is a new one. |
|
-Location |
This defines the resource region. In my demo its Canada Central |
|
-VMScaleSetName |
This defines the name for the Scale Set |
|
-VirtualNetworkName |
This defines the virtual network name |
|
-SubnetName |
This defines the subnet name. if you do not define subnet prefix, it will use default 192.168.1.0/24 |
|
-PublicIpAddressName |
This defines the name for public IP address. If not define allocation method using -AllocationMethod , it will use dynamic by default. |
|
-LoadBalancerName |
This defines the load balancer name |
|
-BackendPort |
This creates relevant rules in loadbalancer and load balance the traffic. in my demo I am using TCP port 80. |
|
-VmSize |
This defines the VM size. if this is not defined, by default it uses Standard_DS2_v2 |
|
-ImageName |
This defines the VM image details. If no valuves used it will use default value which is Windows Server 2016 Datacenter |
|
-InstanceCount |
This defines the initial number of instance running on the scale set |
|
-UpgradePolicy |
This defines upgrade policy for VM instances in scale set |
Once this is run it will ask to define login details for instances. After completes, it will create the scale set.
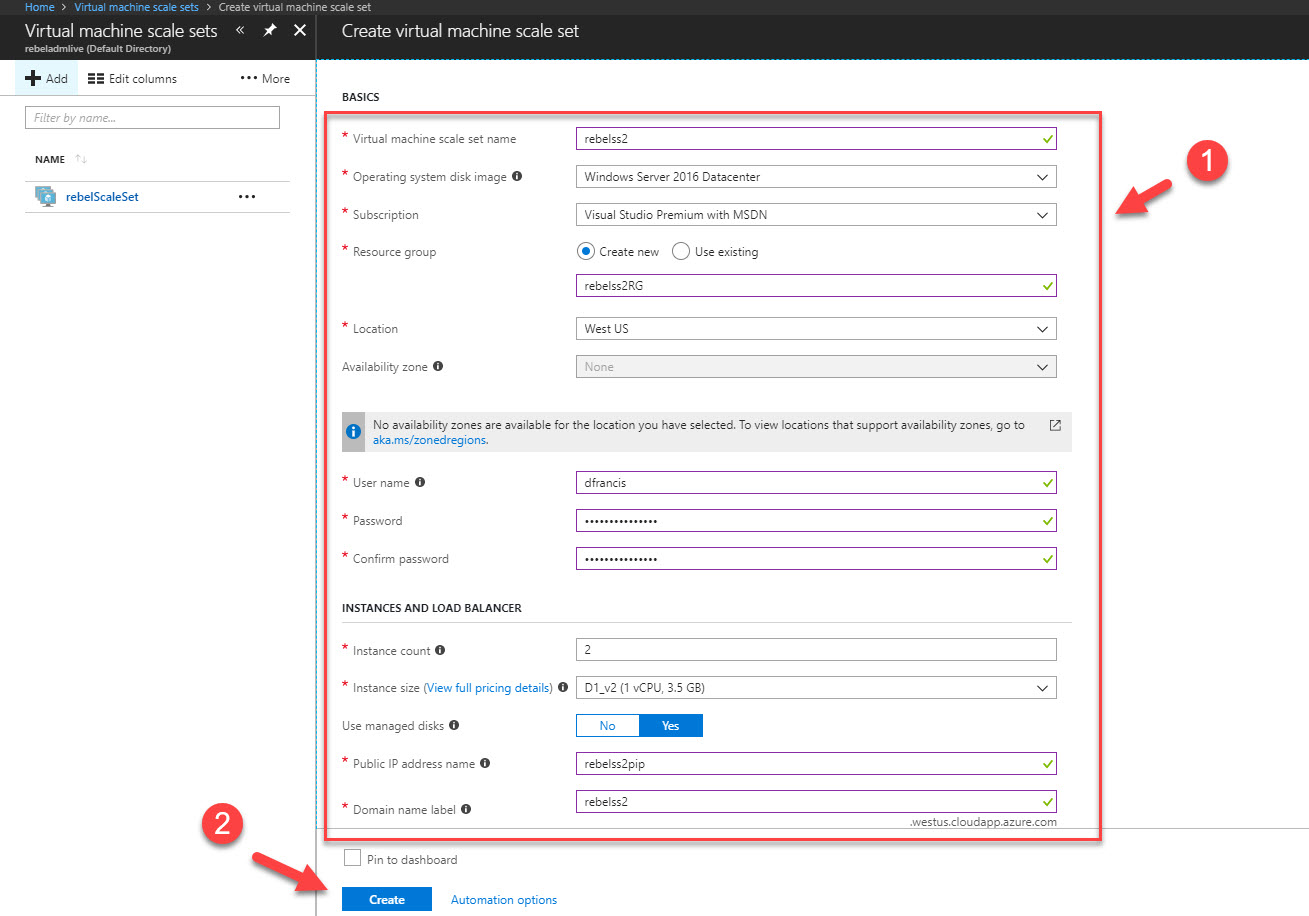
This also can do using Portal. In order to use GUI,
1) Log in to Azure Portal as Global Administrator
2) Go to All Services | Virtual Machine Scale Set
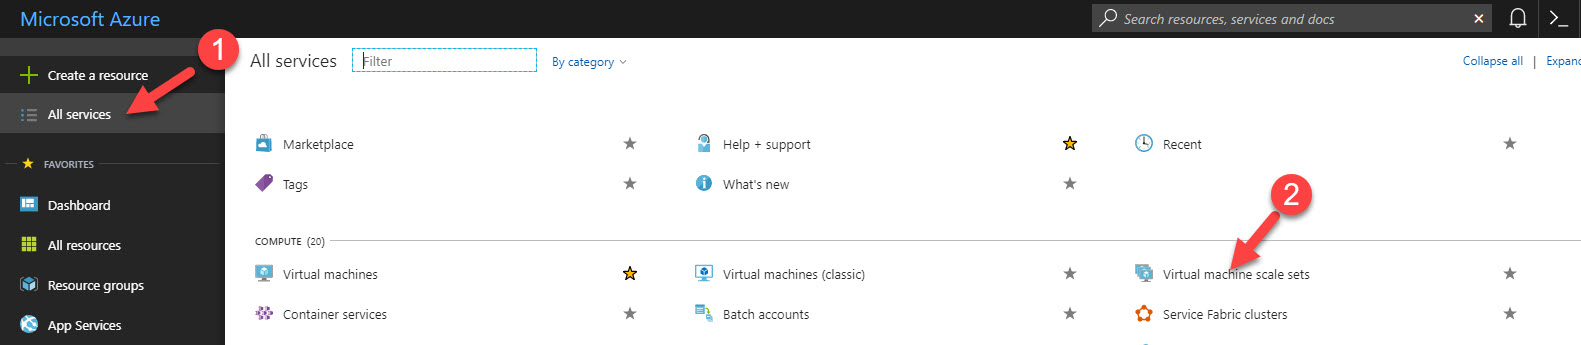
3) In new page, click on Add
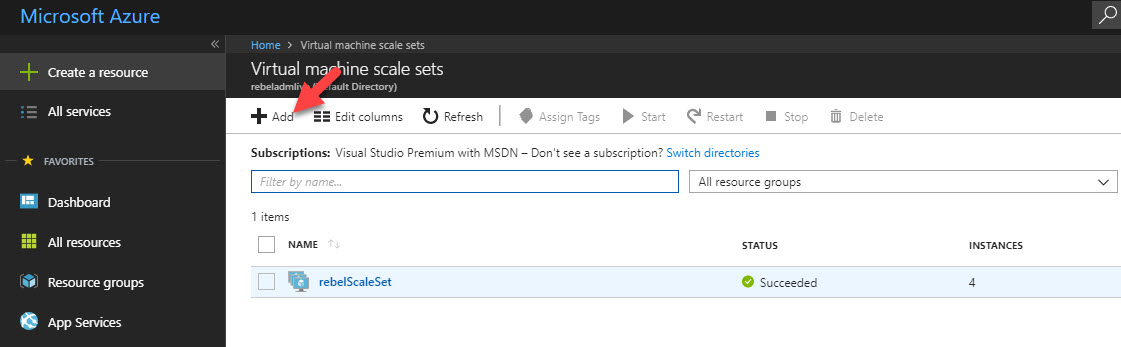
4) Then it will open up the form, once fill in relevant info click on create
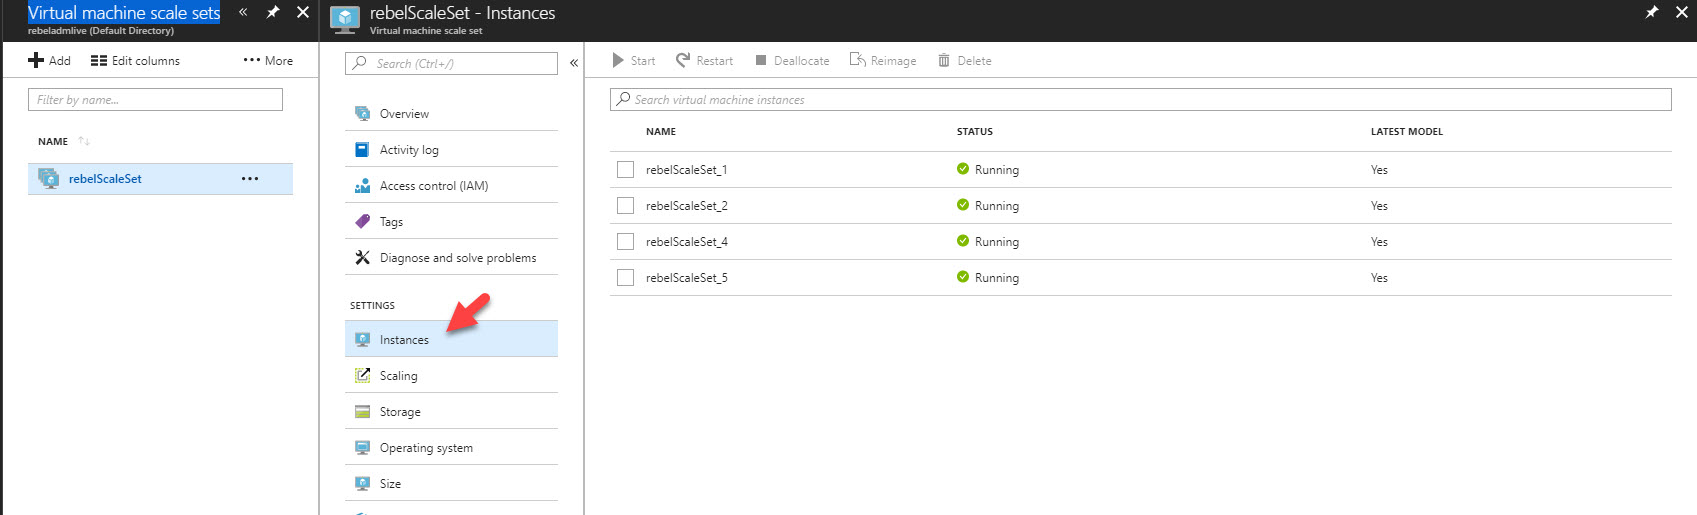
5) We also can review the existing scale set properties using Virtual machine scale sets page. On page click on scale set name to view the properties. If we click on Instances, we can see the number of instances running
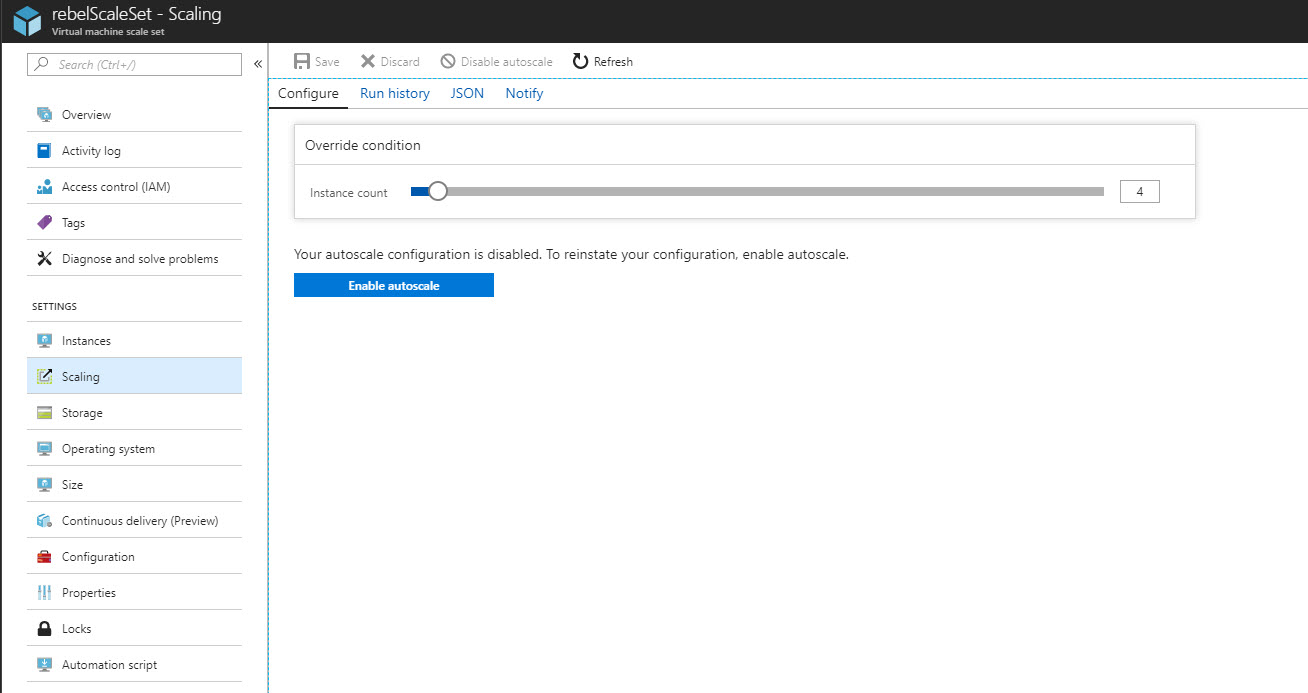
6) Scaling shows the number of instances used. If need it can also adjust in here.
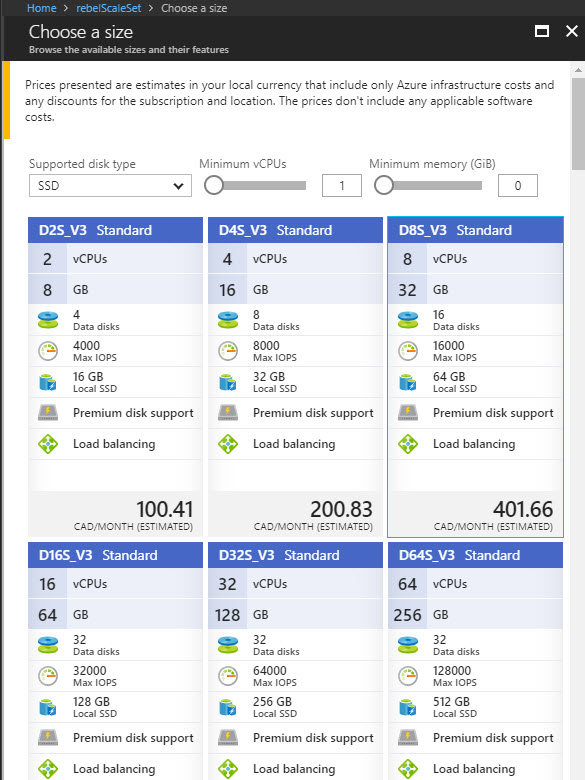
7) Size defines the size of the VM, again if need values can change in same page.
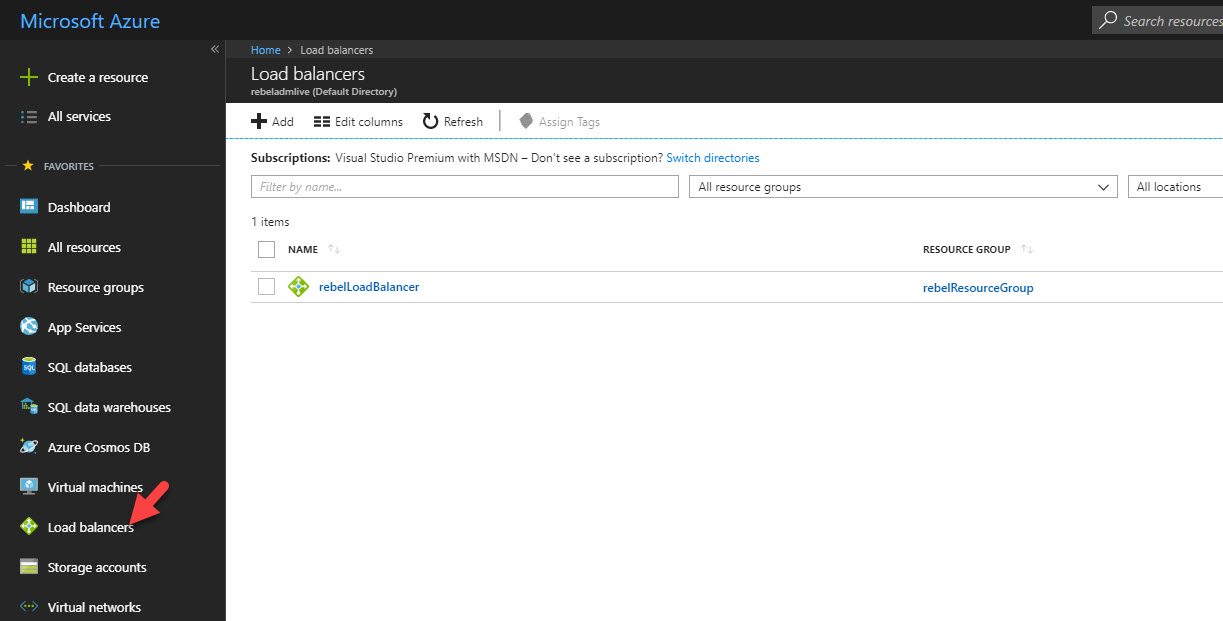
8) Also, if we go to Azure Portal | Load Balancers, we can review settings for load balancer used in scale set.
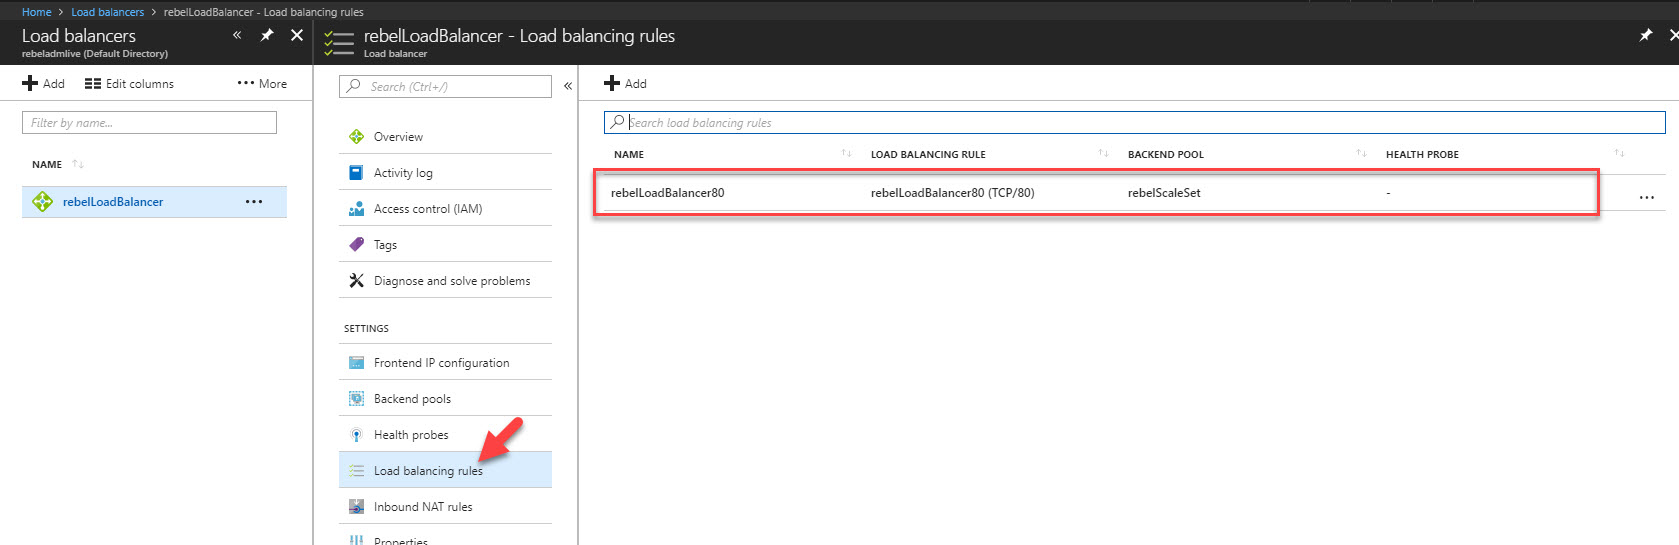
9) In my demo I used TCP port 80 to load balance. Those info can find under Load Balancing rules
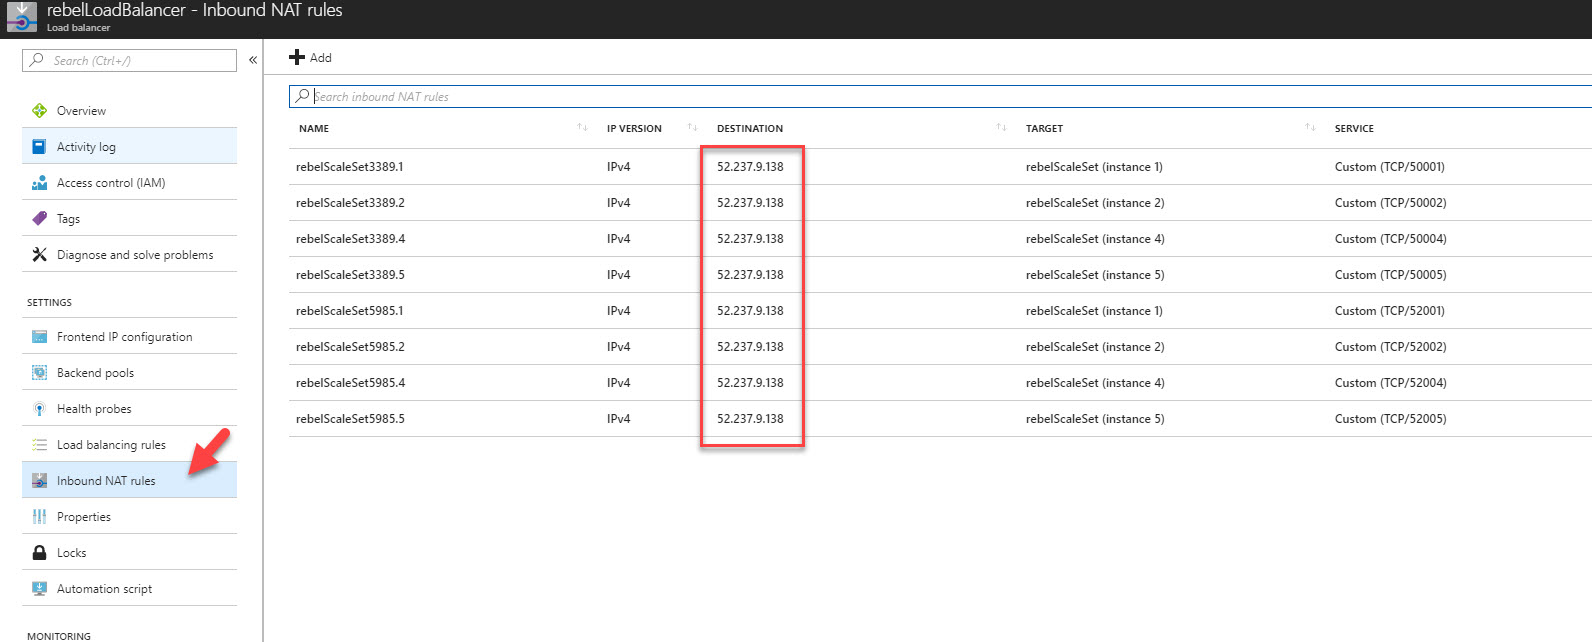
10) Relevant public ip info for scale set can be find under inbound NAT rules
This marks the end of this blog post. In next post we will look in to further configuration of scale set. If you have any questions feel free to contact me on rebeladm@live.com also follow me on twitter @rebeladm to get updates about new blog posts.

