In my previous blog post, I explained how we can use FIDO2 security keys to perform password-less authentication with Azure AD. You can access it using Step-by-Step Guide: Azure AD password-less sign-in using FIDO2 Security keys
We also can use FIDO2 security keys to sign-in to Azure AD Joined or Hybrid Azure AD Joined Windows 10 devices. In this demo, I am going to demonstrate how we can enable FIDO2 security key sign-in using Azure AD and Microsoft Intune.
Before enabling password-less authentication with FIDO2 security keys, make sure you have,
1. Azure AD and Intune – Make sure you have valid Azure AD and Intune subscription in place.
2. Azure AD Join on Hybrid Azure AD joined Windows 10 Devices – If it is Azure AD Join device, it should run at least Windows 10 version 1903. If it is Hybrid Azure AD joined device at least it should be running Windows 10 Insider Build 18945
3. FIDO2 Security keys – The good people at eWBM provided eWBM Goldengate security key G320 (USB-C) and eWBM Goldengate security key G310 (USB-A) for testing. I will be using eWBM Goldengate security key G320 (USB-C) in this demo with Surface Pro 7.
4. Azure AD user account which completed the FIDO2 security key enrolment process – This explained in details via my previous post http://www.rebeladmin.com/2020/03/step-step-guide-azure-ad-password-less-sign-using-fido2-security-keys/
In this demo, I am going to use a user called Megan Bowen (meganb@M365x620957.onmicrosoft.com) for testing. I already have an Azure AD join device ready for her. It is showing as compliant in the Microsoft Intune portal.
Enable Windows Hello for Business with Intune
Before we create a device configuration profile, we need to enable Windows Hello for Business with FIDO2 security key support. To do that,
1. Log in to Azure Portal as Global Administrator ( https://portal.azure.com/ )
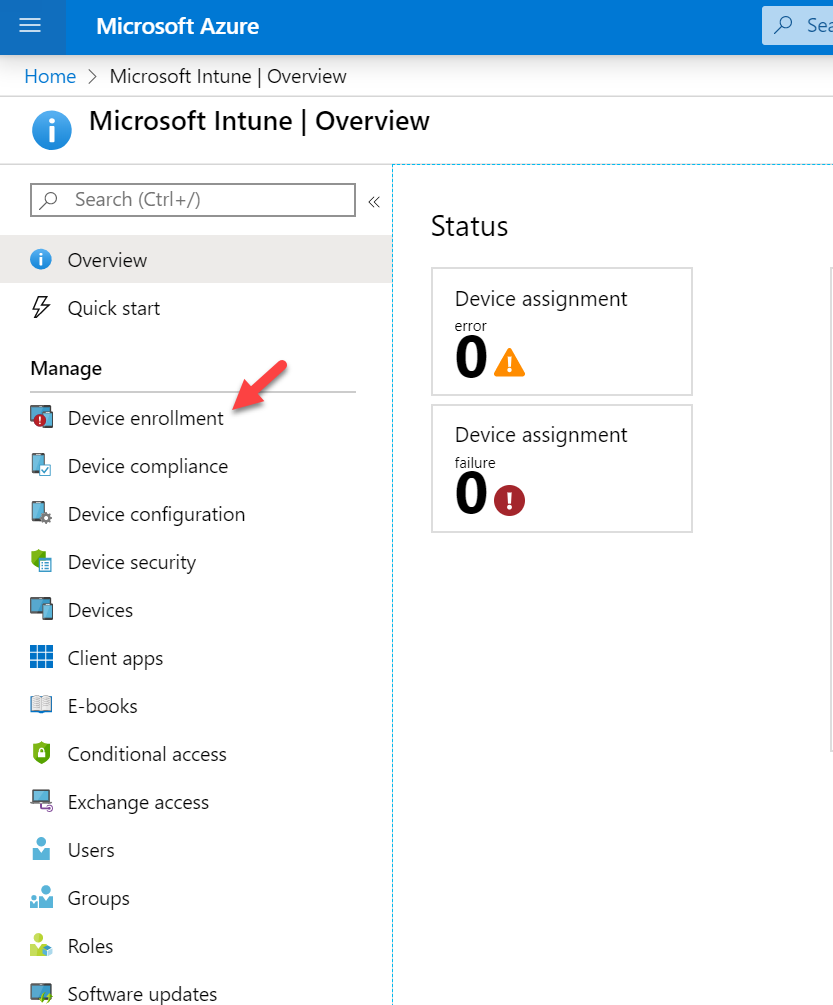
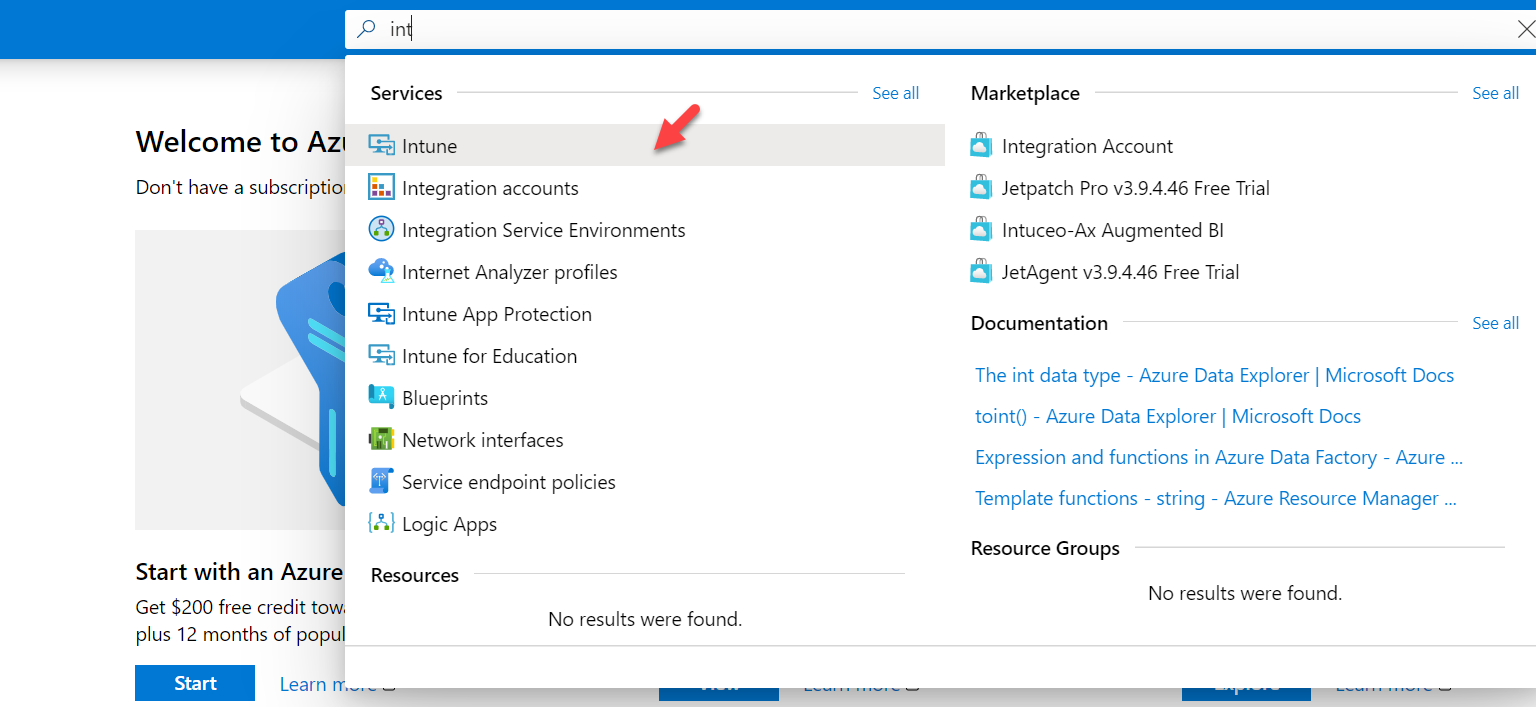
2. Search for Intune in the search box and click on it.
3. Then click on Device Enrolment
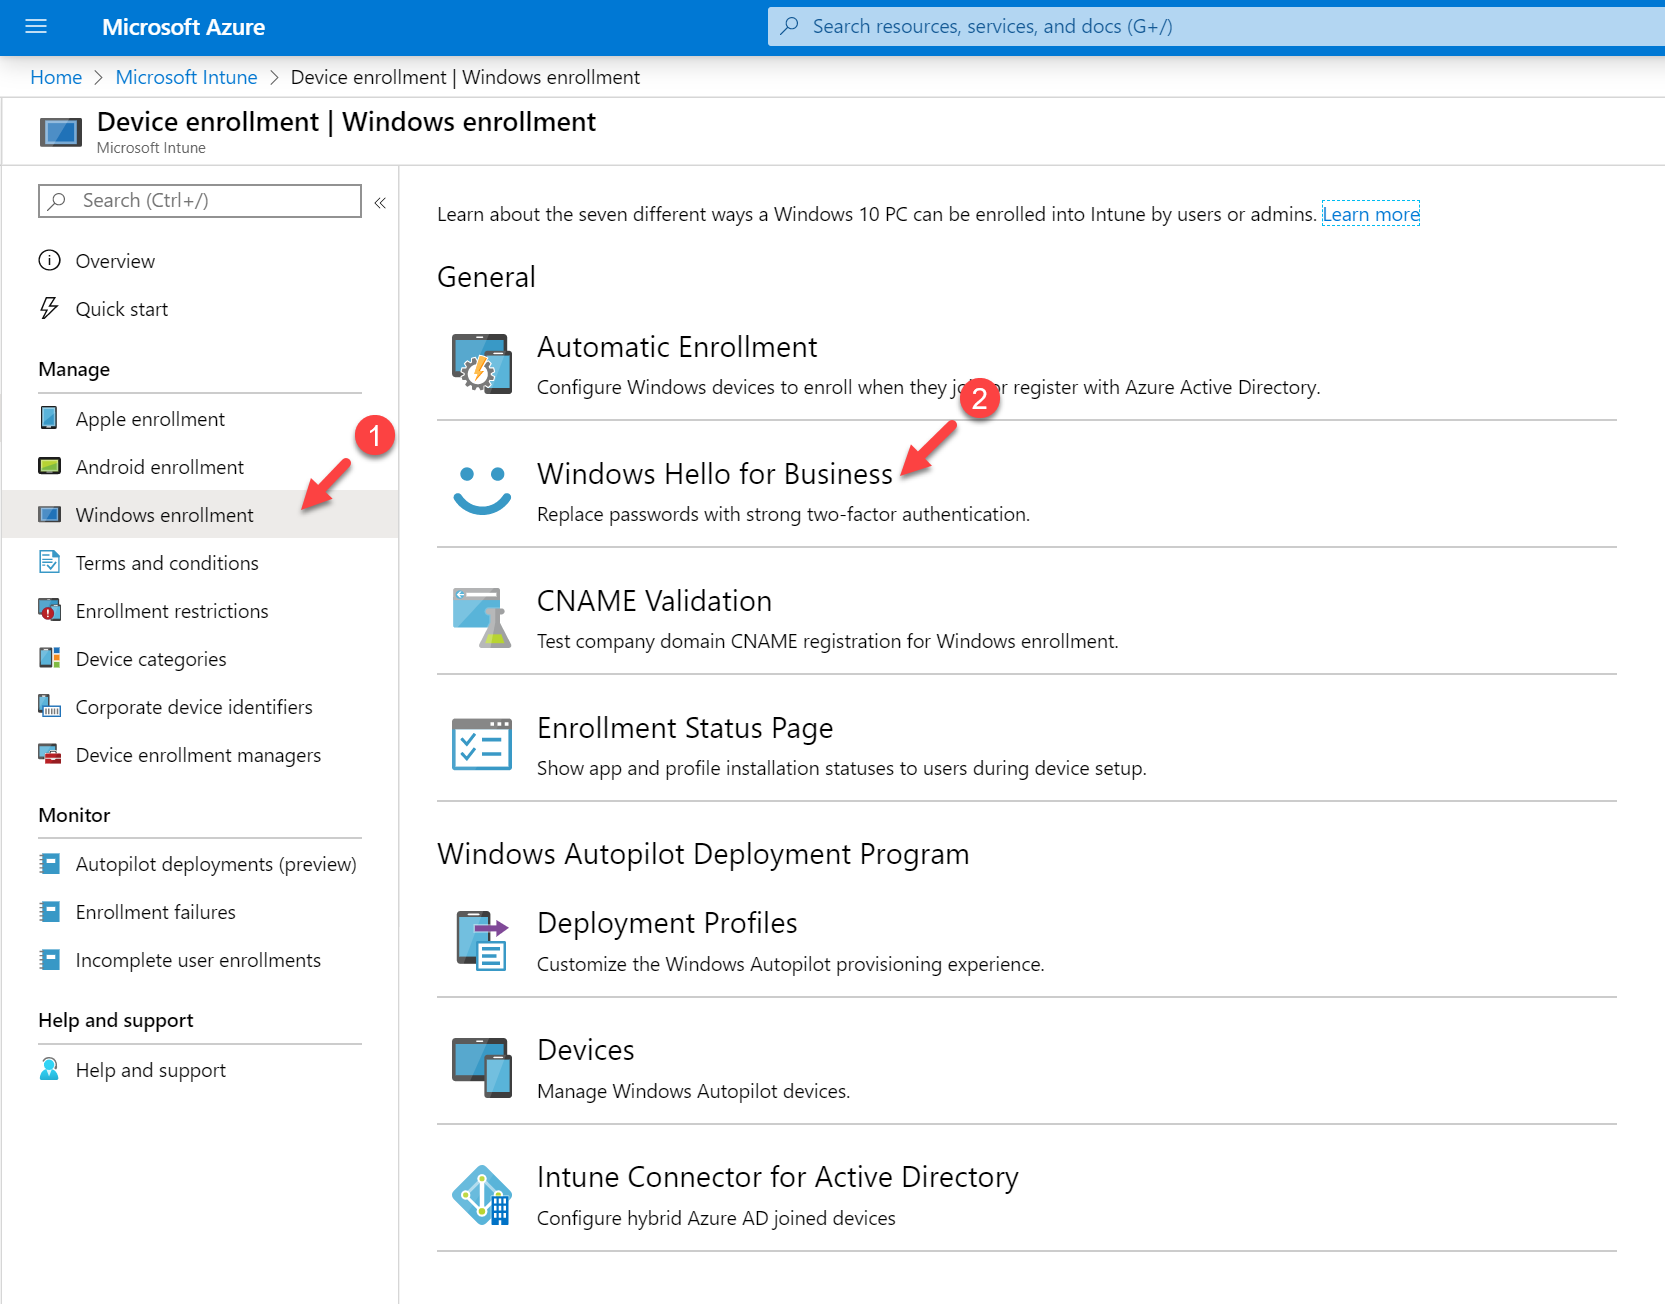
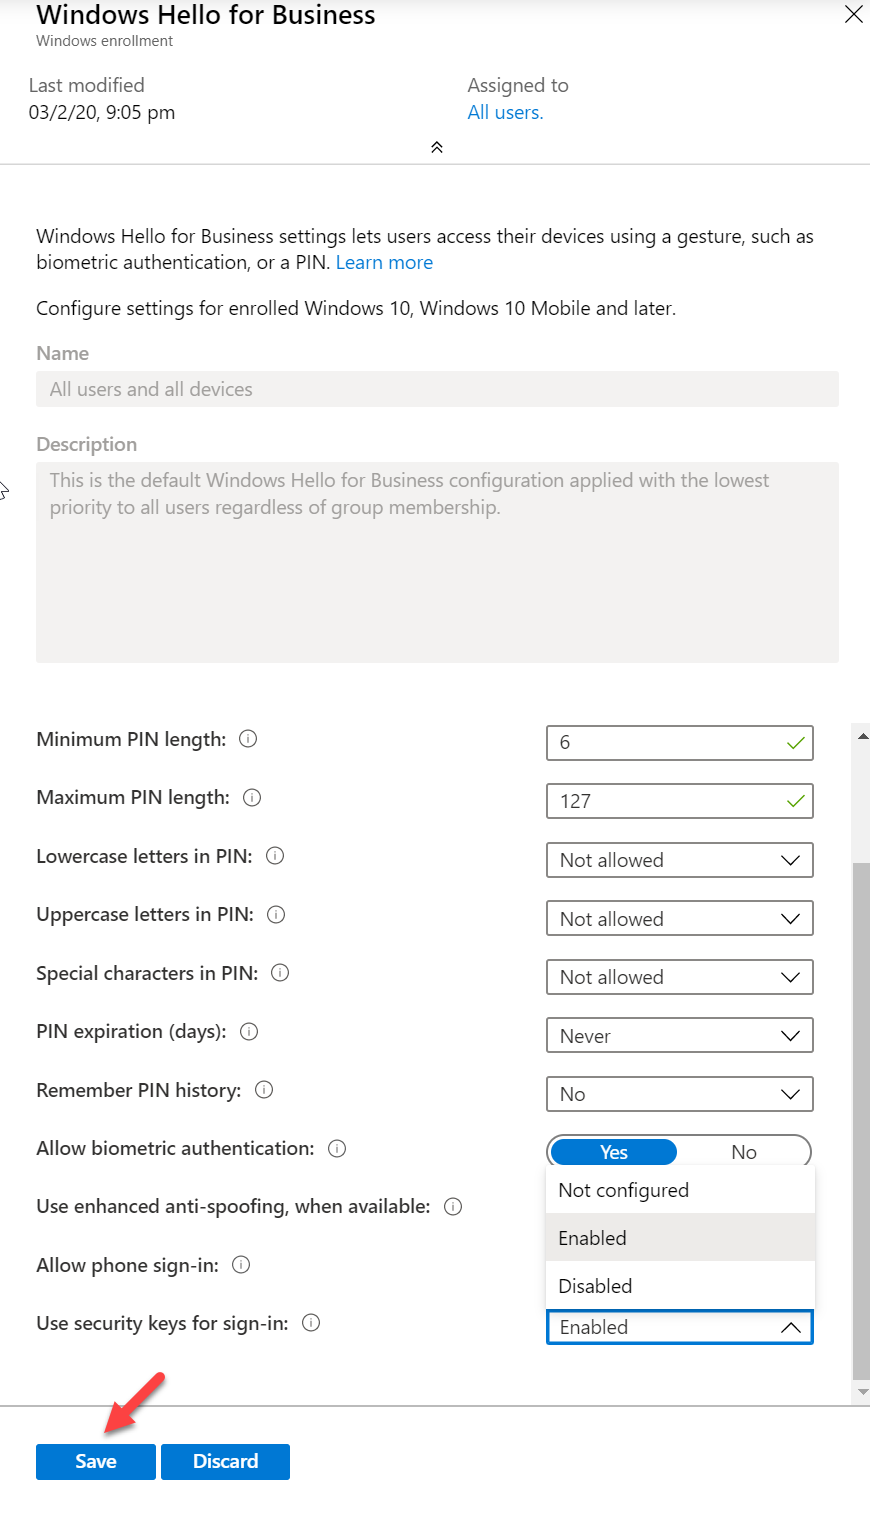
4. In the new window click on Windows enrollment | Windows Hello for Business
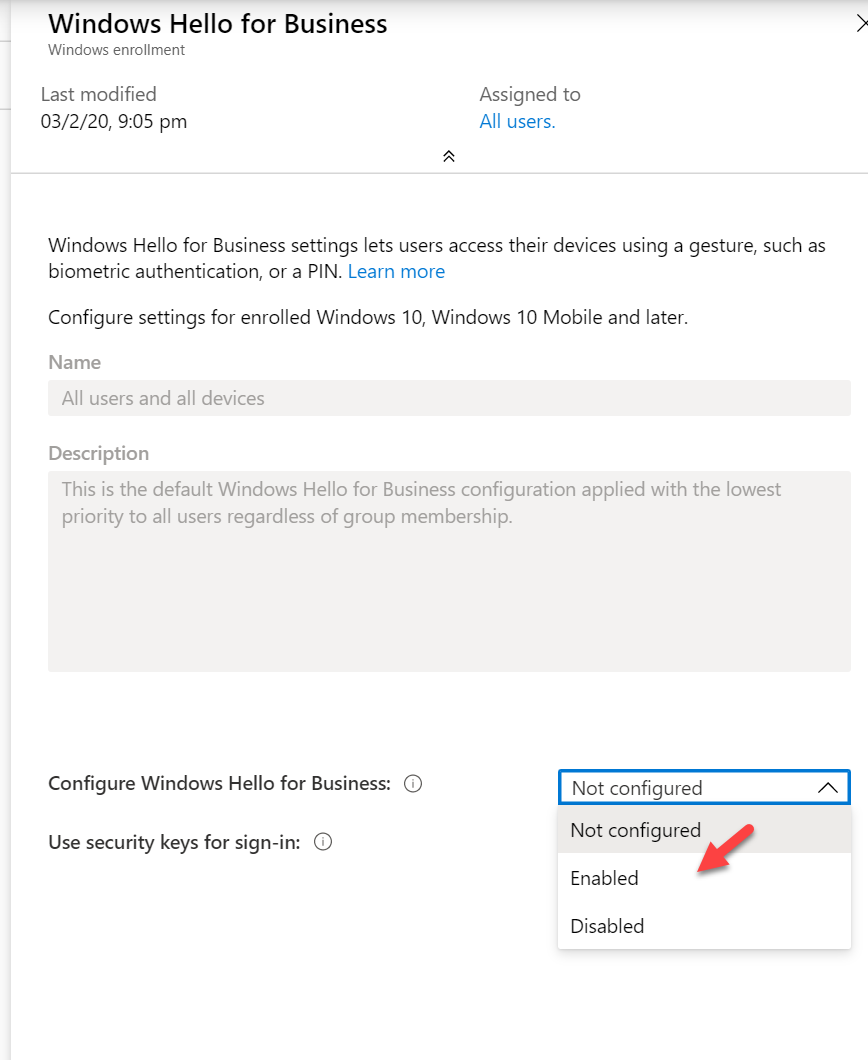
5. Select Enable for Configure Windows Hello for Business. Then keep the default settings.
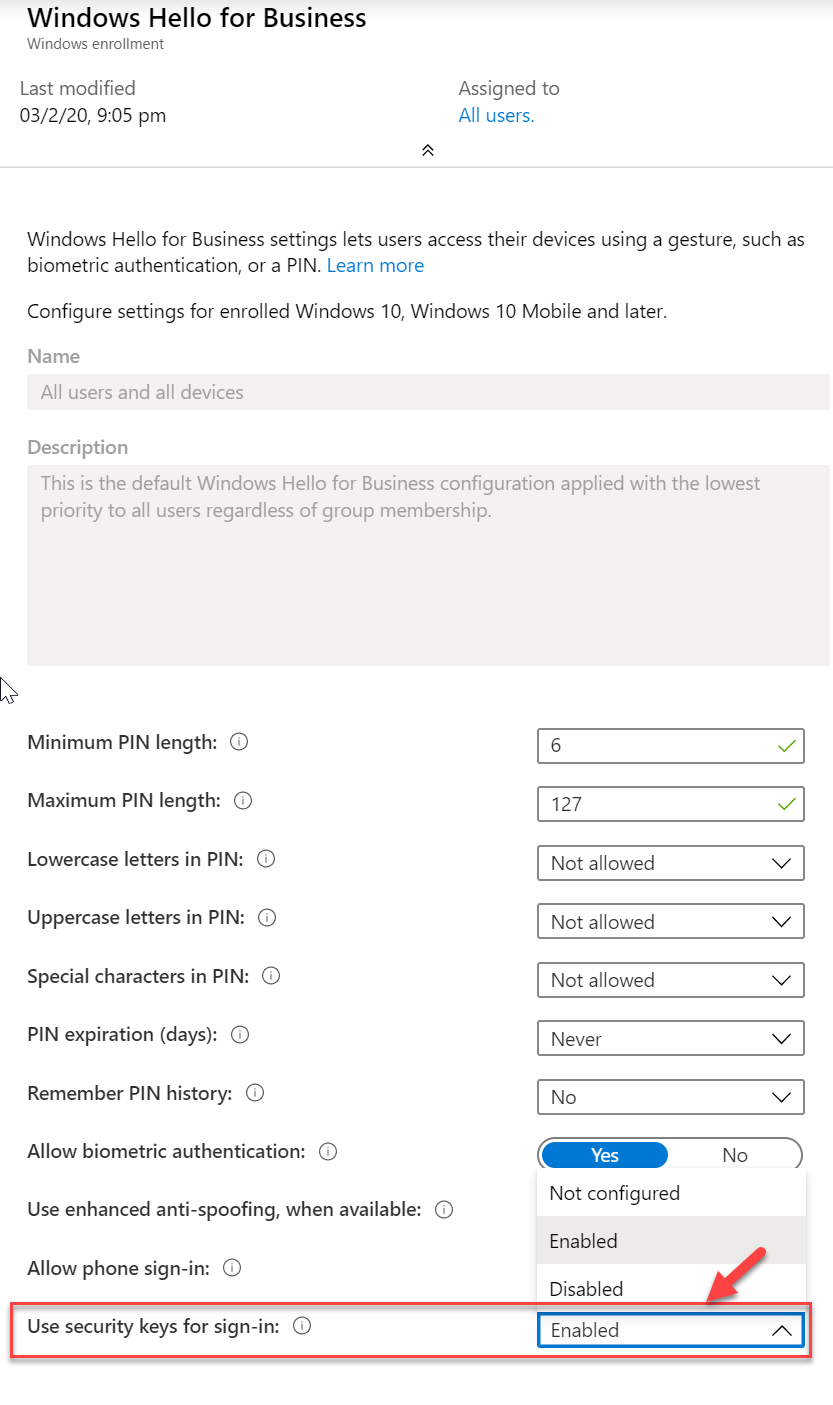
6. Also, select Enable for Use security keys for sign-in
This will enable FIOD2 security key support.
7. At the end click on Save to apply the changes.
Create Device Configuration Profile
The next step of the configuration is to create a Microsoft Intune device configuration profile and enable FIDO2 security key sign-in on the windows login screen. To do that,
1. Log in to Azure Portal as Global Administrator ( https://portal.azure.com/ )
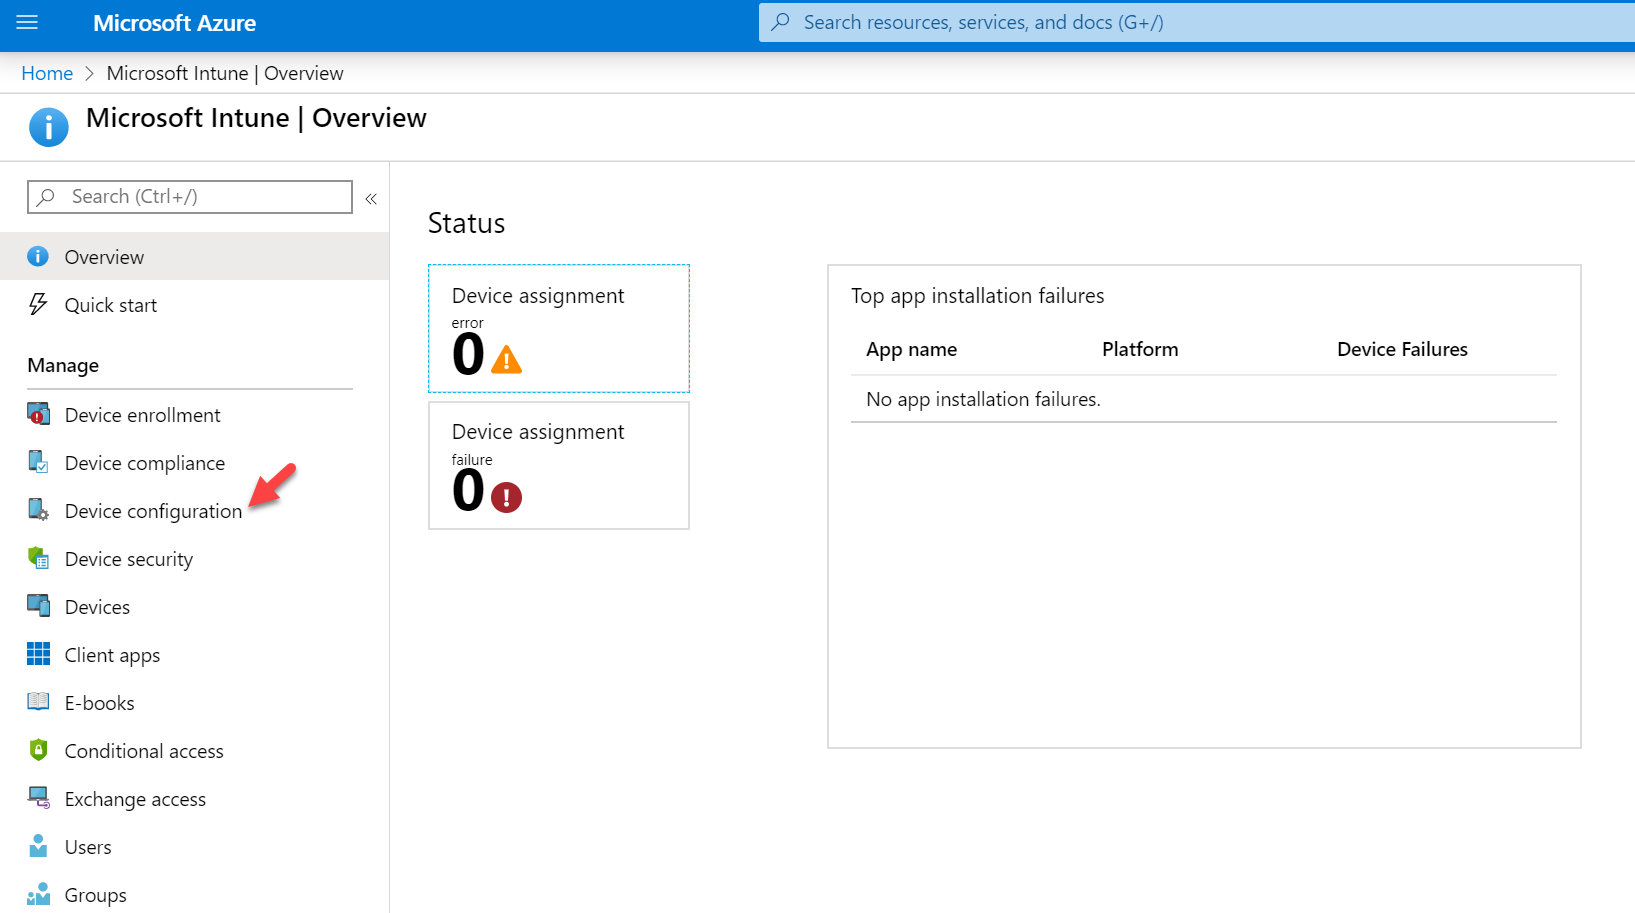
2. Search for Intune in the search box and click on it.
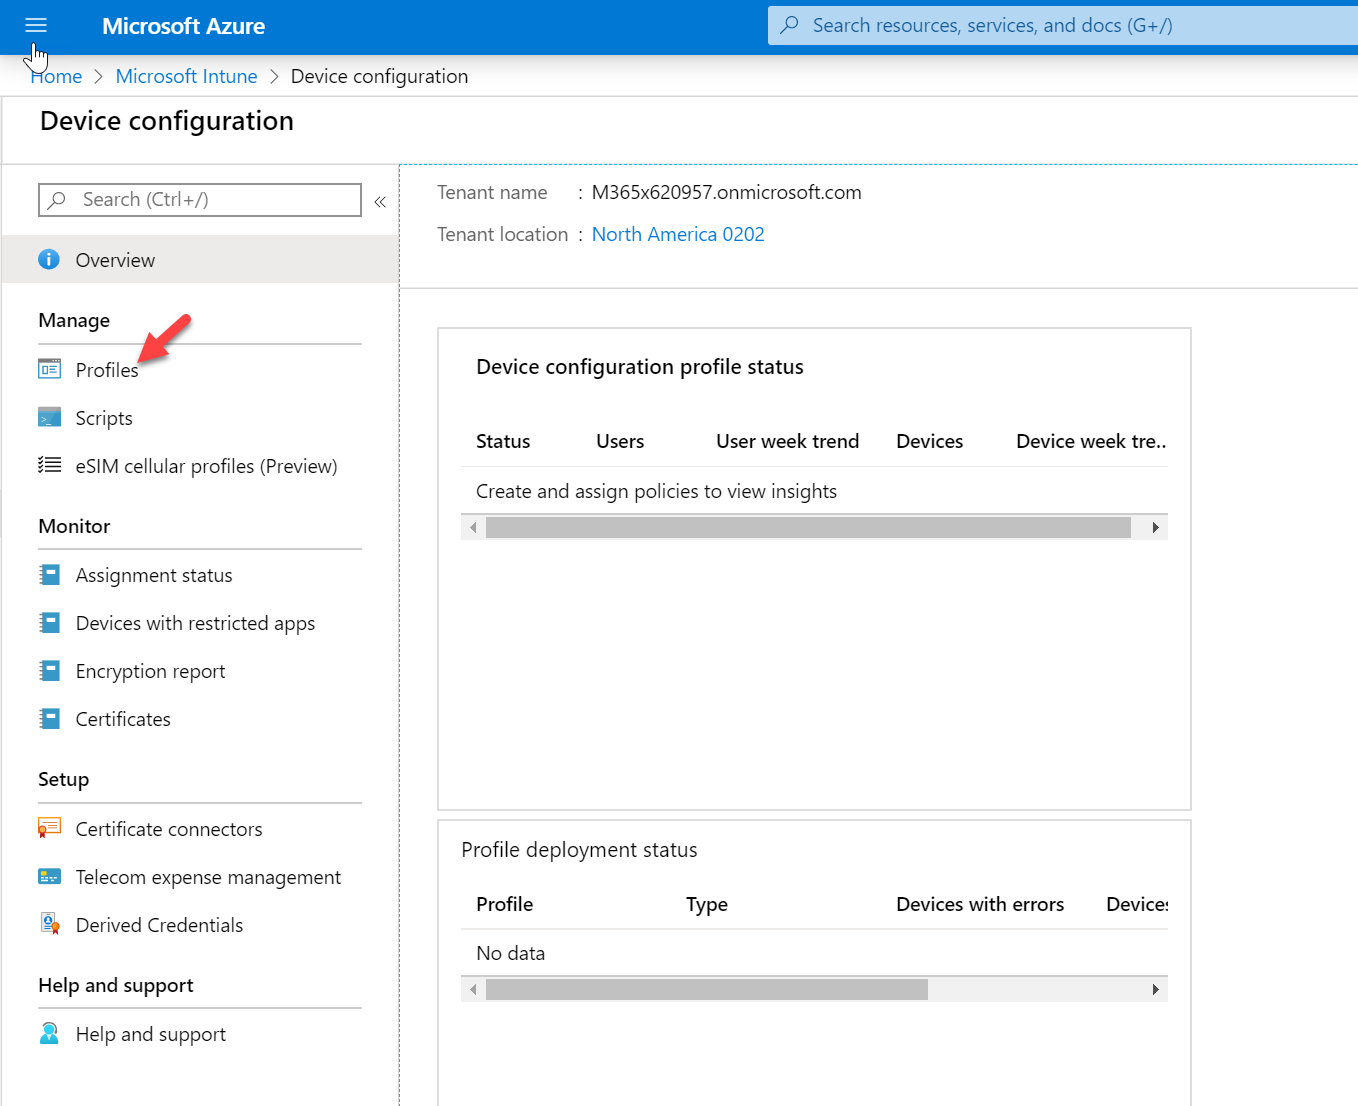
3. Then click on Device Configuration
4. Click on Profiles.
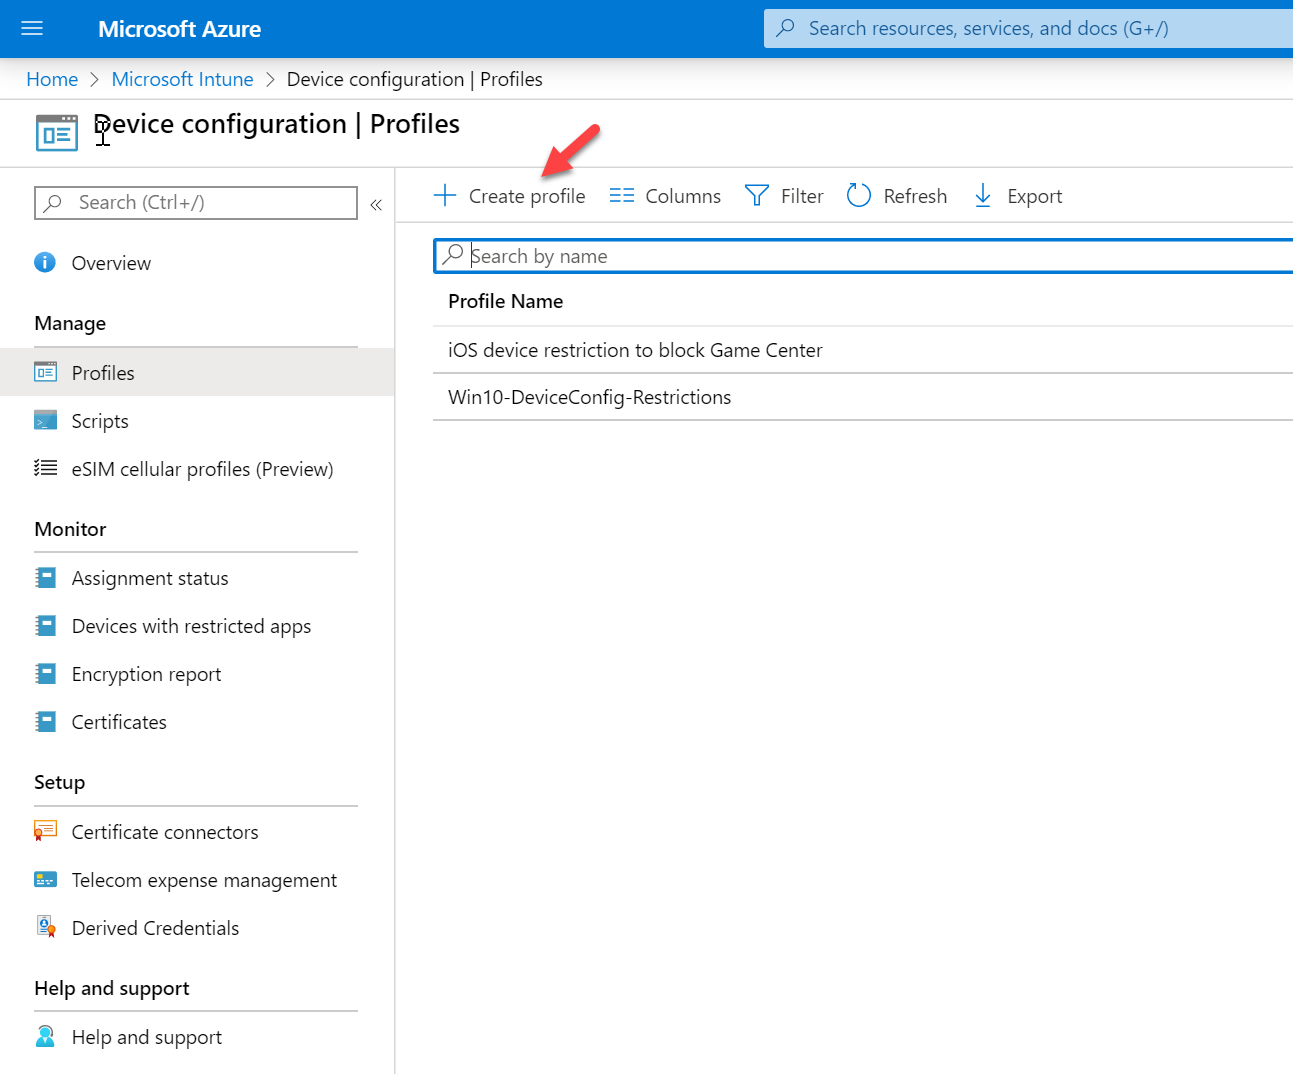
5. Then click on Create Profile
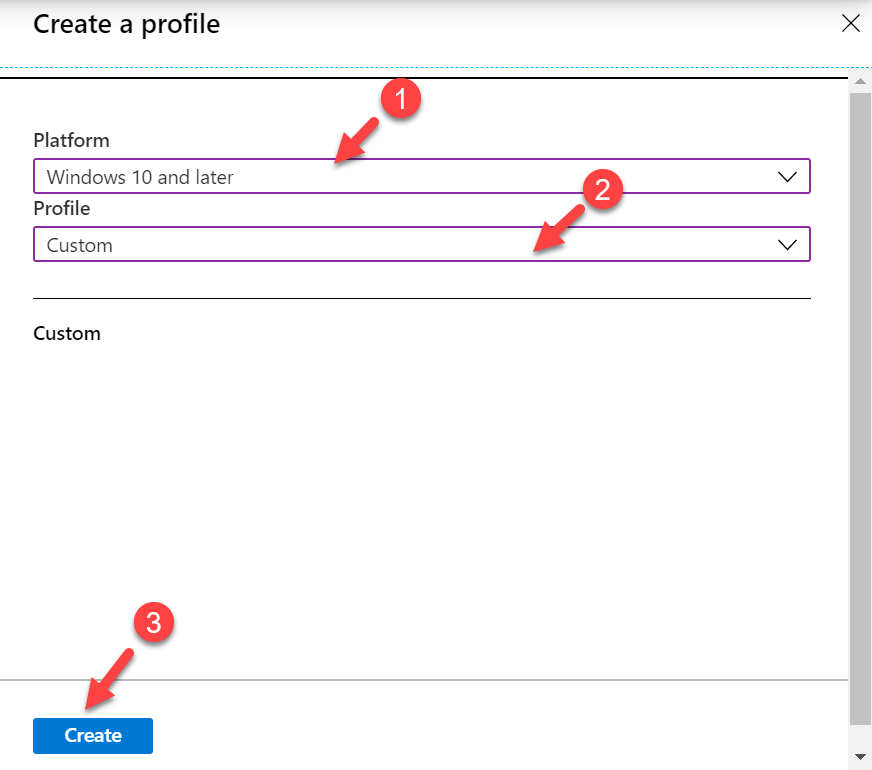
6. In the next window, select Windows 10 and later as Platform and Custom as profile type. Then click on Create.
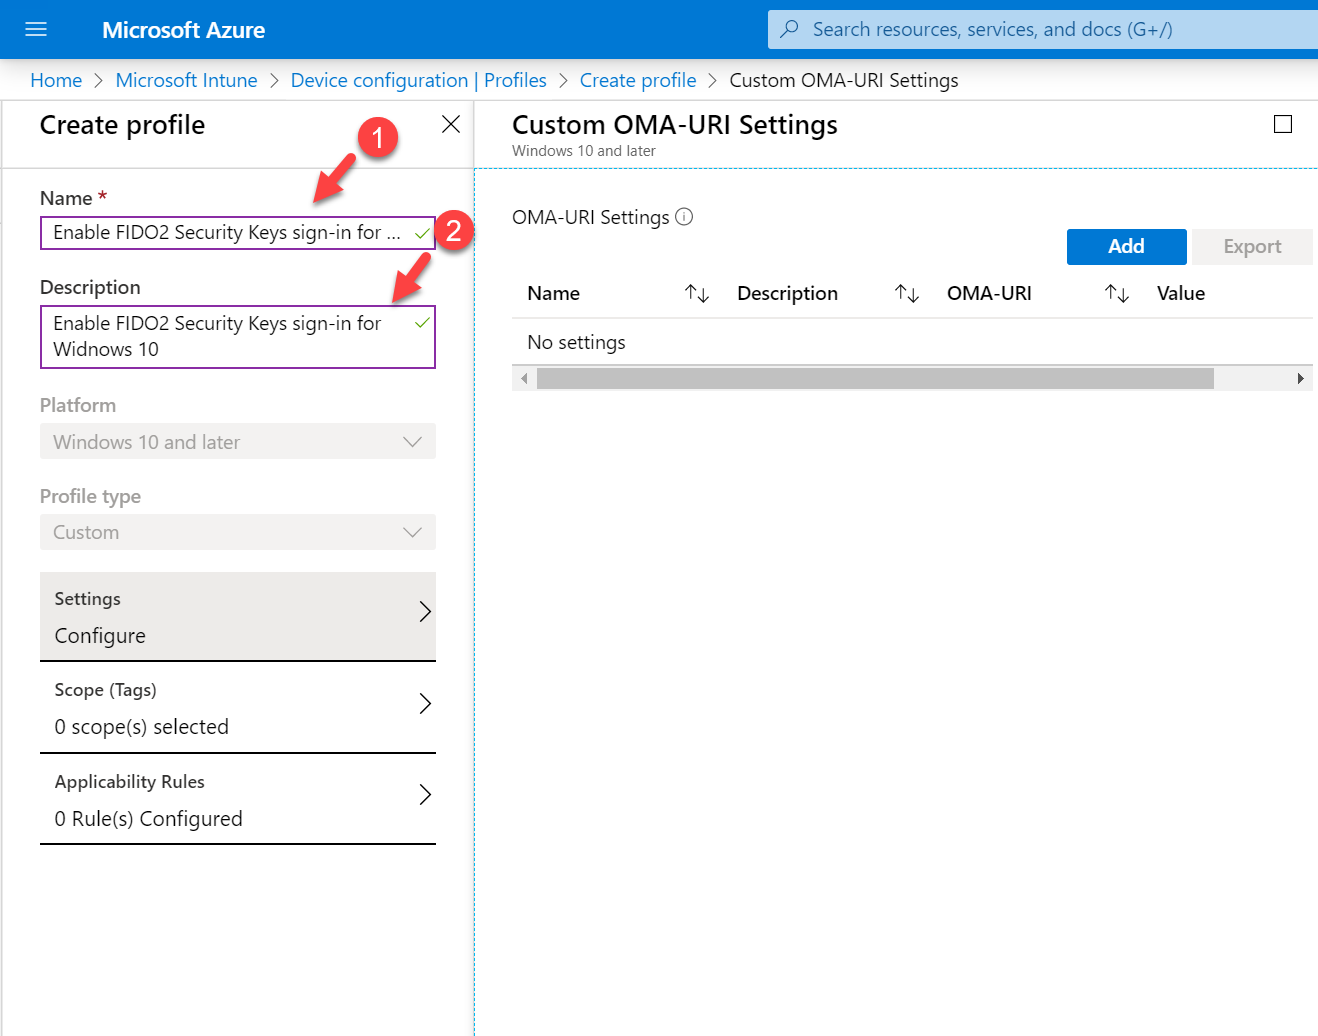
7. This will open the profile configuration window. To start, provide profile name and description.
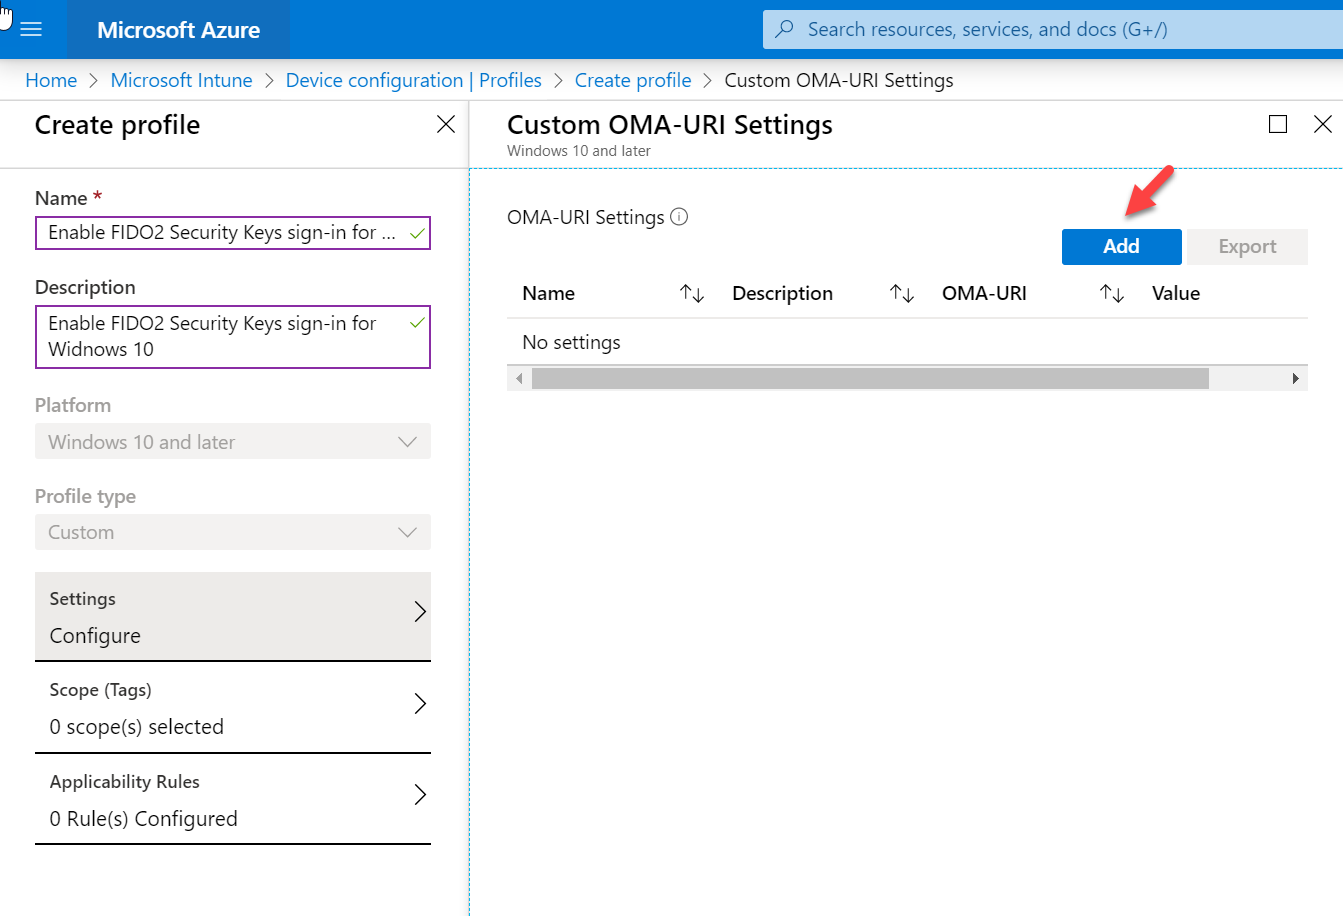
8. Then go to OMA-URI Settings and click Add.
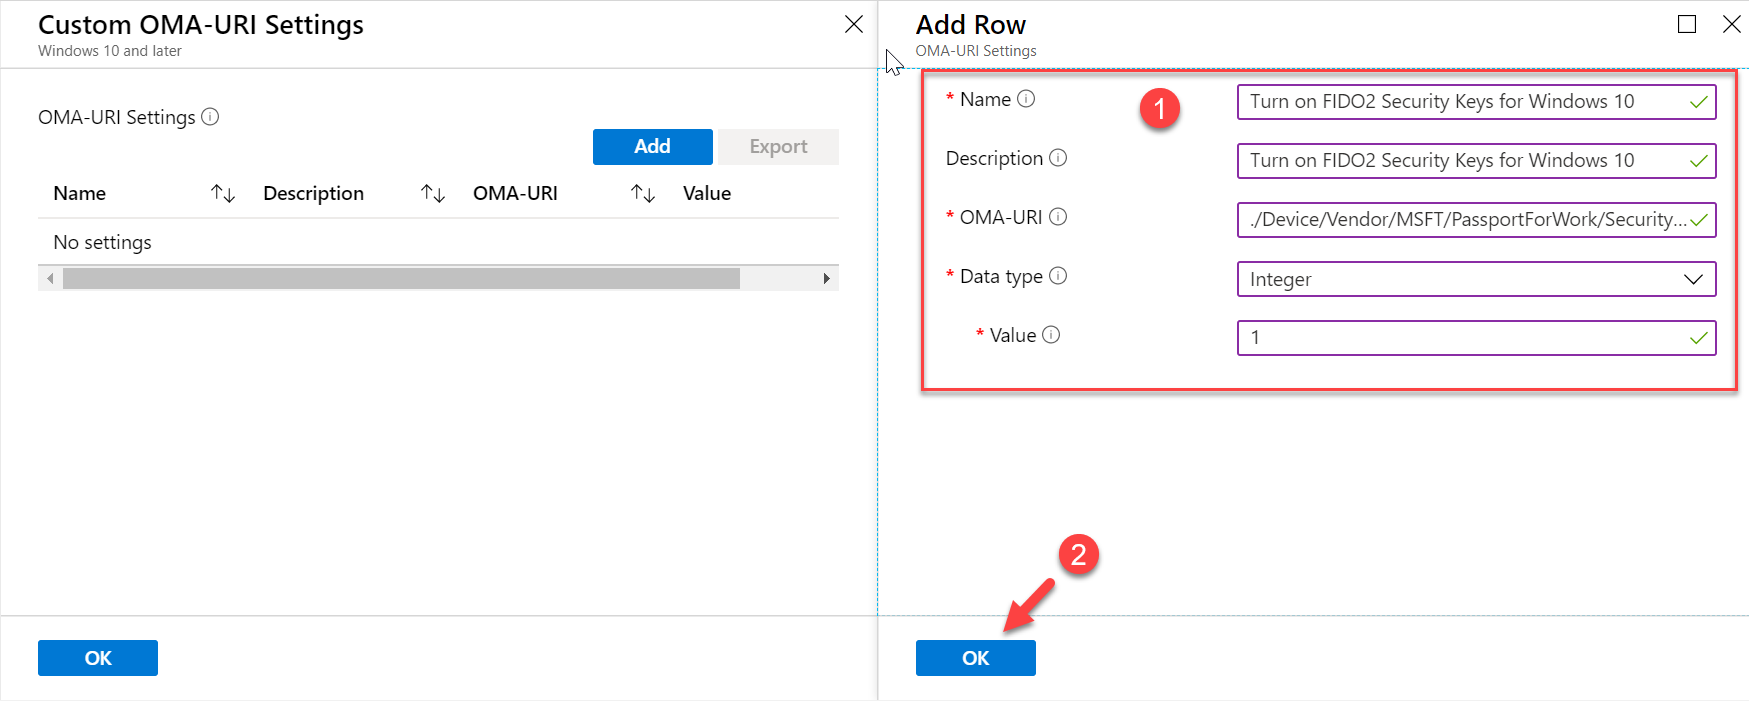
9. In the configuration window, use the following details.
Name: Turn on FIDO2 Security Keys for Windows 10
Description: Turn on FIDO2 Security Keys for Windows 10
OMA-URI: ./Device/Vendor/MSFT/PassportForWork/SecurityKey/UseSecurityKeyForSignin
Data Type: Integer
Value: 1
Once data is in, click on OK to apply the settings.
10. Then click on OK and Create to complete the profile setup.
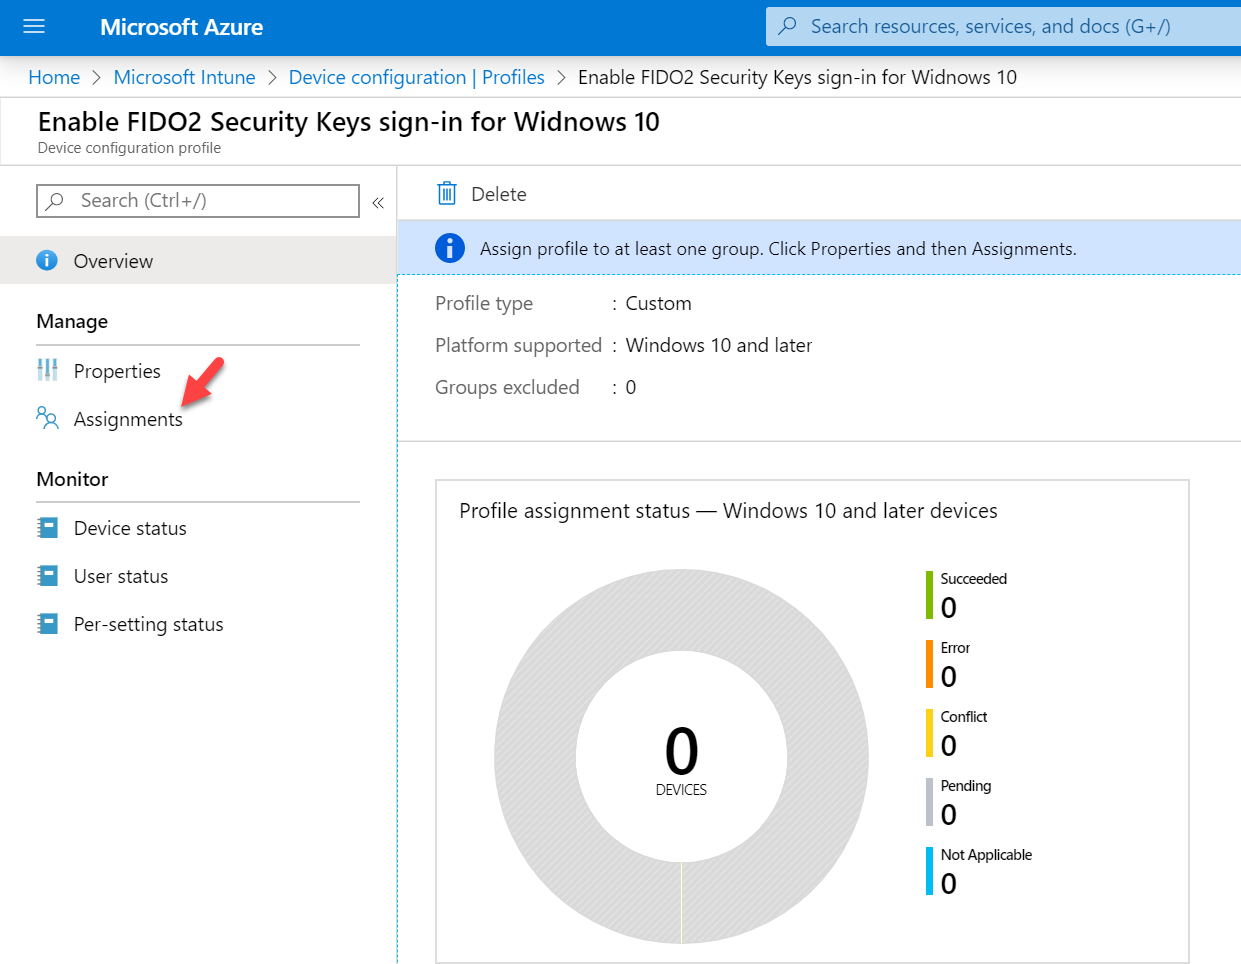
11. Once the profile is created, click on Assignments.
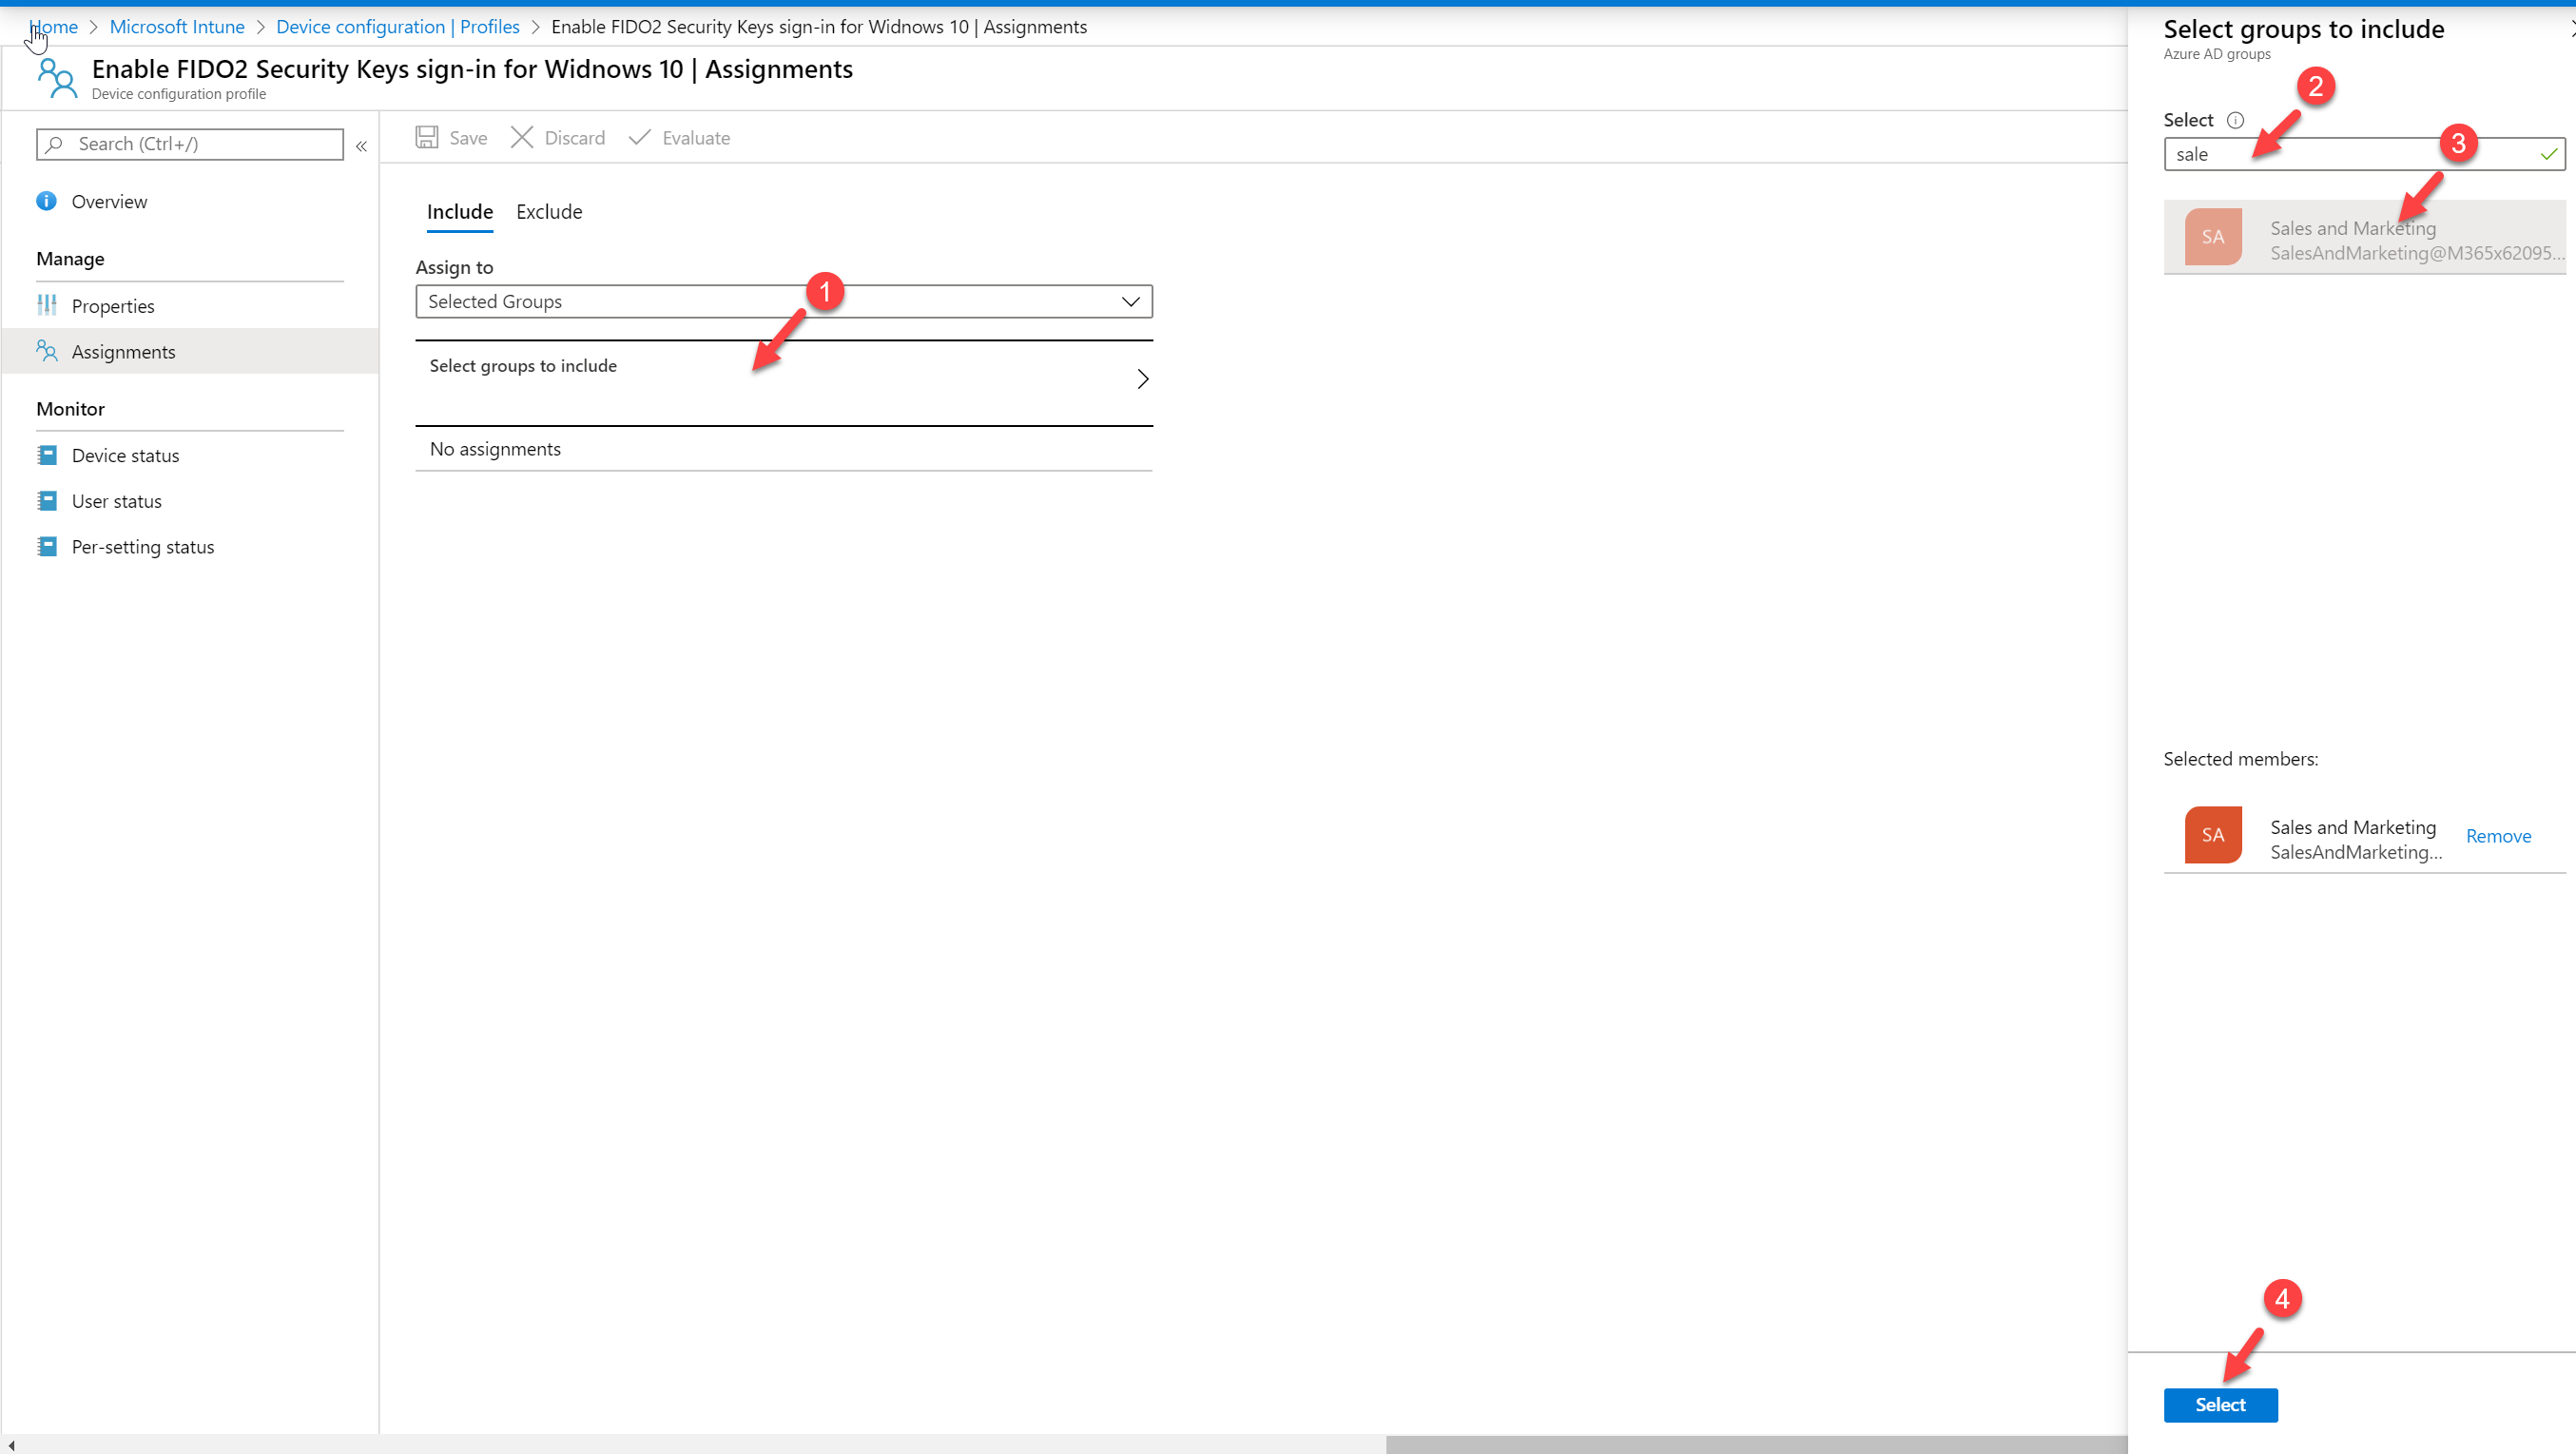
12. Then click on Select groups to include and choose the target for the policy.
13. To apply the changes, click on Save
Testing
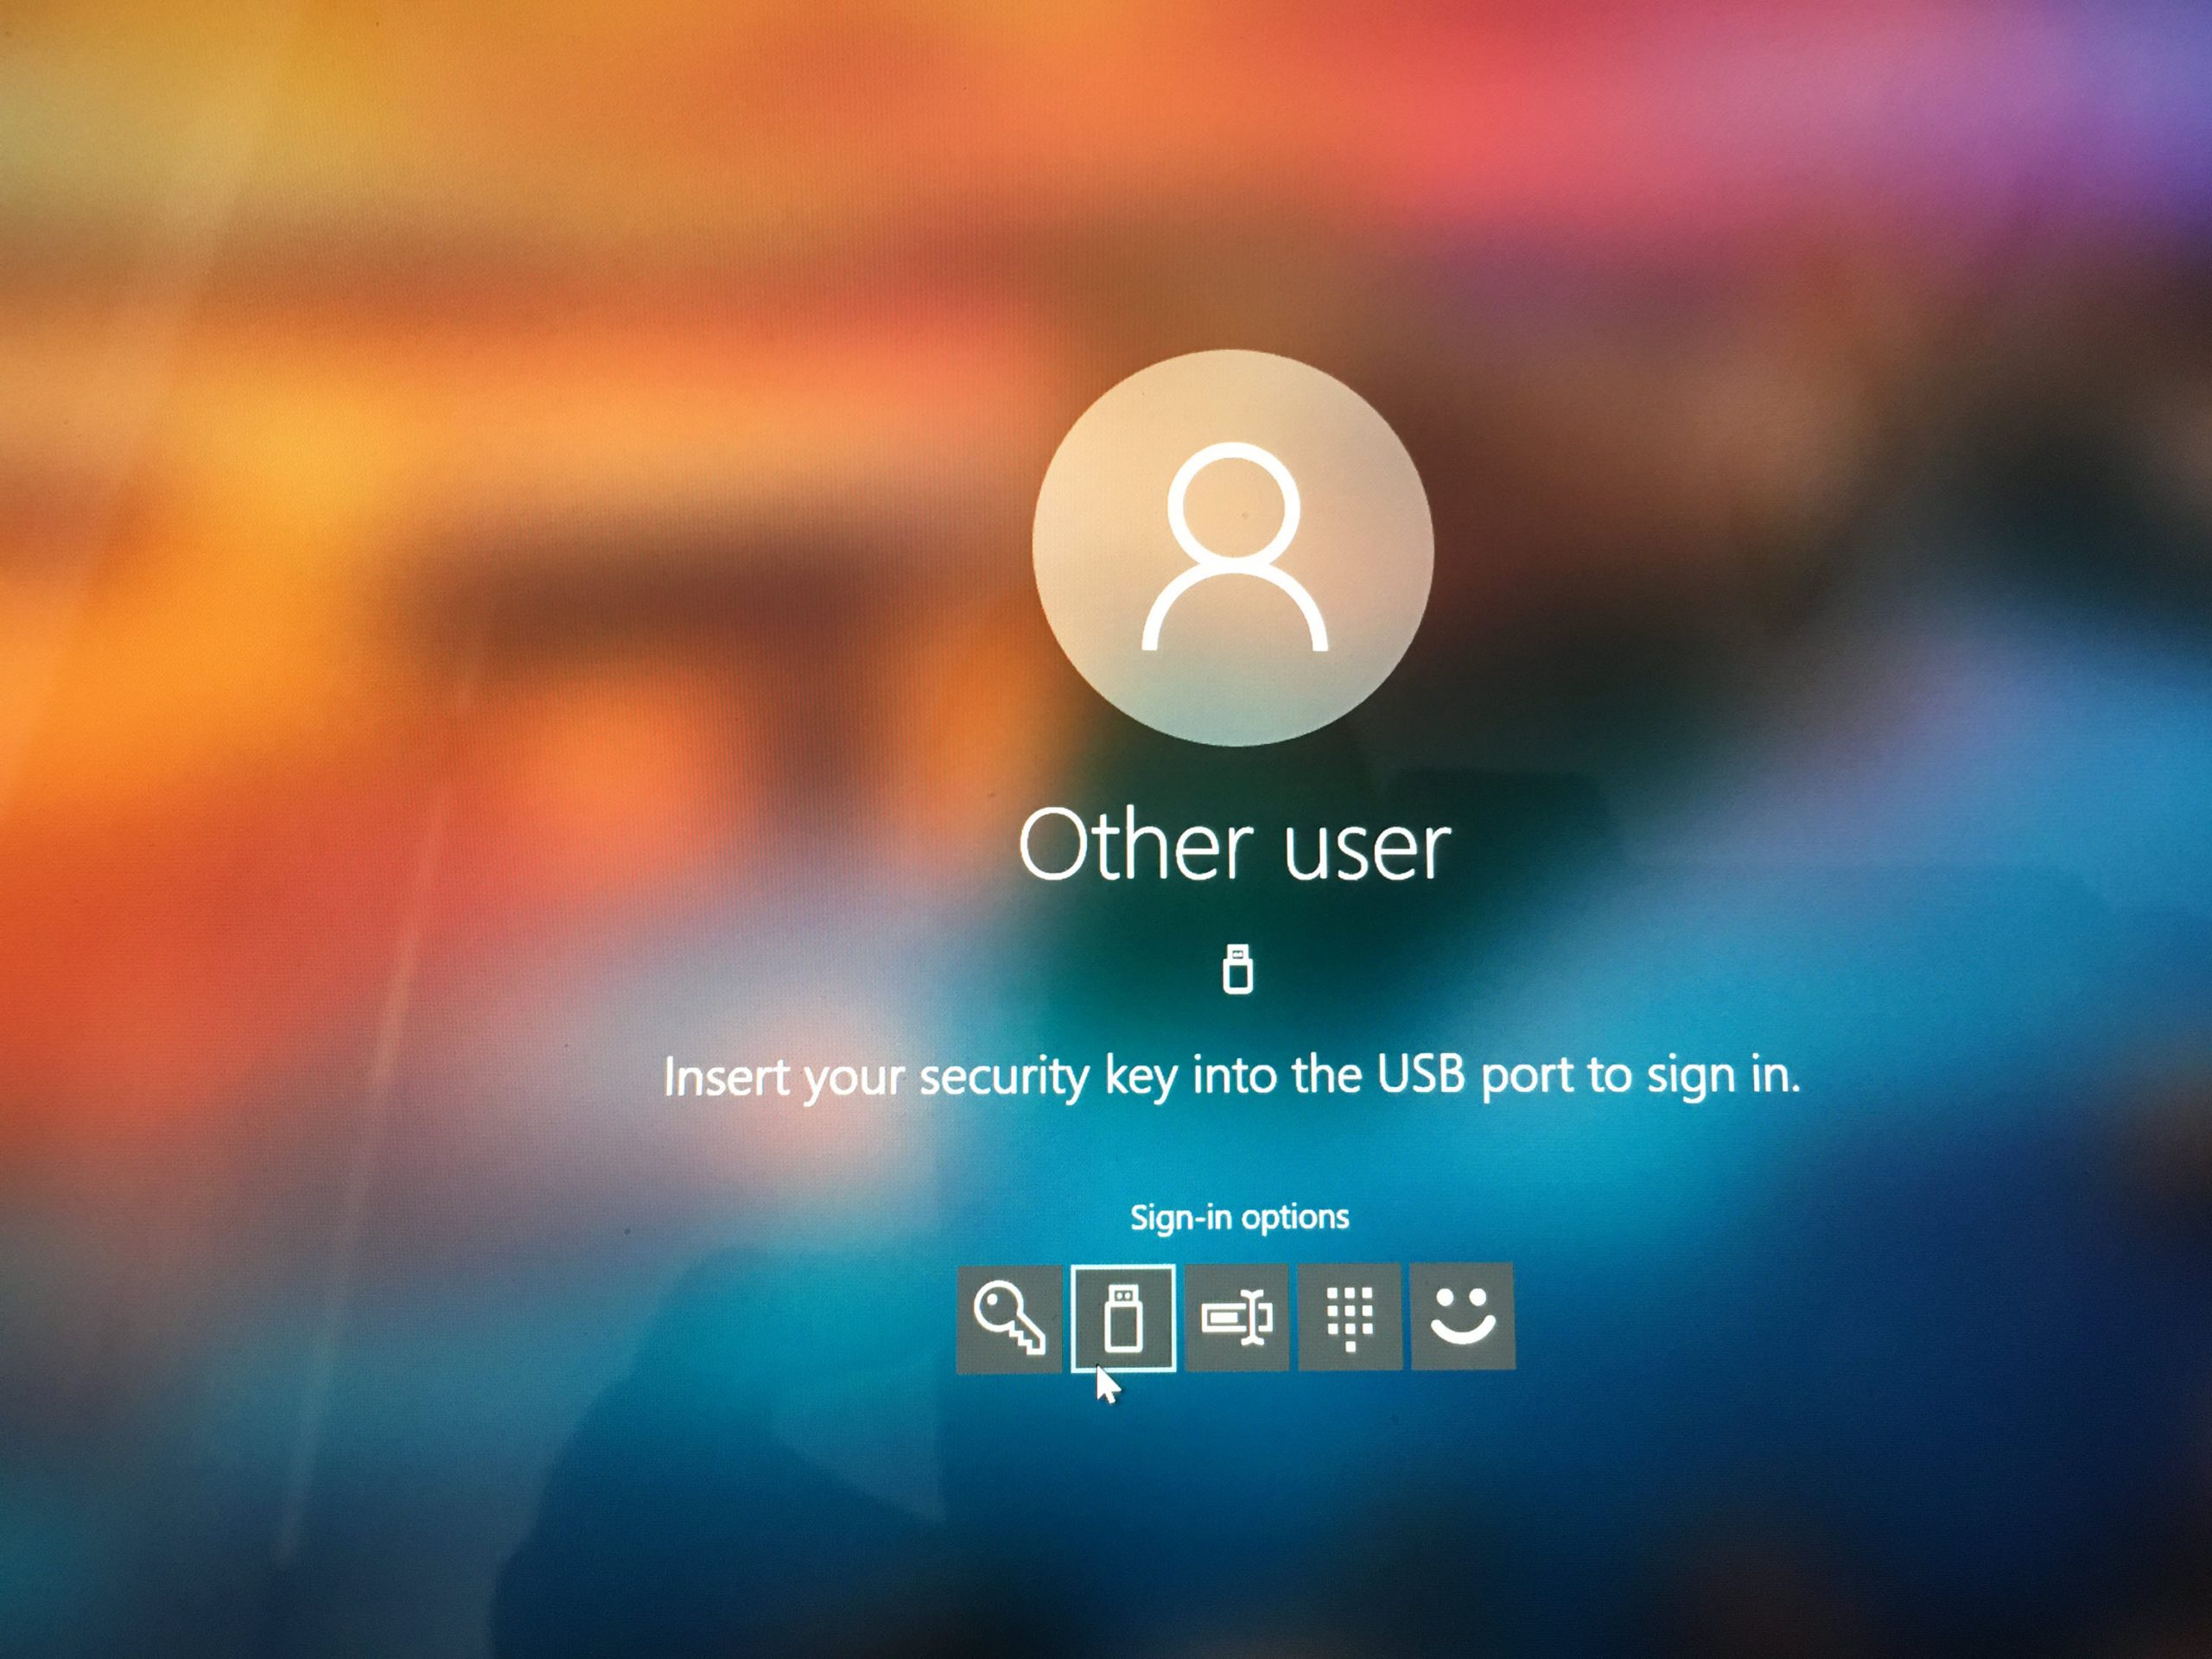
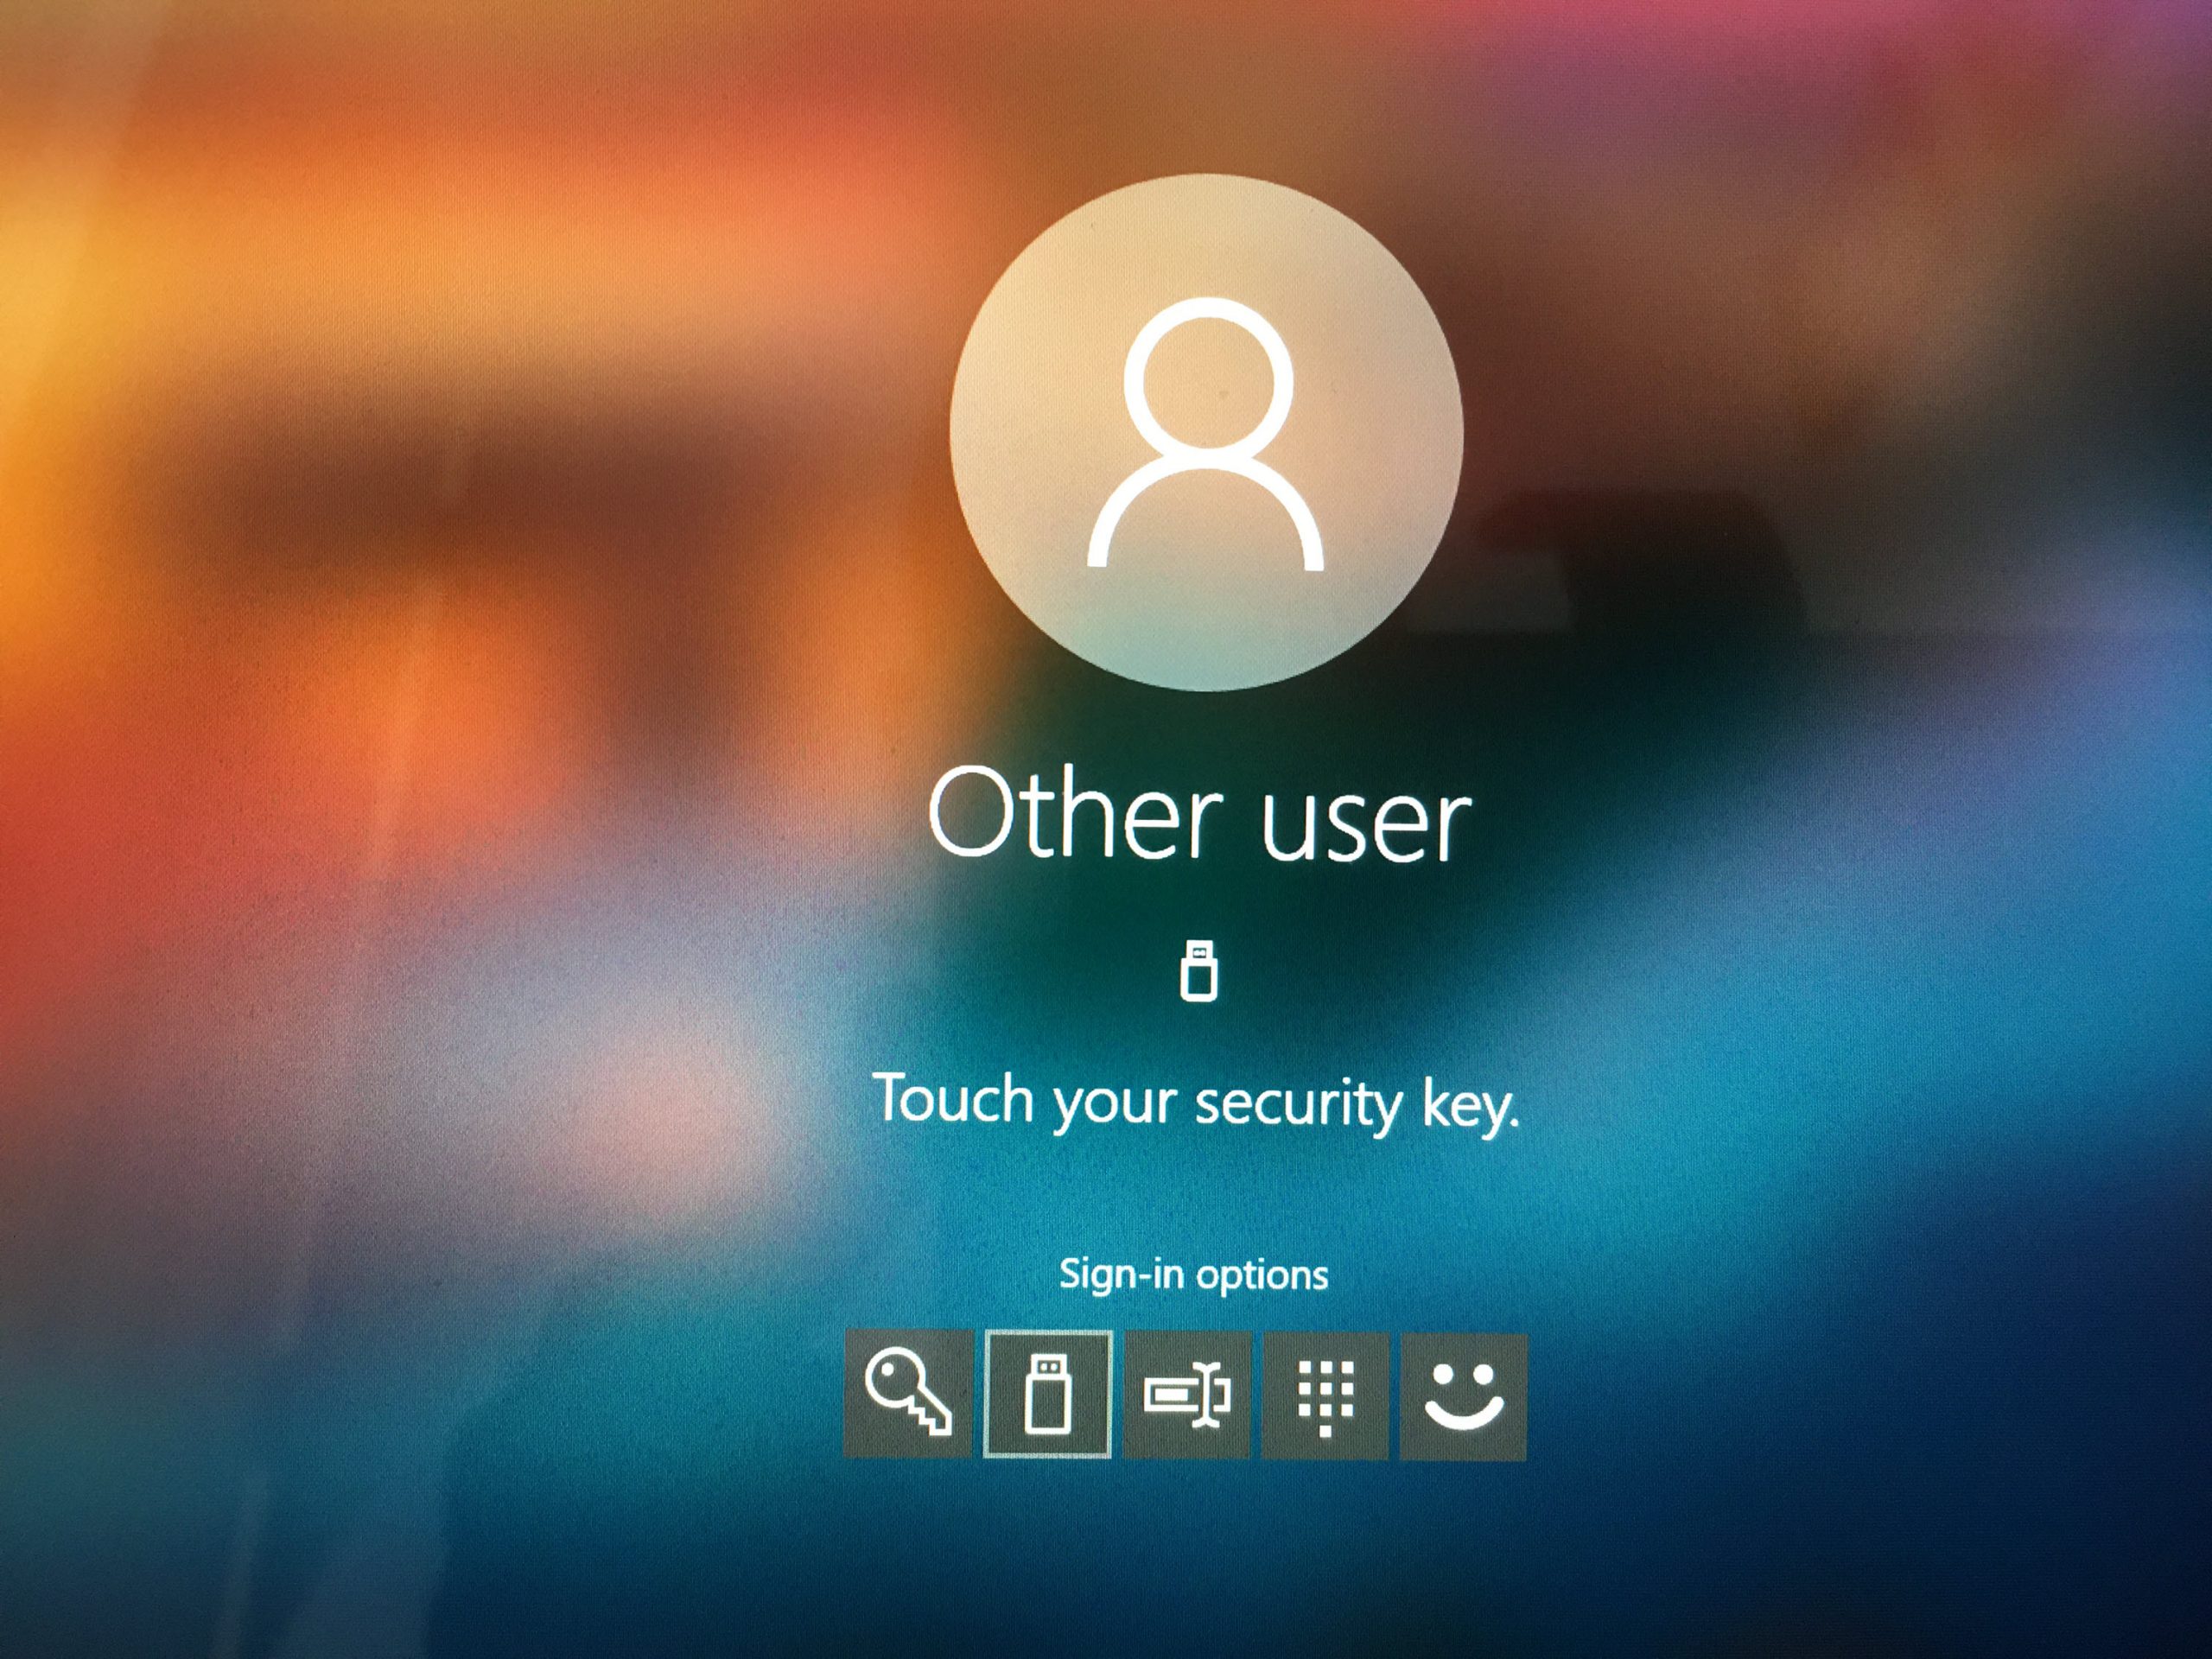
Now it is time for Testing. I went ahead and try to login as Megan. As expected, I can see FIDO2 security key as a login option.
When I click on it, the system requested to plug the FIDO2 device.
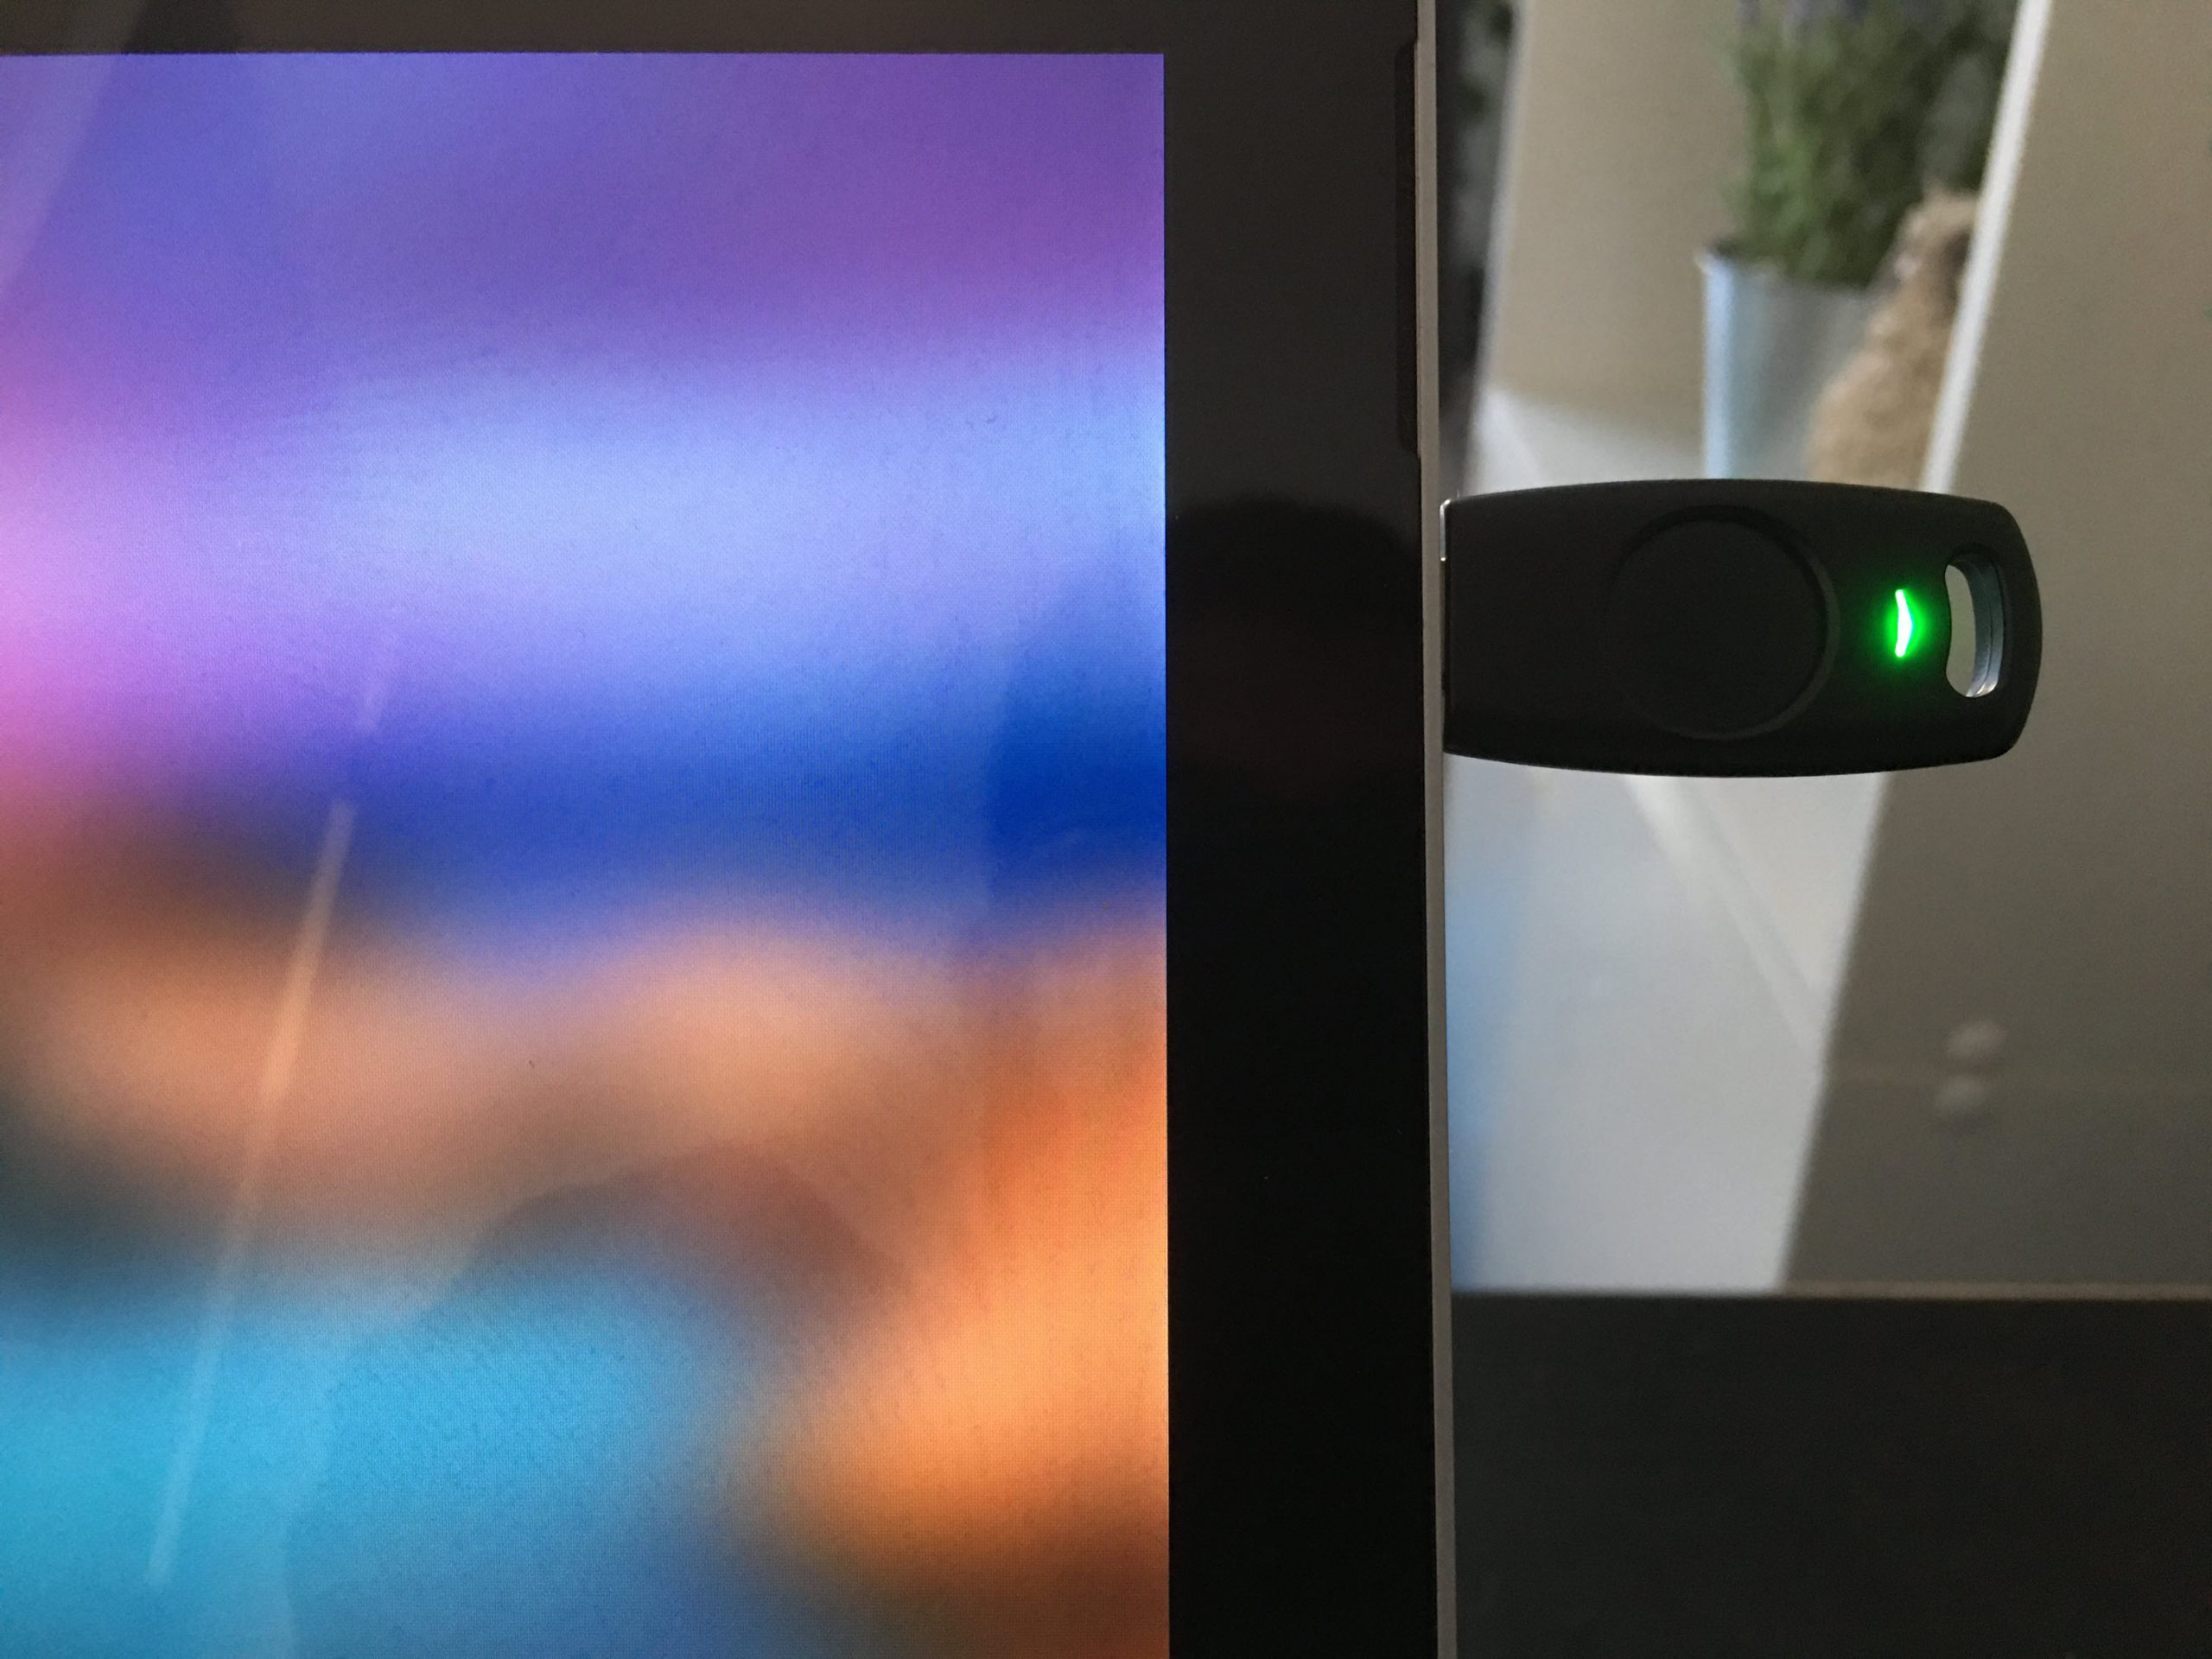
I plug in the eWBM Goldengate security key G320 (USB-C).
Once the system detects the key, it asked for the PIN.
I type in the PIN, then the system is asking to touch the key to complete the biometric sign in.
As soon as I complete the biometric verification, Windows 10 logs me in without password!!!
This marks the end of this blog post. I hope now you have a better understanding of how to enable password-less authentication with FIDO2 security keys. If you have any further questions about this feel free to contact me on rebeladm@live.com also follow me on twitter @rebeladm to get updates about new blog posts.


