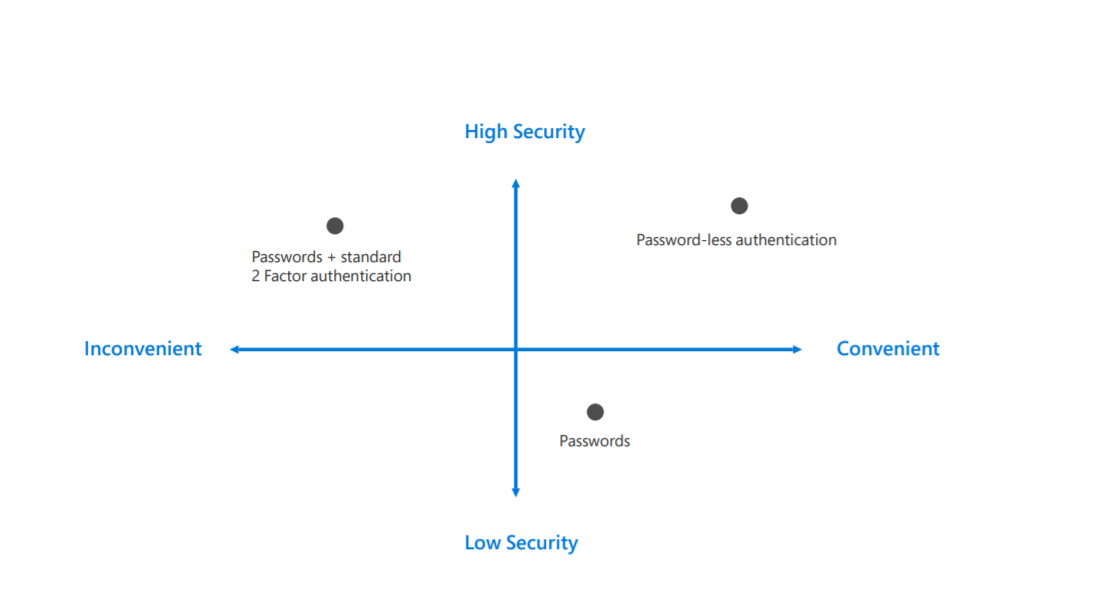
Passwords are the most commonly used method to protect user identities in a system. This is applying to Active Directory as well. However, with growing data breaches, it is obvious that passwords are no longer strong. In Verizon Data Breach Investigations Report (2017), it says, 81% of hacking-related breaches used either stolen or weak passwords. So, if passwords are not safe, what else we can do to improve the security in the sign-in process?
Multi-factor authentication can add another layer of security into the authentication process. It can be SMS, phone call, OTP code, Phone App notification to further confirm the authenticity of the sign-in request. There are many different MFA products available in the market. Each required engineers’ involvement in service provision, deployment, licenses management, integration, end-user training, troubleshooting, and maintenance. It also adds complexity to the sing-in process. MFA doesn’t eliminate the requirement for passwords.
But now we have an option to replace traditional authentication with password-less authentication. This is basically to replace passwords with biometrics, PIN, certificates and security keys. Fast Identity Online (FIDO) is an open standard for passwordless authentication. This allows authenticating into systems using external security key built into a device.
FIDO2 is the third standard that came out from FIDO Alliance. FIDO2 consists of Client to Authenticator Protocol (CTAP) and the W3C standard WebAuthn. When we use FIDO2 security keys for authentication,
1. User register with WebAuthn remote peer (FIDO2 server) and generate new key pair (public and private)
2. Private key is stored in the device and is only available for client-side.
3. Public key will be registered in the web service’s database.
4. After that in sign-in process, the system will verify the private key which is always need to be unlocked by a user action such as biomimetic or PIN.
Azure AD now supports password-less authentication using FIDO2 security keys. In this demo, I am going to demonstrate how we can use FIDO2 security keys to authenticate into Azure AD. To do this we need,
1. Azure AD Multi-factor authentication enabled
2. FIDO2 security keys
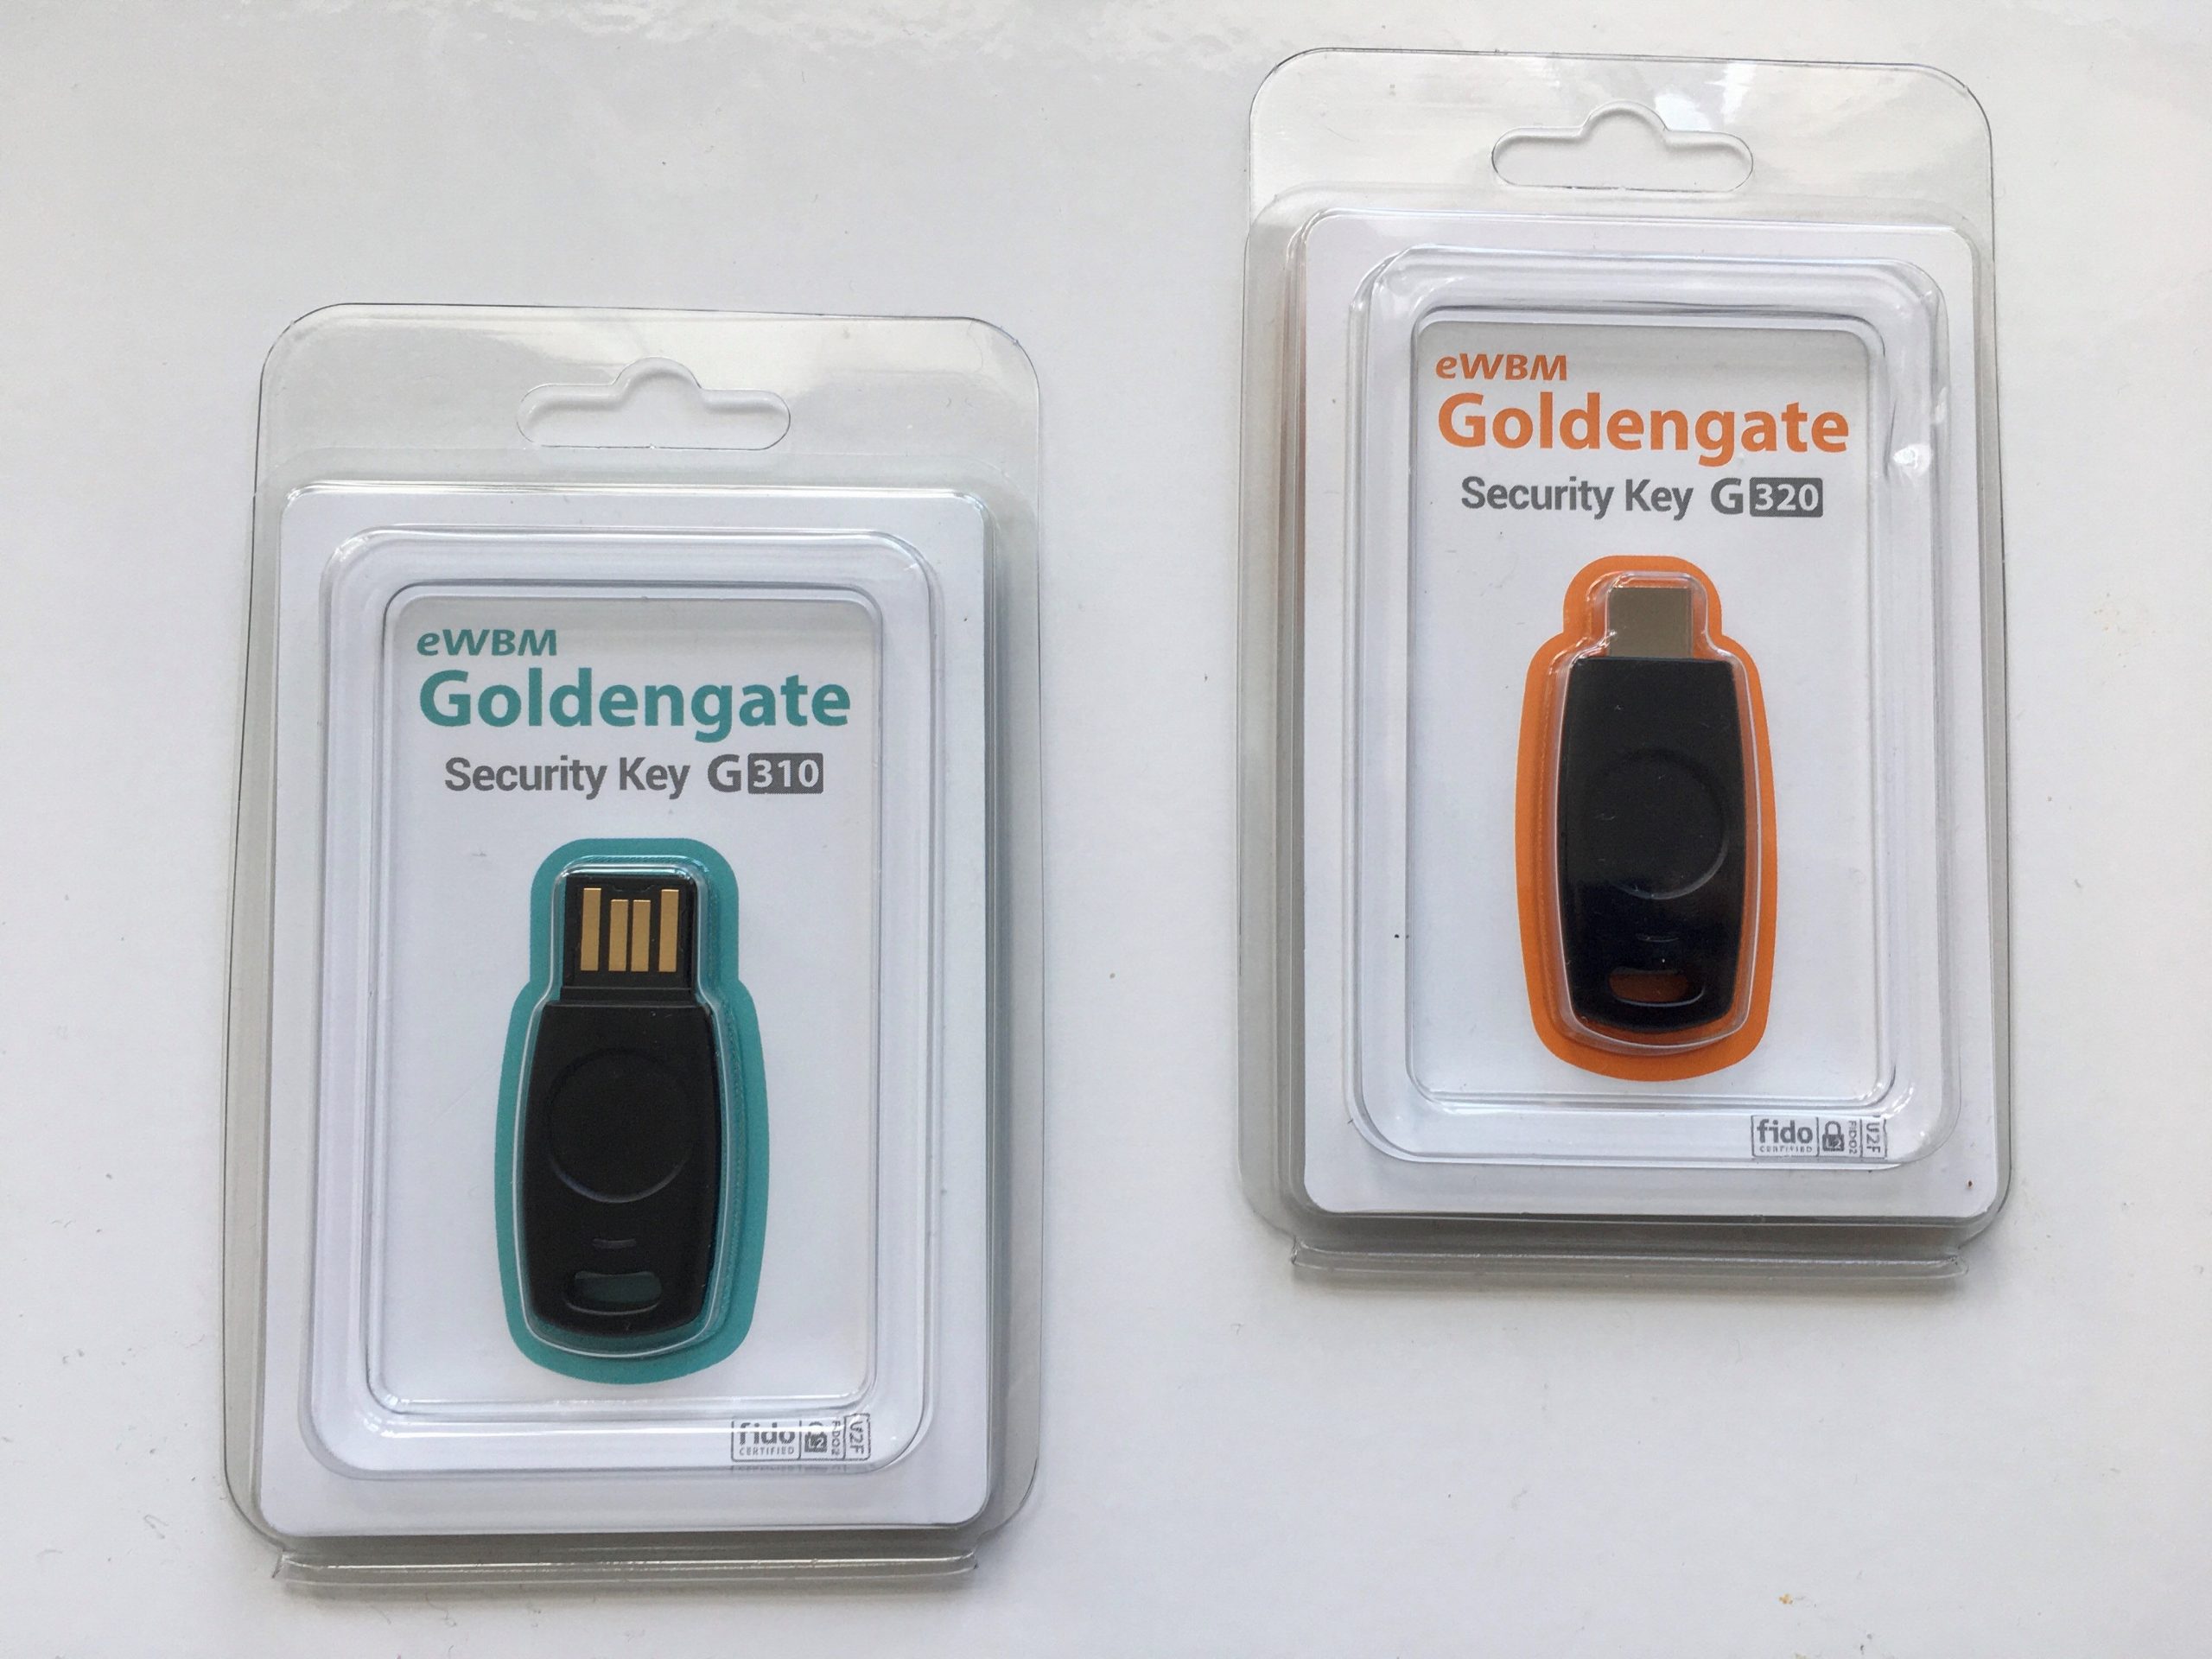
eWBM security keys
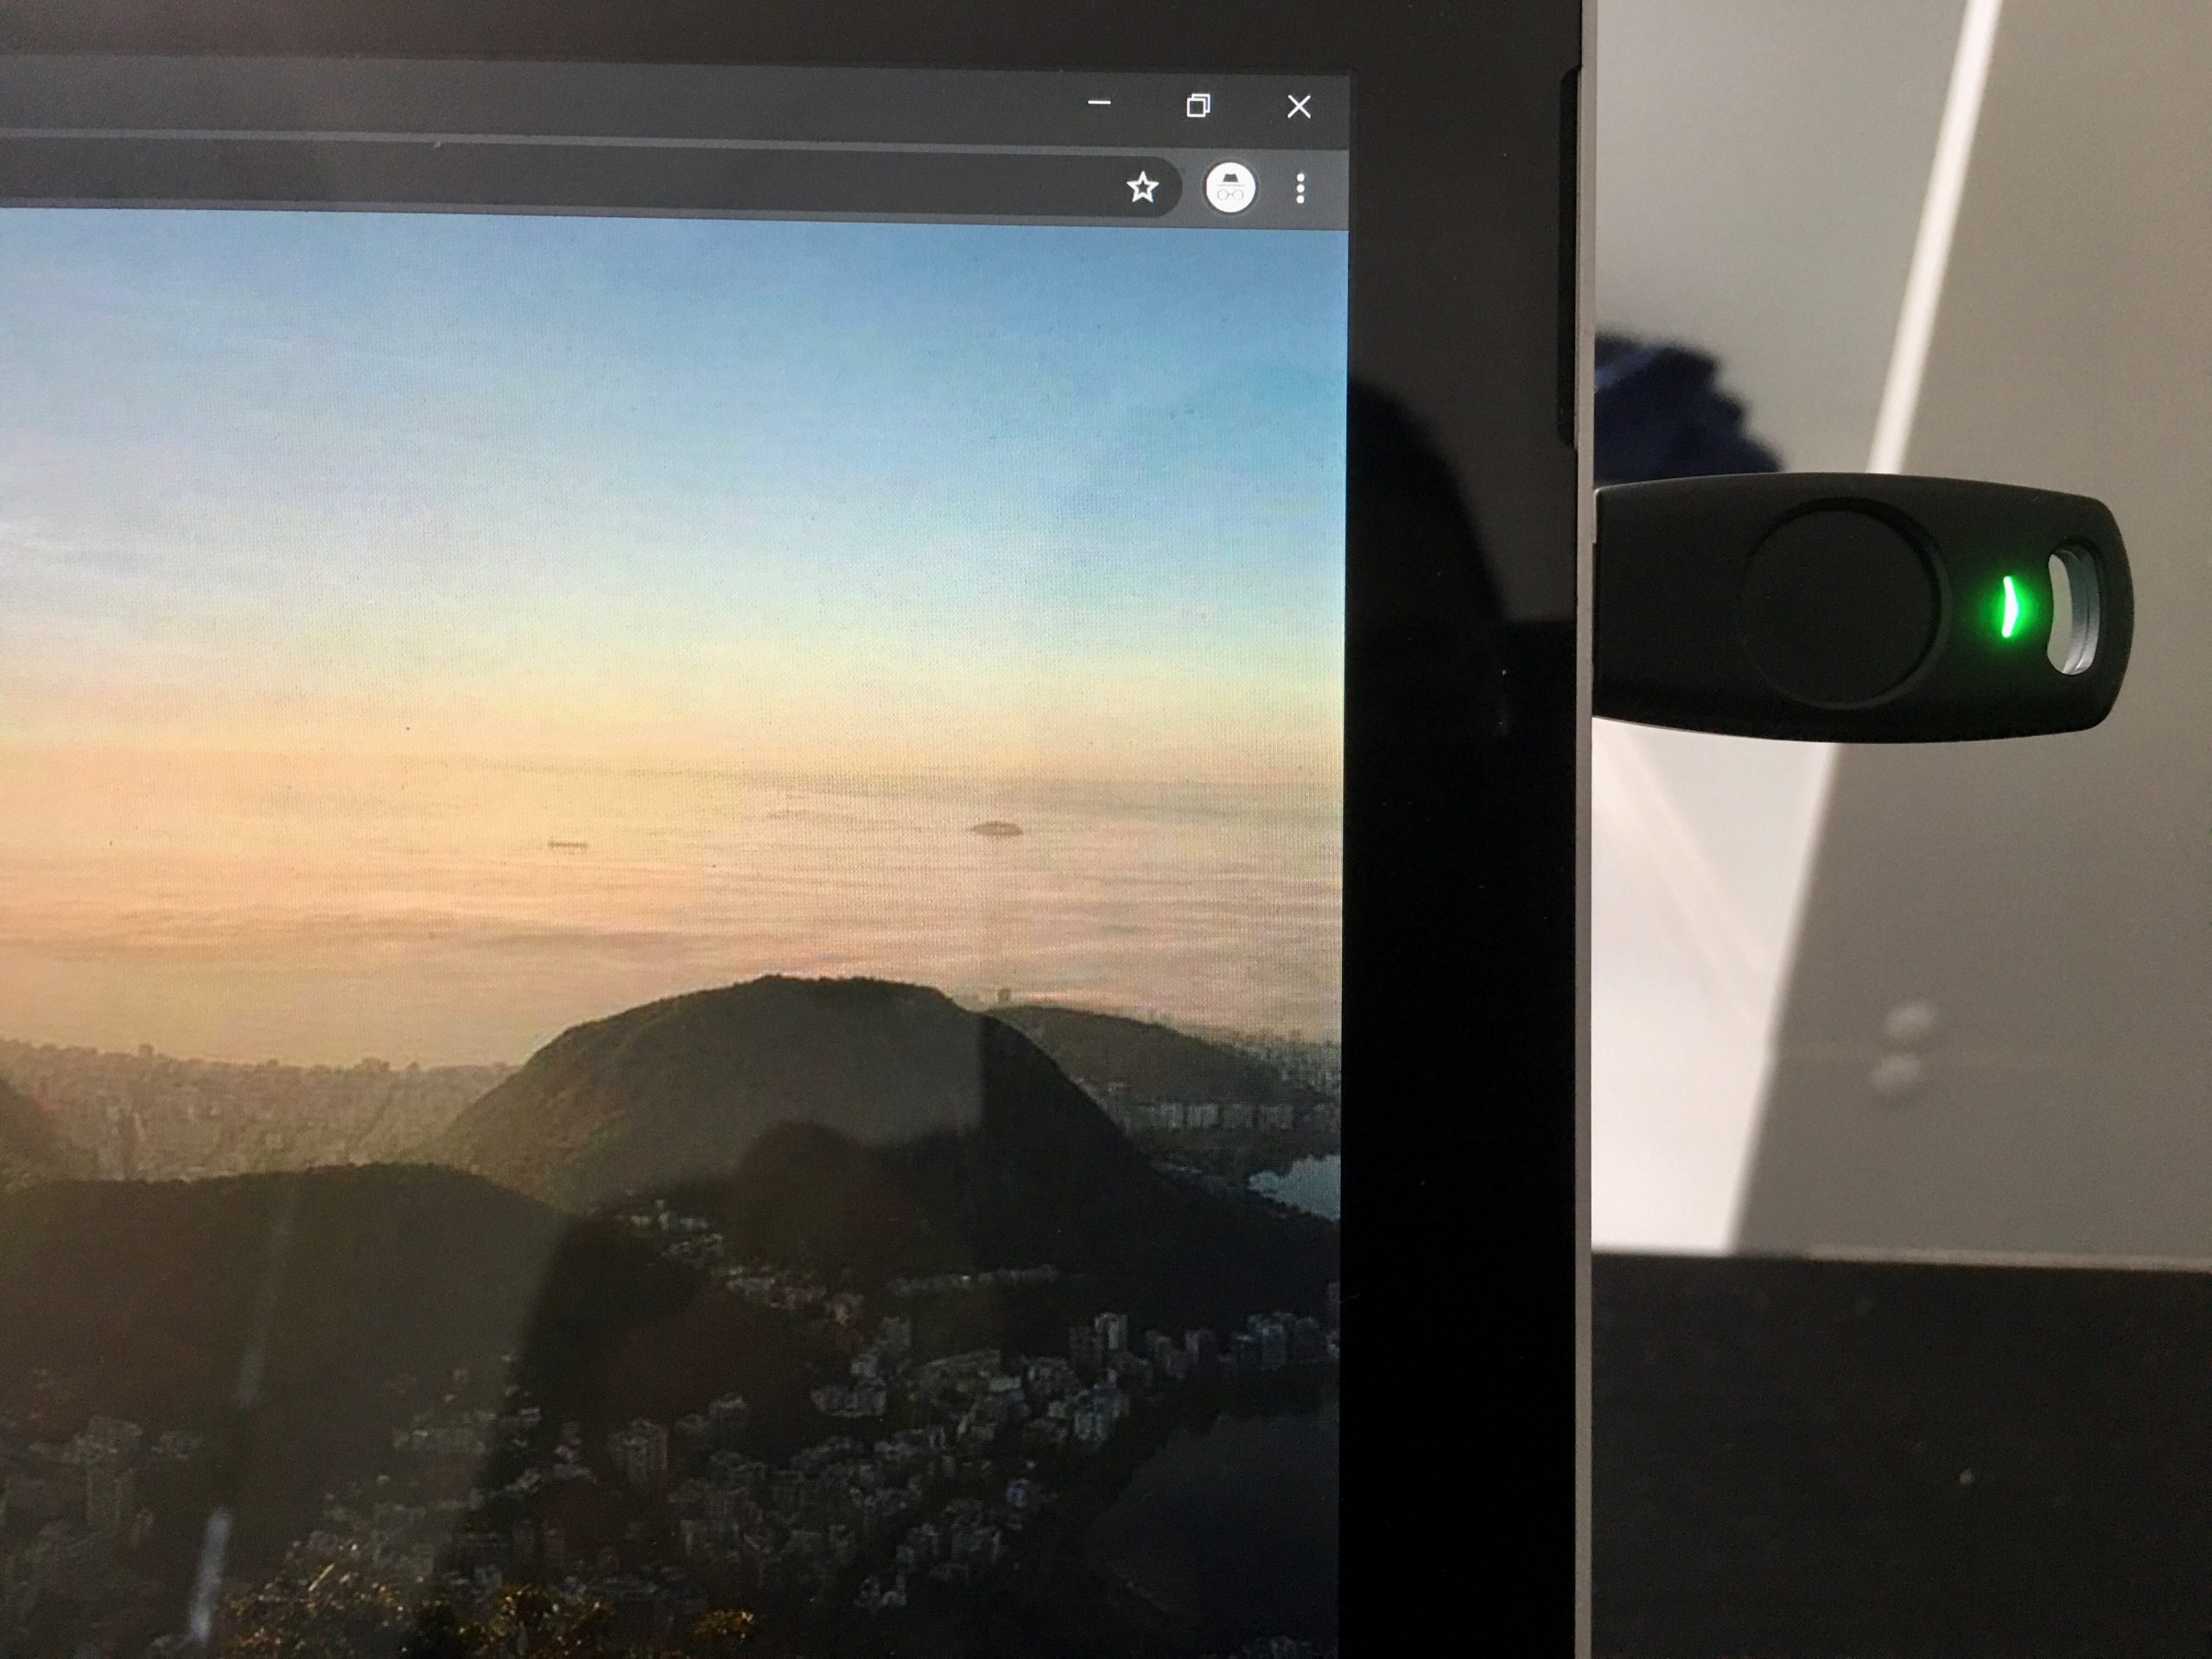
The good people at eWBM provided eWBM Goldengate security key G320 (USB-C) and eWBM Goldengate security key G310 (USB-A) for testing. I will be using eWBM Goldengate security key G320 (USB-C) in this demo with Surface Pro 7.
Enable Multi-factor authentication
Before we go ahead with the FIDO2 enrolment, we need to enable multi-factor authentication for the users. To do that,
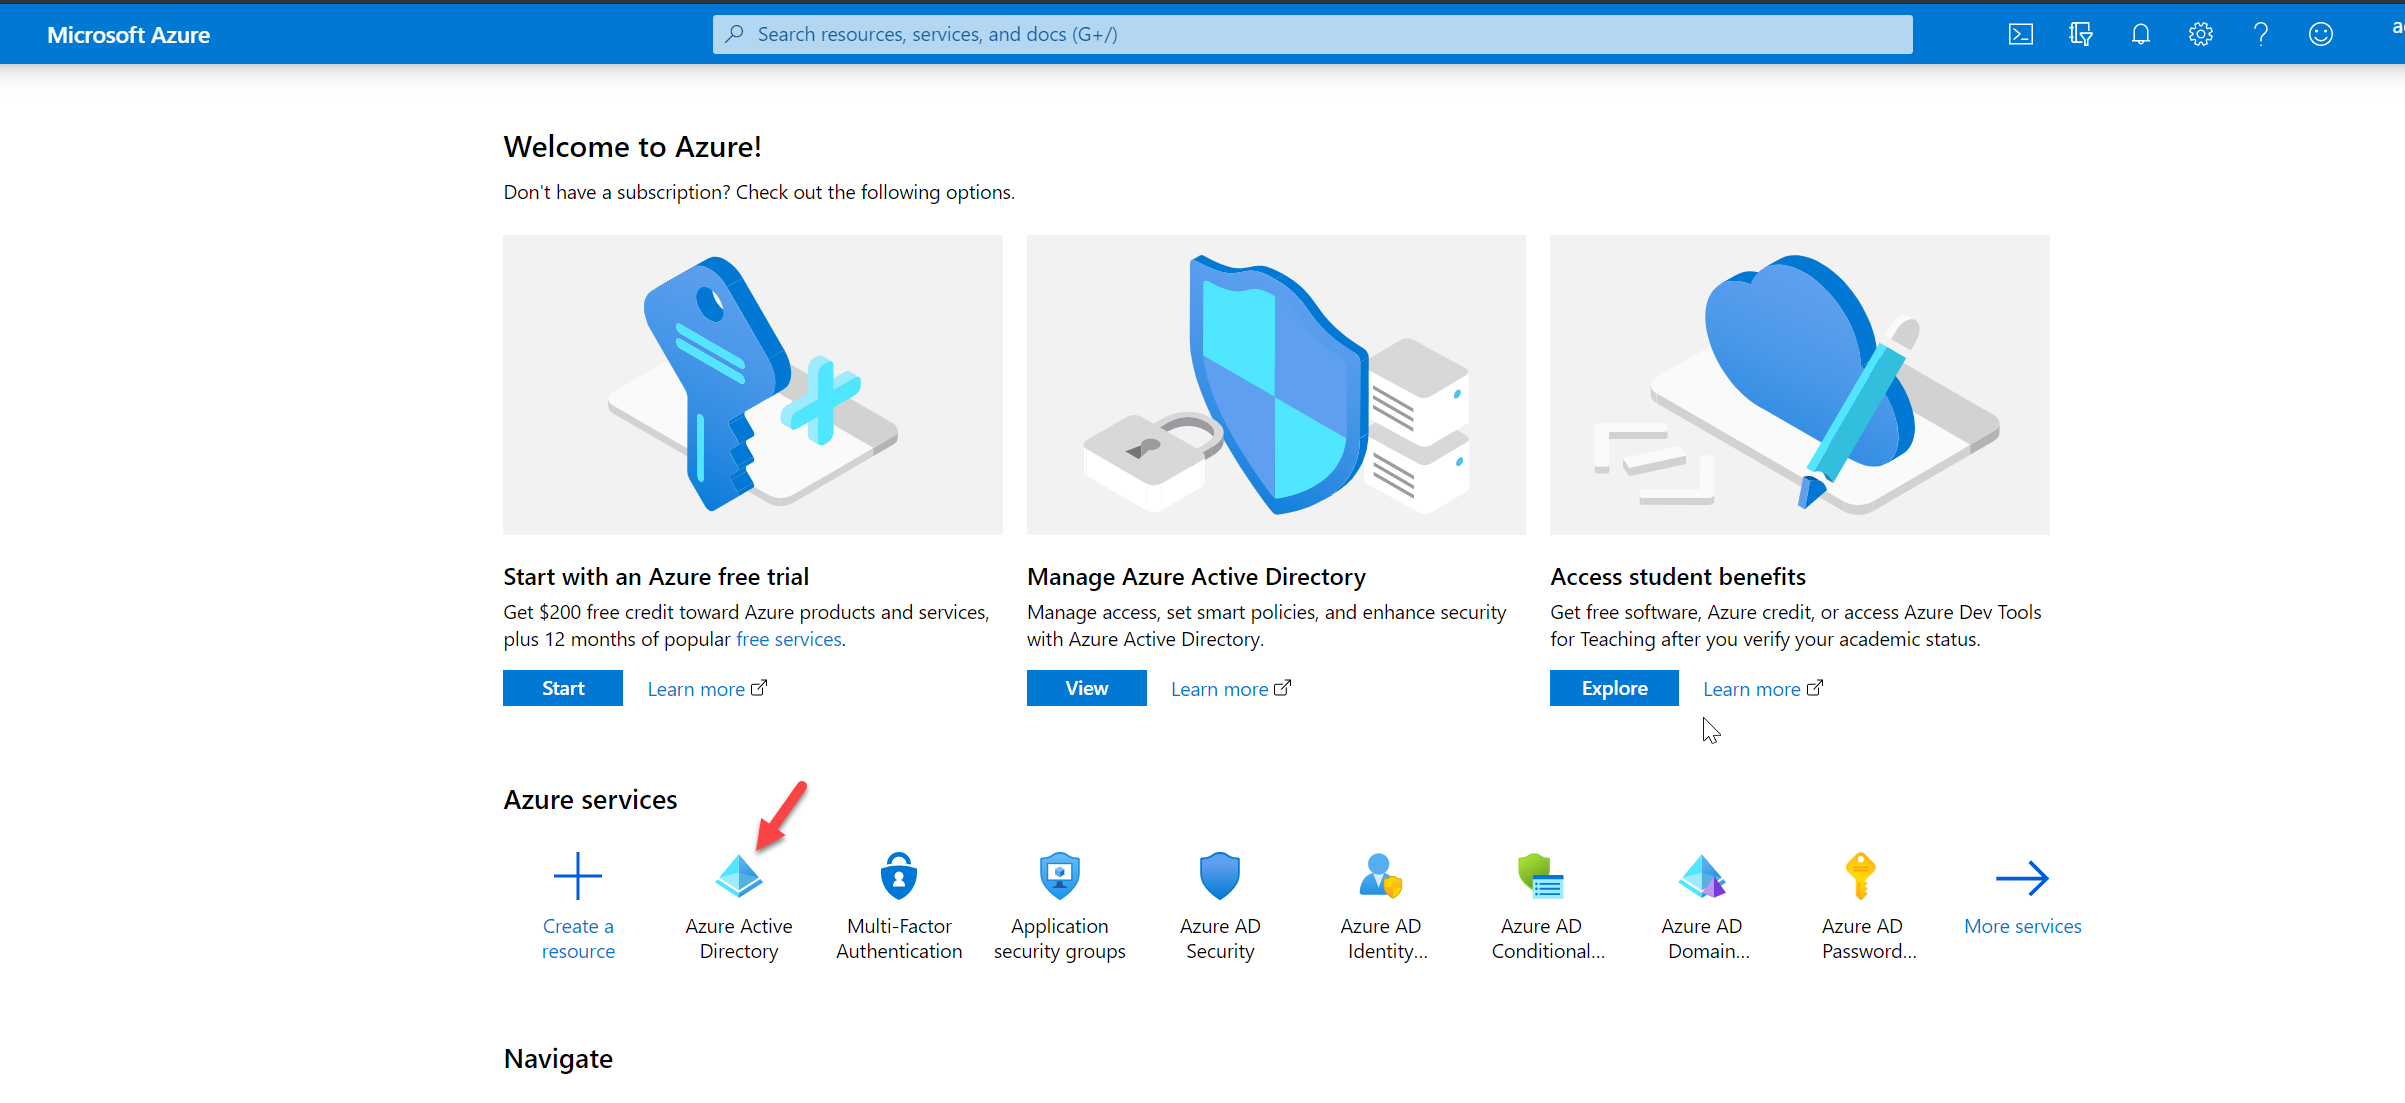
1. Log in to Azure portal https://portal.azure.com/ as Global Administrator
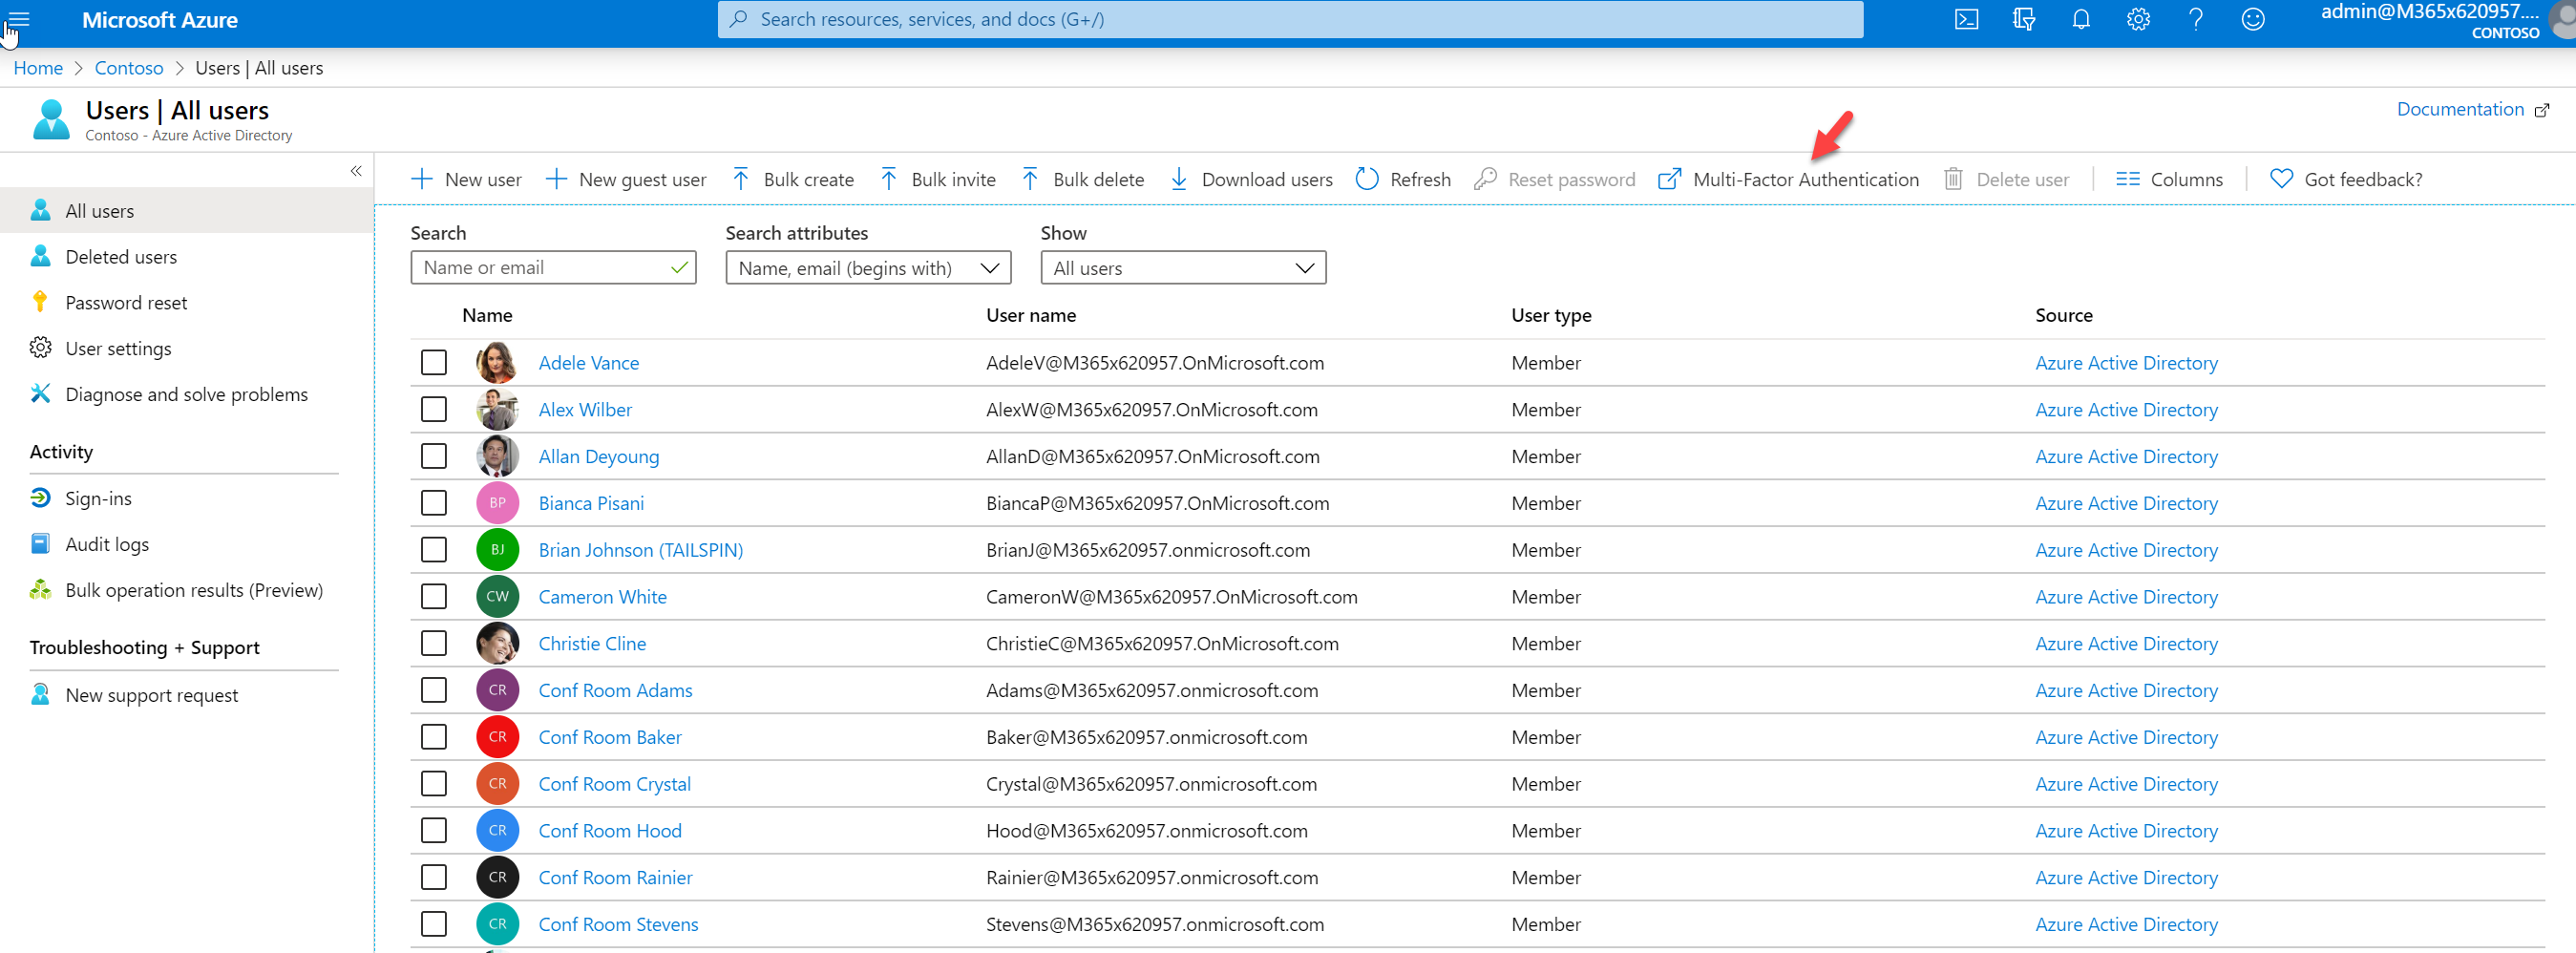
2. Click on Azure Active Directory under Azure Services
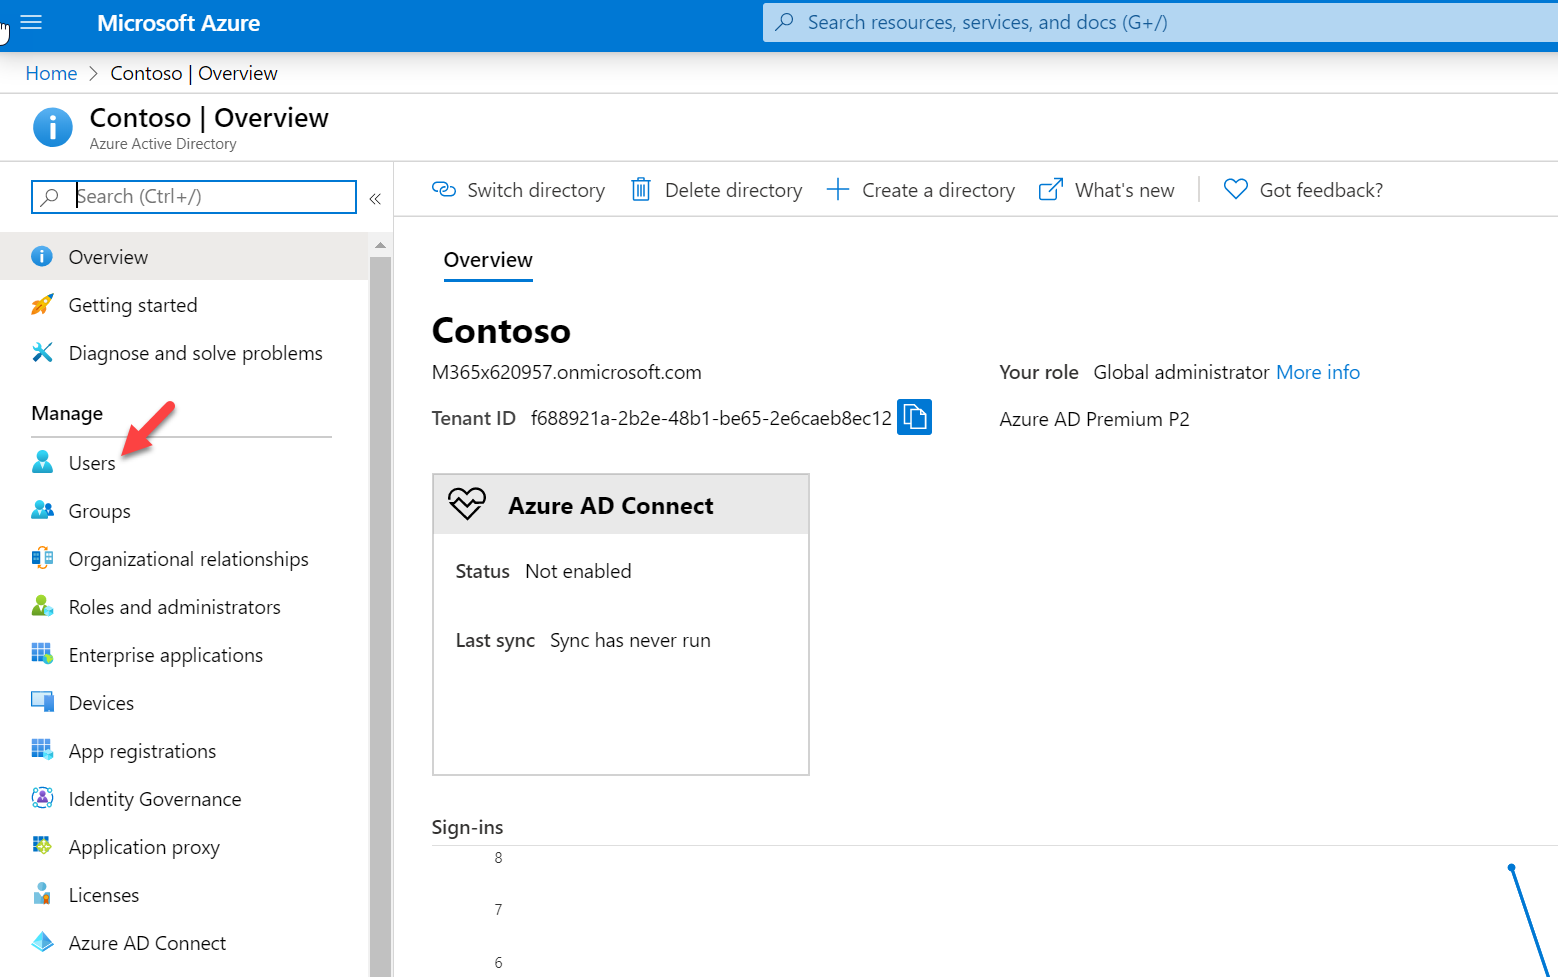
3. Click on Users
4. In All Users window, click on Multi-Factor Authentication
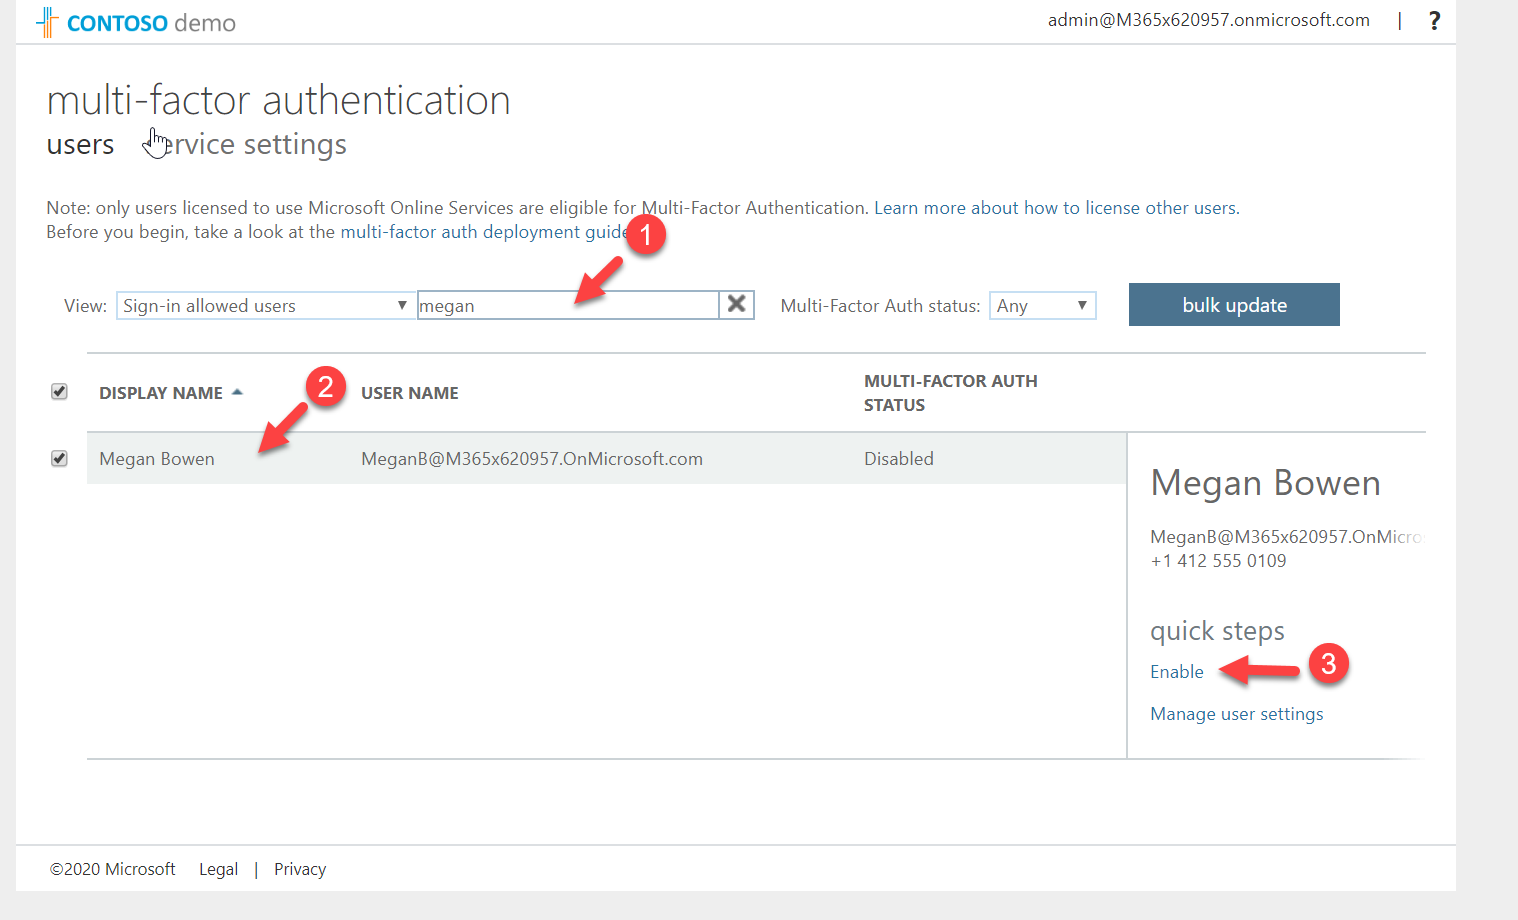
5. Search for the user. In this demo, I am going to use user Megan Brown for testing. Then select the user and click on Enable.
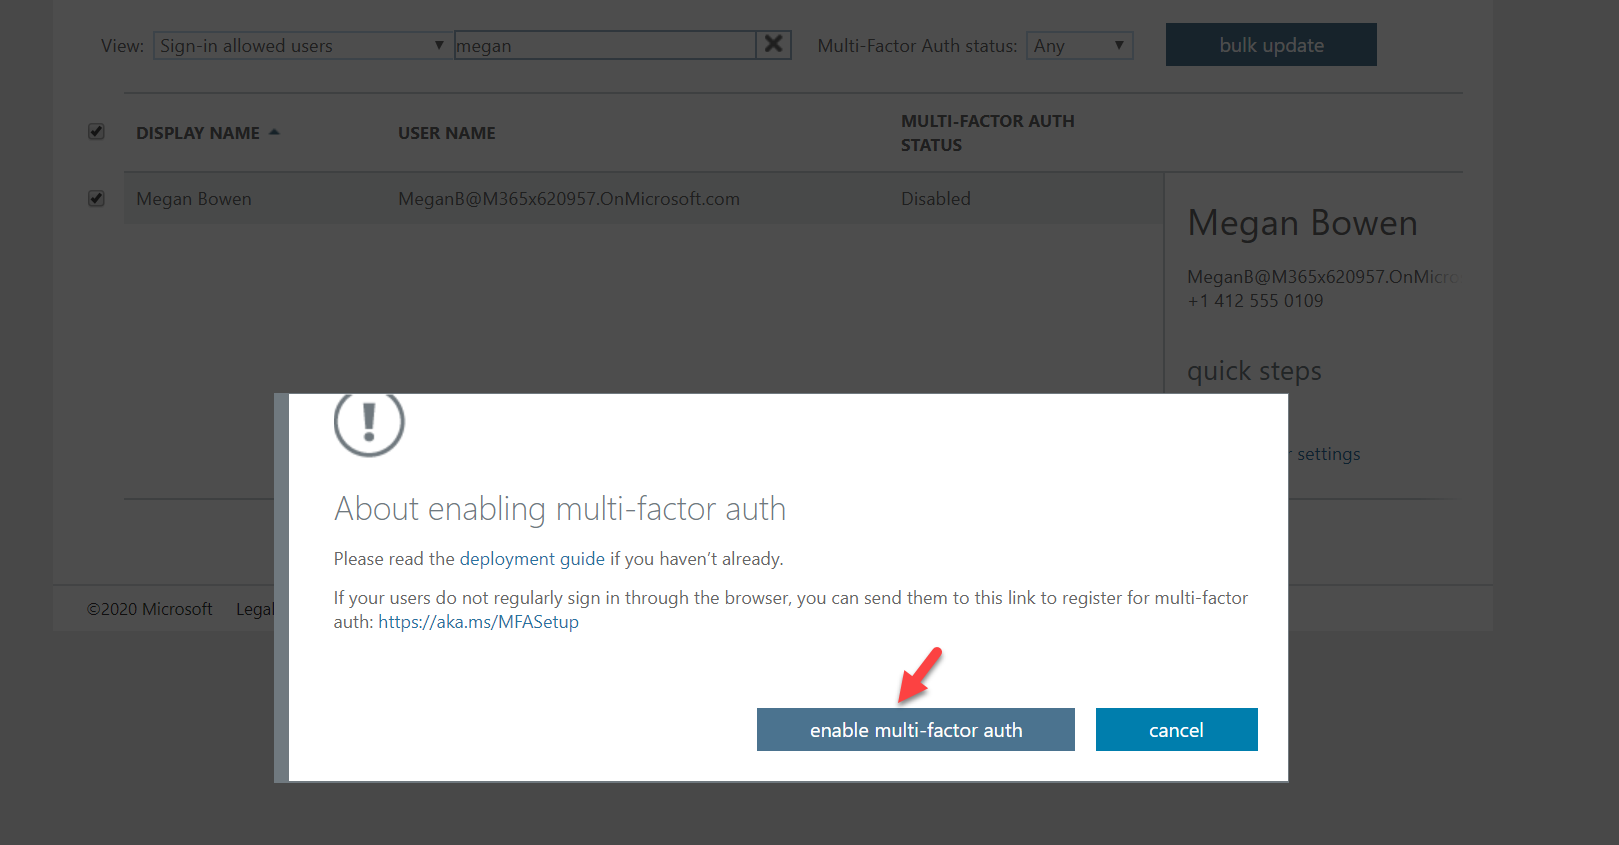
6. Then click on enable multi-factor auth
Enable FIDO2 security key authentication
The next step is to enable FIDO2 for the above-selected user. To do that,
1. Log in to Azure portal https://portal.azure.com/ as Global Administrator
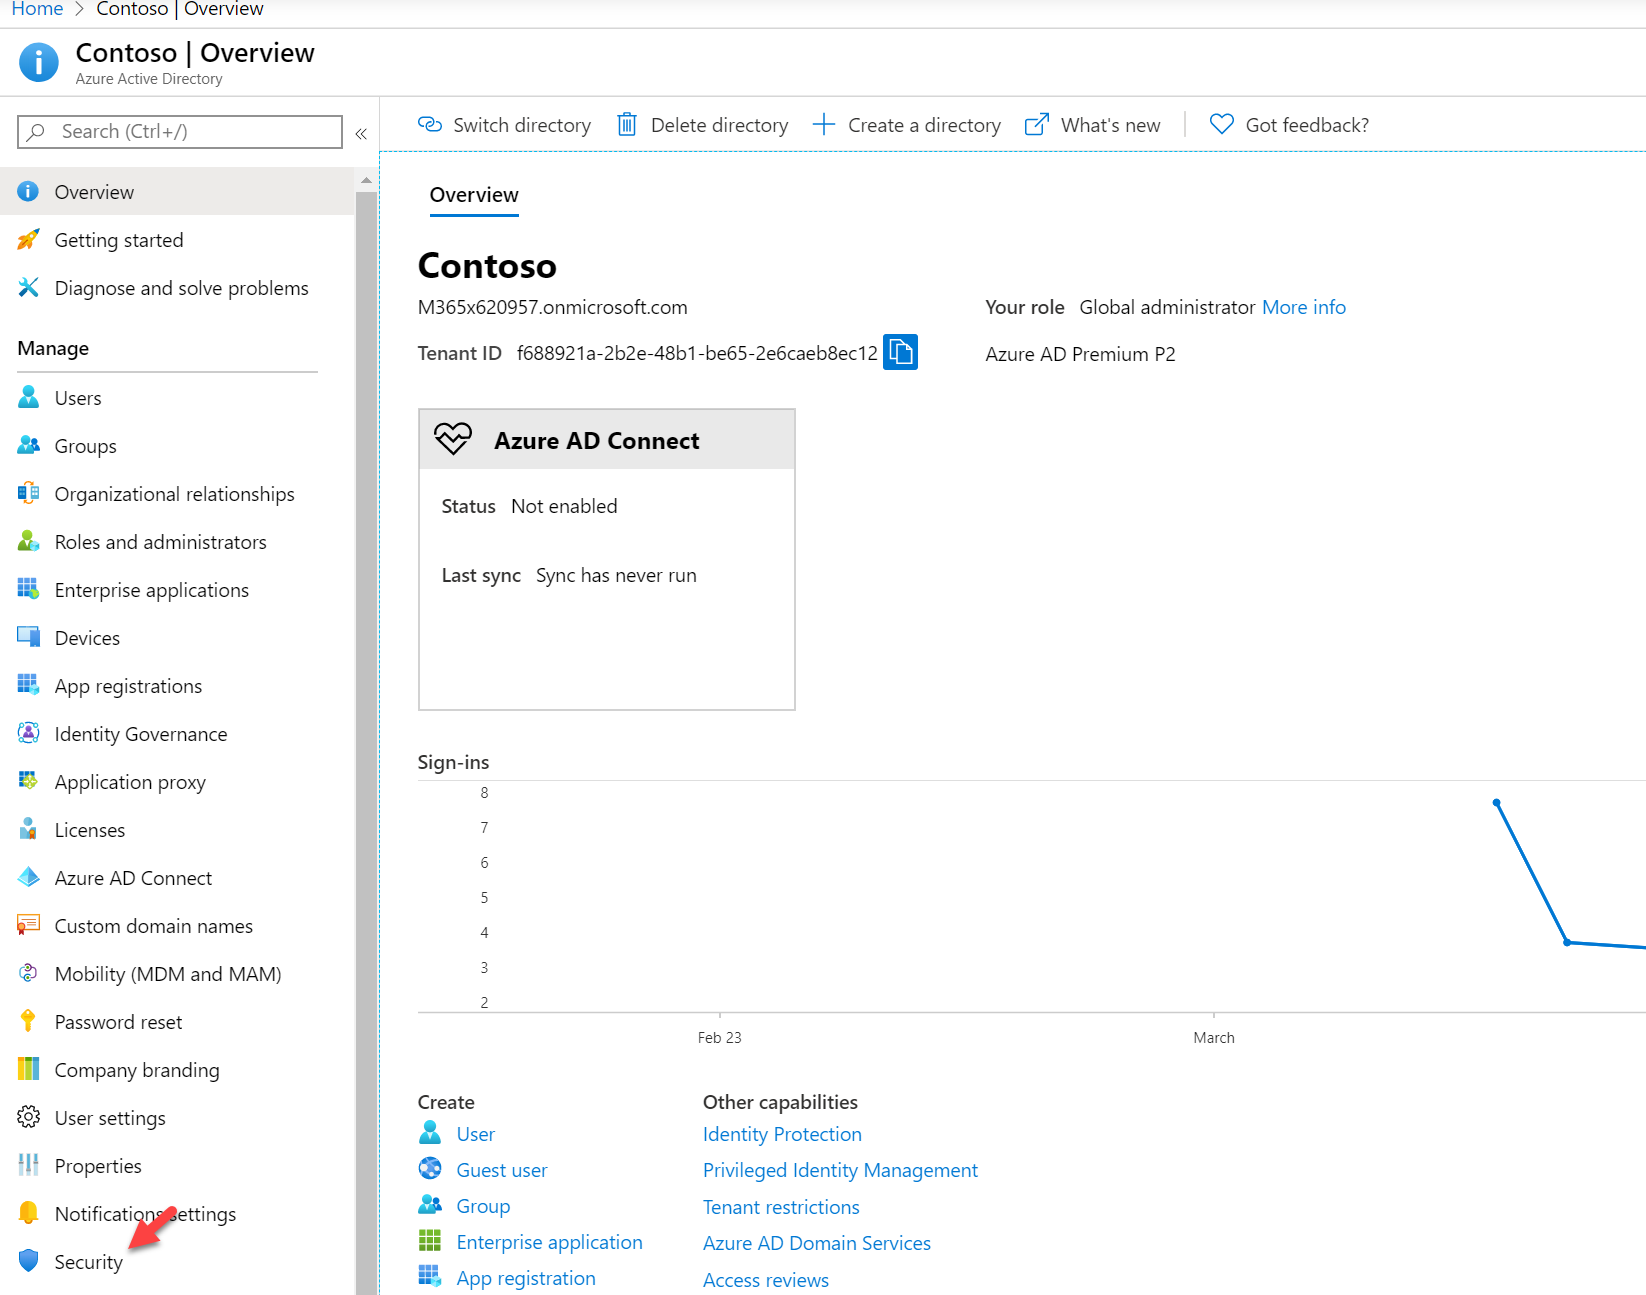
2. Click on Azure Active Directory under Azure Services
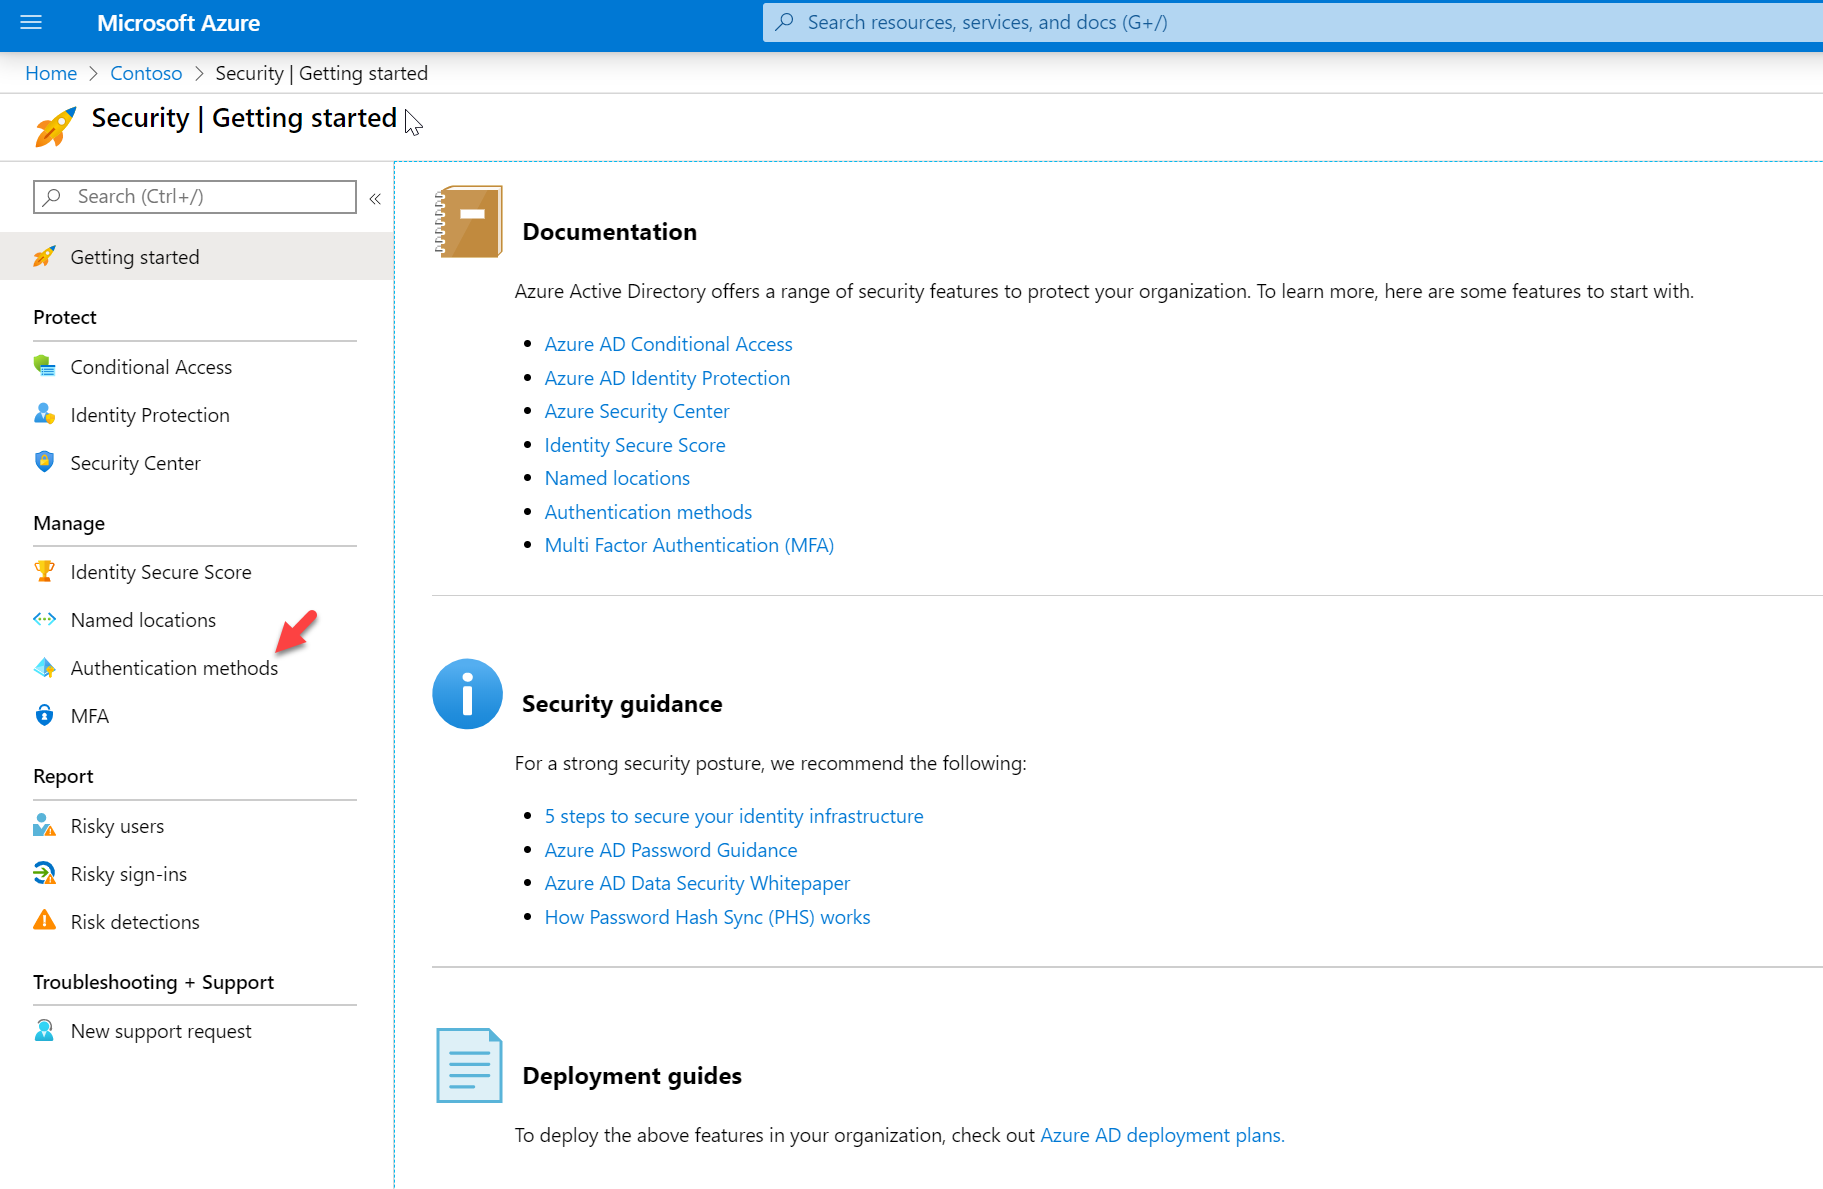
3. Click on Security
4. Then Authentications methods
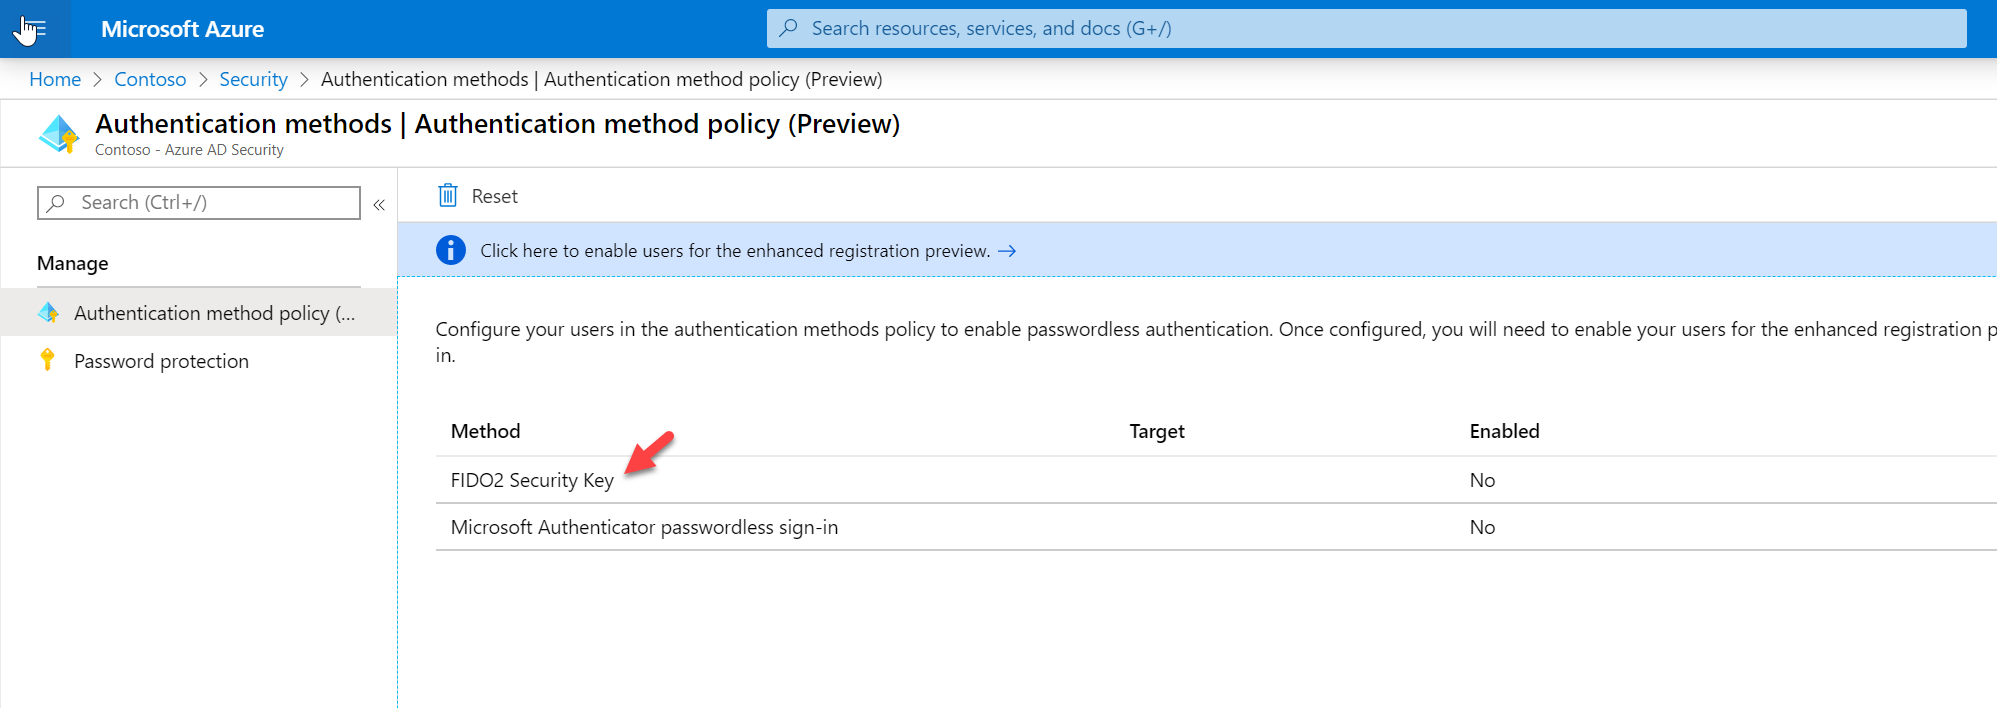
5. In the new window click on FIDO2 Security Key
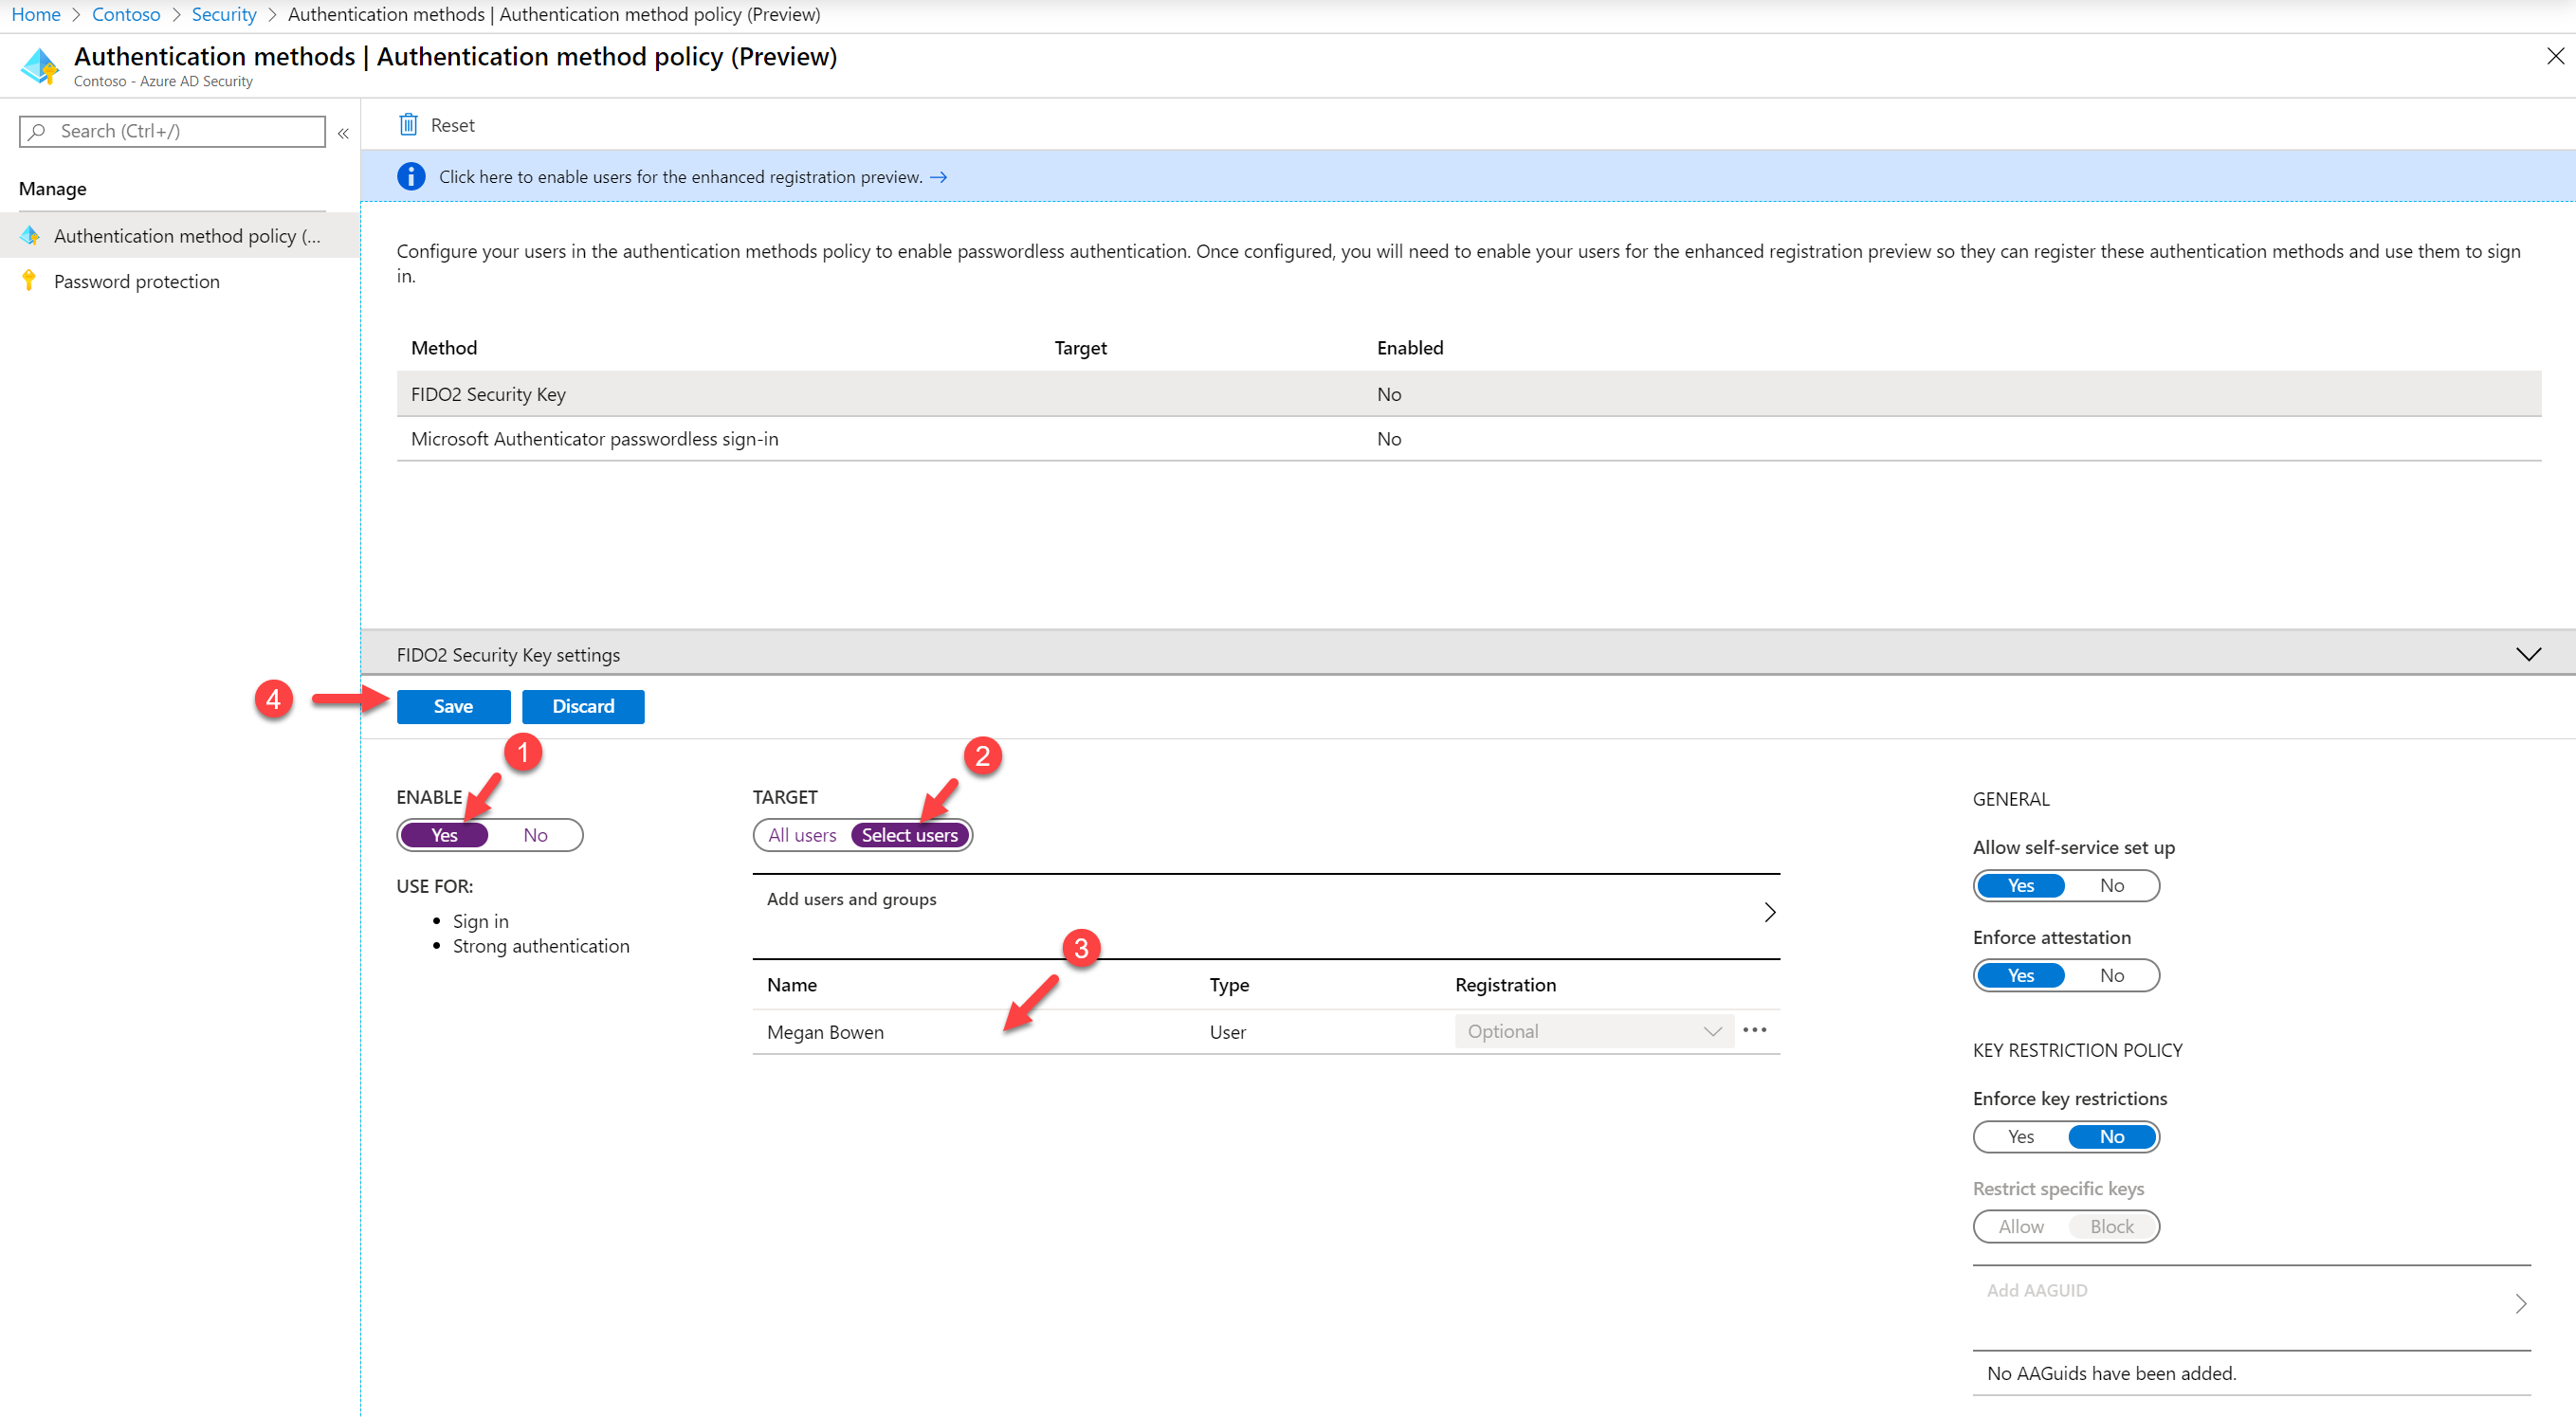
6. In the new window, click on Yes under ENABLE. Then click on Select users under TARGET. After, click on Add users and groups and select Megan Brown from the list. Leave all other settings in default and click on Save to apply the settings.
Enable enhanced registration preview
We also need to enable combined security information registration (preview) before the enrolment process. To do that,
1. Log in to Azure portal https://portal.azure.com/ as Global Administrator
2. Click on Azure Active Directory under Azure Services
3. Click on Security
4. Then Authentications methods
5. Click on the link Click here to enable users for the enhanced registration preview
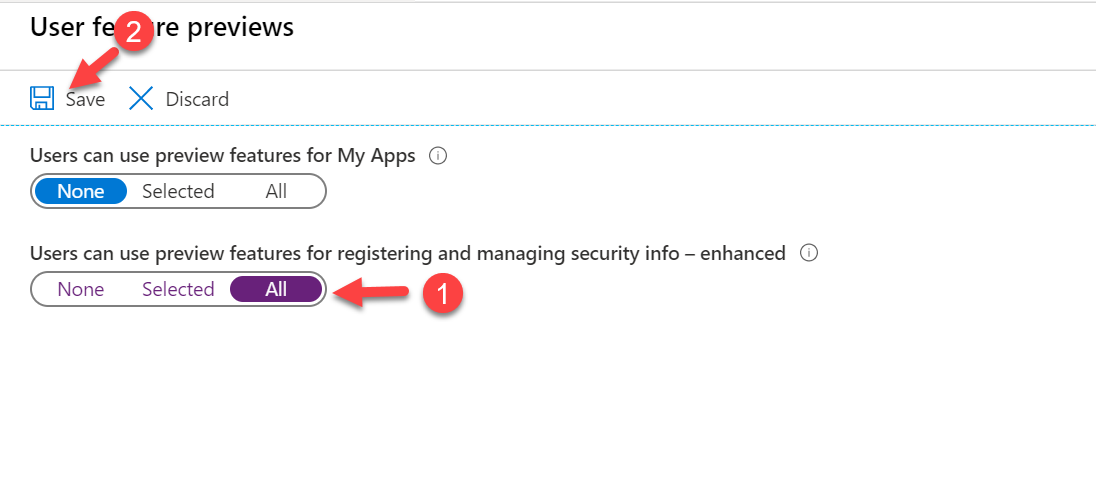
6. Click on All under Users can use preview features for registering and managing security info – enhanced. It will enable new experiences for all users. To apply the changes, click on Save
FIDO2 security key enrolment
Now we ready for the sign-up process. To proceed,
1. Go to https://myprofile.microsoft.com
2. Log in as the user (Megan Brown)
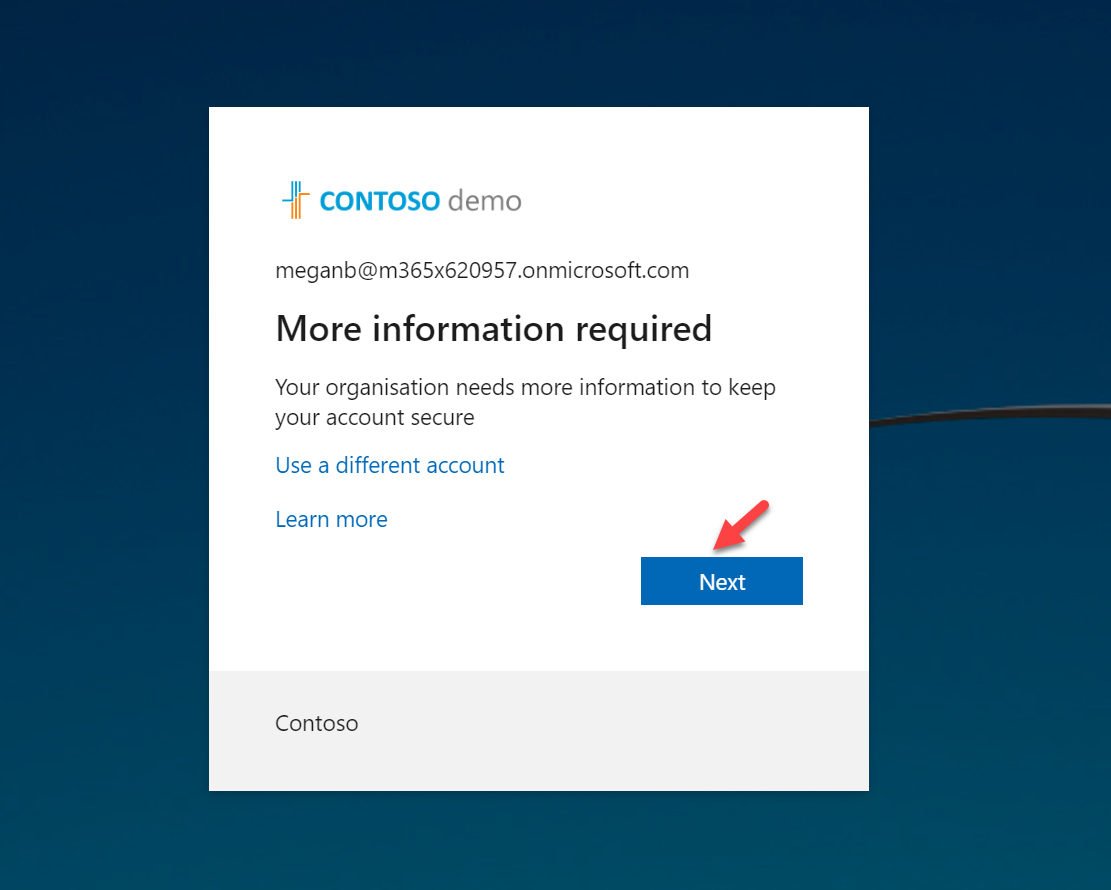
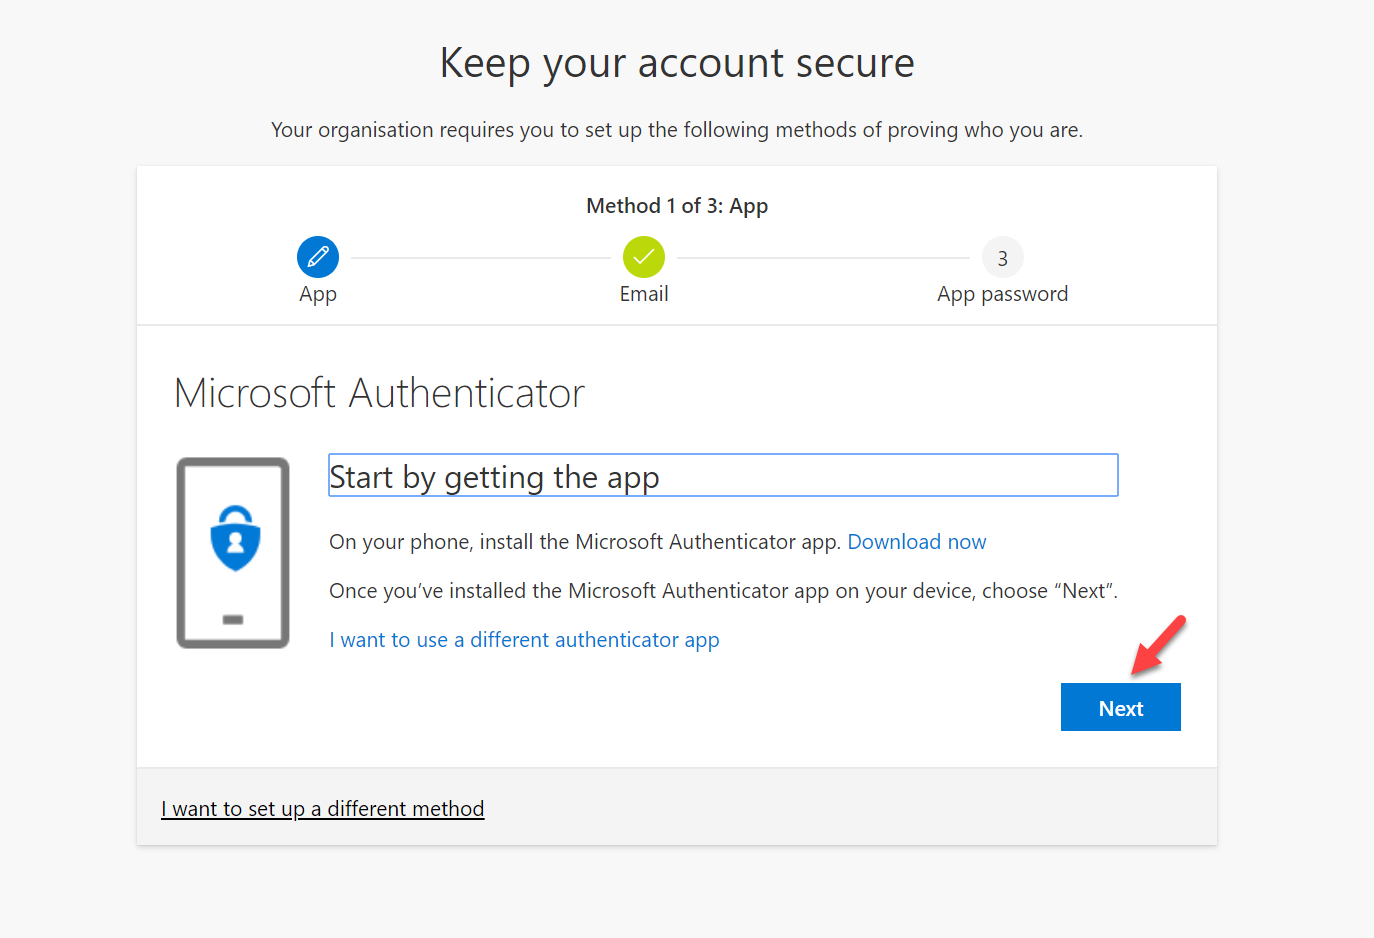
3. Click on Next to proceed with MFA and FIDO2 setup
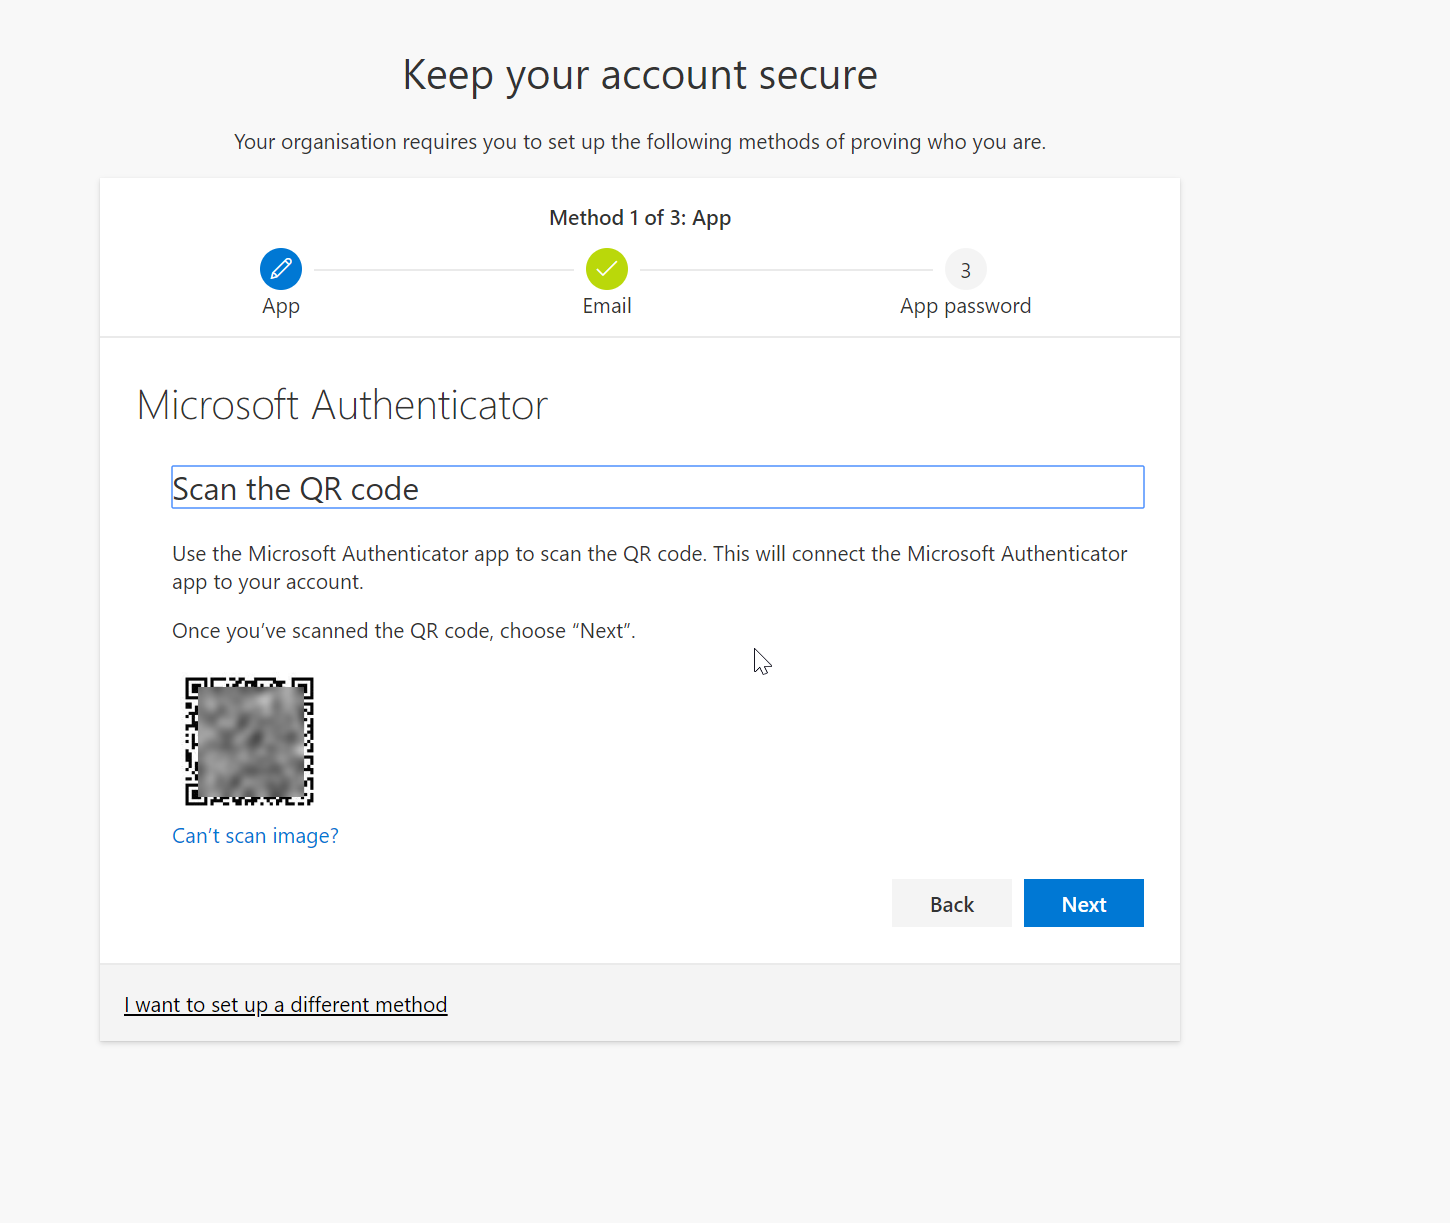
4. Then proceed with the MFA registration.
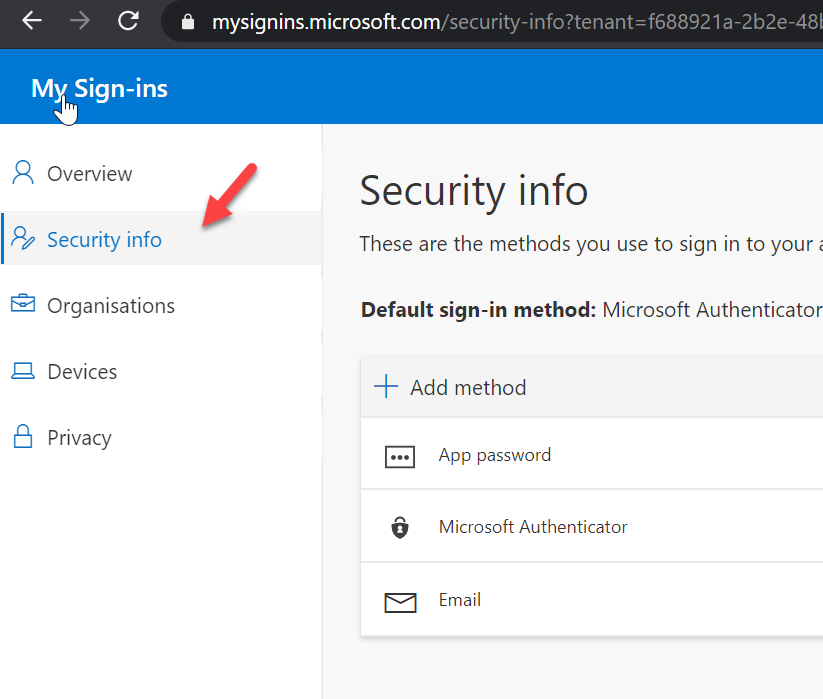
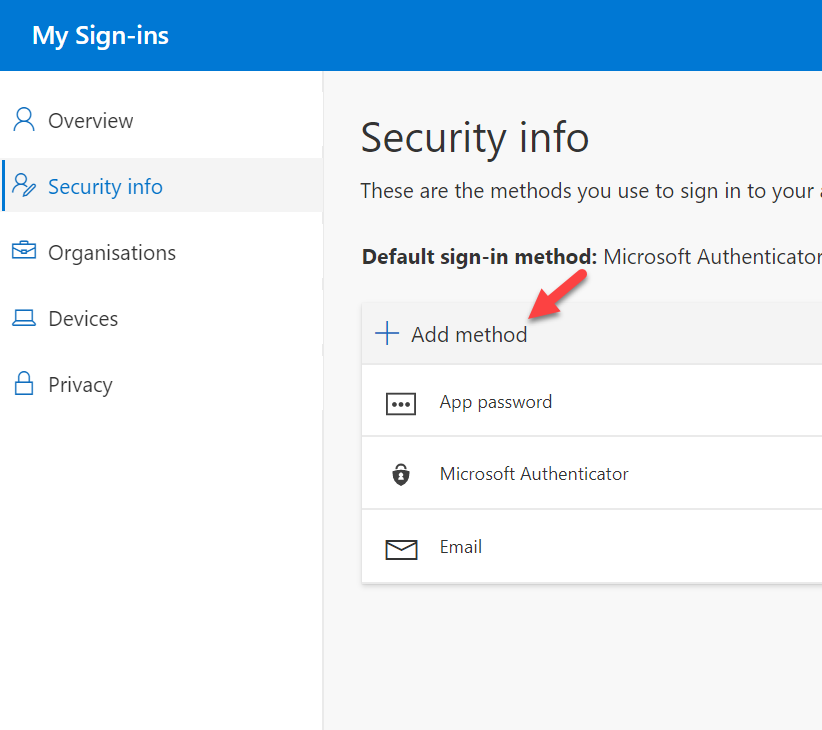
5. Then after login to profile page click on Security info
6. In new page, click on + Add method
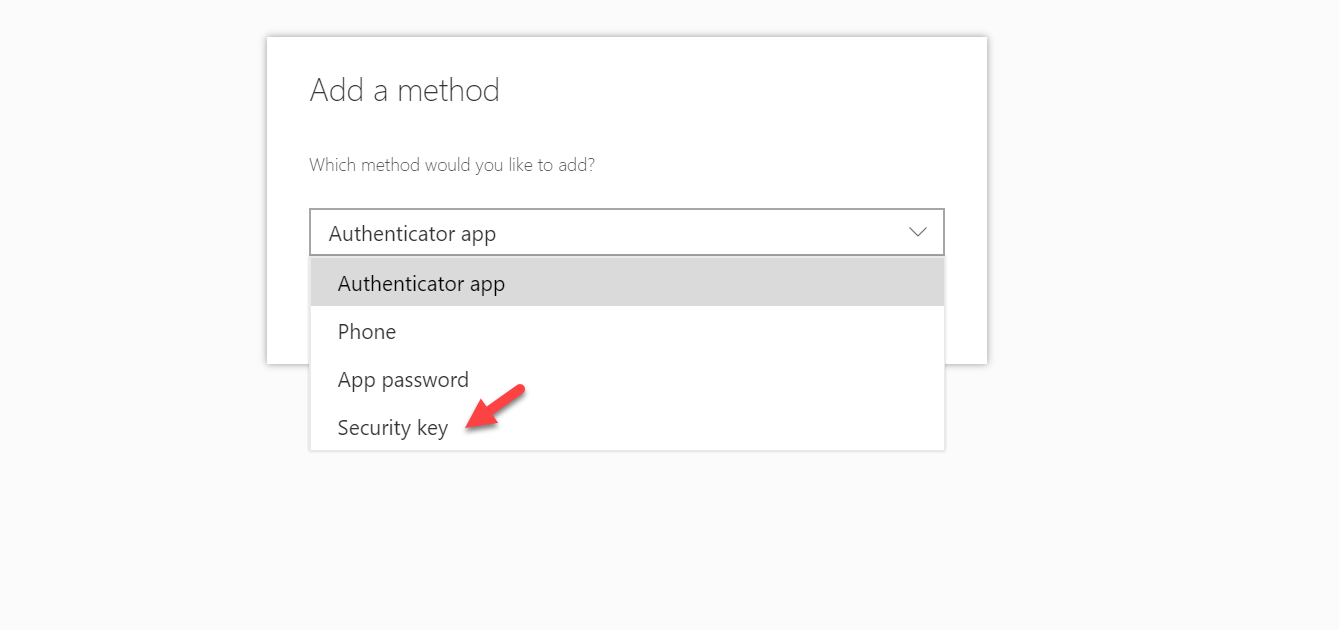
7. In new drop-down select Security key and click on Add.
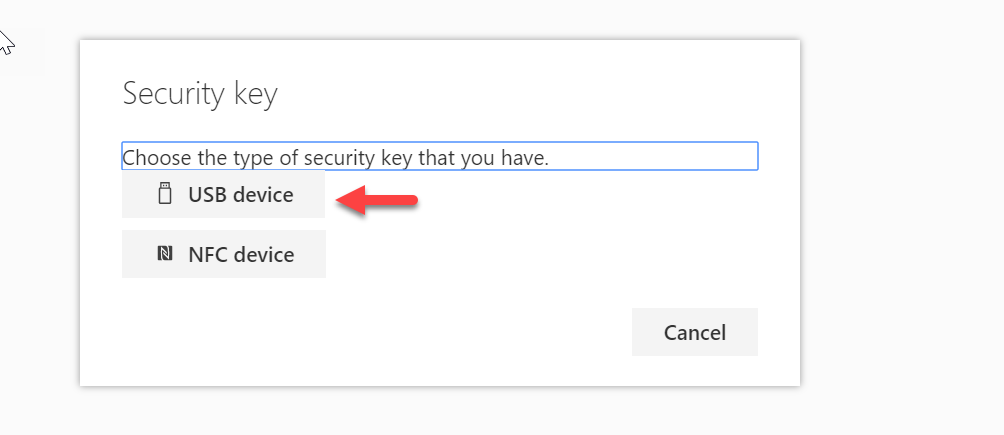
8. Then in the device list select USB device
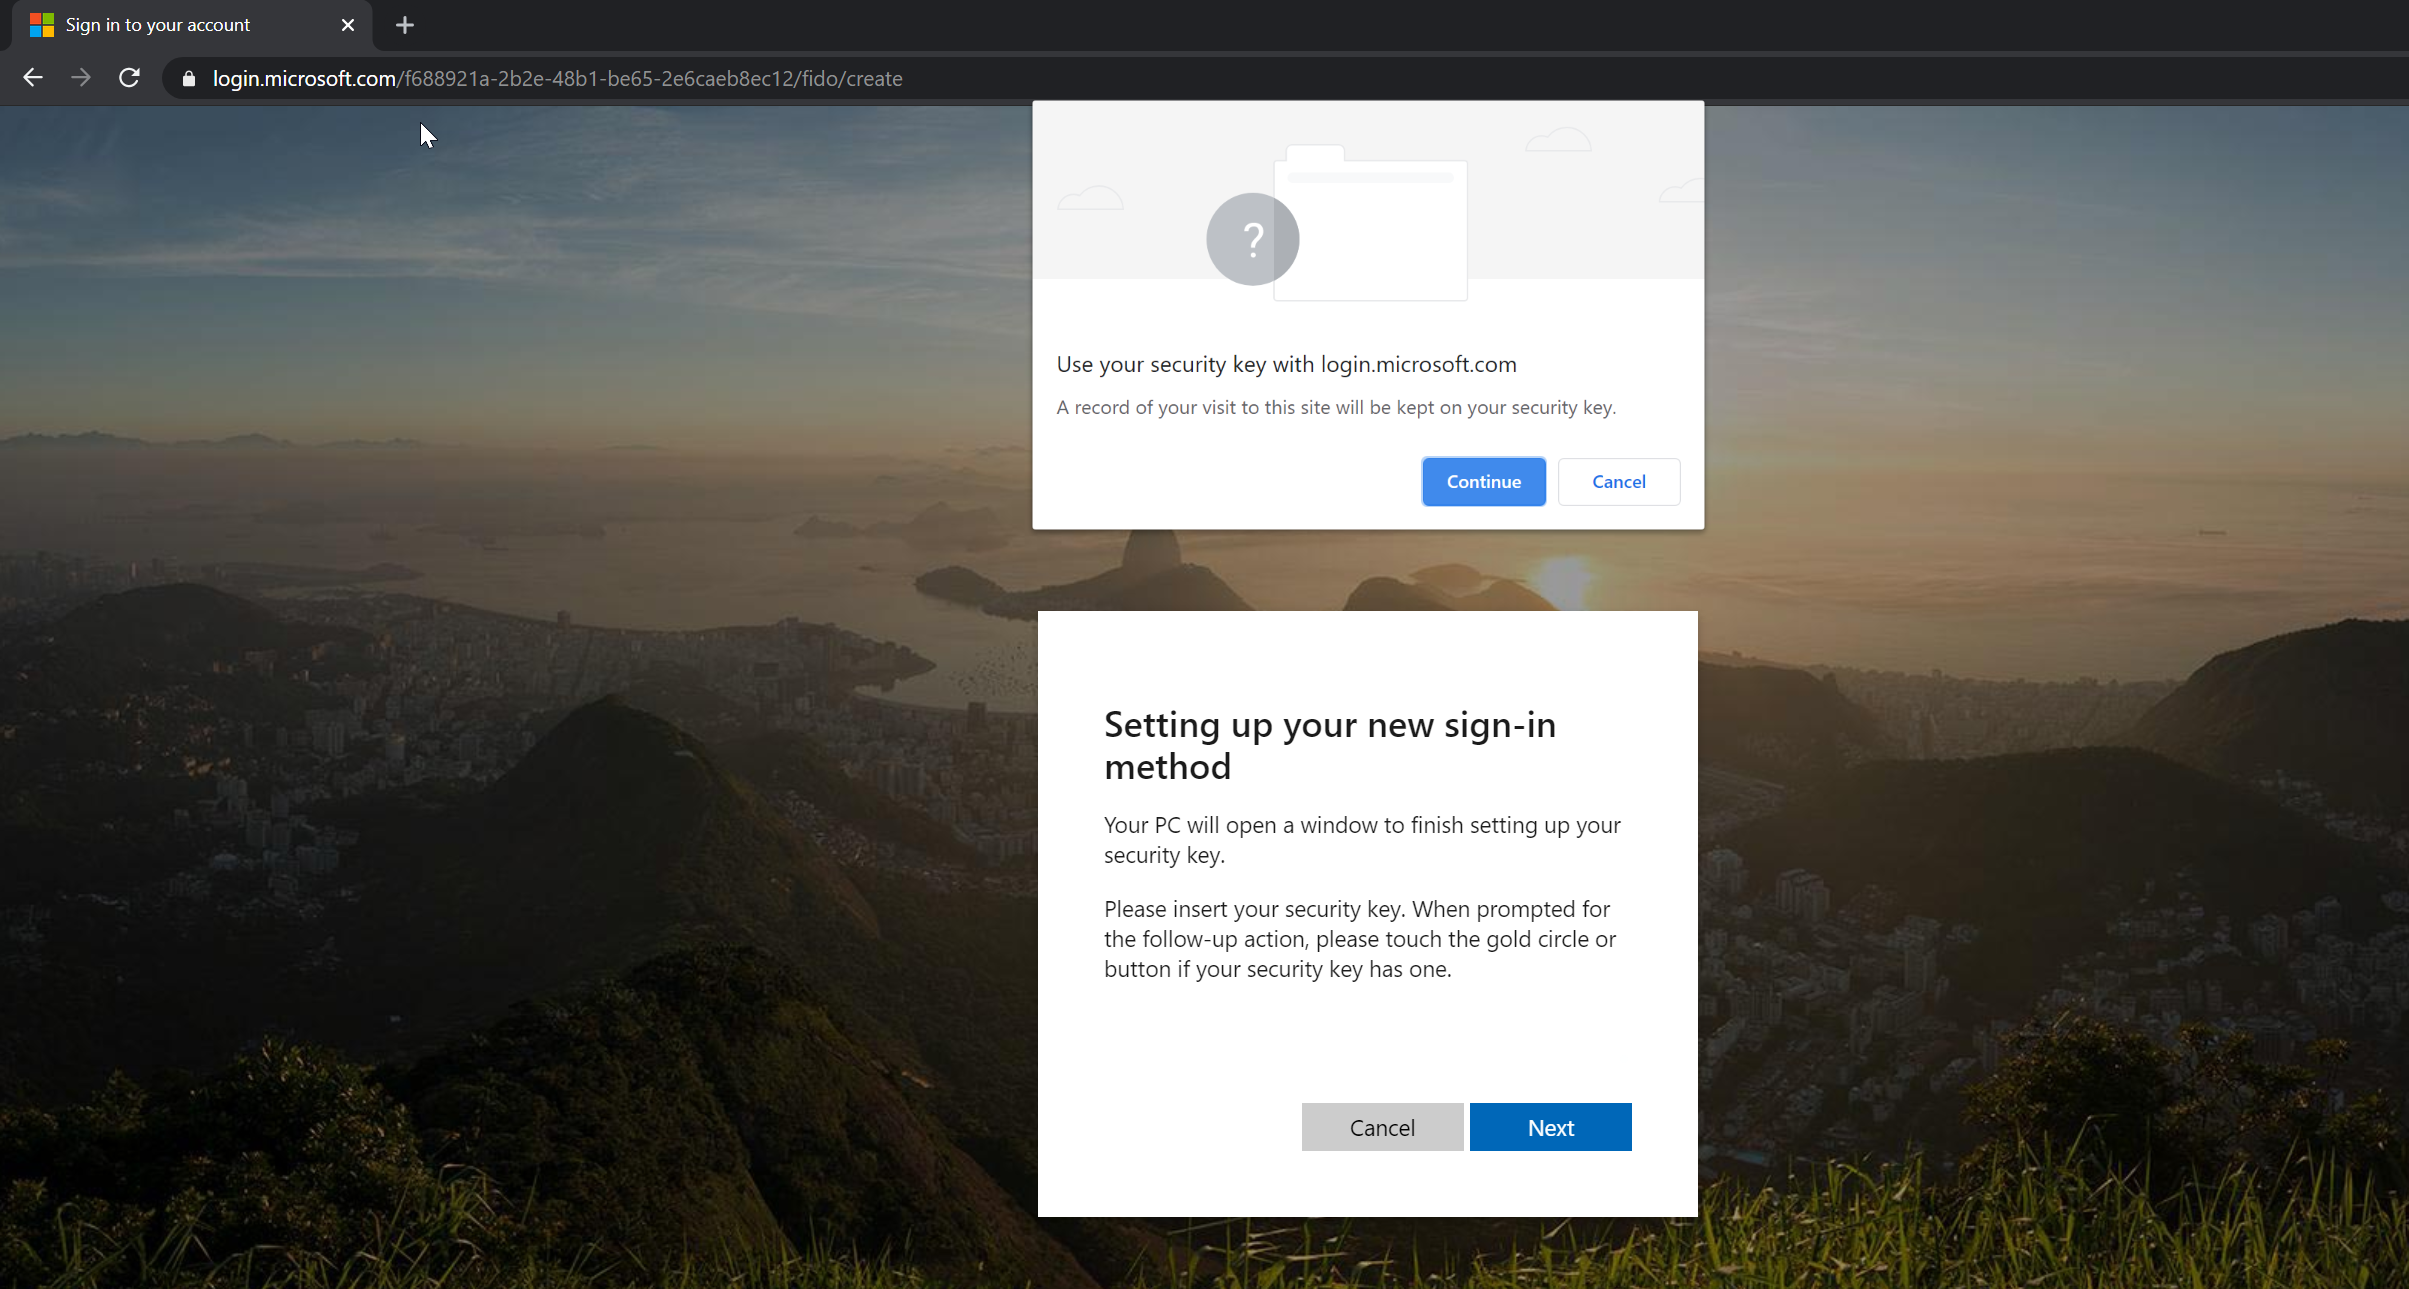
9. The page will redirect to a new sign-in page and ask to plug the security key.
10. I plug in the eWBM Goldengate security key G320 to the device and click on Next.
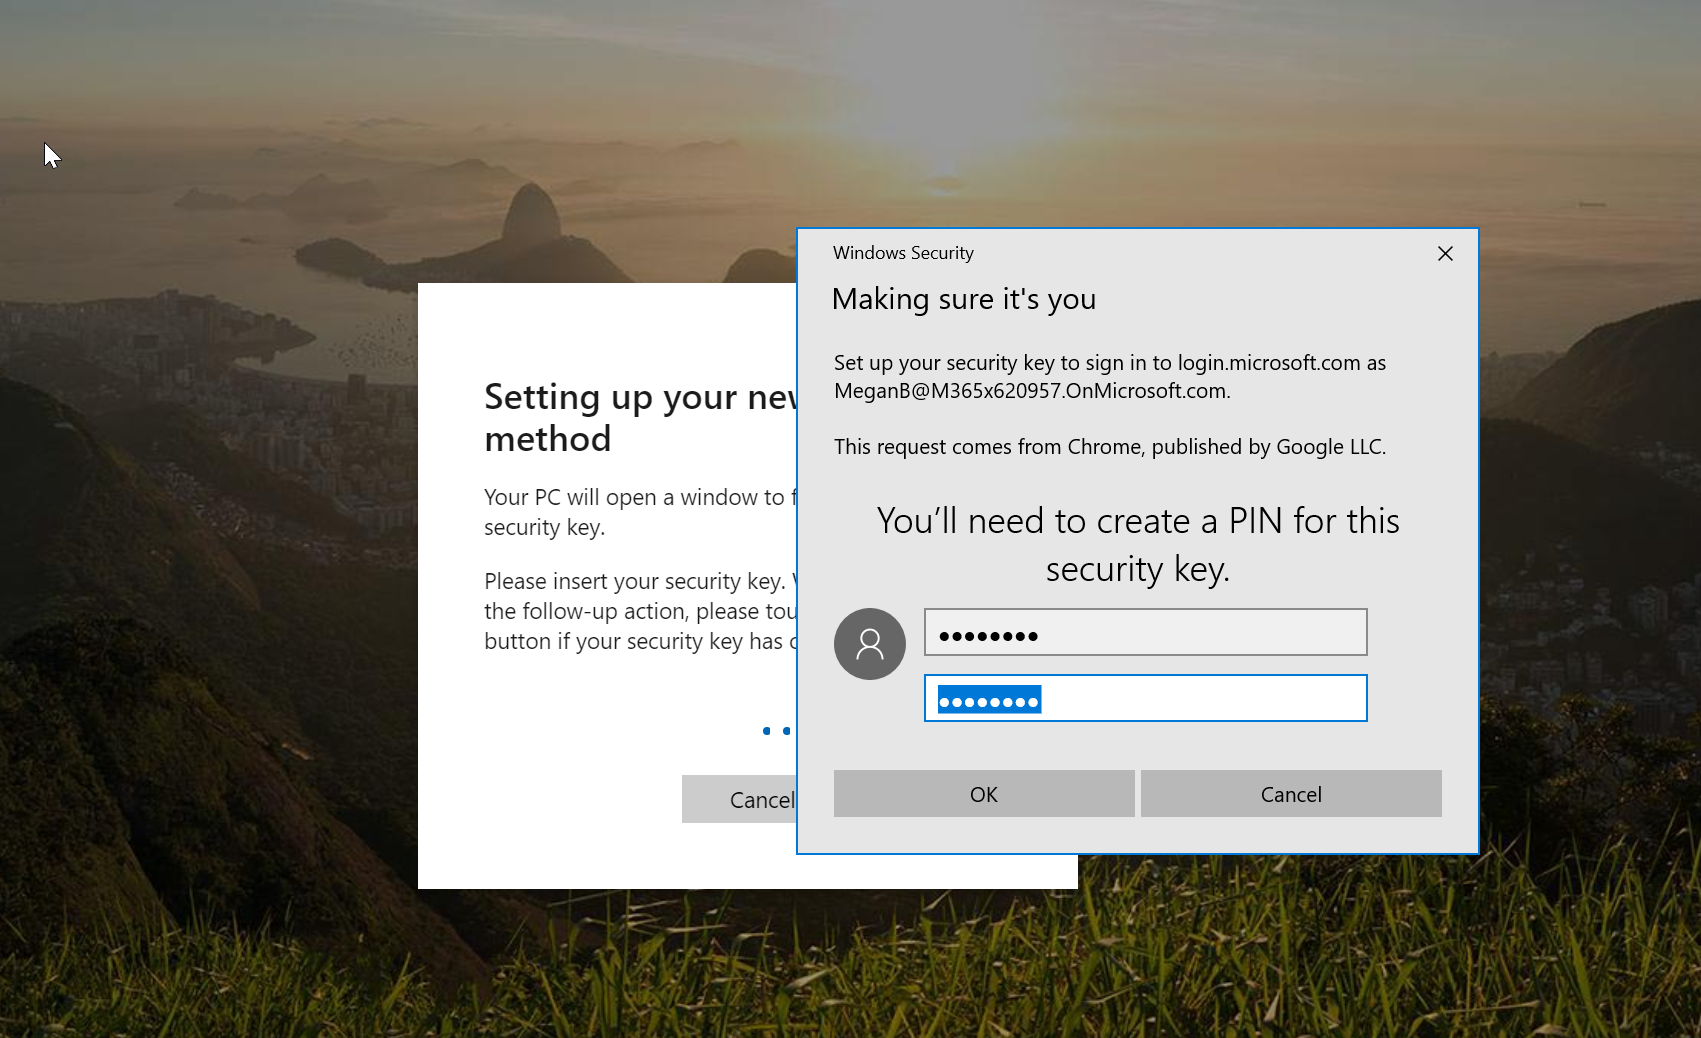
11. Then it asks to provide a new PIN for the security key.
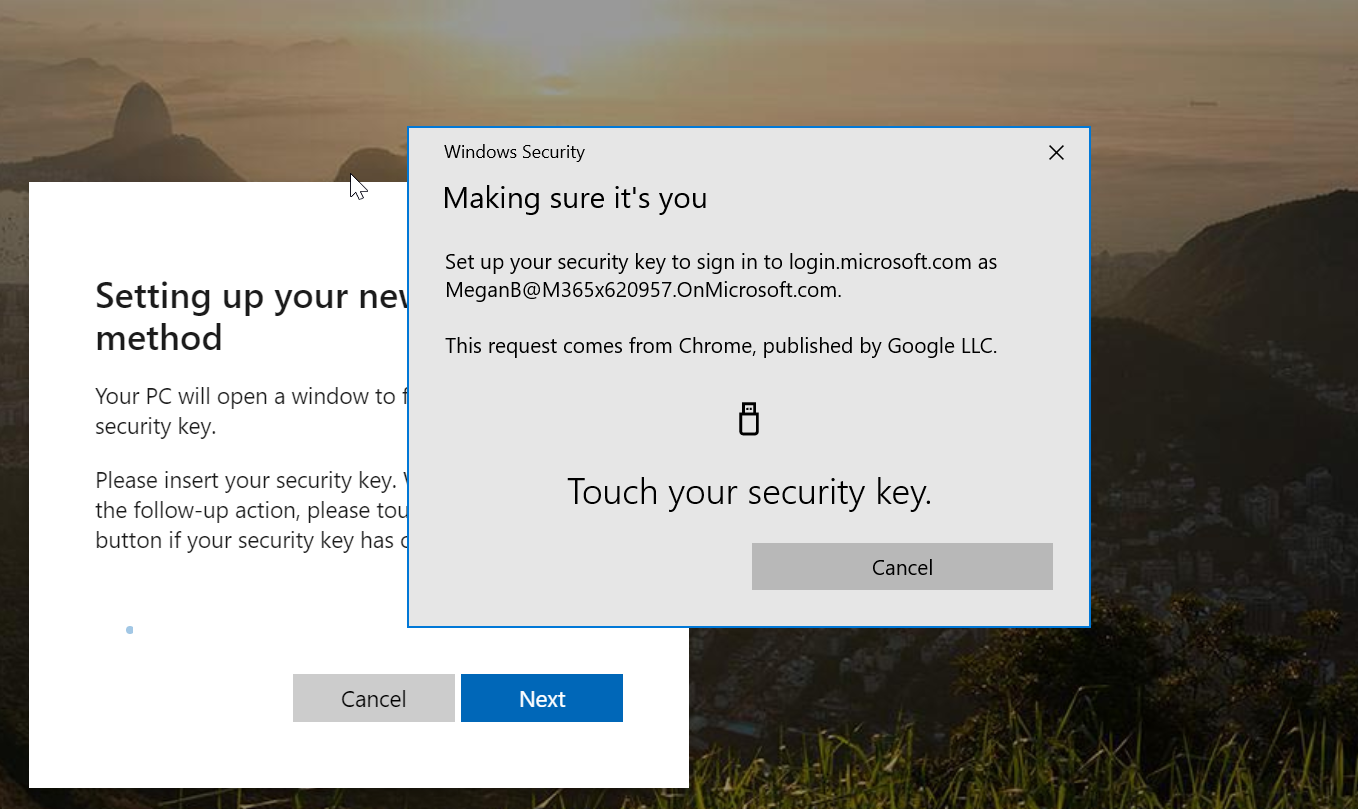
12. Once PIN is provided, it asks to touch the key to provide biometric.
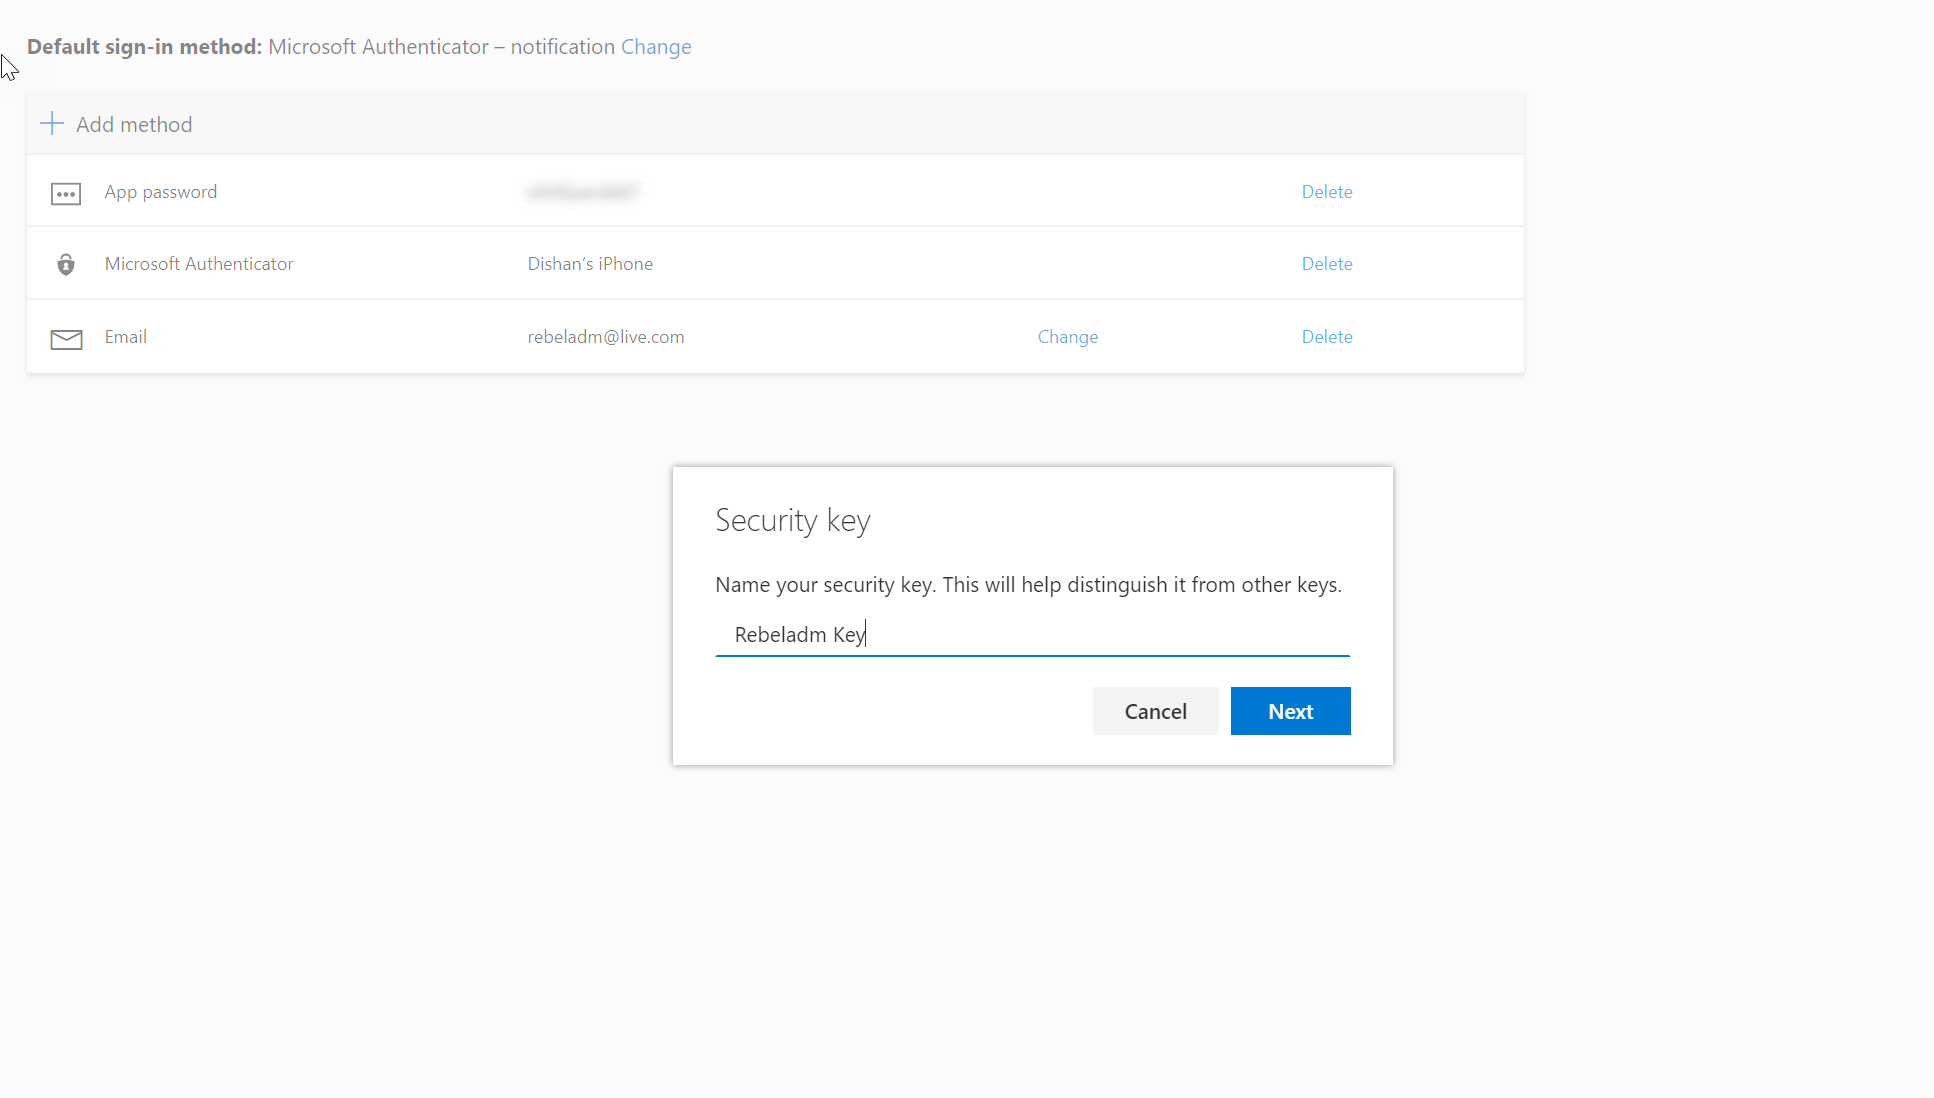
13. Once the sign up is successful, the system will ask to save the key with a distinguish name.
This completes the sign-up process.
Testing
Now it’s time for testing.
I open a new window and launch https://myapps.microsoft.com then start login as user Megan Brown.
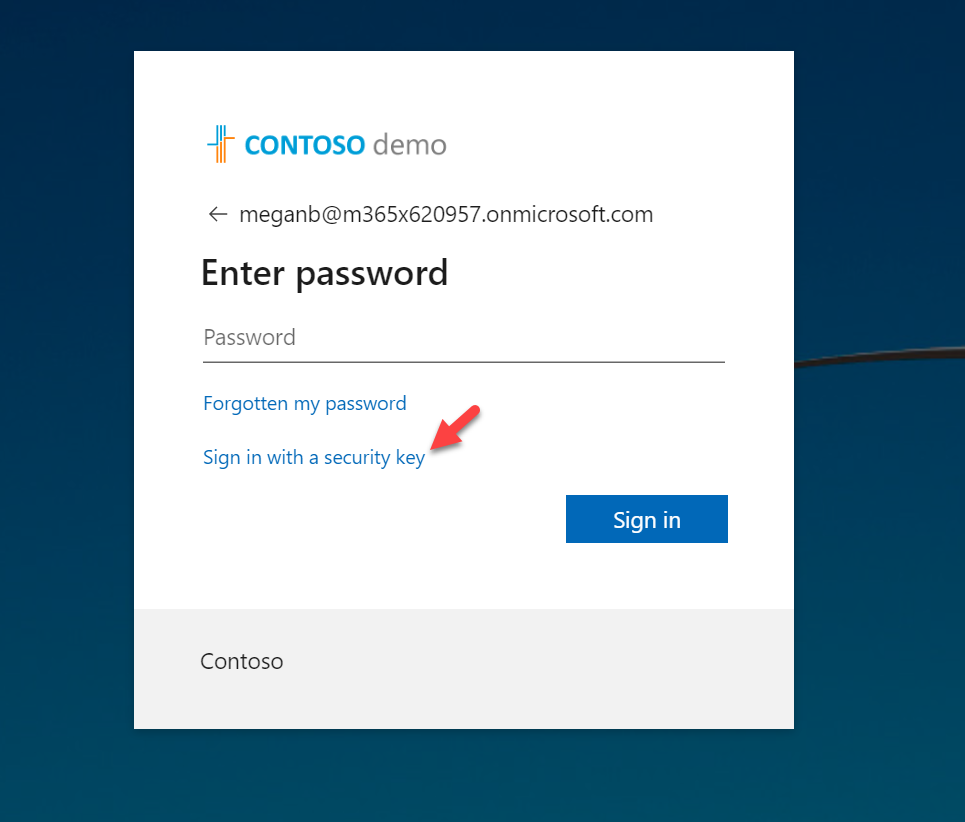
In login page, click on Sign in with security key.
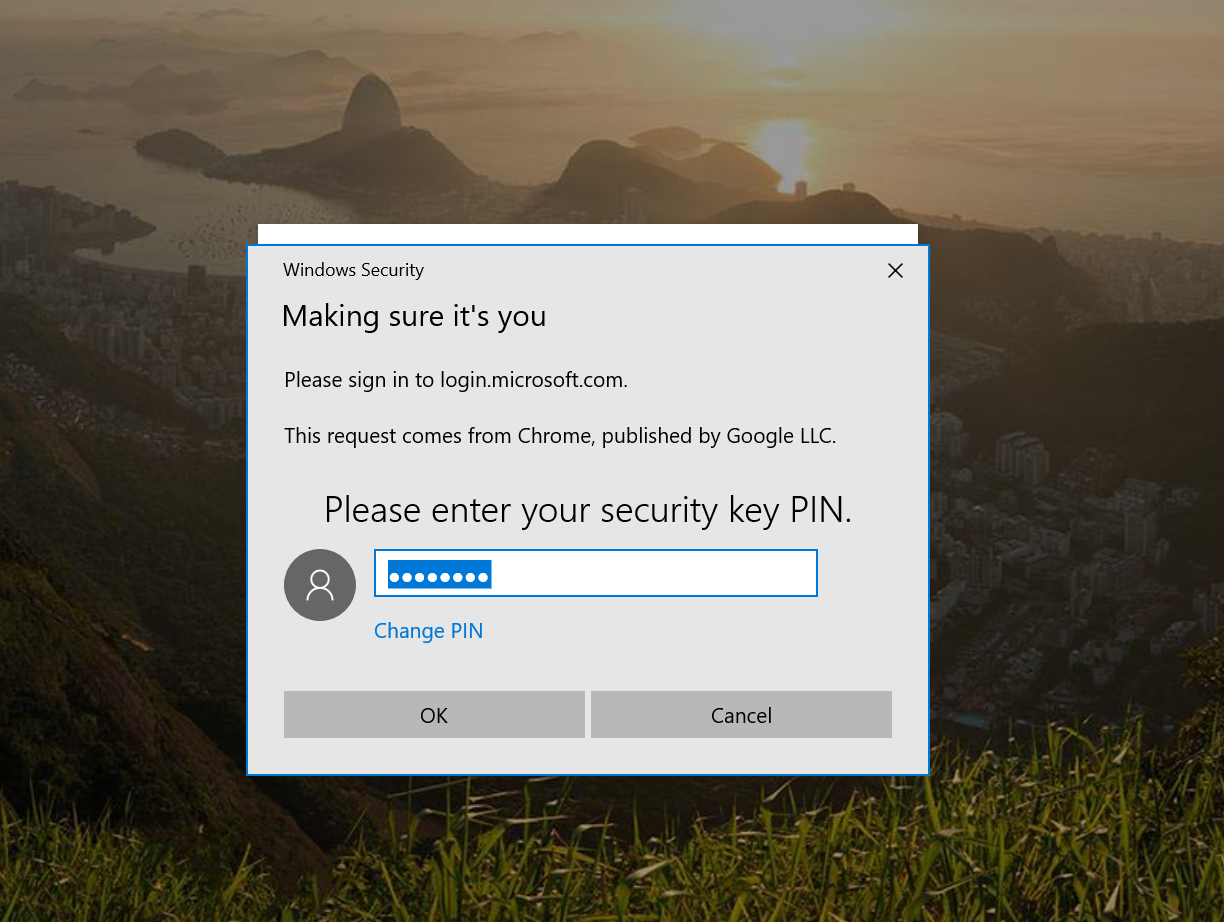
Then it asks for the PIN. I typed the PIN and click OK
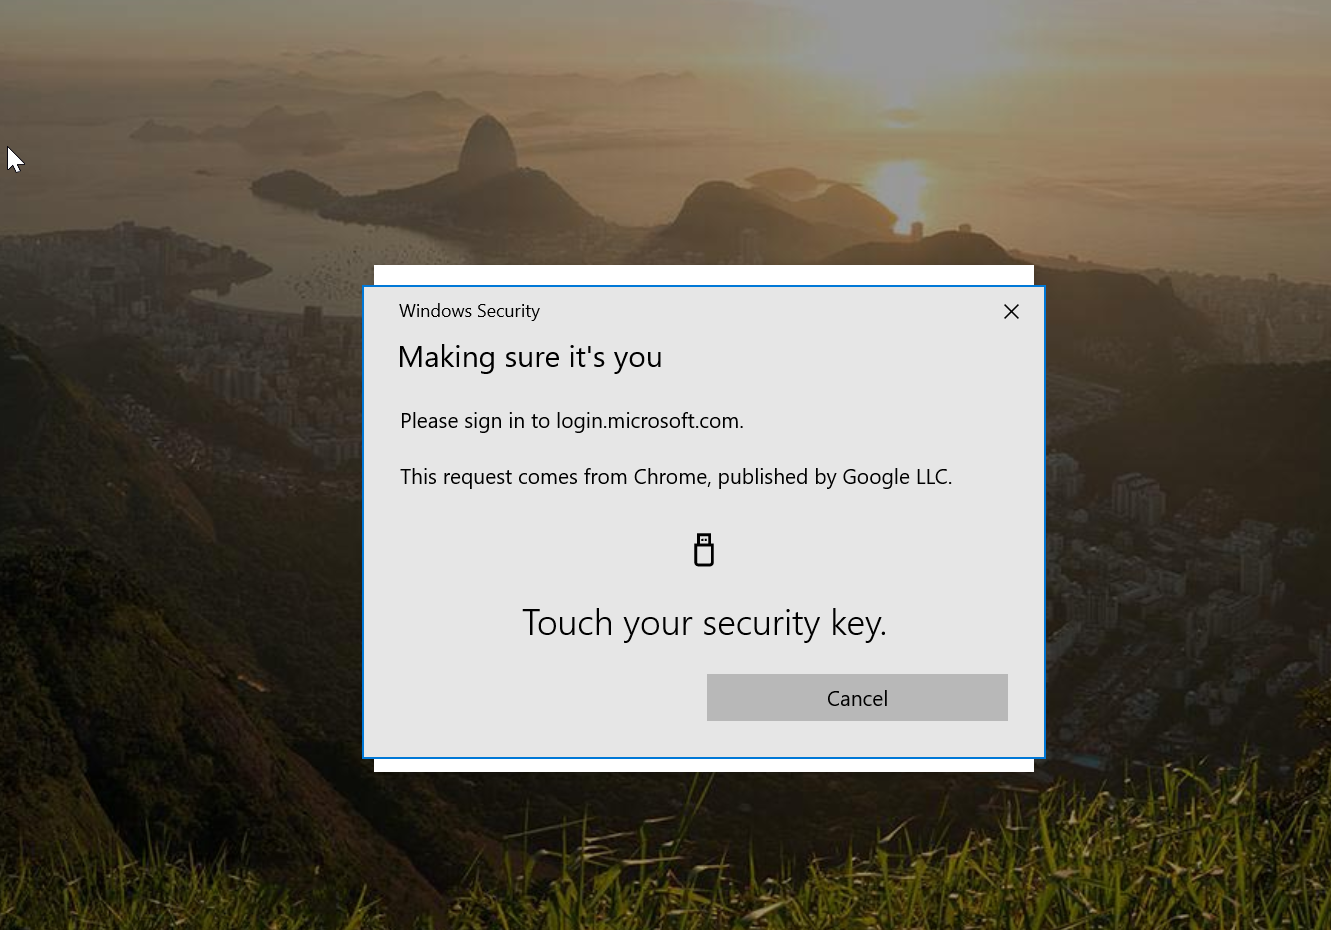
Now its time to provide biometric by touching the device.
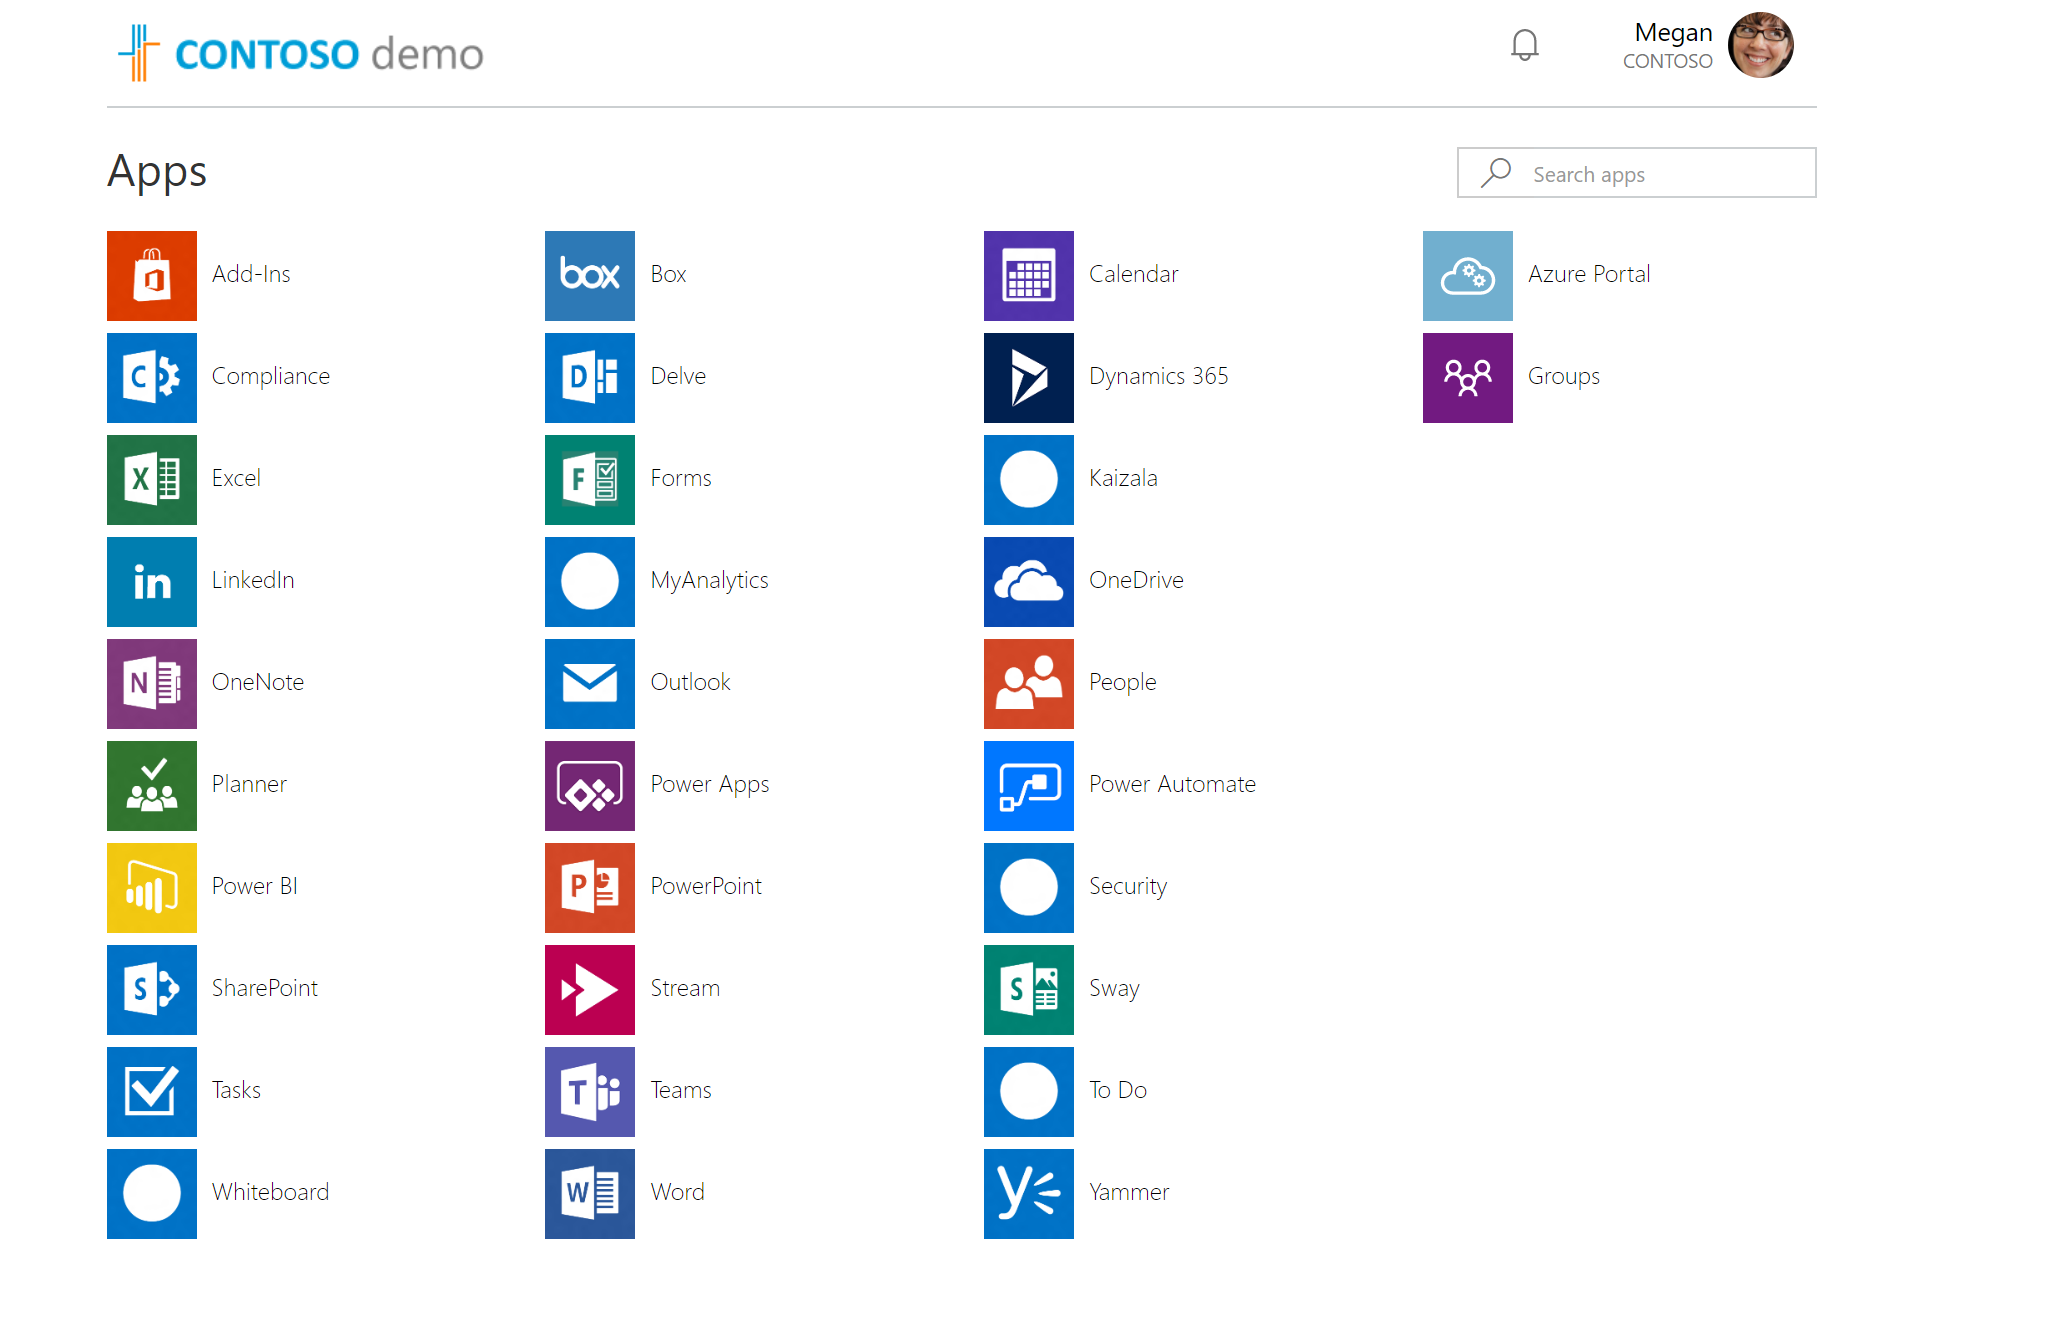
As soon as biometric authentication is completed, I can see my app page.
As we can see we were able to login successfully using FIDO2 security key. No password has been used.
This marks the end of this blog post. If you have any further questions about this feel free to contact me on rebeladm@live.com also follow me on twitter @rebeladm to get updates about new blog posts.

