
The role of a load balancer is to improve the availability of services by distributing the load to a pool of back end servers. When it comes to load balancing, Azure has a few different products to choose from.
• Azure Application Gateway – If you require a load balancer that can provide features such as SSL offloading, reverse proxy and works in the application layer (layer 7), Azure application gateway is the answer.
• Azure Traffic Manager – If you are looking for DNS level load balancing which can distribute traffic to global endpoints, Azure traffic manager will be the product to look at.
• Azure Load Balancer – Azure load balancer works in layer 4 (transport layer) and can distribute network traffic to endpoints in the same Azure region. It can use to distribute internet traffic as well as internal traffic. In this post, we are going to look into this service in detail.
Like many other load balancers, Azure load balancer also has the following components.
• Frontend/Virtual IP address – This is the load balancer IP address that works as a front door to clients. After clients initiate connections to a frontend IP address, the traffic will be distributed to the back-end servers.
• Server pool – The back-end application servers will be group together in a pool to serve an incoming request from a load balancer.
• Rules – The incoming traffic will be distributed to the backend servers according to the rules defined in the load balancer.
• Probes – If a back-end server is down, load balancer needs to know. Then it can stop distributing traffic to the faulty server. The load balancer uses probs to detect the health of the back-end servers.
• Inbound NAT rules – Inbound NAT rules define how the traffic is forward from the load balancer to the back-end server.
In this post, I am going to demonstrate how we can load balance a web application using Azure standard load balancer. This demo includes the following tasks,
1. Setup new resource group
2. Setup two new windows VM
3. Setup IIS with sample web page
4. Create Azure load balancer
5. Create a backend pool
6. Create health probes
7. Create load balancer rule
8. Testing
Setup new resource group
Let's go ahead and start the setup process by creating new Azure resource group.
For the configuration process, I will be using Azure PowerShell. Therefore, please make sure you have an Azure PowerShell module installed. More info about it can find under https://docs.microsoft.com/en-us/powershell/azure/install-az-ps?view=azps-2.6.0
1. Launch PowerShell console and connect to Azure using Connect-AzAccount
2. Then create a new resource group using,
New-AzResourceGroup -Name REBELRG1 -Location "East US"

In the above, REBELRG1 is the resource group name and East US is the resource group location.
Setup two new windows VM
1. In this demo, I am going to use two back end servers. Before VM setup, let's go ahead and create a new virtual network.
$vmsubnet = New-AzVirtualNetworkSubnetConfig -Name vmsubnet -AddressPrefix "10.0.2.0/24"
New-AzVirtualNetwork -Name REBELVN1 -ResourceGroupName REBELRG1 -Location "East US" -AddressPrefix "10.0.0.0/16" -Subnet $vmsubnet
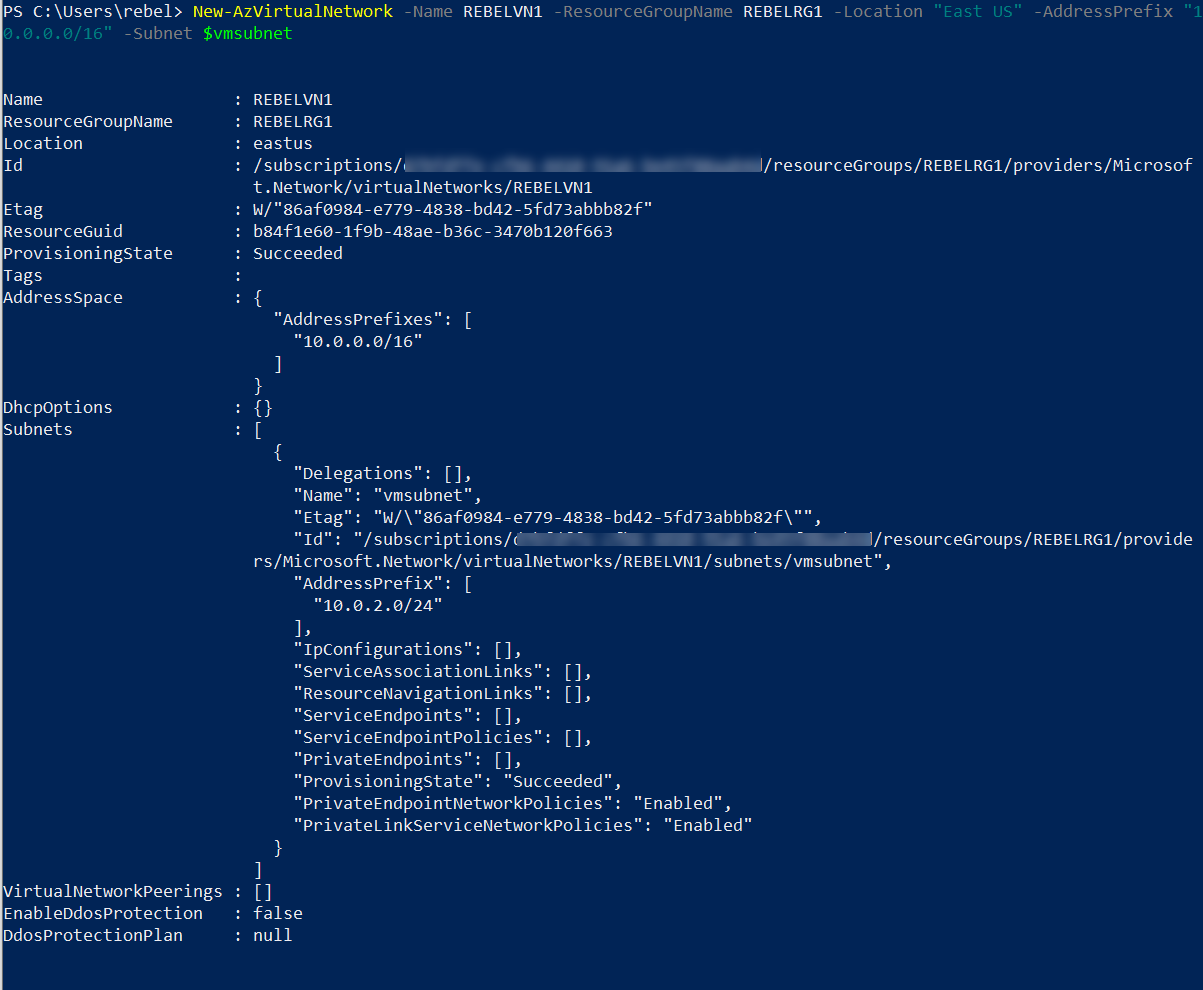
In the above, REBELVN1 is the new virtual network name. It has 10.0.0.0/16 address space. It also has a new subnet 10.0.2.0/24 (vmsubnet) for virtual machines.
2. Then I need to create a new availability set. To add back end servers to load balancer, those VMs need to be in the same availability set.
New-AzAvailabilitySet -Location "EastUS" -Name "REBELAS1" -ResourceGroupName "REBELRG1" -Sku aligned -PlatformFaultDomainCount 2 -PlatformUpdateDomainCount 2

In above REBELAS1 is the availability group name. More info about scale sets can found here https://docs.microsoft.com/en-us/azure/virtual-machine-scale-sets/availability
3. As the next step of the configuration, I am going to create two new virtual machines under REBELRG1 resource group.
$mylogin = Get-Credential
New-AzVm -ResourceGroupName REBELRG1 -Name "REBELTVM01" -Location "East US" -VirtualNetworkName "REBELVN1" -SubnetName "vmsubnet" -addressprefix 10.0.2.0/24 -PublicIpAddressName "REBELTVM01IP1" -AvailabilitySetName "REBELAS1" -OpenPorts 3389,80 -Image win2019datacenter -Size Standard_D2s_v3 -Credential $mylogin
New-AzVm -ResourceGroupName REBELRG1 -Name "REBELTVM02" -Location "East US" -VirtualNetworkName "REBELVN1" -SubnetName "vmsubnet" -addressprefix 10.0.2.0/24 -PublicIpAddressName "REBELTVM02IP1" -AvailabilitySetName "REBELAS1" -OpenPorts 3389,80 -Image win2019datacenter -Size Standard_D2s_v3 -Credential $mylogin
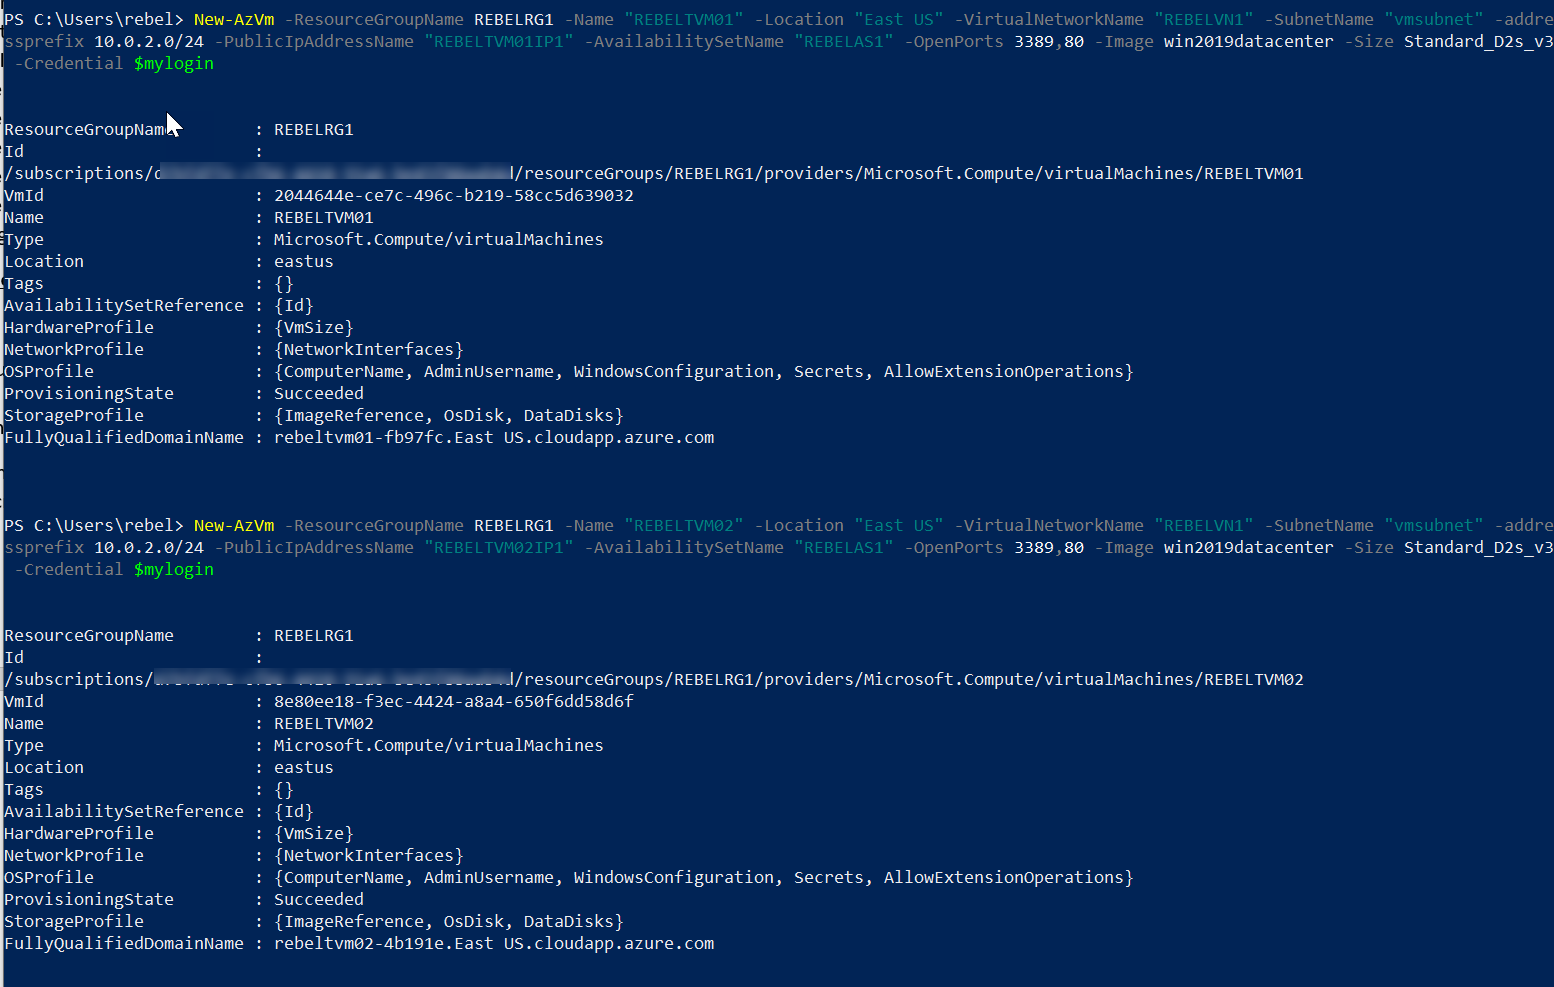
In the above, I am creating two virtual machines called REBELTVM01 & REBELTVM02. It is running windows server 2019 data center edition. I have specified it using -Image parameter. It also using Standard_D2s_v3 vm size. For networking, It uses REBELVN1 virtual network and subnet 10.0.2.0/24.
Setup IIS with sample web page
Now we have two VMs running. For testing purposes, I am going to set up a simple IIS web page in both VMs. To do that,
1. Log in to VM as a local administrator
2. Open PowerShell Console as Administrator
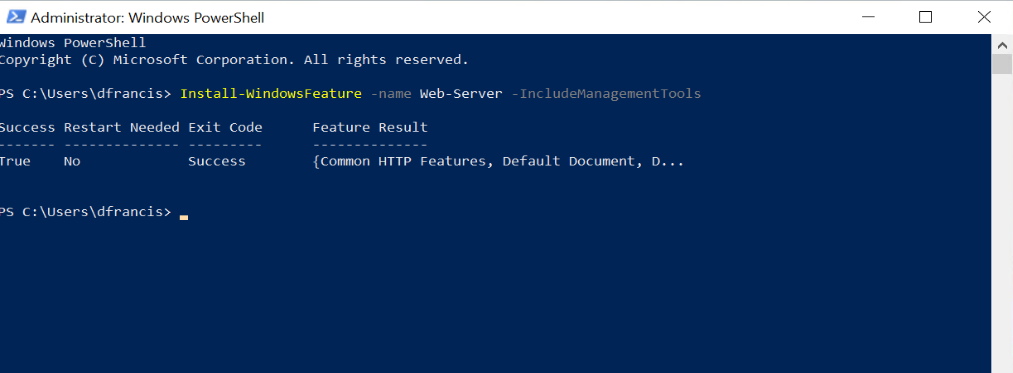
3. Run following to install the IIS role
Install-WindowsFeature -name Web-Server -IncludeManagementTools
4. Then remove default IIS page using,
remove-item C:\inetpub\wwwroot\iisstart.htm
5. As next step, create new content page using,
Add-Content -Path "C:\inetpub\wwwroot\iisstart.htm" -Value $("RebelAdmin LoadBalance Test " + $env:computername)
6. After that, we can test it via a web browser.
7. Follow the same steps and set up the IIS role in the second VM.
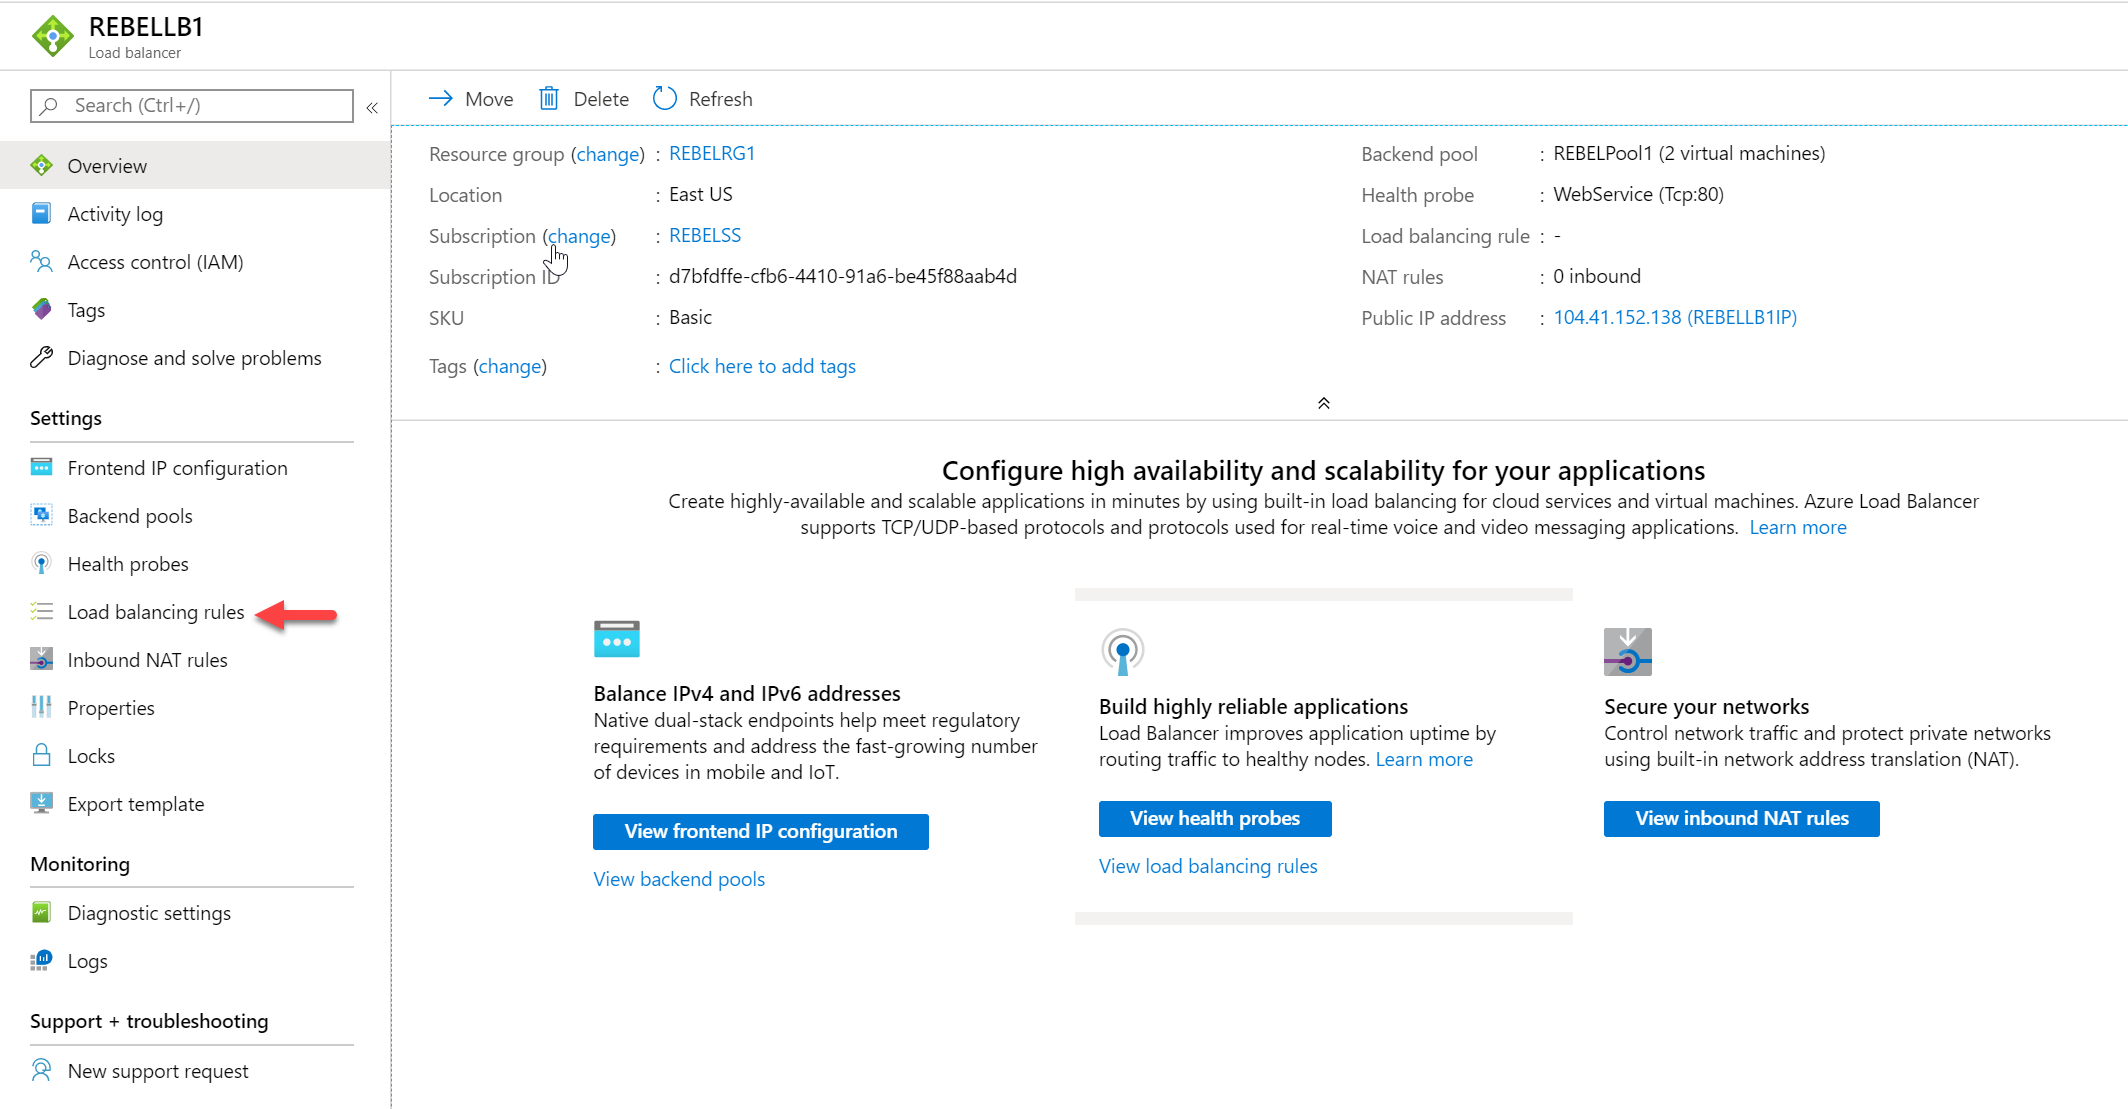
Create Azure load balancer
The next step of the configuration is to set up an Azure load balancer. To do that,
1. Log in to Azure portal (https://portal.azure.com/) as Global Administrator
2. In the search box type "load balancer"
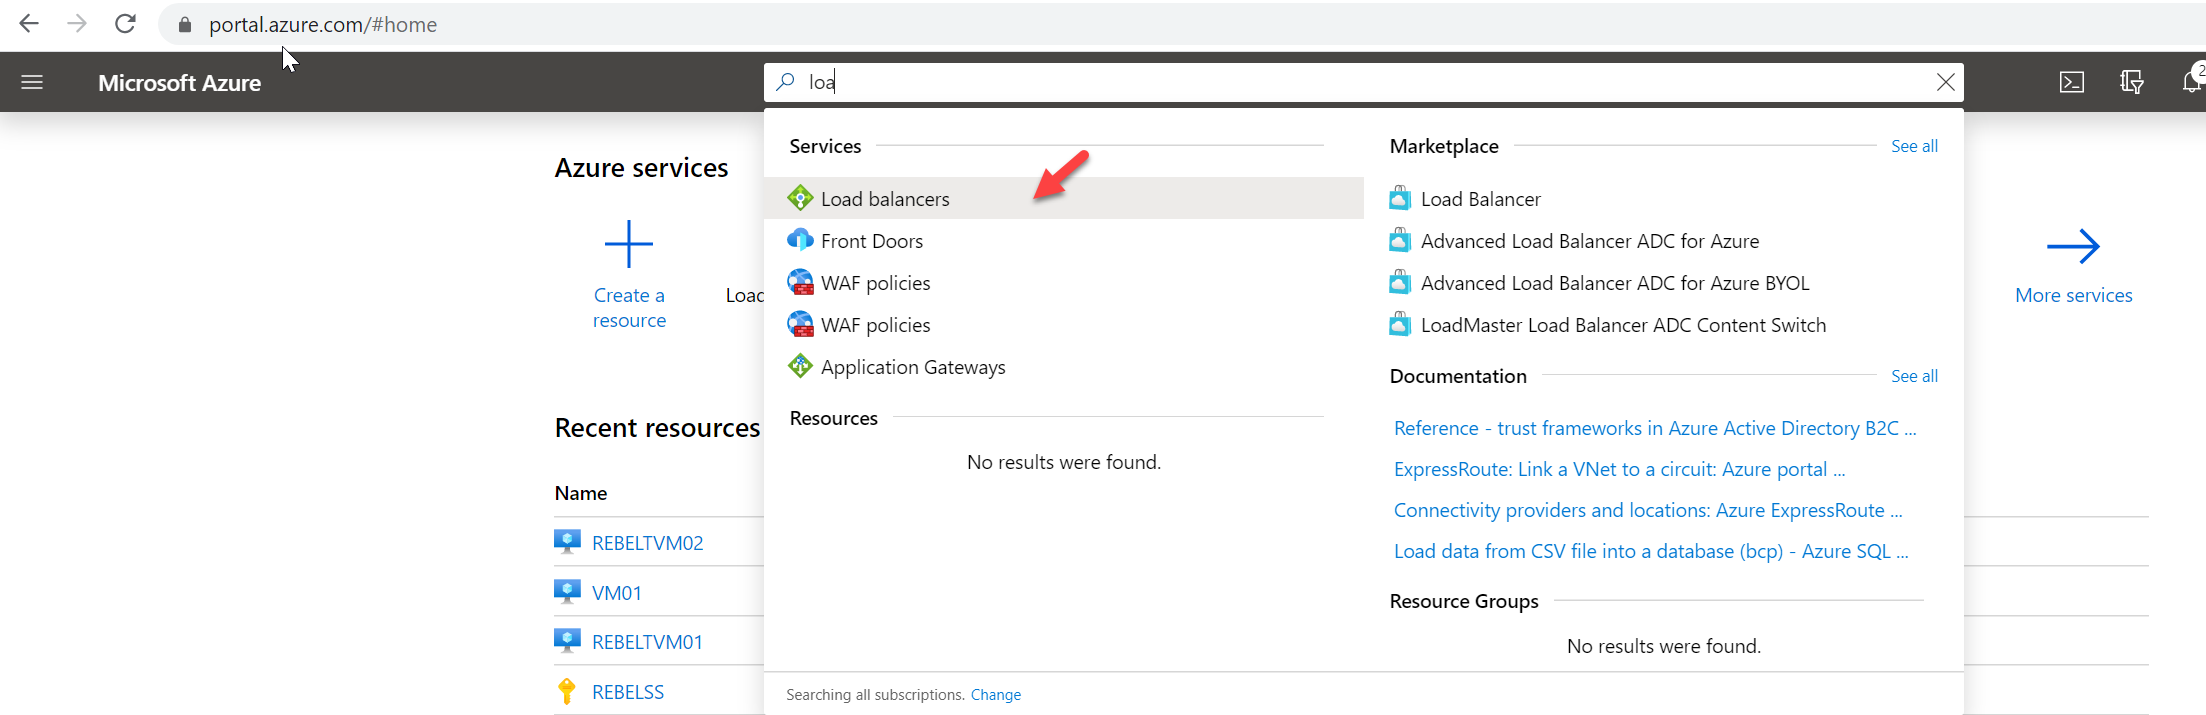
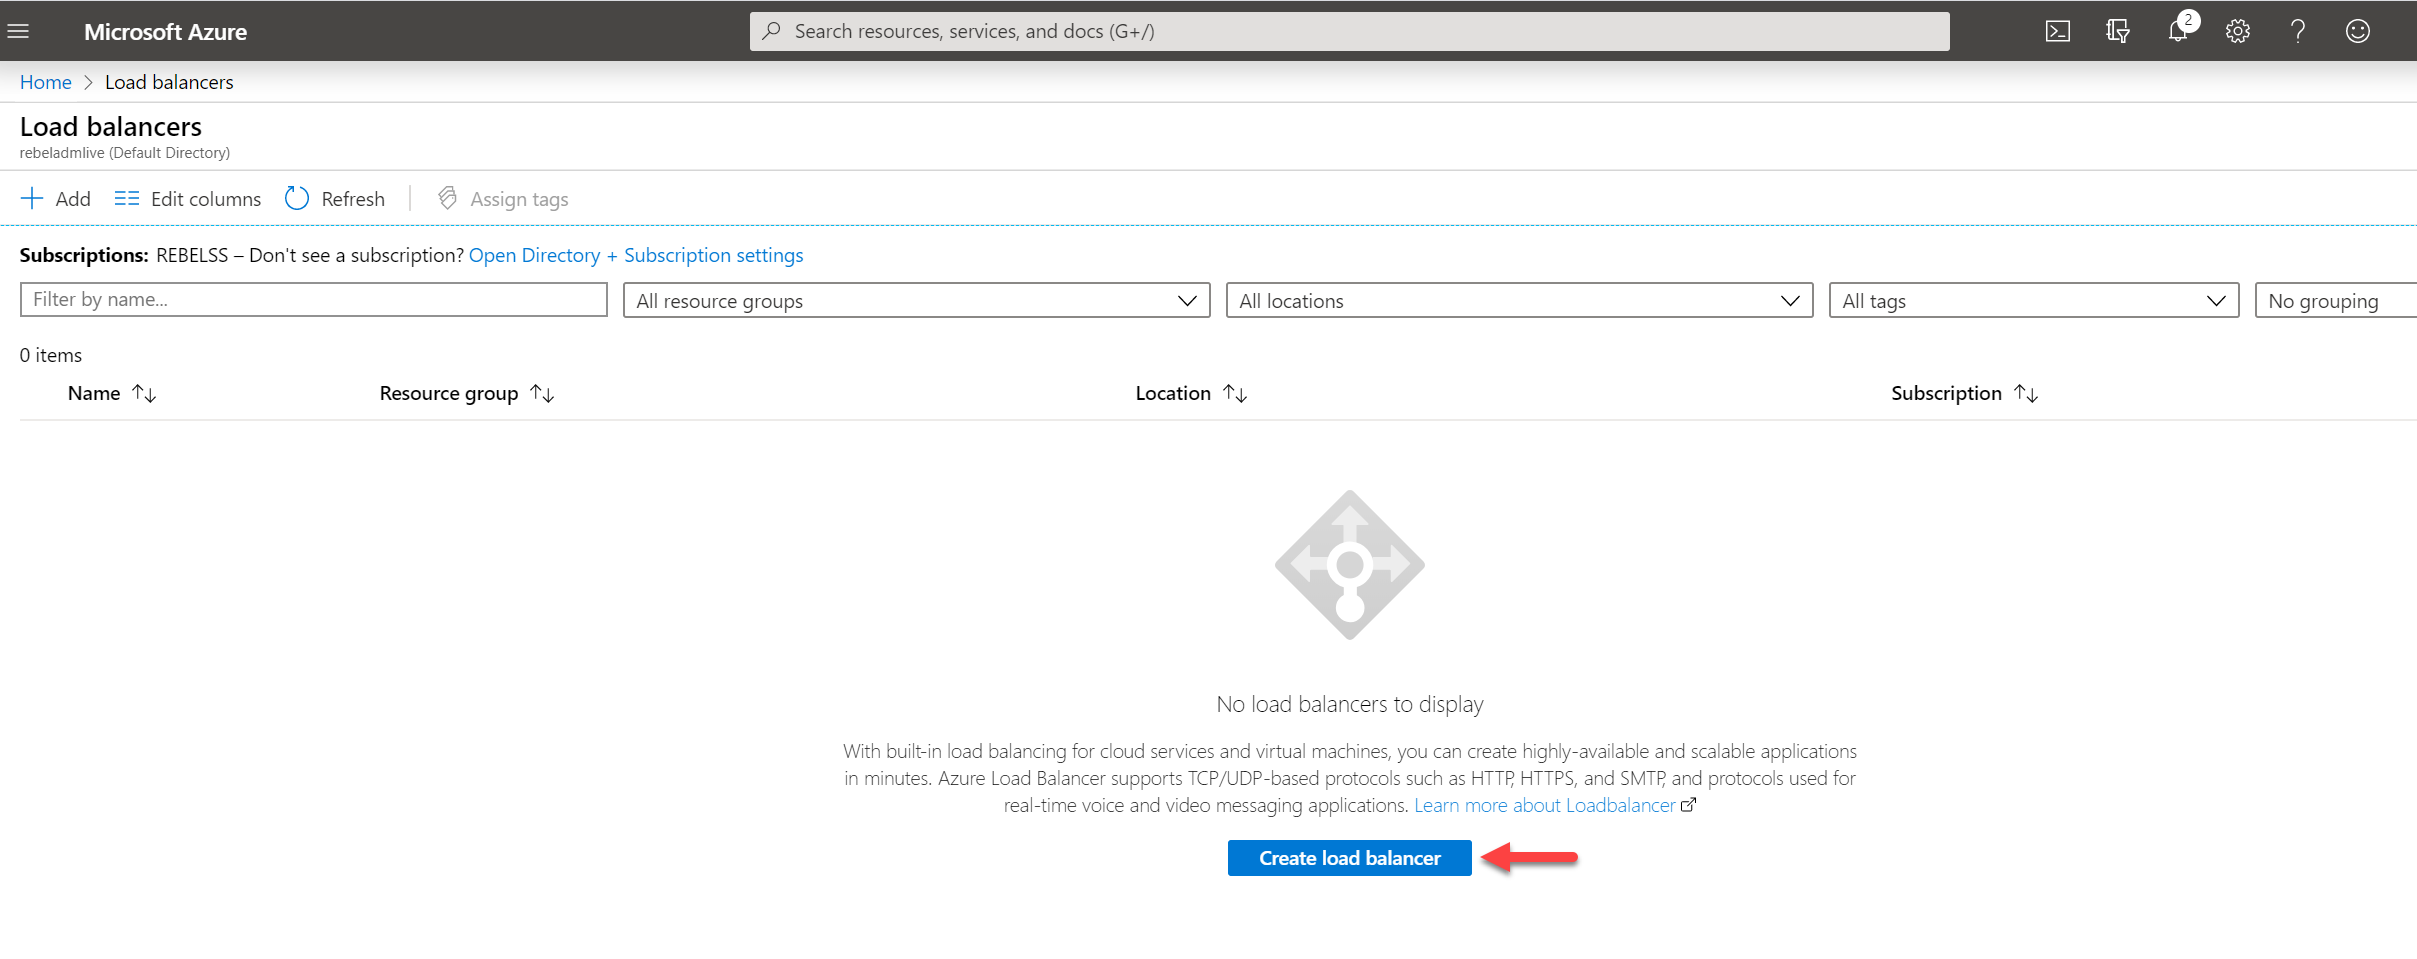
3. Then in load balancer home page click on Create load balancer.
4. It will open up the configuration page. In my demo configuration, I am using the following,
Resource Group : REBELRG1 ( This is the same resource group I used for VMs and VNet)
Name : REBELLB1
Region : East US ( Same region as back end servers)
Type : Public ( We are going to load balance internet traffic )
SKU : Basic ( Difference between version explained in here https://docs.microsoft.com/en-us/azure/load-balancer/load-balancer-standard-overview)
Public IP Address : Create New
Public IP address name : REBELLB1IP
Assignment: Static
At the end click on Review + Create button to create the load balancer.

5. In the next page after config validation, click on Create button to complete the process.
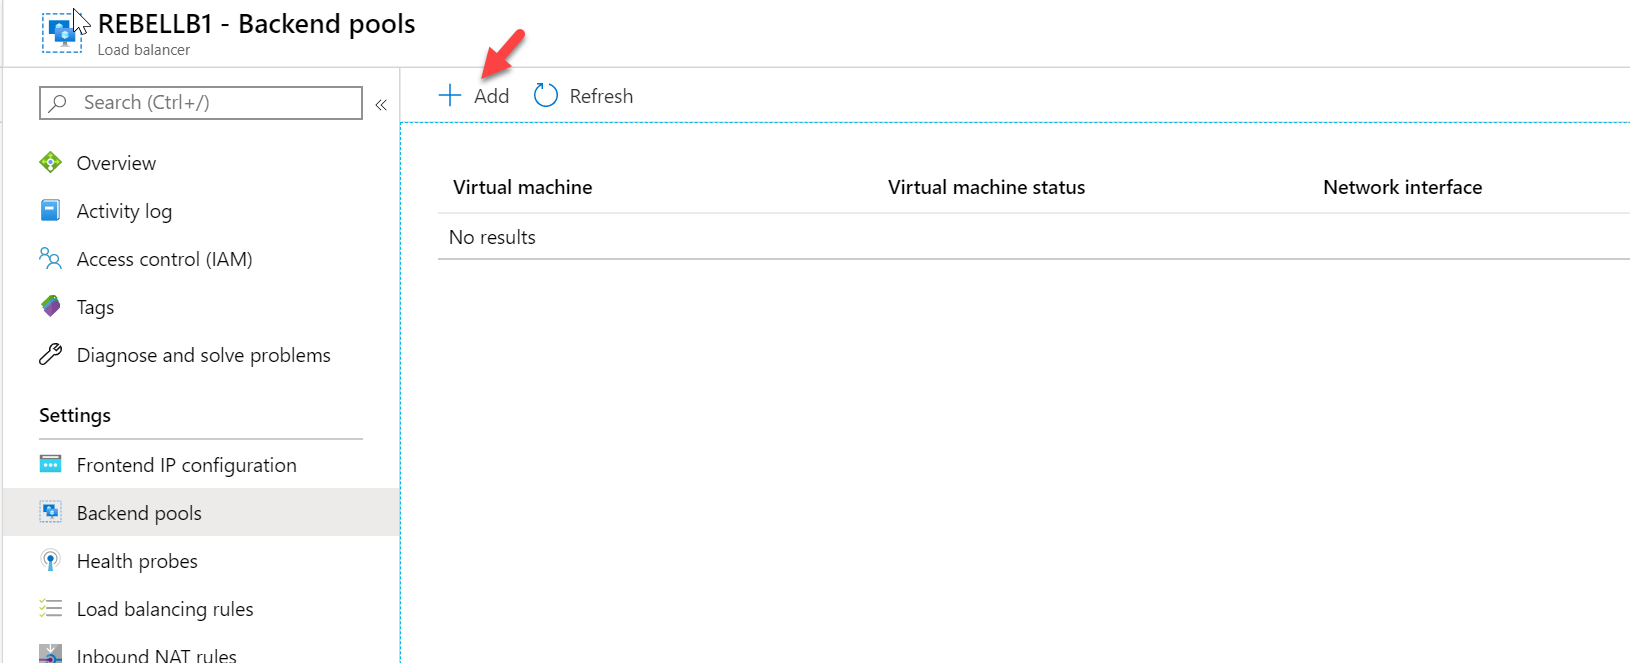
Create a backend pool
To create a back end pool with newly added VMs,
1. Log in to Azure portal (https://portal.azure.com/) as Global Administrator
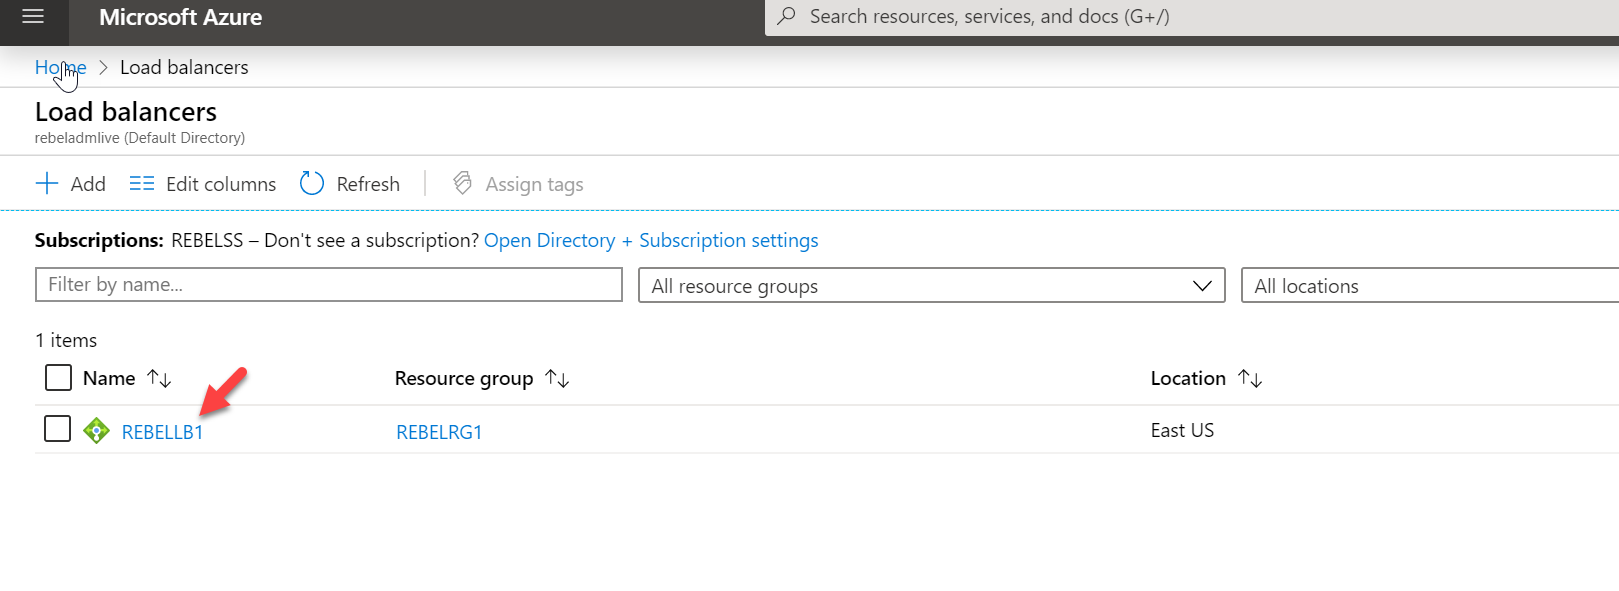
2. In the search box type "load balancer" and click on it once it is appearing in the search result.
3. Then in load balancer home page click on REBELLB1
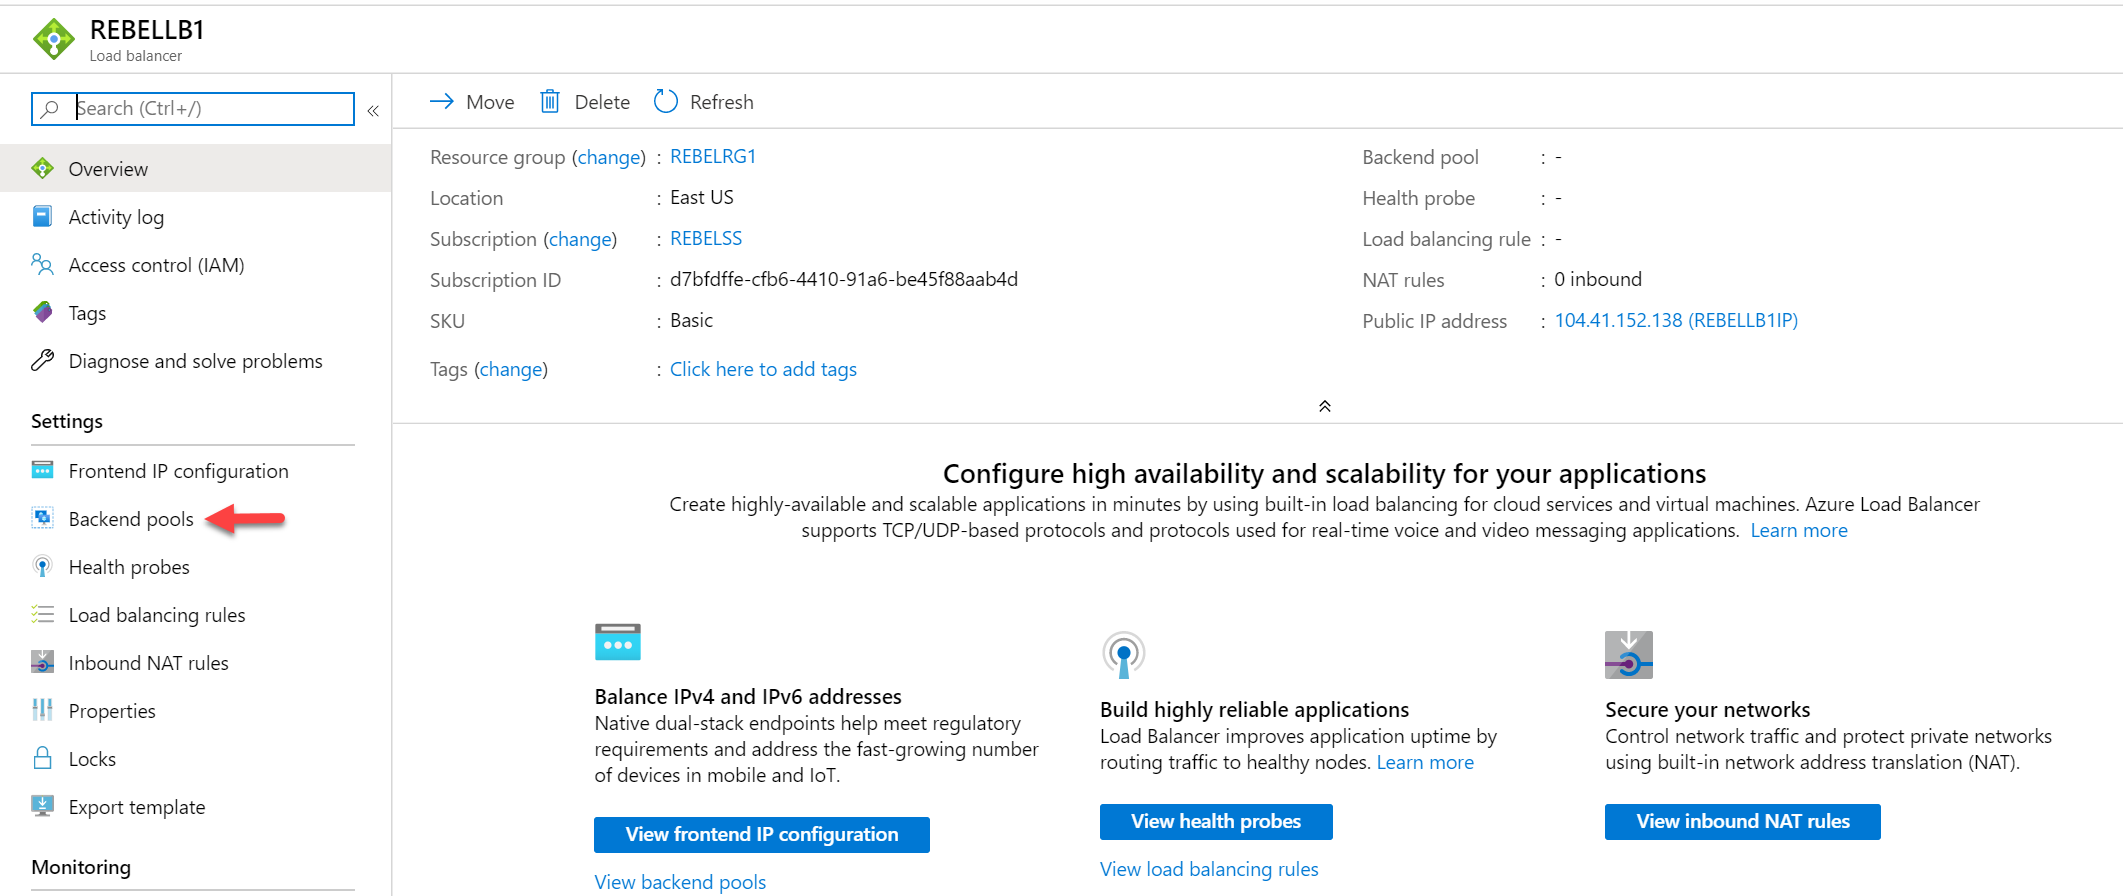
4. In the properties page, click on Backend pools
5. Click on +Add
6. In the configuration page, I am using the following settings,
Name : REBELPool1
Virtual Network : REBELVN1 ( This is the virtual network we setup in earlier step)
Associated to : Virtual Machine
Then under the virtual machine section, I have selected the two VM we created in the previous section.
Once settings are in place, click on Add button to create a Backend pool.

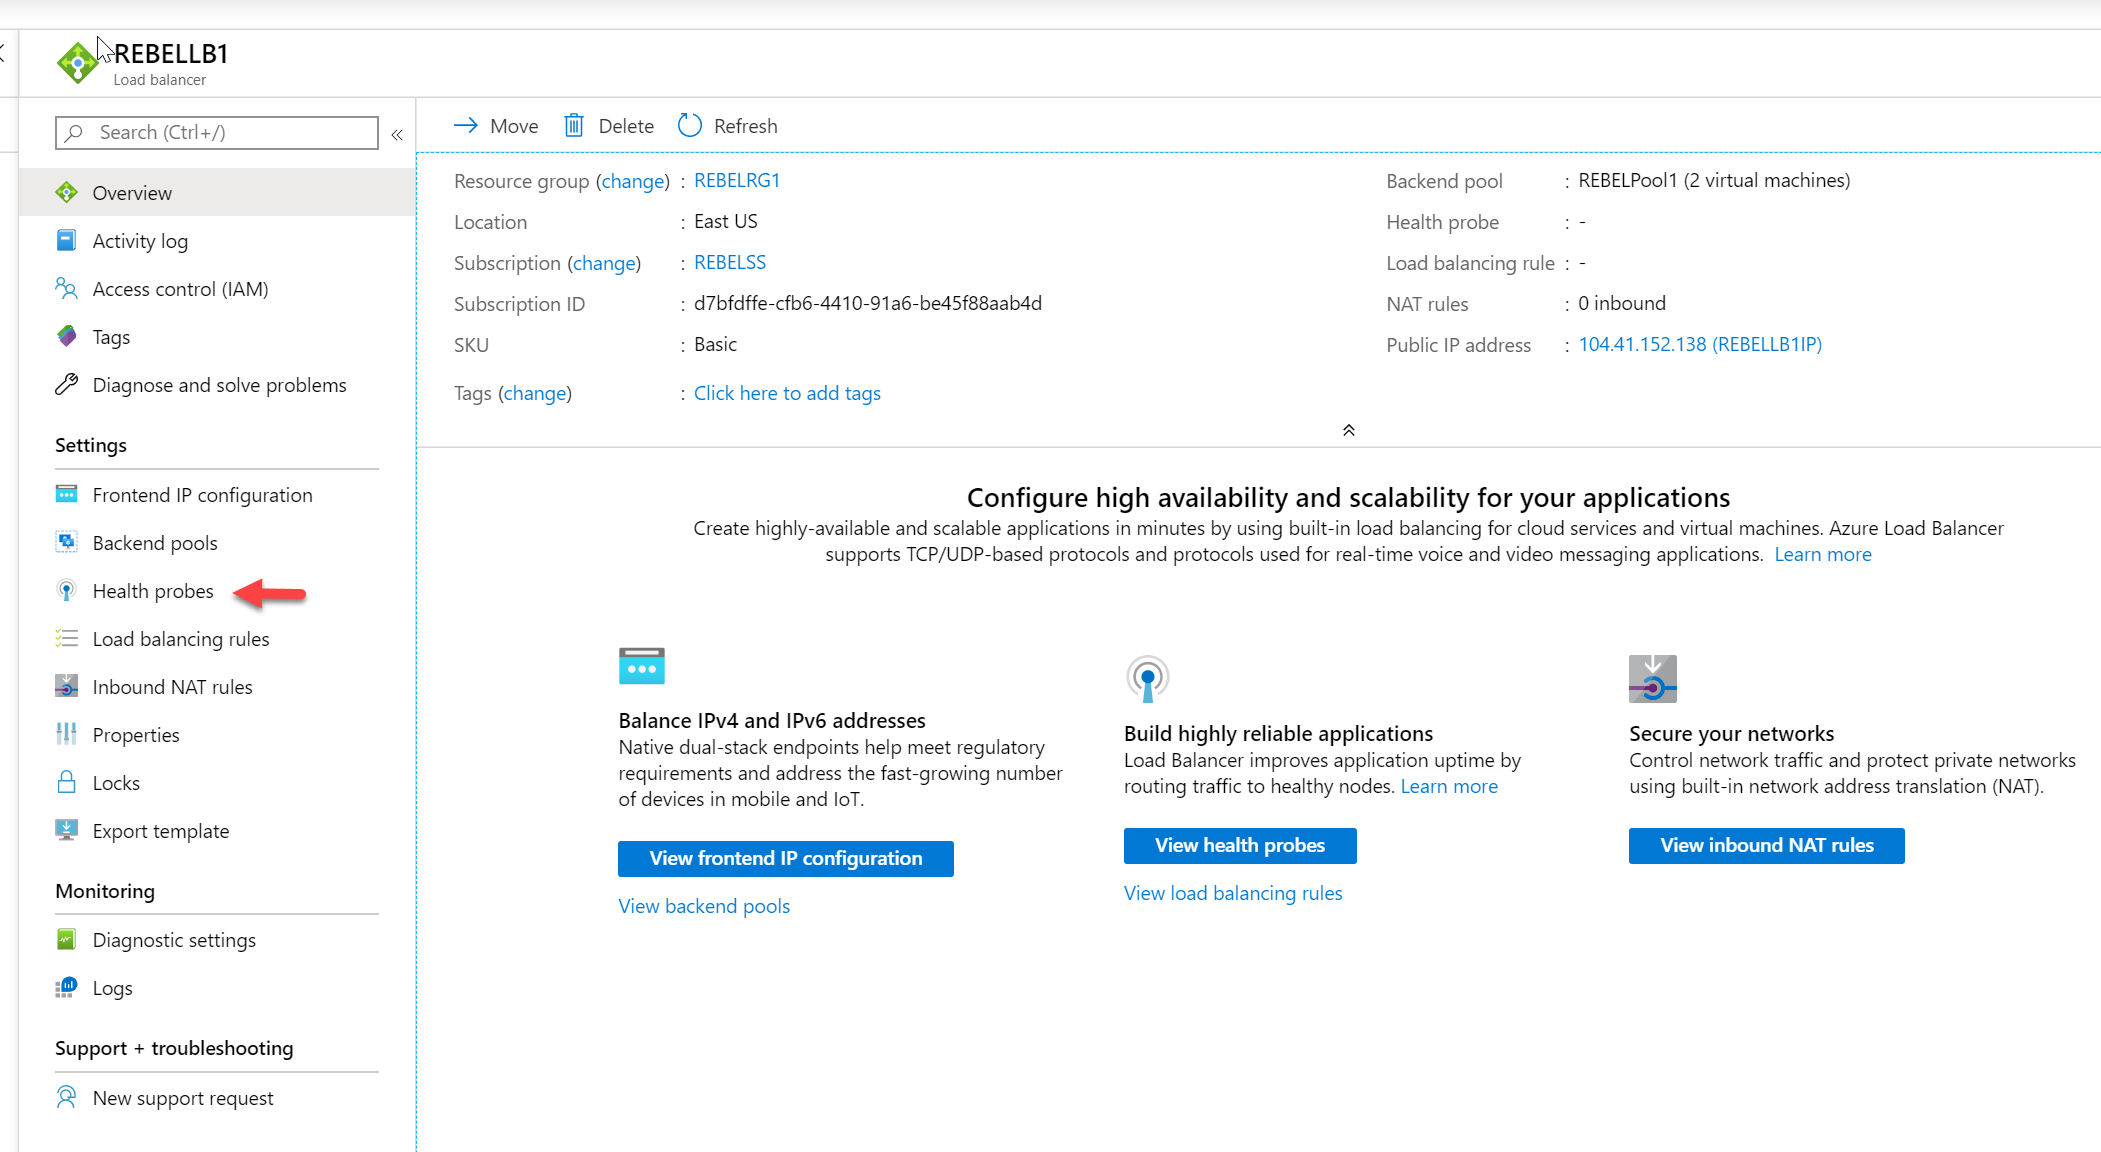
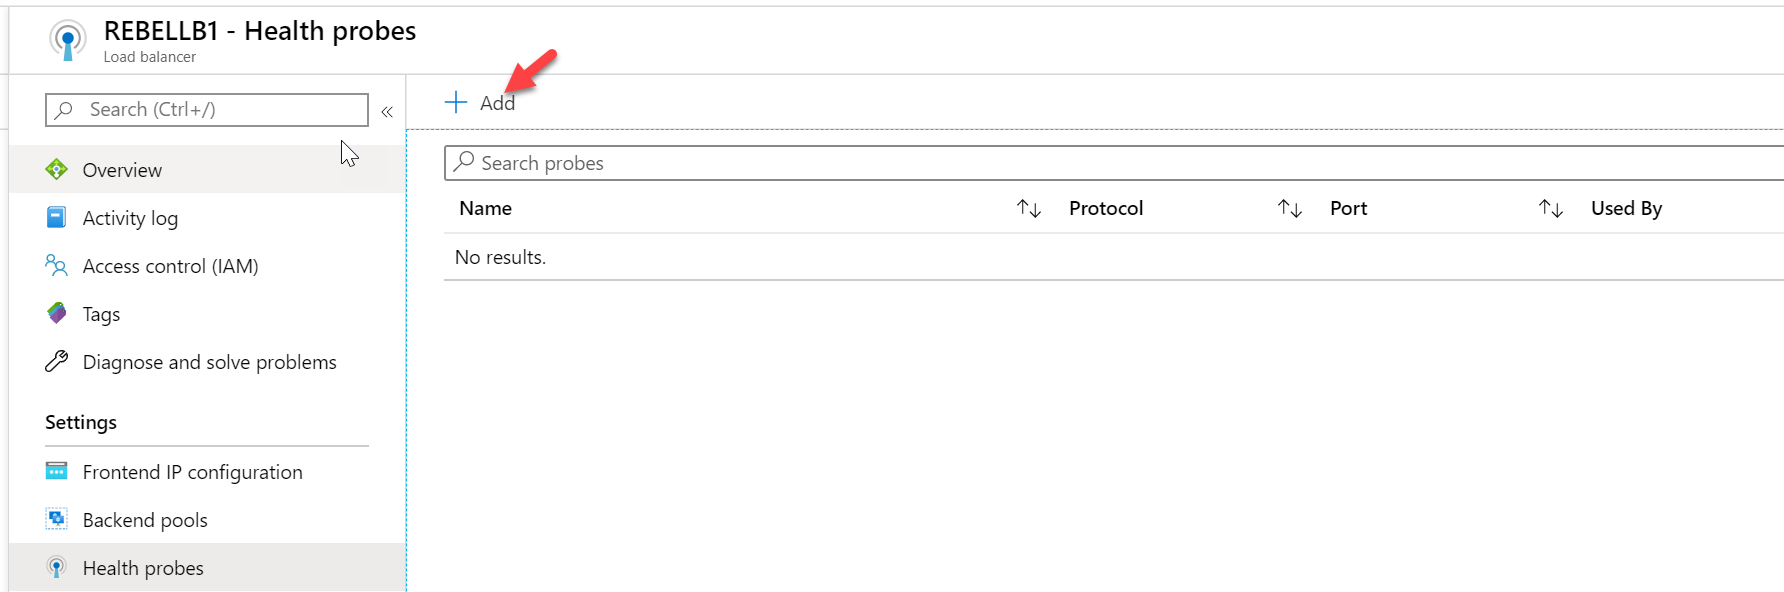
Create health probes
We need health probs to monitor the service status of the back-end servers. To setup probe,
1. Go to REBELLB1 load balancer properties page
2. Click on Health Probes
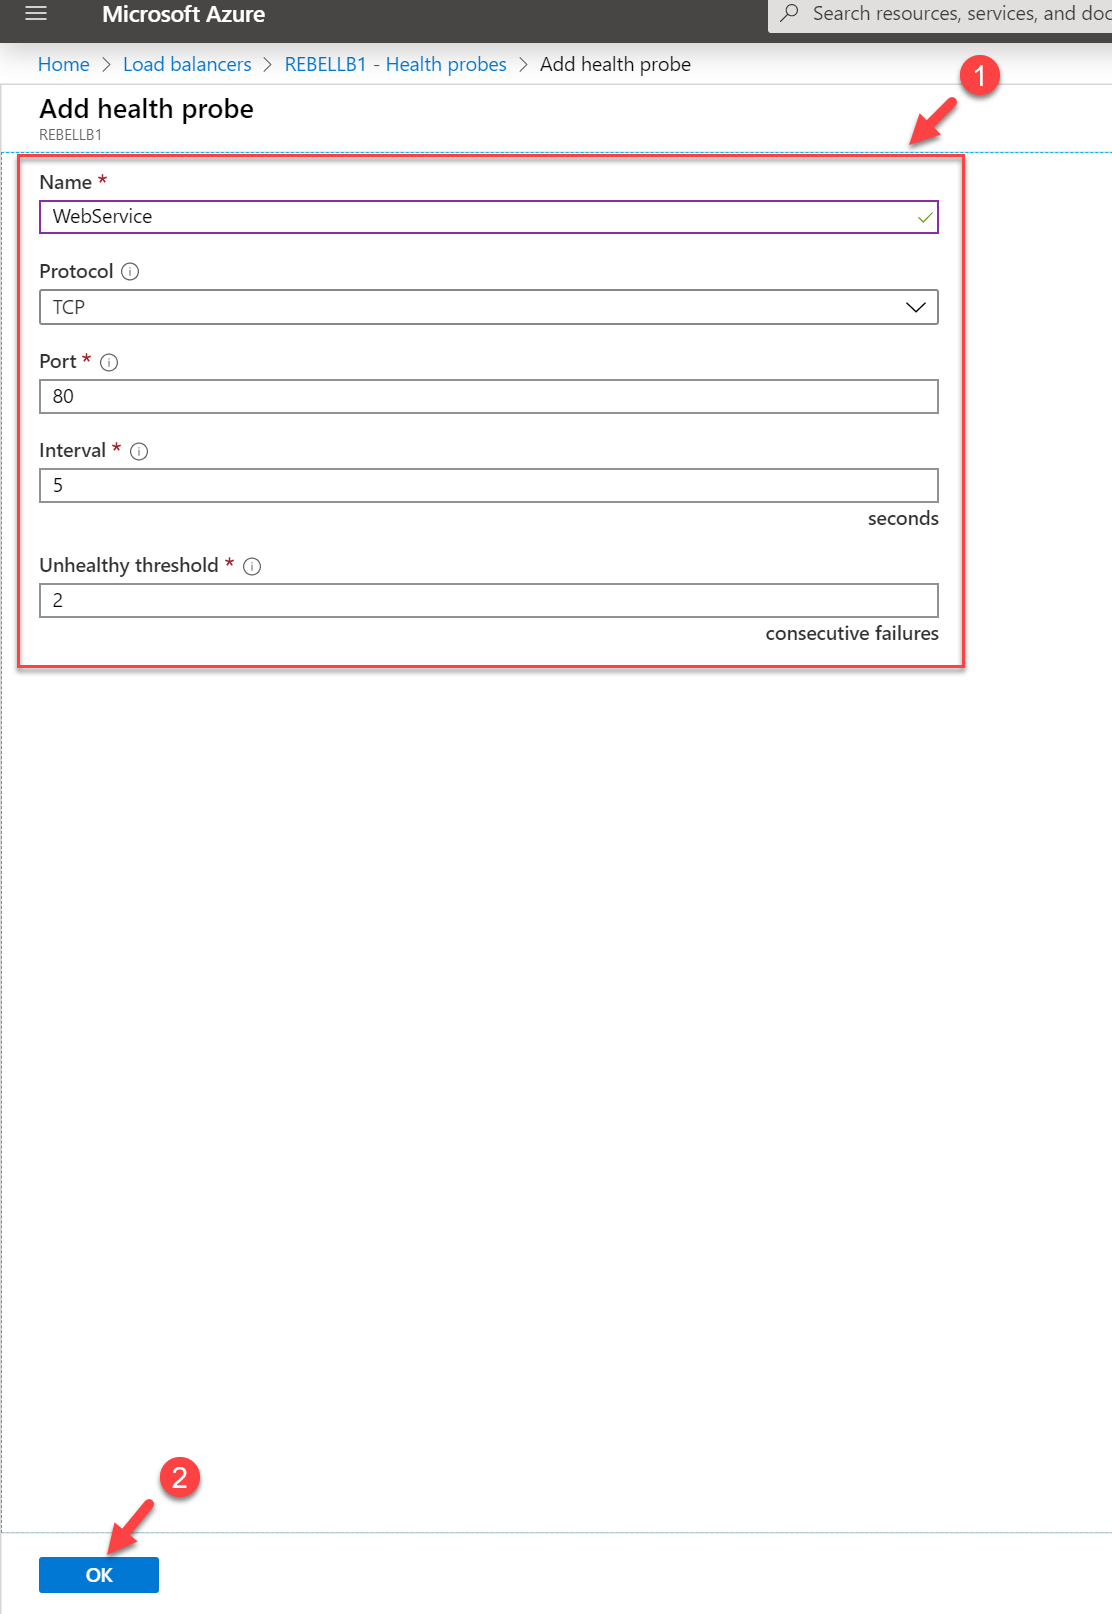
3. Click on + Add
4. In the form provide a name for the probe. Then leave the protocol like TCP. We are running web service on port 80 so leave the default value as it is.
Create load balancer rule
Load balancer rule defines how the traffic will be distributed from load balancer to back end pool.
To set up load balancer rule,
1. Go to REBELLB1 load balancer properties page
2. Click on Load balancing rules
3. Click on + Add
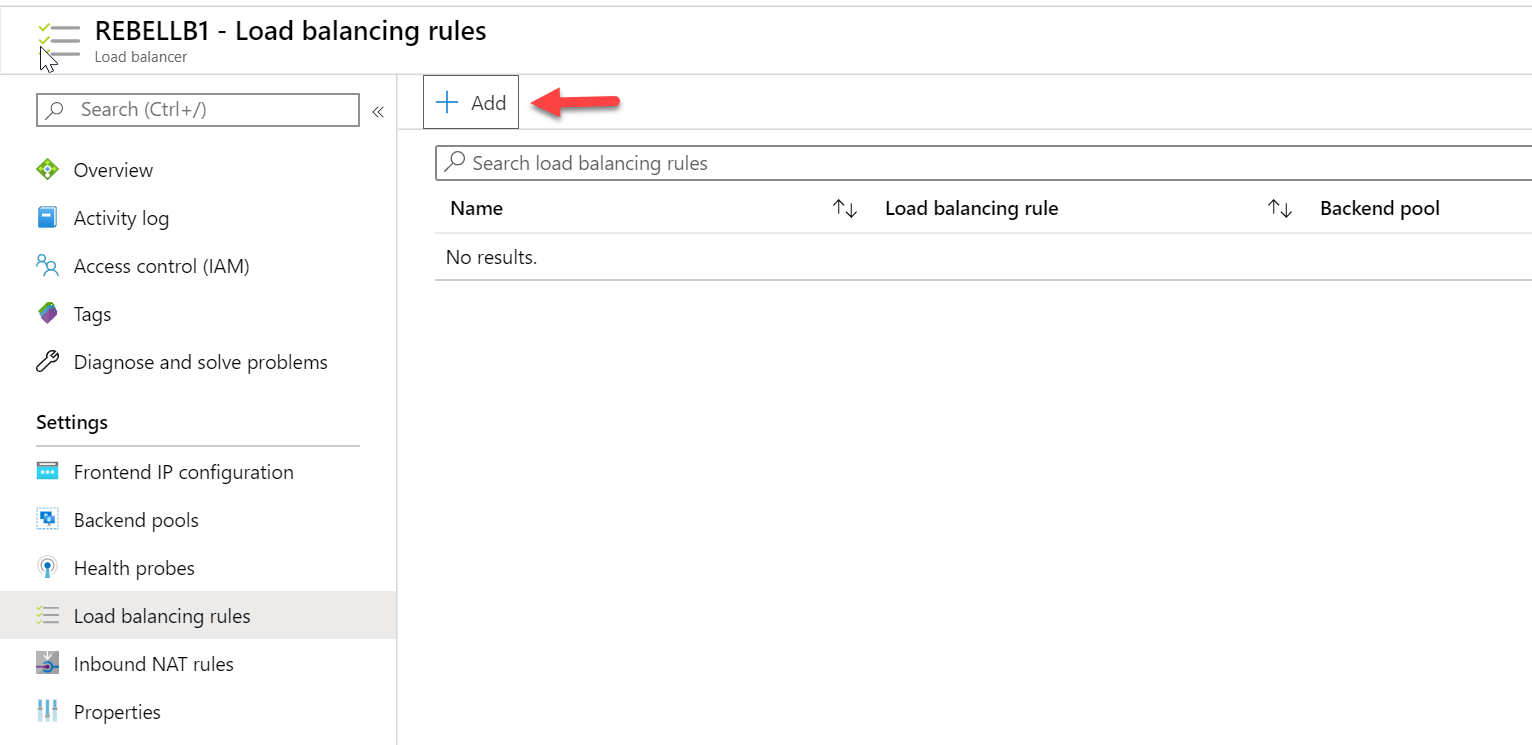
4. In my setup, I am load balancing TCP 80 traffic. So my rule configuration as following,
Name : LBRule1
IP Version: IPv4
Front End IP address : Load balancer IP address
Protocol : TCP
Port : 80
Backend port : 80
Backend pool: REBELPool1
Health probe: Webservice
Once relevant configuration in place, click on OK to create the rule.

Testing
This completes the configuration. It is time for testing.
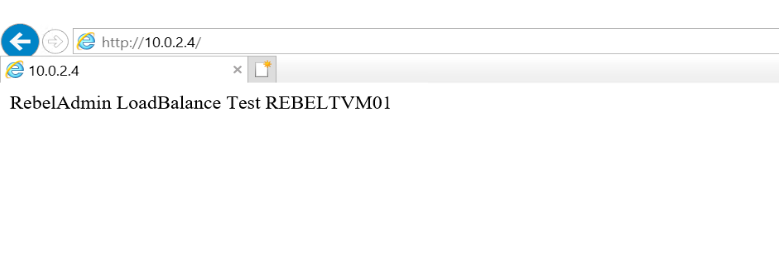
I went ahead and launch the web browser of my laptop and try to access public ip address of the load balancer.
As expected, now I can see the web site running from REBELTVM02 back end server.
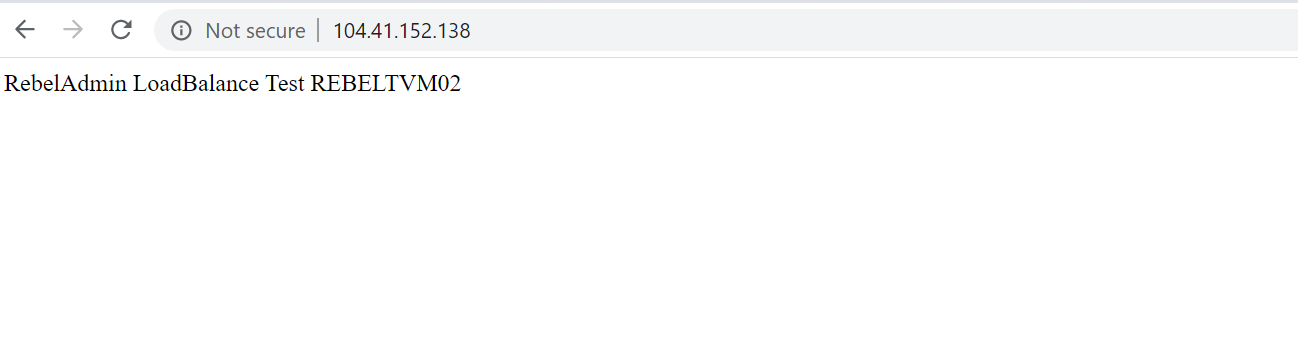
Then I went ahead and shutdown the REBELTVM02 back end server.

When I refresh the web page again, now I can see the web page from REBELTVM01 back end server.

This confirms the load balancer is working as expected.
I hope now you have a better understanding of how to set up an Azure load balancer. This marks the end of this blog post. If you have any further questions about this feel free to contact me on rebeladm@live.com also follow me on twitter @rebeladm to get updates about new blog posts.


Hello Rebel,
I read the precise outlining of Load Balancer setup and configuration with short and crisp explanation. Excellent!!! Very impressive.
Finally happy to read and understand an article in a quick few minutes.
Keep up the good work.
Agree!!
Excellent but I noticed you have an availability set but did not specify in the load balancer config. You opted for adding both VMs instead. I think you can point to the availability set right? If this was something like adfs port 443 is this what you would probe?
Very clear. Cant see why Microsoft doesn’t explain in such a clear way. Kudos!