
"Azure Files" is a managed, cloud-based file share that can access via SMB protocol. Once you create Azure File share it can be accessed from any ware using Windows, Linux or macOS. It can also map as a shared drive to a system. This can be used as a unified, reliable, simple solution to replace traditional file servers.
In the on-premises Active Directory environment, we use NTFS permissions to control access to folders and file shares. If we are replacing traditional file shares with Azure Files, we need a way to manage access permissions to it in a similar manner. This is applicable if these folders are accessed via "Windows Virtual Desktop" or "Domain-Joined Azure VM". Azure File now supports Azure Active Directory Domain Services (Azure AD DS) authentication. Now we can create NTFS access control lists (ACLs) for Azure File Shares to control access permissions in a granular level. In this demo, we are going to look into this new feature in detail.
To test this, we need following,
- Valid Azure AD Subscription
- Azure AD Domain Services on the Azure AD tenant – We need Azure AD Domain Services enabled for the Azure AD tenant.
- Domain-Joined Azure VM – This need to be added to the Azure AD Domain Services
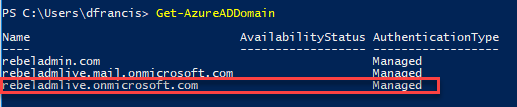
In my demo setup, I already have a managed domain called rebeladmlive.onmicrosoft.com
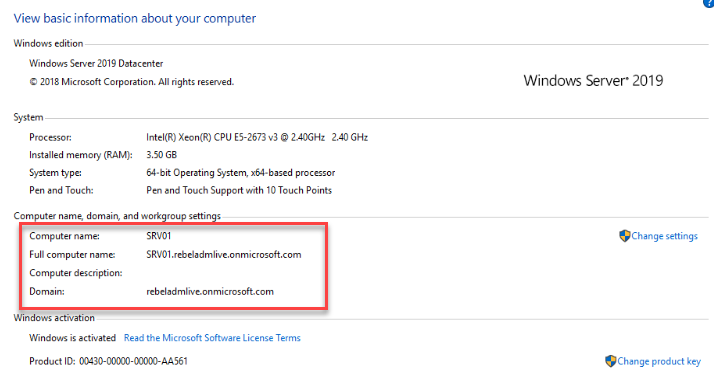
I also have a domain-joined VM called SRV01 which I will be using for the testing.
Setup Storage Account with Azure AD DS authentication
To use Azure AD DS authentication, we need to enable it in the storage account level. We can do this for existing storage accounts which are created after September 24, 2018, as well. But in this demo, I am going to create a new storage account.
We can do this using Azure Portal, Azure Shell or PowerShell. But in this demo, I am using the PowerShell method.
Before we start using PowerShell, make sure you have the Azure module is installed. For installation, please refer to https://docs.microsoft.com/en-gb/powershell/azure/install-Az-ps?view=azps-2.5.0
- Launch PowerShell as Administrator
- Type Connect-AzAccount and Enter
- Then log in as Global Administrator
- After successful login, we can create a storage account using,
New-AzStorageAccount -ResourceGroupName "AzureFileRG" -Name "azfilesa1" -Location "eastus" -SkuName Standard_LRS -Kind StorageV2 -EnableAzureActiveDirectoryDomainServicesForFile $true
In the above, AzureFileRG is the resource group for the storage account. azfilesa1 is the name of the storage account. This account is created on eastus region. For the new storage account, the storage type is Standard_LRS. It stands for Locally-redundant storage. The new storage account also created as version 2 account. It is defined by the value of -Kind parameter. Azure AD DS authentication for the new storage account is enabled using -EnableAzureActiveDirectoryDomainServicesForFile parameter.

Setup Azure File Share
Now we have a new storage account. before we create a file share, we need to find out the storage access key for the account.
To do that we can use,
Get-AzStorageAccountKey -ResourceGroupName "AzureFileRG" -AccountName "azfilesa1"

The next step of the configuration is to create a new file share using the above storage key. We can do this using,
$sc = New-AzStorageContext "azfilesa1" "<storage key>"
New-AzStorageShare rebeldata -Context $sc
In the above, azfilesa1 is the storage key. we need to replace <storage key> with the storage account key value found in the previous step.

Assign access permissions
To access, manage NTFS permissions, first, we need to assign users to the newly created share. This is done by using predefined access roles. There are 3 different roles we can use for this task.
- Storage File Data SMB Share Reader – This allows read access in Azure Storage file shares over SMB.
- Storage File Data SMB Share Contributor – This allows read, write, and delete access in Azure Storage file shares over SMB.
- Storage File Data SMB Share Elevated Contributor – allows read, write, delete and modify NTFS permissions in Azure Storage file shares over SMB.
We can assign this role permissions using,
$fscrole = Get-AzRoleDefinition "Storage File Data SMB Share Contributor"
$scope = "/subscriptions/<subscription-id>/resourceGroups/<resource-group>/providers/Microsoft.Storage/storageAccounts/<storage-account>/fileServices/default/fileshares/<share-name>"
New-AzRoleAssignment -SignInName peter@rebeladmlive.onmicrosoft.com -RoleDefinitionName $fscrole.Name -Scope $scope
In above command, I am assigning Storage File Data SMB Share Contributor role to peter@rebeladmlive.onmicrosoft.com user. Before run above command we also need to assign relevant values to <subscription-id>, <storage-account>, <share-name>.

Map file share to the Domain-Joined VM
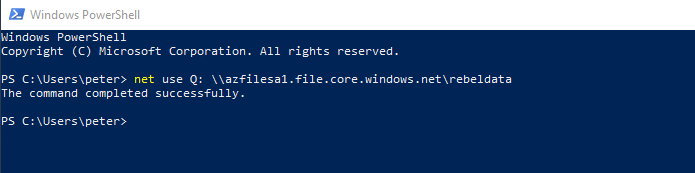
The next step of the configuration is to map this new file share to Azure AD Domain-Joined VM. To do that I log in to the VM as peter@rebeladmlive.onmicrosoft.com and ran,
net use Q: \\azfilesa1.file.core.windows.net\rebeldata
we no longer required storage key or storage account parameters to map Azure file share as it is running on Azure AD user's context.
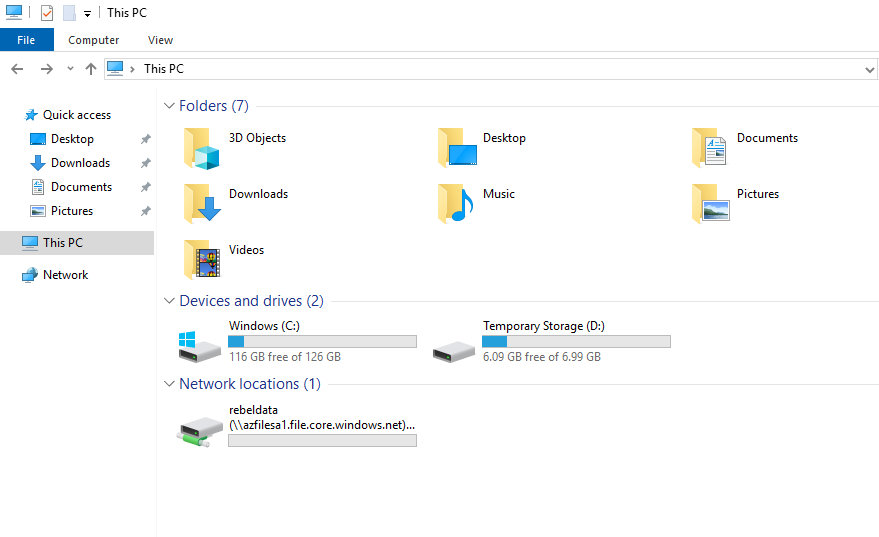
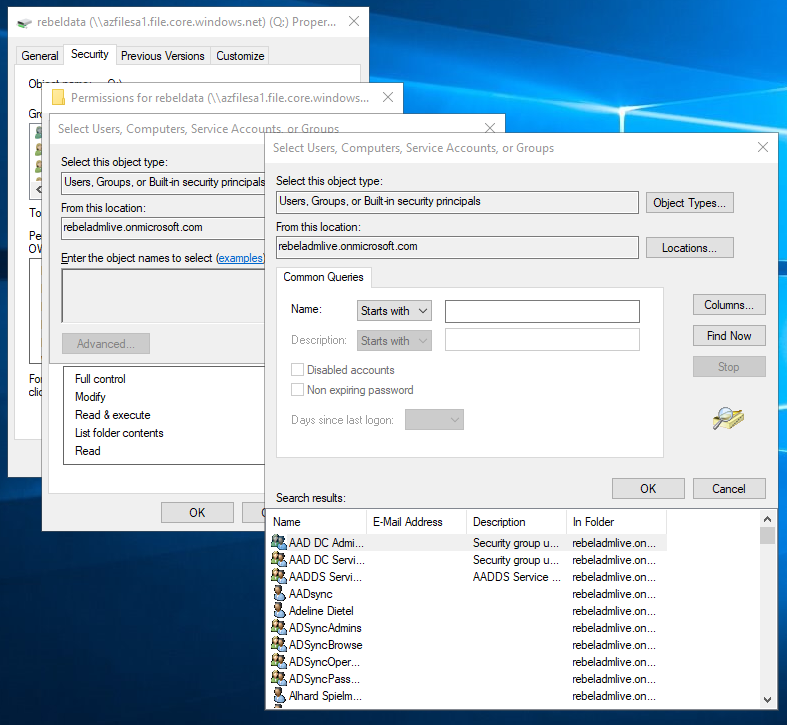
After the drive is mapped, go to properties and verify if you can query users from Azure AD.
Testing
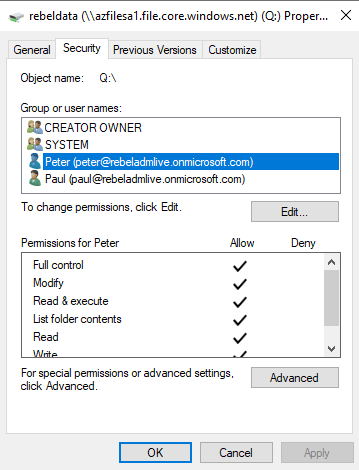
For testing, I have removed Administrator, Authenticated User permissions from Q: drive. Then apply full permissions to peter@rebeladmlive.onmicrosoft.com. I also deny permissions for user paul@rebeladmlive.onmicrosoft.com
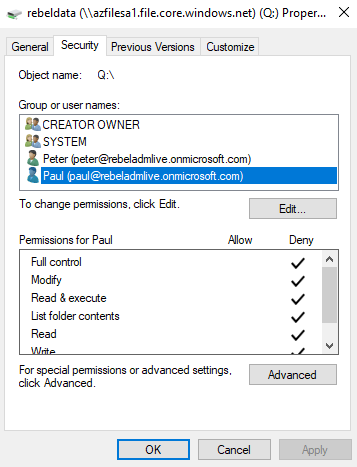
Then I log in to domain-joined VM as paul@rebeladmlive.onmicrosoft.com and try to map the share.

As expected, the user received access denied error.
I hope now you have understood how Azure AD authentication works with Azure File. This marks the end of this blog post. If you have any questions feel free to contact me on rebeladm@live.com also follow me on twitter @rebeladm to get updates about new blog posts.

