
Azure AD authentication is supported for Azure Point-to-Site (P2S) VPN. This means we can use Azure AD features such as conditional access, user-based policies, Azure MFA with VPN authentication. In this Demo, I am going to demonstrate how to enable Azure AD authentication for Azure P2S VPN.
As we go along, we will be working on the following tasks,
• Setup Azure point-to-site VPN with native Azure certificate authentication
• Configure OpenVPN for Azure P2S VPN
• Enable Azure AD Authentication for Azure point-to-site VPN
• Configure VPN Client
• Testing
I am going to use Azure PowerShell for configuration. Please make sure you have the Azure PowerShell module installed. More info about it can find under https://docs.microsoft.com/en-us/powershell/azure/install-az-ps?view=azps-2.6.0
Setup Azure point-to-site VPN with native Azure certificate authentication
Before we configure OpenVPN for Azure Point-to-Site (P2S) VPN, first we need to set up Azure Point-to-Site (P2S) VPN with native Azure certificate authentication. To do this,
1. Launch PowerShell console and connect to Azure using Connect-AzAccount (Using Global Administrator Account)
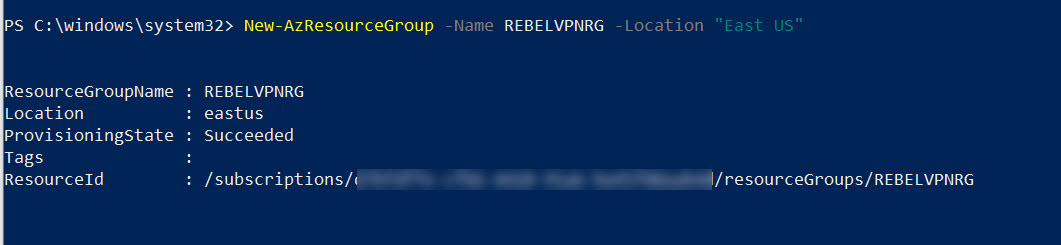
2. Create a new resource group using New-AzResourceGroup -Name REBELVPNRG -Location “East US”. Here REBELVPNRG is RG group name and East US is the location.
3. Now we need to create a new virtual network. We can create a virtual network using,
New-AzVirtualNetwork -ResourceGroupName REBELVPNRG -Name REBEL-VNET -AddressPrefix 192.168.0.0/16 -Location “East US”
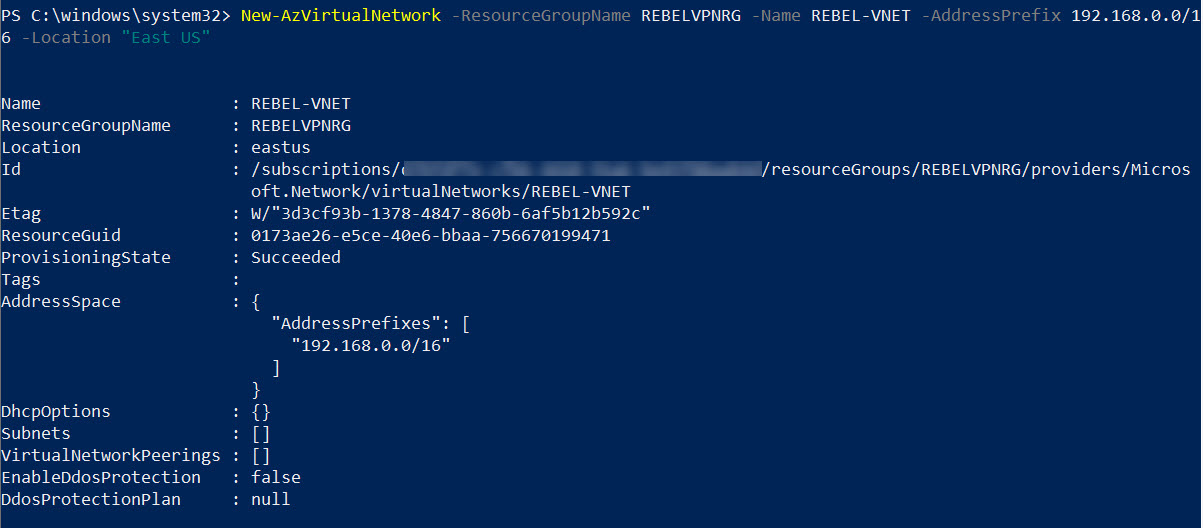
In the above, REBEL-VNET is the virtual network name. it uses 192.168.0.0/16 IP address range.
4. Under the virtual network, I am going to create two subnets. One for servers and one for VPN gateway. To create subnets,
$vn = Get-AzVirtualNetwork -ResourceGroupName REBELVPNRG -Name REBEL-VNET
Add-AzVirtualNetworkSubnetConfig -Name “REBEL-SVR-SUB” -VirtualNetwork $vn -AddressPrefix 192.168.100.0/24
Add-AzVirtualNetworkSubnetConfig -Name “GatewaySubnet” -VirtualNetwork $vn -AddressPrefix 192.168.5.0/24
Set-AzVirtualNetwork -VirtualNetwork $vn
In above REBEL-SVR-SUB is the server subnet and its address prefix is 192.168.100.0/24. GatewaySubnet is the VPN gateway subnet and its address prefix is 192.168.5.0/24.
Virtual Network Gateway can only be created in a subnet with name ‘GatewaySubnet’
5. VPN gateway is required a public IP address. To create one use,
$publicip = New-AzPublicIpAddress -Name REBELVPNPublicIP -ResourceGroupName REBELVPNRG -Location “East US” -AllocationMethod Dynamic
VPN Gateway currently only supports Dynamic Public IP address allocation.
Then update ip configuration using,
$vn = Get-AzVirtualNetwork -ResourceGroupName REBELVPNRG -Name REBEL-VNET
$gwsubnet = Get-AzVirtualNetworkSubnetConfig -Name “GatewaySubnet” -VirtualNetwork $vn
$gwipconf = New-AzVirtualNetworkGatewayIpConfig -Name REBELVPNGWipconf -Subnet $gwsubnet -PublicIpAddress $publicip

6. Next step of the configuration is to create a new VPN gateway,
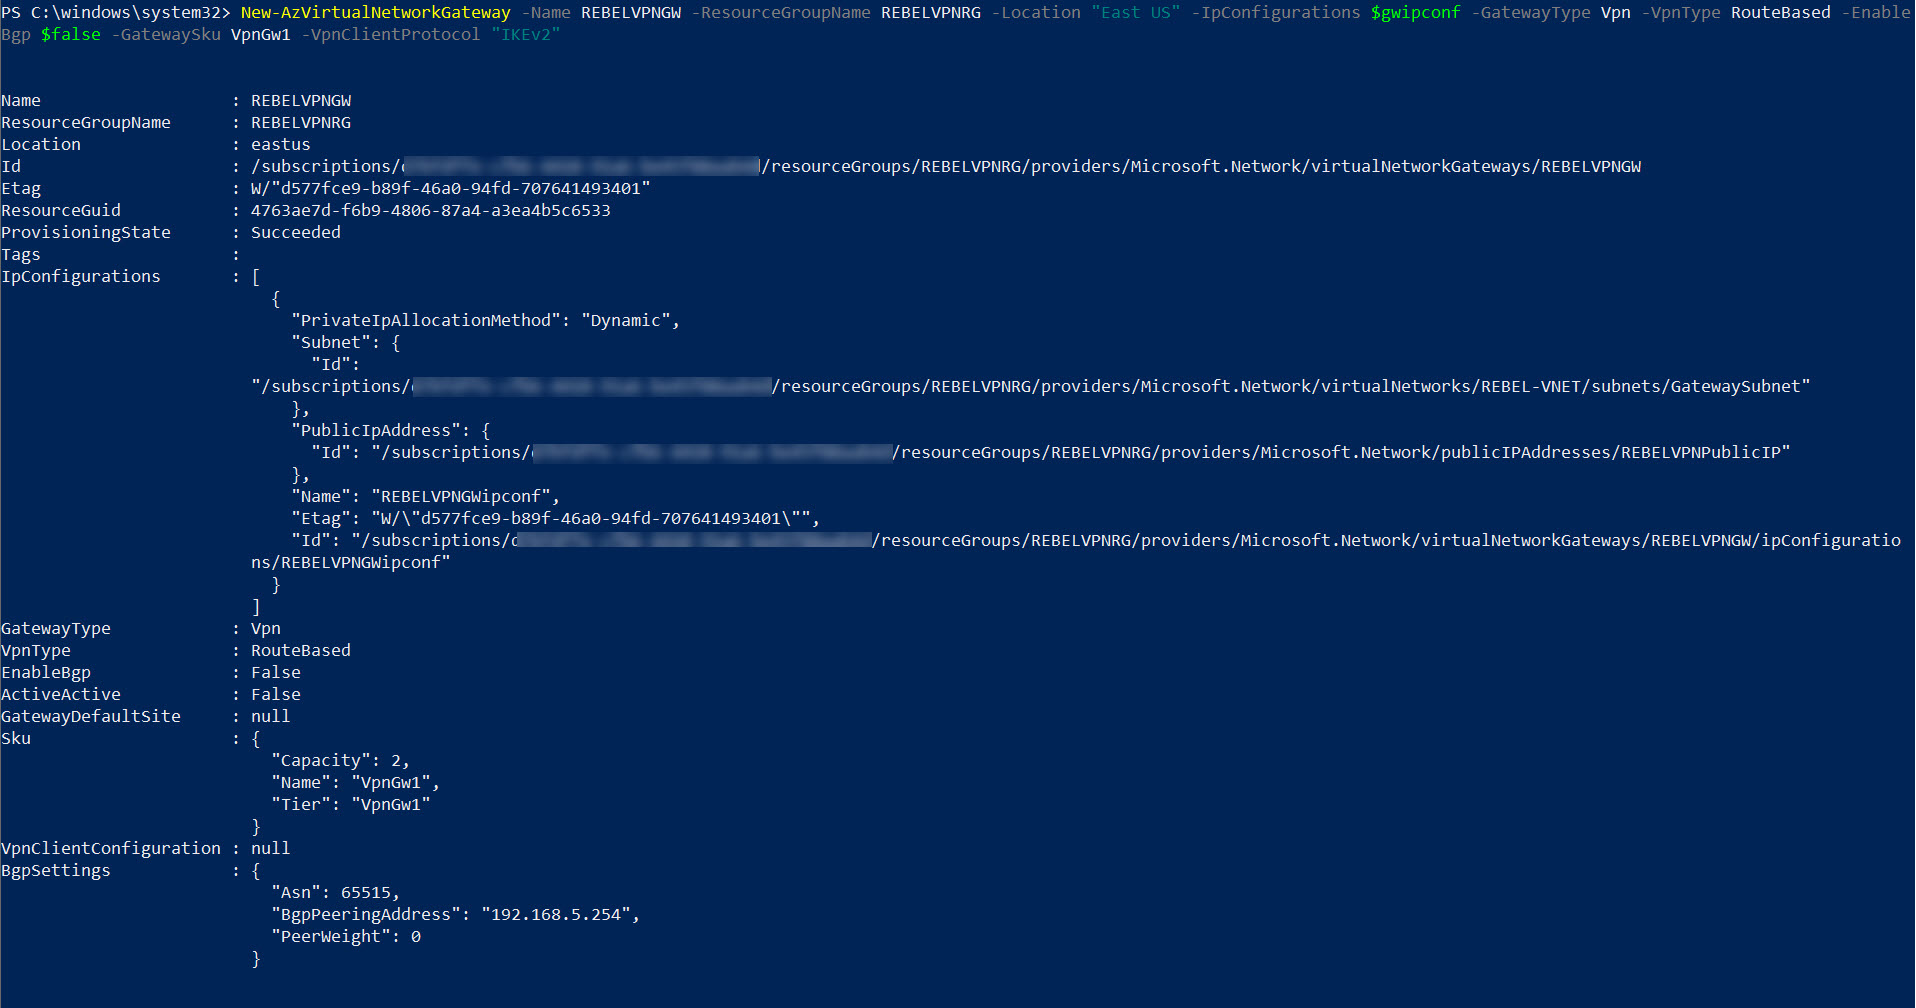
New-AzVirtualNetworkGateway -Name REBELVPNGW -ResourceGroupName REBELVPNRG -Location “East US” -IpConfigurations $gwipconf -GatewayType Vpn -VpnType RouteBased -EnableBgp $false -GatewaySku VpnGw1 -VpnClientProtocol “IKEv2”
In the above, VpnType must be RouteBased. -GatewaySku should not be Basic as we are going to use OpenVPN and IKEv2. This can take up to 45 minutes to create the gateway.
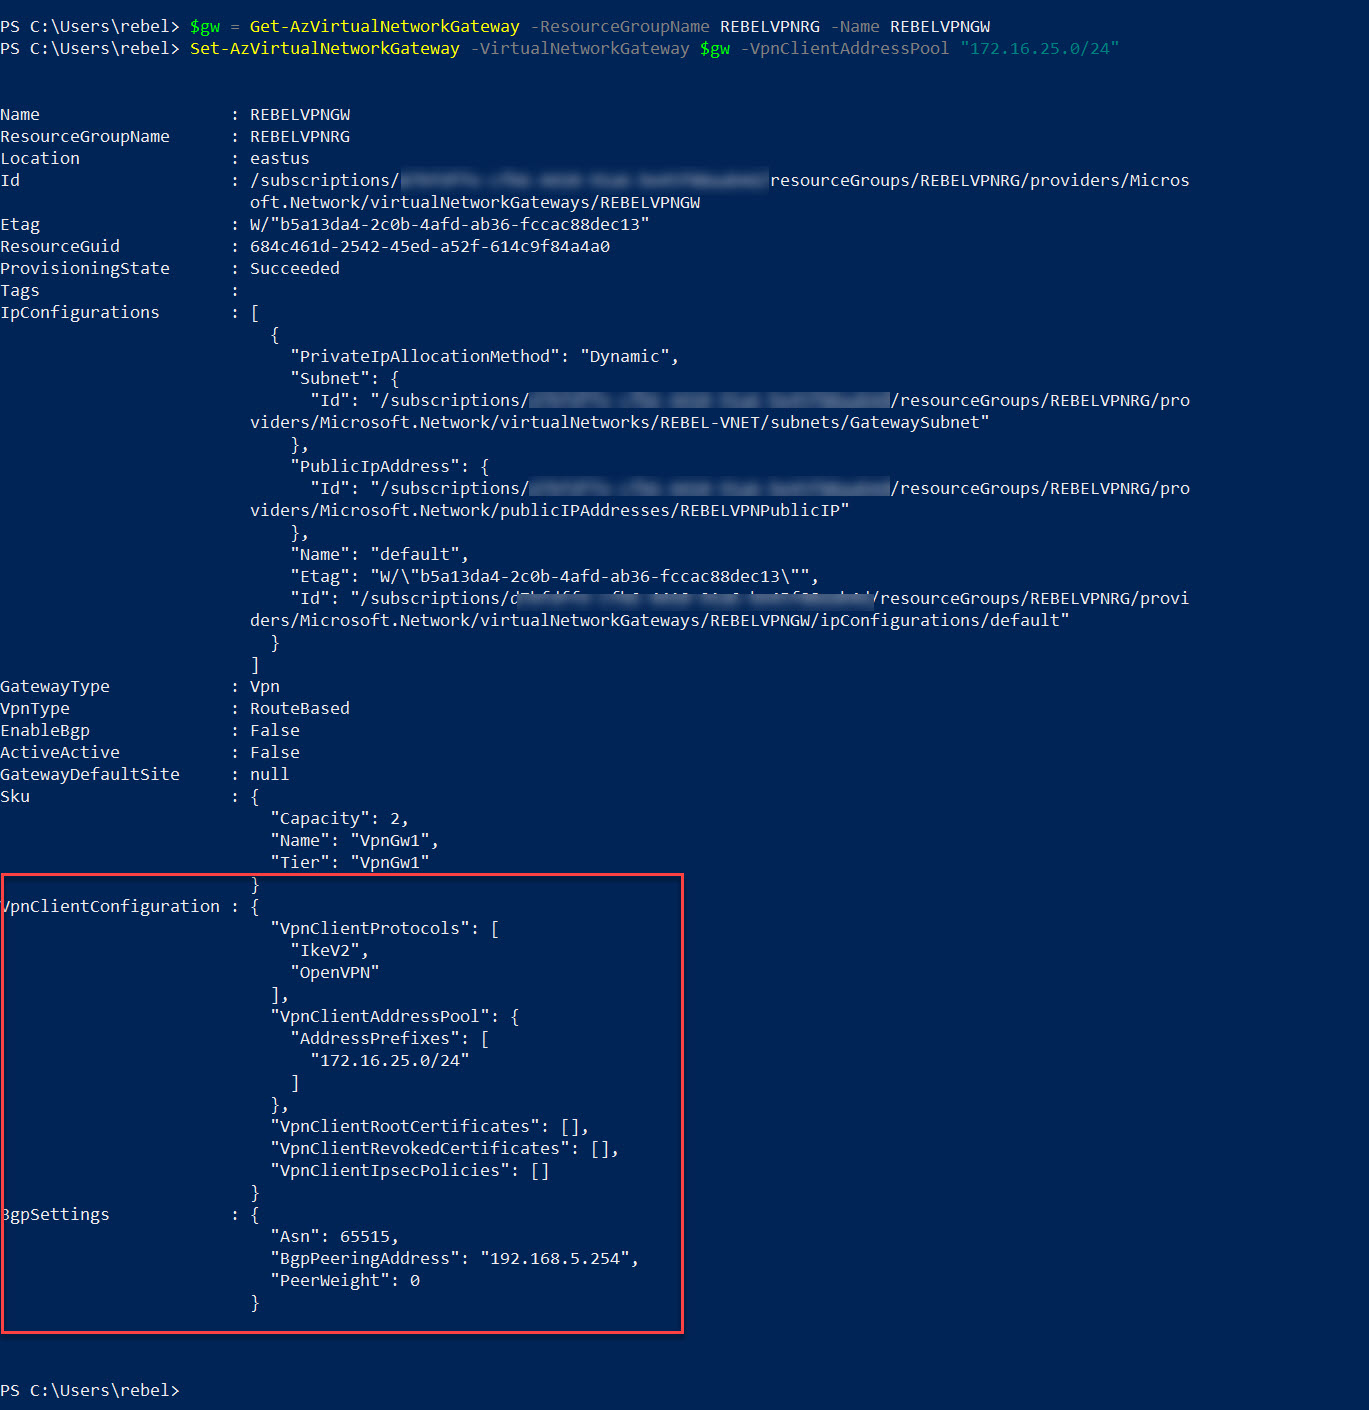
7. Now we have the gateway. The next step is to configure VPN client address pool. In this demo, I am going to use 172.16.25.0/24 as a client pool.
$gw = Get-AzVirtualNetworkGateway -ResourceGroupName REBELVPNRG -Name REBELVPNGW
Set-AzVirtualNetworkGateway -VirtualNetworkGateway $gw -VpnClientAddressPool “172.16.25.0/24”
Configure OpenVPN for Azure Point-to-Site (P2S) VPN
OpenVPN is an open-source VPN protocol that is trusted by many cloud service providers to provide site-to-site, point-to-site, and point-to-point connectivity to cloud resources. Now Azure AD authentication also works with OpenVPN protocol.
By default, virtual network gateway use IKEv2 and OpenVPN as client protocol.
Get-AzVirtualNetworkGateway -ResourceGroupName REBELVPNRG

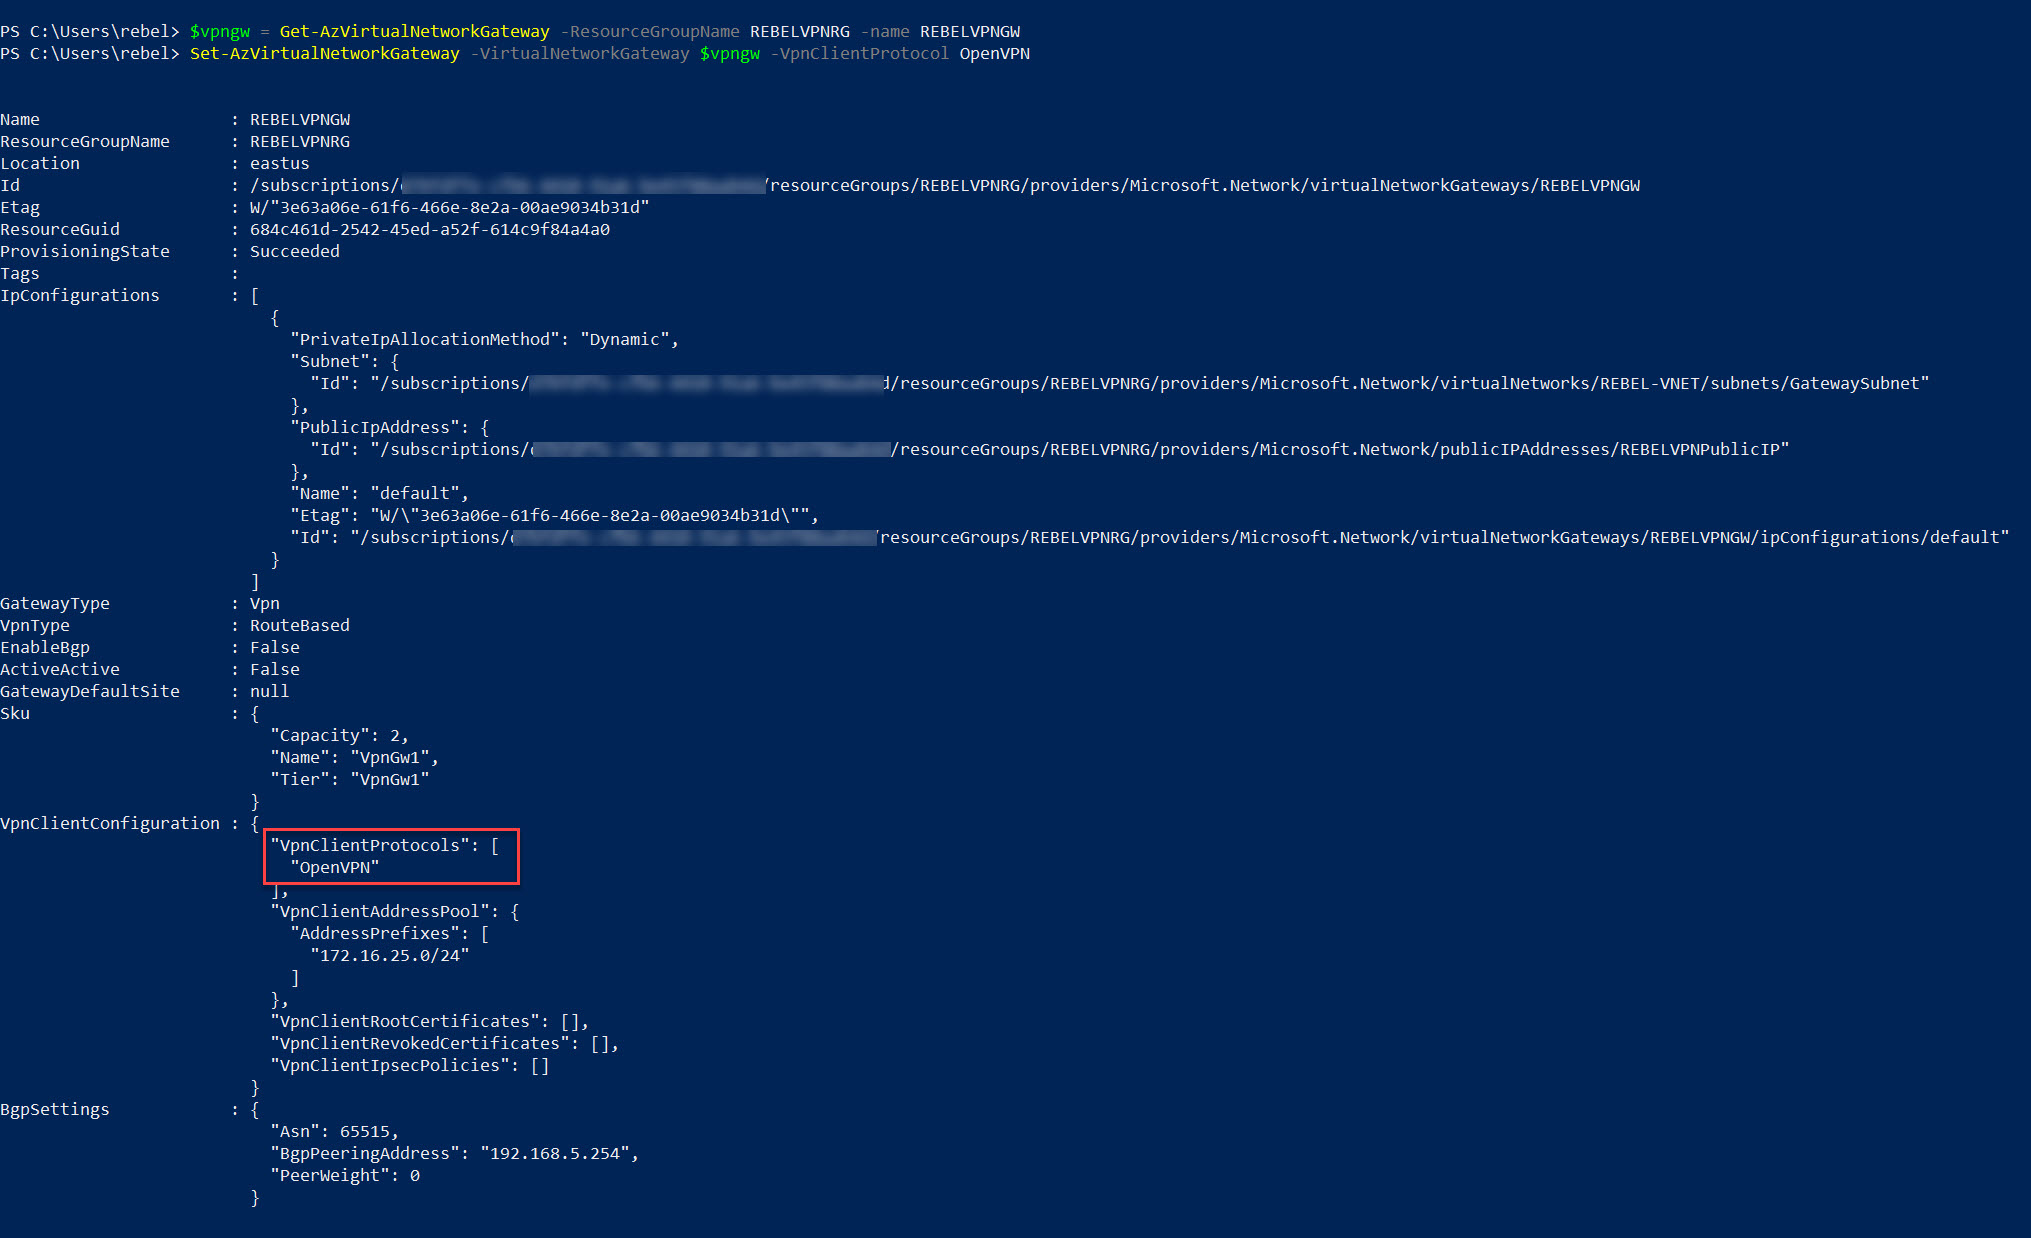
let’s go ahead and change the VPN client protocol to OpenVPN using,
$vpngw = Get-AzVirtualNetworkGateway -ResourceGroupName REBELVPNRG -name REBELVPNGW
Set-AzVirtualNetworkGateway -VirtualNetworkGateway $vpngw -VpnClientProtocol OpenVPN
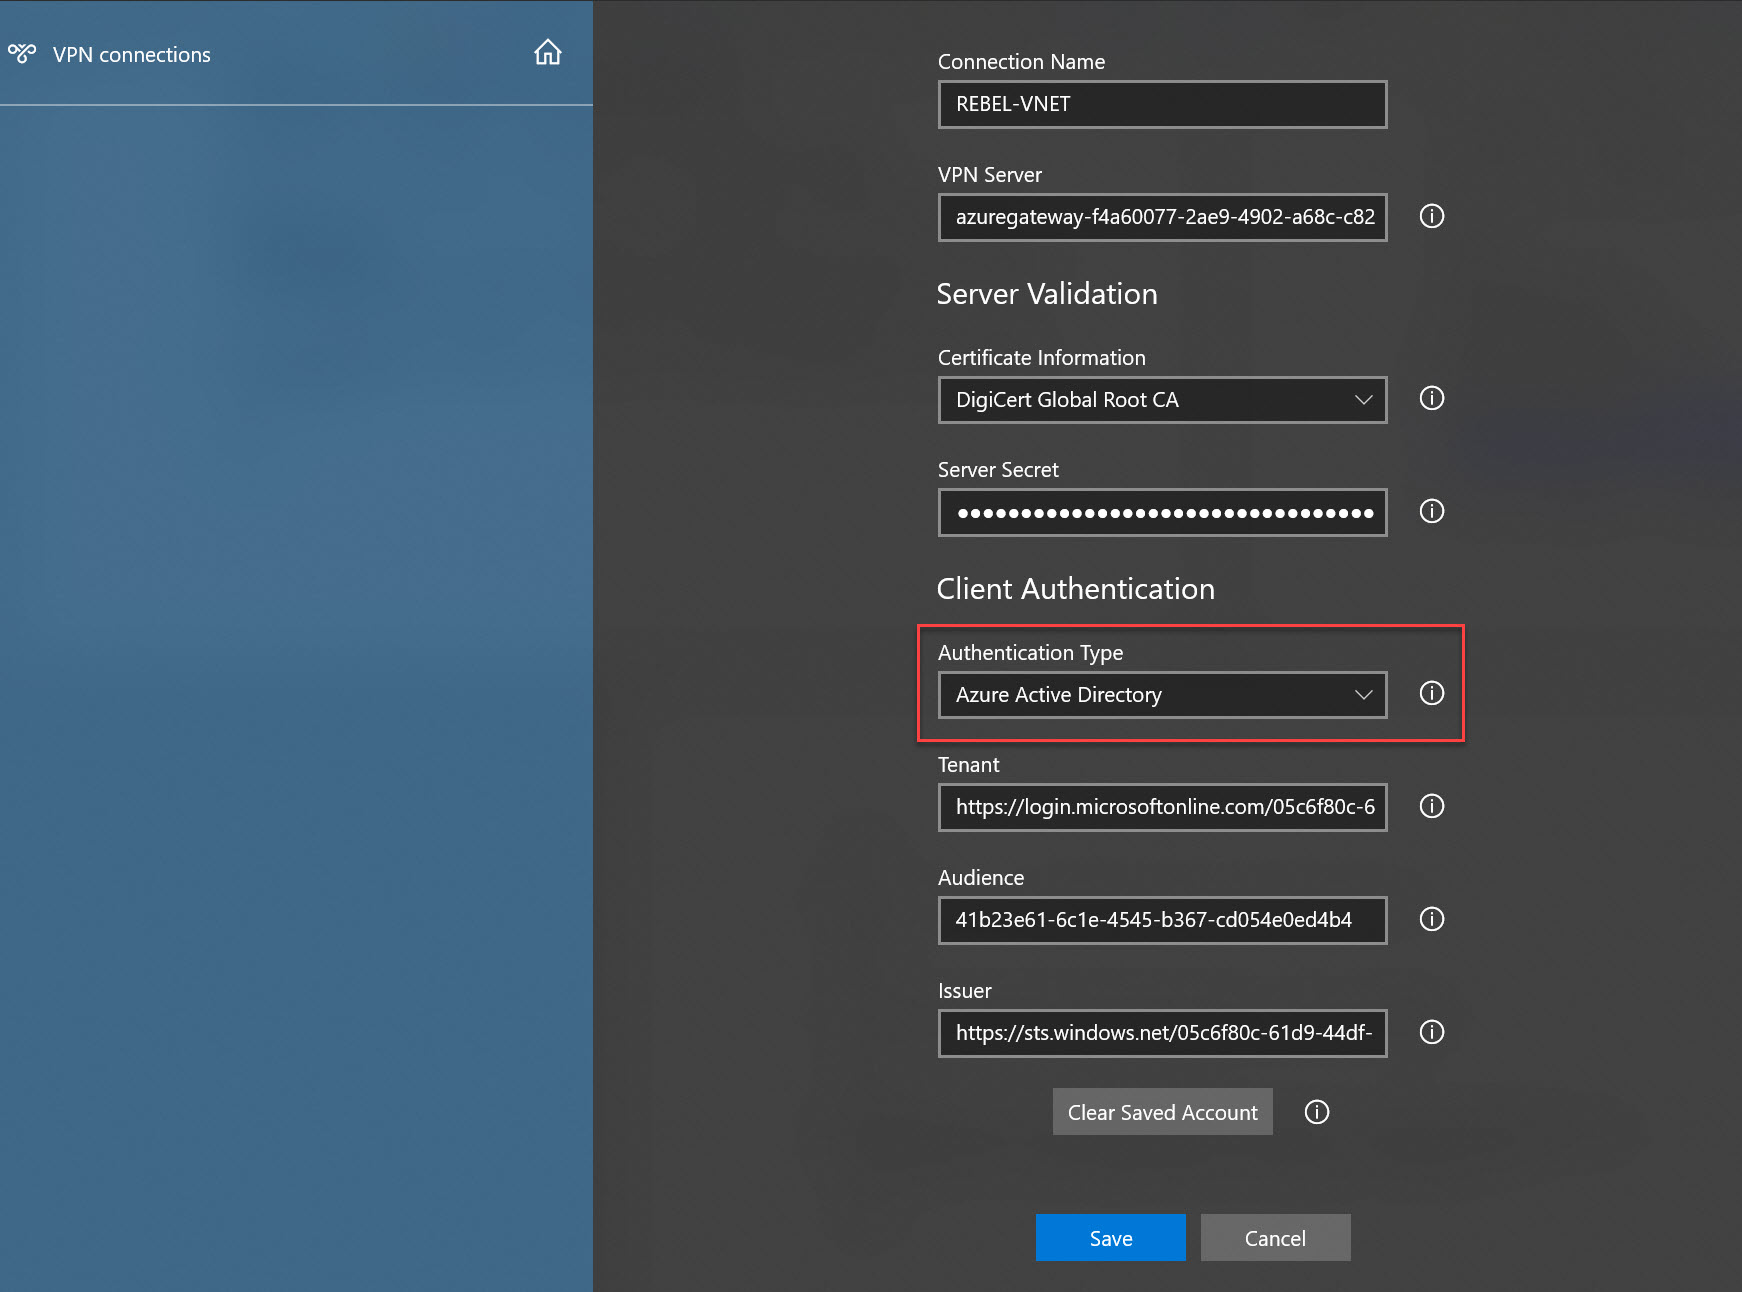
Enable Azure AD Authentication for Azure P2S VPN
1. Log in to Azure Portal (https://portal.azure.com) as Global Administrator
2. Copy https://login.microsoftonline.com/common/oauth2/authorize?client_id=41b23e61-6c1e-4545-b367-cd054e0ed4b4&response_type=code&redirect_uri=https://portal.azure.com&nonce=1234&prompt=admin_consent and paste it in the browser window and press enter.
3. Then we can see the prompt for admin approval. Click on accept to grant permission to the Azure VPN app.

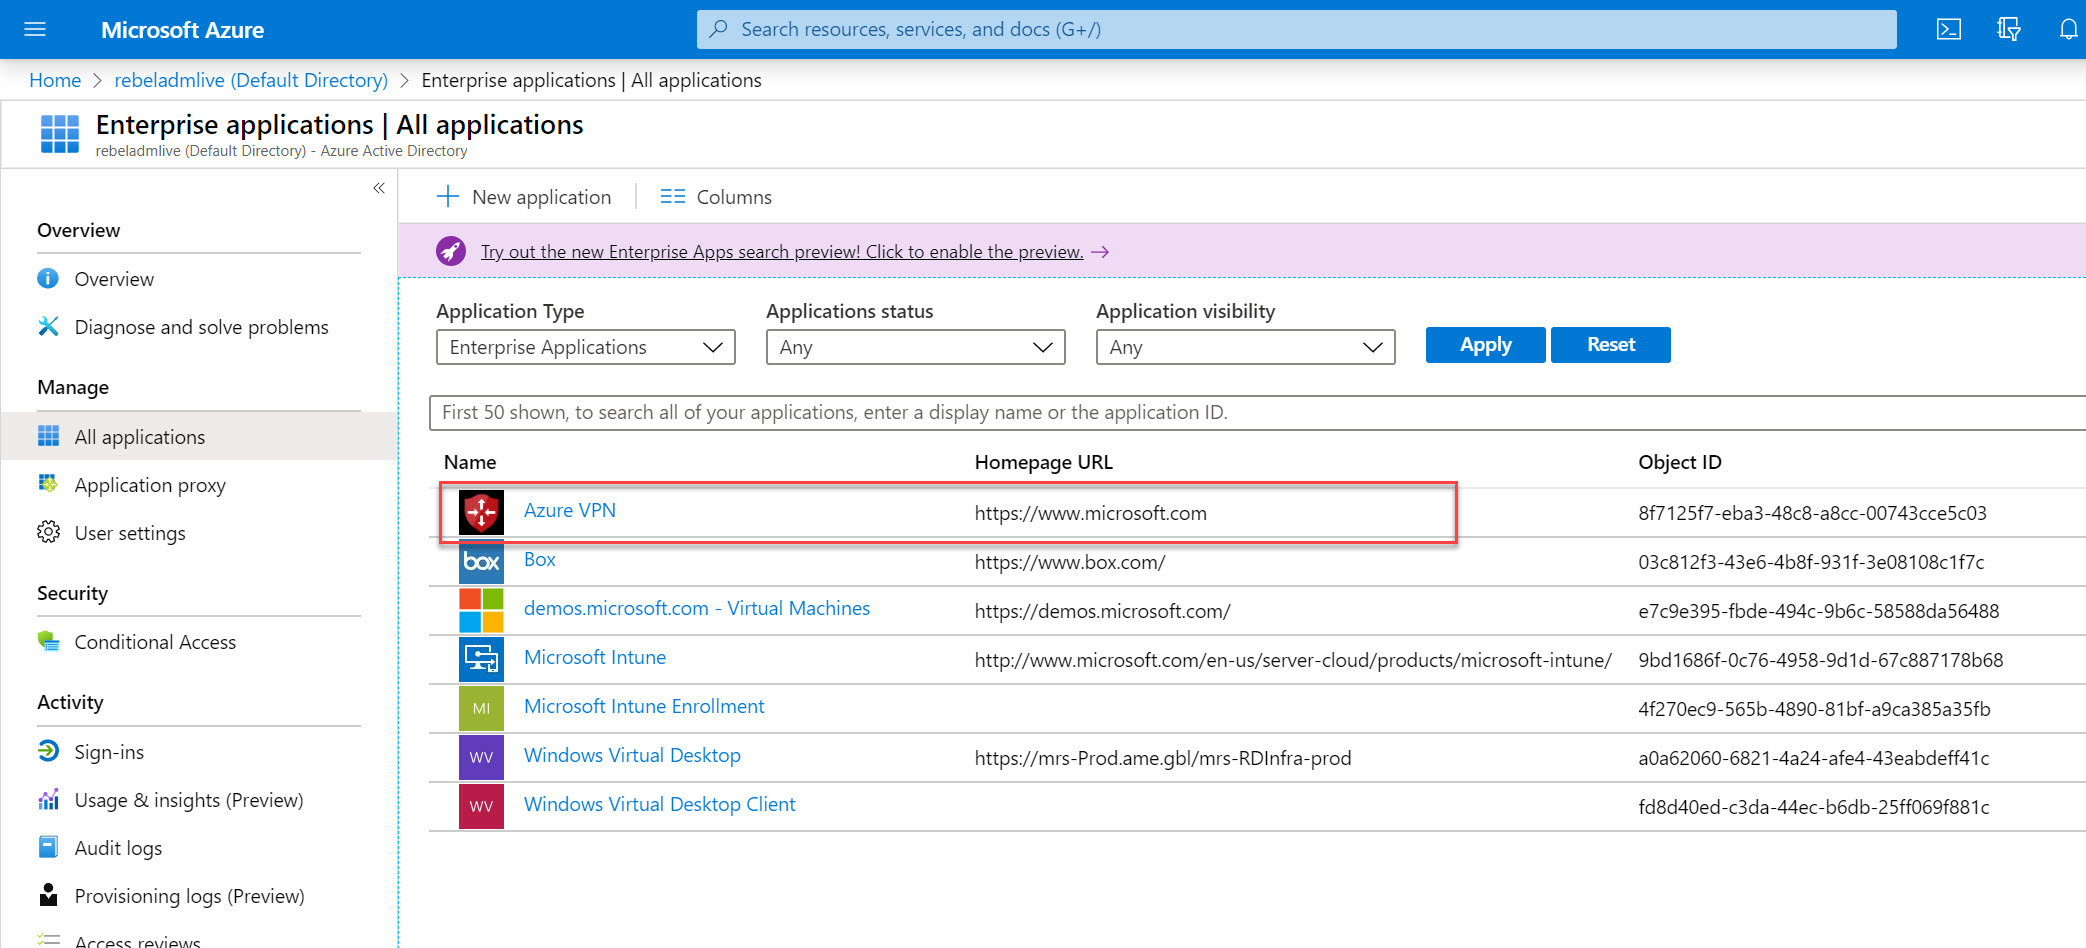
4. After a few minutes, we should be able to see Azure VPN app under Azure Active Directory | All Applications
5. Then to enable Azure AD authentication for Azure VPN gateway user,
$vpngw = Get-AzVirtualNetworkGateway -ResourceGroupName REBELVPNRG -Name REBELVPNGW
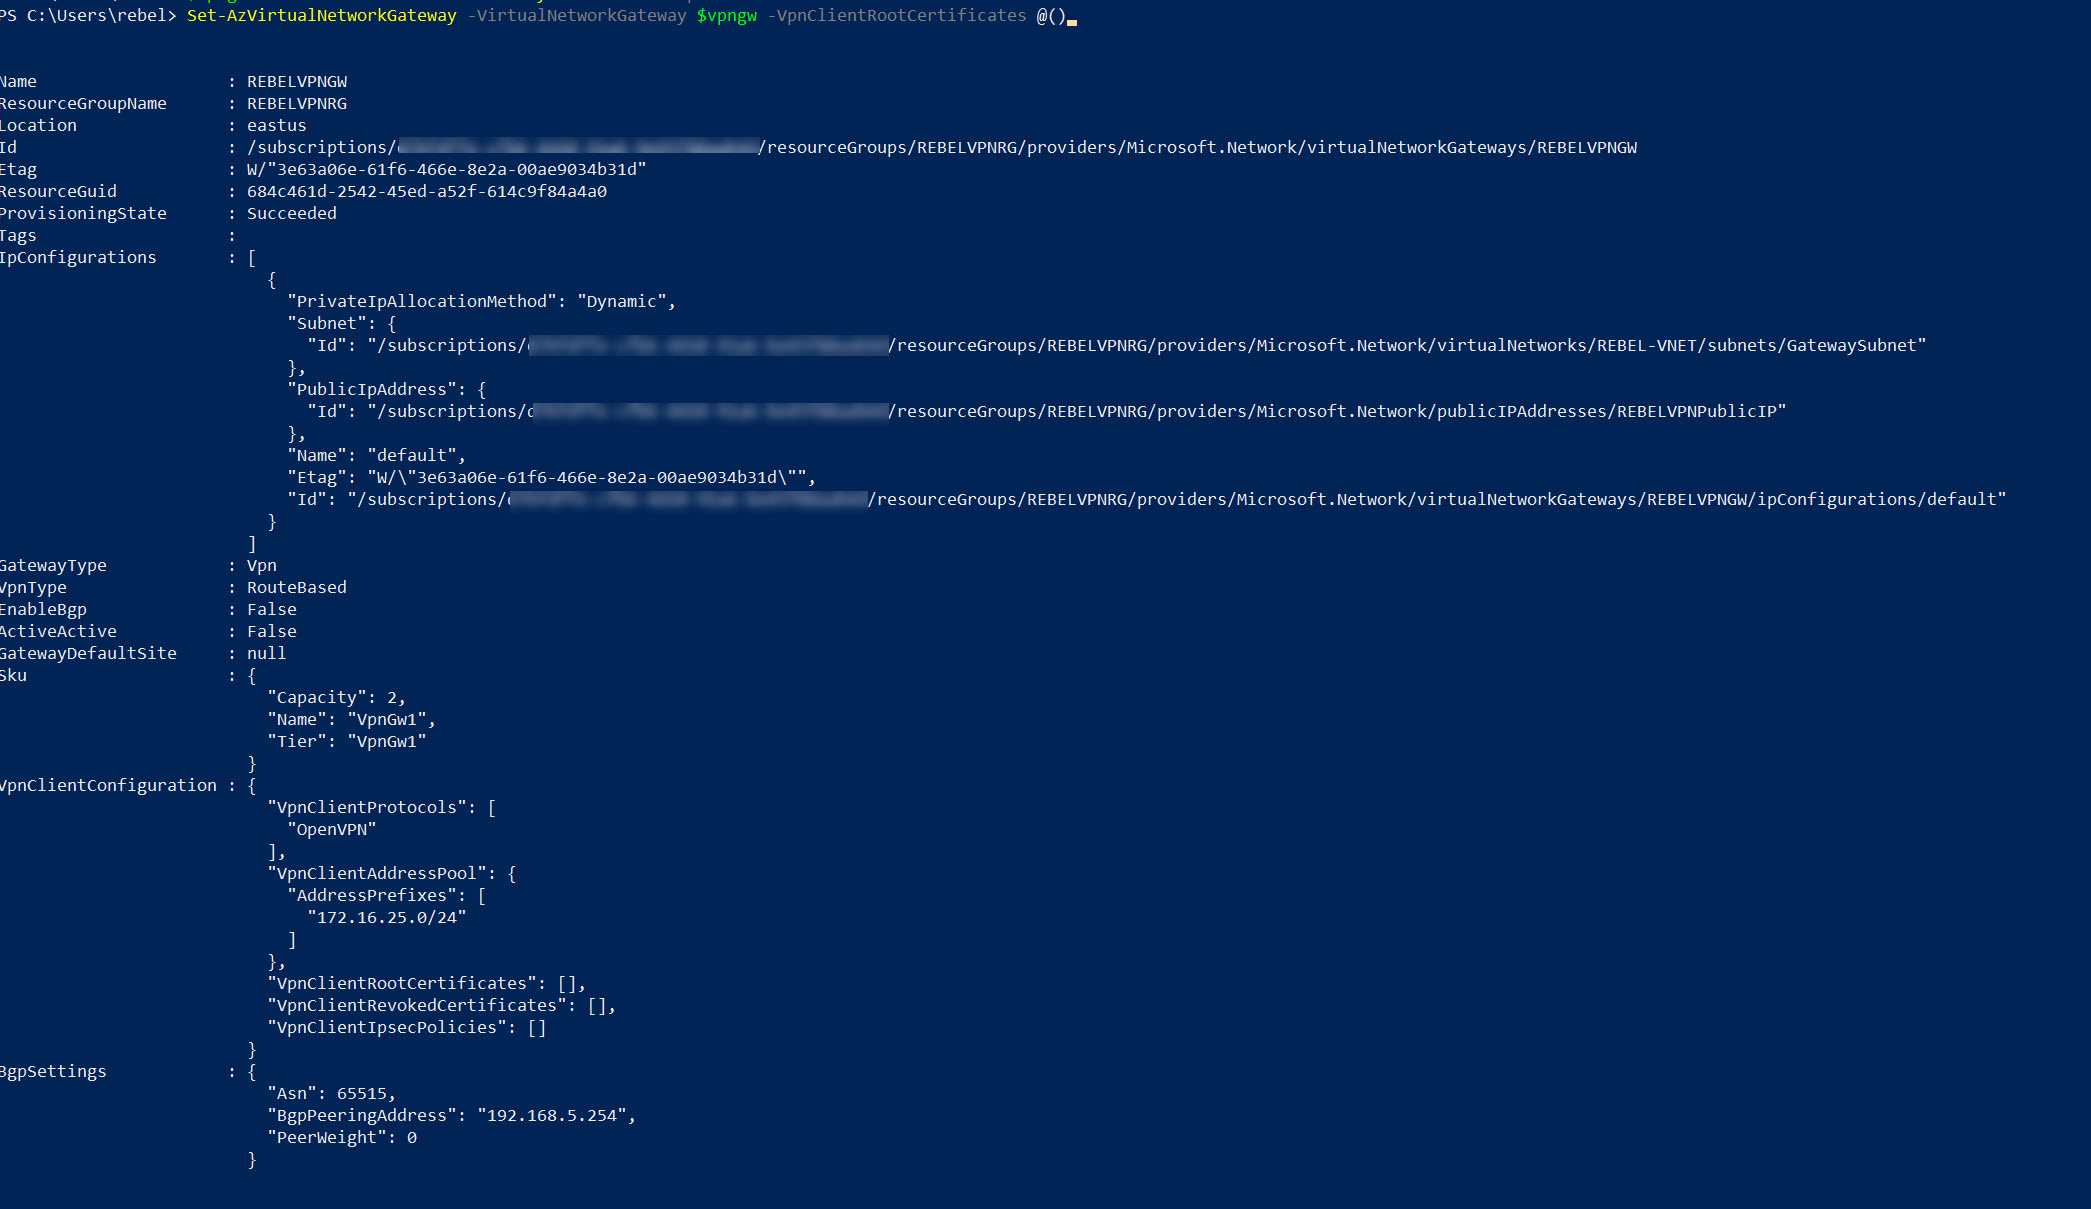
Set-AzVirtualNetworkGateway -VirtualNetworkGateway $vpngw -VpnClientRootCertificates @()
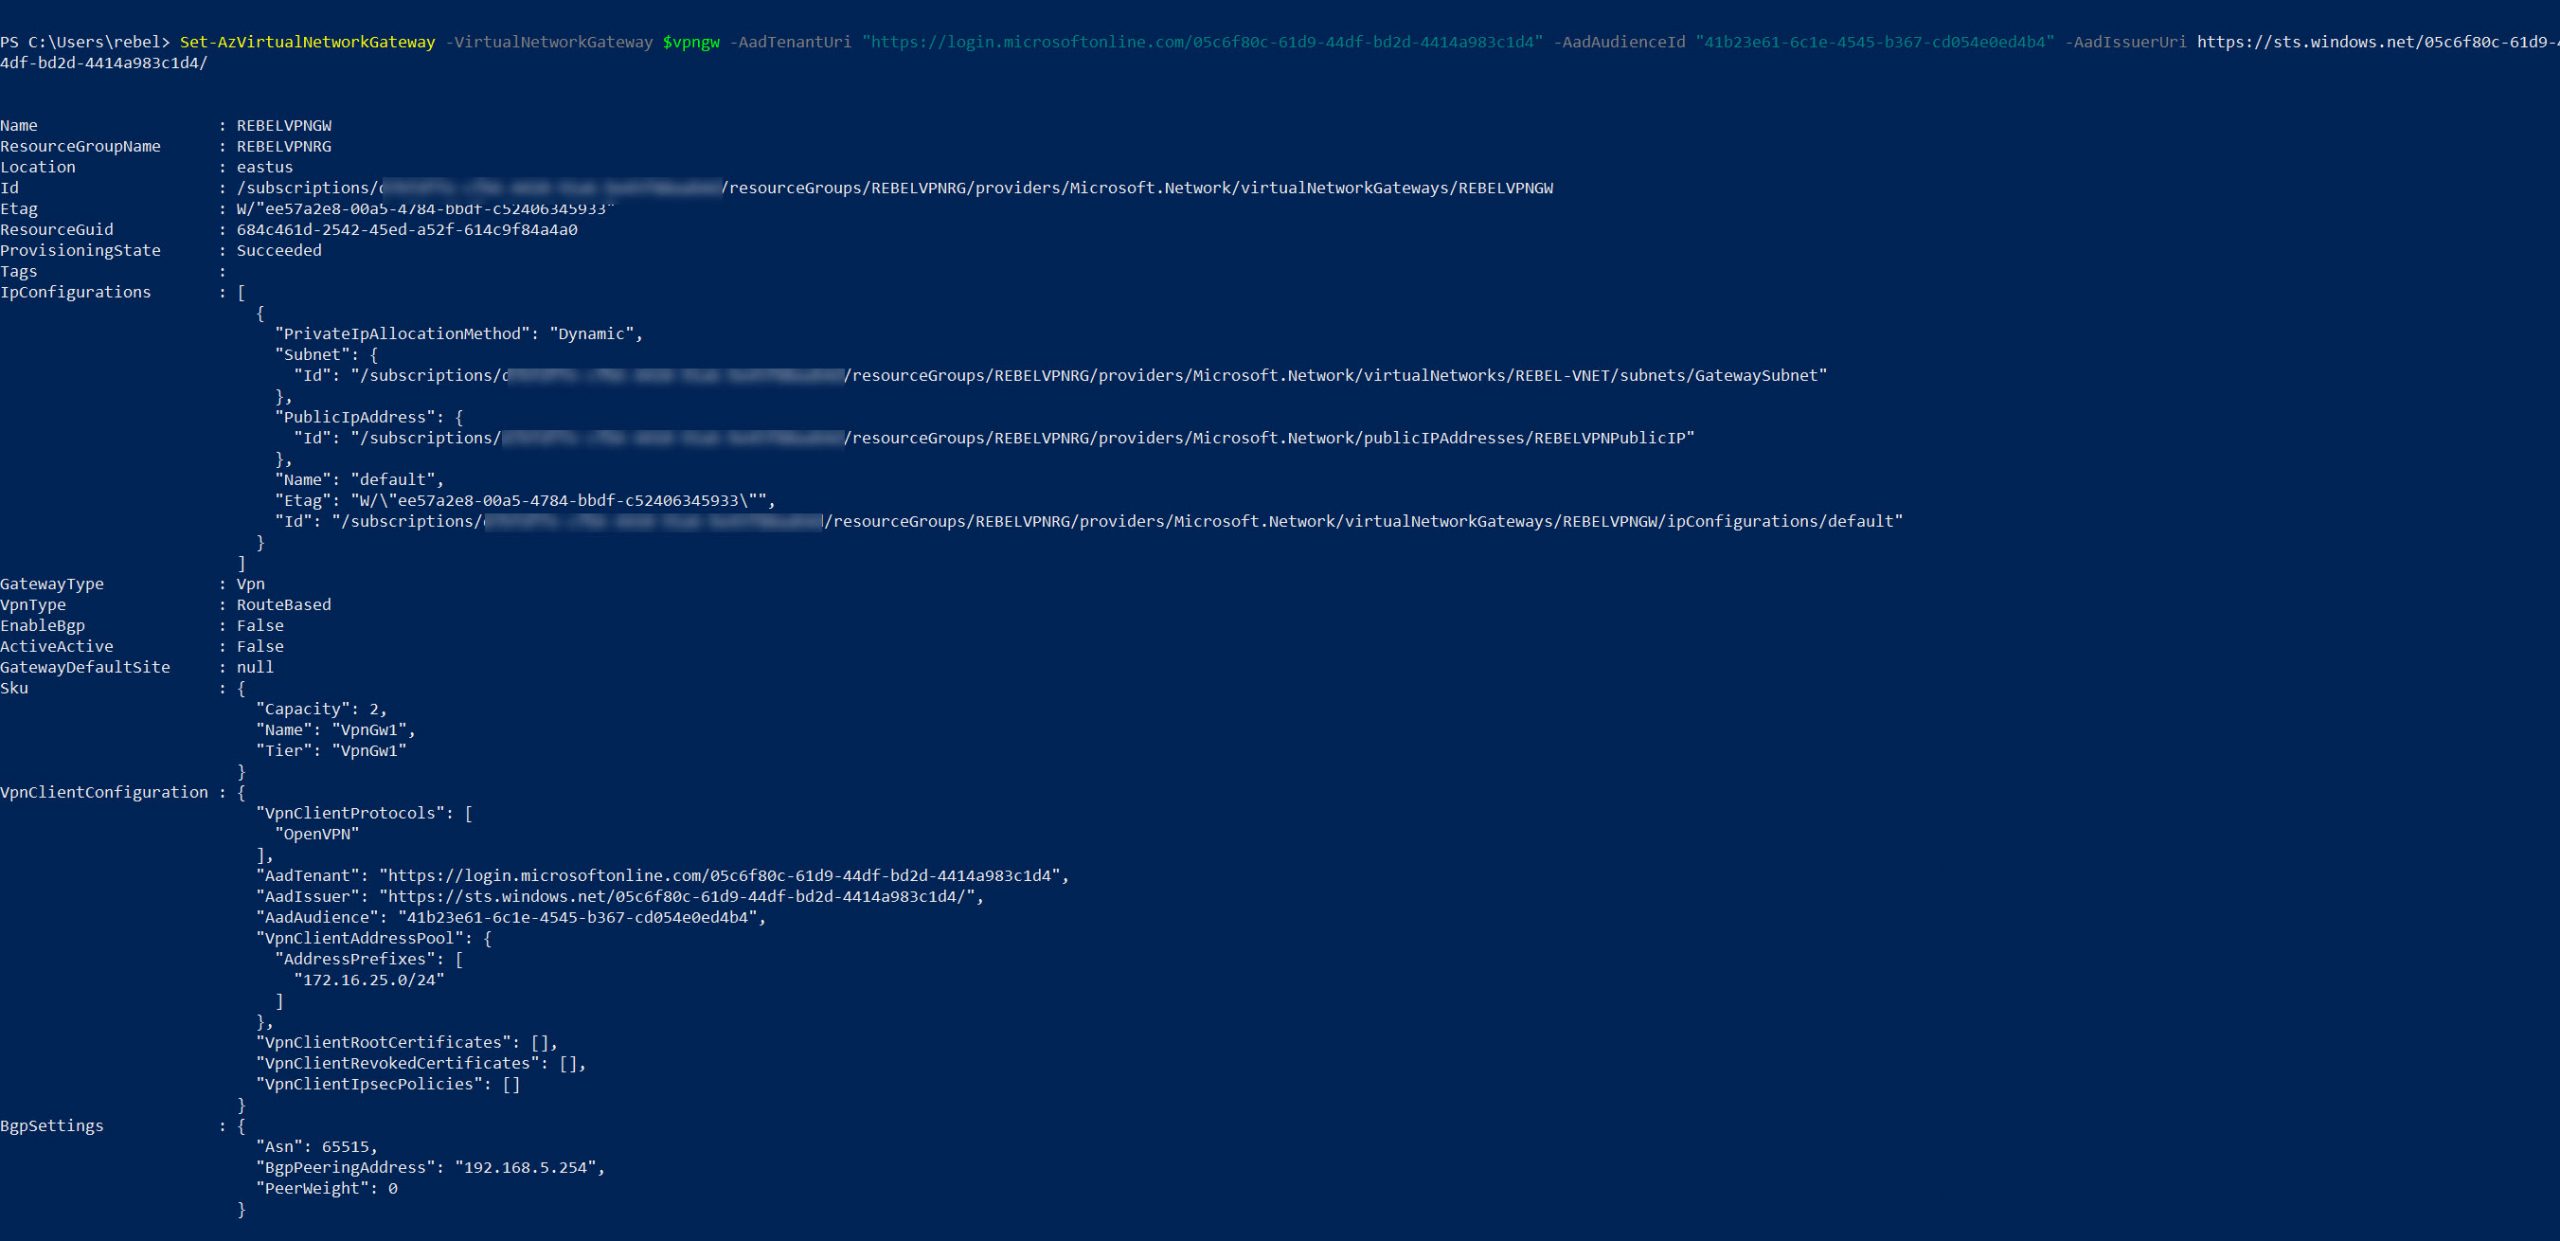
Set-AzVirtualNetworkGateway -VirtualNetworkGateway $vpngw -AadTenantUri “https://login.microsoftonline.com/<Azure AD Directory ID>” -AadAudienceId “41b23e61-6c1e-4545-b367-cd054e0ed4b4” -AadIssuerUri https://sts.windows.net/<Azure AD Directory ID>/
In the above, REBELVPNRG is the resource group name and REBELVPNGW is the VPN gateway. Also, replace <Azure AD Directory ID> with your Azure AD tenant id.
6. The next step of the configuration is to generate VPN profile settings XML so we can use it with the client. To do that run,
$vpnprofile = New-AzVpnClientConfiguration -ResourceGroupName REBELVPNRG -Name REBELVPNGW -AuthenticationMethod “EapTls”
$VPNPROFILE.VpnProfileSASUrl

This will return a URL. Copy it and place it in the browser. Then download and save it.
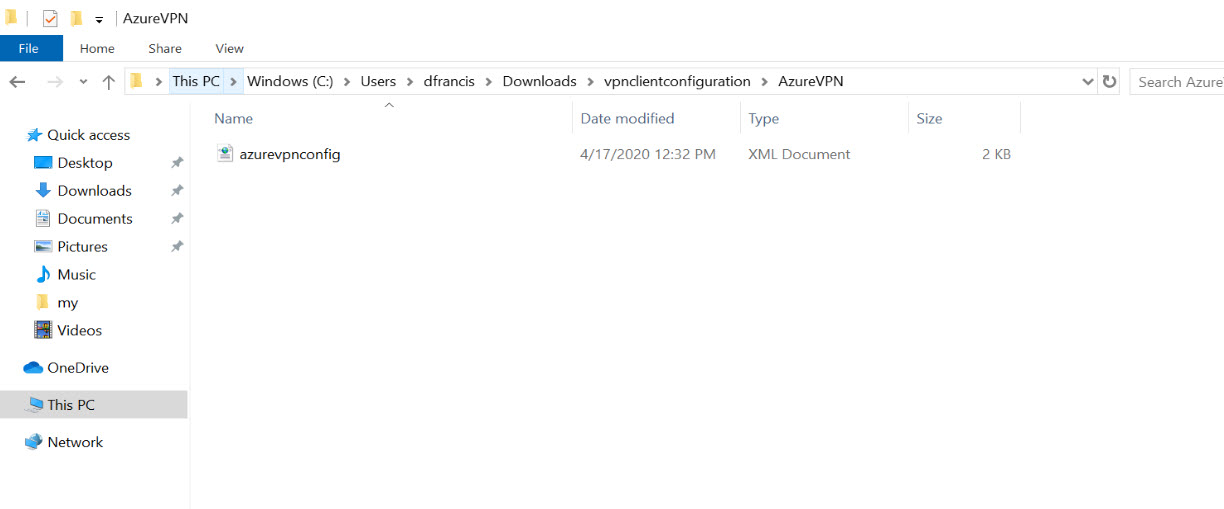
7. Extract it and confirm if you can see azurevpnconfig.xml in vpnclientconfiguration\AzureVPN
Configure VPN Client
1. Log in to the client computer.
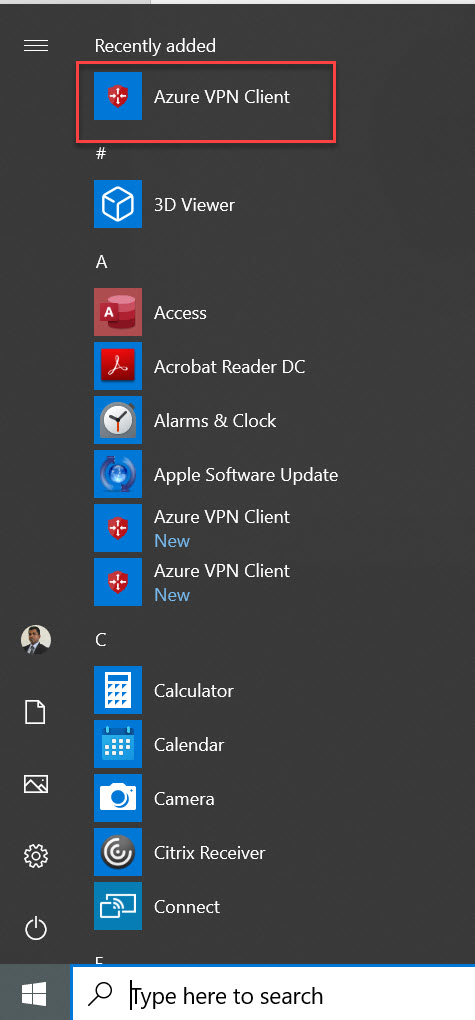
2. Install VPN client from https://www.microsoft.com/p/azure-vpn-client-preview/9np355qt2sqb?rtc=1&activetab=pivot:overviewtab
3. Once the installation is completed, launch the app.
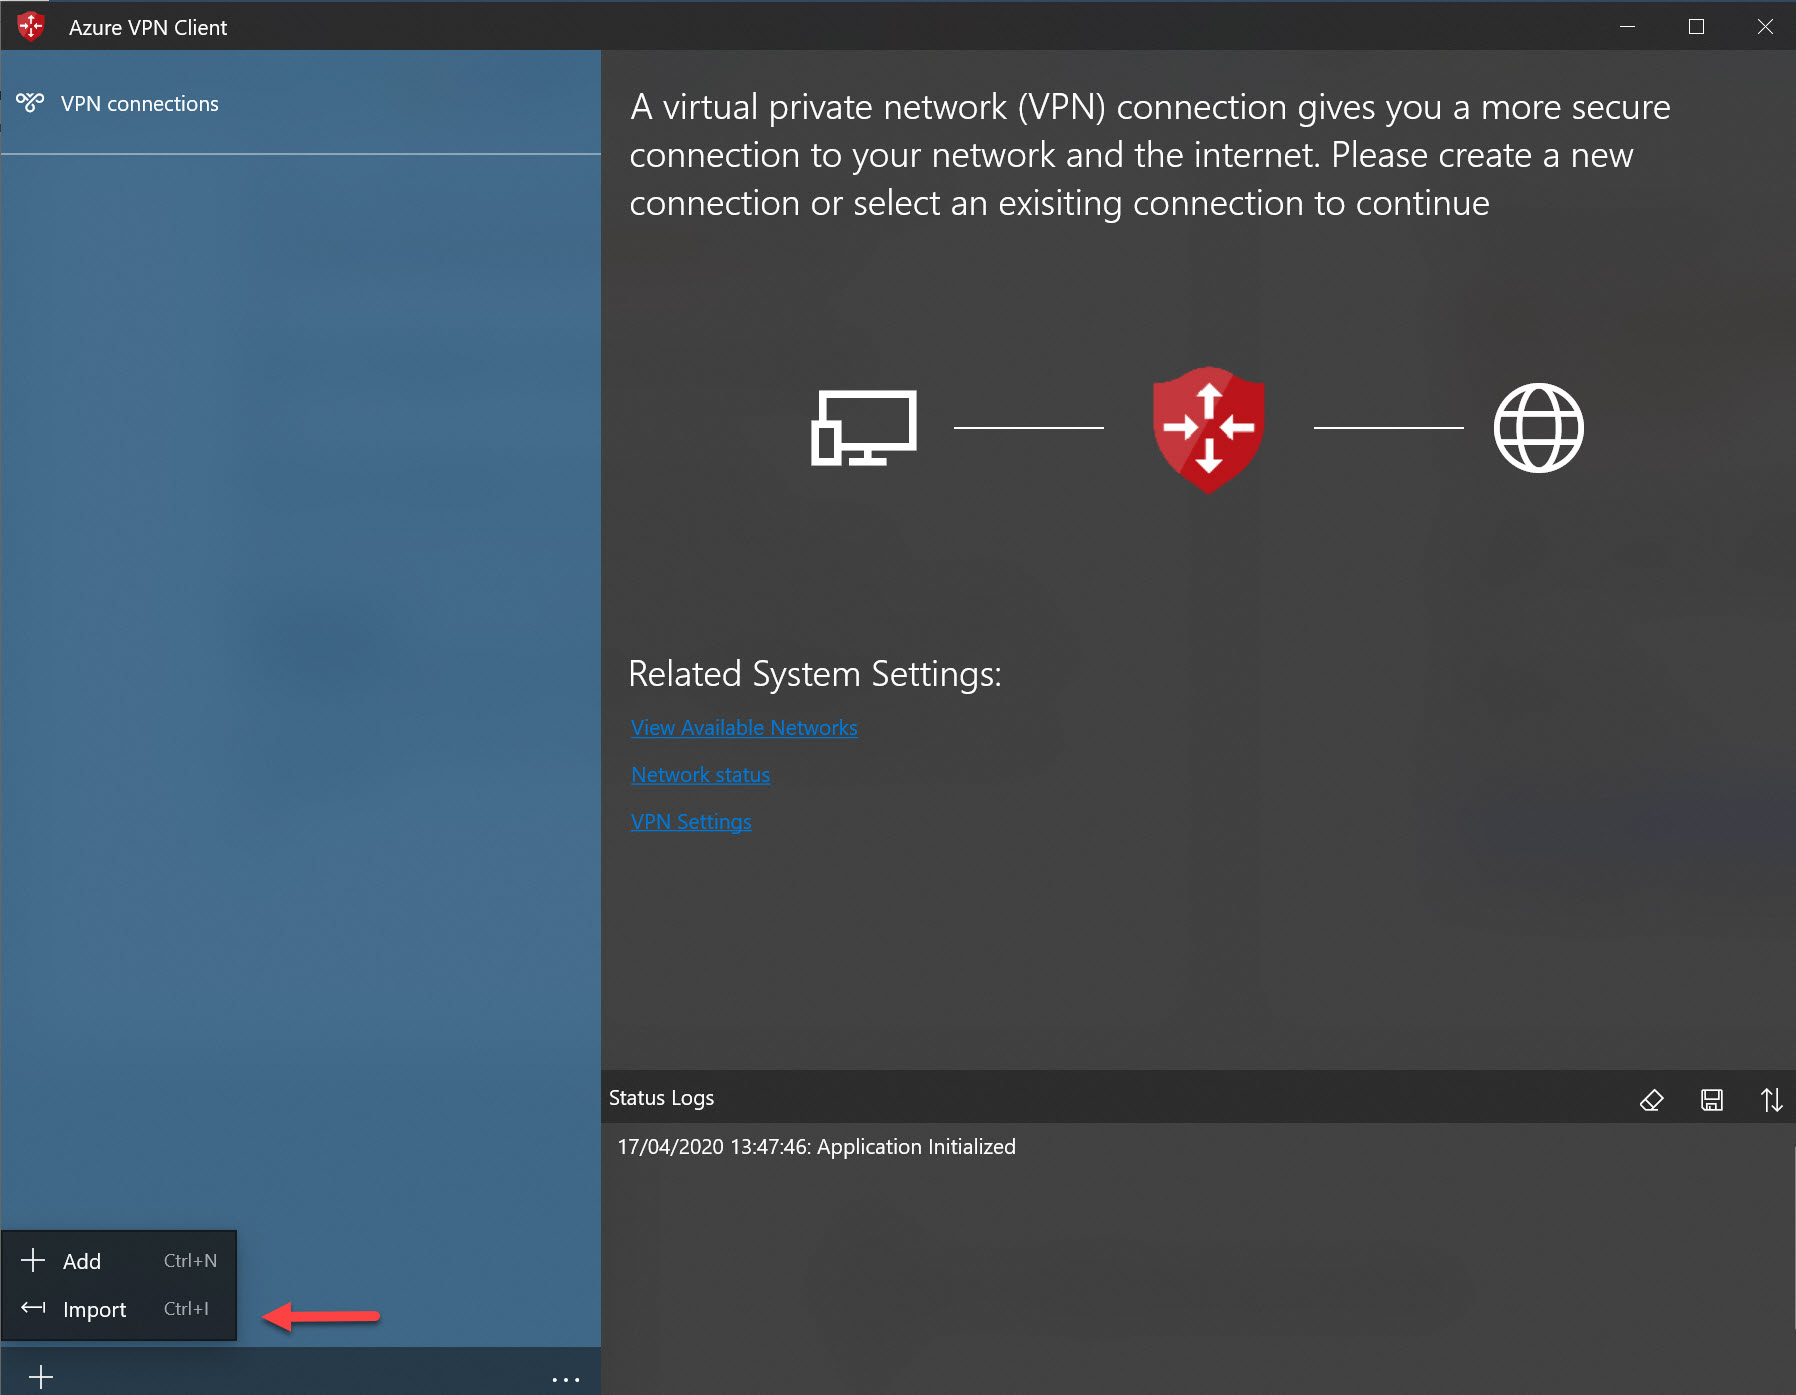
4. In application, click on the Import option to import the VPN settings.
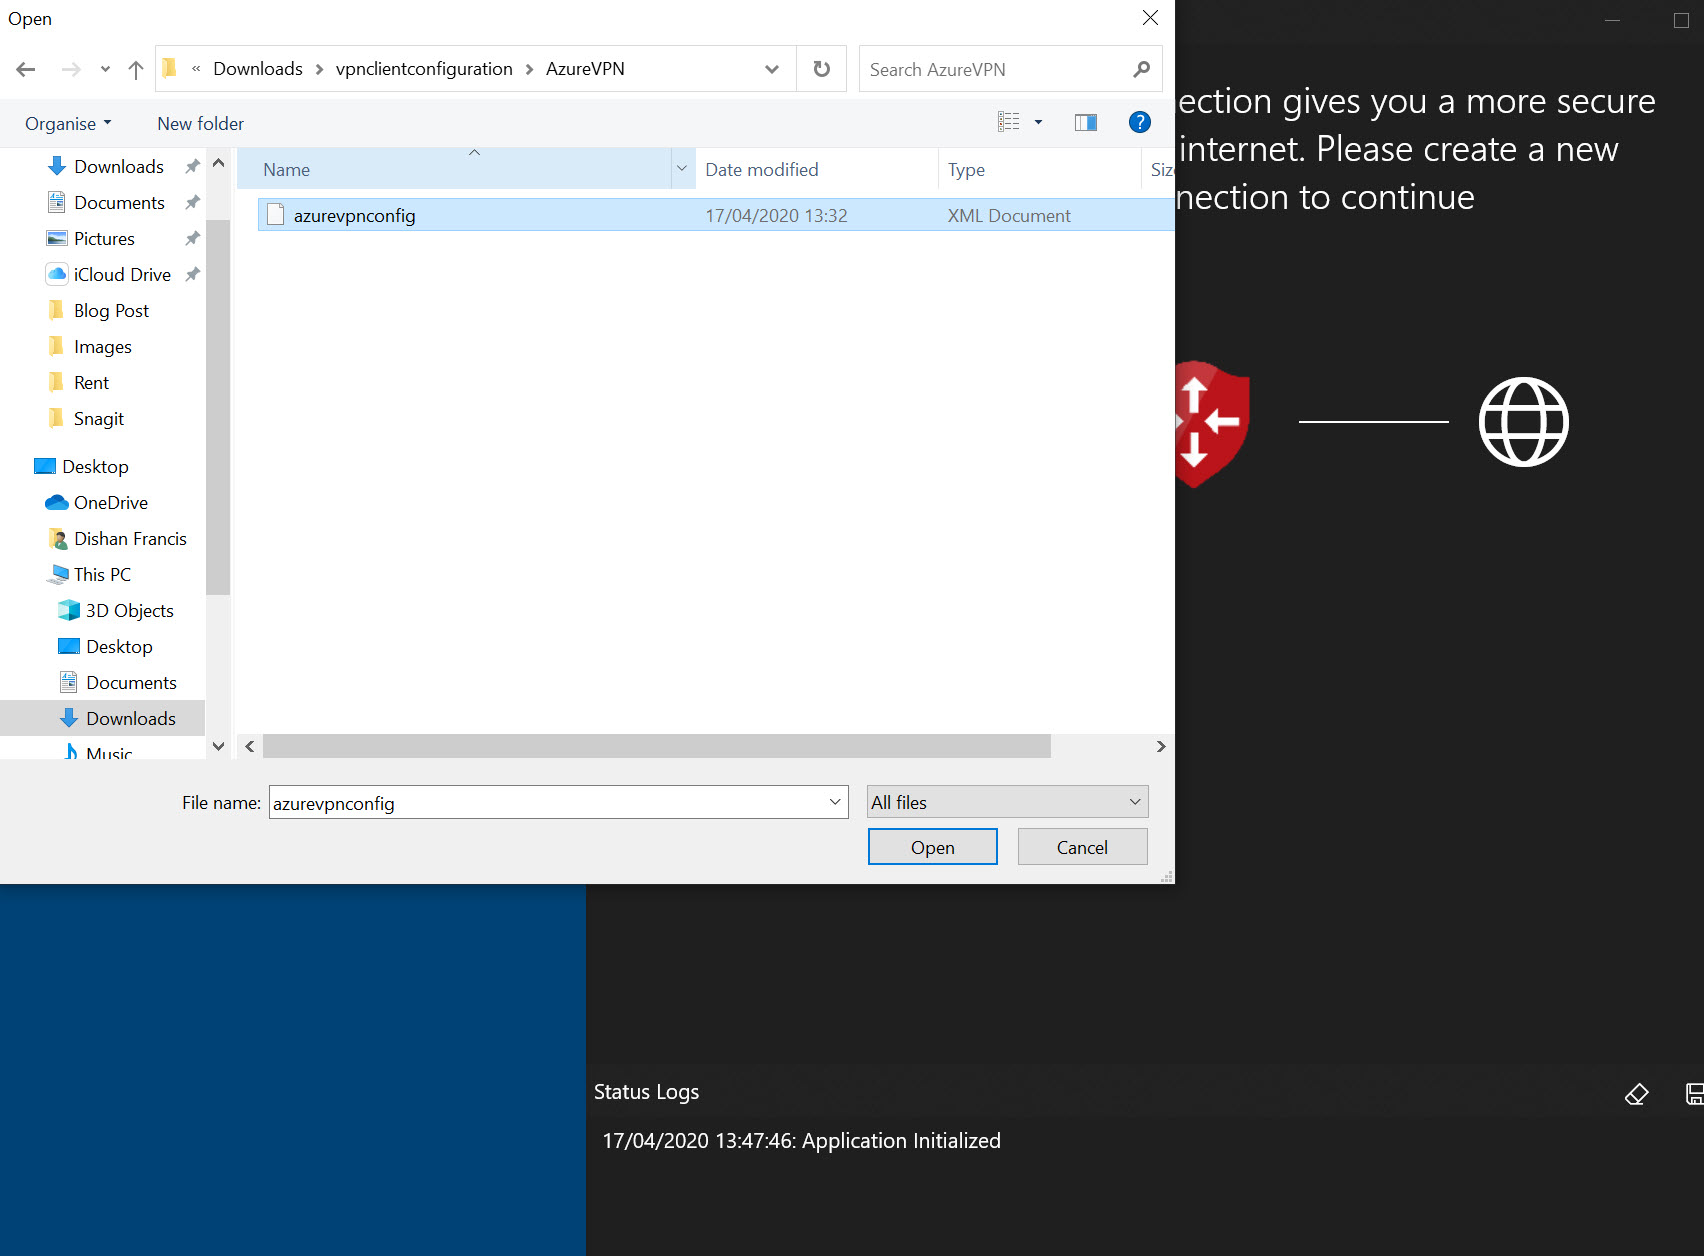
5. Then browse and select the azurevpnconfig.xml file we downloaded.
6. In the app window, we can see the imported config, click on Save to complete the import process. As we can see authentication type is set to Azure Active Directory.
Azure P2S VPN Testing
Now it’s time for testing.
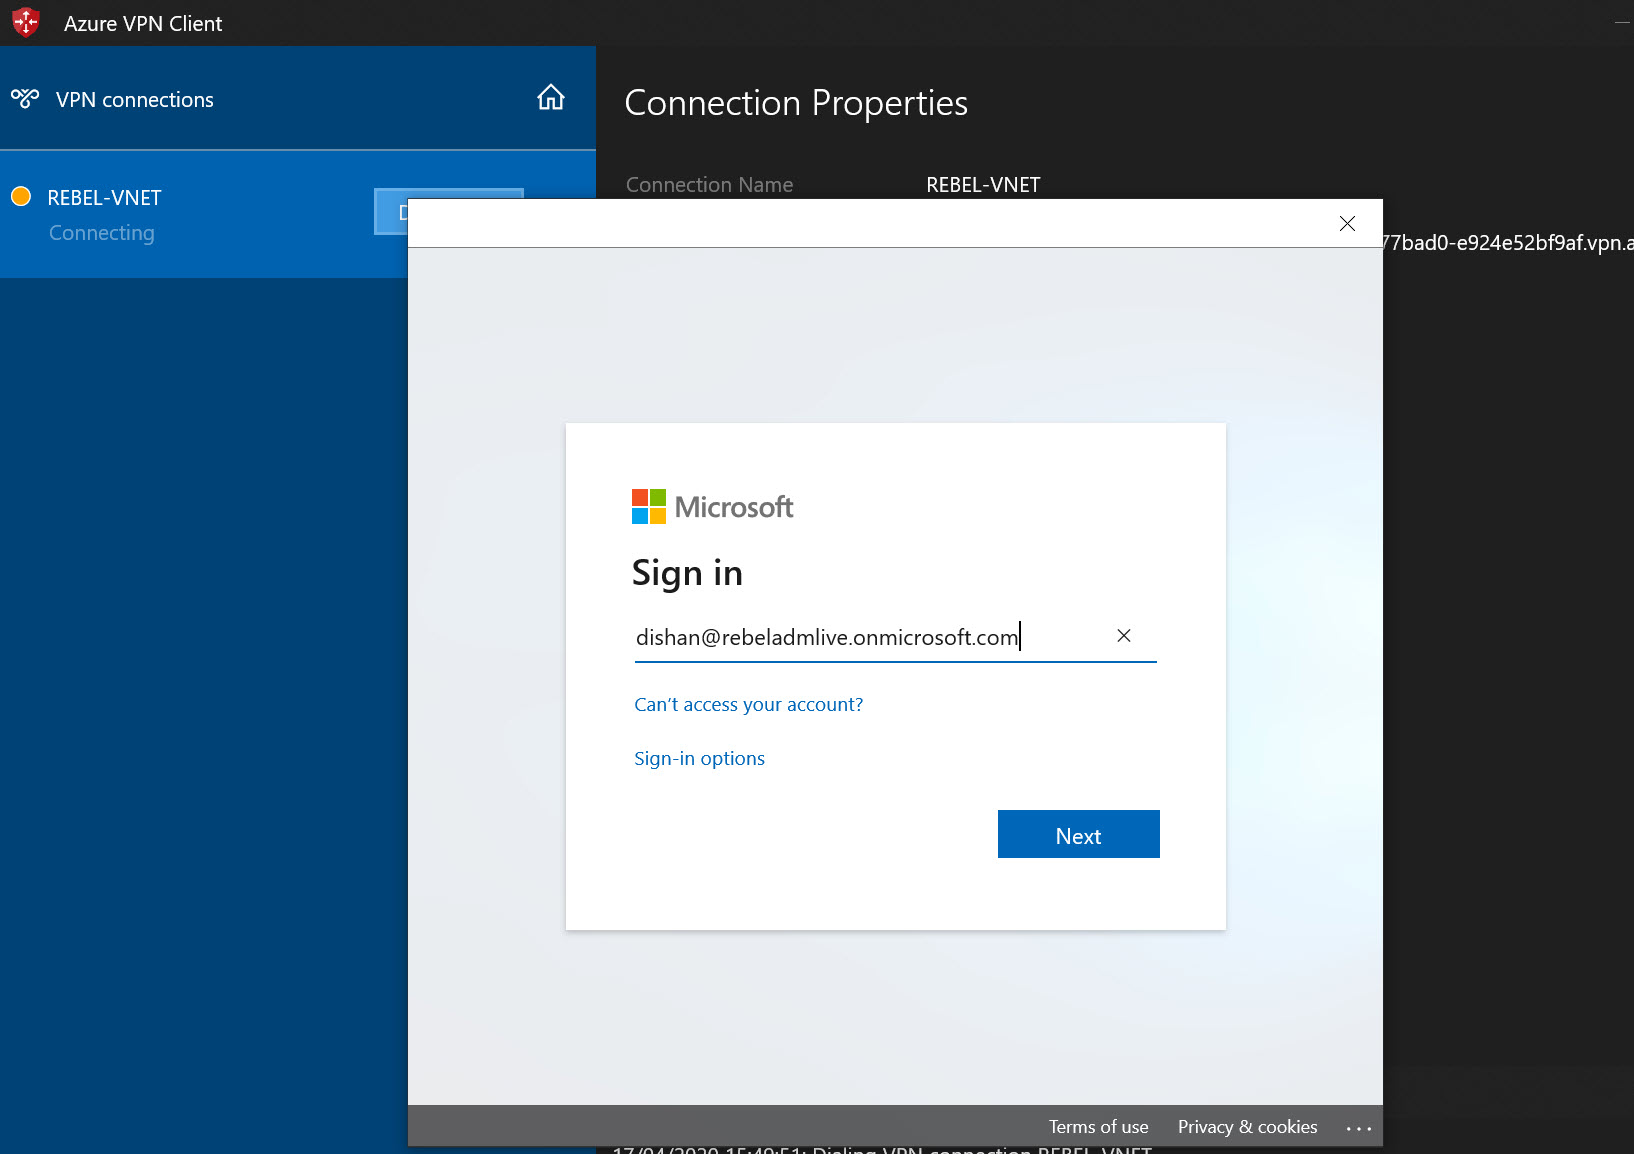
I open up the VPN client and click on Connect

It opens up the Azure AD login window, I type the user name and click on Next.
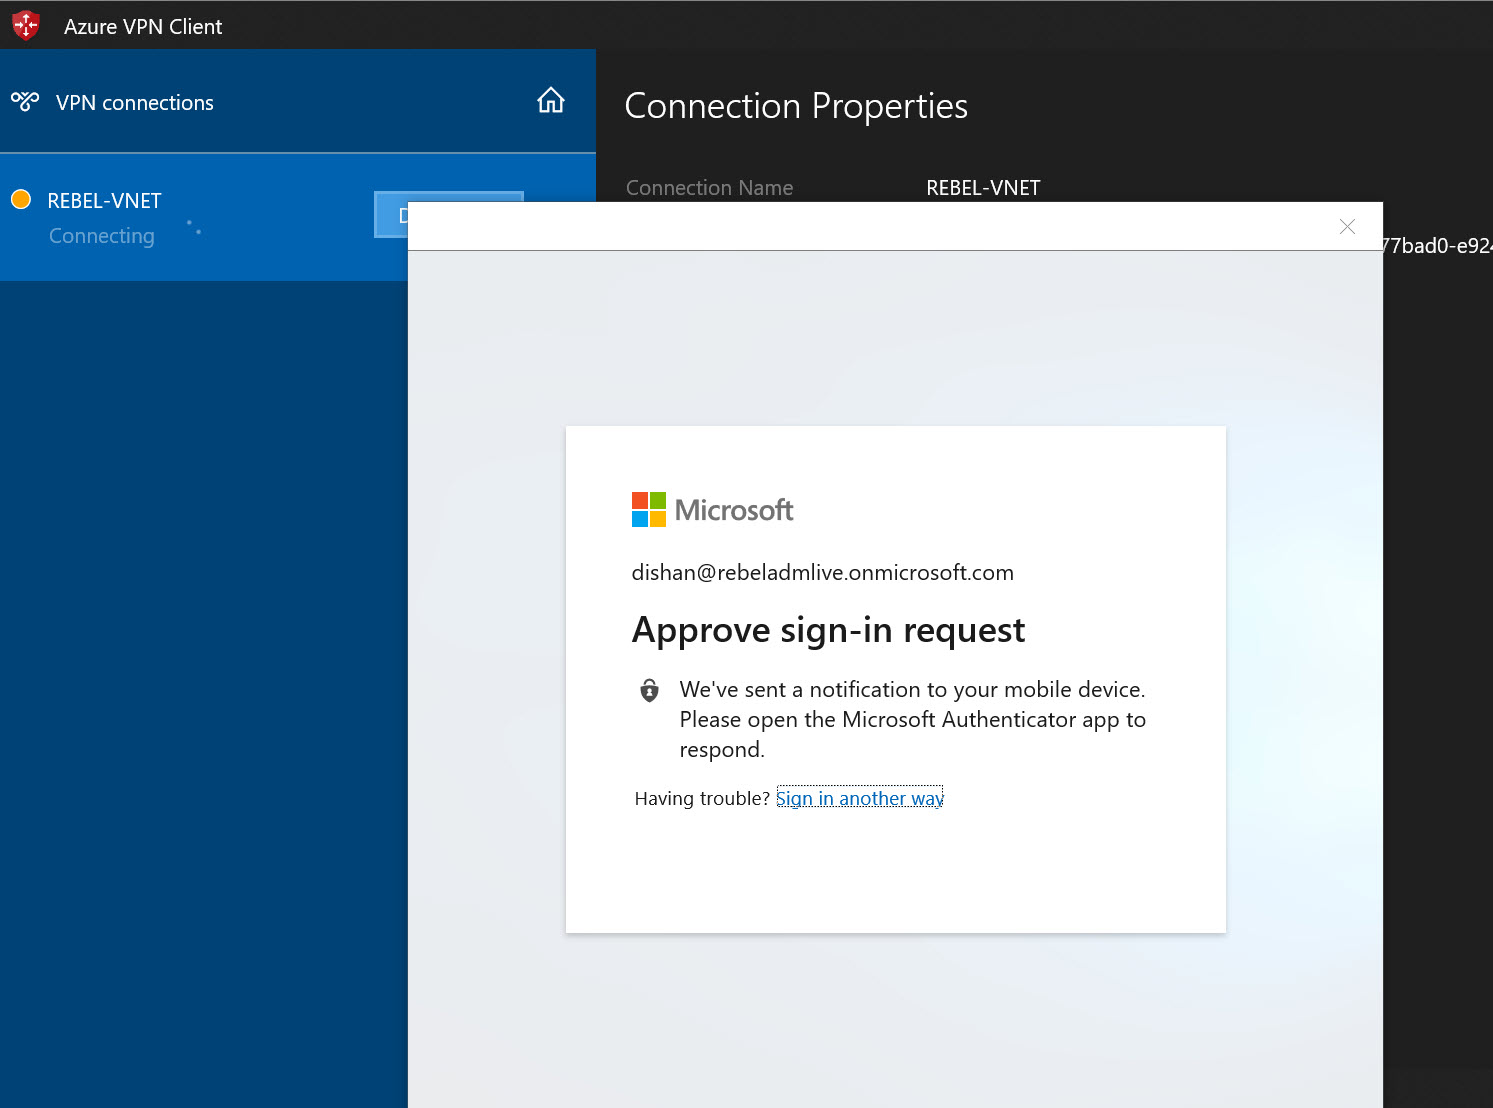
Then I type the password in the next window and click on Sign in

It prompts for MFA and I have to approve it from the authenticator app.
After approval VPN session is initiated successfully.
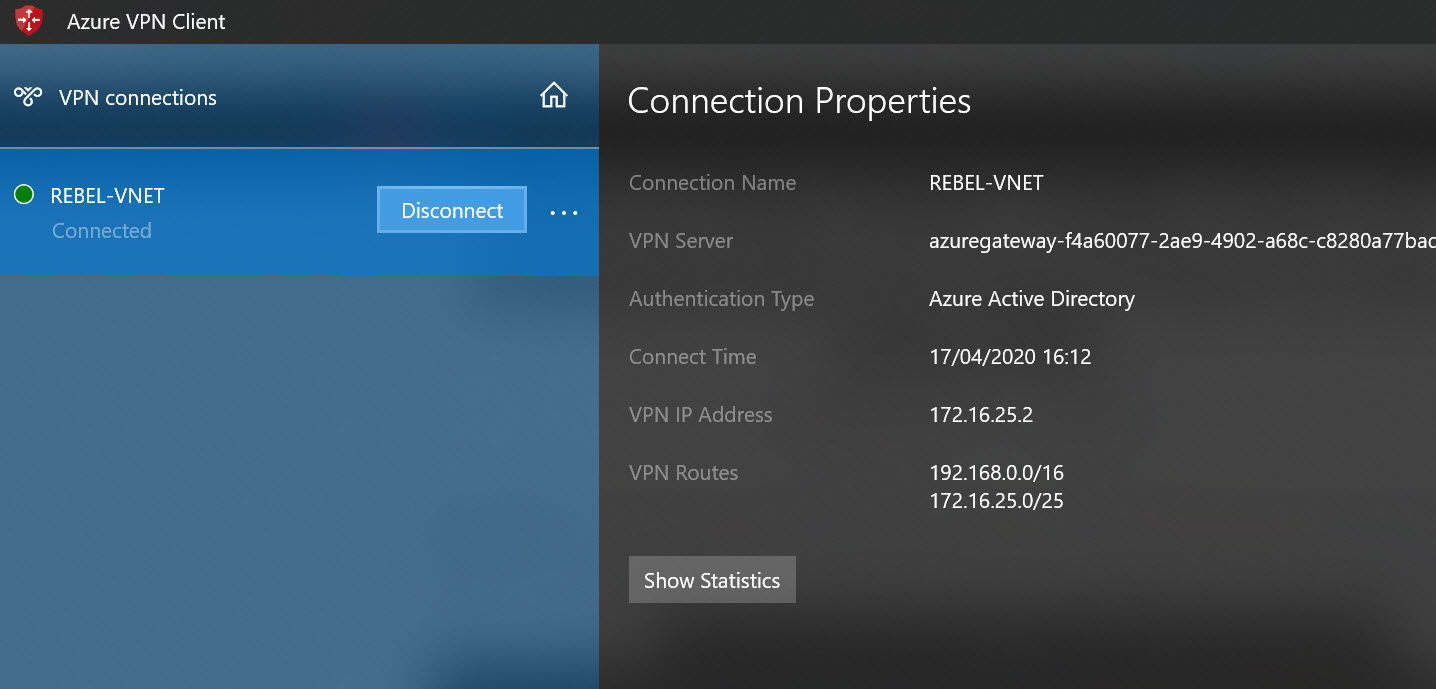
As we can see Azure AD authentication is working successfully with Azure Point-to-Site (P2S) VPN. This marks the end of this blog post. I hope now you have a better understanding of how to set up Azure Point-to-Site (P2S) VPN with Azure AD authentication. If you have any questions feel free to contact me on rebeladm@live.com also follow me on twitter @rebeladm to get updates about new blog posts.


Hi Thank you for the how-to guide! I was wondering I didn’t see the part of doing the certificate… we don’t need that for this VPN configuration? thanks again!
No , we do not need to configure certificate as we are using Azure AD authentication.
Thanks! and what is the best way to monitor this?
Thank you for the How to guide. How do set MFA to prompt for each login?