
In my previous blog posts, I explained what Azure information protection is and how we can use it to do data classification and protect sensitive data. In those, I was using data stored in corporate OneDrive accounts. But in most cases organizations use on-premises file servers. in this blog post I am going to explain how we can use Azure information protection with on-premises file shares.
To do this we are going to use component called Azure Information Protection Scanner. This comes with Azure Information Protection add-on that we normally install in user computers.
Pre-requisites
1) Windows Server 2012 R2 or newer
2) Minimum SQL Server 2012 (Express, Standard or Enterprise)
3) Service Account to run the service – Ideally this should be AD sync account and should have log on locally & log on as a service permission. If you have lockdown environment, you can use local account to run service and separate Azure AD account to do authentication. In my demo I am going to use this method.
4) The Azure Information Protection client installed
5) Classification with automatic protection – More details can find under http://www.rebeladmin.com/2018/12/step-step-guide-automatic-data-classification-via-azure-information-protection/
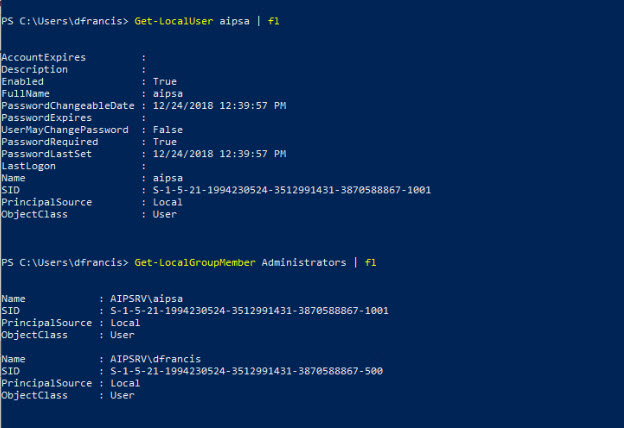
Create Service Account
In my demo server I have created a local user called aipsa and assign local administrator rights.
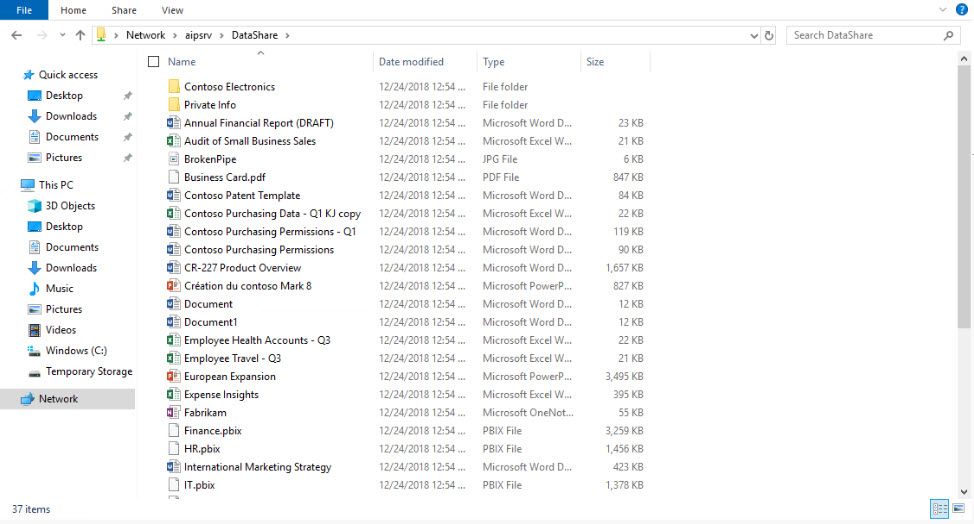
File Share
For demo purpose I have created a file share called DataShare and add different types of files to it.
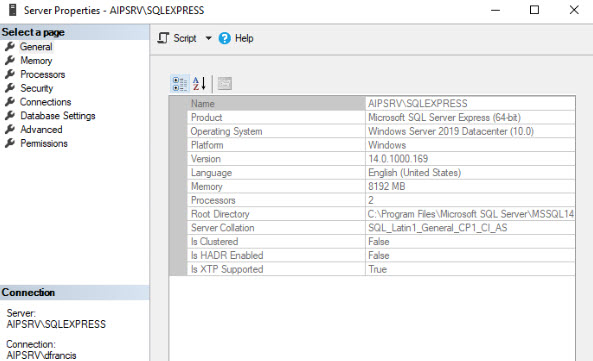
SQL Server 2017 Express
In my demo server I have SQL Server 2017 Express installed. This will use for AIP Scanner.
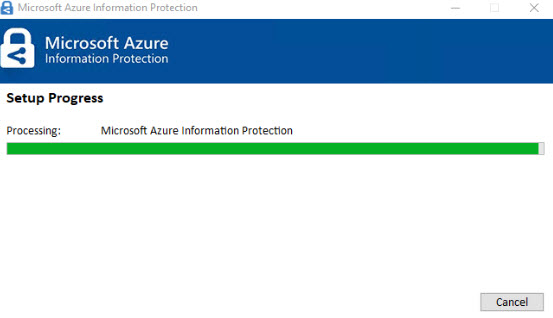
AIP Client Install
We need full AIP client install before we start the scanner configuration.
1) Log in to the server as Administrator
2) Download AIP client from https://www.microsoft.com/en-gb/download/details.aspx?id=53018
3) Run the AzInfoProtection.exe as Administrator
4) Accept terms & conditions in first screen
5) It will start the installation
Install AIP Scanner
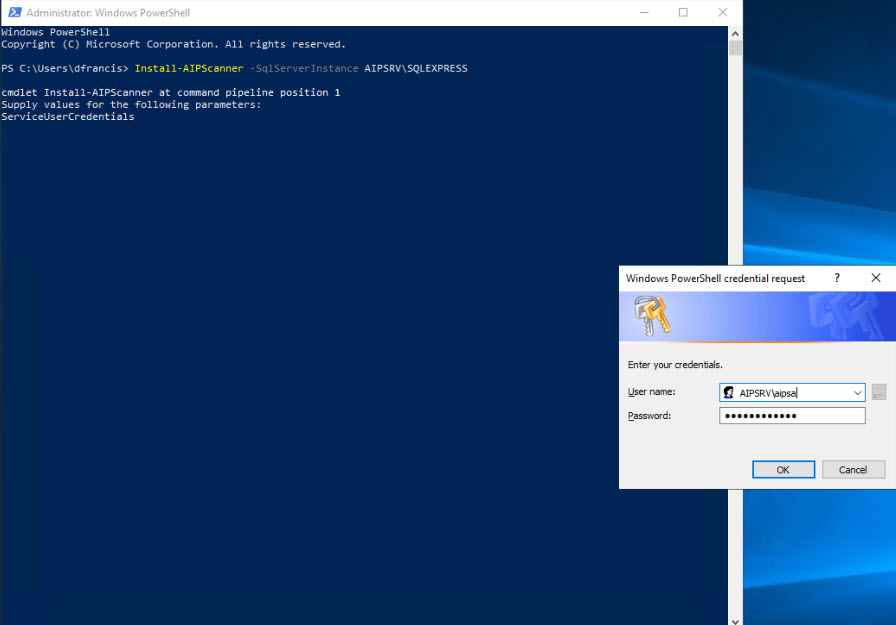
1) Log in to the Server
2) Run PowerShell as Administrator
3) Then run Install-AIPScanner -SqlServerInstance AIPSRV\SQLEXPRESS , in above command AIPSRV\SQLEXPRESS is the SQL instance running on the server
4) When it prompts for the login, type the service account we created in earlier step.
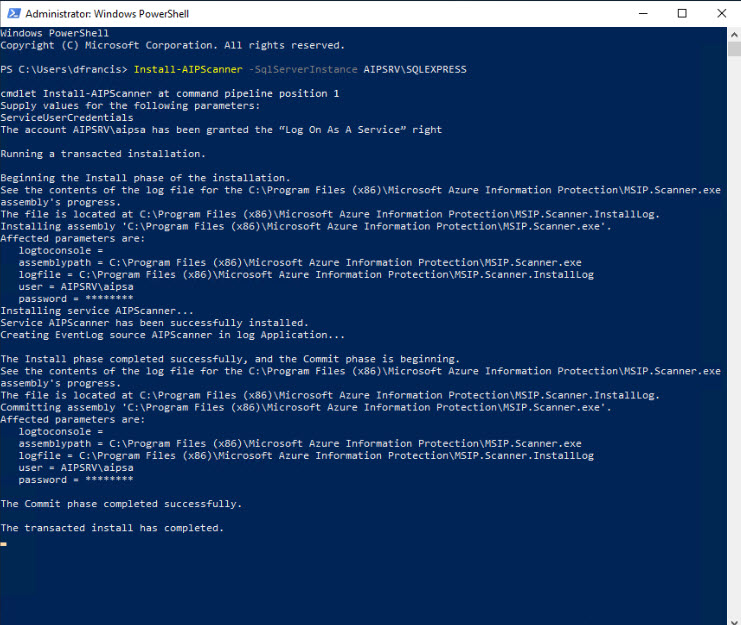
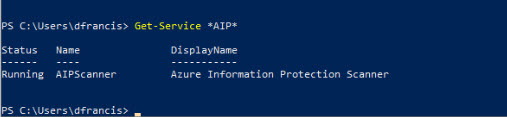
5) Once installation is completed, we can see the service is running under services.
Create Azure AD Token for the AIP Scanner
We need token to allow AIP scanner service account to authenticate AIP service. To create that,
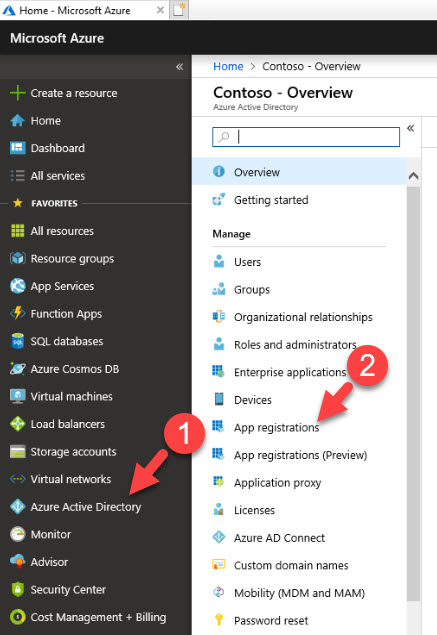
1) Log in to the server
2) Launch https://portal.azure.com
3) Log in to the portal as Global Administrator
4) Then go to Azure Active Directory > App registrations
5) Then click on New application registration
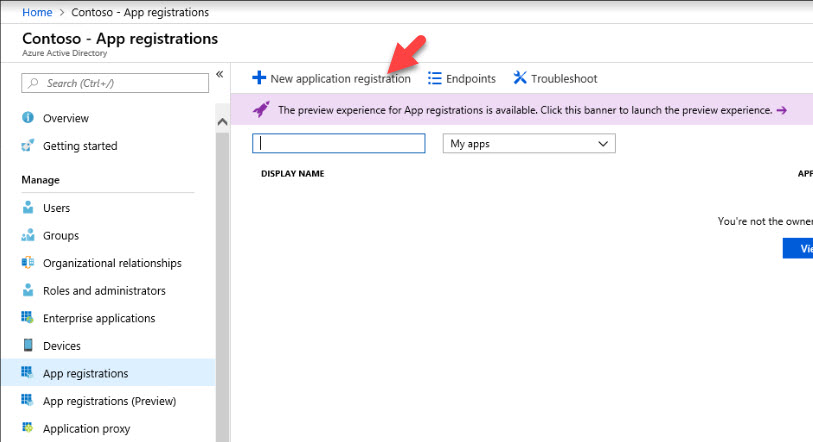
6) In new window type,
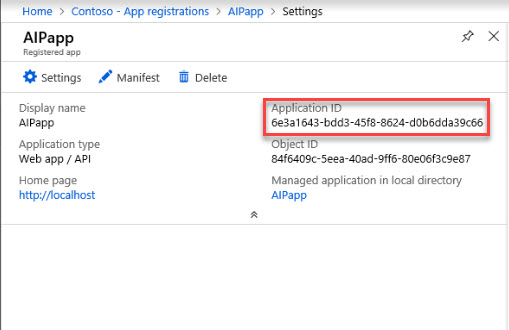
Name – AIPapp (This needs to be unique)
Application Type – Web app /API
Sign-on URL – http://localhost
Then click on Create

7) Once it is created, copy the Application ID value and save it as we need it for future configuration.
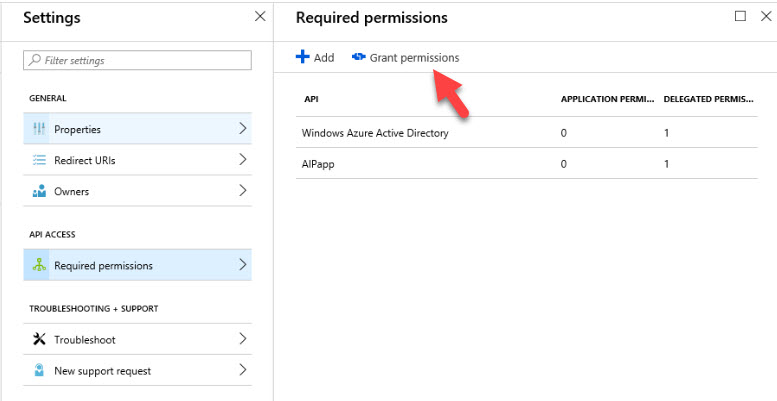
8) Then under application settings click on Required permissions | Grant Permissions
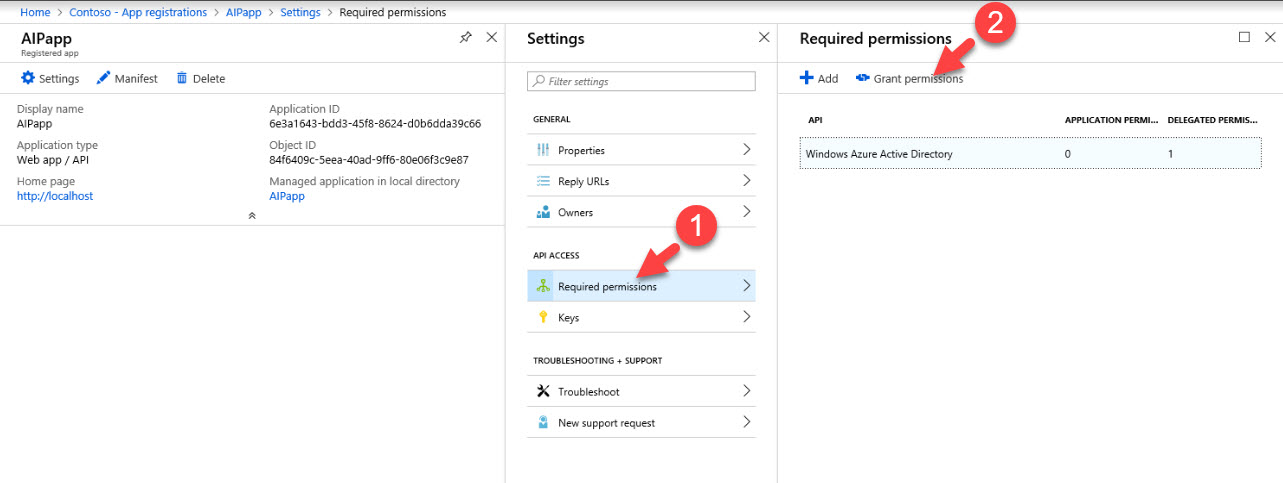
9) Then click on Yes

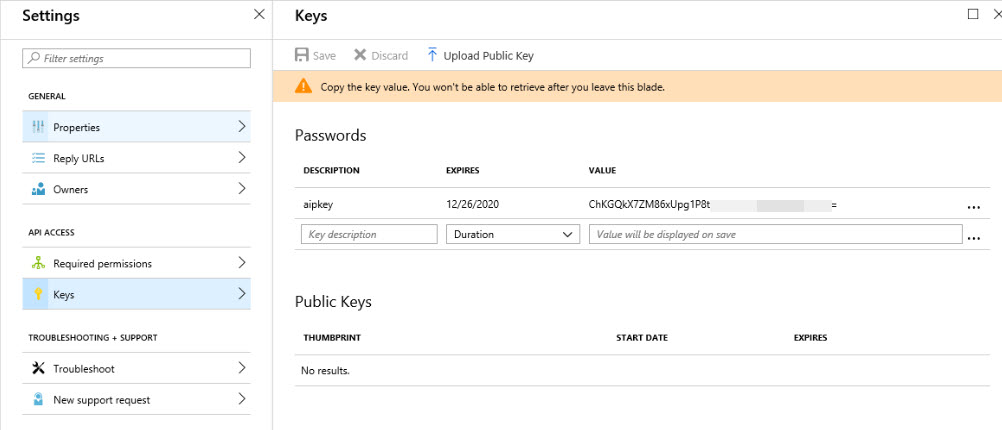
10) Then go to Keys and create a key. copy the key value to safe place as this will be the value use in future for WebAppKey parameter.
11) Go back to application registration and create another app using following settings,
Name – AIPfront (This needs to be unique)
Application Type – Native
Sign-on URL – http://localhost
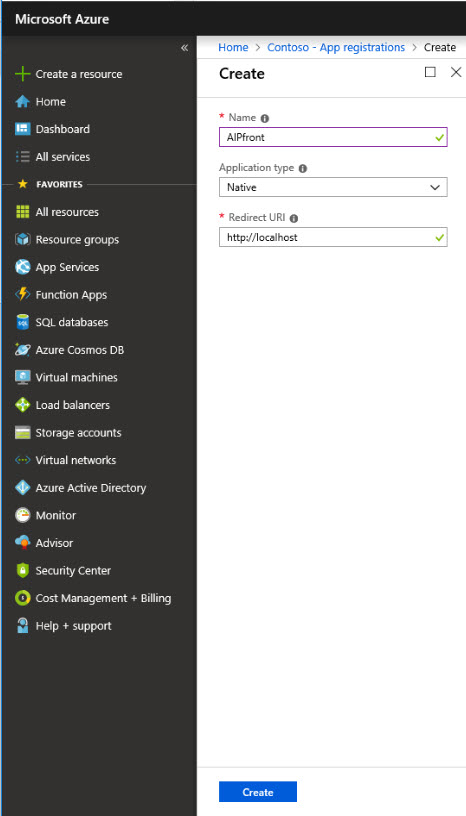
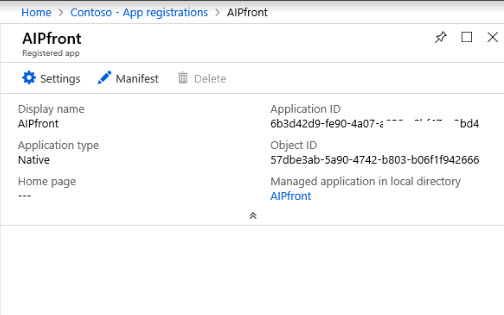
12) Once app is created, copy the Application ID and save it in safe place as it will require in future for NativeAppId parameter.
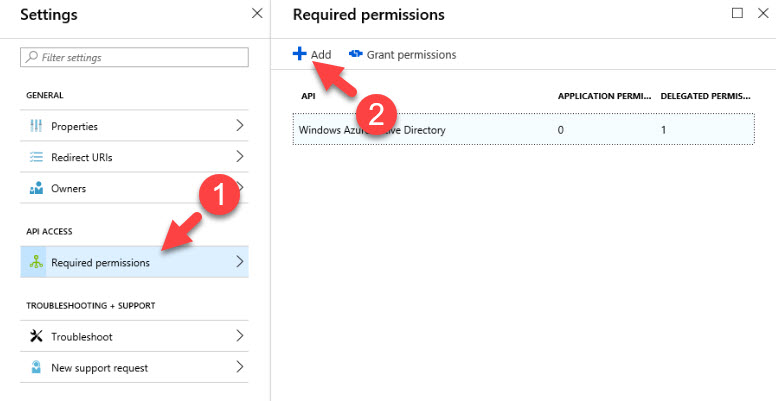
13) Then go to Required permissions | Add
14) In new window select the API created in previous step and click on Select.
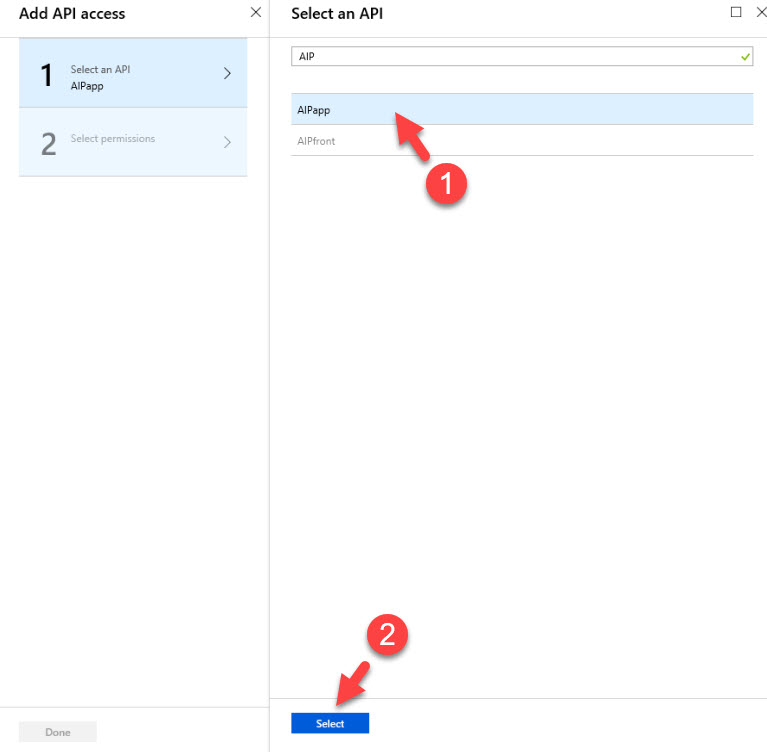
15) Then under permissions select the available access permissions and Select.
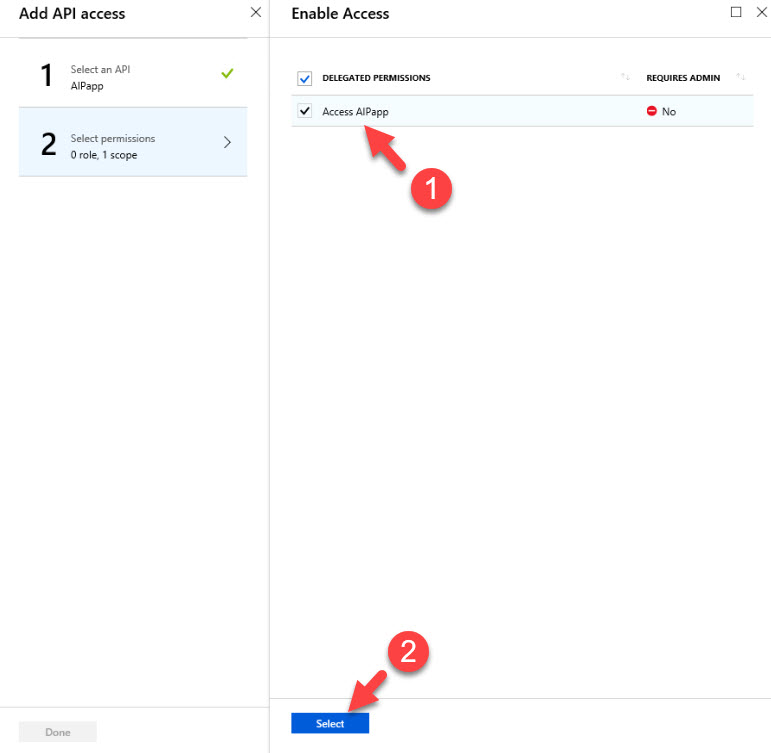
16) Click on Done to return to permissions window. Then click on Grant permissions and Yes
Grant Permissions to Service Account
We need additional configuration on permissions if AIP service account is not a Azure AD sync account.
1) Run following command as administrator,
(Set-AIPAuthentication -WebAppId "6e3a1643-bdd3-45f8-8624-d0b6dda39c66" -WebAppKey "ChKGQkX7ZM86xUpg1P8tYVJ9K2sXKjeZRLf3x19qIeA=" -NativeAppId "6b3d42d9-fe90-4a07-a686-a0bf47ee2bd4").token | clip
In above, change WebAppId, WebAppKey & NativeAppId values according to information gathered in previous steps.
When prompt log in using Azure AD account for AIP authentication
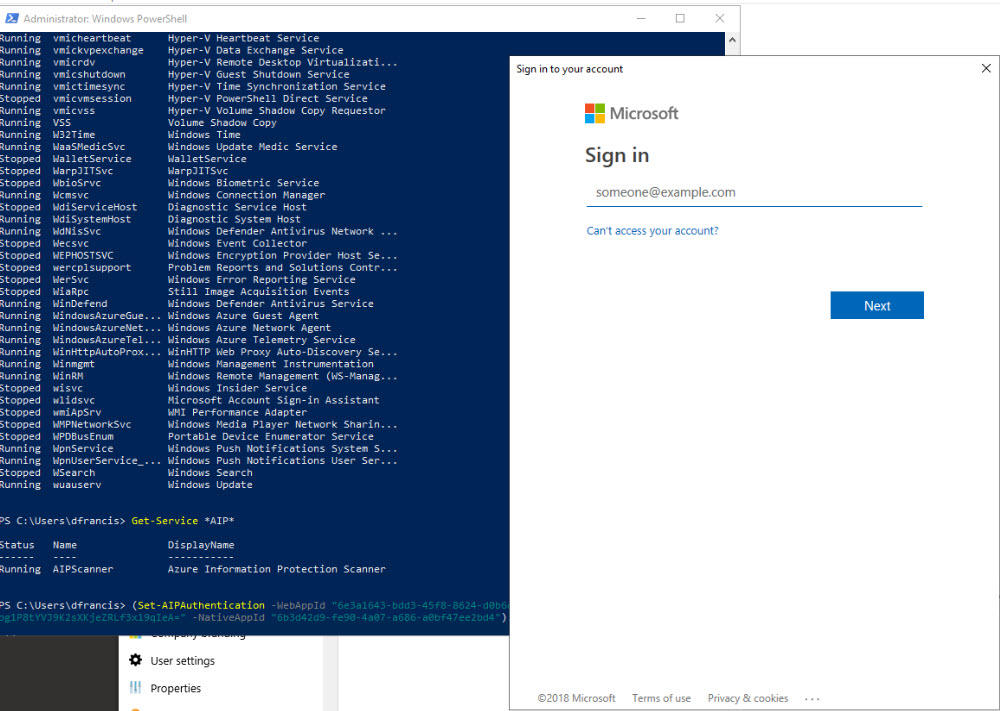
This will copy the token value to the clipboard, save it to a safe place.
2) Create PowerShell script with following and save it in the computer.
Set-AIPAuthentication -WebAppId "6e3a1643-bdd3-45f8-8624-d0b6dda39c66" -WebAppKey "ChKGQkX7ZM86xUpg1P8tYVJ9K2sXKjeZRLf3x19qIeA=" -NativeAppId "6b3d42d9-fe90-4a07-a686-a0bf47ee2bd4" -Token
In above replace the
3) Then run Set-ExecutionPolicy RemoteSigned in same computer and it will allow script to run without issue.

4) Create Task schedule using task scheduler with following to run the script.
Action – Start a Program
Program – Powershell.exe
Argument – -NoProfile -WindowStyle Hidden -command "&{C:\aipscript.ps1}"
When save the script use the service account details.
Then run the script and make sure it run successfully.
Specify the data repository
Now we need to specify data repository for the scanner. In this demo I am going to use share called DataShare
To specify the path use,
Add-AIPScannerRepository -Path \\aipsrv\DataShare

You can use same to add additional repositories. You can verify repositories using,
Get-AIPScannerRepository
Set Scanner to Apply Classifications
by default, scanner is running on report-only mode. To force it start the classification use
Set-AIPScannerConfiguration -Enforce On -Schedule Always
Then to start scanning
Start-AIPScan
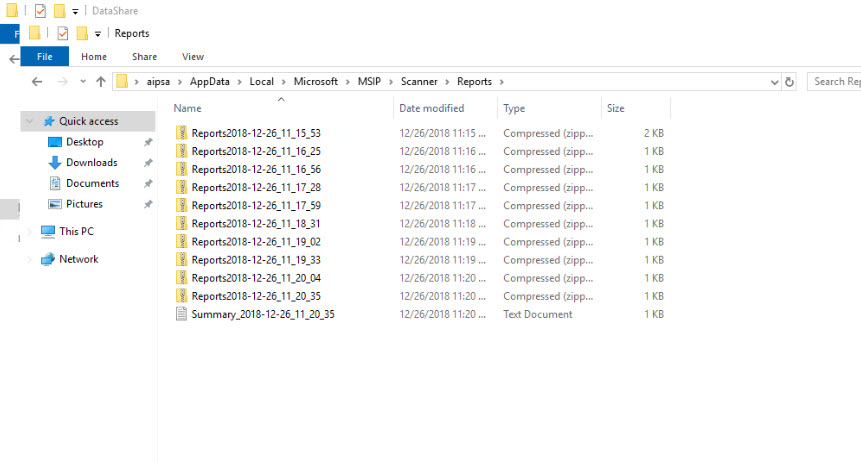
Then it is all good to go. You can review reports for scanning under %localappdata%\Microsoft\MSIP\Scanner\Reports
[su_note]This data is located under service user profile[/su_note]

You also can see the local server under Azure Portal | Azure Information Protection | Nodes (preview)
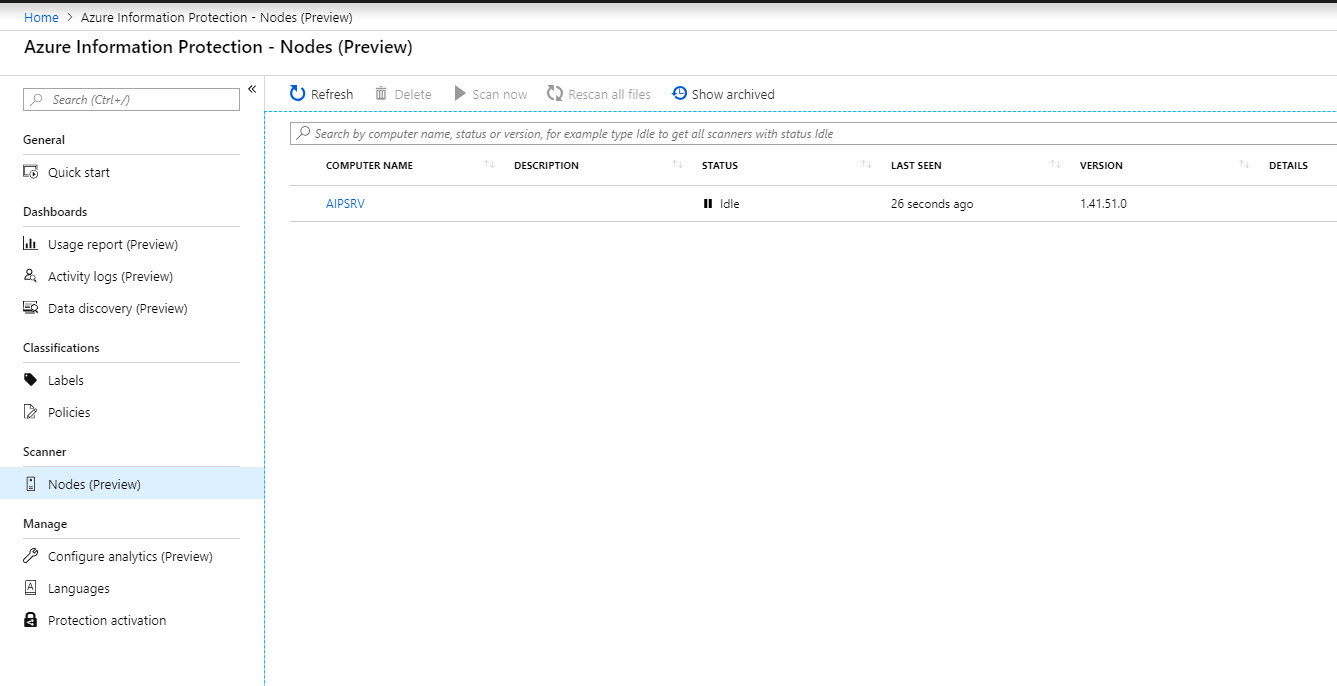
We also can force scan using the portal.
This completes the configuration and now you have azure information protection classification and protection for your on-premises data too. This marks the end of this blog post. If you have any further questions feel free to contact me on rebeladm@live.com also follow me on twitter @rebeladm to get updates about new blog posts.


Good job mate, Thanks for all the details.
So you ripped this post straight from (see link) and claimed it as your own! Class
https://connectioncloudsupport.zendesk.com/hc/en-us/articles/4405498477849-Step-by-Step-Guide-On-premise-Data-Protection-via-Azure-Information-Protection-Scanner#:~:text=%20Create%20Azure%20AD%20Token%20for%20the%20AIP,Required…%209%20Then%20click%20on%20Yes%20More%20
Next time at lease check the publish date 🙂 then you can see who copied the post. Also see the screenshot of SQL installation, it even have my name lol