
Azure point-to-site VPN means VPN tunnel between end-point & Azure without using corporate firewall. I have already written a complete guide on how to create point-to-site VPN with Azure. You can access it using http://www.rebeladmin.com/2018/07/step-step-guide-azure-point-site-vpn/
The above method includes many different tasks which we need to perform in both azure and on-premise to get it going. With Windows Server 2019, Microsoft introduced Azure Network Adapter which can use to create point-to-site VPN in a straightforward way. In this demo, I am going to demonstrate how we can create a point-to-site VPN using Azure Network Adapter.
This feature currently available via new Windows Admin Center. So, before you start you need to get it running in your environment. In my demo setup, I have a domain joined server which running latest Windows Admin Center (build 1809).
1. Log in to the Server as Administrator
2. Launch Windows Admin Center
3. Click on the relevant server from the list
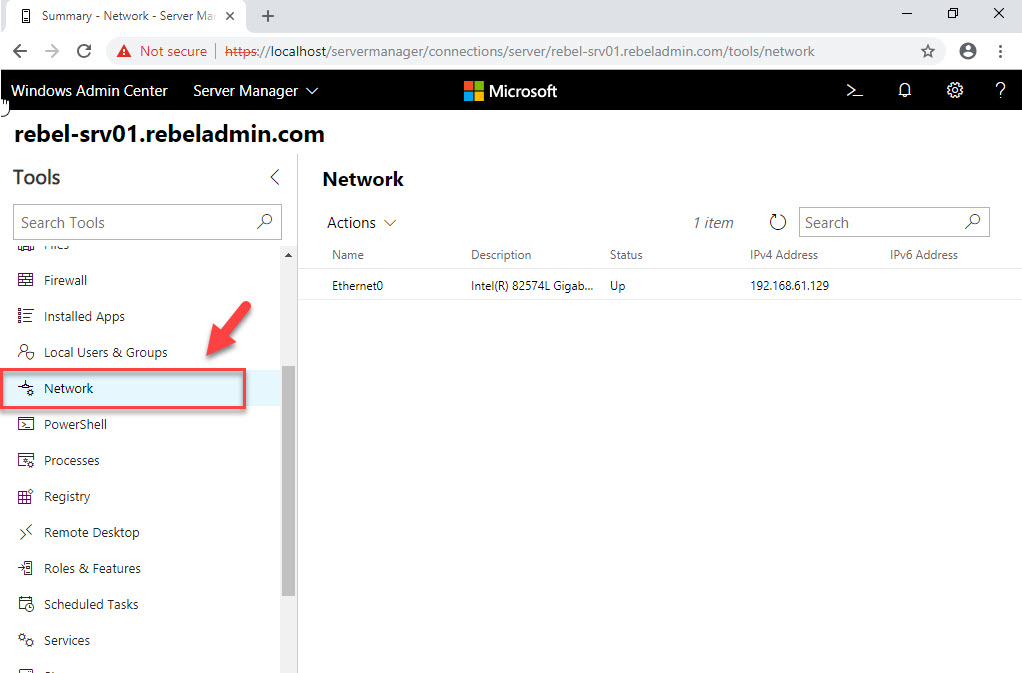
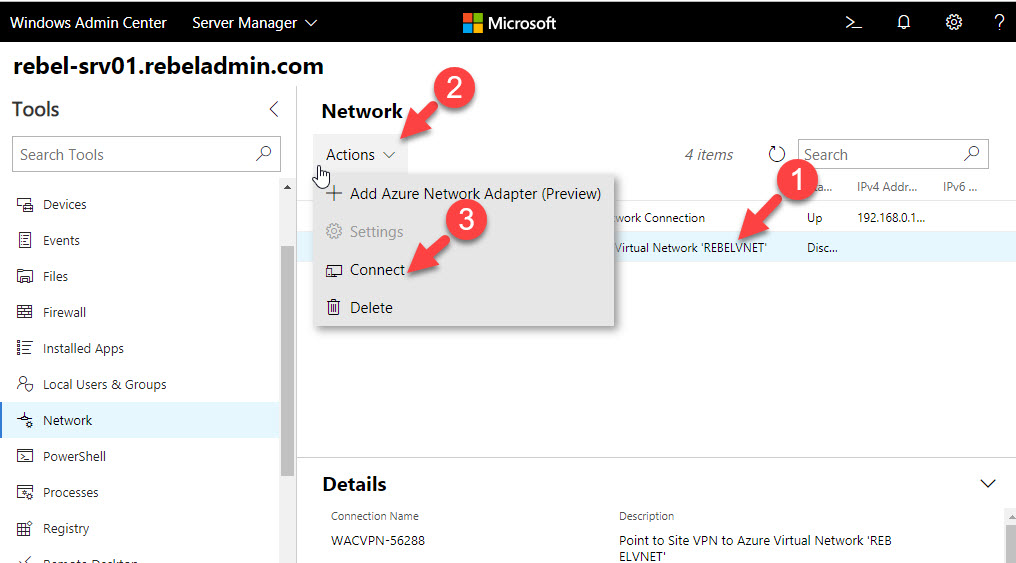
4. Click on Network
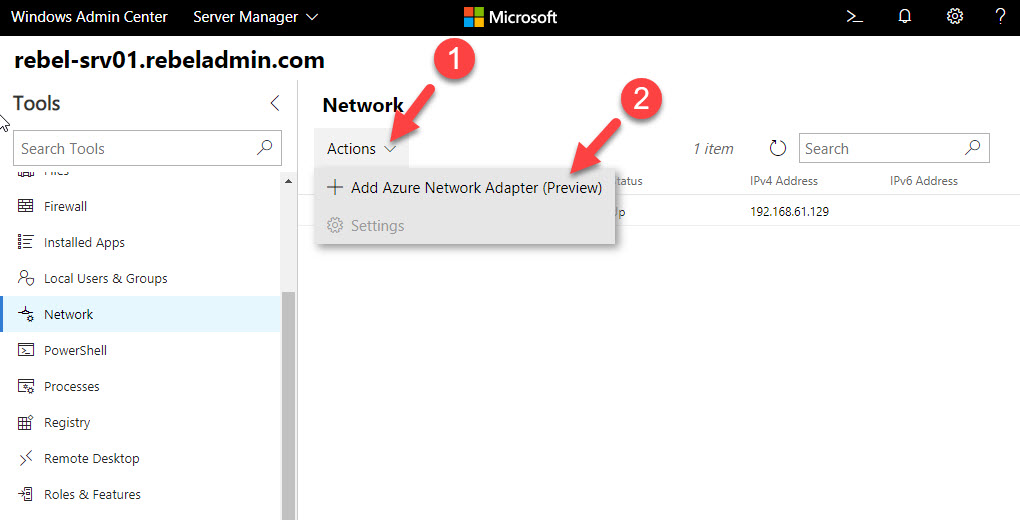
5. Then click on Actions | Add Azure Network Adapter
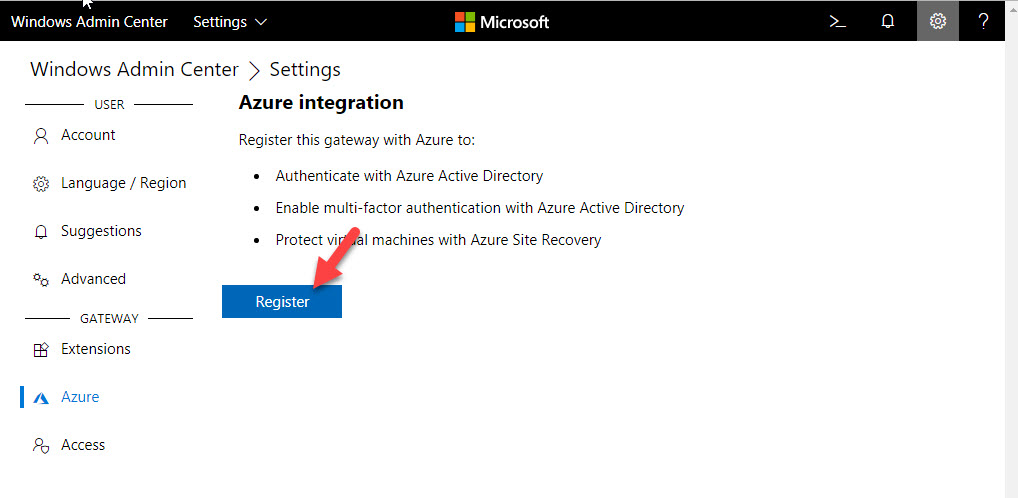
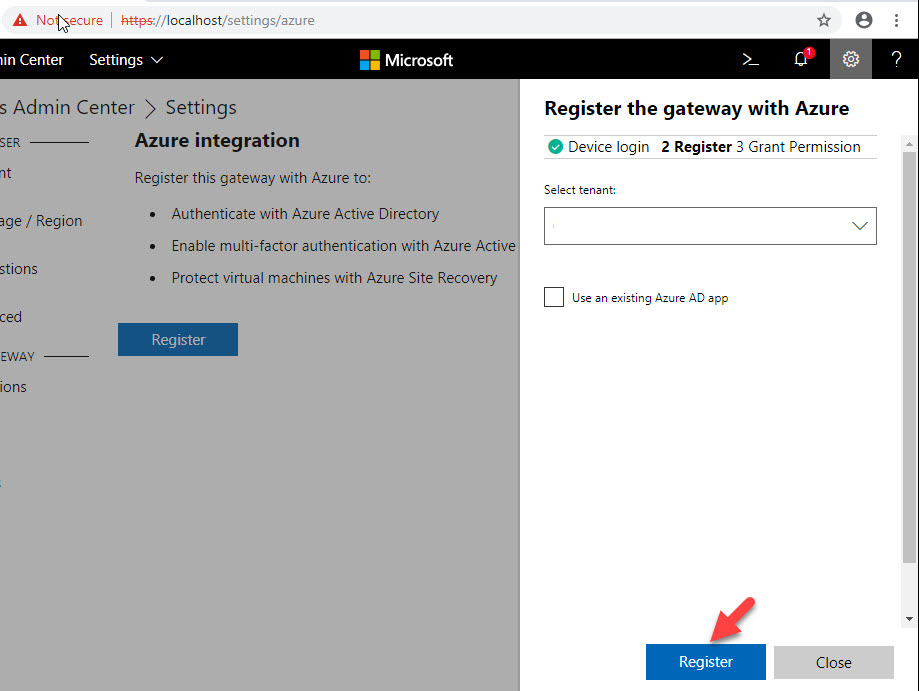
6. It will open up a pop up. Then It asks to register Windows Admin Center with Azure. Click on Register Windows Admin Center to Azure to proceed.

7. In next page click on Register
8. Then click on Device Login link and copy and paste the code in to it.

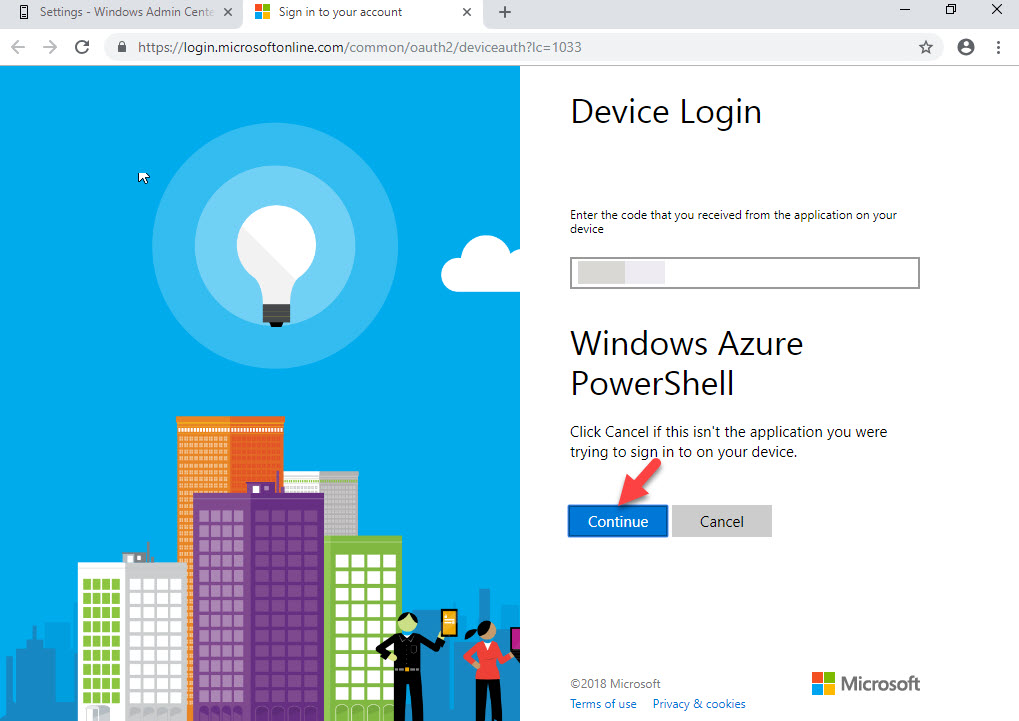
9. Type the Azure login details and complete the process. once it’s done it click on Register button again in following console.
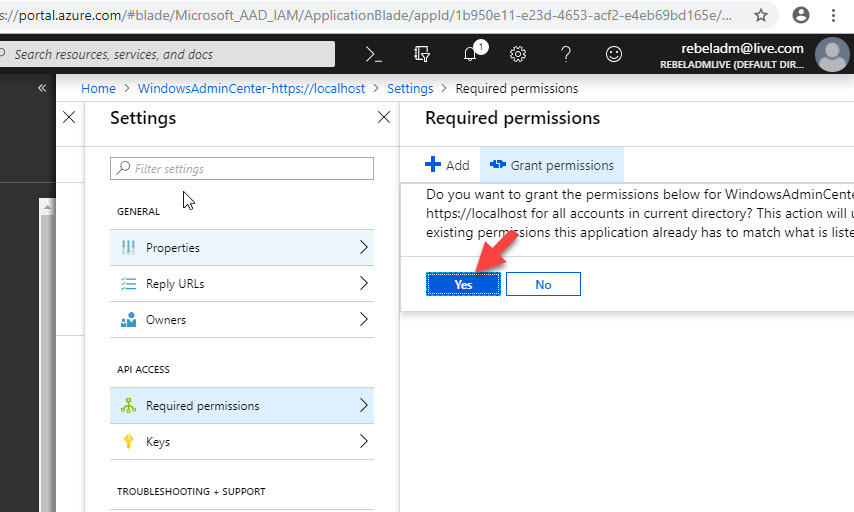
10. Then go to Azure AD App Registration page using the link in window and grant permissions.


11. Once it is done, go back to WAC | Network | Actions | Add Azure Network Adapter
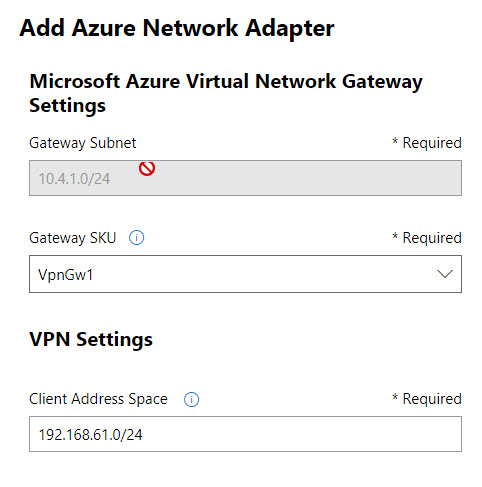
12. Then it opens up new window. In there select the region and your virtual network.

13. Under gateway subnet section, you can see the gateway subnet associated with your VNET. If you do not have gateway subnet, you need to create it first.

14. If you like to change gateway SKU, you can do it in this wizard. More info about SKUs can find in here https://azure.microsoft.com/en-gb/pricing/details/vpn-gateway/ . For certificate, I am going to use self-sign certificate. After changes, Click on Create to proceed.

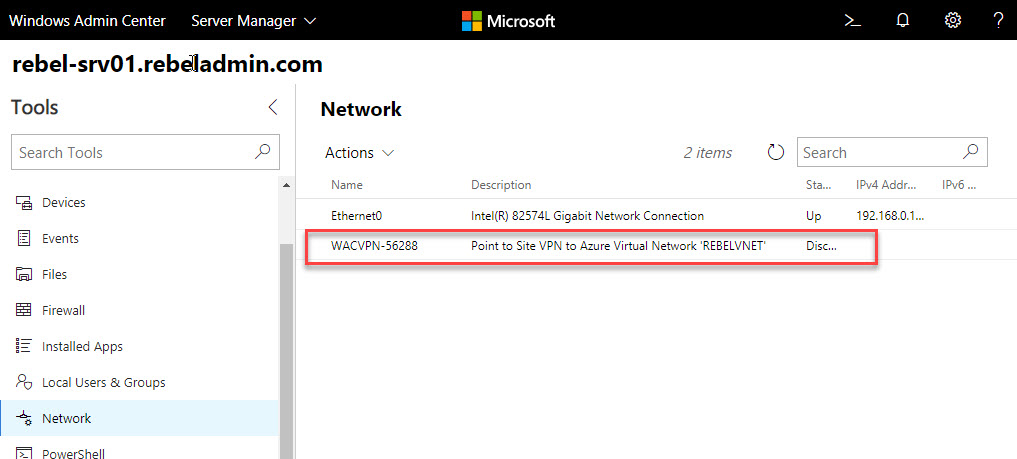
15. Once process begins, it can take up to 35 minutes to complete the process. After process completes, we can see the new Azure network adapter in WAC.
Also, we can see the new gateway under Azure virtual network gateways.

16. Let go back to WAC and click on connect to establish the VPN connection.

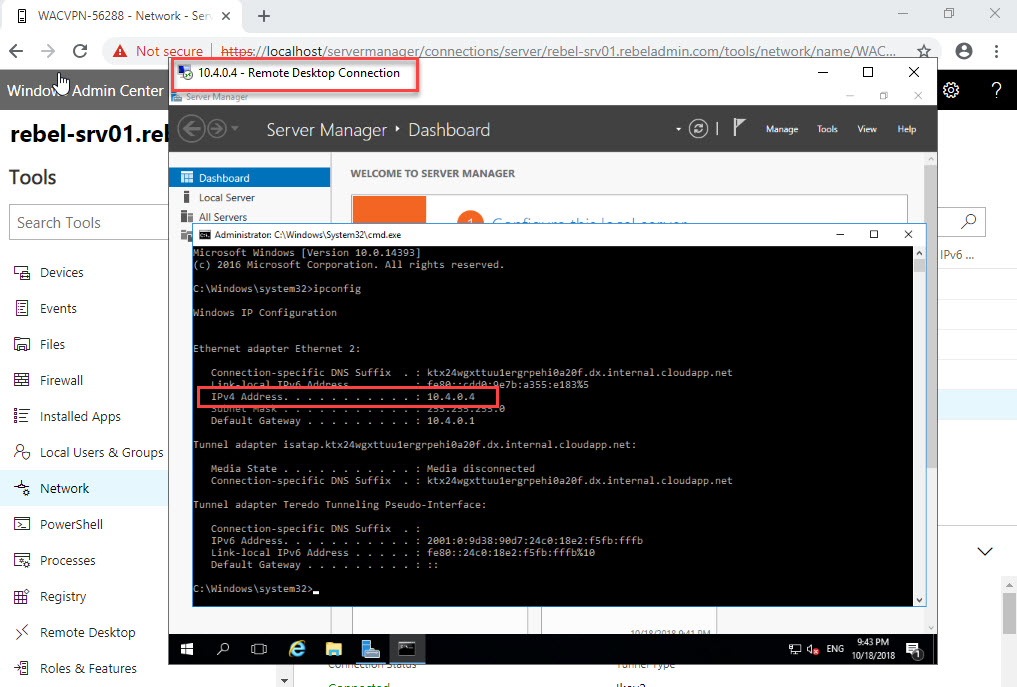
17. To test it, I have VM running under same VNET with private IP. I should be able to RDP to it via VPN connection.
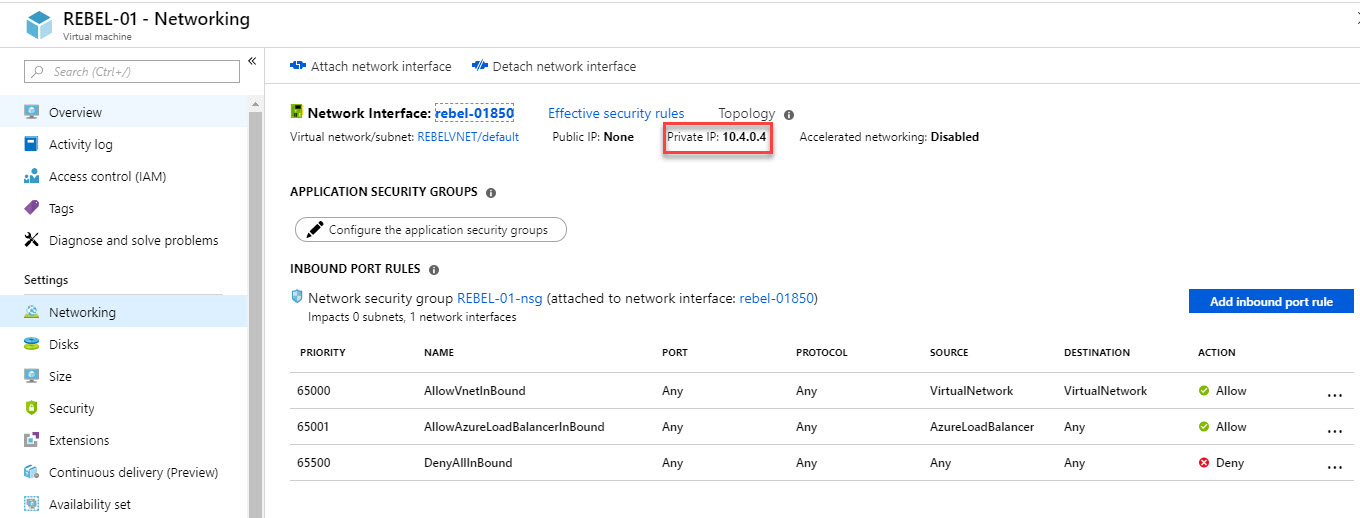
And yes, it was.
As we can see, we have established a successful point-to-site VPN connection with Azure using Azure Network Adapter. This marks the end of this blog post. If you have any further questions feel free to contact me on rebeladm@live.com also follow me on twitter @rebeladm to get updates about new blog posts.

