
In Hyper-V or VMware virtualization environment, Enable/Disable NIC in a VM is not a big deal. Even if you do not have NIC or valid IP configure, administrators still can connect to VM as it does have “Console” access. Few weeks ago, I received an email from one of my regular blog readers. He accidently disabled NIC in azure vm and he lost RDP access to it. since there is no console access like other on-premises virtualization solution, of cause he was panicking. In this blog post I am going to share what you can do to re-enable your Azure VM NIC in such scenario.
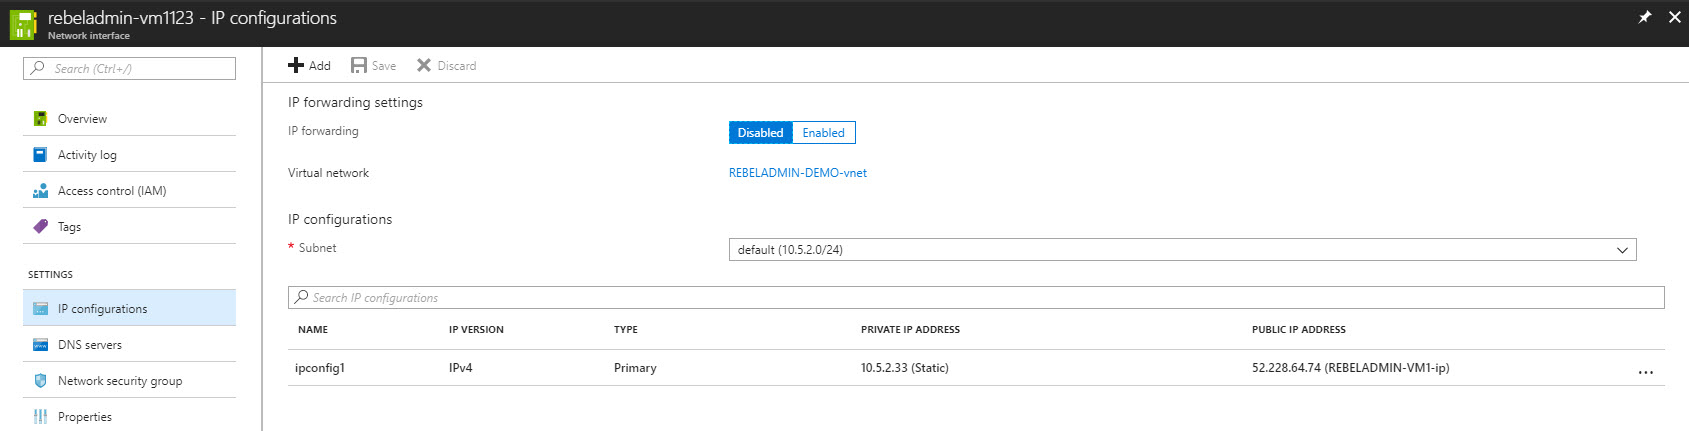
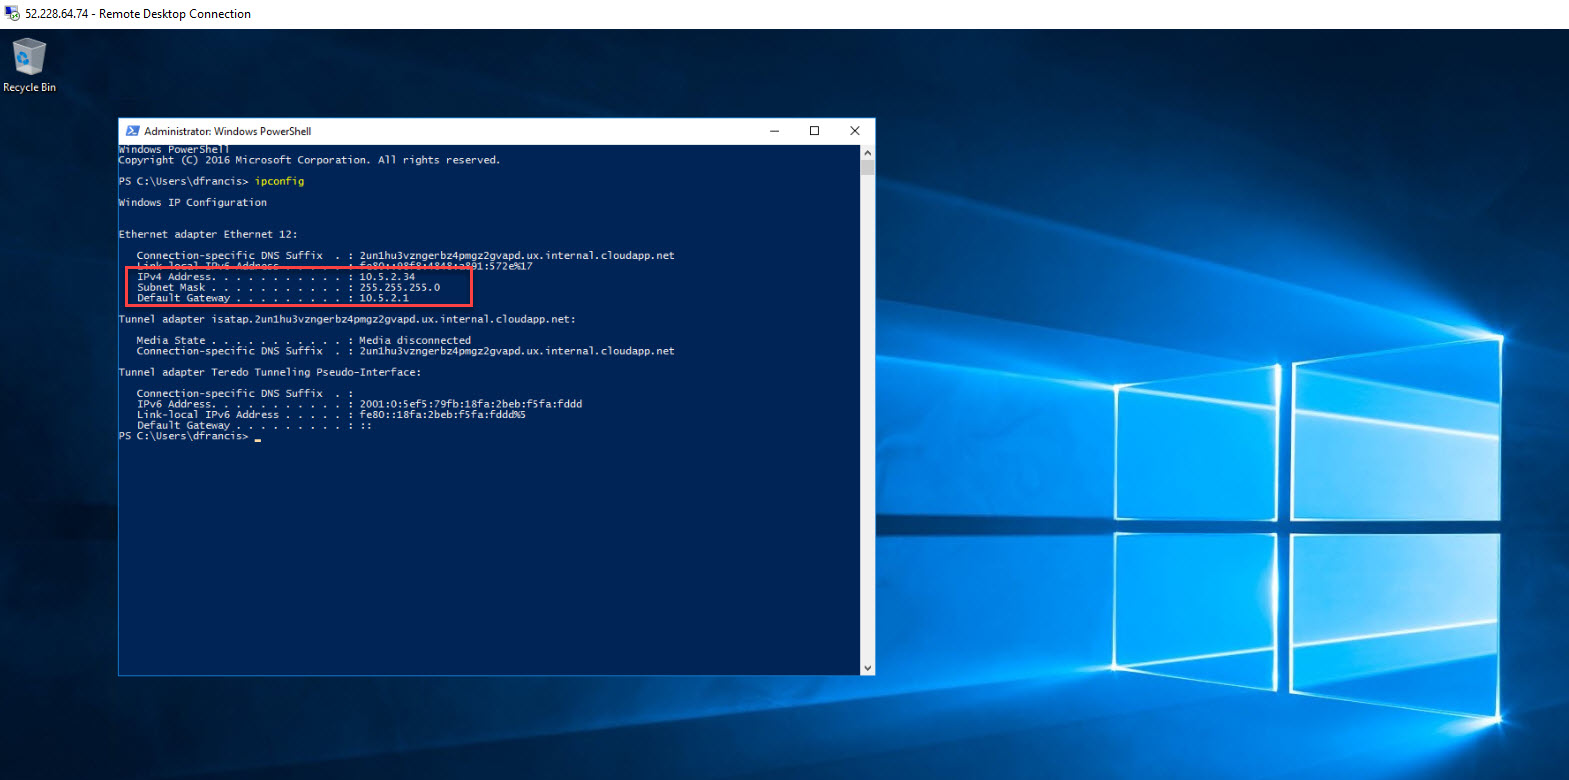
In my demo setup, I have an active azure VM running with 10.5.2.33 private IP address.
I logged in to VM as administrator and disable the NIC.
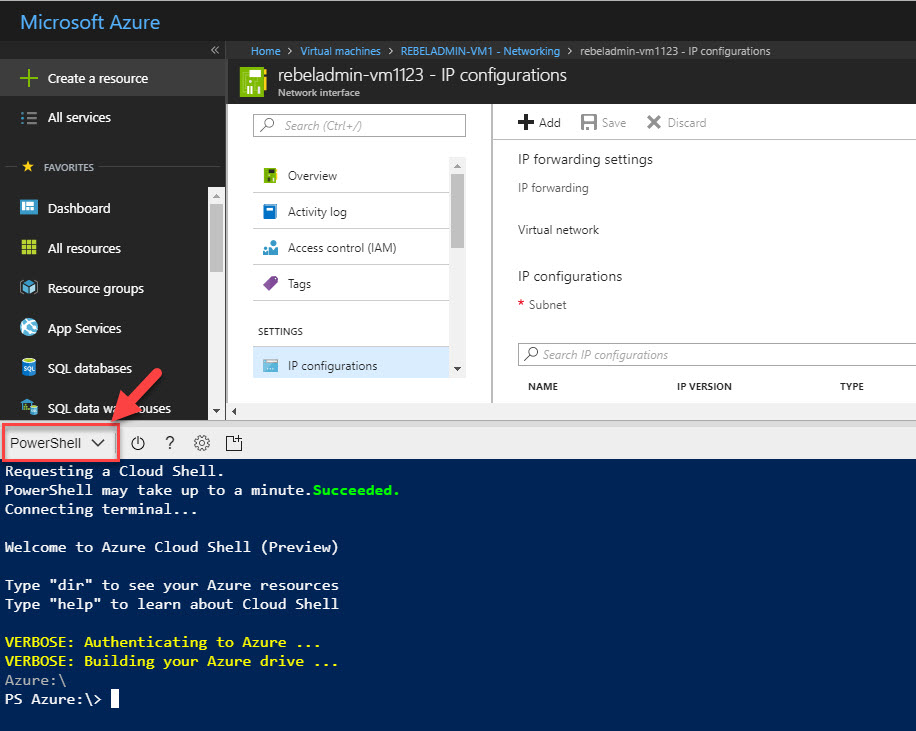
Now I need to regain the RDP access to server. in order to do that, log in to Azure Portal as Global Administrator and click on Cloud Shell button in right hand top corner.

When window load up makes sure you are using PowerShell option.
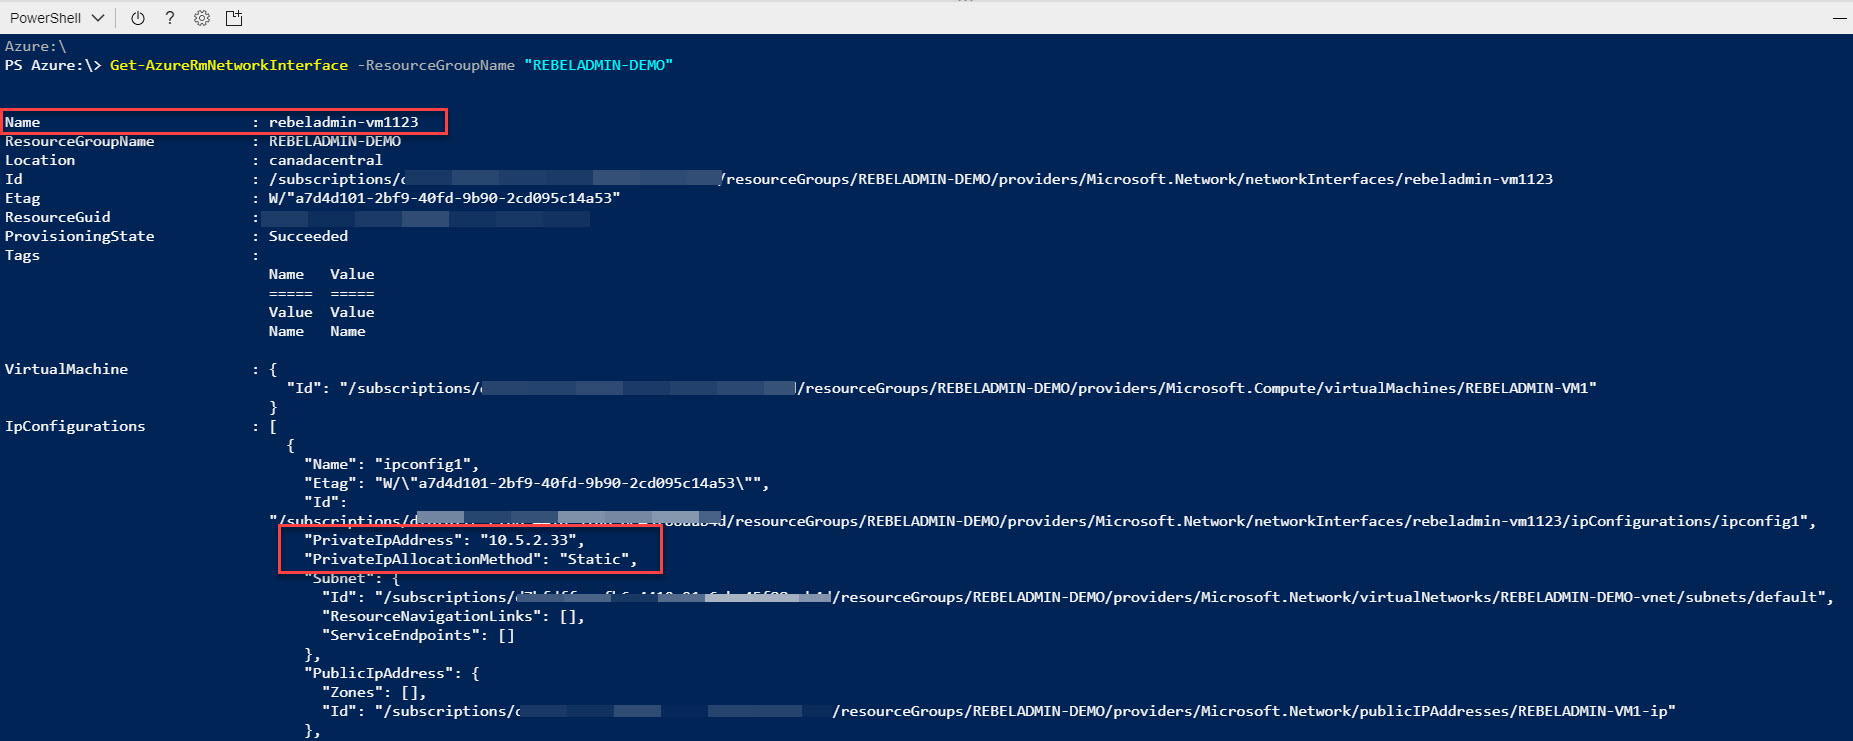
Now we need to find out the NIC details of the VM that we having issues with. We can do this using,
Get-AzureRmNetworkInterface -ResourceGroupName "REBELADMIN-DEMO"
In this command, -ResourceGroupName represent the resource group that VM belongs to. In my demo setup I only have one VM under that resource group. but if you have more VMs it can be hard to find the relevant info. In that case I recommend to use portal itself to view this info.
In here, note down the network interface name, IP address and allocation method you using.
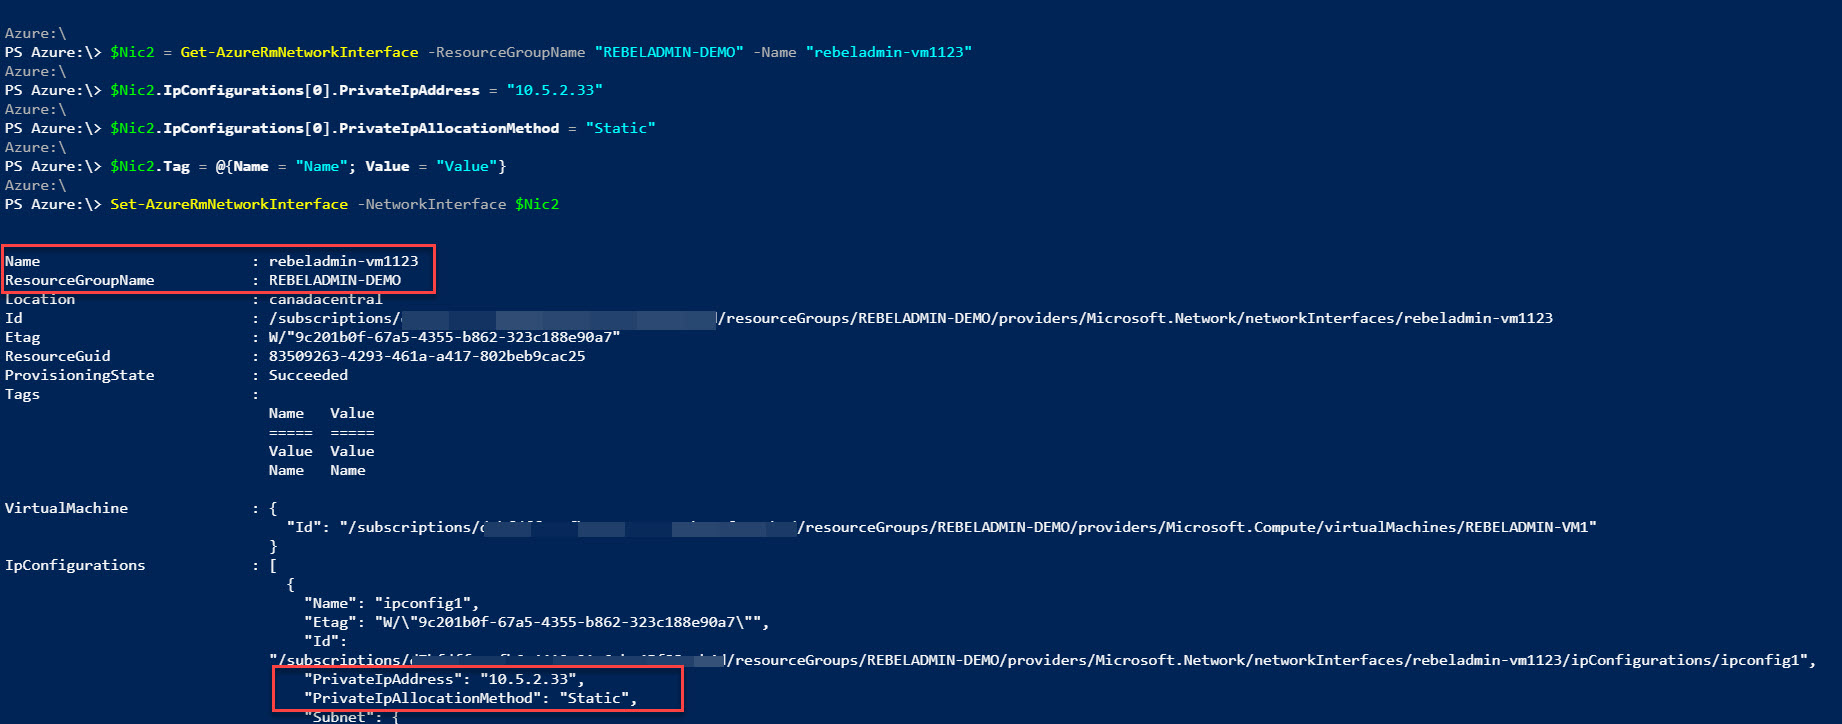
Now, we need to assign a new IP address to the same nic from same subnet. It can be done using,
$Nic = Get-AzureRmNetworkInterface -ResourceGroupName "REBELADMIN-DEMO" -Name "rebeladmin-vm1123"
$Nic.IpConfigurations[0].PrivateIpAddress = "10.5.2.34"
$Nic.IpConfigurations[0].PrivateIpAllocationMethod = "Static"
$Nic.Tag = @{Name = "Name"; Value = "Value"}
Set-AzureRmNetworkInterface -NetworkInterface $Nic
In above commands, rebeladmin-vm1123 represent the network interface name. 10.5.2.34 is the new ip address for the network interface. PrivateIpAllocationMethod define the ip allocation method. Set-AzureRmNetworkInterface cmdlet sets the network interface configuration.
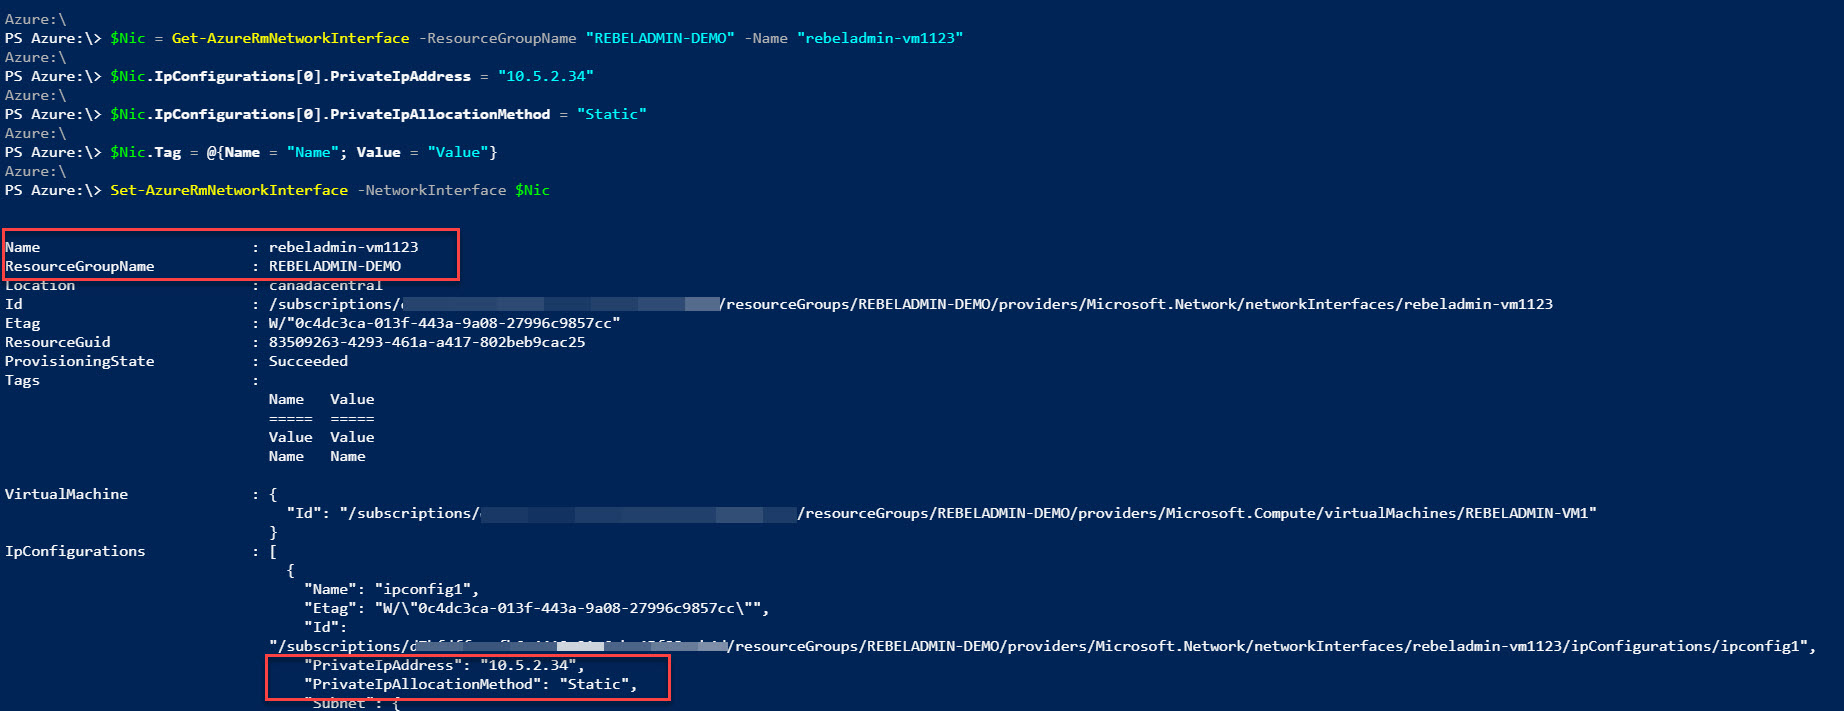
Great!! Now I got my RDP access back with new IP address.
But it is not the original IP it had, now we can change it back with,
$Nic2 = Get-AzureRmNetworkInterface -ResourceGroupName "REBELADMIN-DEMO" -Name "rebeladmin-vm1123"
$Nic2.IpConfigurations[0].PrivateIpAddress = "10.5.2.33"
$Nic2.IpConfigurations[0].PrivateIpAllocationMethod = "Static"
$Nic2.Tag = @{Name = "Name"; Value = "Value"}
Set-AzureRmNetworkInterface -NetworkInterface $Nic2
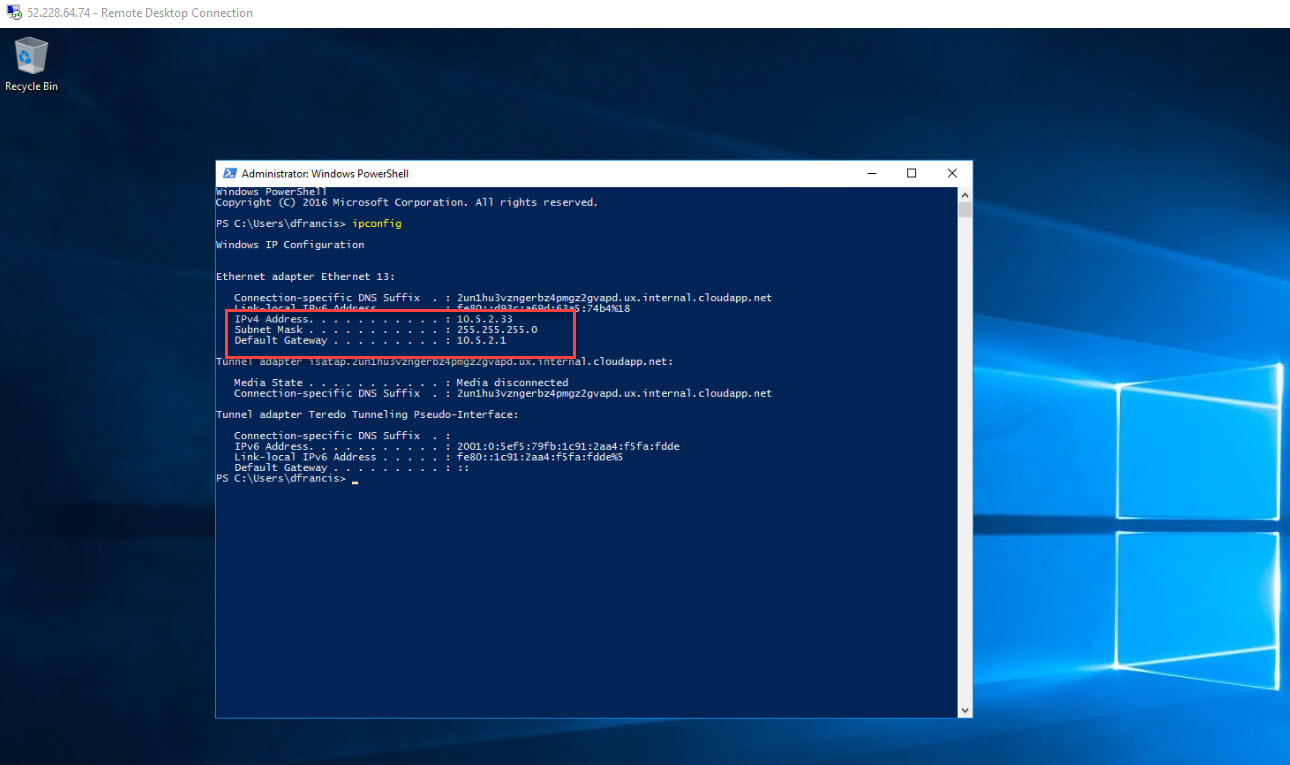
Once it is applied, I can access server via RDP and now it has same private IP address it had.
If you using dynamic IP allocation method, you need to make it static, then change the ip and go back to dynamic mode.
This marks the end of this blog post. If you have any questions feel free to contact me on rebeladm@live.com also follow me on twitter @rebeladm to get updates about new blog posts.

