Active Directory schema accepts custom attributes. Based on business requirements some time organizations will have to introduce custom attributes to object classes. On most occasions, it is related to application integration requirements with Active Directory. In one of my previous blog posts, I explained how we can add a custom attribute to Active Directory. You can access it using https://www.rebeladmin.com/2017/11/step-step-guide-create-custom-active-directory-attributes/
In a hybrid setup, Azure AD Connect can sync attribute values from on-premise Active Directory to Azure AD (https://docs.microsoft.com/en-us/azure/active-directory/hybrid/reference-connect-sync-attributes-synchronized). Apart from default attributes, sometimes there can be business requirements to sync custom Active Directory attributes to Azure AD. We can sync these custom attributes to Azure AD by using the Azure AD Connect “Directory extension attribute sync” feature.
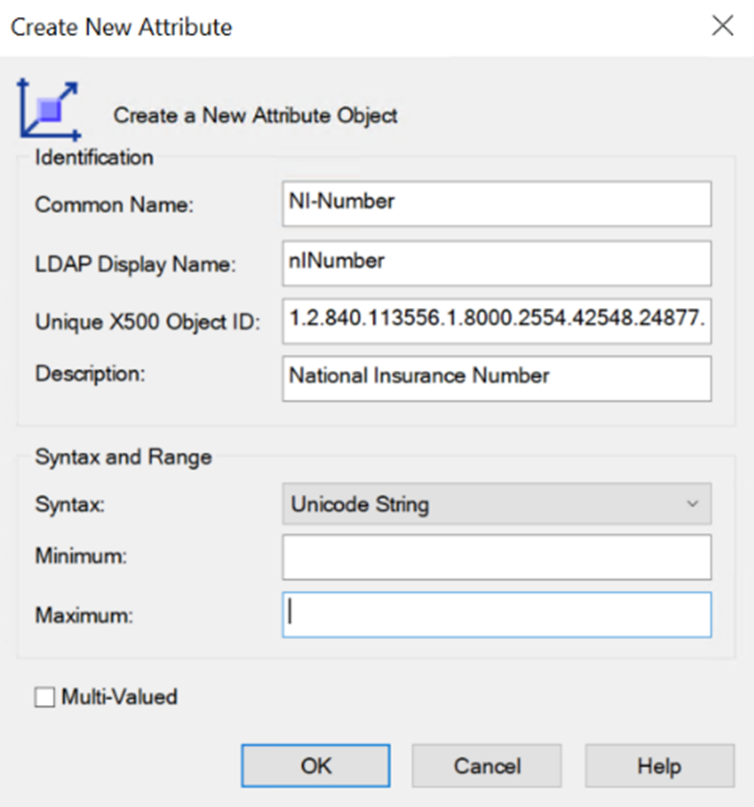
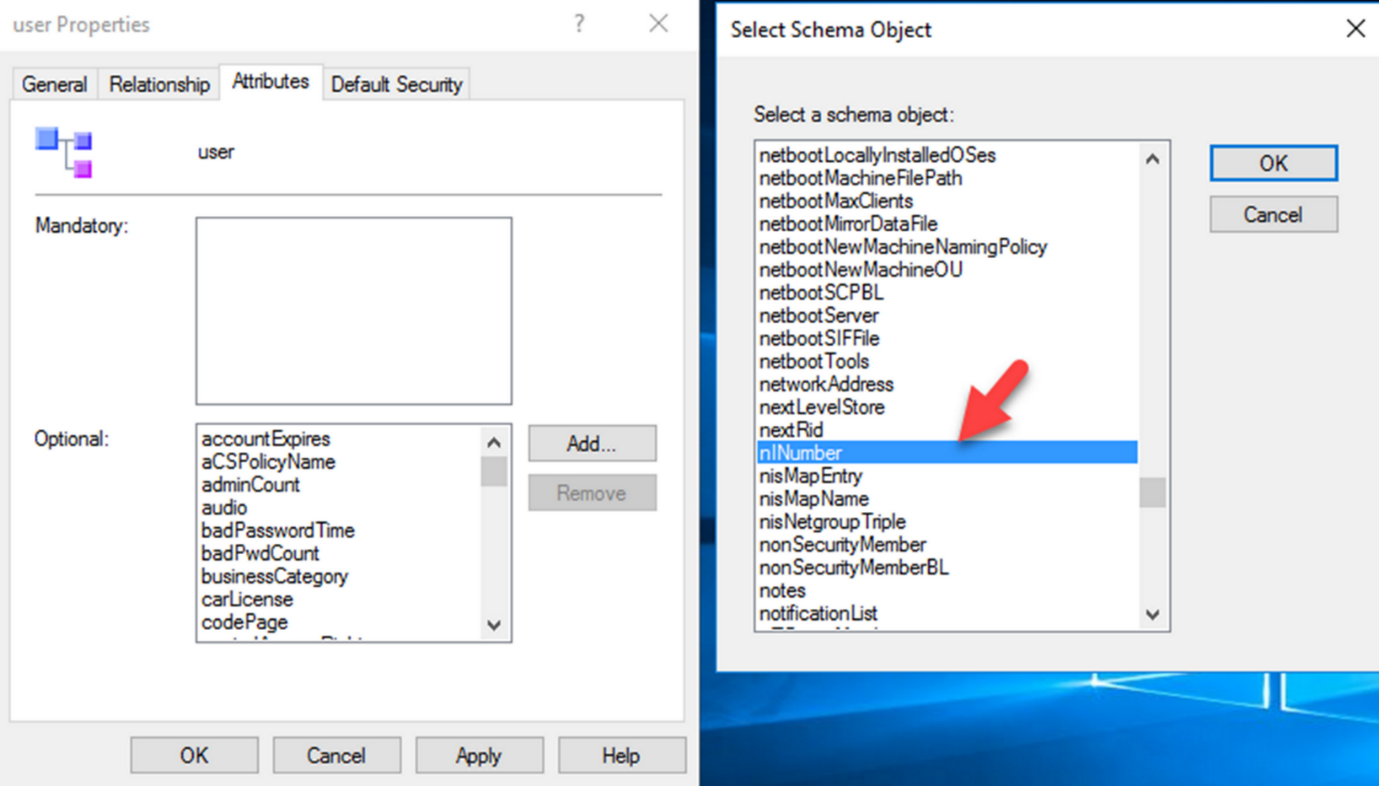
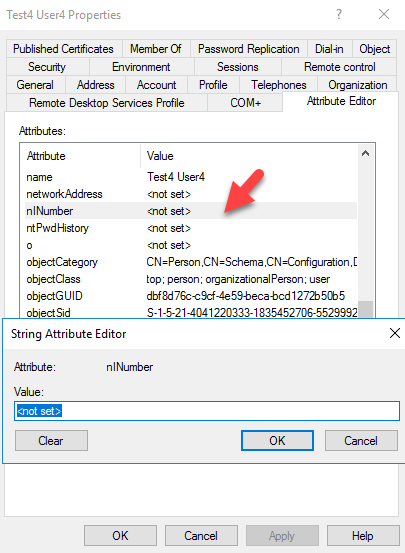
In this demo, I am going to demonstrate how to sync the custom Active Directory attribute to Azure AD. To simplify the process, I already installed Azure AD Connect and configure it to sync. I also created a custom AD attribute called “nINumber” and added it to the user class.
Figure 1 : Custom Attribute Values
Figure 2 : Add attribute to user class
Figure 3 : Custom Attribute under user account
Let’s go ahead and see how we can configure Azure AD Connect to sync custom attributes.
1. Launch Azure AD Connect Console in the Azure AD Connect Server
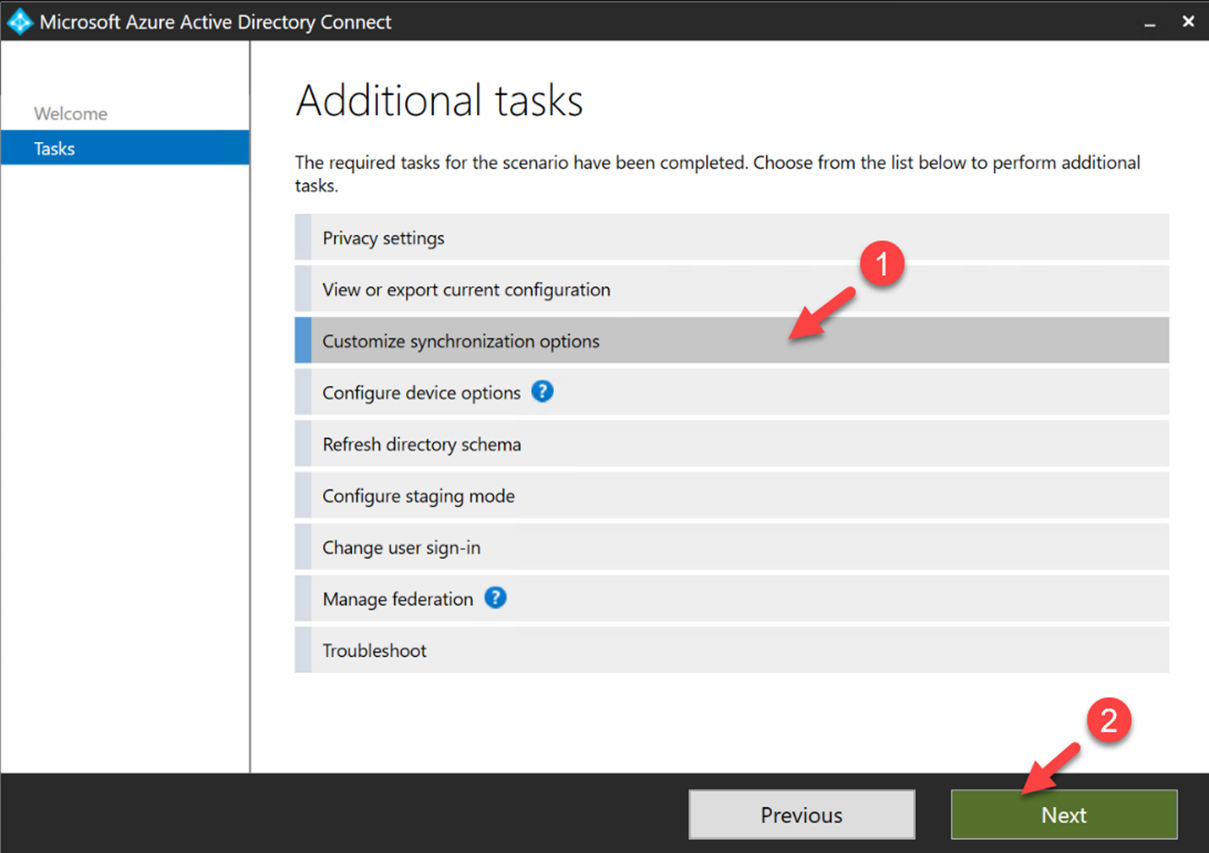
2. Then from the list of the options, select “Customize synchronization options” and click on Next
Figure 4 : Azure AD Connect sync options
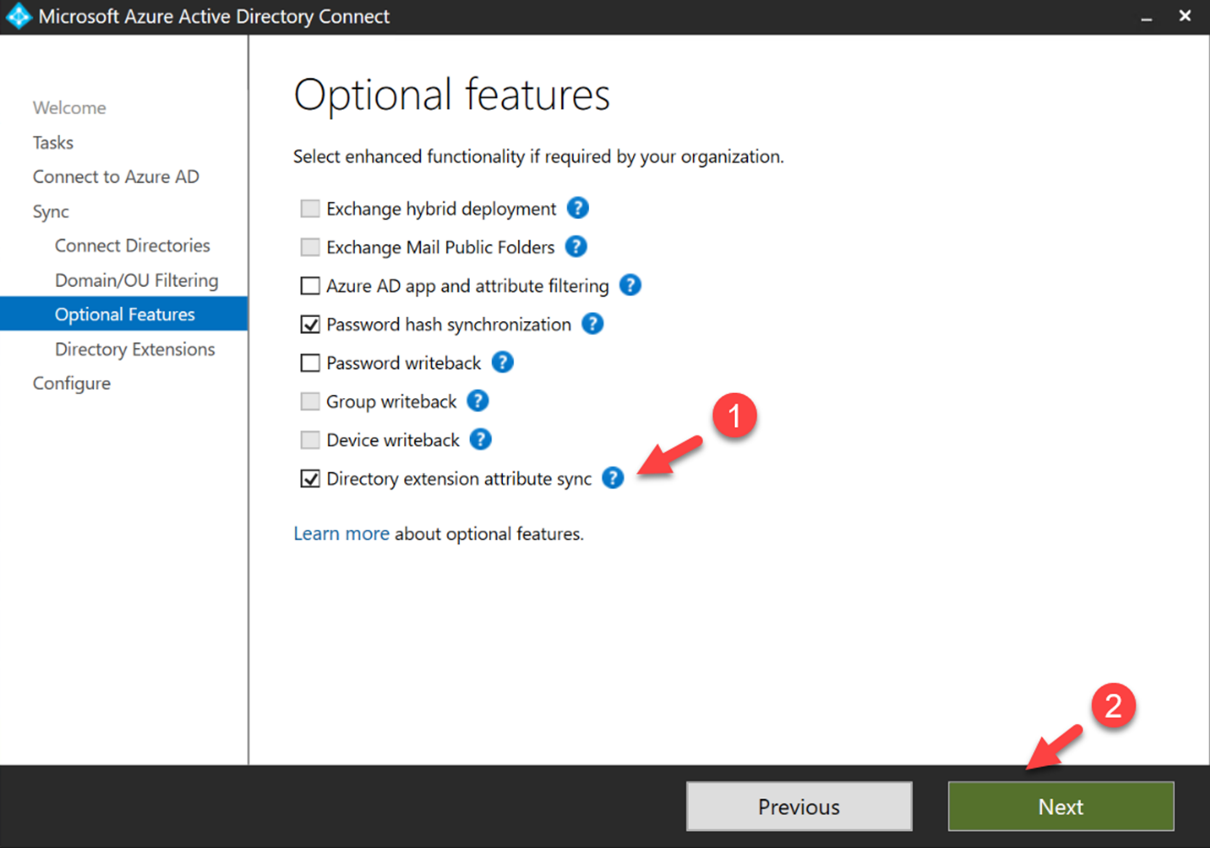
3. Follow the authentication steps first and then in Option features window, click on Directory extension attribute sync | Next.
Figure 5 : Directory extension attribute sync option
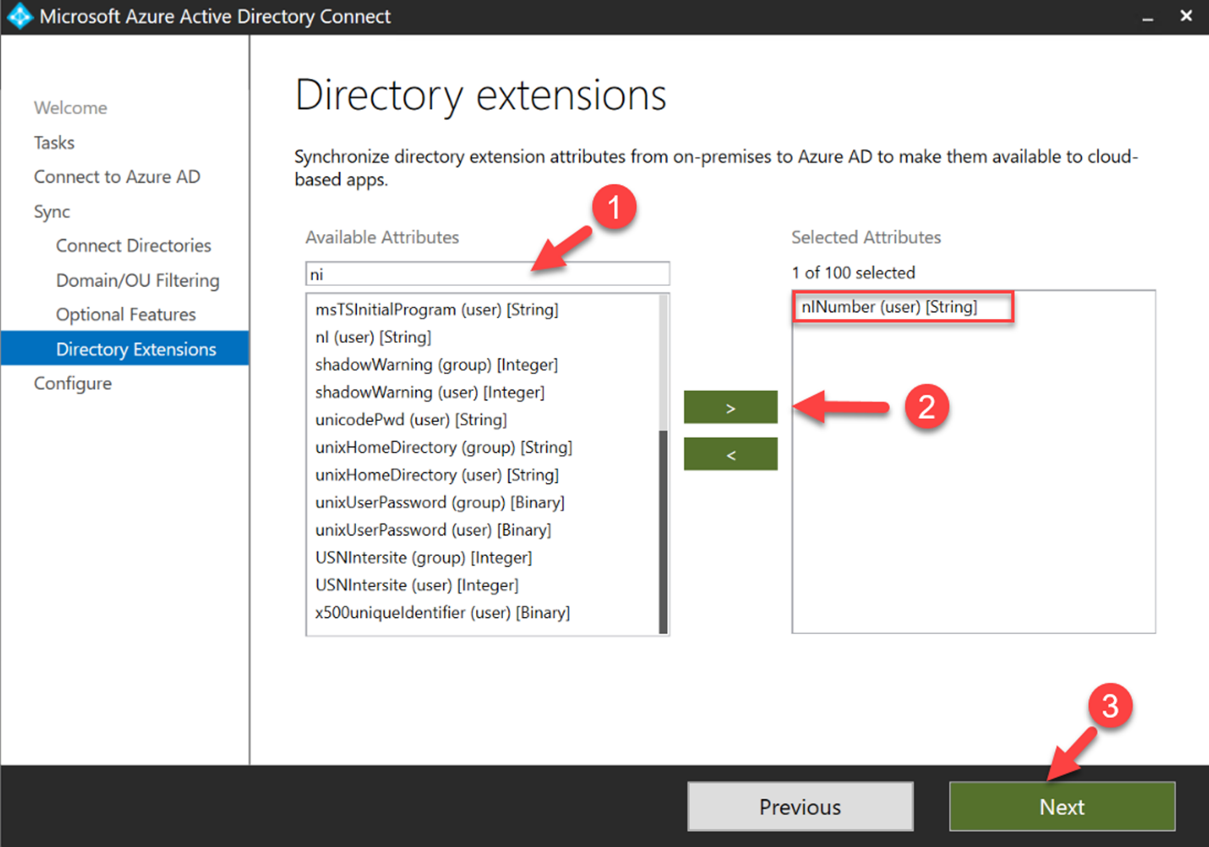
4. In the next window, it lists down all the available attributes. From the list, I selected the newly created custom attribute “nINumber” and click Next to complete the configuration process.
Figure 6 : Add custom attribute
At the end of the configuration wizard, the new attribute values will sync to Azure AD.
We can verify these synced values by using Microsoft Graph Explorer.
Note : More info about Microsoft Graph is available on https://docs.microsoft.com/en-us/graph/overview
In my demo environment, I am using the following to verify nINumber attribute values.
https://graph.microsoft.com/v1.0/users/testuser2@M365x581675.onmicrosoft.com?$select=displayName,givenName,extension_7c51781fcb5b481a98ba6efa5c7578d6_nINumber
In the above, testuser2@M365x581675.onmicrosoft.com is the user account. displayName, givenName is the attributes sync from on-premises Active Directory via default Azure AD Connect configuration. As you can see, I have used extension_7c51781fcb5b481a98ba6efa5c7578d6_nINumber to define nINumber attribute. In this string, 7c51781fcb5b481a98ba6efa5c7578d6 is the application Id value for application called “Tenant Schema Extension App”. All these custom attribute values are available under the Tenant Schema Extension application. If you referring to a custom attribute in the Azure AD group or application, you must use the same format. The application ID value is different from one tenant to another. This application can be found under Azure AD Enterprise apps.
Figure 7 : Tenant Schema Extension App
When I use Microsoft Graph Explorer, as expected I can see the custom attribute value.
Figure 8 : Synced custom attribute value
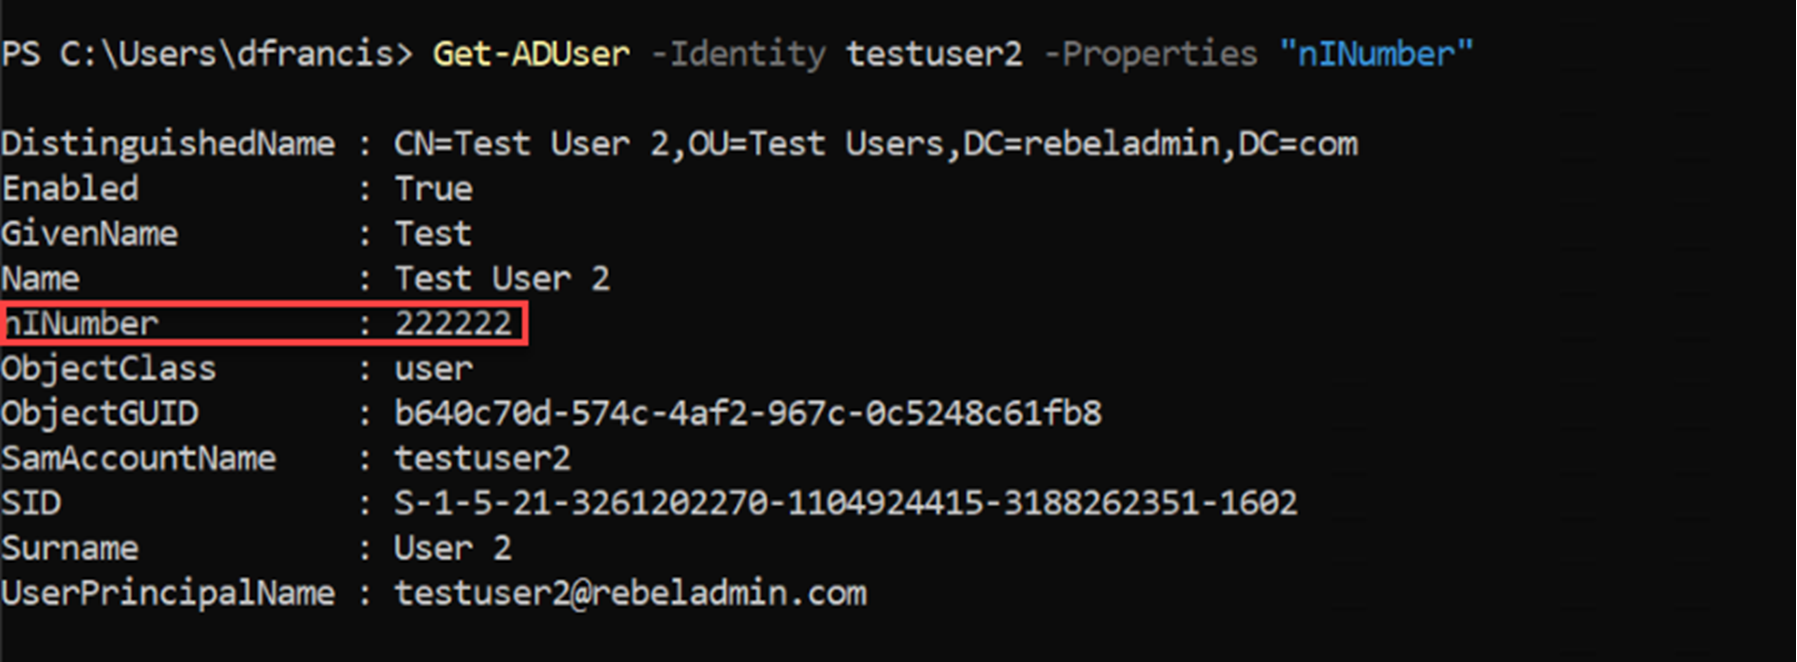
Also, it matches the value in the on-premises user object.
Figure 9 : AD custom attribute value
As we can see, it is possible to sync custom attributes to Azure AD using Azure AD connect.
This marks the end of this blog post. If you have any questions feel free to contact me on rebeladm@live.com also follow me on Twitter @rebeladm to get updates about new blog posts.





Can we sync computer attributes too?
I had to select the “Refresh Directory Schema” option first so AAD Connect could see the new attribute before this would work.
I was stuck until finding this tip, tx a lot