
In active directory schema, it is allowed to add custom attributes. In organizations, there are situations where this option is useful. It is most of the time related to application integration requirements with active directory infrastructure. In modern infrastructures, applications are decentralizing identity management. Organization’s identities can sit on active directory as well as applications. Some may in in-house infrastructures and some may even in public cloud. If these applications are integrated with active directory it’s still provides central identity management but it’s not always. Some applications have their own way of handling its user accounts and privileges. Similar to active directory attributes, these applications can also have their own attributes defined by its database system to store the data. These application attributes most of the time will not match the attributes on active directory. As an example, HR system uses employee ID to identify an employee record uniquely from others. But active directory use username to identify a unique record. Each system’s attributes hold some data about the objects even its referring to same user or device. If there is another application which required to retrieve data from both system’s attributes how we can facilitate such without data duplication?
One’s a customer was talking to me regarding similar requirement. They have active directory infrastructure in place. They also maintaining a HR system which is not integrated with active directory. They got a new requirement for an employee collaboration application which required data input in specific way. It has defined its fields in the database and we need to match the data on that order. Some of these required data about users can retrieve from active directory and some of user data can retrieve from the HR system. Instead of keeping two data feeds to the system we decided to treat the active directory as the trustworthy data source for this new system. If active directory need to hold all the required data, it somehow need to store the data comes from HR system as well. The final solution was to add custom attributes to active directory schema and associate it with the user class. Instead of both system operate as data feeds, now HR system pass the filtered values to Active directory and it exports all the required data in CSV format to the application.
In order to create custom attributes, go to active directory schema snap-in, right click on attributes container and select create attribute.
Tip – In order to open active directory schema snap-in you need to run command regsvr32 schmmgmt.dll from the Domain Controller. After that you can use MMC and add active directory schema as snap-in.
Then system will give a warning about the schema object creation and click OK to continue.
It will open up a form and this is where we need to define the details about custom attribute.
1) Common Name – This is the name of the object. It is only allowed to use letters, numbers and hyphen for the CN.
2) LDAP Display Name – When object is referring in script, program or command line utility it need to call using the LDAP Display name instead of the Common Name. when you define the CN, it will automatically create the LDAP Display name.
3) X500 Object ID – Each and every attribute in active directory schema has unique OID value. There is script develop by Microsoft to generate these unique OID valves. It can be found in https://gallery.technet.microsoft.com/scriptcenter/Generate-an-Object-4c9be66a#content it also can directly run using following PowerShell command.
#---
$Prefix="1.2.840.113556.1.8000.2554"
$GUID=[System.Guid]::NewGuid().ToString()
$Parts=@()
$Parts+=[UInt64]::Parse($guid.SubString(0,4),"AllowHexSpecifier")
$Parts+=[UInt64]::Parse($guid.SubString(4,4),"AllowHexSpecifier")
$Parts+=[UInt64]::Parse($guid.SubString(9,4),"AllowHexSpecifier")
$Parts+=[UInt64]::Parse($guid.SubString(14,4),"AllowHexSpecifier")
$Parts+=[UInt64]::Parse($guid.SubString(19,4),"AllowHexSpecifier")
$Parts+=[UInt64]::Parse($guid.SubString(24,6),"AllowHexSpecifier")
$Parts+=[UInt64]::Parse($guid.SubString(30,6),"AllowHexSpecifier")
$OID=[String]::Format("{0}.{1}.{2}.{3}.{4}.{5}.{6}.{7}",$prefix,$Parts[0],$Parts[1],$Parts[2],$Parts[3],$Parts[4],$Parts[5],$Parts[6])
$oid
#---
4) Syntax – It define the storage representation for the object. It is only allowed to use syntaxes defined by Microsoft. One attribute can only associate with one syntax. In below I listed few common used syntaxes in attributes.
|
Syntax |
Description |
|
Boolean |
True or False |
|
Unicode String |
A large string |
|
Numeric String |
String of digits |
|
Integer |
32-bit Numeric value |
|
Large Integer |
64-bit Numeric value |
|
SID |
Security Identifier Value |
|
Distinguished Name |
String value to uniquely identify object in AD |
Along with the syntax we also can define the minimum or maximum values. If it’s not defined it will take the default values.
In following demo, I like to add a new attribute called NI-Number and add it to the User Class.

As the next step, we need to add it to the user class. In order to do that go to classes container, double click on user class and click on attributes tab. In there by clicking the add button can browse and select the newly added attribute from the list.
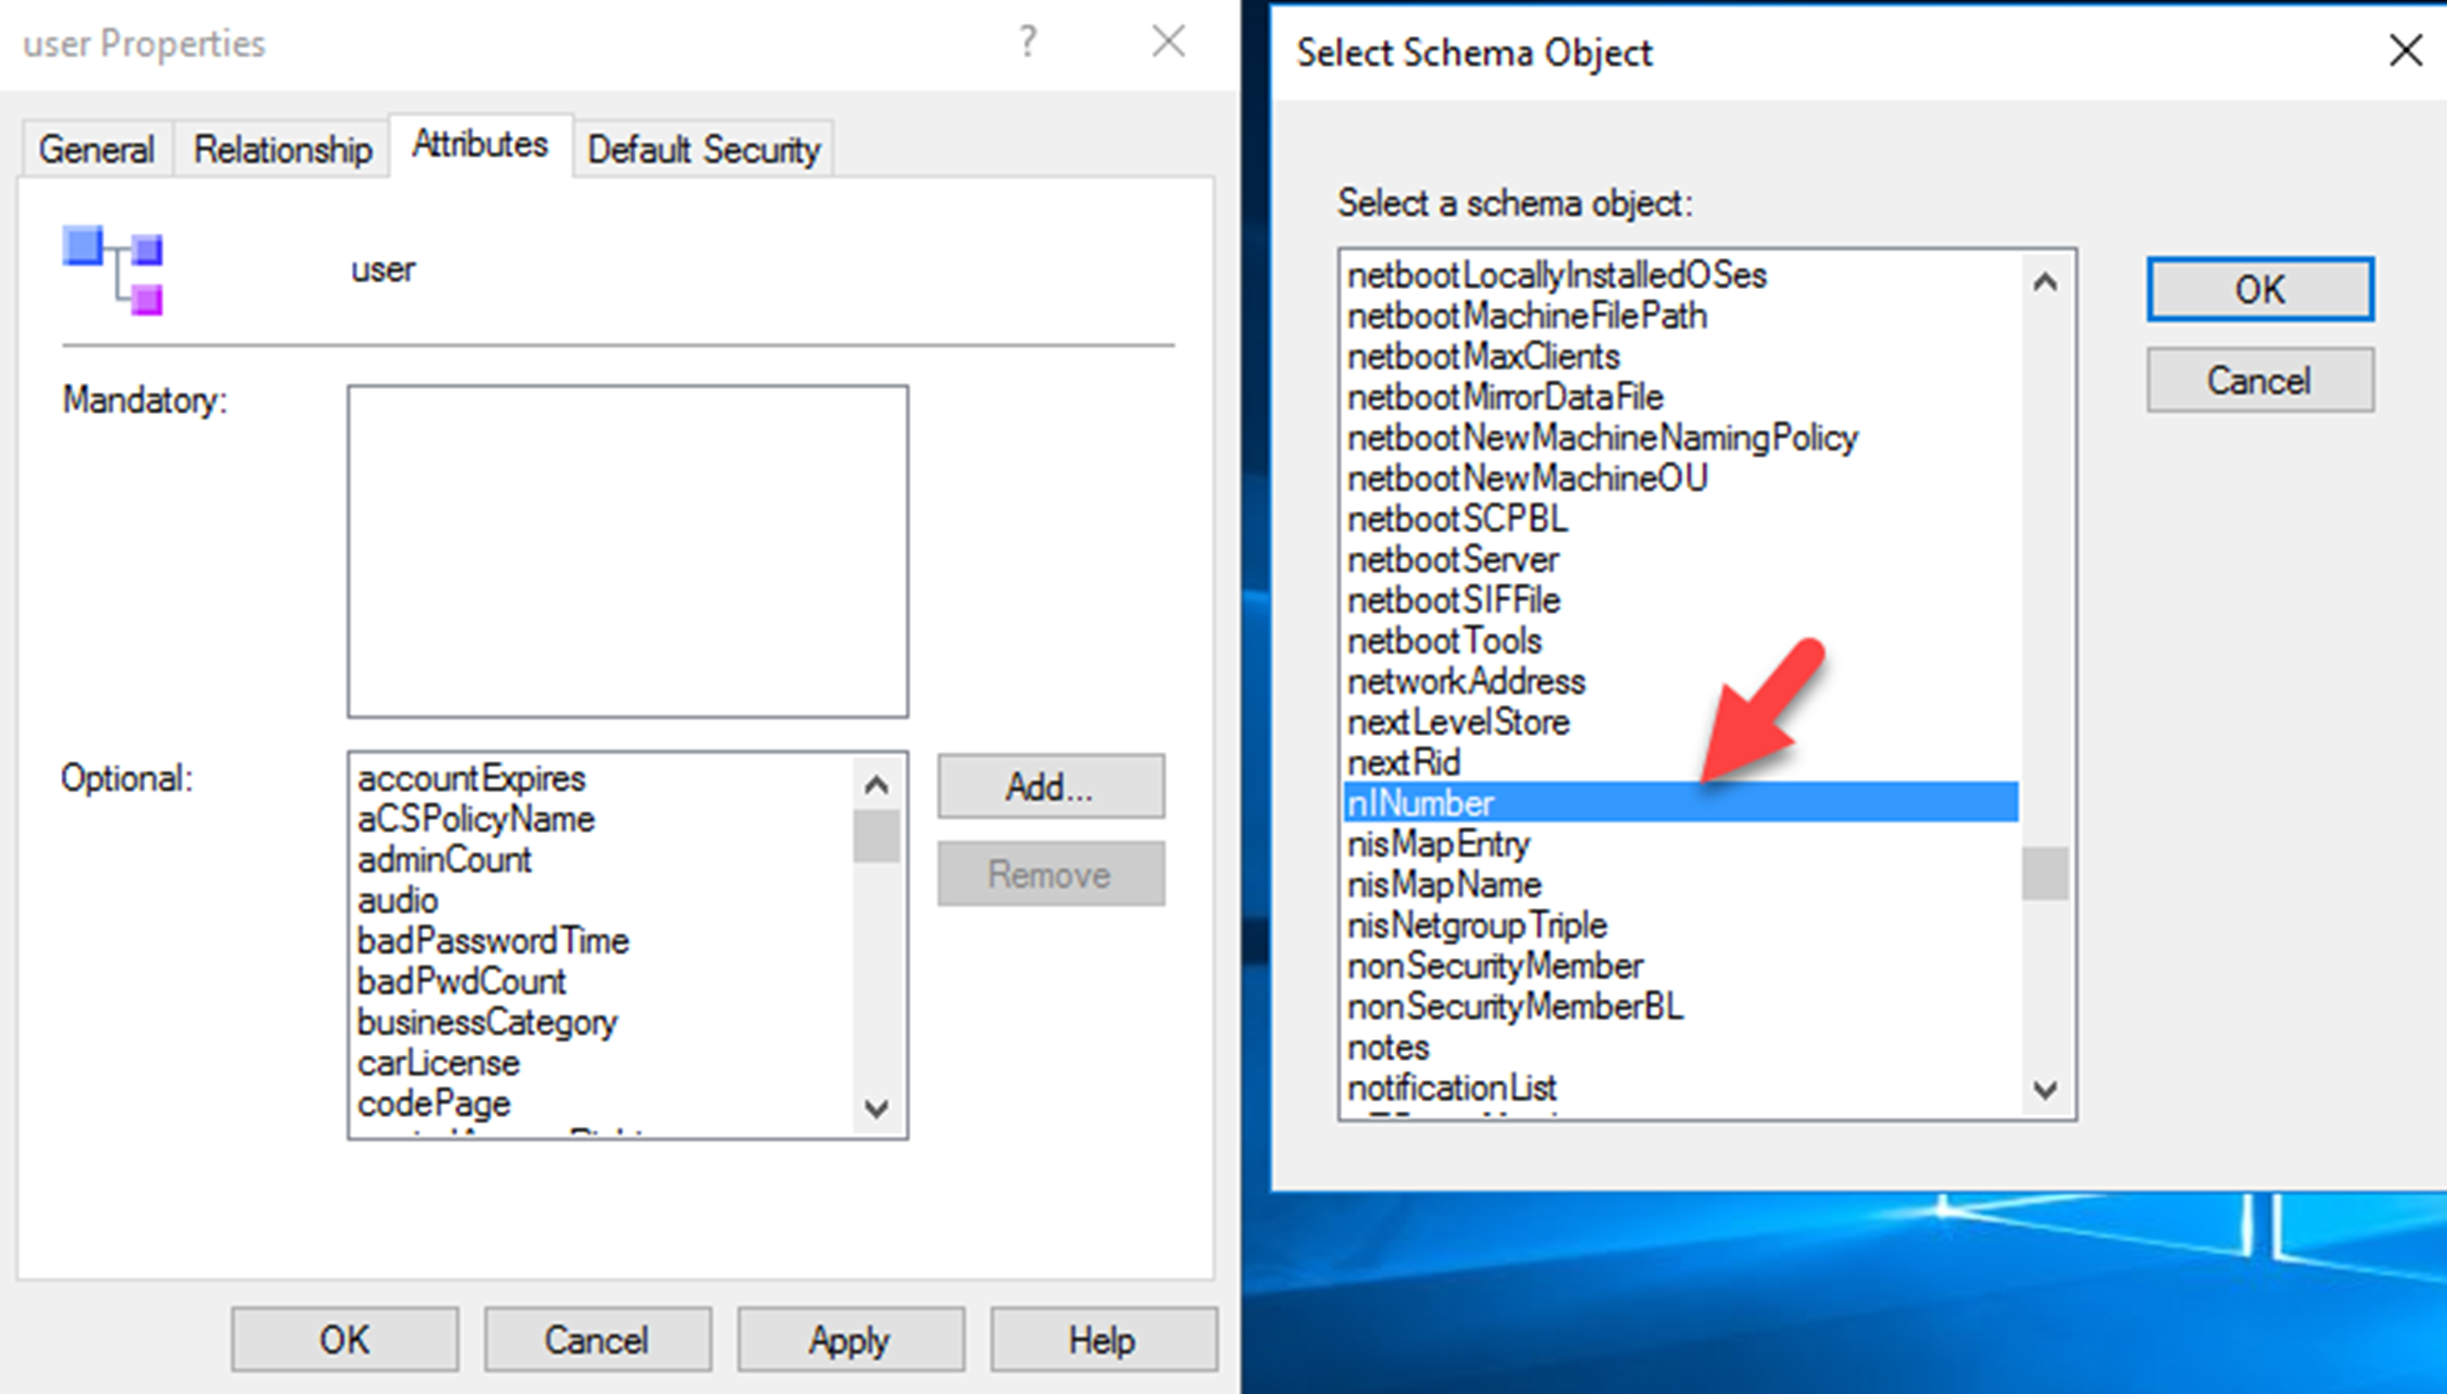
Now when we open a user account we can see the new attribute and we can add the new data to it.
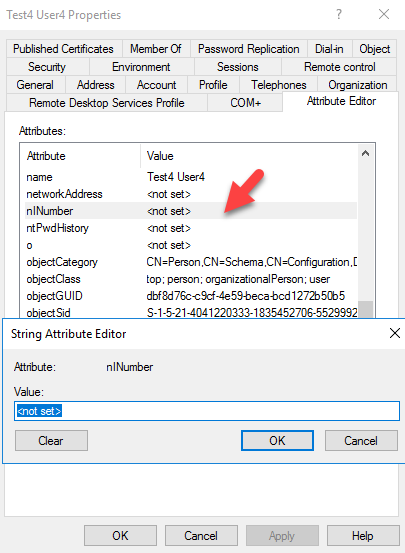
Once data been added we can filter out the information as required.
Get-ADuser “tuser4” -Properties nINumber | ft nINumber

Note – To add the attributes to the schema you need to have schema administrator privileges or enterprise administrator privileges.
This marks the end of this blog post. If you have any questions feel free to contact me on rebeladm@live.com also follow me on twitter @rebeladm to get updates about new blog posts.


Hello! Just a few days ago, I was spending time searching Google for custom attributes in the AD schema, such as “pseudo-Exchange attributes” for a test instance of a DC without an Exchange installed in this forest. Well, your post helped me solve one part of the problem. Thank you!
But the script in the post seems to me not as good as I would like. I just rewrote a few lines in it, the result is here: https://gist.github.com/drlsdee/713171eb3eb847b7b30e2dc6ab4f27ee
And an example of solving the second part of the problem, creating attributes and adding them to the AD schema and AD classes using PowerShell, can be found here: https://www.dataart.ru/news/extending-active-directory-schema-to-store-application-configuration-powershell-examples/
And again, I rewrote a few lines and built them into a small PowerShell module: https://github.com/drlsdee/ADCustomAttributes
Feel free to use it, fork it and rewrite according to your needs.
was very helpful