
In my previous blog posts about Windows Virtual Desktop Host Pool (Spring 2020 Release), I have explained how to publish desktop and applications. These blog posts can be accessed using the following links.
1. Step-by-Step Guide to Windows Virtual Desktop (Spring 2020 Release)
2. Step-by-Step Guide: How to publish Applications using Windows Virtual Desktop (Spring 2020 Release)
With a growing demand for WVD resources, you may have a requirement to add additional session hosts to the existing Windows Virtual Desktop host pool. In this blog post, I am going to demonstrate how to add additional session host to Windows Virtual Desktop host pool.
Before we start, let’s go ahead and check how is my demo environment looks like and what I am trying to achieve.
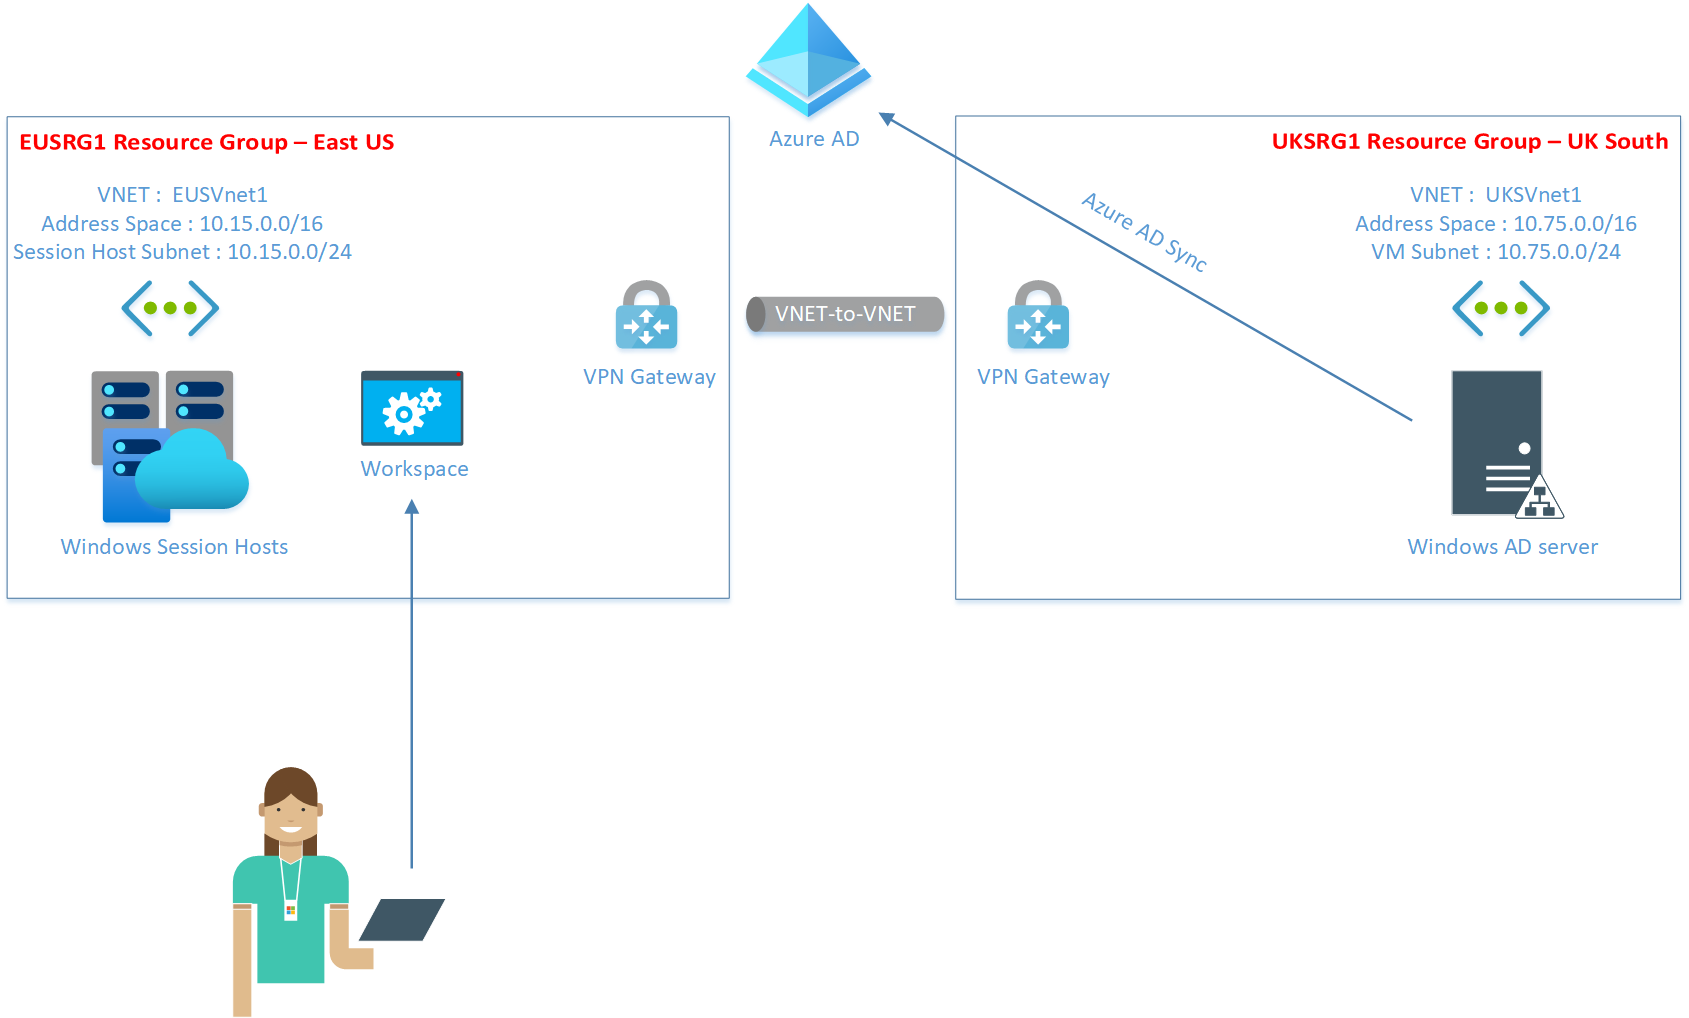
• I have two Resource groups in place. EUSRG1 resource group is in Azure East US region and UKSRG1 resource group is in UK South Azure region.
• Resource in UKSRG1 resource group represents my on-premises infrastructure.
• I have a Windows AD server running in UKSRG1. It is syncing to Azure AD by using Azure AD Connect.
• EUSVNet1 and UKSVnet1 are connected using Azure VNet-to-VNet VPN Gateway Connection (https://www.rebeladmin.com/2019/09/step-step-guide-setup-azure-vnet-vnet-vpn-gateway-connection-powershell-guide/). This way session hosts in EUSRG1 can be added to Windows AD using the standard method.
• I have set up two session hosts (REBELSH-0 & REBELSH-1) and added it to a host pool called REBELHP01. I also created a workspace (REBELWP01) in EUSRG1 resource group. Both session hosts are joined to Windows AD using the standard domain join method.
Add new session host to an existing Windows Virtual Desktop host pool
In this demo, I am going to add 3rd session host called REBELSH-2 to host pool REBELHP01.
To do that,
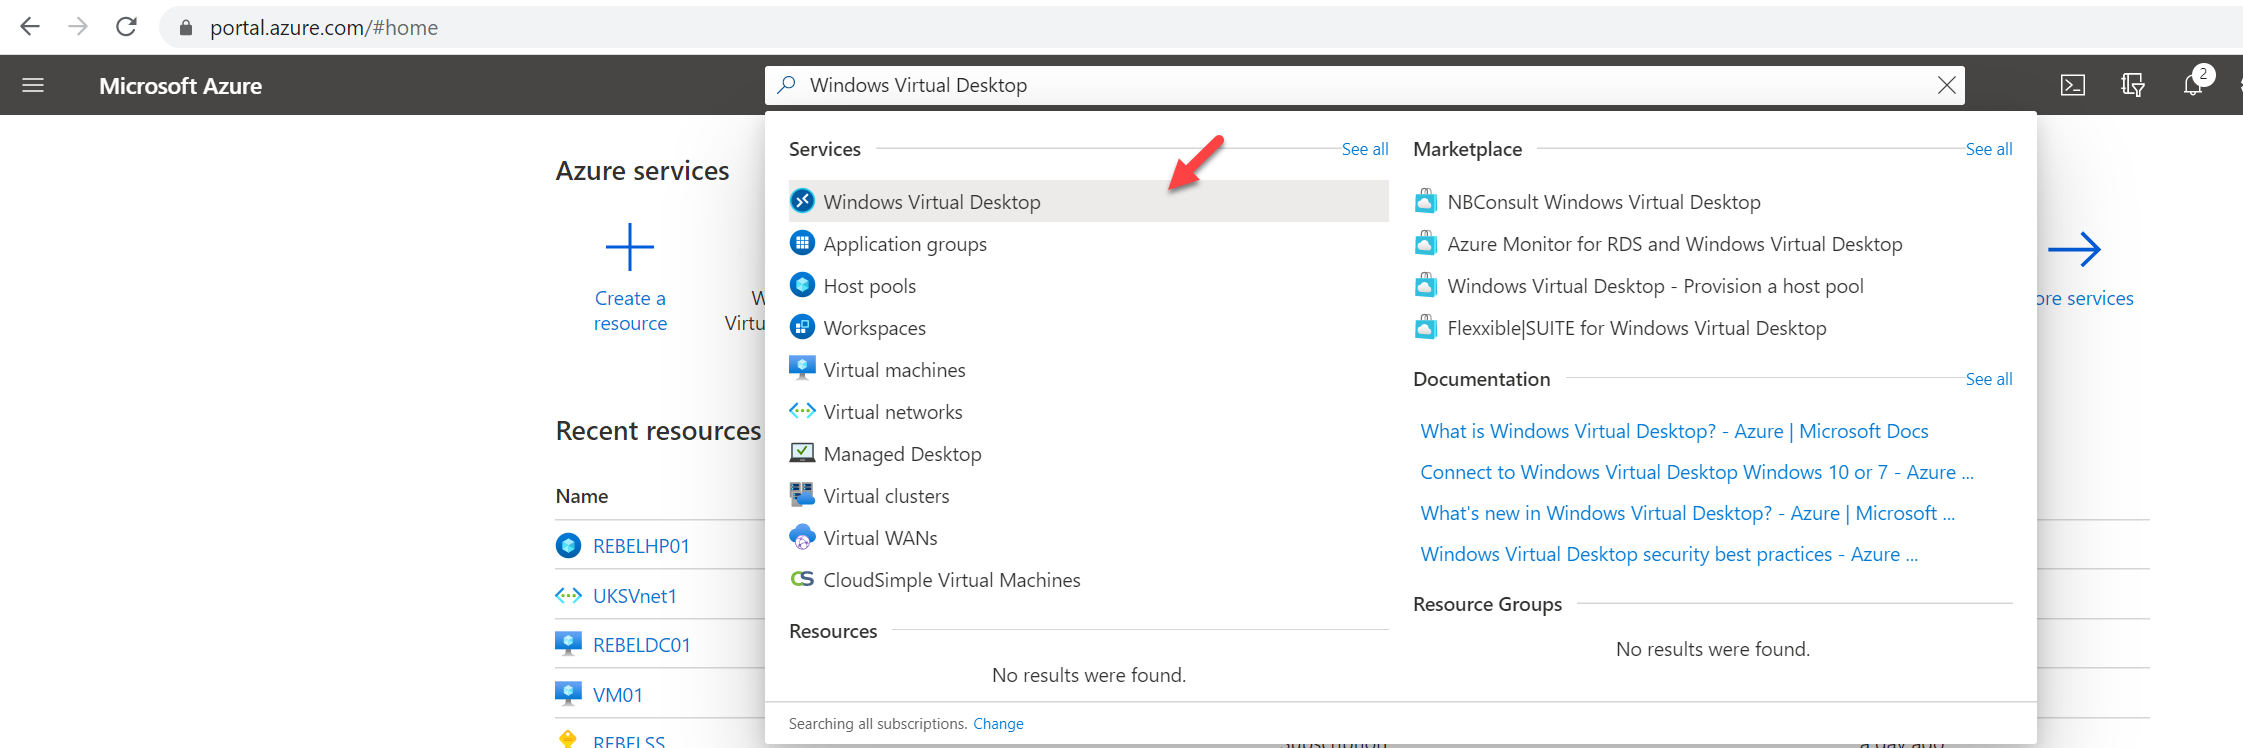
1. Log in to Azure portal as Global Administrator
2. Search for Windows Virtual Desktop and click on it.
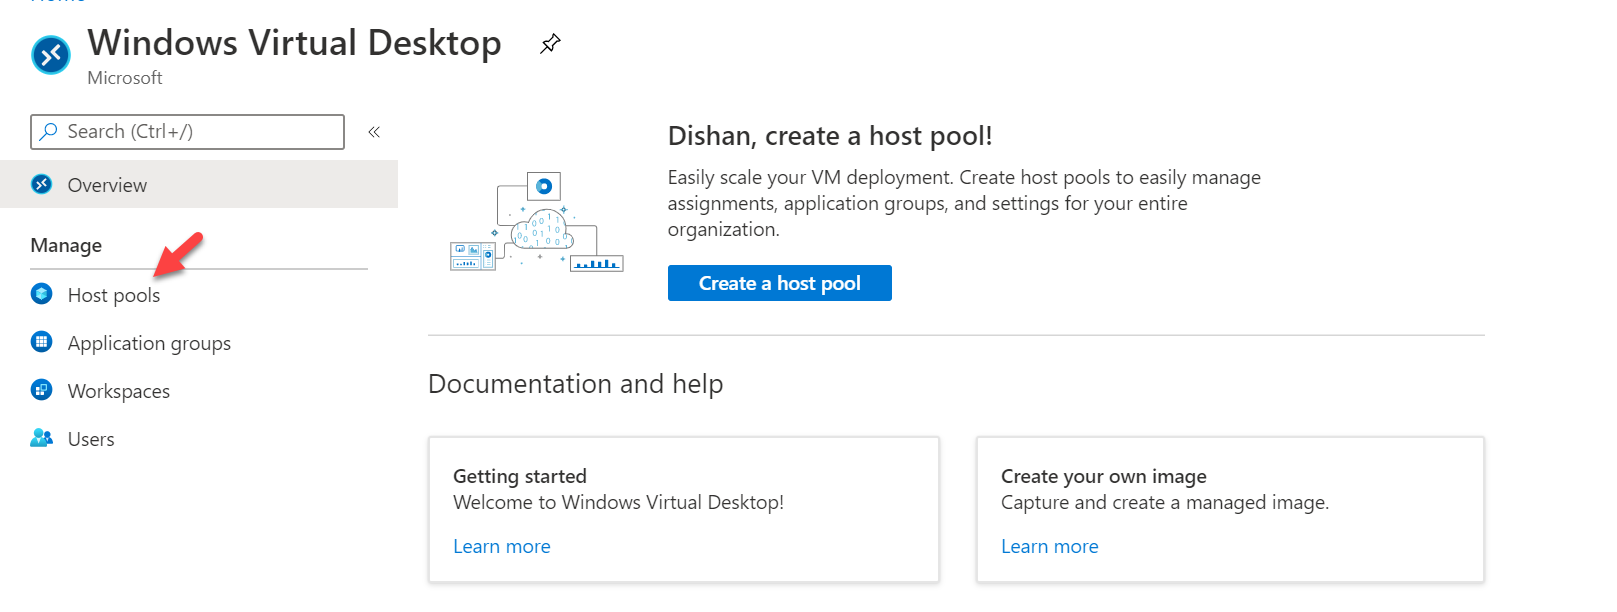
3. Then click on Host pools
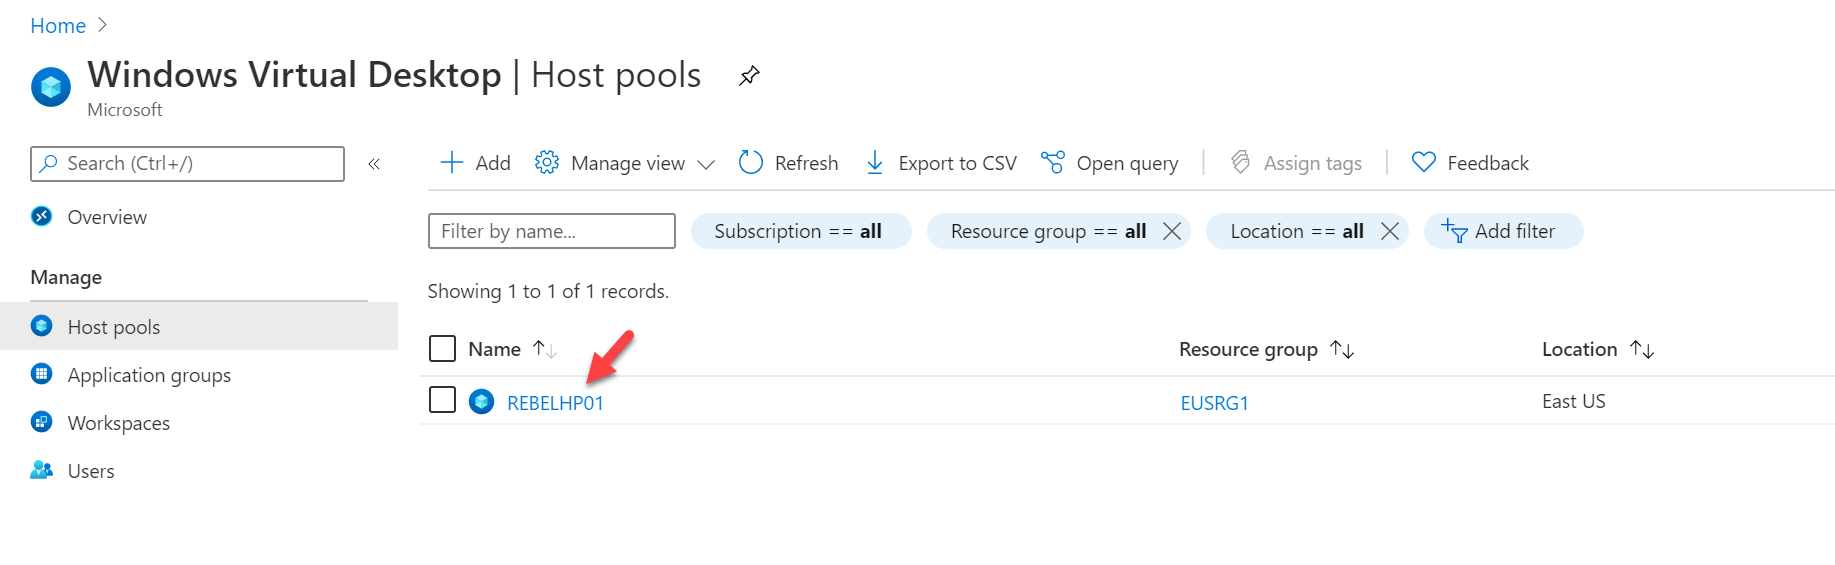
4. It will list the existing host pools. From the list select the host pool you need and click on it to go to the properties page. In my demo, I am going to use REBELHP01 host pool.
5. In properties, page click on Session hosts.
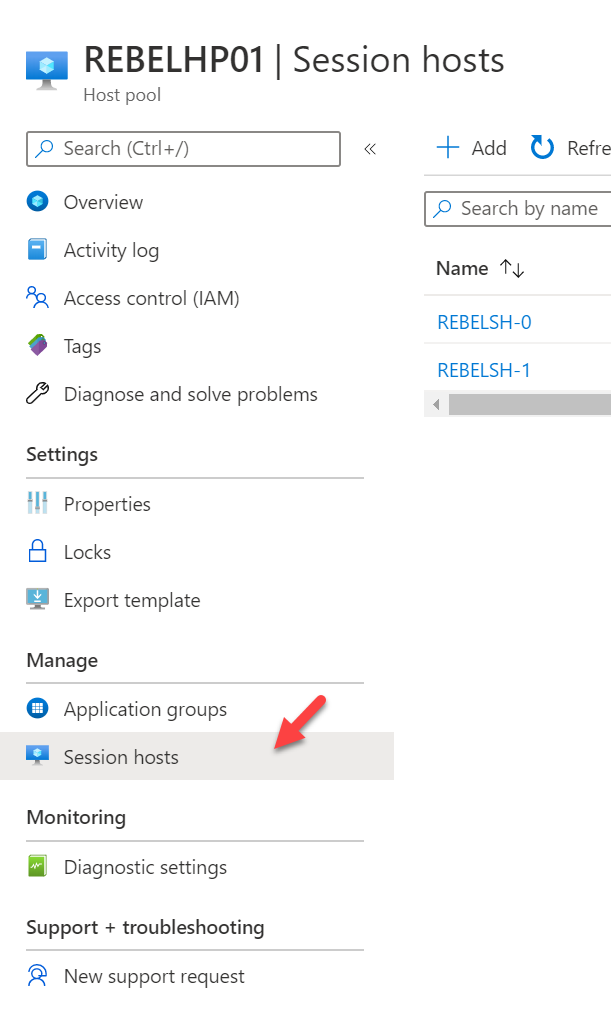
6. It will list down all the session hosts you have. Then we can go ahead and click on + Add
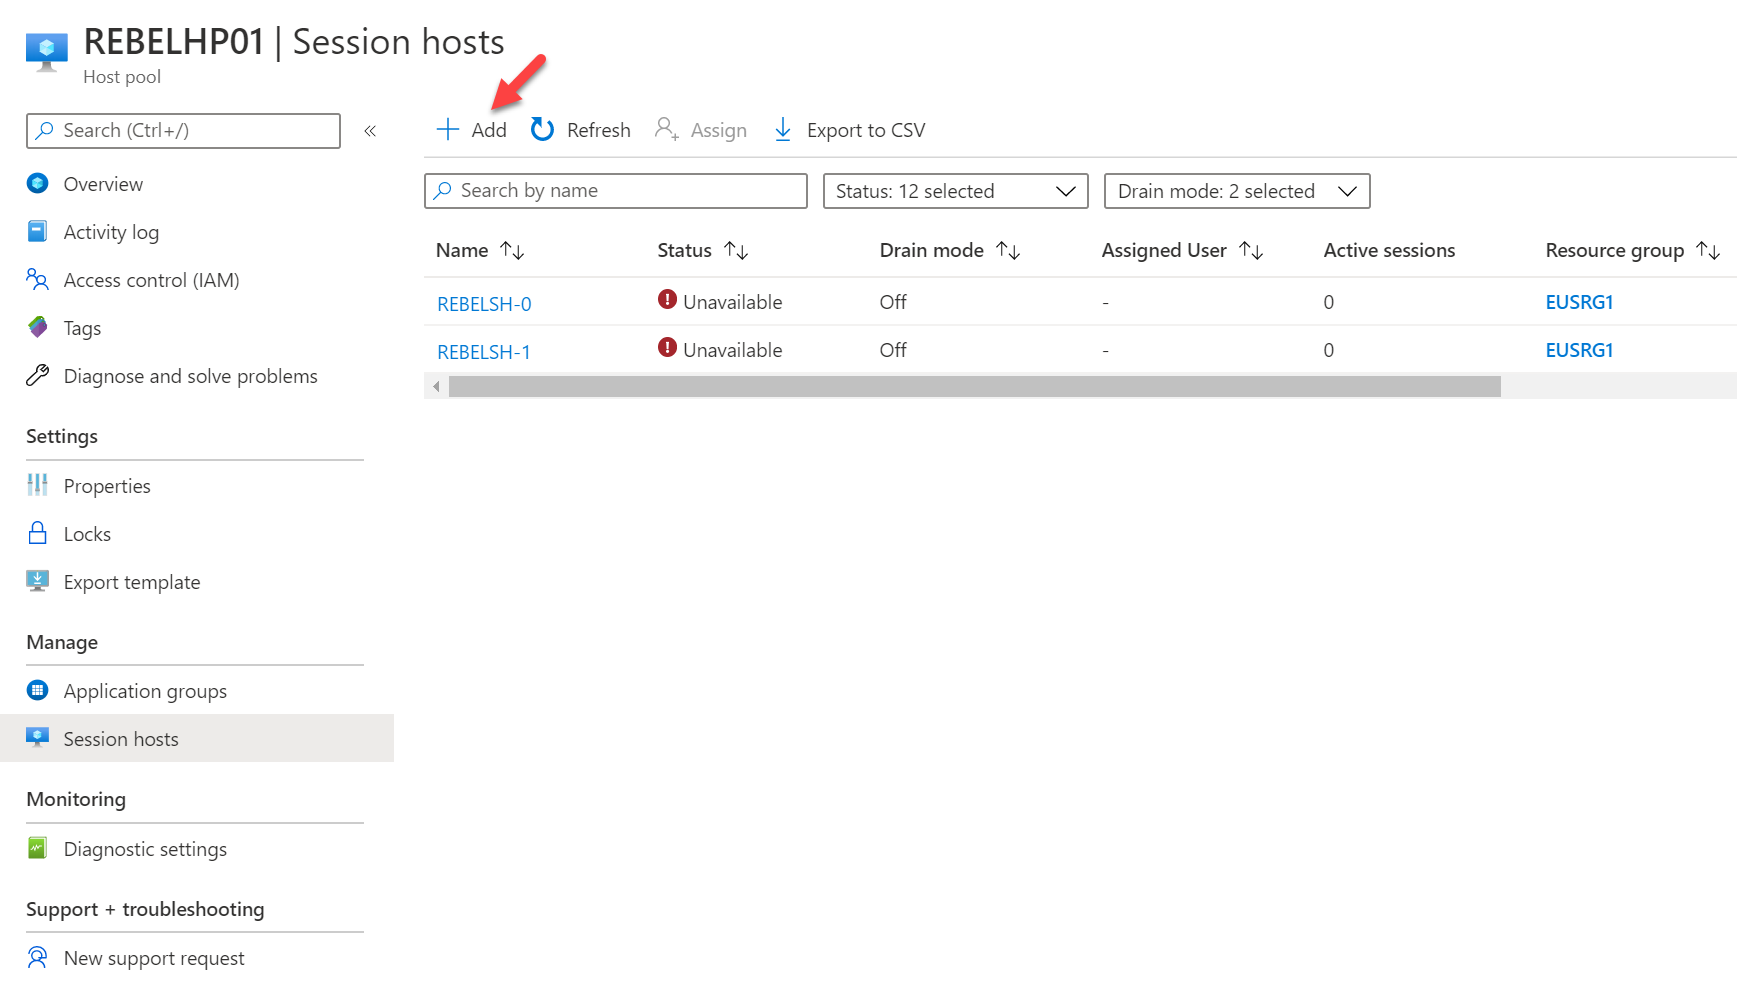
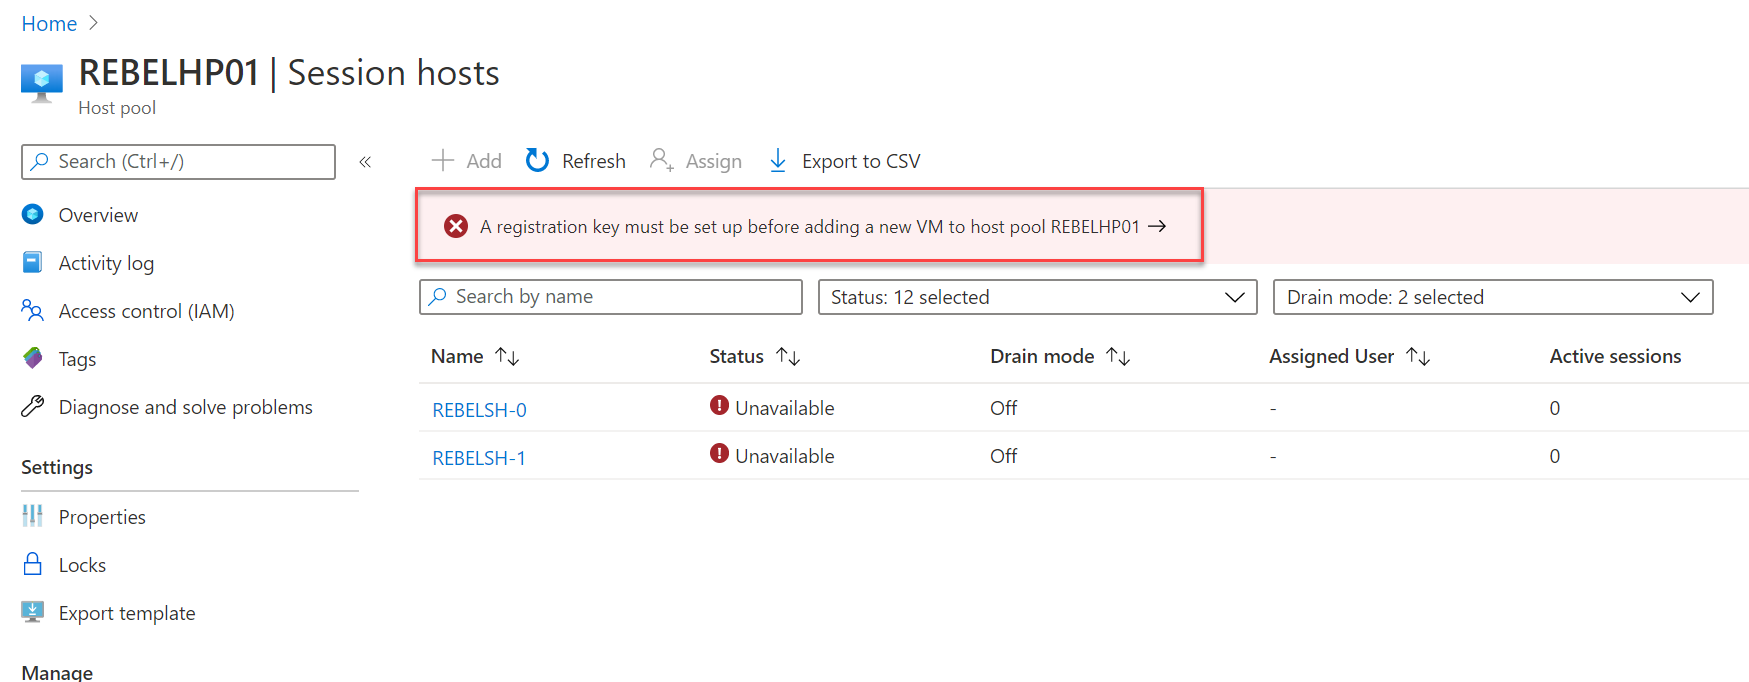
7. When you add the first additional session host it will give the following error. We need to set up a registration key for the host pool before we add a new session host. To do that click on the error message.
8. It will open up a new window. Click on Generate new key to create a new registration key.
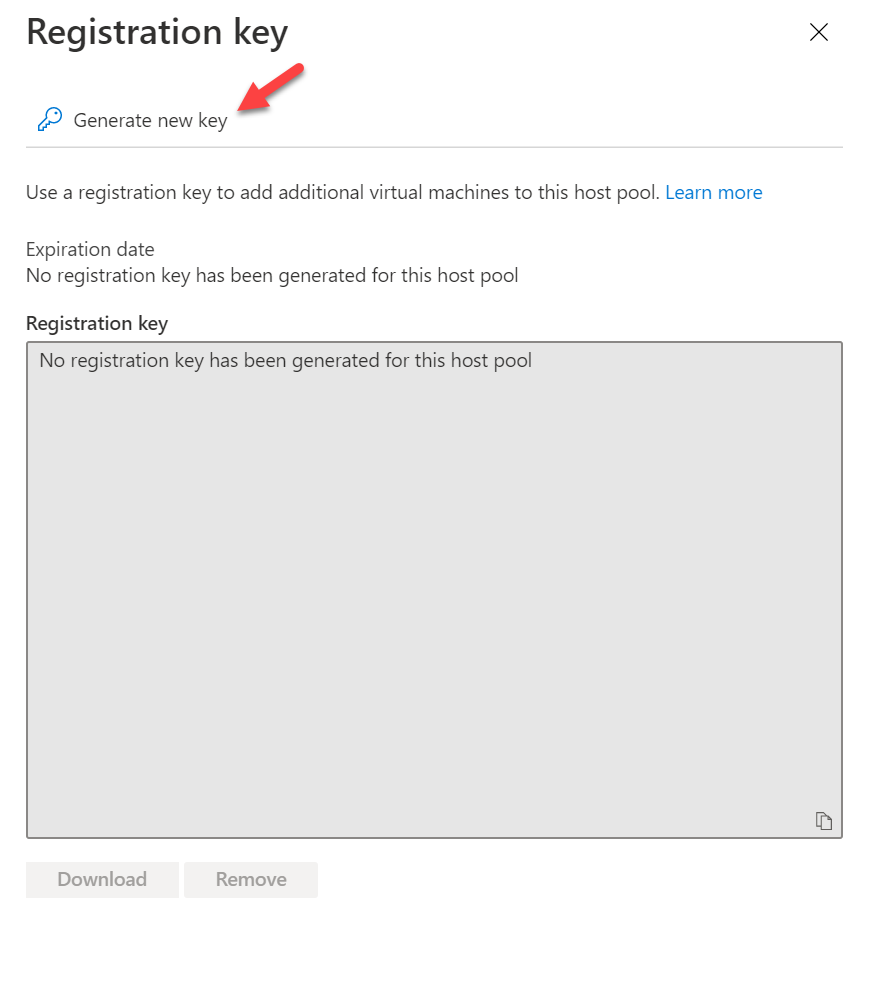
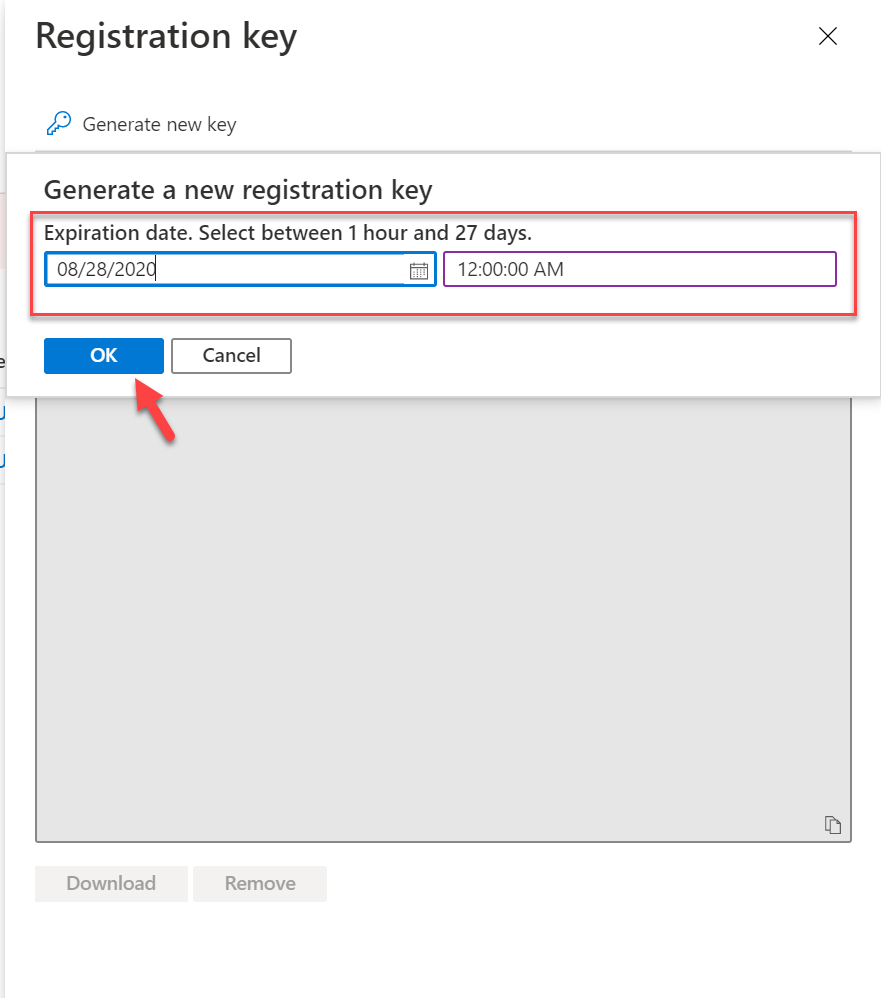
9. Then it will ask for an expire date. Select any time between 1 hour and 27 days and click on OK.
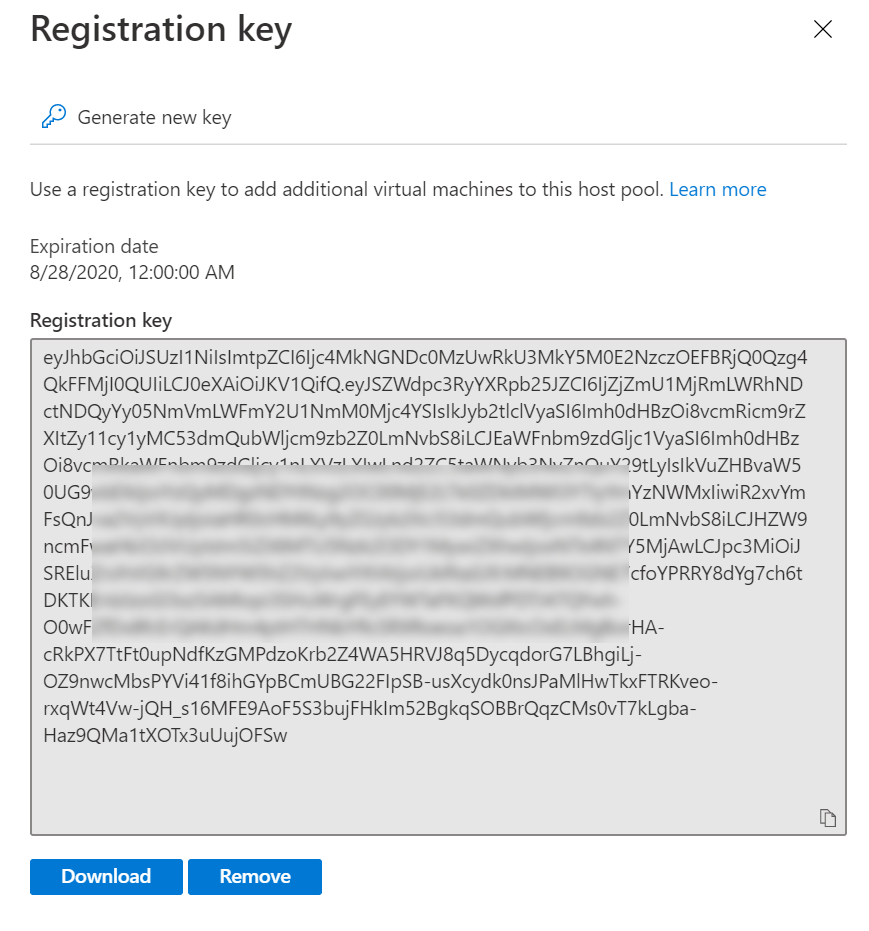
10. This will generate a new registration key.
11. Then go back to session host page again and click on + Add
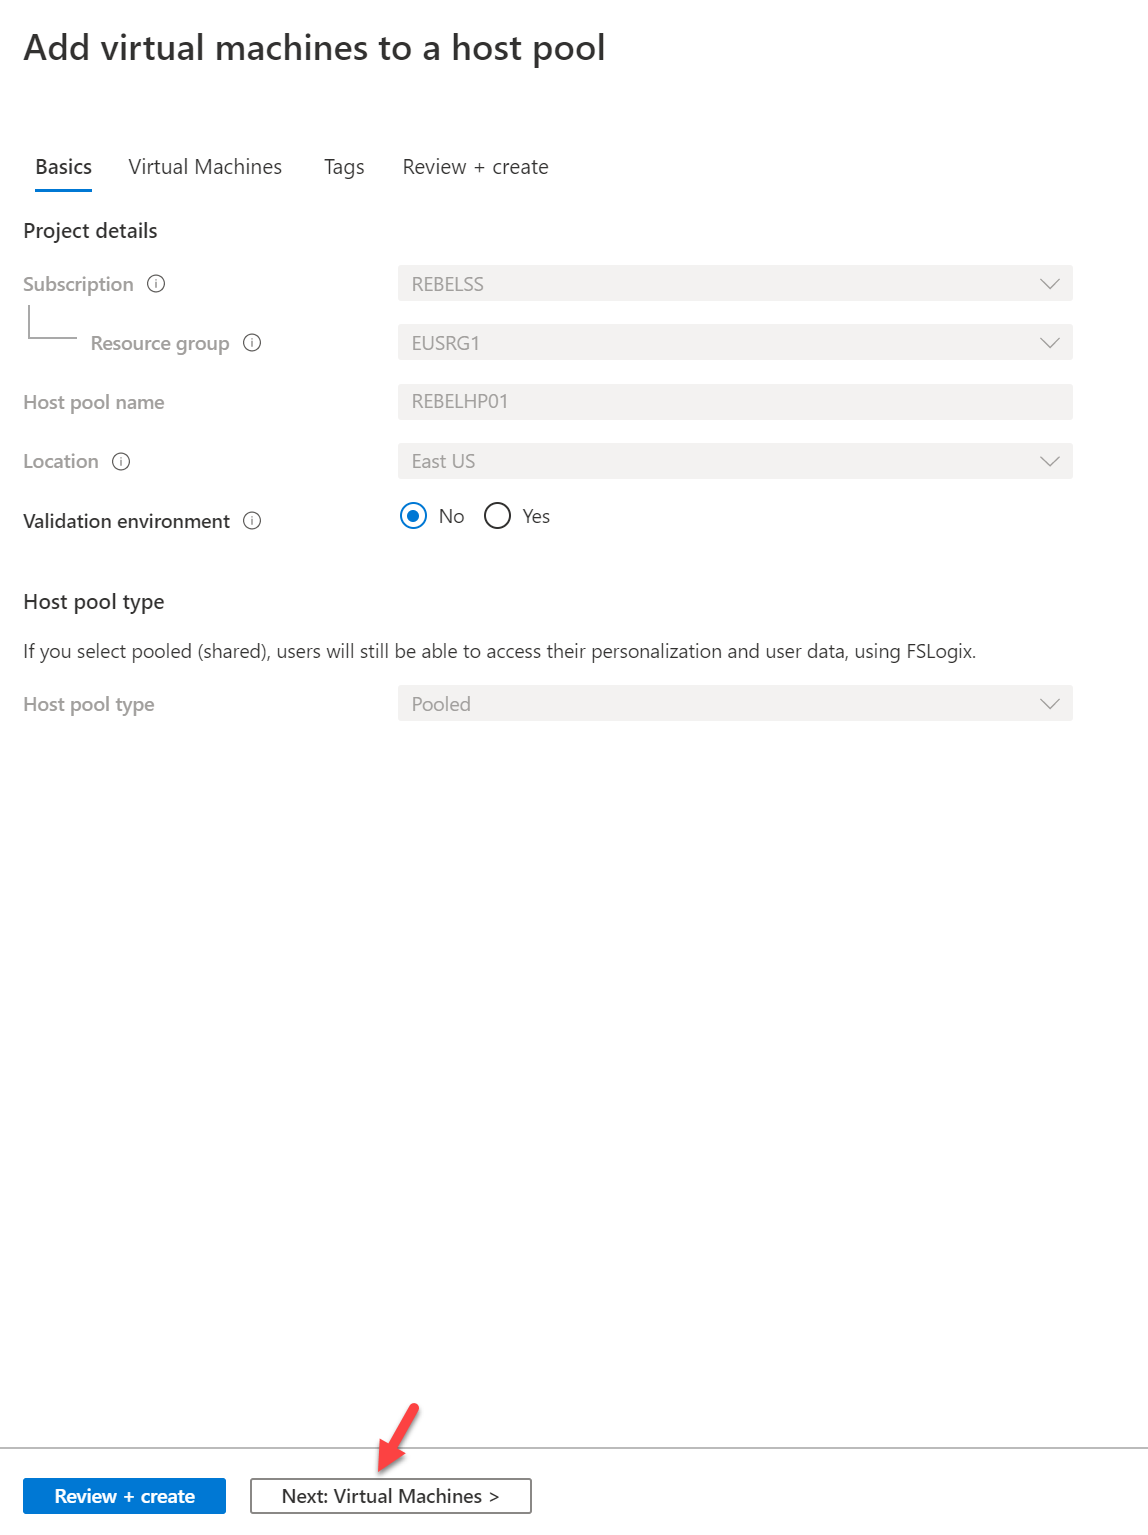
12. This time it will open Add virtual machines to a host pool wizard. In the first page, the fields are already greyed out as it is taken from the existing host pool configuration. Click on Next: Virtual Machines > to continue.
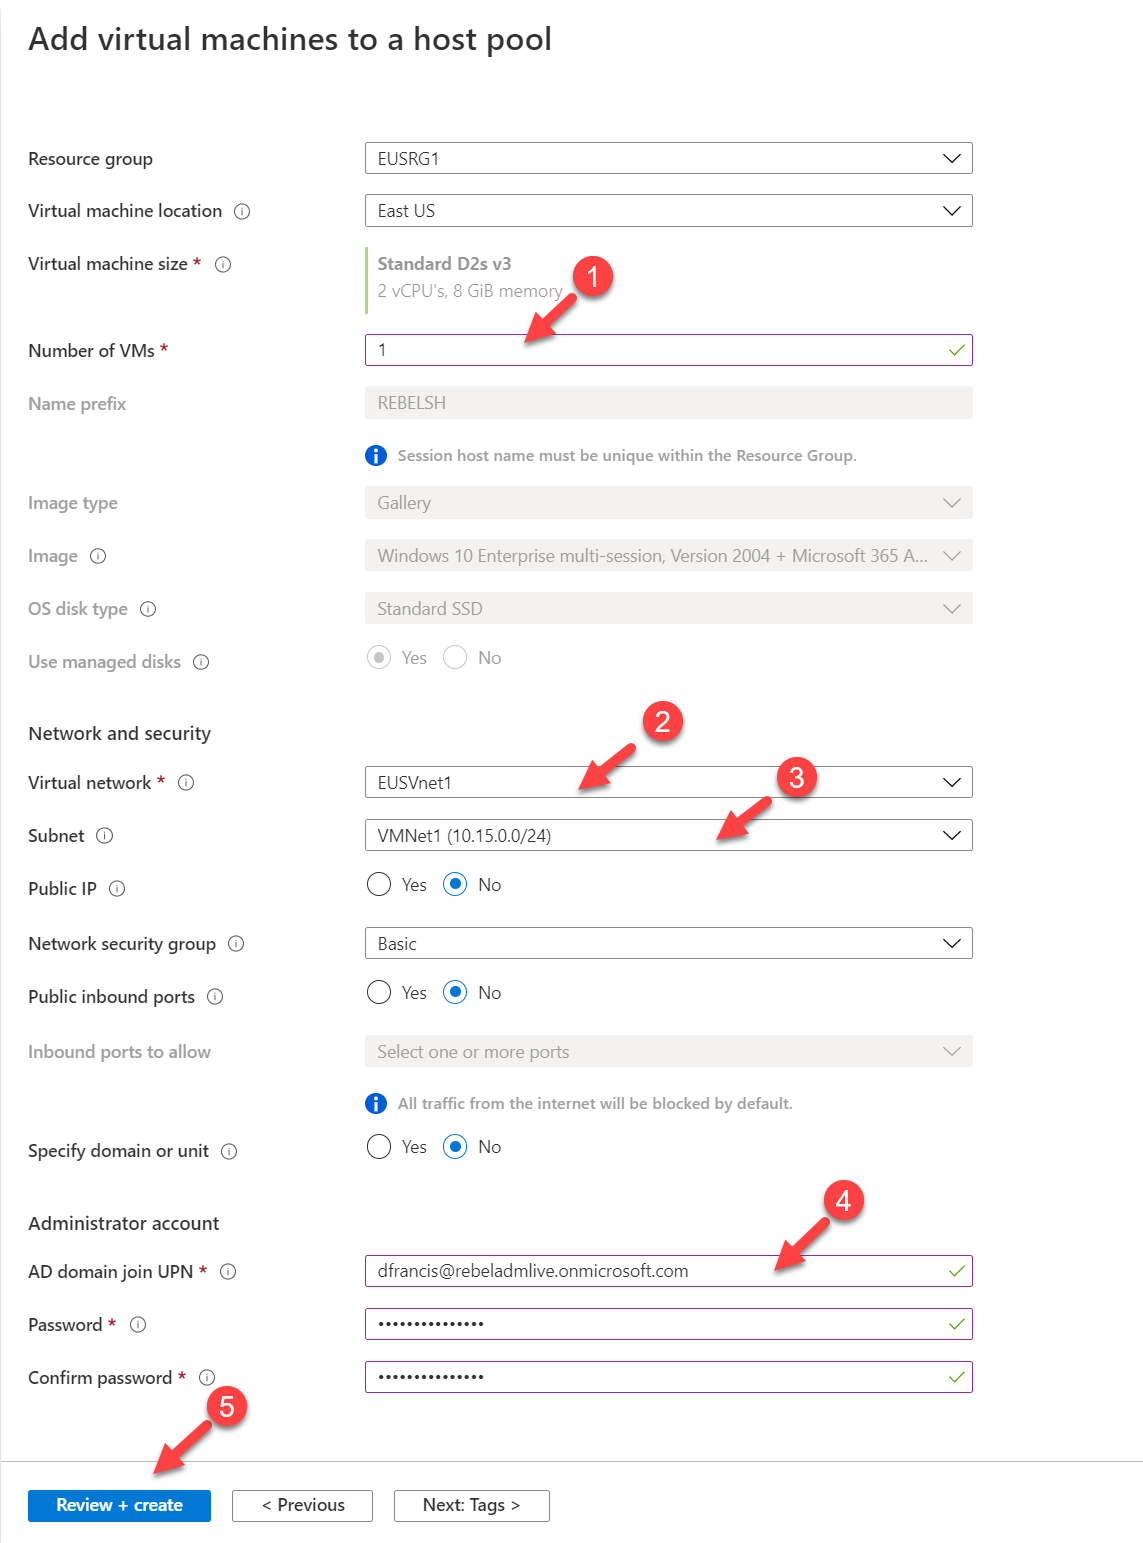
13. On this page also some settings are already greyed out. This is to match the configuration of other session hosts. To start with, define the Number of VMs to add. In this demo, it will be one. Under Network and security section make sure to select relevant virtual network and subnet for session hosts. It is recommended not to assign public ip address or open up any Public inbound ports to session hosts.
Under the Administrator account section, define Active Directory user account which has permissions to add virtual machines to the domain.
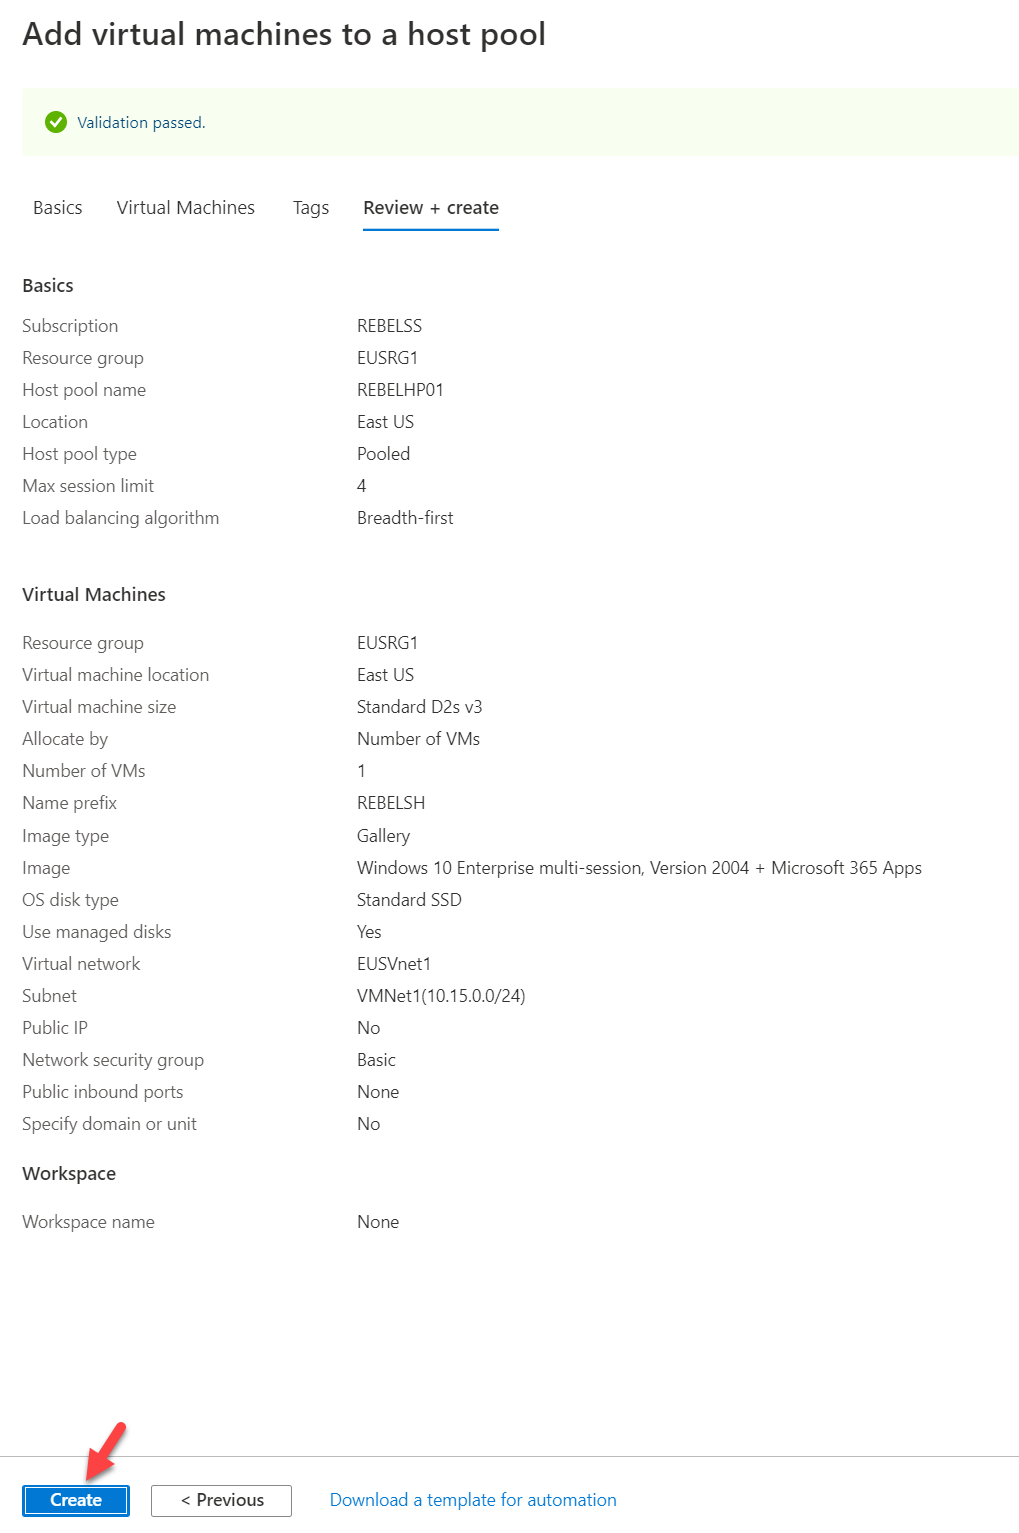
Once all the settings are in place click on Review + Create
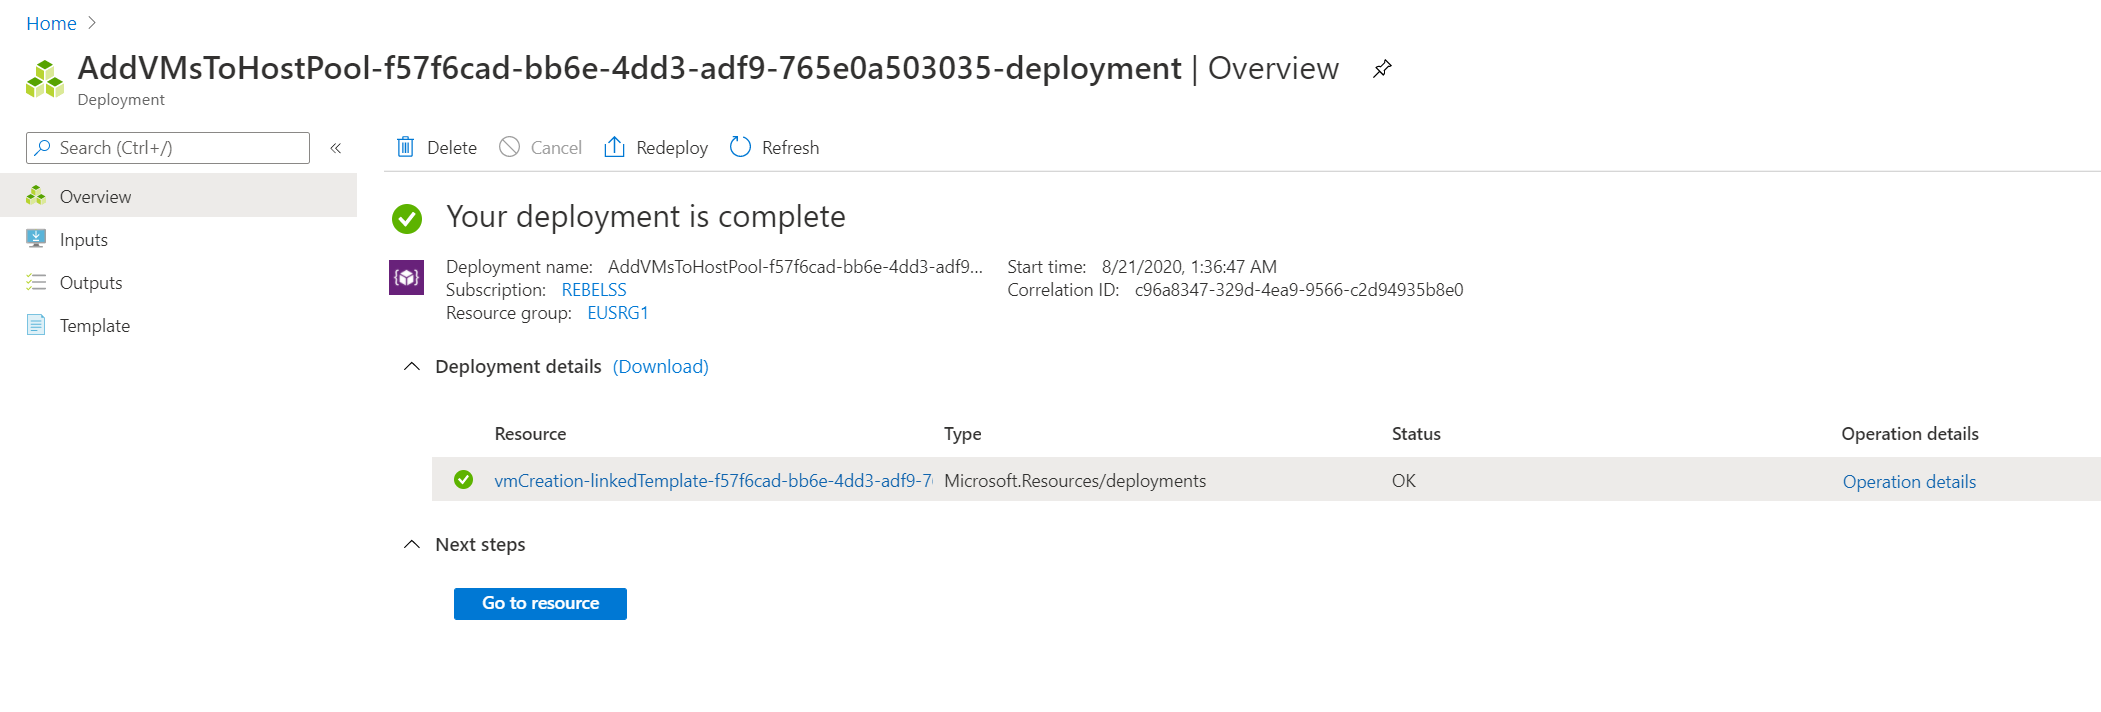
14. In the next window, the system will validate the settings. Once validation is completed, click on Create to complete the host pool setup.
15. The time it takes to complete the deployment process depends on the number of session host you deploying. Before we move forward with testing, make sure the deployment is completed without errors.
New WVD session host testing
For testing purposes, I have shut down other session hosts and only left the new session host REBELSH-2 running.
There are many different ways to connect to Windows virtual desktop services. In this demo, I am using a web client method.
1. Launch a web browser and go to https://rdweb.wvd.microsoft.com/arm/webclient
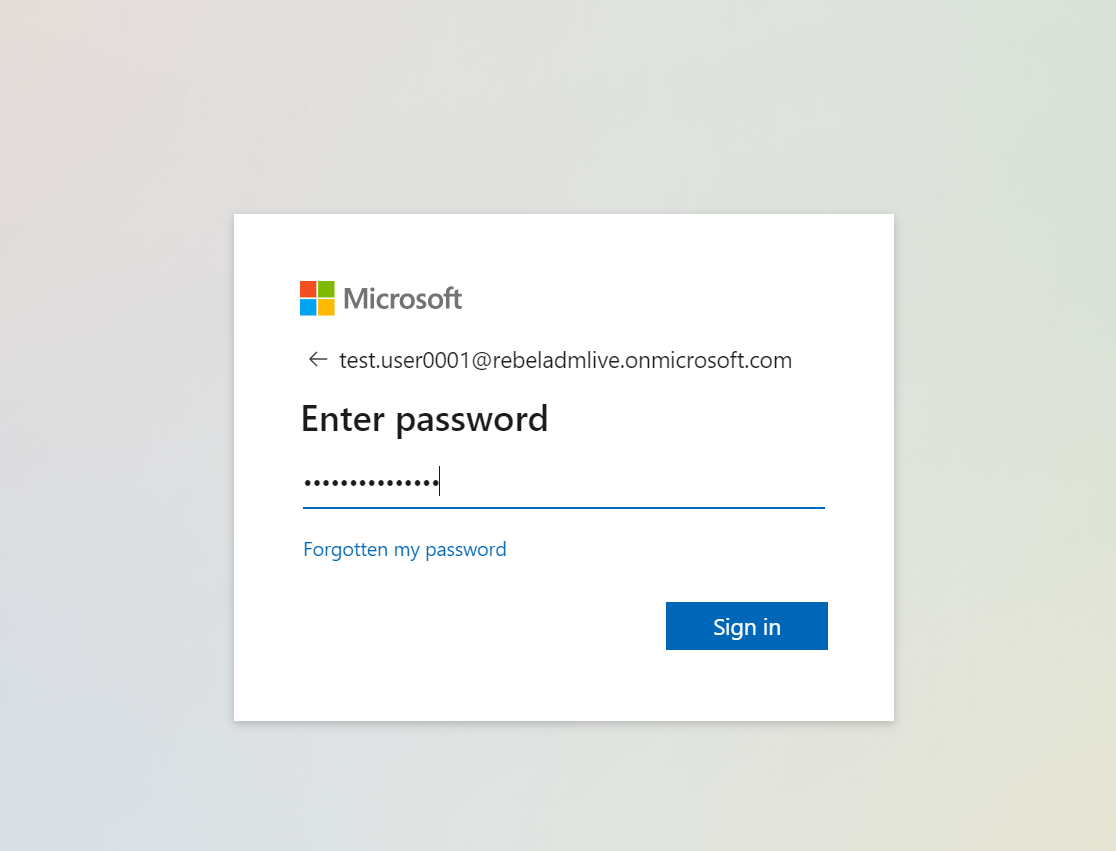
2. Then I am login as a member of Desktop users’ group (this group already have relevant permissions to use the desktop)
3. Once I logged in, I can see the application group. I went ahead and click on it.

4. Then system prompt for permissions to access local resources. Click on Allow to proceed.
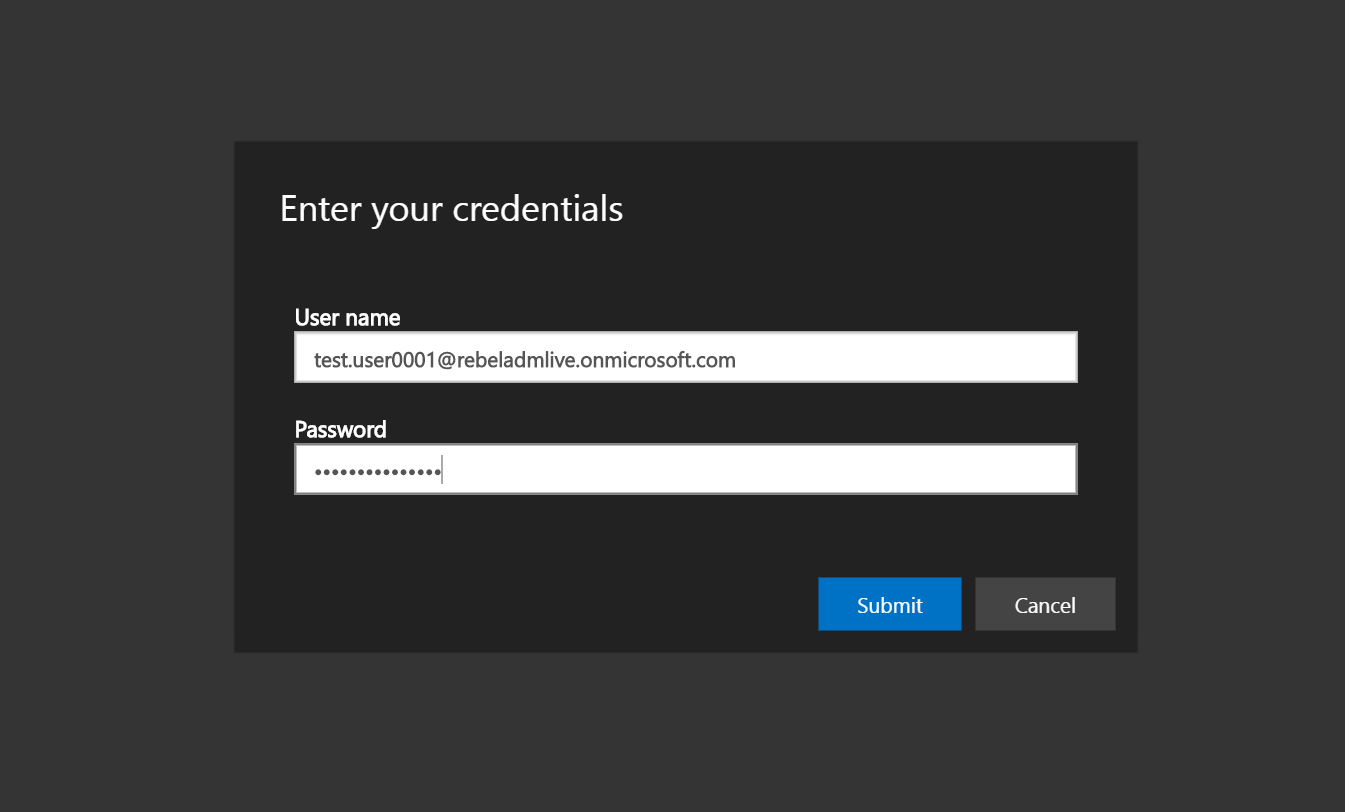
5. In the next window, the system asks for credentials again. I type the same login details and click on Submit.
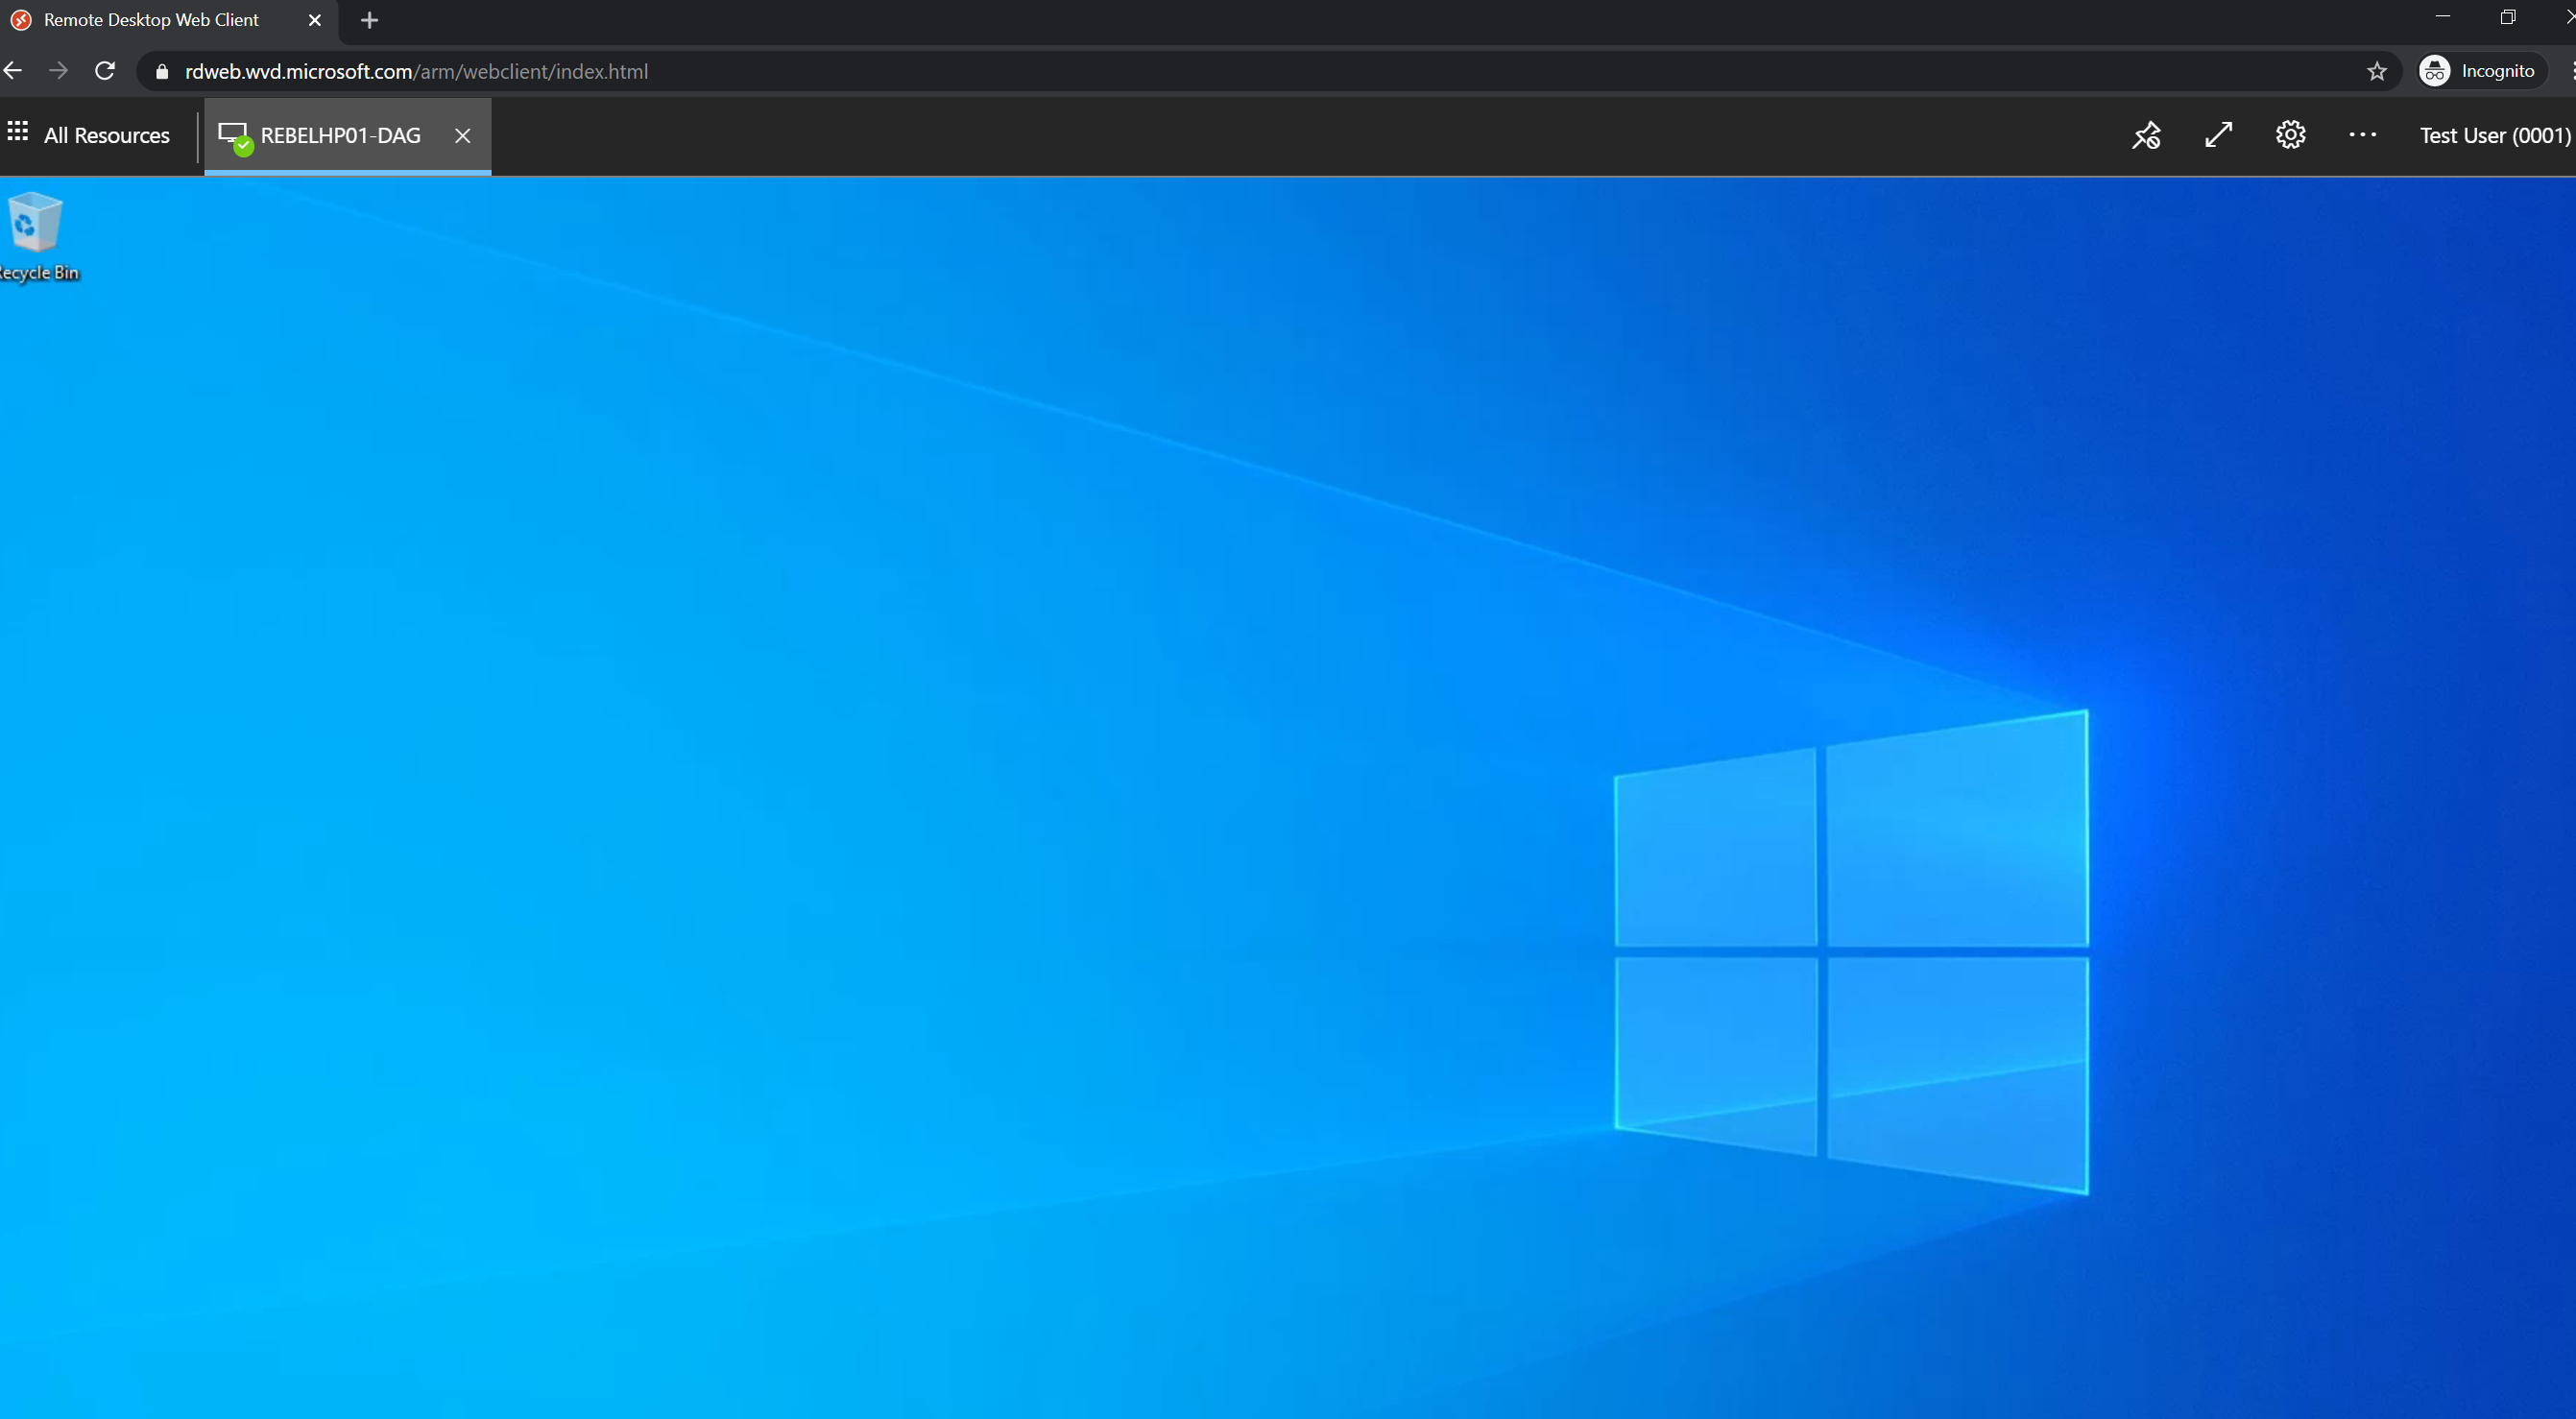
6. Then as expected I can see the windows 10 session
7. Also, if we check the session host REBELSH-2, we can see the session status.
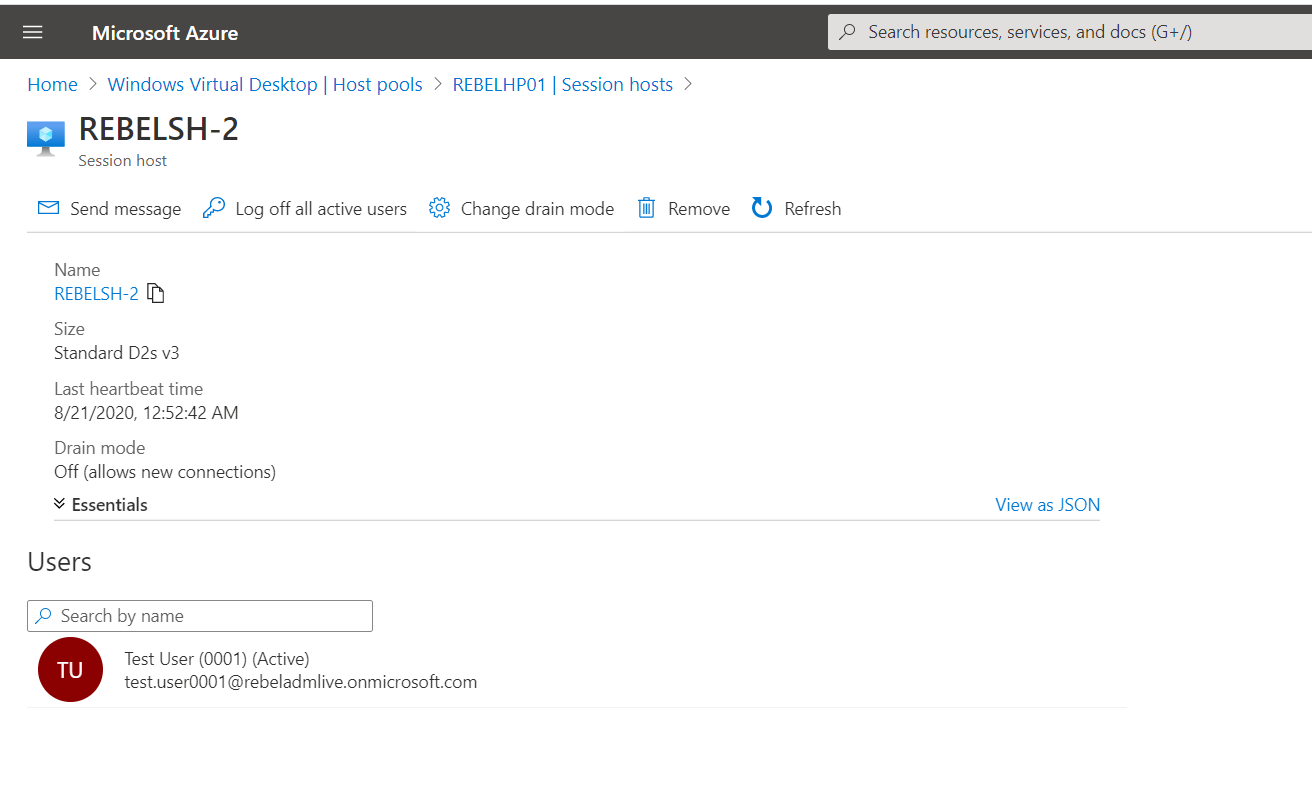
As we can see above the new session host is working correctly. This marks the end of this blog post. If you have any further questions feel free to contact me on rebeladm@live.com also follow me on twitter @rebeladm to get updates about new blog posts.

