
Finally waiting game is over, Windows server 2019 is now available for public. So, it is time to start planning for your production migrations. In this demo I am going to demonstrate how we can setup Active Directory 2019 with new AD forest. I will discuss new features of AD 2019 in a later post.
In below, I created a checklist which we can use to track the progress of installation.
Active Directory Domain Service Installation Check List for First Domain Controller
Produce Active Directory Design Document
Prepare Physical / Virtual resources for Domain Controller
Install Windows server 2019 Standard / Datacenter
Patch Servers with latest Windows Updates
Assign Dedicate IP address to Domain Controller
Install AD DS Role
Configure AD DS according to Design
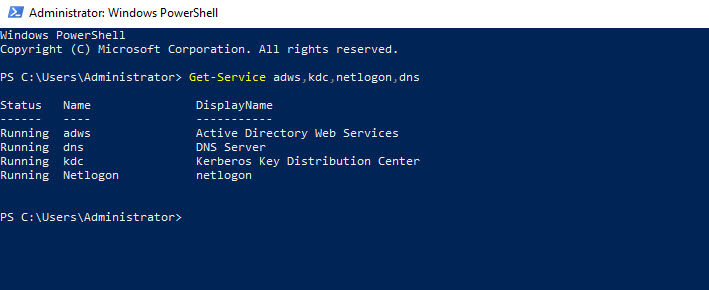
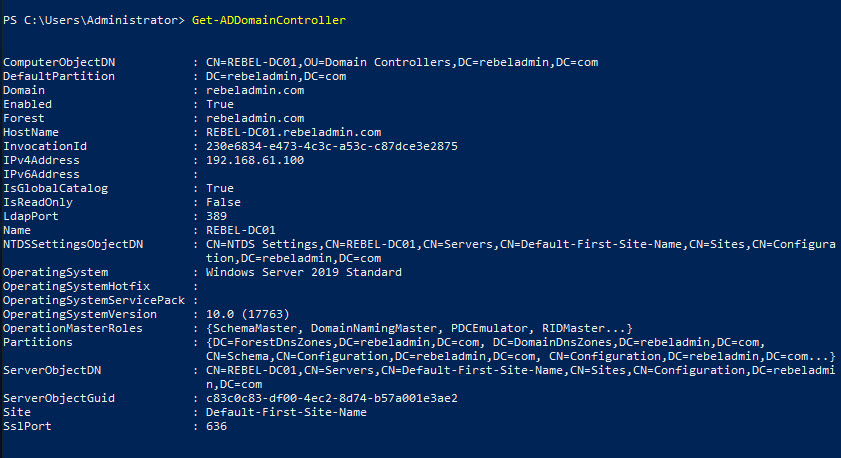
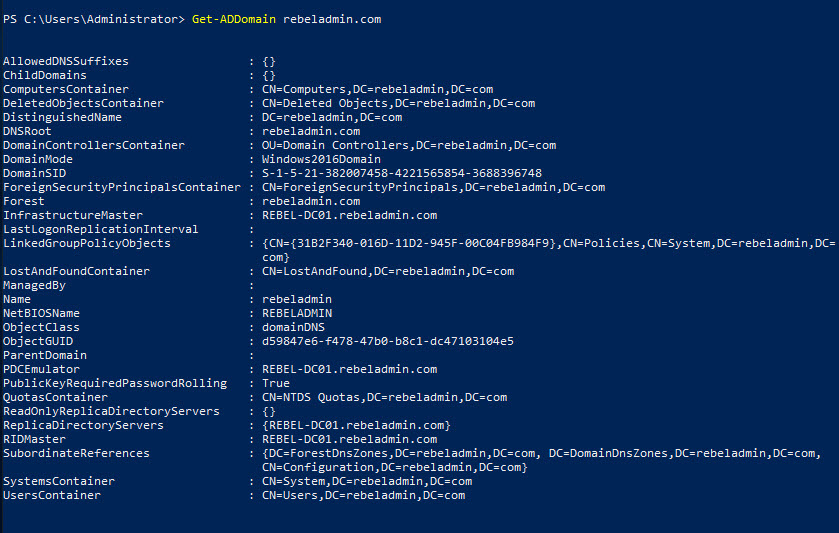
Review logs to verify the healthy AD DS installation and configuration
Configure Service and Performance Monitoring
AD DS Backup / DR Configuration
Produce System Documentation

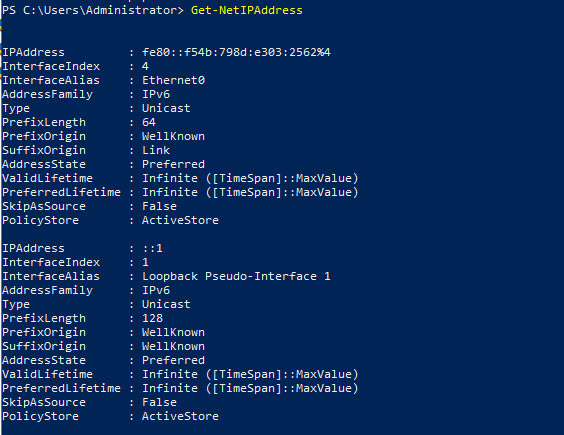
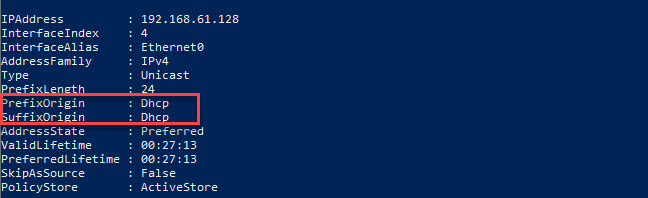
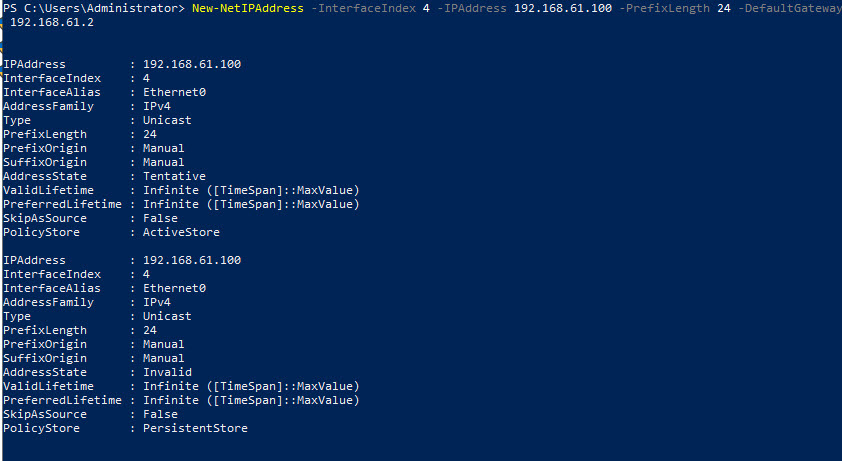
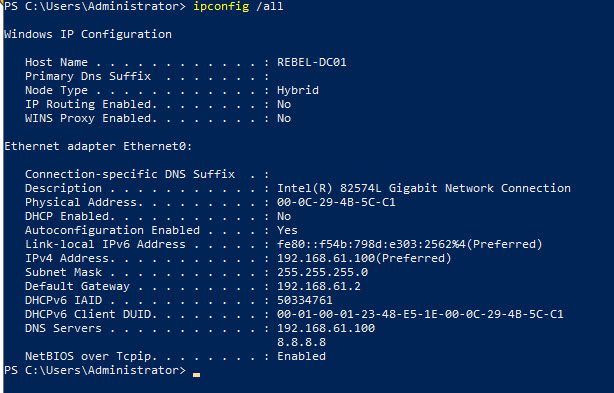
2. I already change the name of the pc to a meaningful one. Then need to check the ip config. in my initial config it got a DHCP IP. We need to change it to static first. (Get-NetIPAddress)
|
Argument |
Description |
|
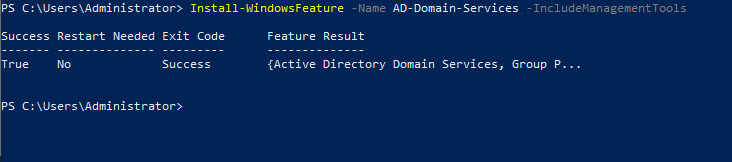
Install-WindowsFeature |
This cmdlet will allow to install windows role, role services or windows feature in local server or remote server. It is similar to using windows server manager to install those. |
|
IncludeManagementTools |
This will install the management tools for the selected role service. |
|
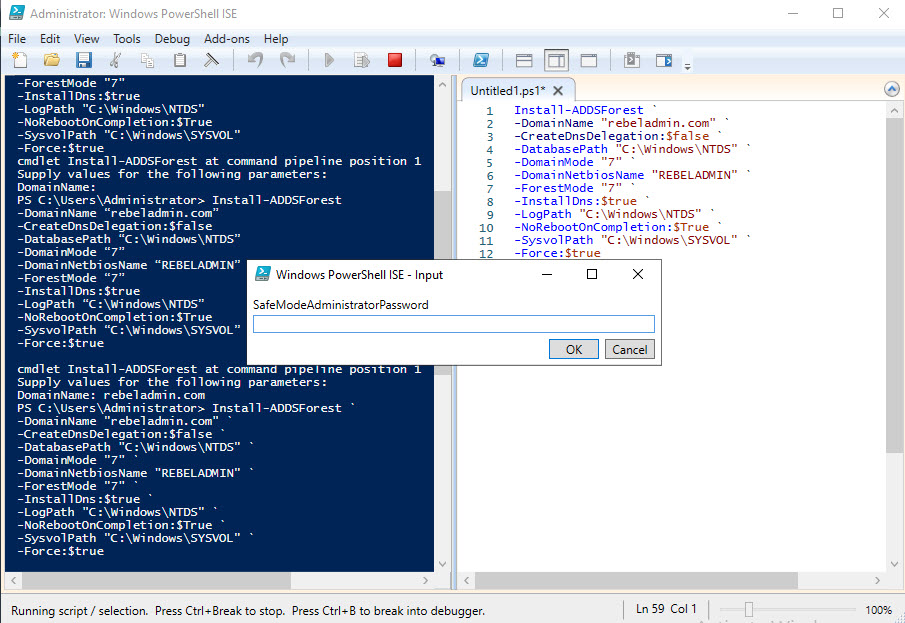
Install-ADDSForest
|
This cmdlet will allow to setup new active directory forest. |
|
-DomainName |
This parameter defines the FQDN for the active directory domain. |
|
-CreateDnsDelegation |
Using this parameter can define whether to create DNS delegation that reference active directory integrated DNS. |
|
-DatabasePath |
This parameter will use to define the folder path to store active directory database file (Ntds.dit) |
|
-DomainMode |
This parameter will specify the active directory domain functional level. in above I, have used mode 7 which is windows server 2016. Windows server 2019 doesn’t have separate domain functional level. |
|
-DomainNetbiosName |
This defines the NetBIOS name for the forest root domain. |
|
-ForestMode |
This parameter will specify the active directory forest functional level. in above I, have used mode 7 which is windows server 2016. Windows server 2016 doesn’t have separate forest functional level. |
|
-InstallDns |
Using this can specify whether DNS role need to install with active directory domain controller. For new forest, it is default requirement to set it to $true. |
|
-LogPath |
Log path can use to specify the location to save domain log files. |
|
-SysvolPath |
This is to define the SYSVOL folder path. Default location for it will be C:\Windows |
|
–NoRebootOnCompletion |
By default, system will restart the server after domain controller configuration. using this command can prevent the automatic system restart. |
|
-Force |
This parameter will force command to execute by ignoring the warning. It is typical for the system to pass the warning about best practices and recommendations. |


All the steps worked flawlessly! Thanks for sharing them.
I faced one issue that I did not give a complex password as per the Windows expectations. Please put the text “According to windows password complexity recommendations). Failure to do so will stop the configuration” in red color so that visitor your website does not miss out on this important consideration.
Thank you so much for that!!