
Azure Backup is capable of replacing typical on-premises backup solutions. It is cloud-based, secure, reliable solution. It has four components which can use to backup different types of data.
|
Component |
Protected data |
Can use with On-premises? |
Can use with Azure? |
|
Azure Backup (MARS) agent |
Files, Folders, System State |
Yes |
Yes |
|
System Center DPM |
Files, Folders, Volumes, VMs, Applications, Workloads, System State |
Yes |
Yes |
|
Azure Backup Server |
Files, Folders, Volumes, VMs, Applications, Workloads, System State |
Yes |
Yes |
|
Azure IaaS VM Backup |
VMs, All disks (using PowerShell) |
No |
Yes |
More details about azure backup and components limitations can be find on https://docs.microsoft.com/en-us/azure/backup/backup-introduction-to-azure-backup
In this article we are going to look in to Azure VM backup (Azure IaaS VM Backup).
How Azure VM Backup works?
Azure VM backup doesn’t need any special agent installed in VM. It also does not need to have any additional components (backup server) install either to enable backup. When very first backup job is triggered, it installs backup extension inside the VM. If its Windows VM, it installs VMSnapshot extension and if its Linux VM, it installs VMSnapshotLinux extension. VM must be in running state in order to install extension. After extension in place, it takes point-in-time snapshot of the VM. If VM is not running during backup window, it takes snapshot of VM storage. If its windows VM, backup service uses Volume Shadow Copy Service (VSS) to get consistence snapshot of VM disk. If its Linux VM, users can create custom scripts to run before and after backup job to keep application consistency. Once snapshot is taken it will transfer to the backup vault. Service can identify the recent changes and only transfer the block of data which changed from last backup. Once the data transfer completes snapshot will removed and recovery point will be created.
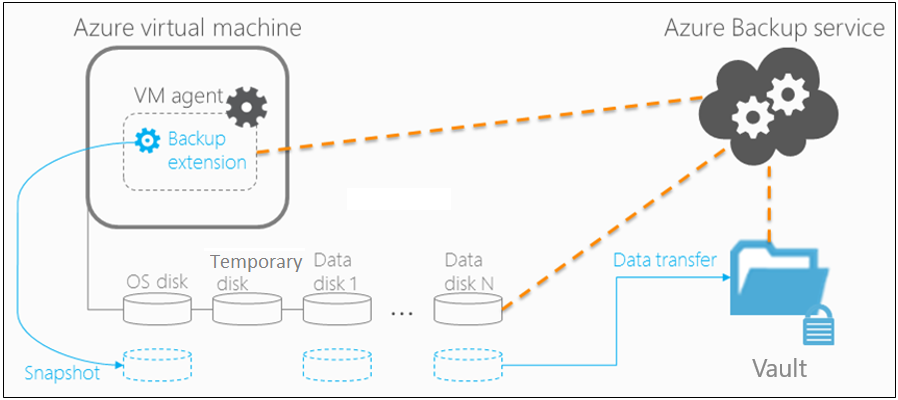
Image Source: https://docs.microsoft.com/en-us/azure/backup/media/backup-azure-vms-introduction/vmbackup-architecture.png
Performance of backup depends on,
1) Storage account limitations
2) Number of disks in VM
3) Backup Schedule – if all jobs running in same time it can create traffic jam
According to Microsoft following are recommended when you use Azure backup for Azure VMs. Reference: https://docs.microsoft.com/en-us/azure/backup/backup-azure-vms-introduction
1) Do not schedule more than 40 VMs to backup same time.
2) Schedule VMs backup when minimum IOPs been used in your environment (In relevant storage accounts).
3) Better not to back up more than 20 disks in single storage account. If you have more than 20 disks in single storage account spread those VMs across the multiple policies to maintain required IOPS.
4) Do not restore a VM running on Premium storage to same storage account. Also try to avoid restore while backup process is running on same storage account.
5) For Premium VM backup, ensure that storage account that hosts premium disks has at least 50% free space for staging snapshot for a successful backup.
6) Linux VM needs python 2.7 enabled for backup.
Next step is to see this in action.
1) Log in to Azure Portal as Global Administrator
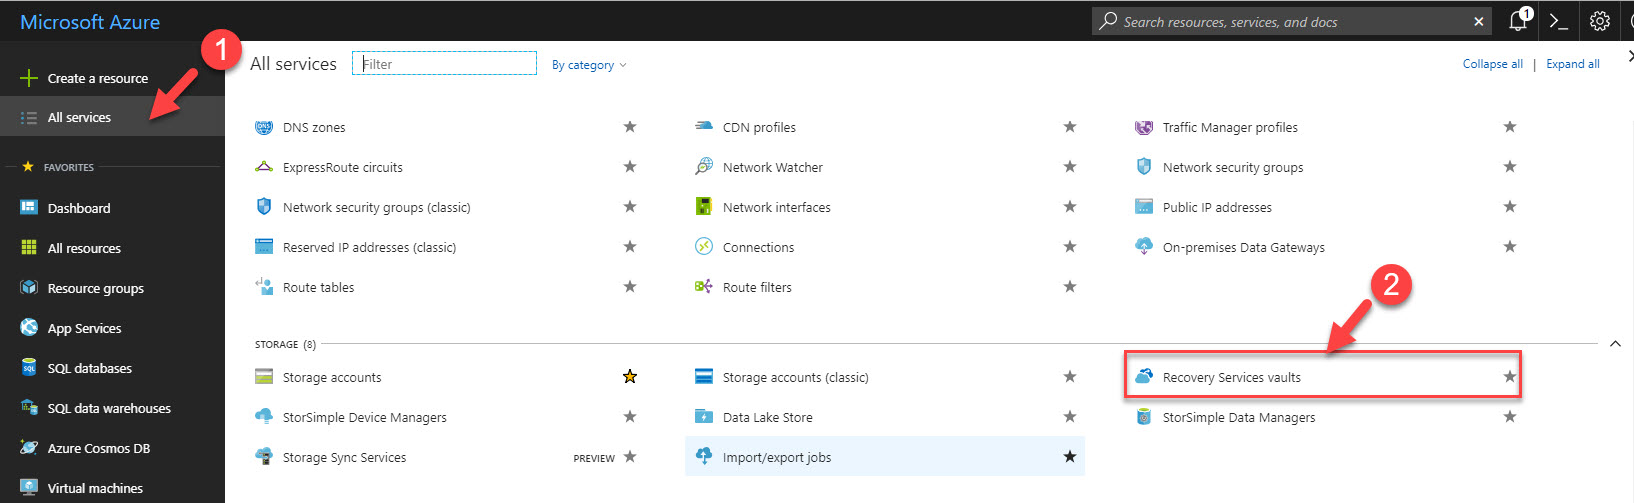
2) First step is to create Azure Recovery Service Vault. In order to do that, go to All Services and click on Recovery Service vaults under storage section.
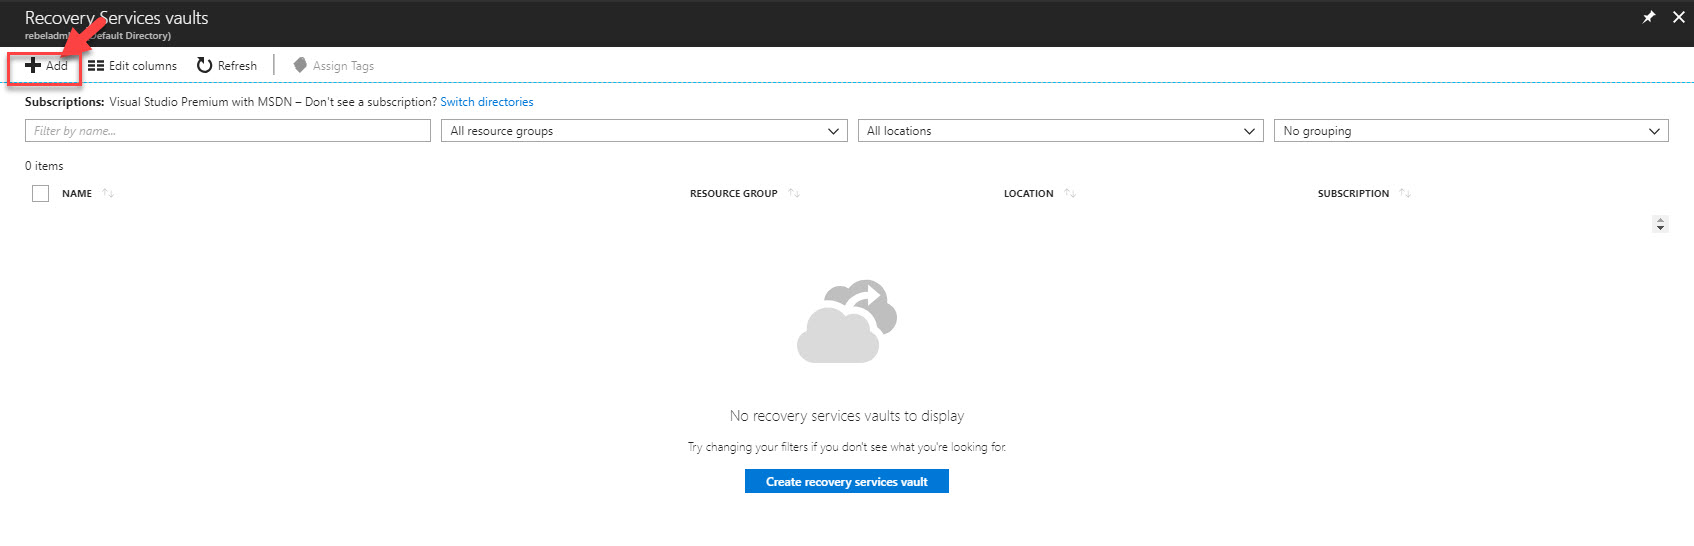
3) Then click on Add in new window
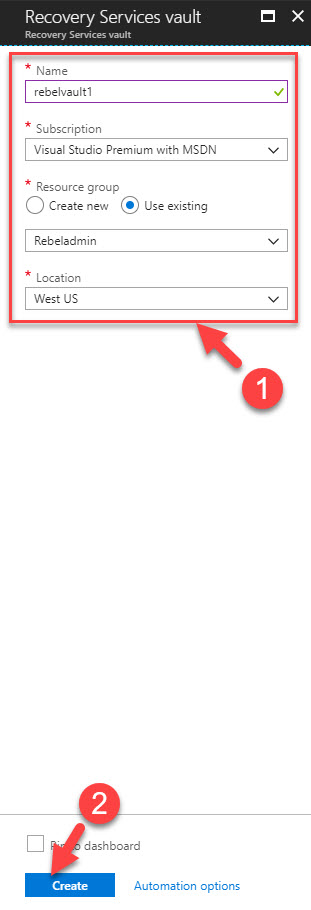
4) It will open up wizard and there provide vault name, subscription, resource group and location. Once done, click on Create.
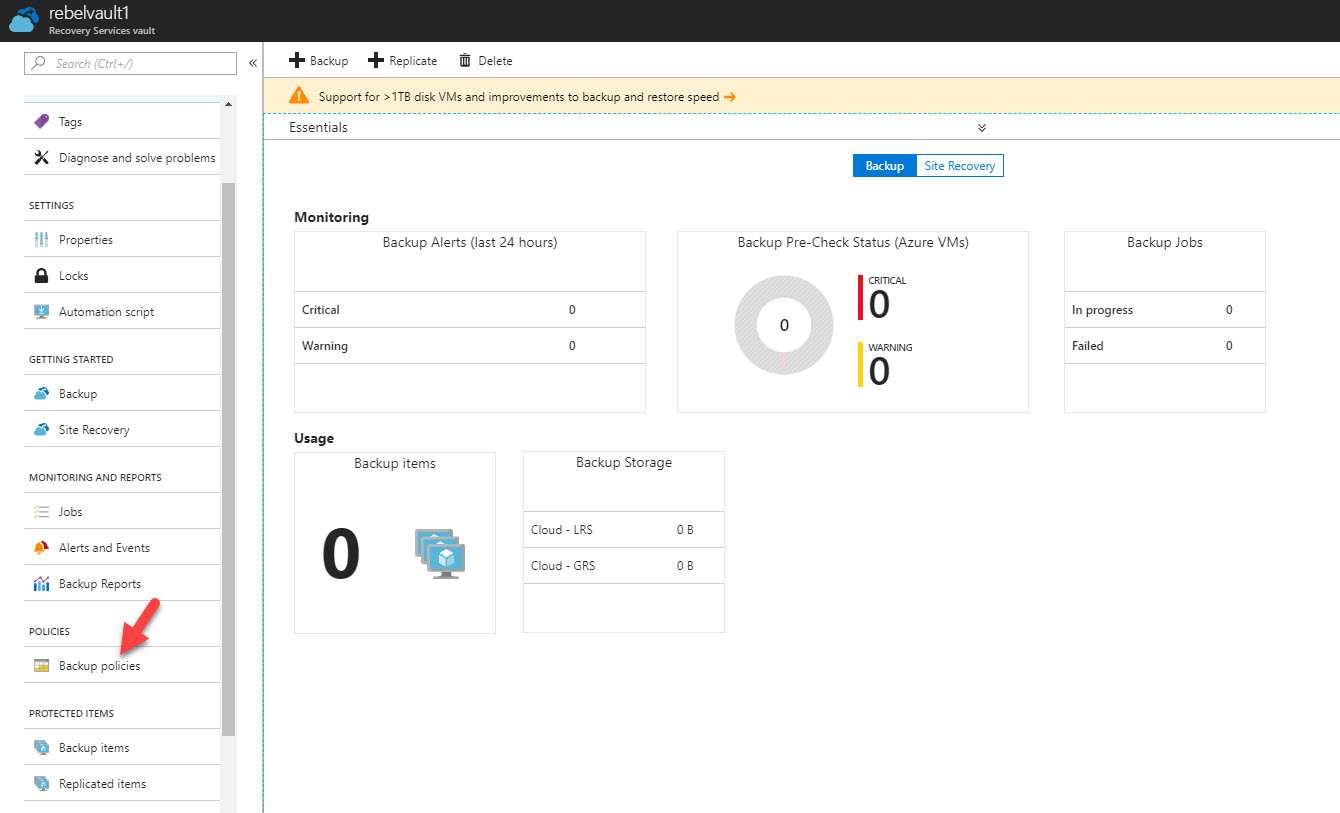
5) Now we have vault created, next step is to create backup policy. To do that click on vault we just created from the Recovery service vault window.

6) Then click on Backup Policies
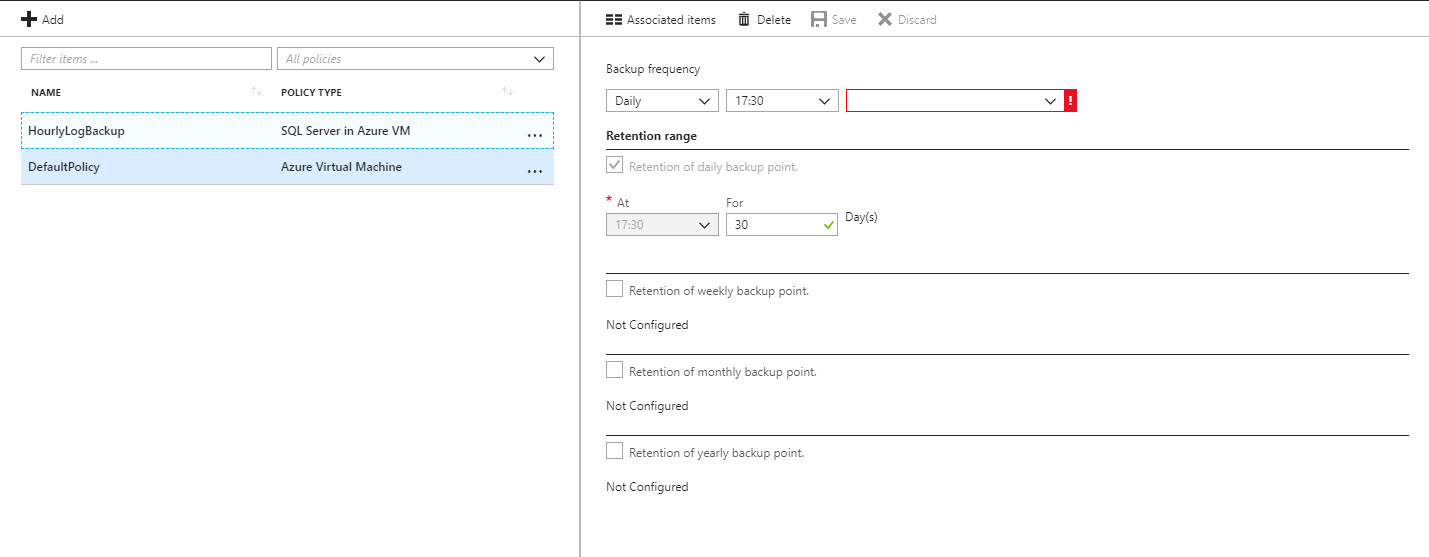
7) There is default policy from Azure VM backup. It backup VMs daily and keep it for 30 days.
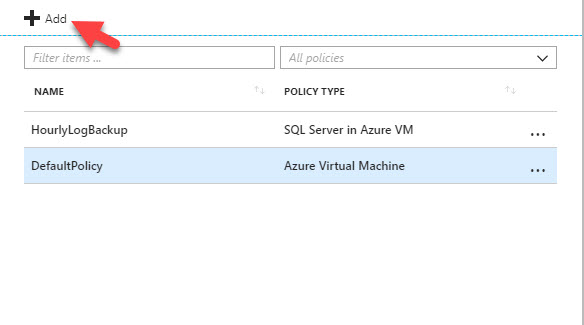
8) I am going to create new policy to do backup every day at 01:00 am and keep it for 7 days. To do that click on add option in policy window.
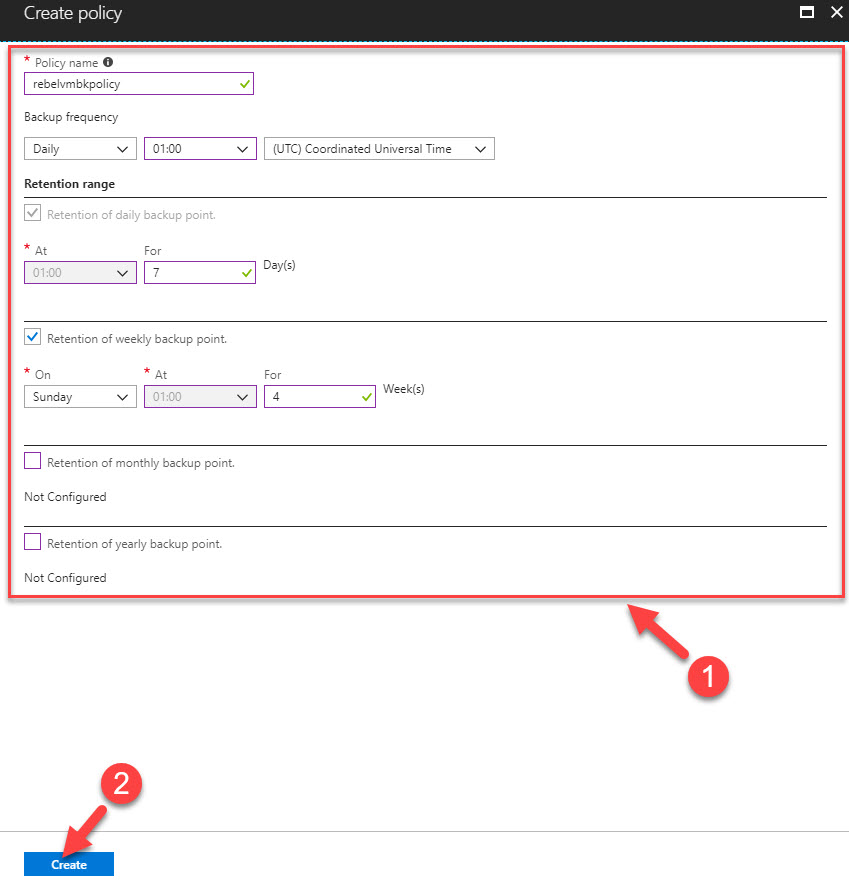
9) Then select the policy type. for VMs, it should be Azure Virtual Machine

10) In next window we can define time and retention period of data. Once done with the details click on Create.
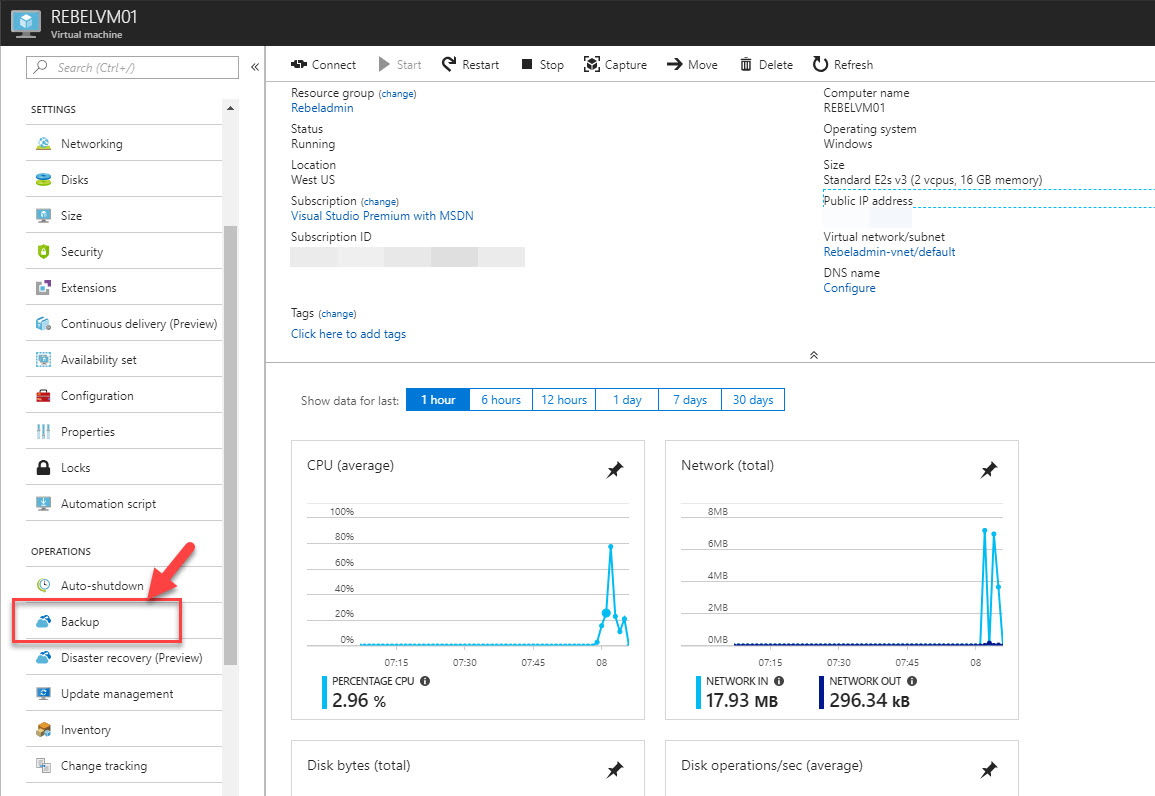
11) Next step of the configuration is to enable backup. In order to do that, go to the VM you like to backup. Then click on the option Backup
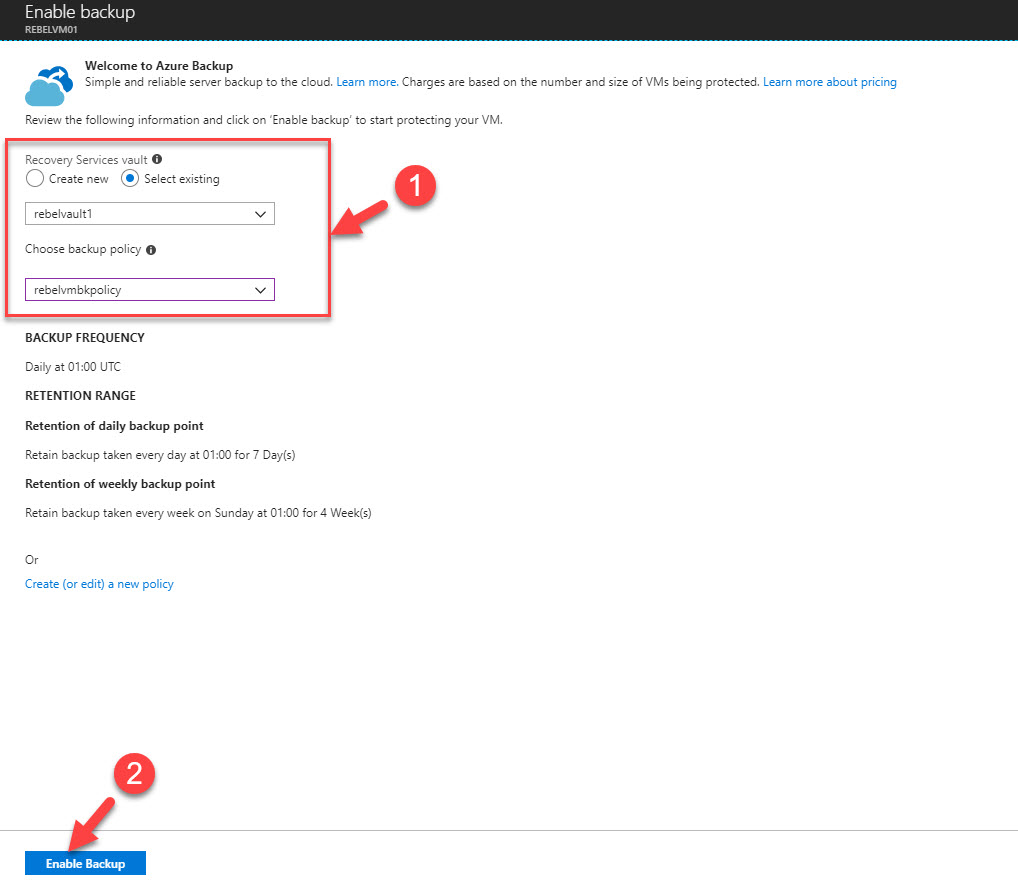
12) Then in new window select the vault and policy we created before and then click on enable backup
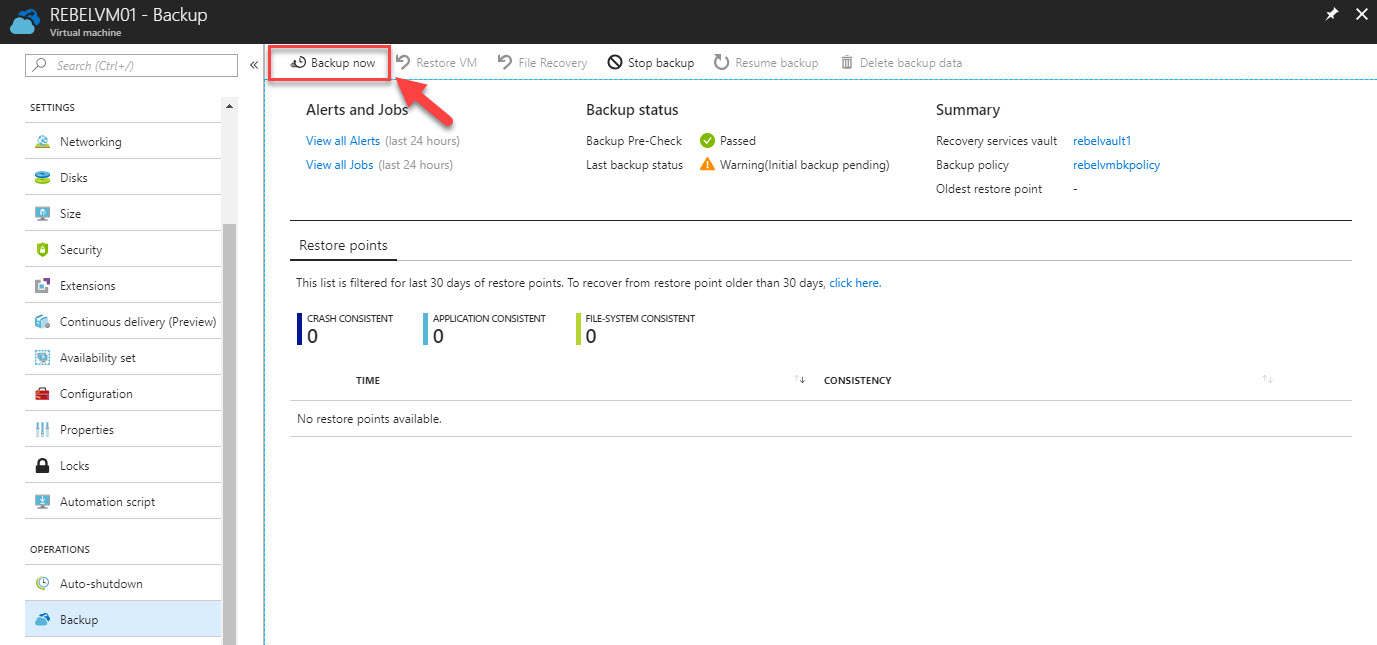
13) Once it is done we can run backup by going in to same backup window. If you like to take ad-hoc backup, click on Backup Now
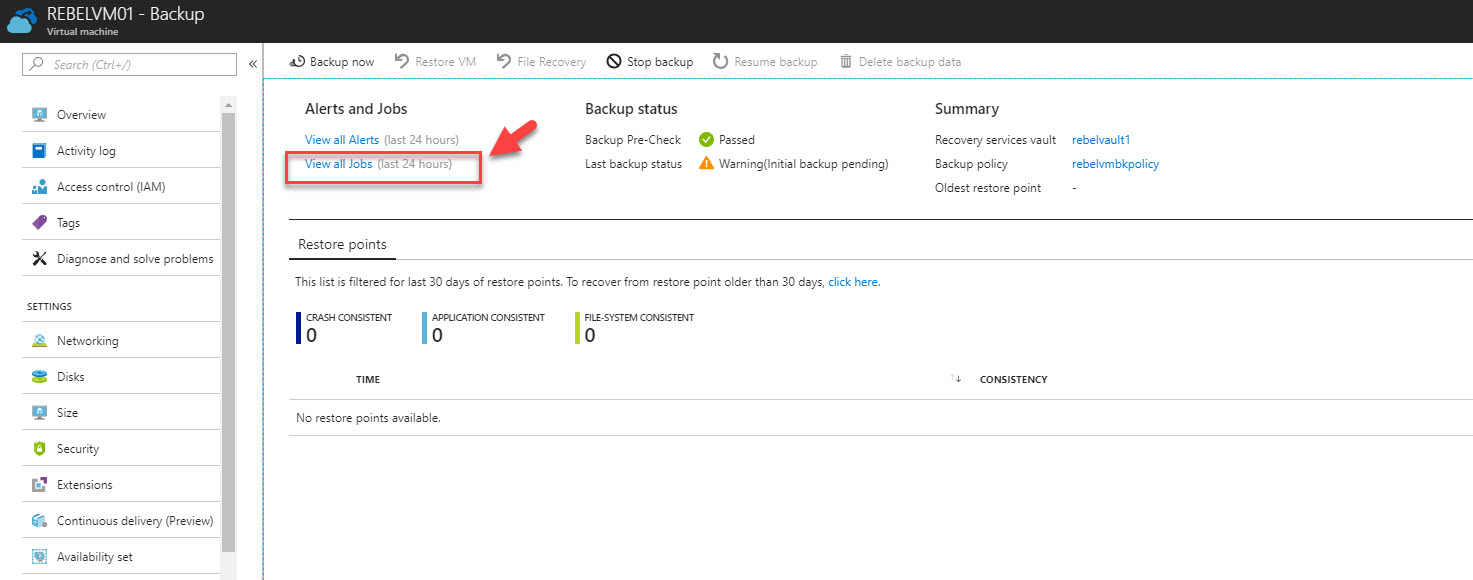
14) We can see the progress of the backup job by clicking View All Jobs
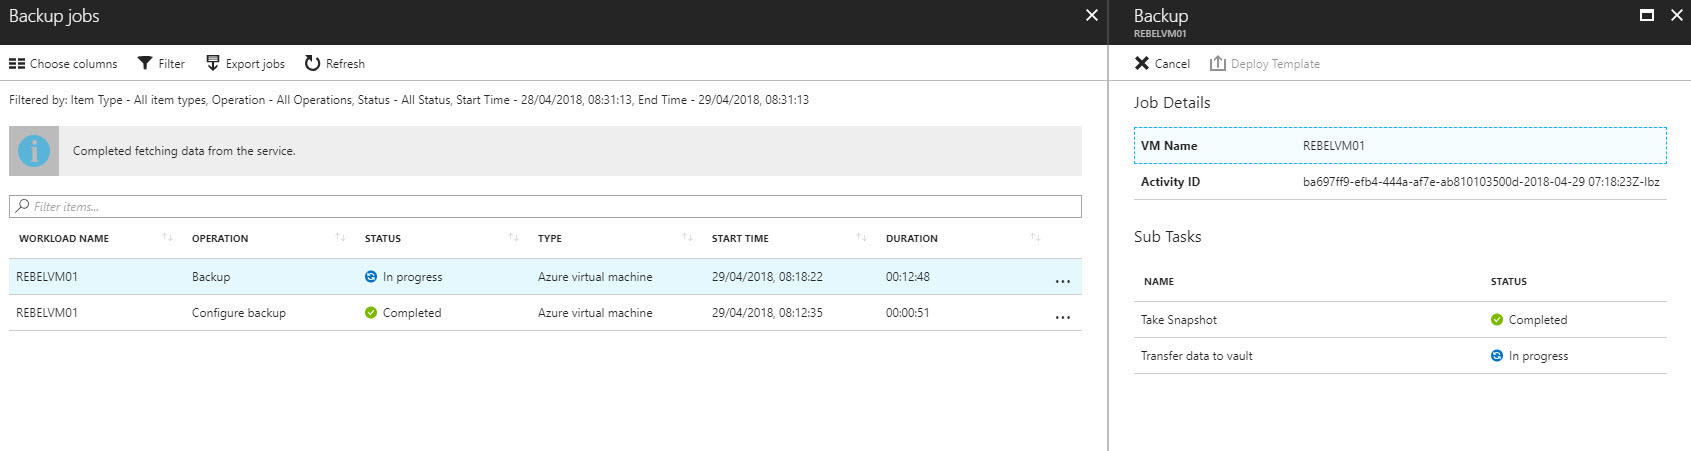
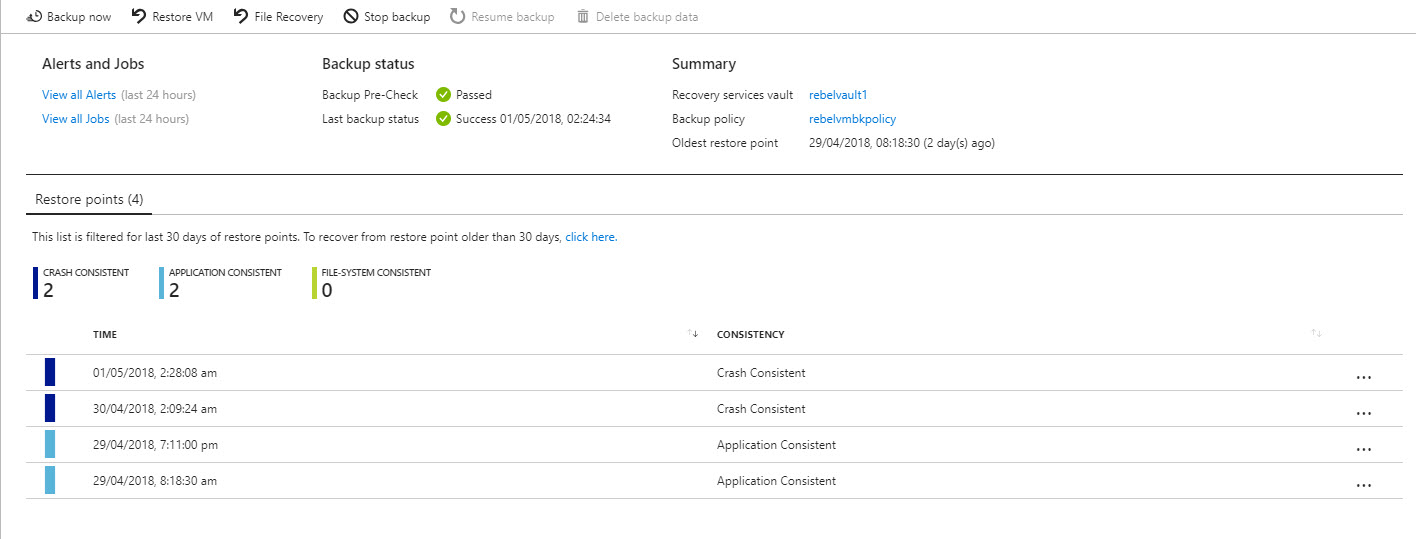
15) Once backup jobs completed we can see the status of it in same backup window.
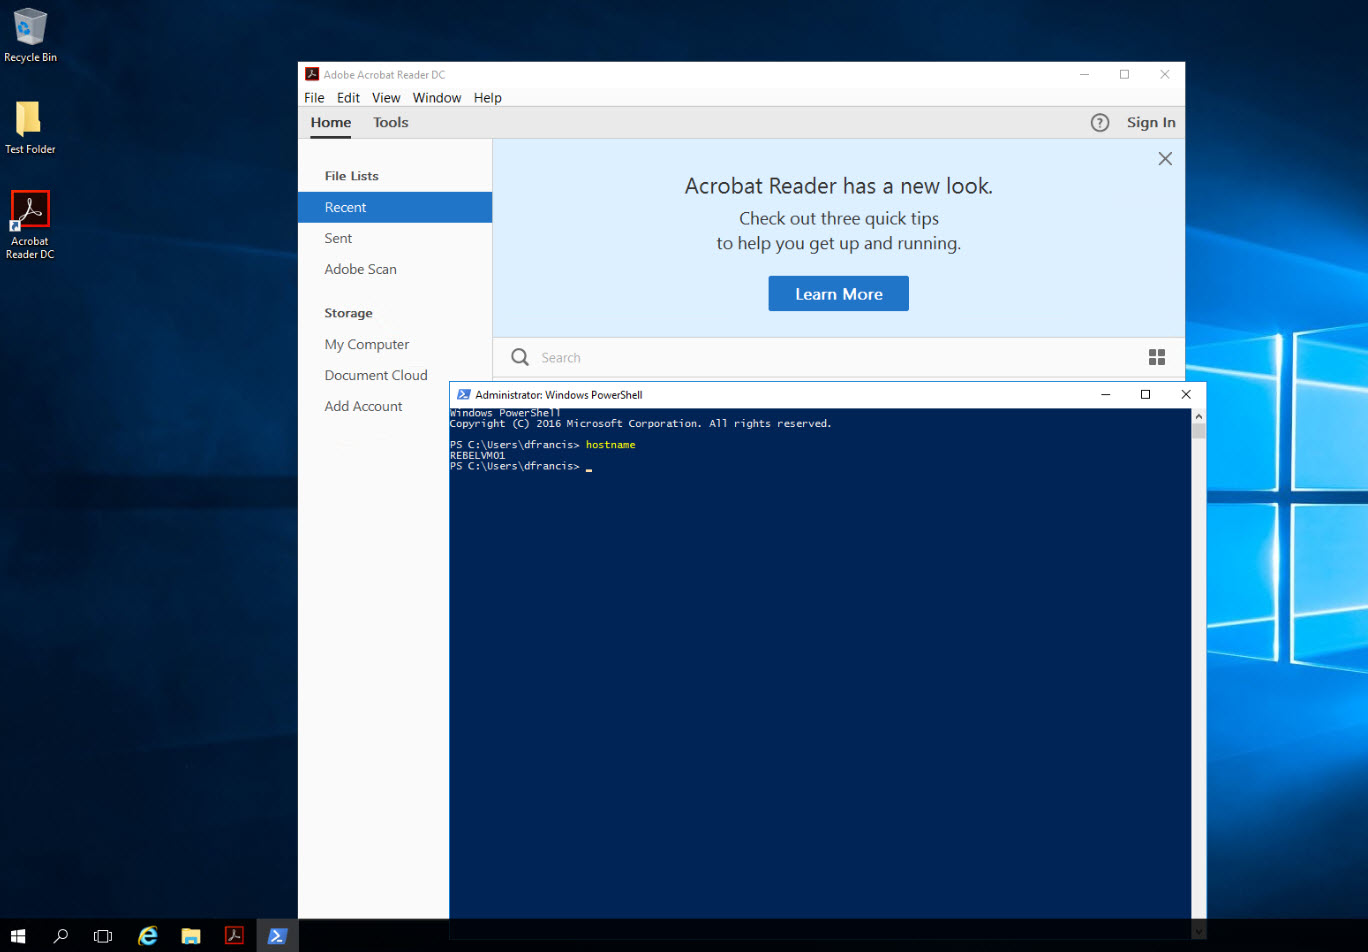
16) To test the restore I installed Acrobat Reader in this server and created test folder in desktop.
17) Now I am going to do a restore to an earlier day. To do that go to VM backup page, then click on Restore VM
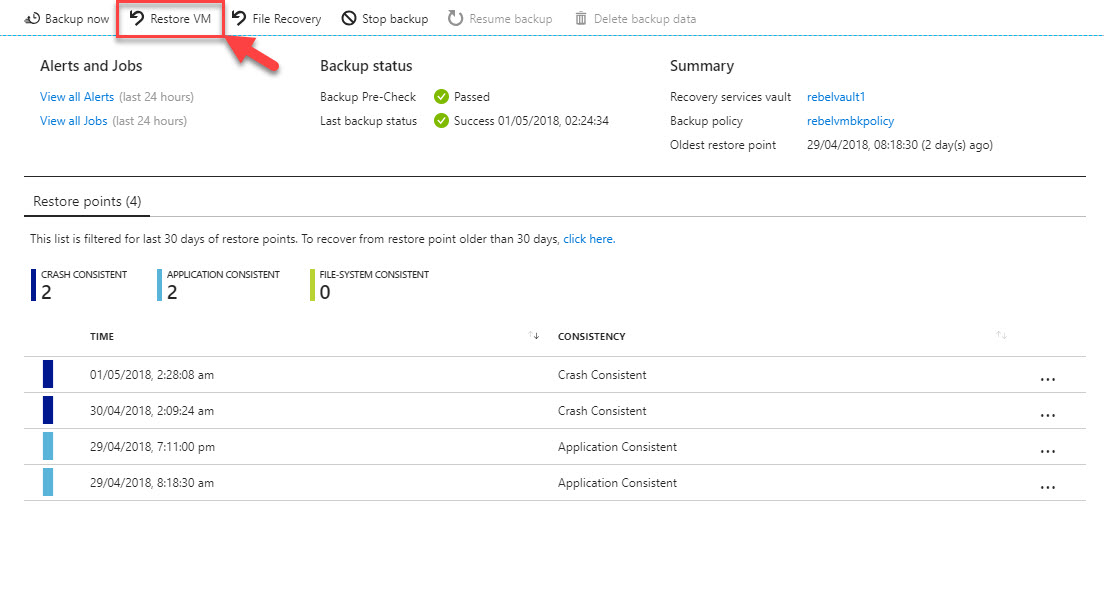
18) In next window it asks which backup to restore. I am selecting back up from 3 days.
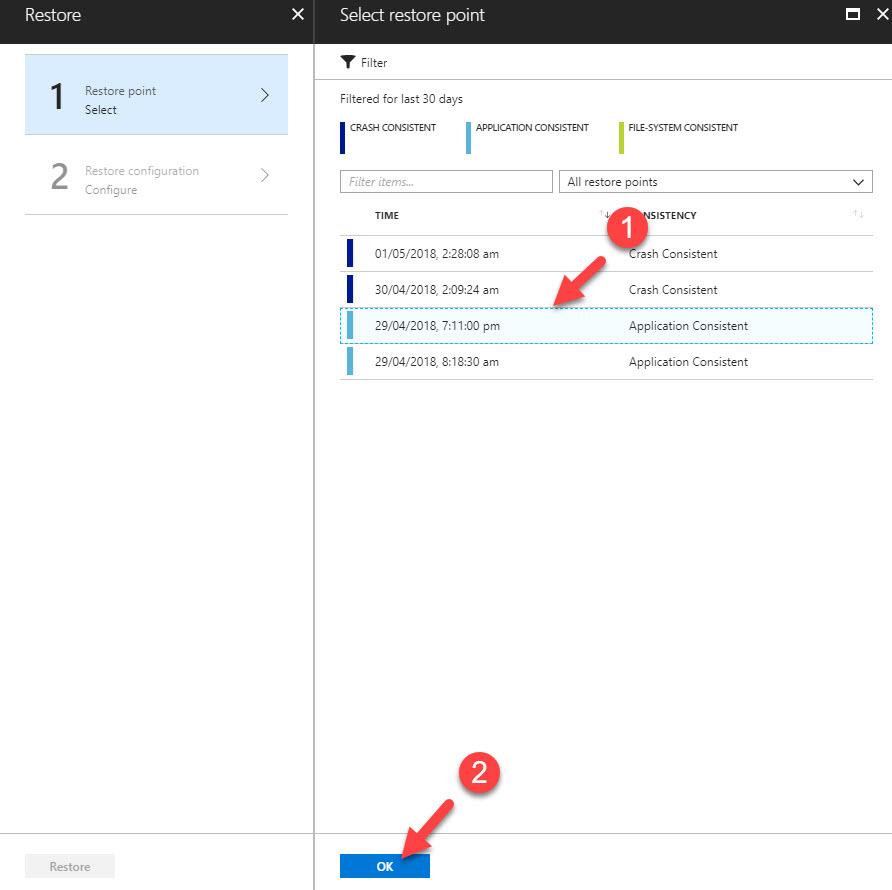
19) In next window it allows me to restore it as new VM or as disk. In here I am going to restore it as new VM
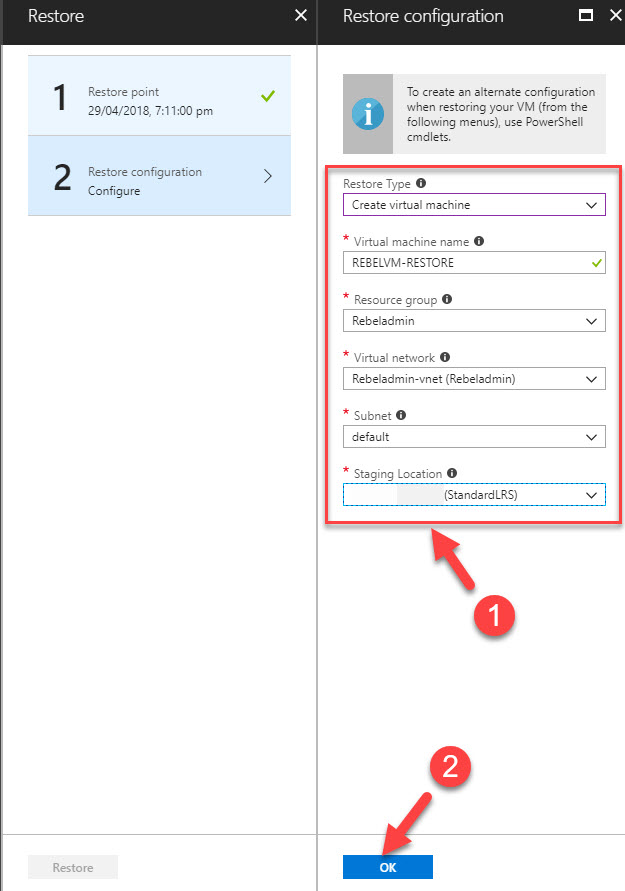
20) Once selection is done click on Restore to begin the process.
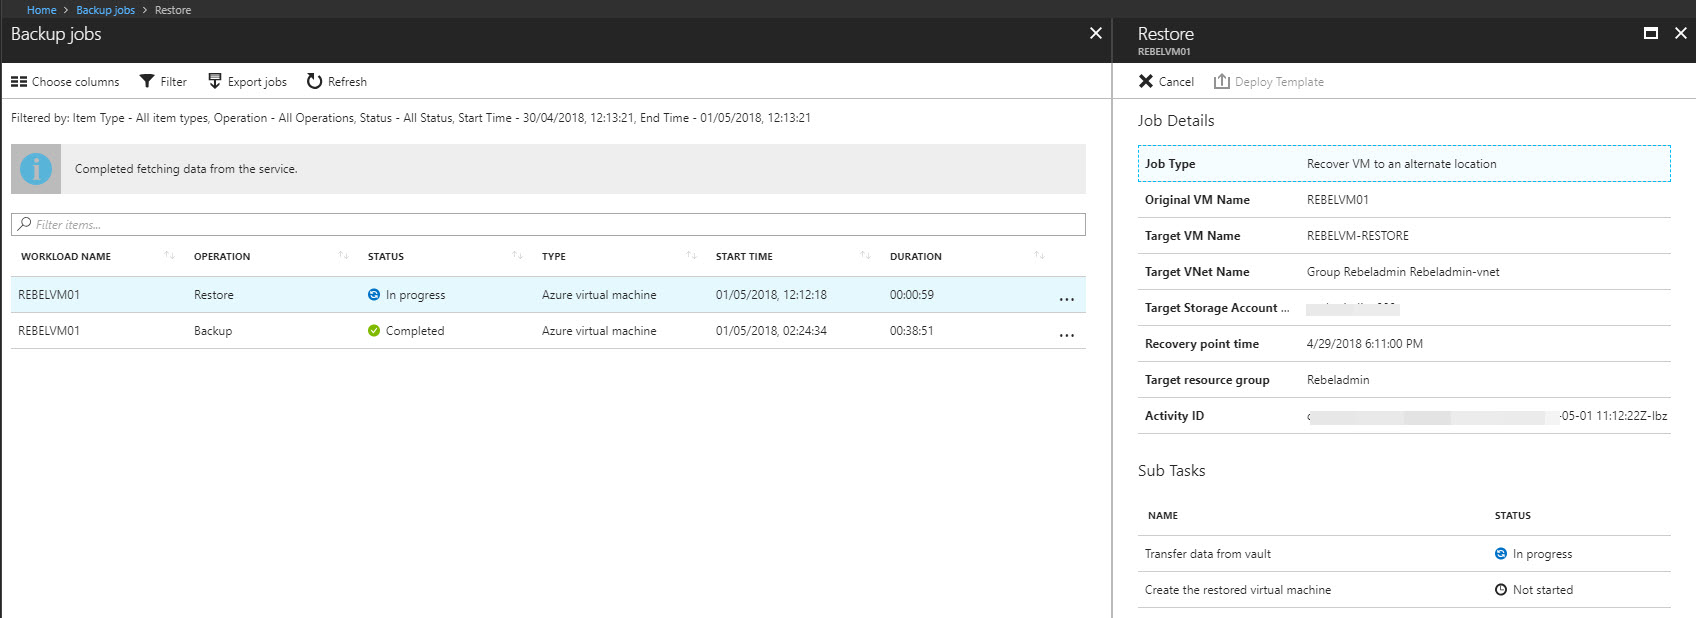
21) We also can check the status of the job using backup job window.
22) Once restore completed, I can see a new VM.

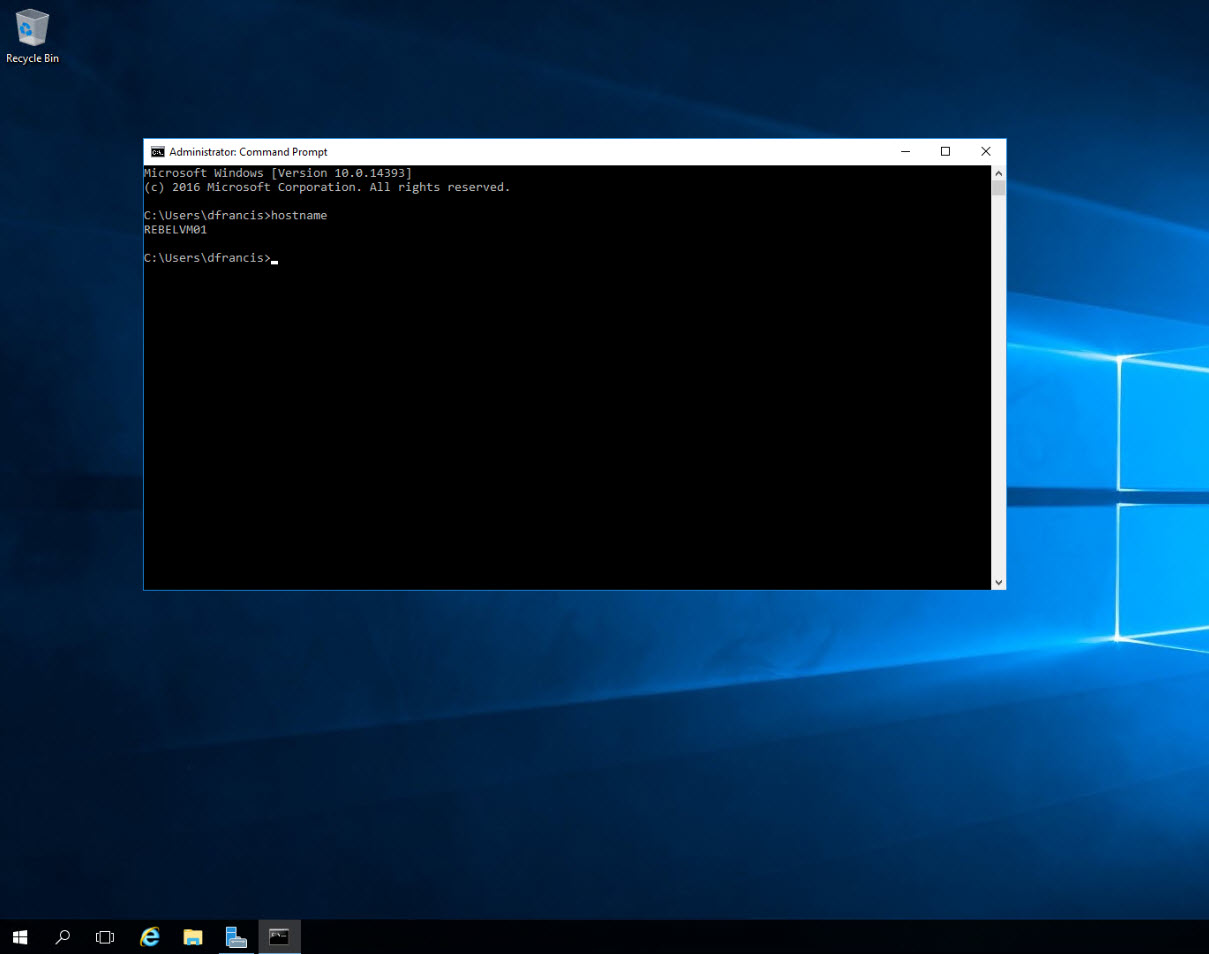
23) Once log in to the VM I can’t see the folder and application I installed, as expected.
This marks the end of this blog post. If you have any questions feel free to contact me on rebeladm@live.com also follow me on twitter @rebeladm to get updates about new blog posts.


1 Comment