
By using source network address translation (SNAT), we can translate a local IP address, a pool of local IP addresses, or even a subnet to a specific public IP address for outbound connections. This is important as it will help to control traffic flow through firewalls by using ACLs. In Azure, we can do SNAT by using Azure NAT gateway. This allows virtual machines in the subnet to use a specific static public IP address when initiate outbound traffic.
Azure NAT Gateway has the following characteristics,
• NAT gateway resources can use up to 16 public IP addresses.
• One public IP can provide up to 64,000 concurrent UDP and TCP flows.
• NAT gateway is a fully managed service. No need to worry about high availability.
• NAT is only compatible with standard SKU public IP, public IP prefix, and load balancer resources. It is not supported to work with basic SKUs.
In this blog post, I am going to demonstrate how to set up Azure NAT gateway.
For the configuration process, I will be using PowerShell. Therefore, please make sure you have an Azure PowerShell module installed. More info about it can find under https://docs.microsoft.com/en-us/powershell/azure/install-az-ps?view=azps-3.8.0
Let’s start the configuration by creating a new resource group.
1. Launch PowerShell console and connect to Azure using Connect-AzAccount
2. Then create a new resource group using,
New-AzResourceGroup -Name REBELRG1 -Location “East US”

In the above, REBELRG1 is the resource group names and it is created in the Azure East US region.
3. The next step of the configuration is to create a public IP address to use in Azure NAT gateway.
$REBELPublicIP =
New-AzPublicIpAddress -Name “REBELPUB1” -ResourceGroupName “REBELRG1” -AllocationMethod Static -Location “East US” -Sku “Standard”

In the above, REBELPUB1 is the name for new public IP resources. This New IP address is using Static allocation method and Standard SKU.
4. We also need to create public IP prefix to use with NAT gateway.
$REBELPublicIPPrefix =
New-AzPublicIpPrefix -Name “REBELPUB1PREFIX” -ResourceGroupName “REBELRG1” -Location “East US” -PrefixLength 31

In the above, the prefix name is REBELPUB1PREFIX and prefix length is set to 31.
5. Now we are ready to create NAT gateway. We can do that with following command,
$REBELNATGW =
New-AzNatGateway -Name “REBELNAT1” -ResourceGroupName “REBELRG1” -PublicIpAddress $REBELPublicIP -PublicIpPrefix $REBELPublicIPPrefix -Location “East US” -Sku “Standard” -IdleTimeoutInMinutes 10

The gateway is using Standard SKU. Its idle time out setting is set to 10 minutes.
6. The next step is to create a new virtual network under REBELRG1 resource group.
$vmsubnet = New-AzVirtualNetworkSubnetConfig -Name vmsubnet -AddressPrefix “10.0.2.0/24” -NatGateway $REBELNATGW
$REBELVNET = New-AzVirtualNetwork -Name REBELVN1 -ResourceGroupName REBELRG1 -Location “East US” -AddressPrefix “10.0.0.0/16” -Subnet $vmsubnet
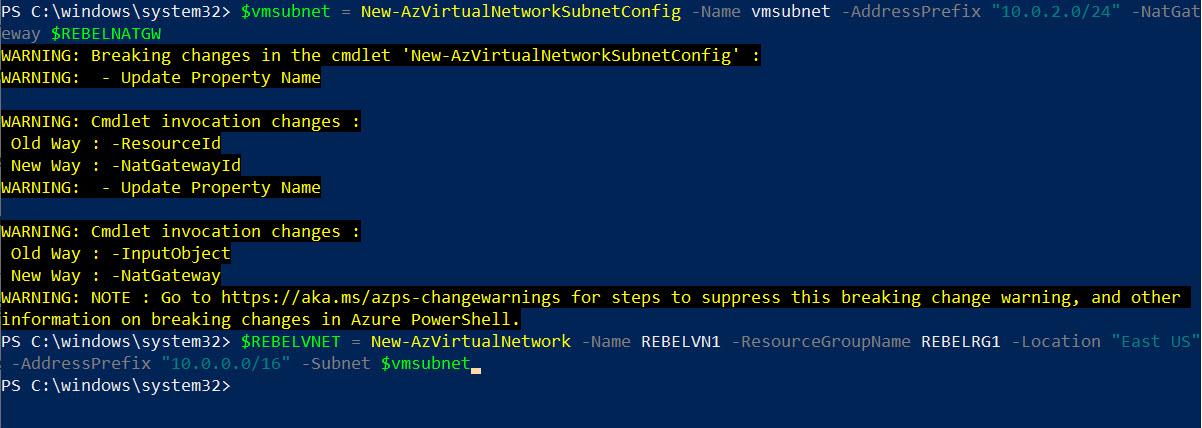
In the above, REBELVN1 is the new virtual network name. It has 10.0.0.0/16 address space. It also has a new subnet 10.0.2.0/24 (vmsubnet) for virtual machines.
7. In this demo, I am going to create windows VM, so I can use it to test the NAT gateway. To do that first I need a public IP address for the VM. I need this to connect to VM.
$REBELVMPublicIP1 =
New-AzPublicIpAddress -Name “REBELPUB2” -ResourceGroupName “REBELRG1” -AllocationMethod Static -Location “East US” -Sku “Standard”
This IP address also a Static public IP address with standard SKU.
8. Then I need to create a network security group with rule to allow inbound RDP connections on default TCP port 3389. This way I can connect to this VM from my home network.
$RDPRule =
New-AzNetworkSecurityRuleConfig -Name “RDPAccess” -Description “RDP Access” -Access “Allow” -Protocol “TCP” -Direction “Inbound” -Priority 100 -SourceAddressPrefix * -SourcePortRange * -DestinationAddressPrefix * -DestinationPortRange 3389
After rule is created, we can proceed with NSG setup,
$REBELnsg1 =
New-AzNetworkSecurityGroup -ResourceGroupName “REBELRG1” -Name “REBELNSG1” -Location “East US” -SecurityRules $RDPRule

9. The next step is to create NIC for a new VM with a public IP address and NSG settings.
$REBELVMNIC1 =
New-AzNetworkInterface -ResourceGroupName “REBELRG1” -Name “REBELVMNIC1” -NetworkSecurityGroupID $REBELnsg1.Id -PublicIPAddressID $REBELVMPublicIP1.Id -SubnetID $REBELVNET.Subnets[0].Id -Location “East US”

10. Now we have all the prerequisites for the VM. Let’s go ahead and create a new VM.
$mylogin = Get-Credential
$vmconfig = New-AzVMConfig -VMName REBELTVM01 -VMSize Standard_D2s_v3
Set-AzVMOperatingSystem -VM $vmconfig -Windows -ComputerName REBELTVM01 -Credential $mylogin
Set-AzVMSourceImage -VM $vmconfig -PublisherName MicrosoftWindowsServer -Offer WindowsServer -Skus 2019-Datacenter -Version latest
Add-AzVMNetworkInterface -VM $vmconfig -Id $REBELVMNIC1.Id
New-AzVM -ResourceGroupName REBELRG1 -Location “East US” -VM $vmconfig
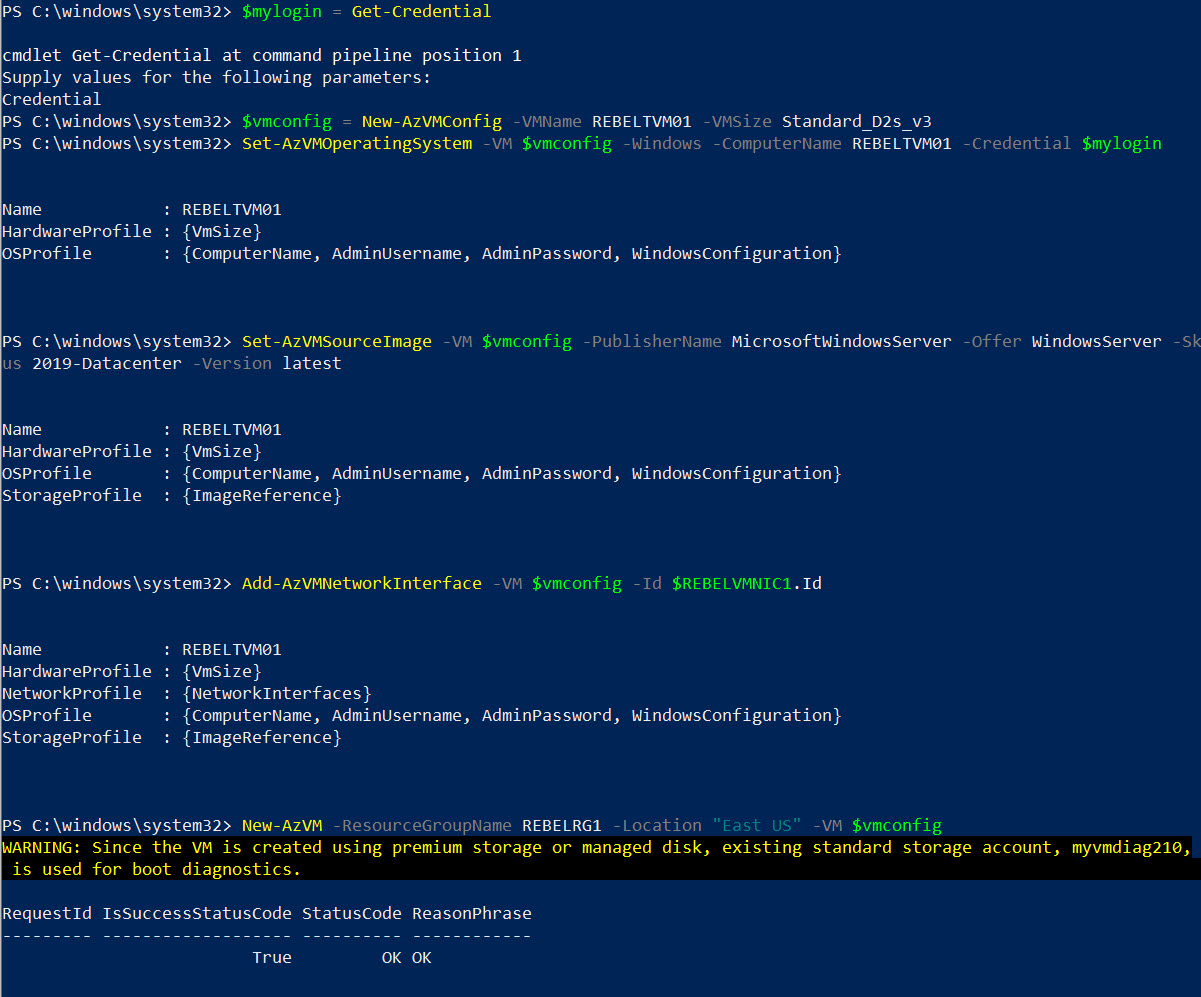
In the above, I am creating a virtual machine called REBELTVM01 in East US Azure region. It is running windows server 2019 data center edition. It also using Standard_D2s_v3 vm size. For networking, it uses REBELVN1 virtual network and subnet 10.0.2.0/24.
Testing
The configuration is now in place. It is time for testing. Let’s go ahead and find the public IP address of the Virtual machine.
Get-AzPublicIpAddress -ResourceGroupName “REBELRG1” -Name REBELPUB2 | select IpAddress

So, this is the IP I will use to log in to VM via RDP.
I also need to know IP address of the NAT gateway.
Get-AzPublicIpAddress -ResourceGroupName “REBELRG1” -Name REBELPUB1 | select IpAddress

If NAT gateway is working correctly, when I make an outbound connection from REBELTVM01, it should translate to NAT gateway public IP address.
So, I logged in to test VM and check the public IP address. As expected, it returns the NAT gateway IP.
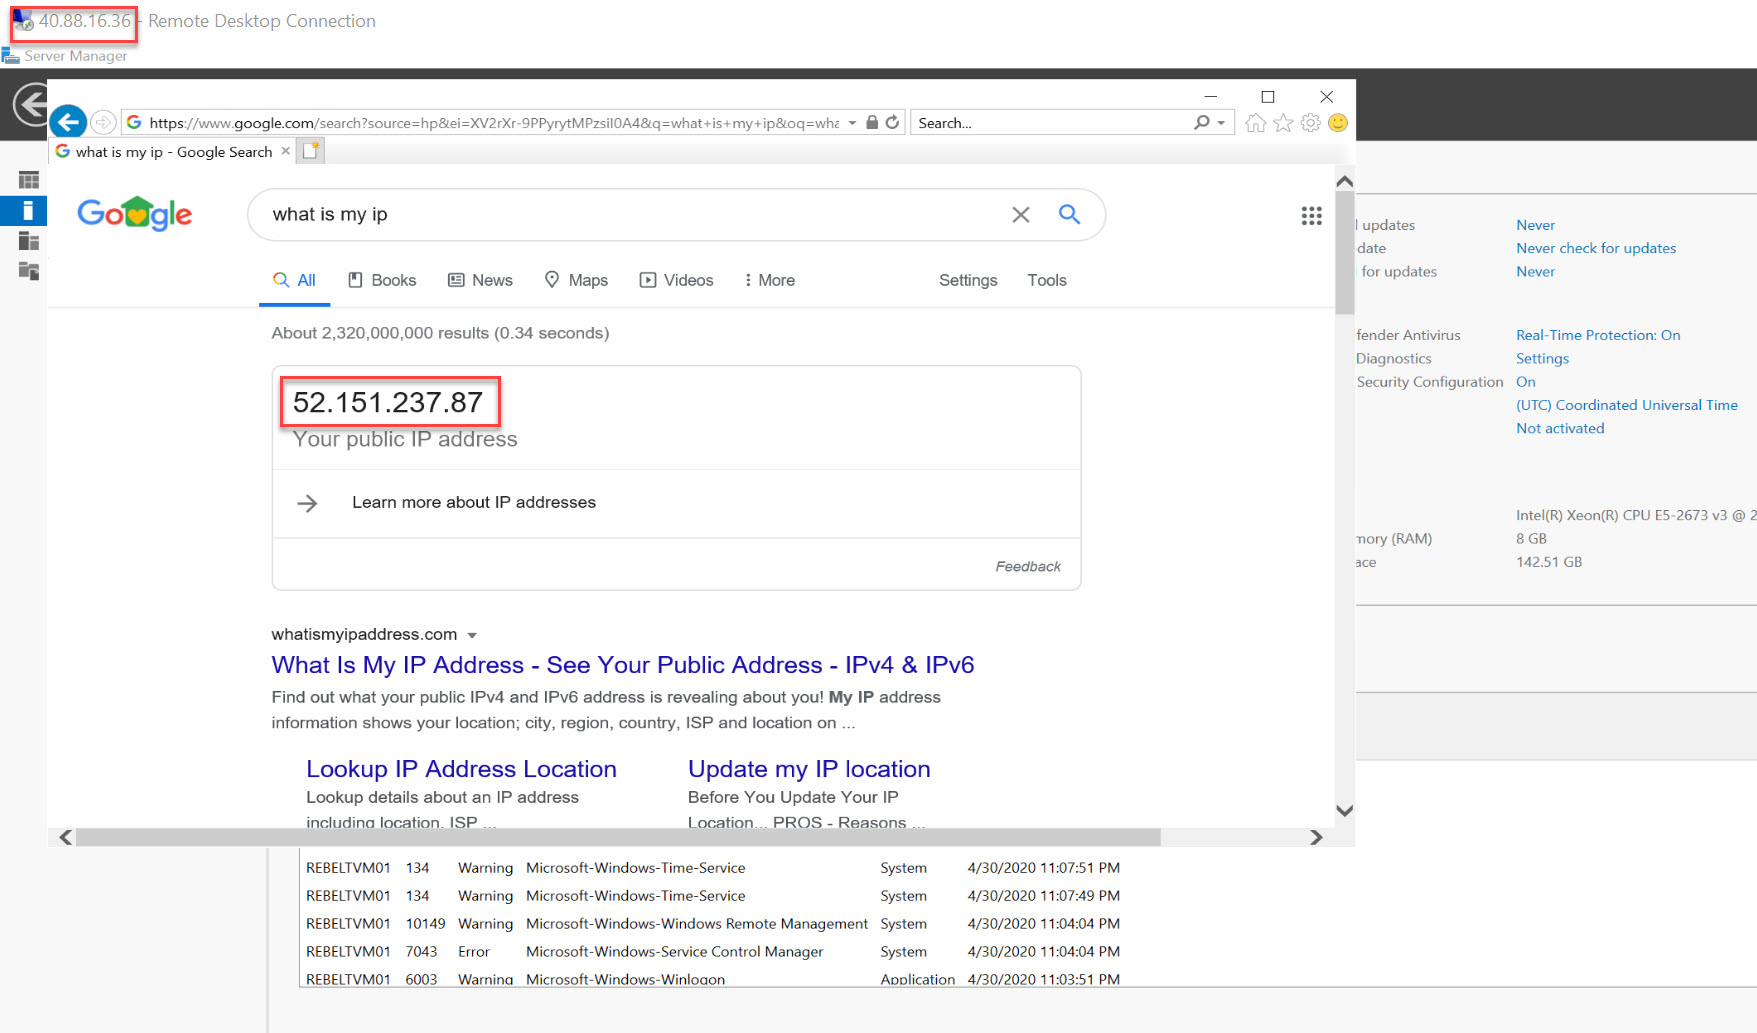
This confirms the Azure NAT gateway is working as expected.
This marks the end of this blog post. I hope now you have a better understanding of how to configure Azure NAT gateway for SNAT. If you have any further questions about this feel free to contact me on rebeladm@live.com also follow me on twitter @rebeladm to get updates about new blog posts.

