
If we are in an Active Directory environment, we can use windows DNS services to manage DNS records. This allows us to connect to hosts using their FQDN. When a new host added or when host IP address updated, relevant DNS entries are get updated automatically. Also, the same DNS servers can use to create custom DNS records.
If it is not an Active Directory environment and still wants to use DNS services, we have to use a custom DNS solution. In such a situation most of the time we need to manually add/update DNS records.
So, what about Azure environment? Does the same apply to it?
Azure DNS is a managed DNS solution. We can use it for public DNS records as well as for private DNS records. Using Azure private DNS, we can resolve DNS names in a virtual network.
Azure Private DNS has following benefits,
• No additional servers – We do not need to maintain additional servers to run DNS solution. It is a fully managed service.
• Automatic Record Update – Similar to Active Directory DNS, we can configure Azure DNS to register/update/delete hostname records for virtual machines automatically.
• Support common DNS records types – It supports common DNS records types such A, AAAA, MX, NS, SRV, TXT.
• DNS resolution between virtual networks – Azure Private DNS zones can be shared between virtual networks.
In this demo, I am going to demonstrate how to create an Azure private DNS zone.
For the configuration process, I will be using PowerShell. Therefore, please make sure you have Azure PowerShell module installed. More info about it can find under https://docs.microsoft.com/en-us/powershell/azure/install-az-ps?view=azps-2.6.0
Let's go ahead and start the configuration process by creating a new resource group.
1. Launch PowerShell console and connect to Azure using Connect-AzAccount
2. Then create a new resource group using,
New-AzResourceGroup -Name REBELRG -Location "East US"
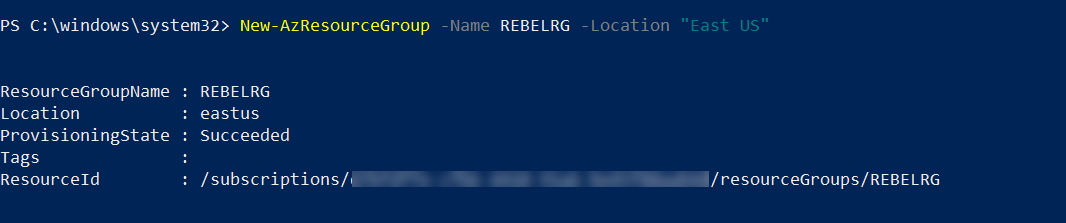
In the above, REBELRG is the resource group name and East US is the resource group location.
3. The next step is to create a new virtual network.
$vmsubnet = New-AzVirtualNetworkSubnetConfig -Name vmsubnet -AddressPrefix "10.0.2.0/24"
New-AzVirtualNetwork -Name REBELVN1 -ResourceGroupName REBELRG -Location "East US" -AddressPrefix "10.0.0.0/16" -Subnet $vmsubnet
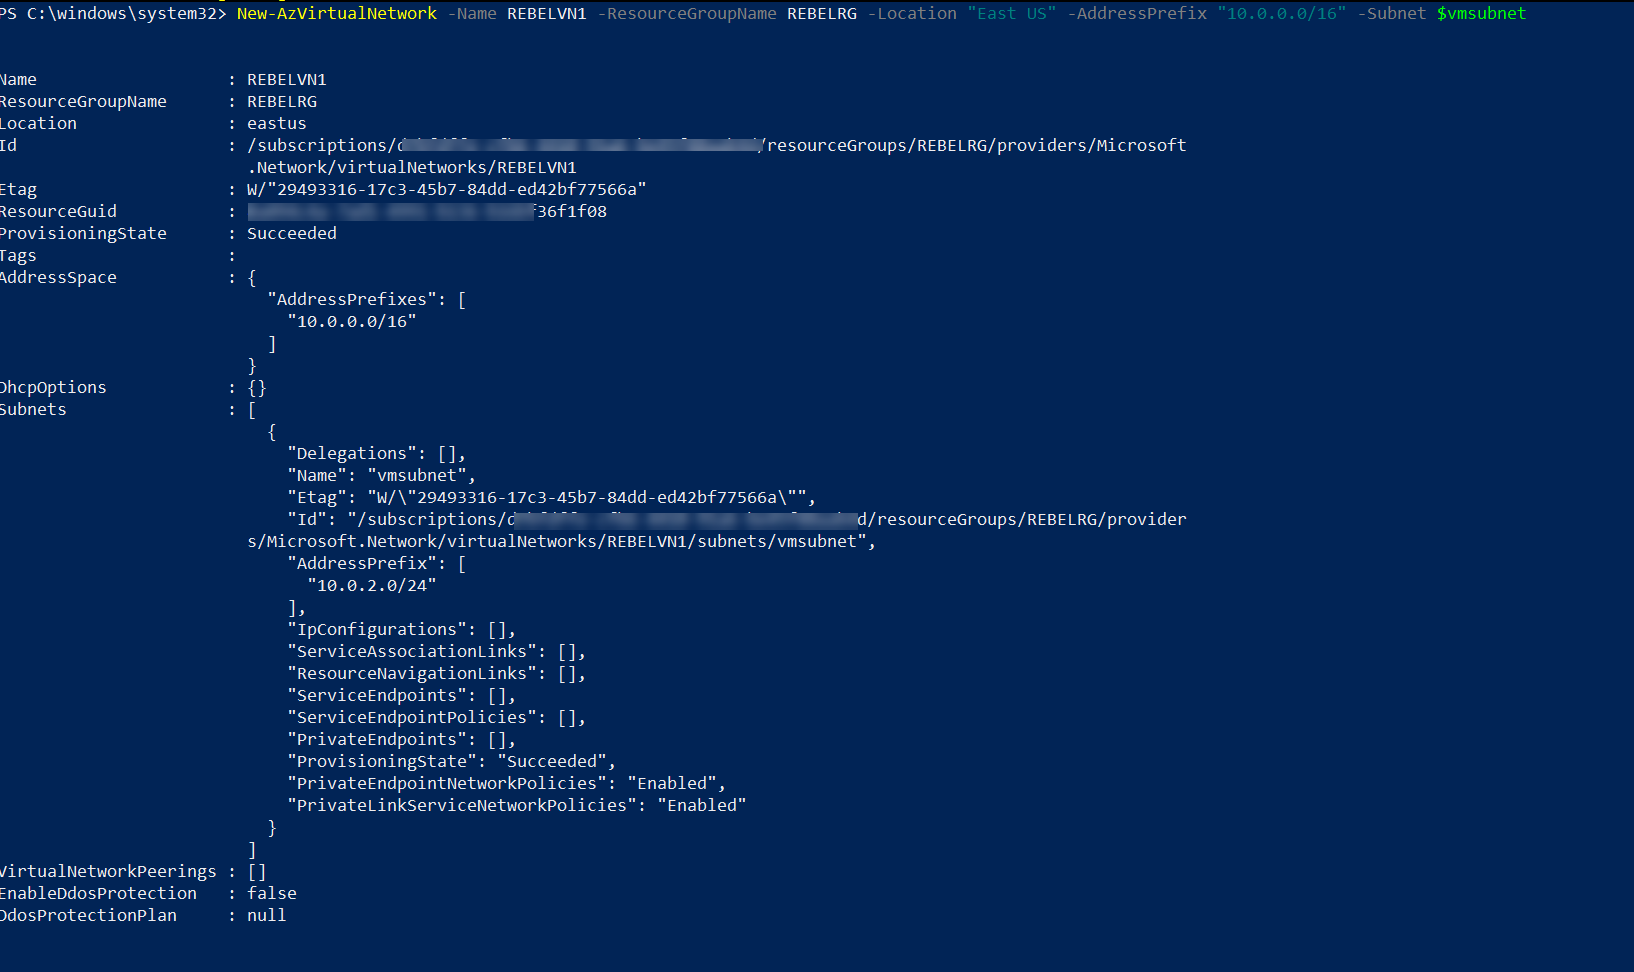
In the above, REBELVN1 is the new virtual network name. It has 10.0.0.0/16 address space. It also has a new subnet 10.0.2.0/24 (vmsubnet) for virtual machines.
4. I like to use hq.rebeladmin.com for the new private DNS zone. Let's go ahead and see how we can create it.
Before we start, we need to install the Az.PrivateDns module. To do that use,
Install-Module -Name Az.PrivateDns -force
Then import module using,
Import-Module Az.PrivateDns
After we can create a new zone using,
New-AzPrivateDnsZone -Name hq.rebeladmin.com -ResourceGroupName REBELRG

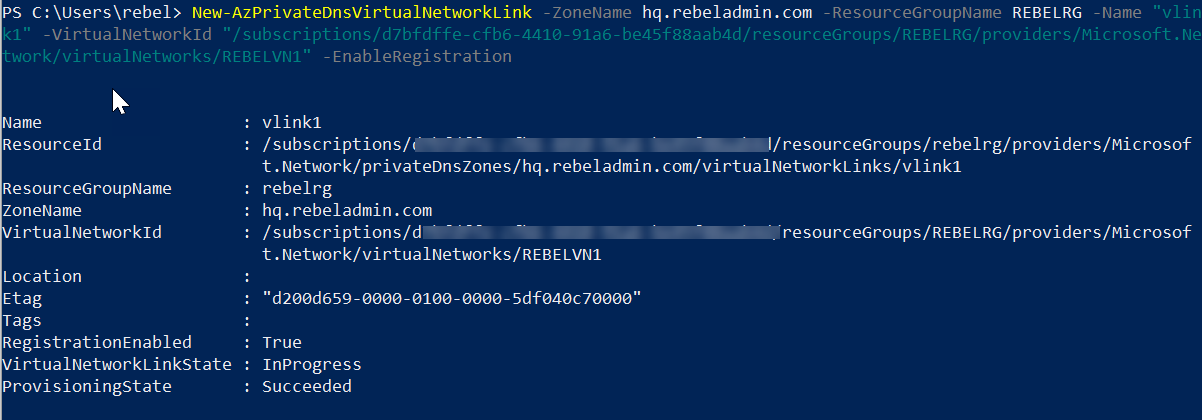
5. Next step of the configuration is to attach this new private dns zone to virtual network we create. We also need to enable autoregistration so host records will get updated automatically. To do that,
New-AzPrivateDnsVirtualNetworkLink -ZoneName hq.rebeladmin.com -ResourceGroupName REBELRG -Name "vlink1" -VirtualNetworkId "/subscriptions/xxxxxx-cfb6-4410-91a6-be45f88aab4d/resourceGroups/REBELRG/providers/Microsoft.Network/virtualNetworks/REBELVN1" -EnableRegistration
In the above, -EnableRegistration parameter enables the automatic DNS record update for hostnames. VirtualNetworkId is used to specify the virtual network. We can find this id by running,
Get-AzVirtualNetwork -Name REBELVN1 -ResourceGroupName REBELRG
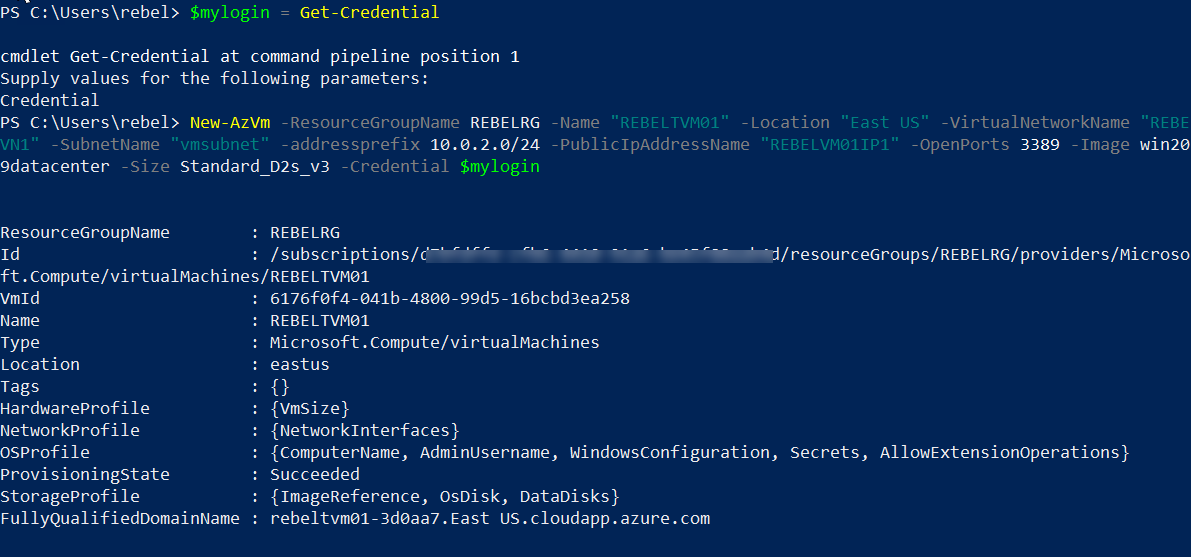
6. Now we have done with the configuration. The next step is to test it. To start with let's go ahead and create 2 virtual machines under the new virtual network and see if it updates the host records.
$mylogin = Get-Credential
New-AzVm -ResourceGroupName REBELRG -Name "REBELTVM01" -Location "East US" -VirtualNetworkName "REBELVN1" -SubnetName "vmsubnet" -addressprefix 10.0.2.0/24 -PublicIpAddressName "REBELVM01IP1" -OpenPorts 3389 -Image win2019datacenter -Size Standard_D2s_v3 -Credential $mylogin
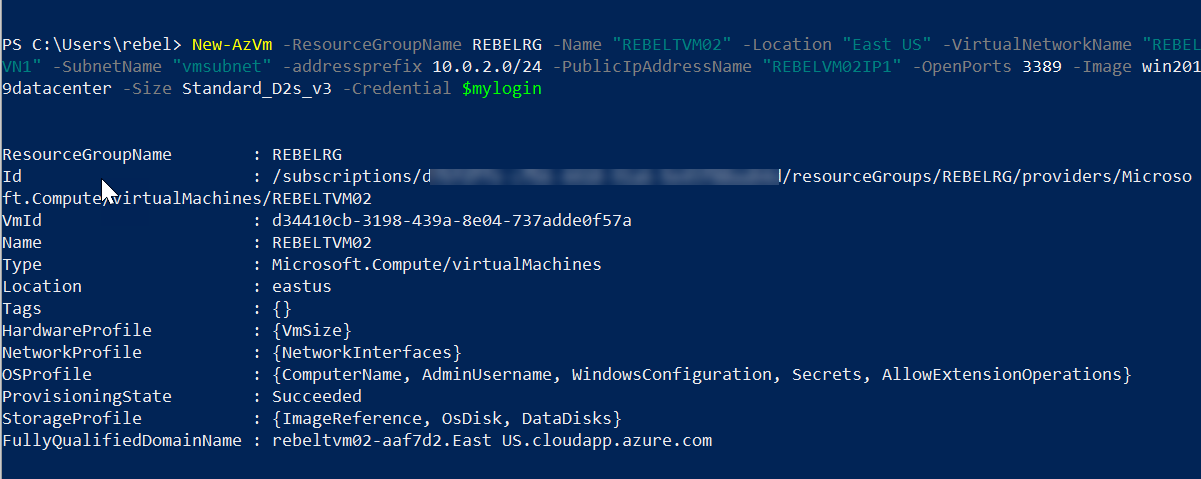
New-AzVm -ResourceGroupName REBELRG -Name "REBELTVM02" -Location "East US" -VirtualNetworkName "REBELVN1" -SubnetName "vmsubnet" -addressprefix 10.0.2.0/24 -PublicIpAddressName "REBELVM02IP1" -OpenPorts 3389 -Image win2019datacenter -Size Standard_D2s_v3 -Credential $mylogin
In the above I am creating two virtual machines called REBELTVM01 & REBELTVM02. It is running windows server 2019 data center edition. I have specified it using -Image parameter. It also using Standard_D2s_v3 vm size.
Once VM is up, let's go ahead and check the DNS zone data using
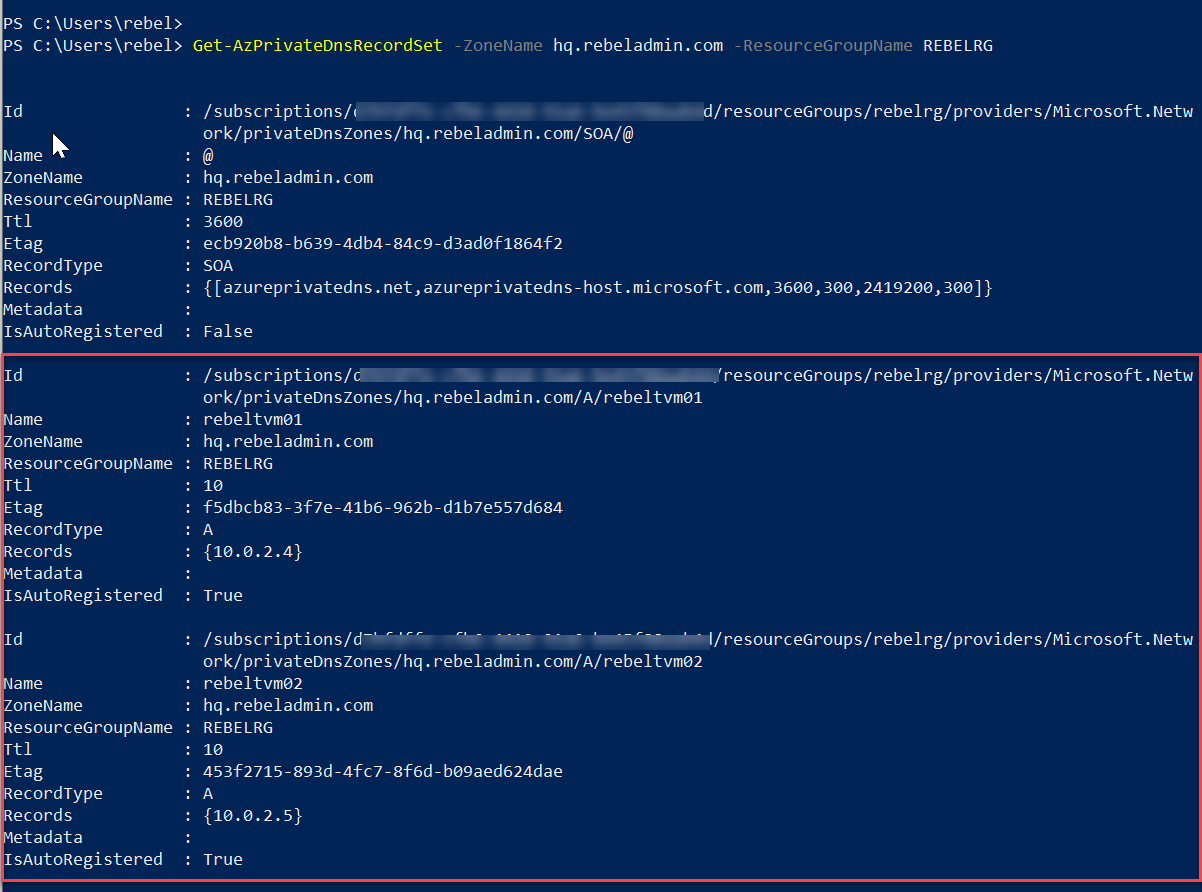
Get-AzPrivateDnsRecordSet -ZoneName hq.rebeladmin.com -ResourceGroupName REBELRG
As we can see it got 2 new host records for two new VM we just created.
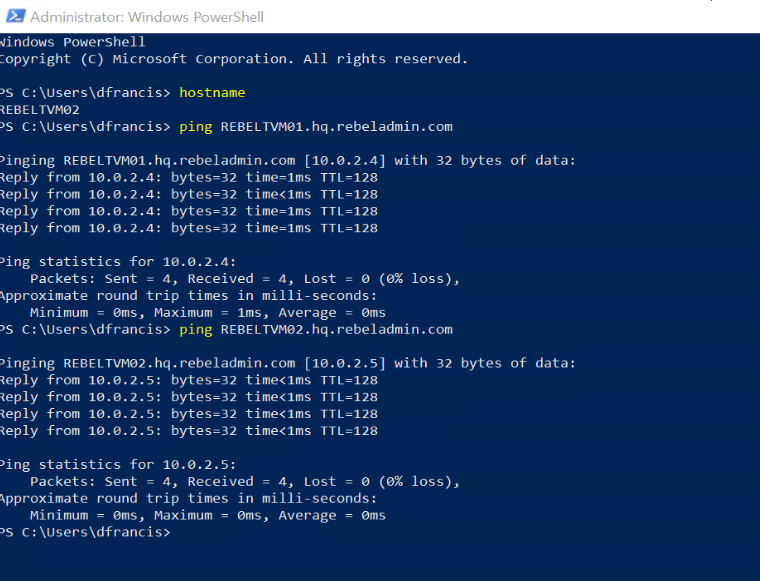
Then I log in to one of the VM and ping REBELTVM01.hq.rebeladmin.com & REBELTVM02.hq.rebeladmin.com
As expected, I can resolve the names to correct IP addresses.
[su_note]We need to allow ICMP traffic first by using VM's windows firewall. By default, it is not allowed. [/su_note]
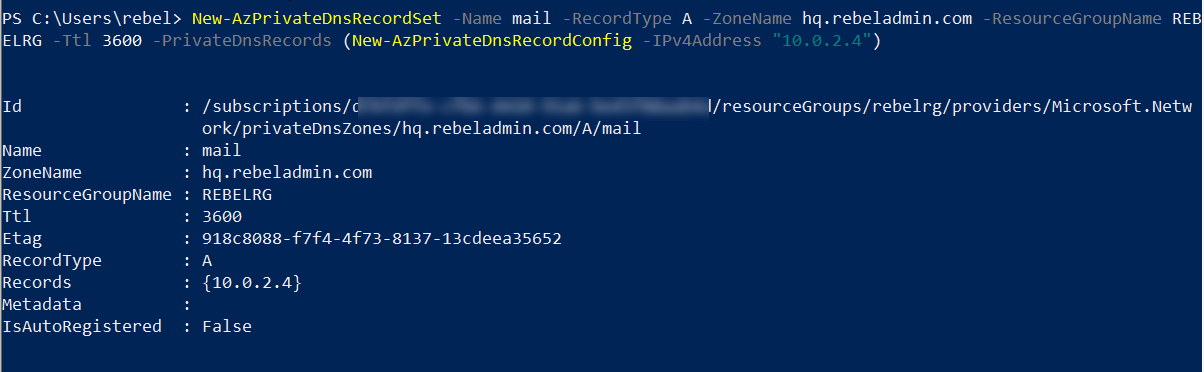
7. The next step of this exercise is to create a custom DNS record. For testing purposes, I like to create mail.hq.rebeladmin.com and point it to 10.0.2.4. To do that we can use,
New-AzPrivateDnsRecordSet -Name mail -RecordType A -ZoneName hq.rebeladmin.com -ResourceGroupName REBELRG -Ttl 3600 -PrivateDnsRecords (New-AzPrivateDnsRecordConfig -IPv4Address "10.0.2.4")
We can verify the record using,
Get-AzPrivateDnsRecordSet -ZoneName hq.rebeladmin.com -ResourceGroupName REBELRG
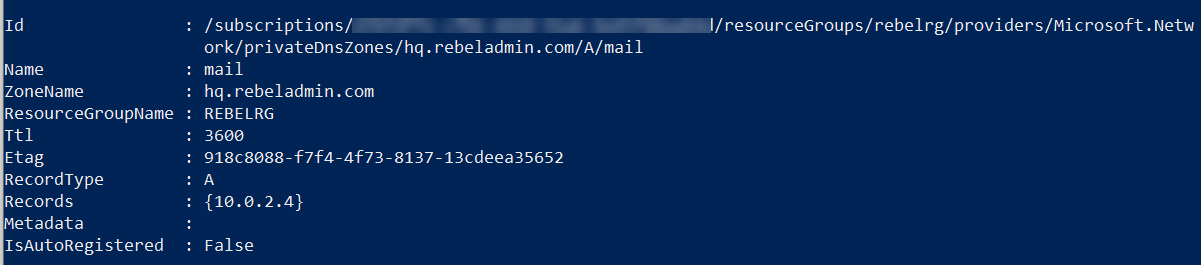
As we can see the custom record is there.
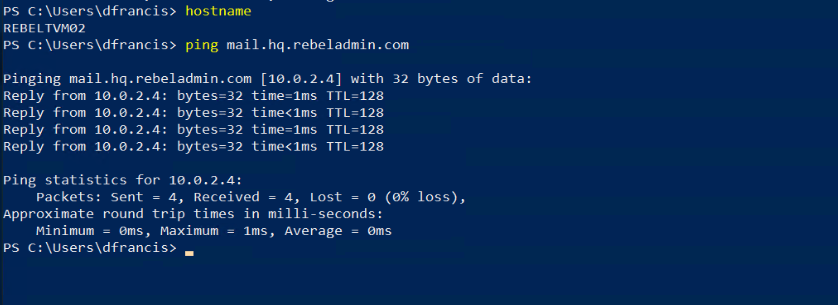
After, I log in to one of the VM and try to ping mail.hq.rebeladmin.com. As expected, I was able to resolve the correct IP address.
As we can see, manual as well as automatic DNS registration is working with Azure Private DNS. I hope now you have a better understanding of how Azure private DNS works. This marks the end of this blog post. If you have any further questions about this feel free to contact me on rebeladm@live.com also follow me on twitter @rebeladm to get updates about new blog posts.

