
If we need to access an Azure VM using RDP or SSH, most commonly we use public IP method. In this way, the virtual machine will have a public IP address (static or dynamic) assigned to it. Also, RDP or SSH service ports will open to the public via NSG. This is easy but not a very secure method.
If we have VPN or Express Route connectivity to Azure, we can connect to virtual machines using private IP addresses. It is secure than the public IP address method. However, it required additional configuration in-network level.
Azure Bastion is a solution that we can use to access Azure VM securely without the use of public IP addresses or VPN connectivity. This is similar to using a jump-server to connect to resources in the remote network but instead of the traditional RDP method, it is using browser-based secure HTTP connectivity. Let's go ahead and explore a bit more about the Azure bastion solution.
1. This service is now generally available (From 4th of Nov 2019). However, it is still only available for six Azure regions which are Australia East, East US, Japan East, South Central US, West Europe, and West US.
2. Azure bastion service deployment is per virtual network.
3. Users can connect to Azure bastion service via the Azure portal. It is a browser-based connectivity. From the user end, only TCP port 443 needs to be open.
4. Machines in the virtual network don't need to have public IP addresses assigned. Bastion service can connect to virtual machines using private IP addresses.
5. Azure bastion is a fully managed PaaS service. We do not need to worry about the hardening or protection of it.
In this post, I am going to demonstrate how we can enable Azure bastion service.
Create Virtual Machines
Before we go into the Azure bastion service setup, I am going to create one windows 2019 virtual machine and one ubuntu Linux virtual machine. These machines will not have any public IP address assign. After that, I will demonstrate how we can access those securely using Azure bastion service.
To begin,
1. Log in to Azure portal (https://portal.azure.com) as Global Administrator
2. Go to Virtual Machines | + Add
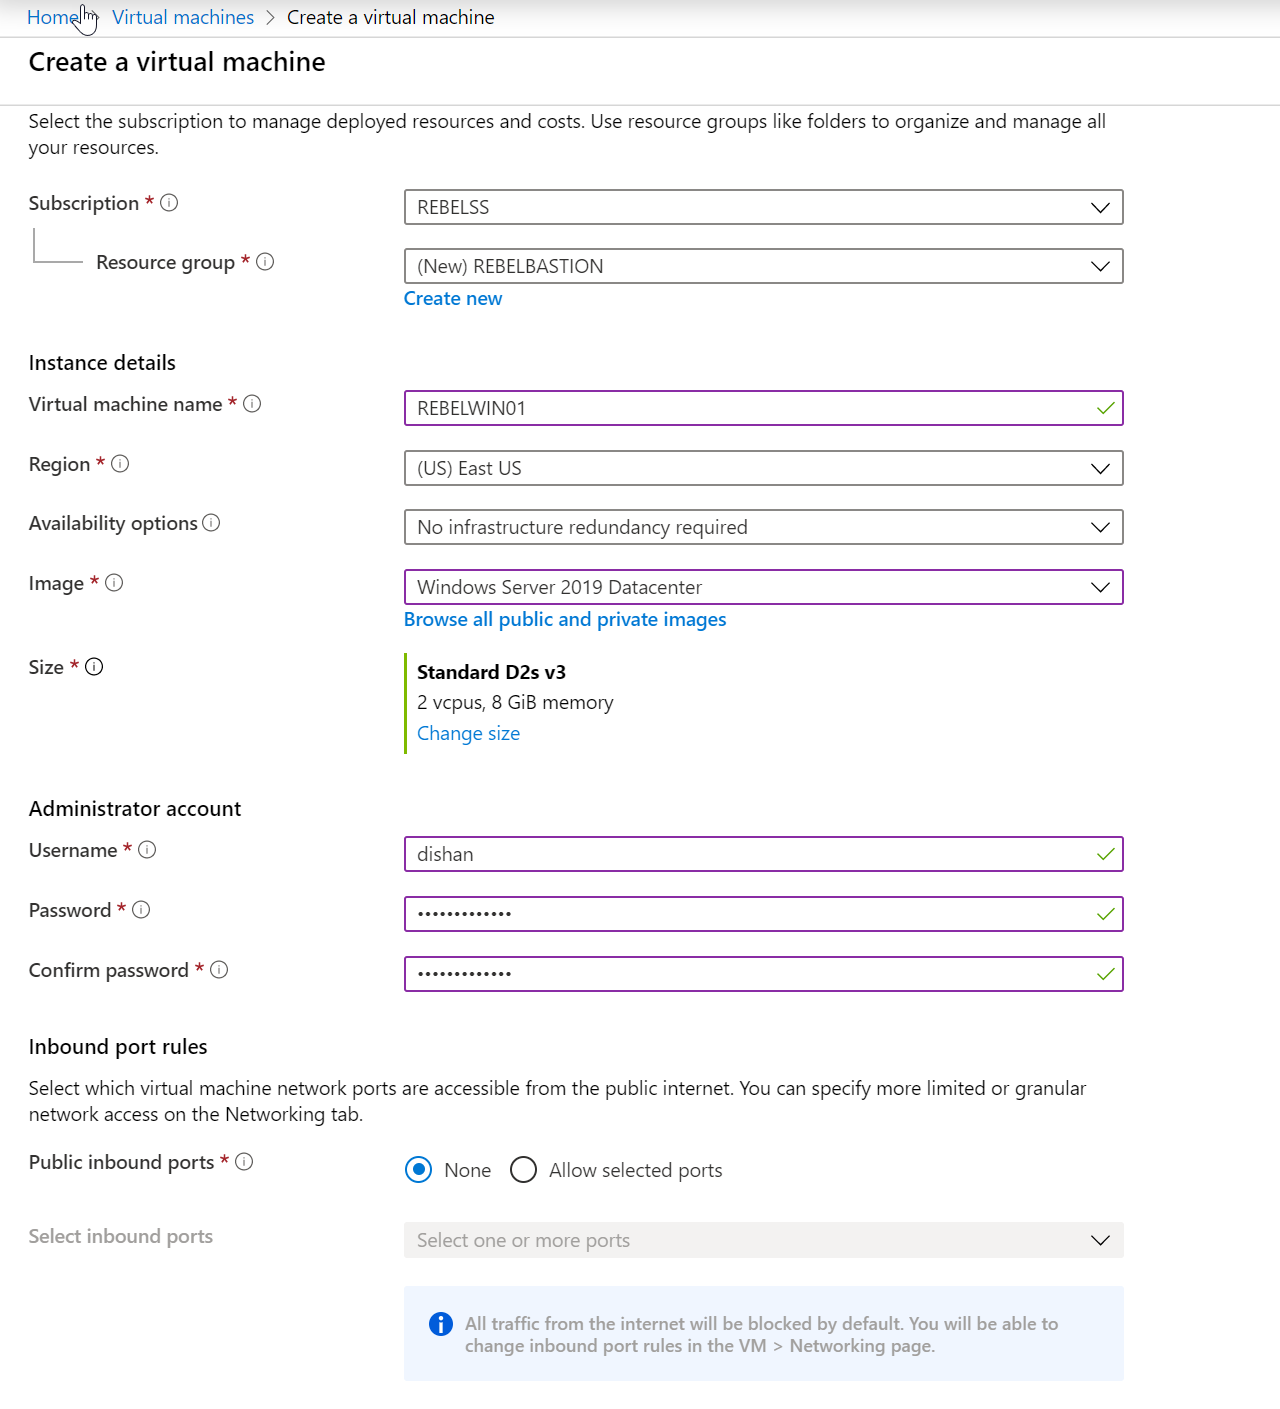
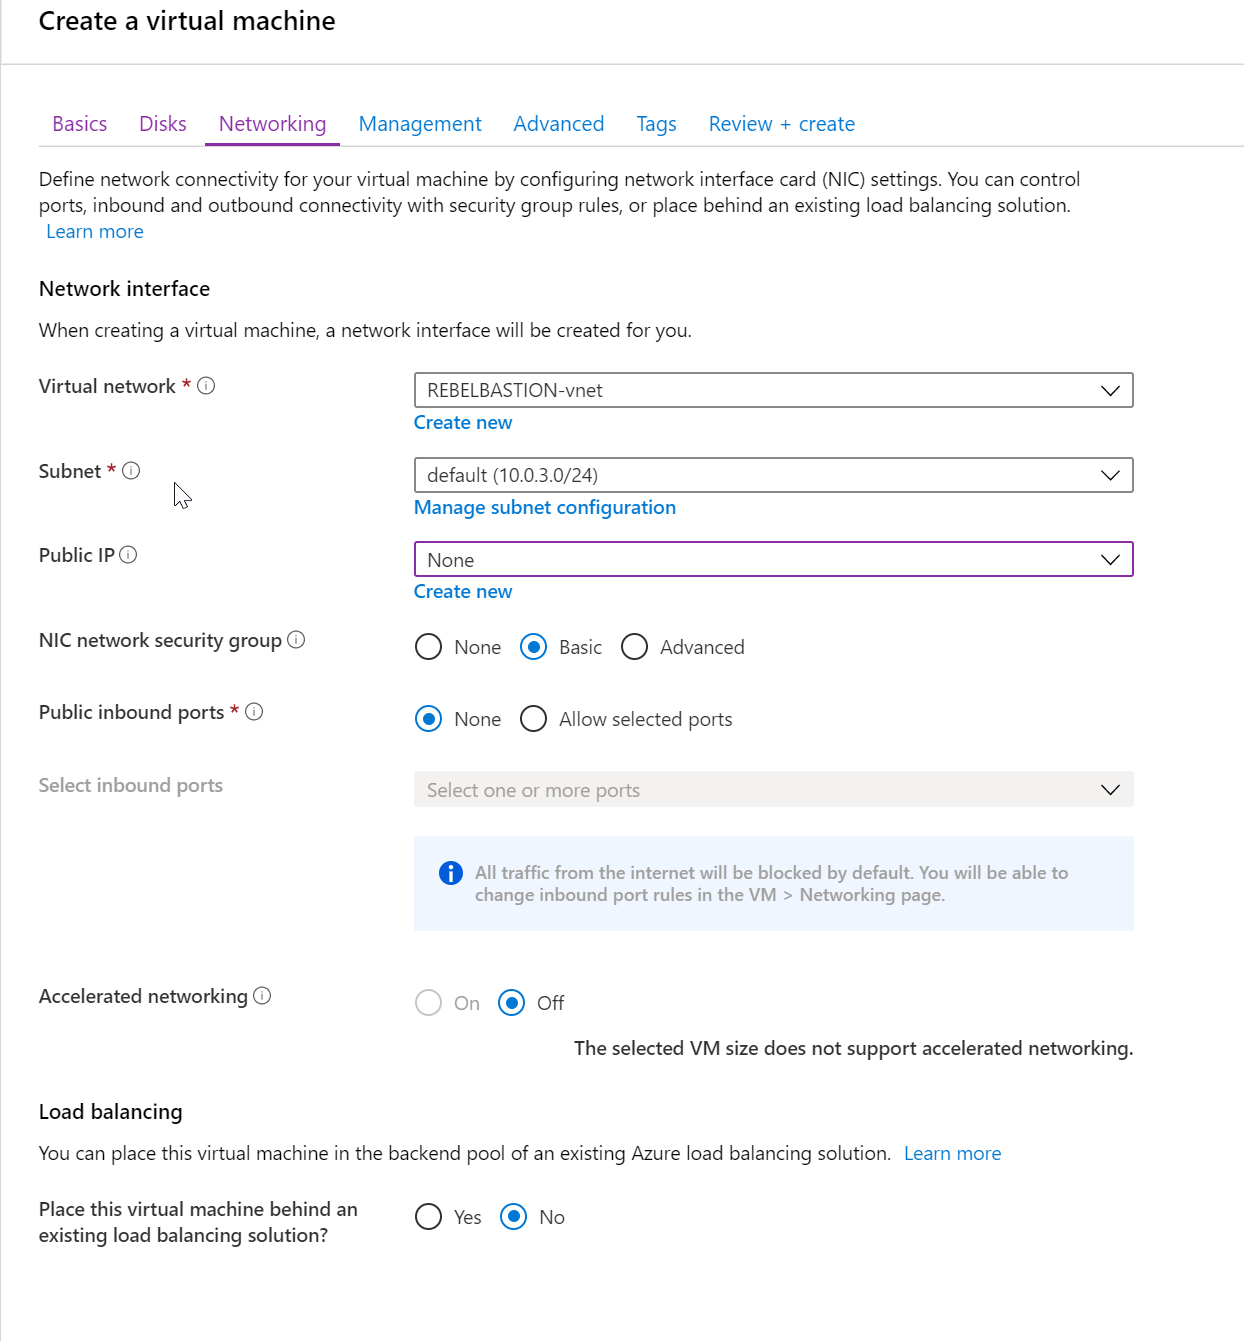
3. Create Windows Server 2019 Server with following settings,
Resource Group Name (new) : REBELBASTION
Virtual Machine Name : REBELWIN01
Region : East US
Image : Windows Server 2019 DataCenter
Size : Standard D2s v3
Public inbounds ports: None
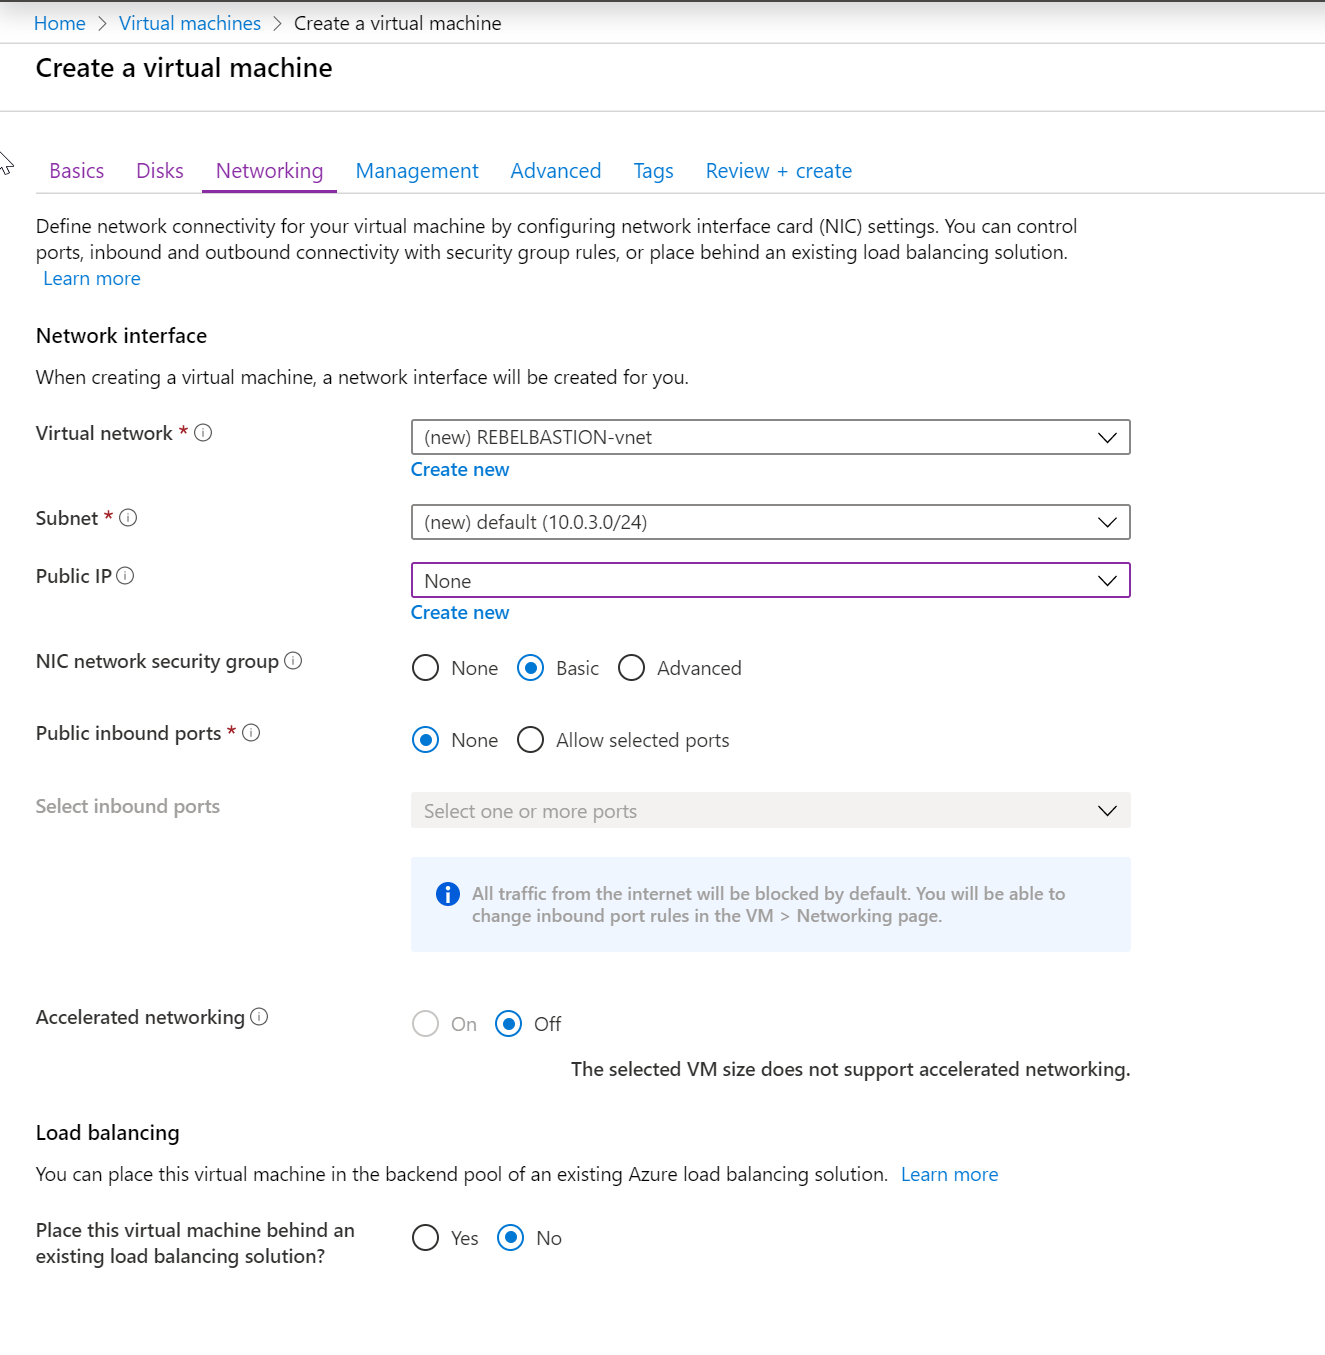
Virtual network : REBELBASTION-vnet
Subnet : 10.0.3.0/24
Public IP : None
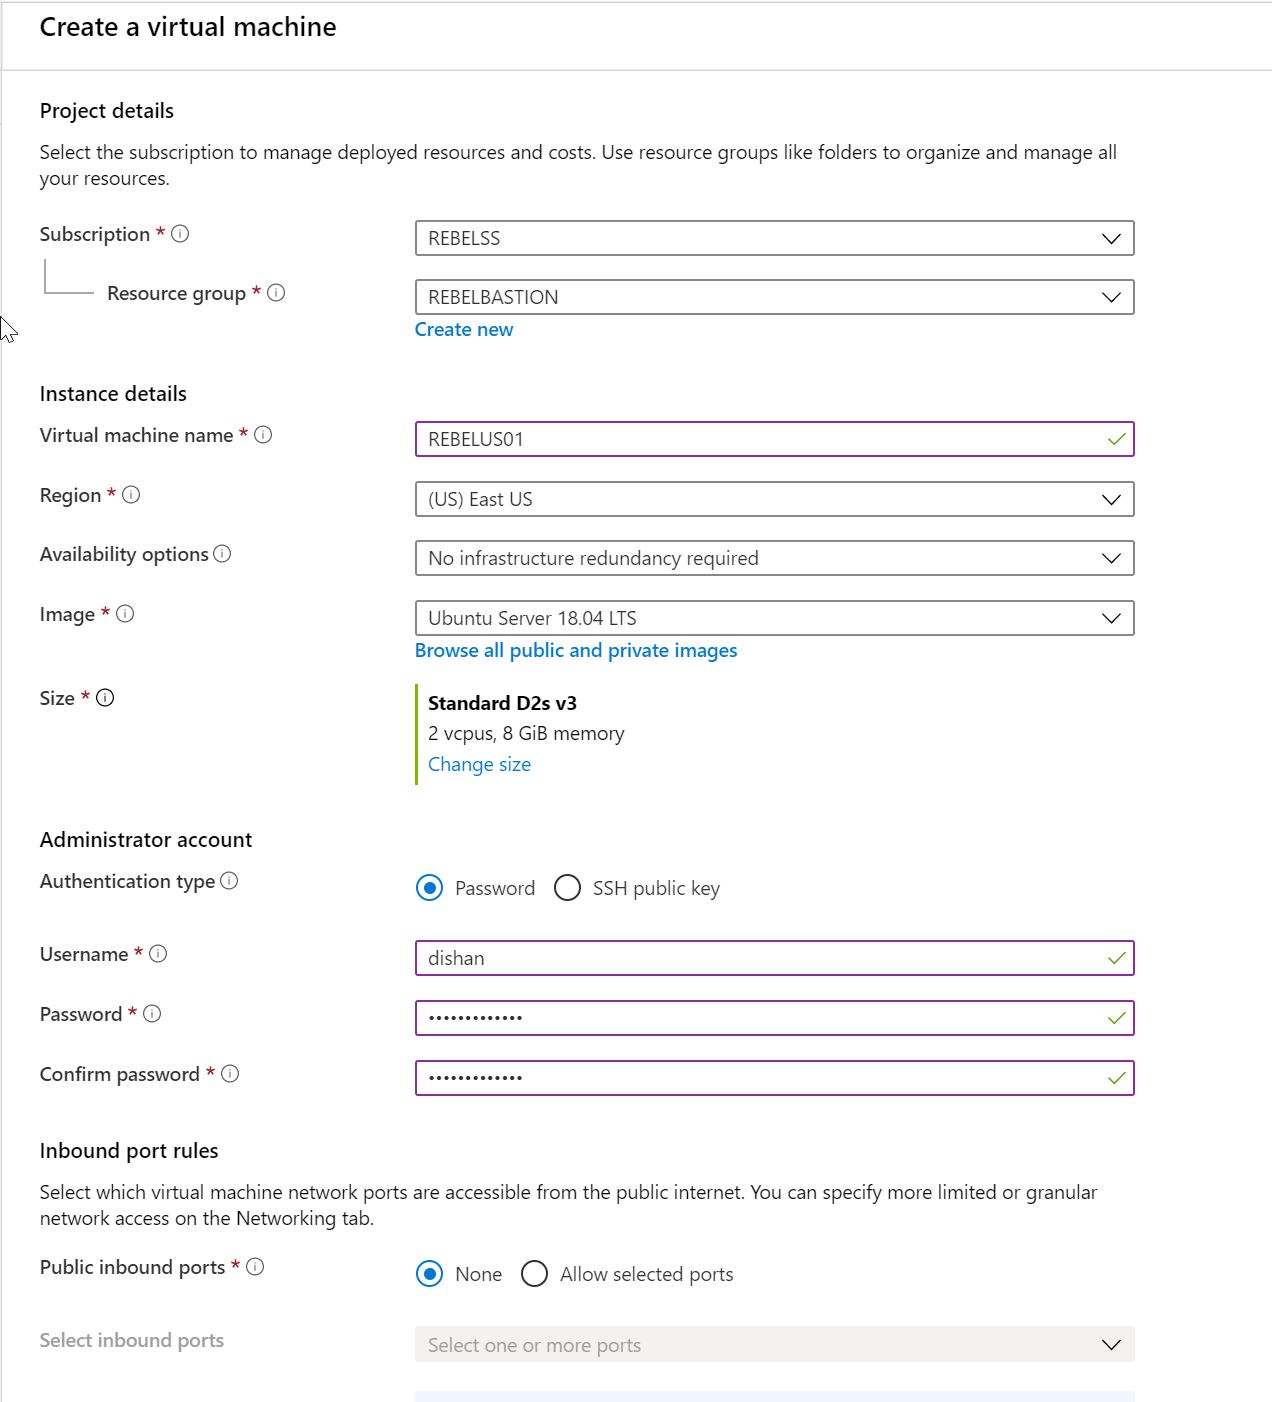
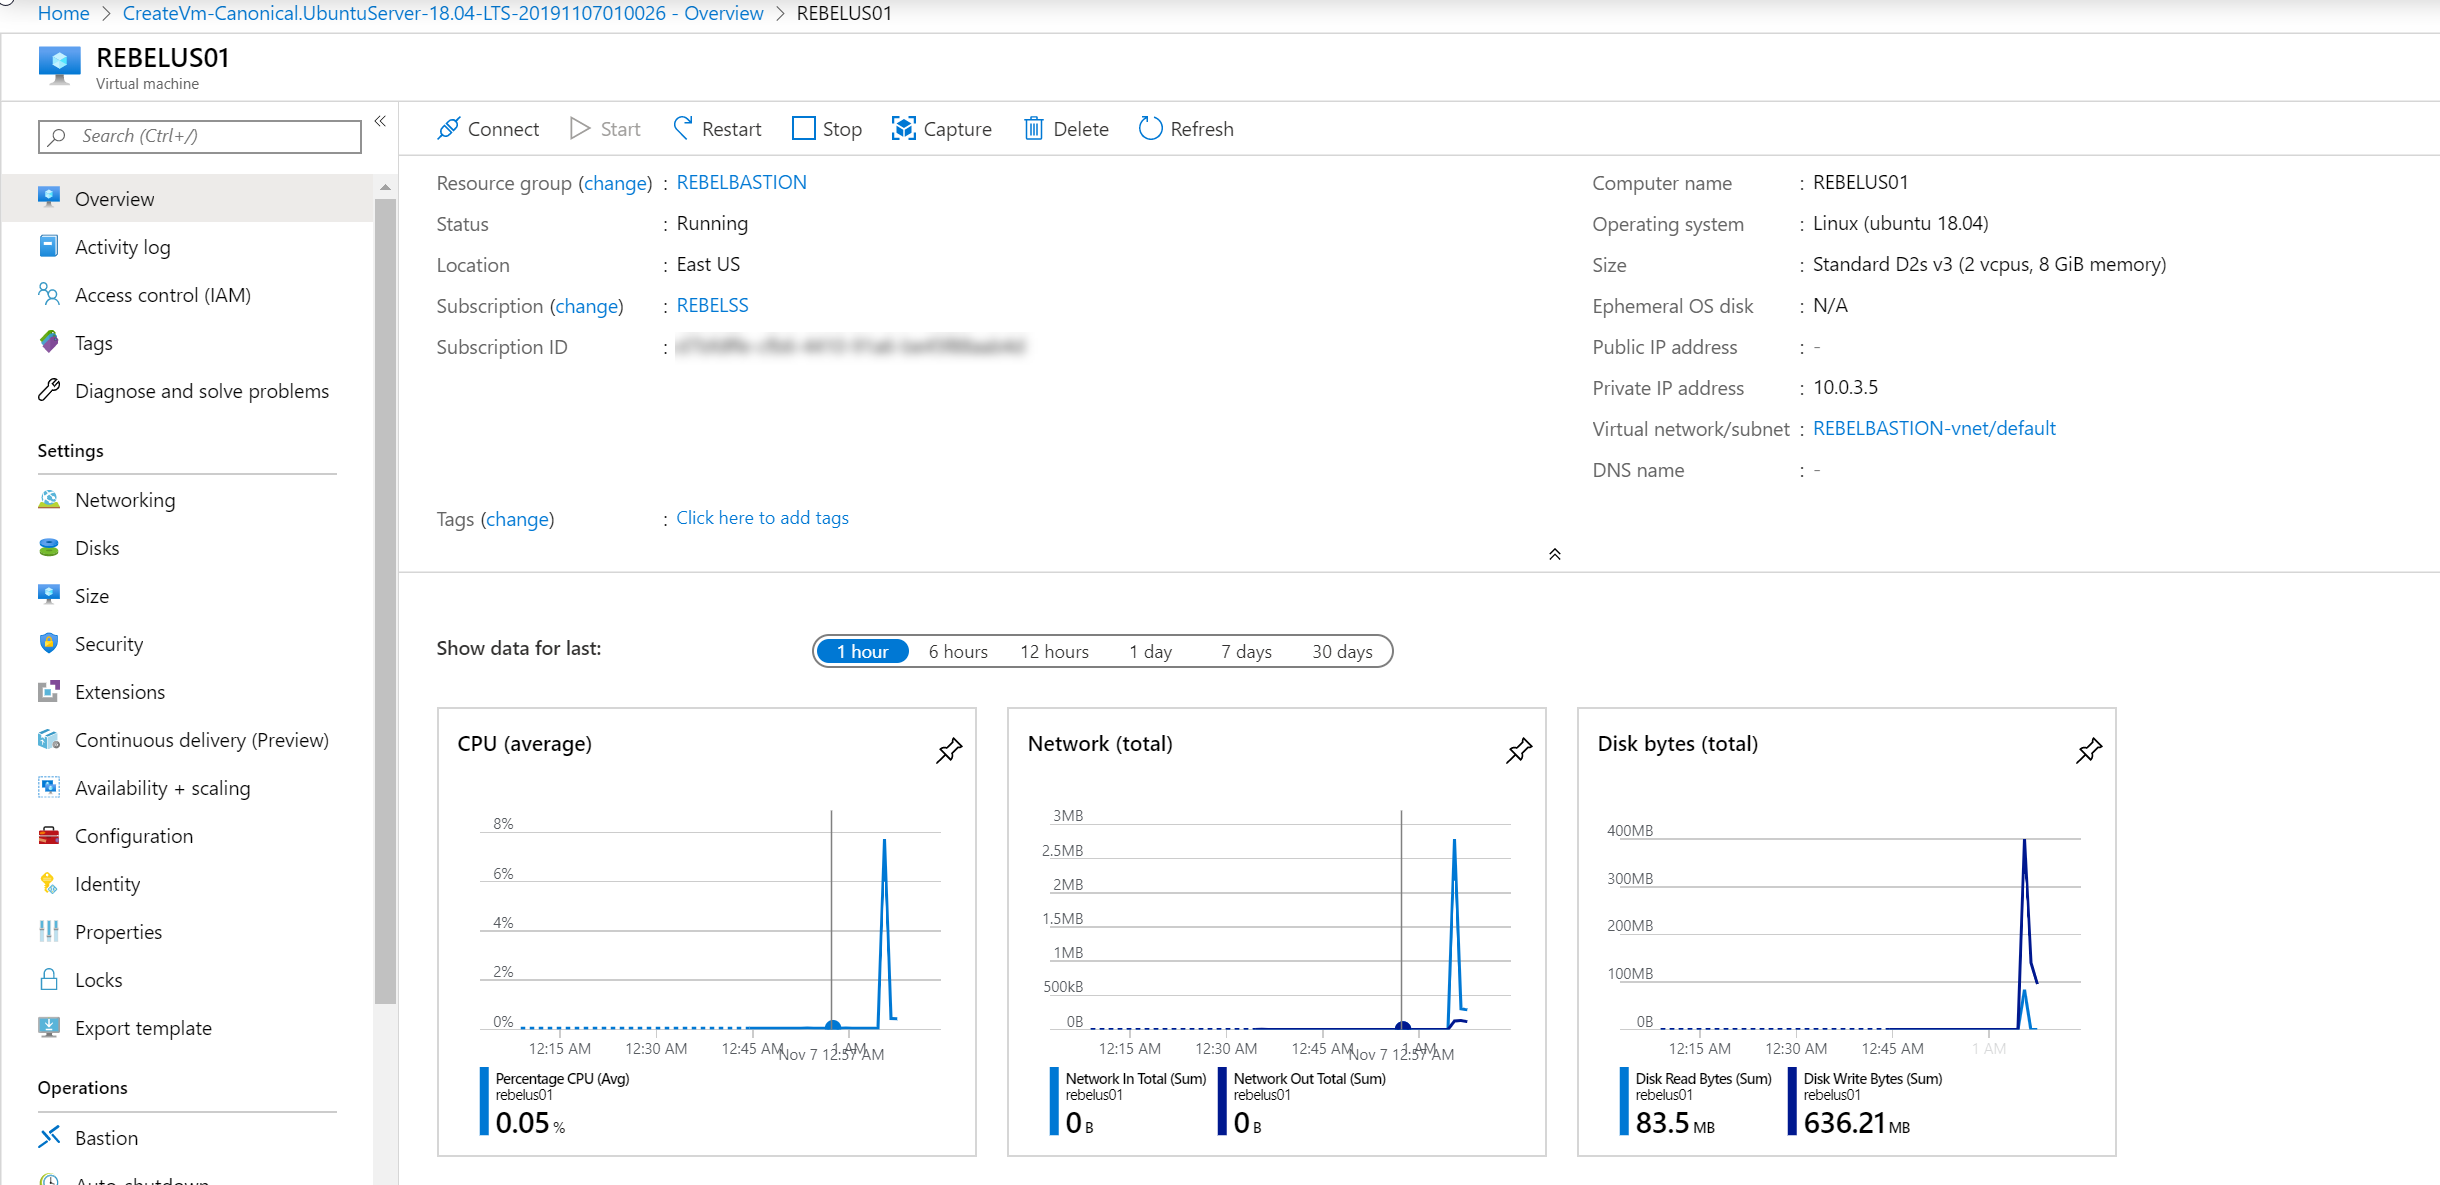
4. Create an Ubuntu Linux VM with following settings,
Resource Group Name : REBELBASTION
Virtual Machine Name : REBELUS01
Region : East US
Image : Ubuntu Server 18.04 LTS
Size : Standard D2s v3
Public inbounds ports: None
Virtual network : REBELBASTION-vnet
Subnet : 10.0.3.0/24
Public IP : None
[su_note]I normally use Azure Powershell for the deployment. But to create VM without public IP address is not a straight forward process. Hopefully, in the future, it will support to create VM directly without a public IP address.[/su_note]
Now we have our VMs ready. Next step is to enable Azure bastion service.
Enable Azure Bastion
1. Log in to Azure portal (https://portal.azure.com) as Global Administrator
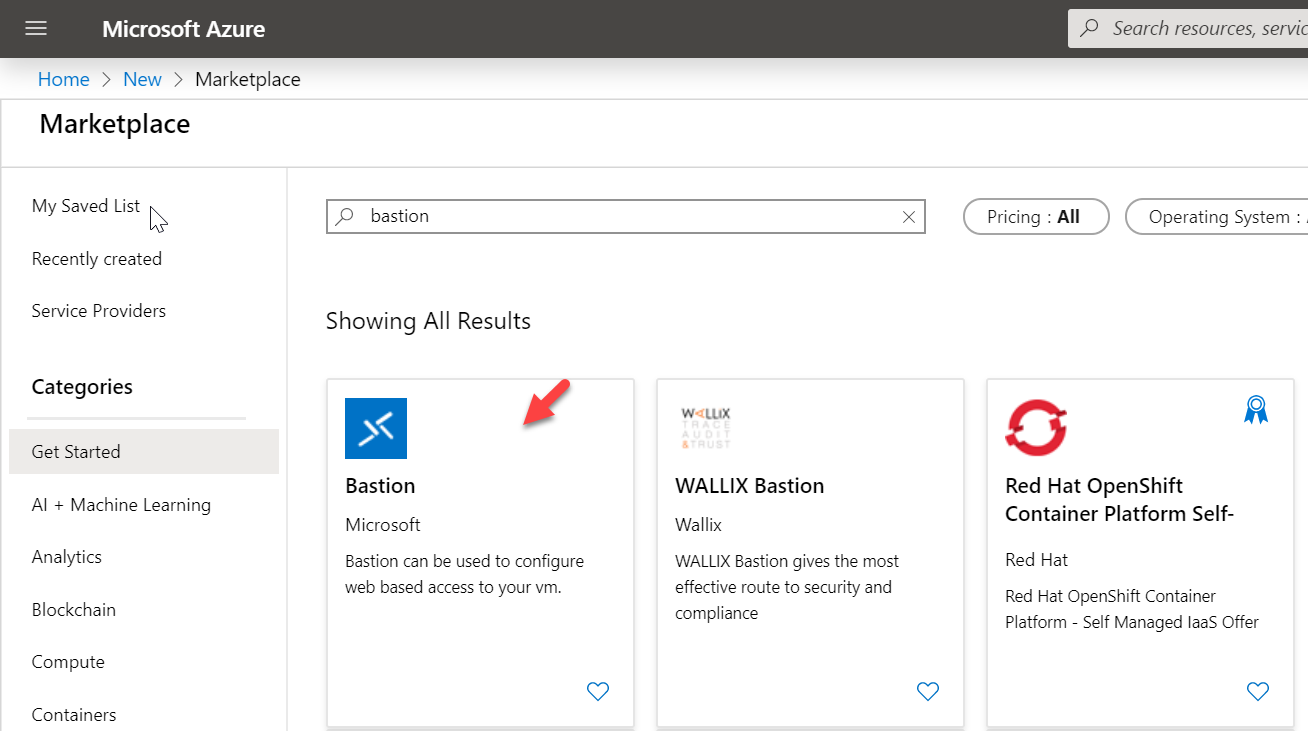
2. Click on + Create a Resource option
3. In the marketplace, search for Bastion and then click on it.
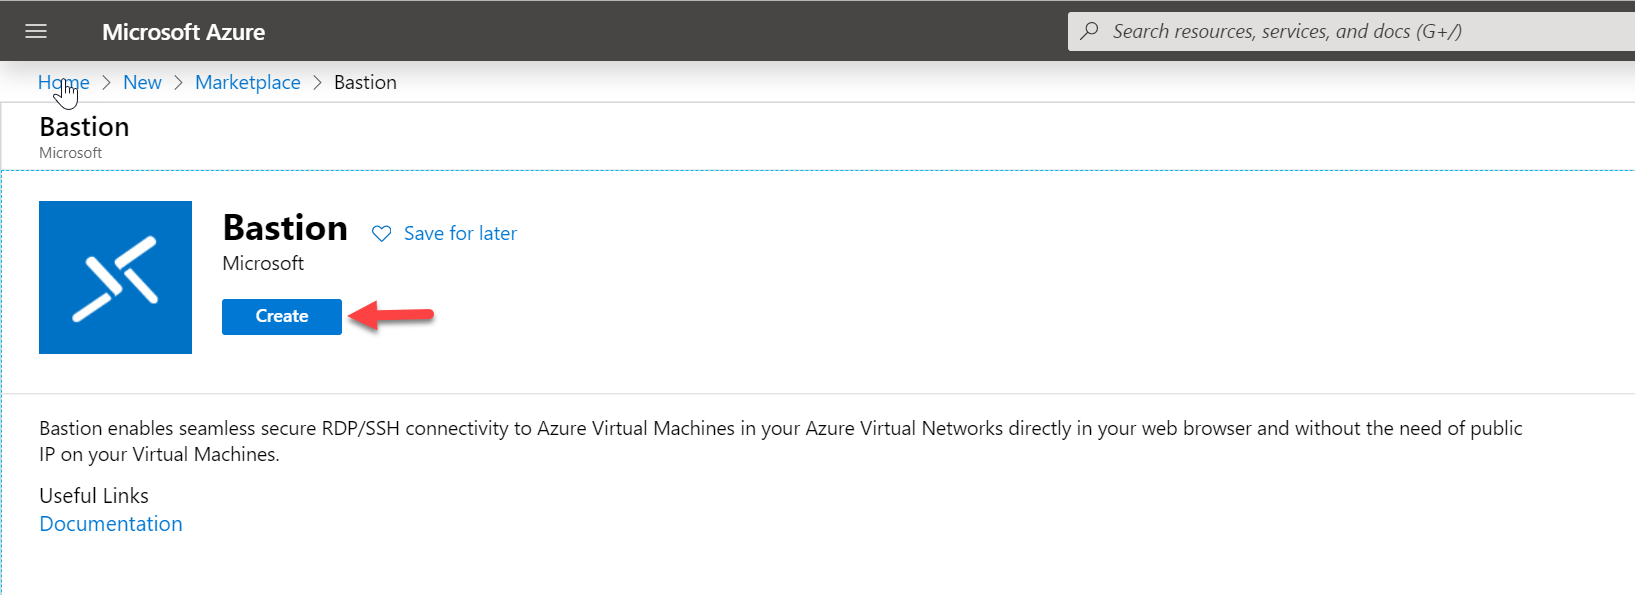
4. In the new window, click on Create.
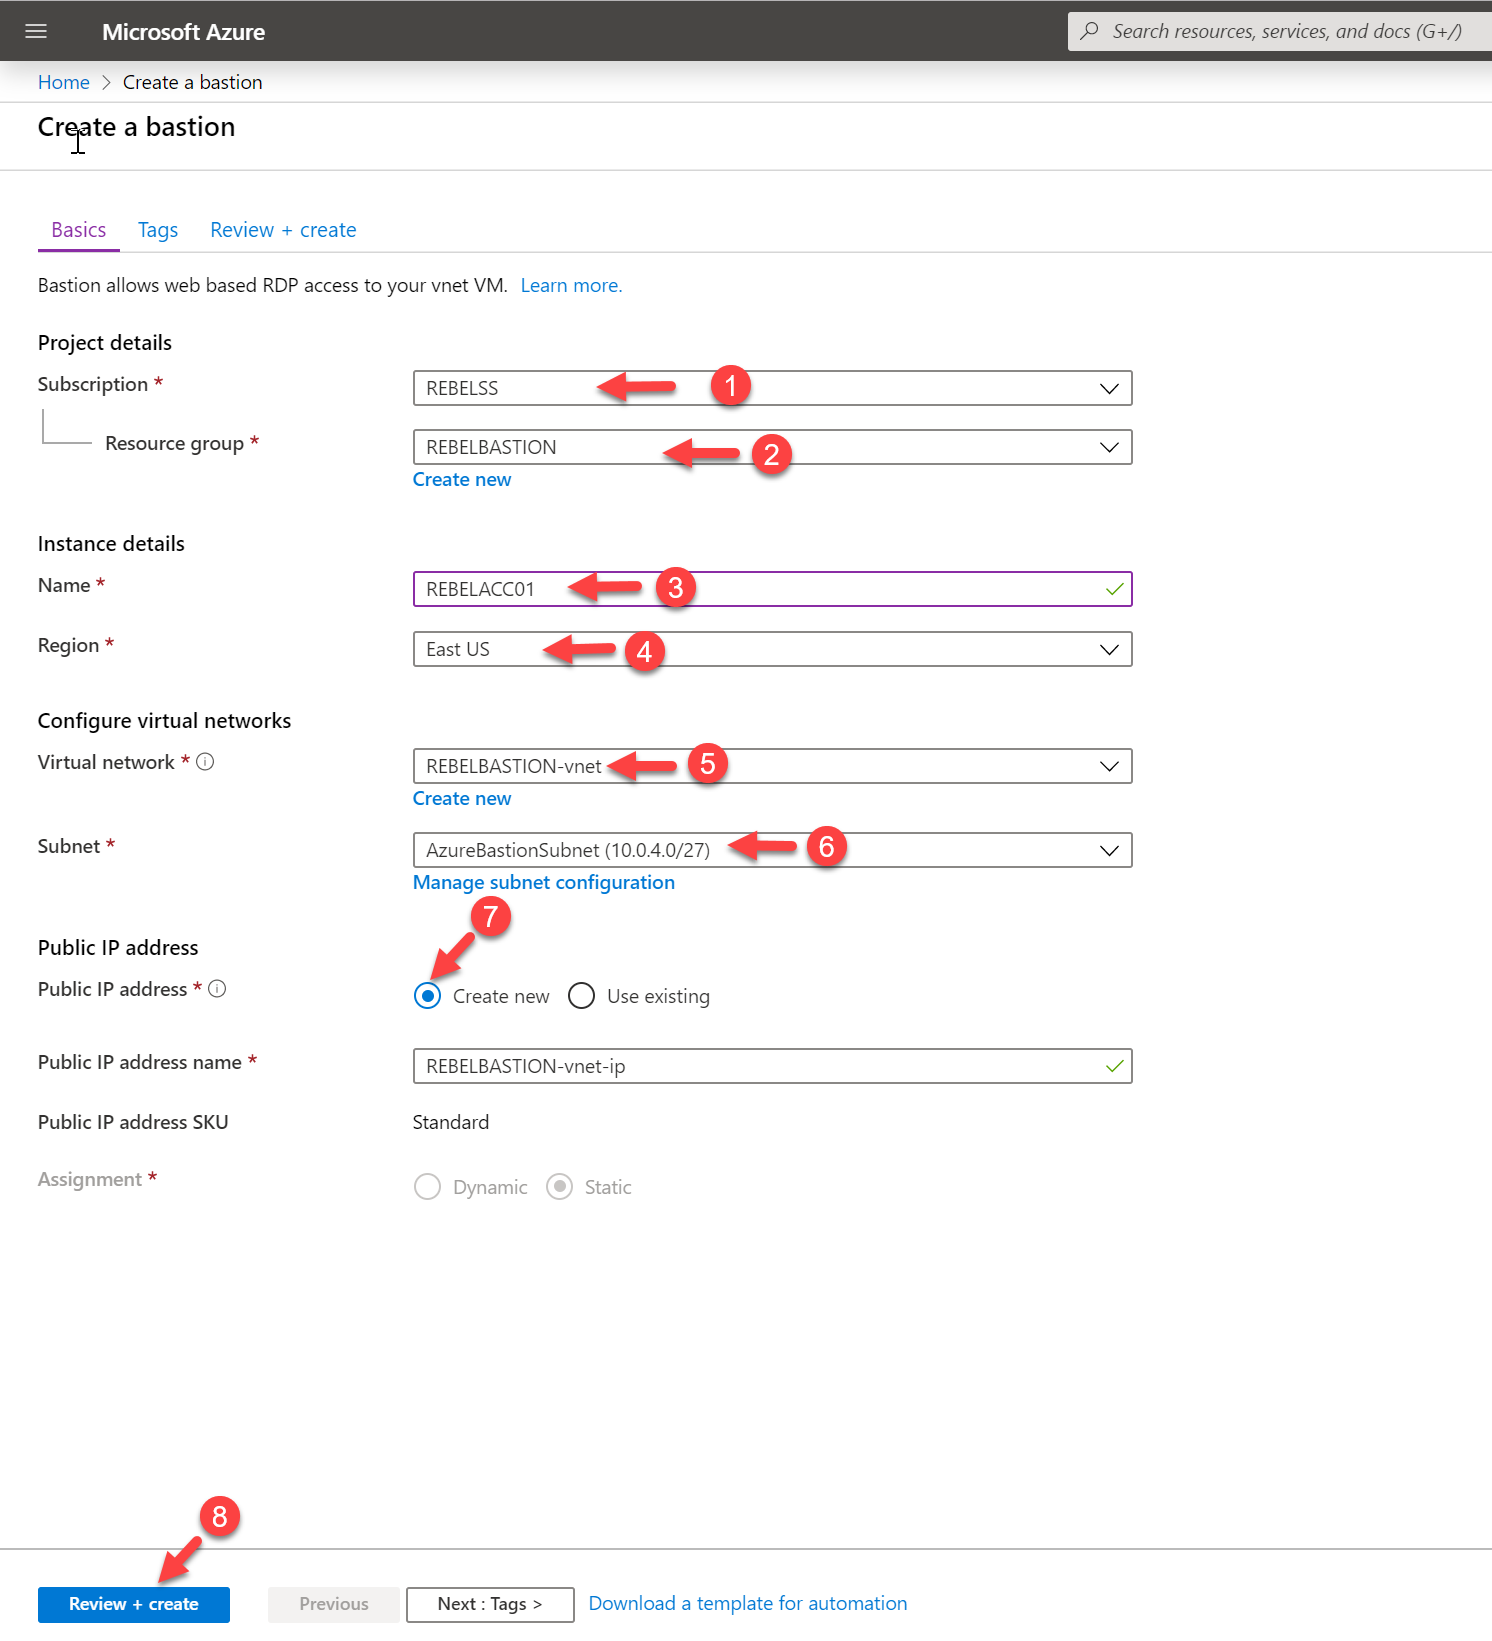
5. In the new window, select the same resource group we created in the previous step which is REBELBASTION. Then define a name for the bastion service instance. In this demo, I am using REBELACC01. Under region, select East US as all the resources we created above is also in East US.
For the virtual network, select the virtual network we created for the VMs which is REBELBASTION-vnet.
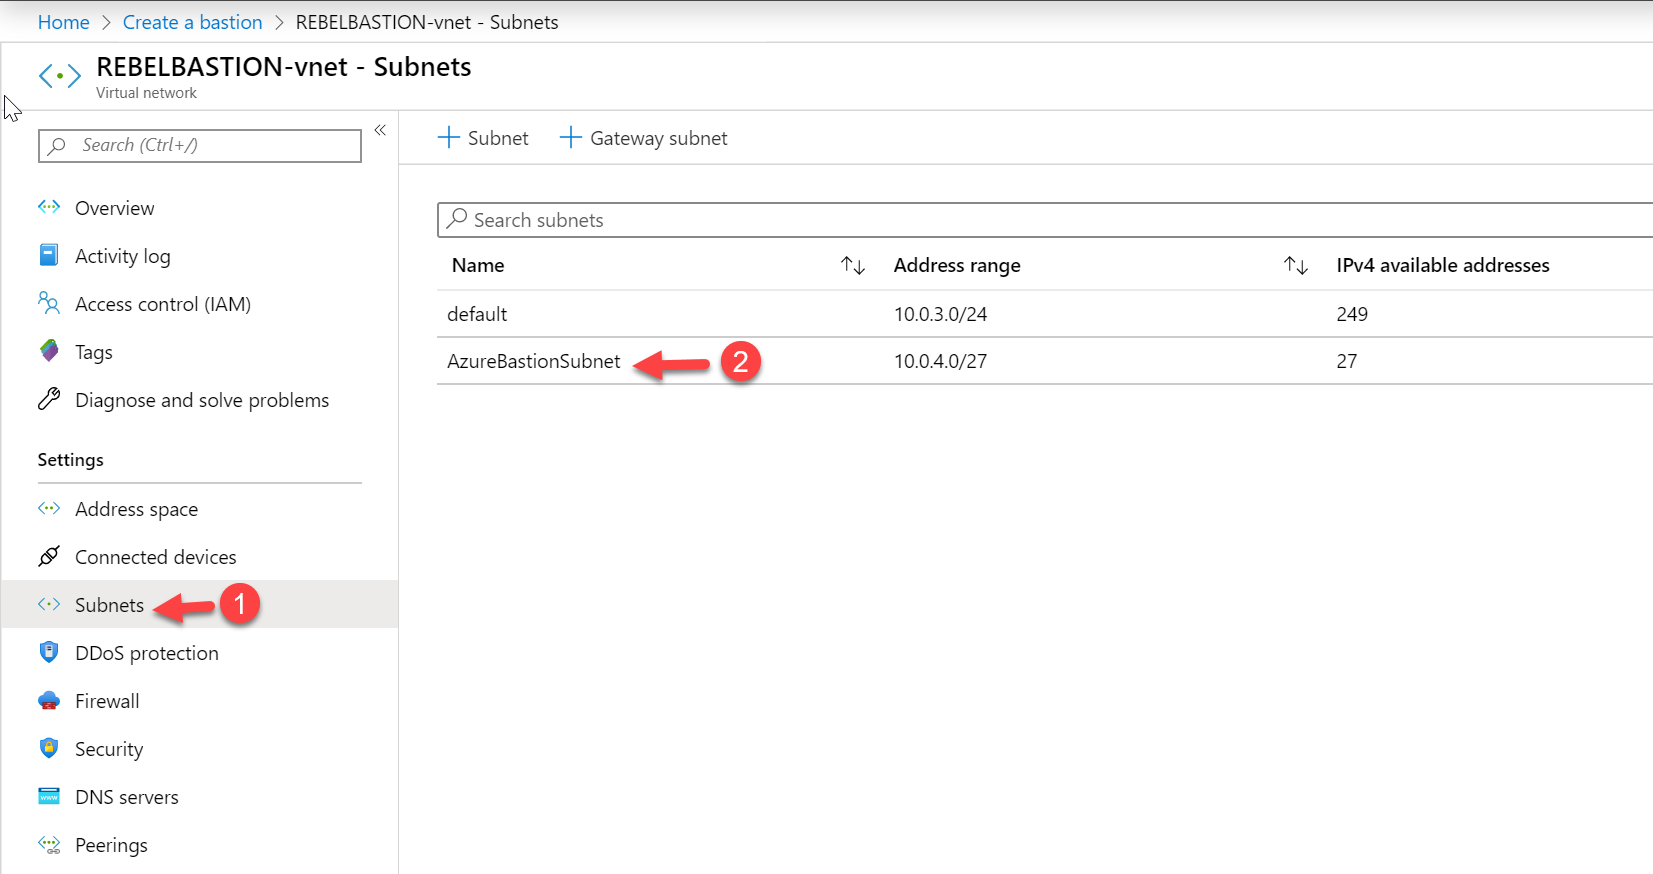
For the subnet, we need to create a new subnet with the name of AzureBastionSubnet. It also should have /27 address range. We cannot use any custom name as a subnet name.
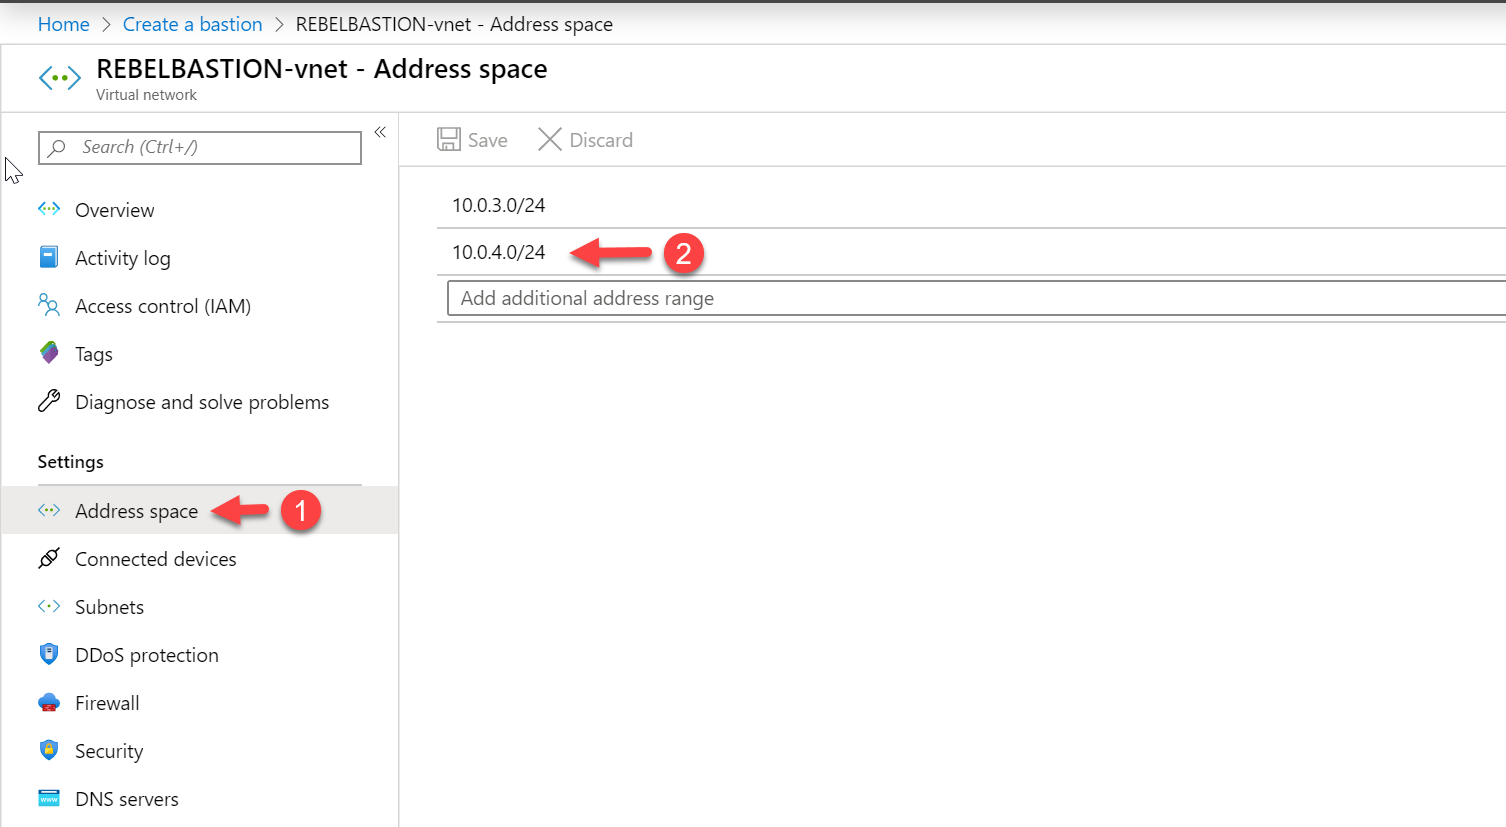
To do this, I have created a new address space 10.0.4.0/24 under the same virtual network and create a new subnet 10.0.4.0/27. This should not have any routing table attached.

Apart from that we also need public IP asking for the bastion service.
Once all the settings are correctly in place, click on Review + Create.
After the validation pass, click on Create to proceed with the service deployment.
It can take up to 5 minutes to complete the deployment process. Once the deployment is completed, we can continue with testing.
Testing
Let's start testing with Windows VM. To do that,
1. Log in to Azure portal (https://portal.azure.com) as Global Administrator
2. Go to Virtual Machines
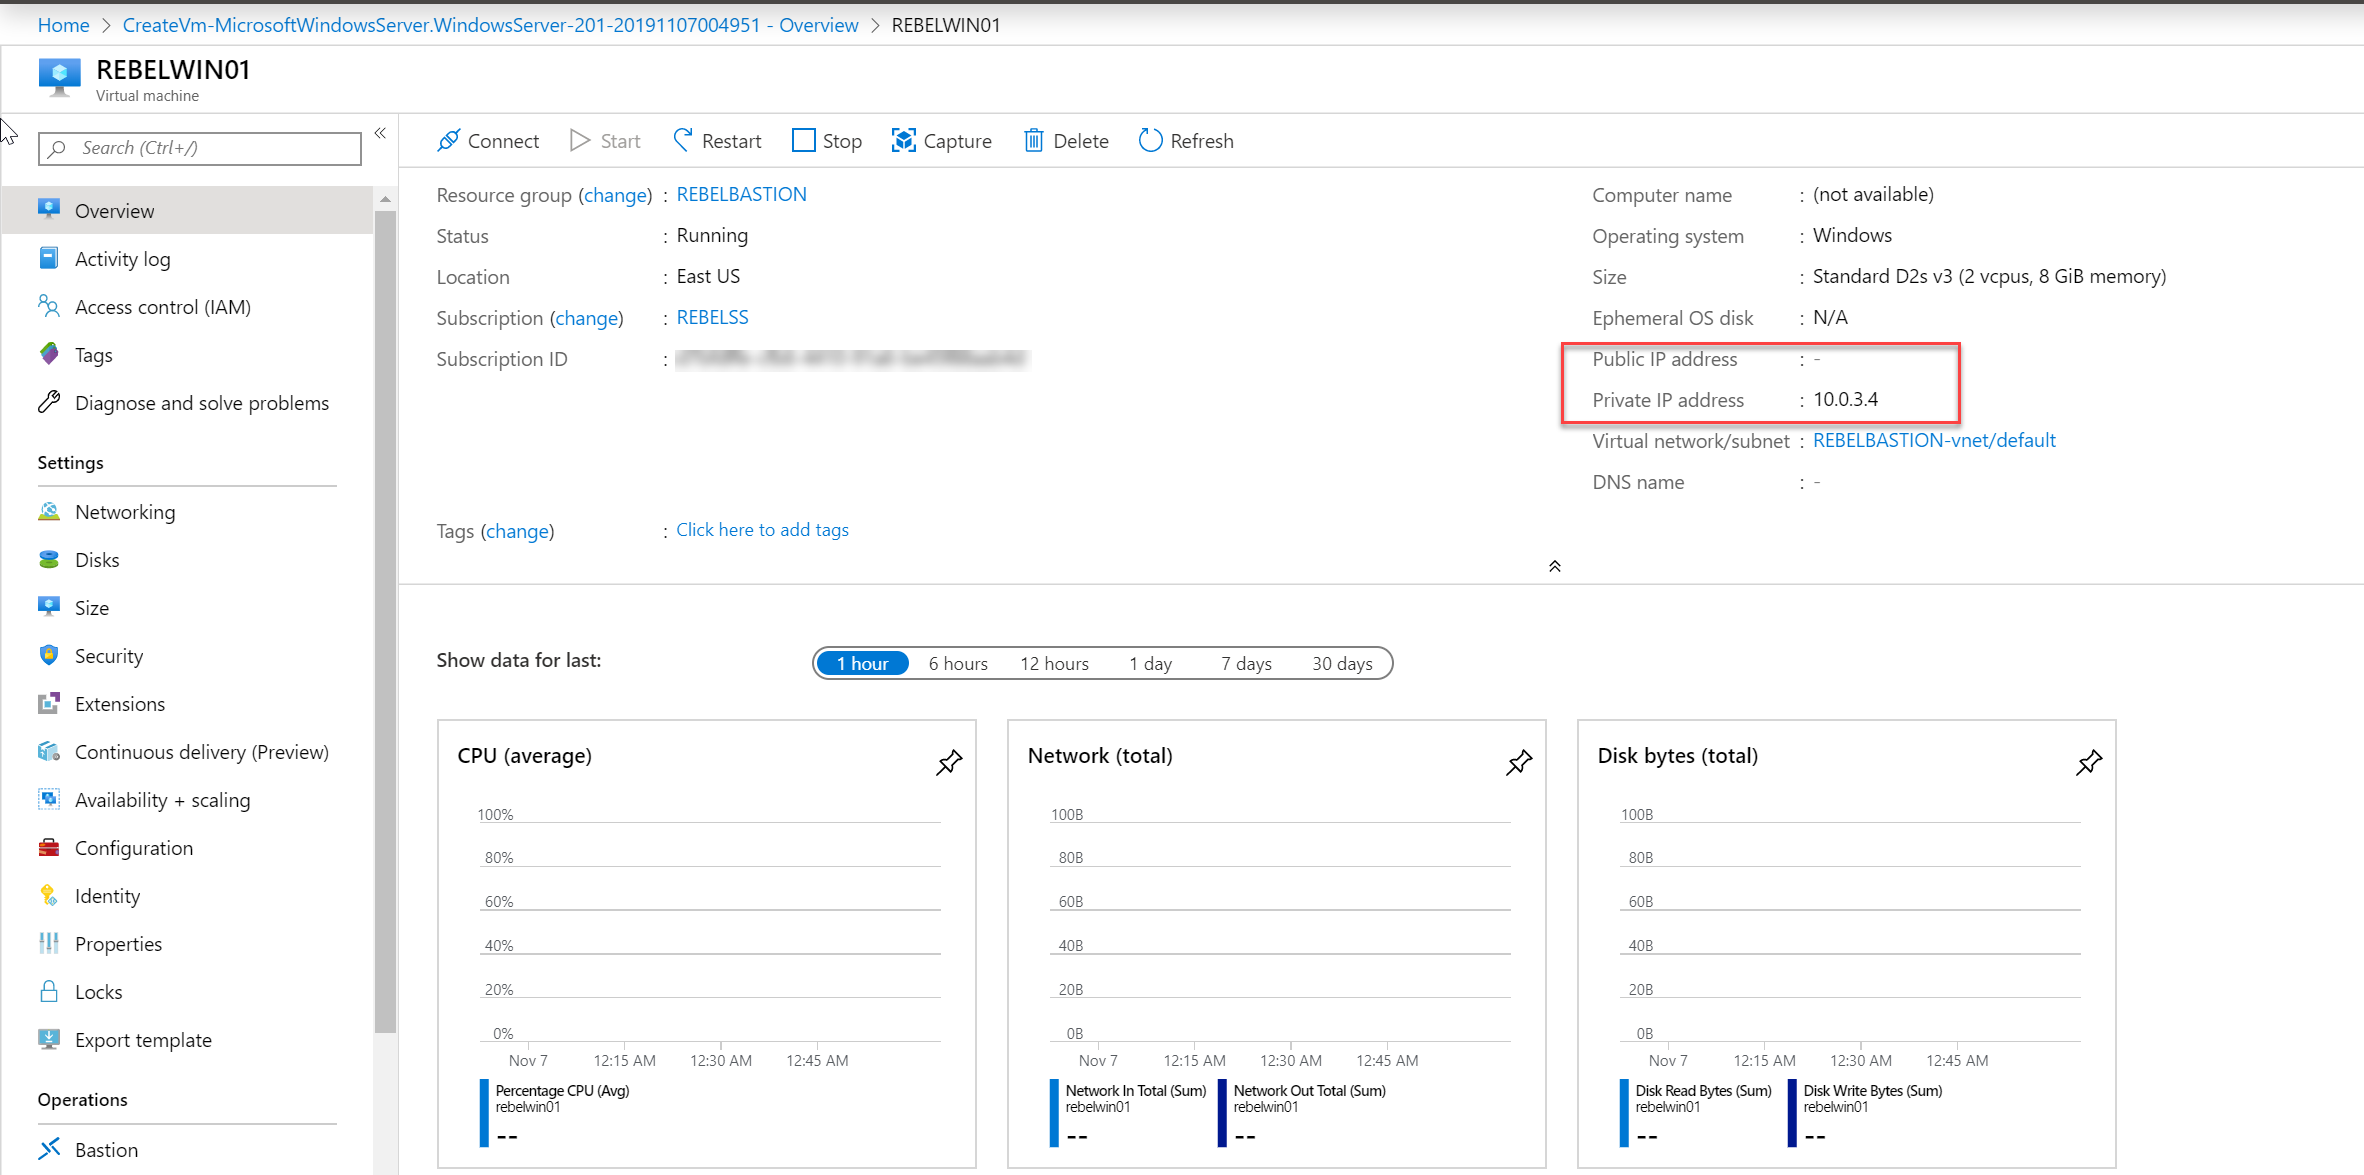
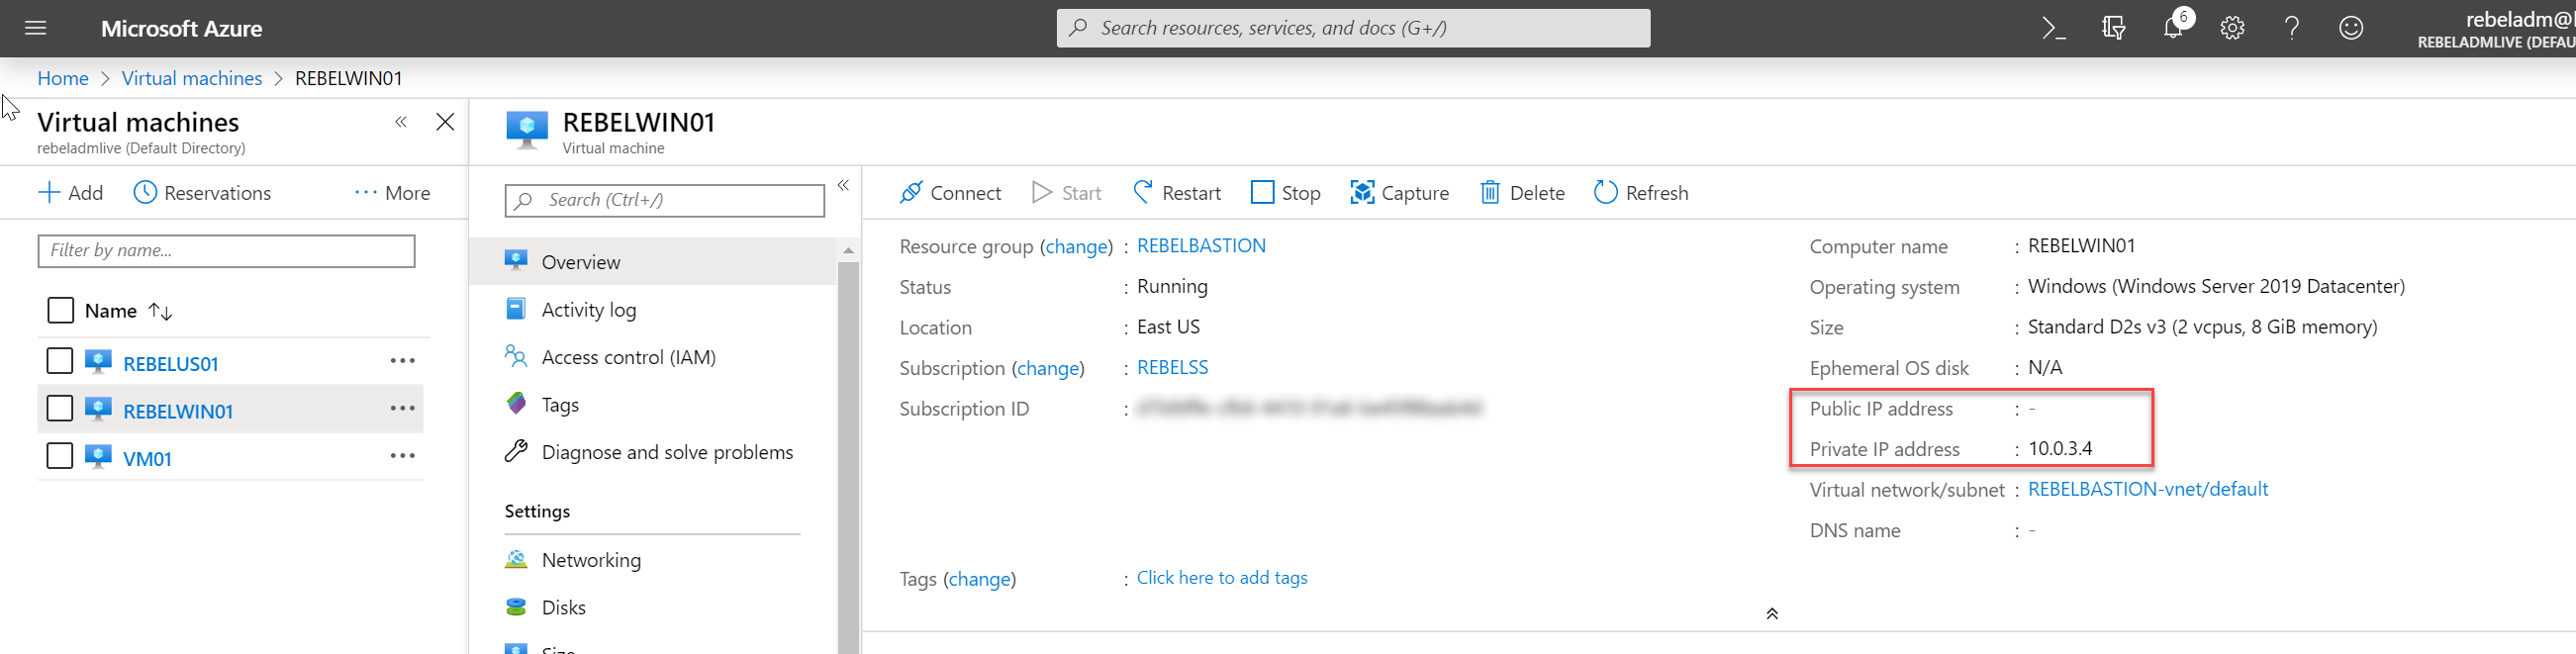
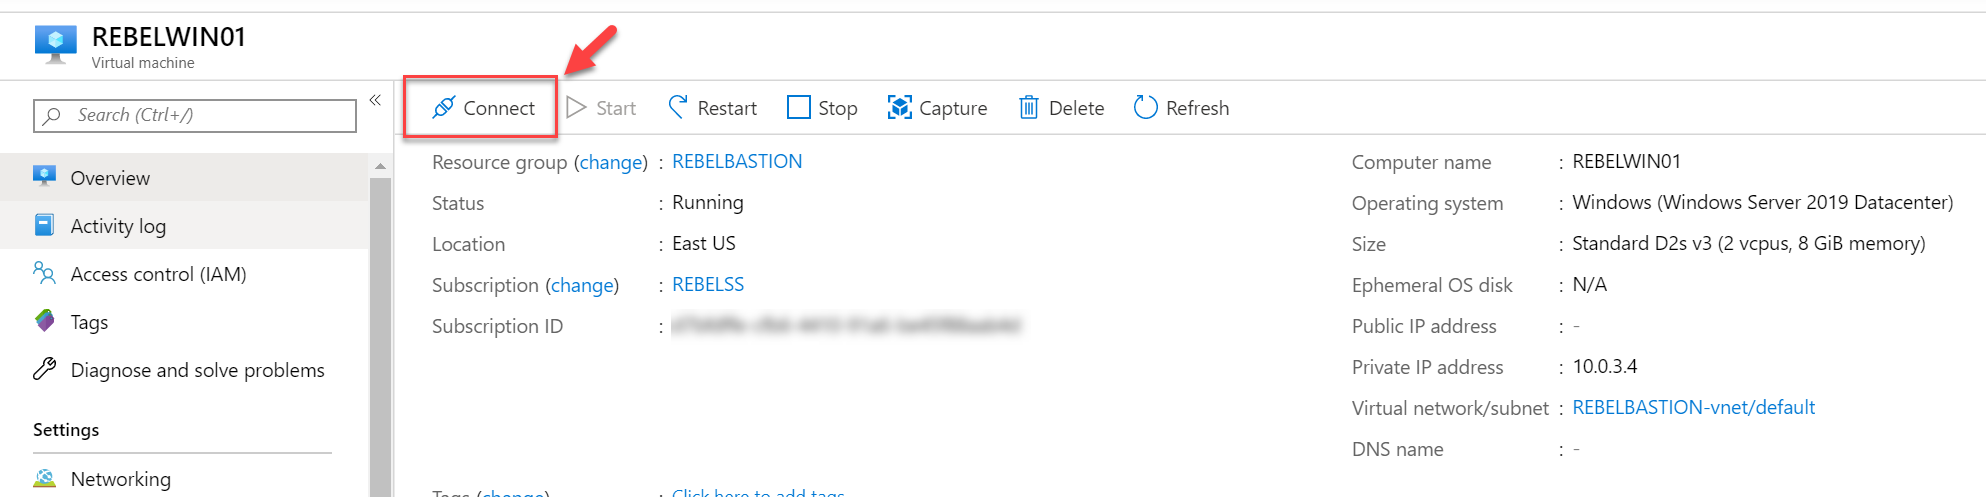
3. From the VM list, click on the Windows server 2019 VM we created in the earlier step. In my demo it is REBELWIN01.
4. In VM properties page, verify it doesn't have public IP assigned.
5. To test the bastion service, click on Connect
6. It will open up a new window. On that page, click on BASTION tab.

7. Then type the user name and password for the Windows VM and click on Connect.
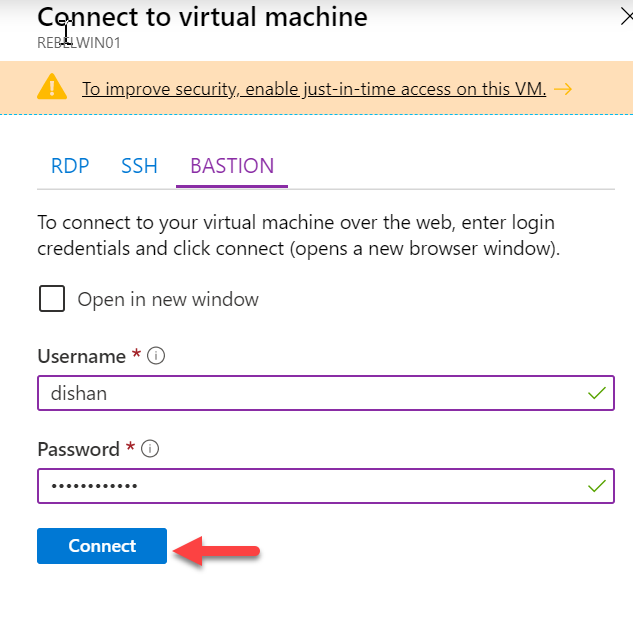
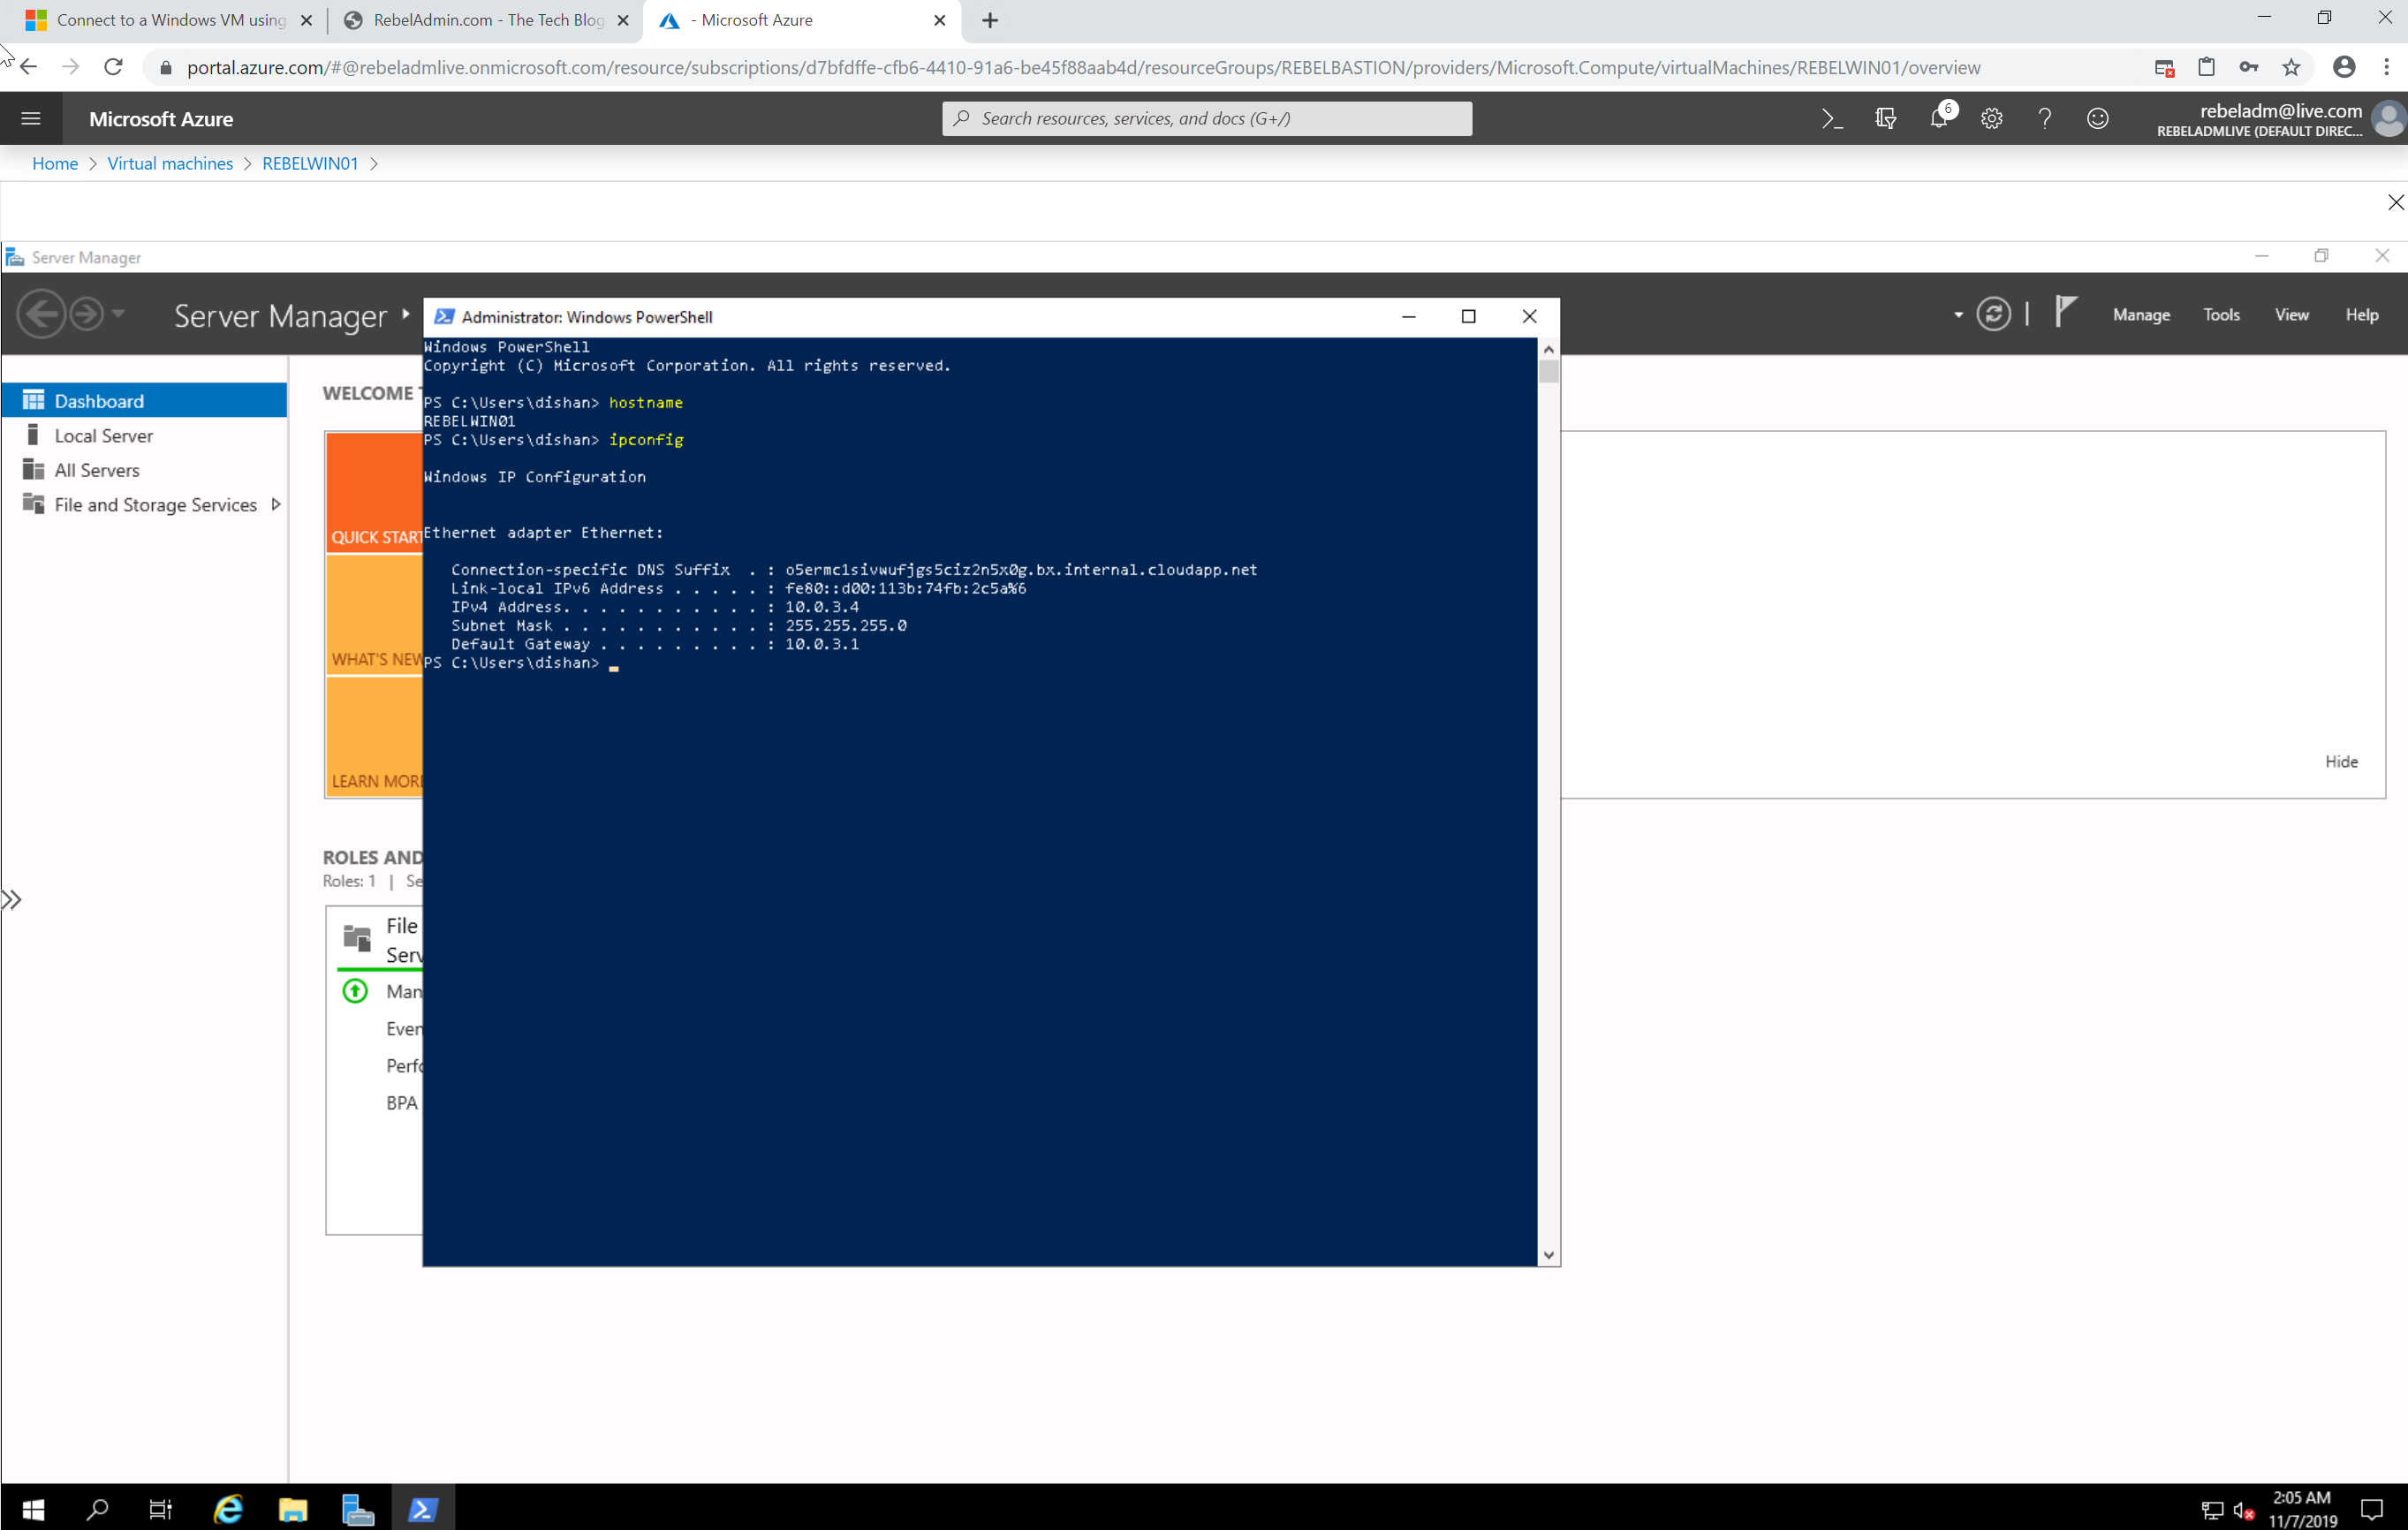
8. Then it opens up a browser session to the server. Cool ha???
9. The same way I went ahead and try the SSH connection to Ubuntu Server.


As we can see, without VPN or public IP address we were able to connect to Azure VMs using Private IP addresses. This reduces the attack surface and protect you Azure resources further. This marks the end of this blog post. If you have any further questions about this feel free to contact me on rebeladm@live.com also follow me on twitter @rebeladm to get updates about new blog posts.


Thank you for this information, very useful
Helpful
Hi,
Can an Azure AD “Guest” get access to an Azure VM via Bastion?
Thanks!