
This is another part of my blog post series which was covering Azure CLI 2.0 functions. If you not read those yet you can find it with following links.
Step-by-step guide to start with azure cli 2.0 – http://www.rebeladmin.com/2017/08/step-step-guide-start-azure-cli-2-0/
Step-by-step guide to create azure vm using azure cli 2.0 – http://www.rebeladmin.com/2017/08/step-step-guide-create-azure-vm-using-azure-cli-2-0/
In part 01 of this blog post, we are going to look in to managing disks using Azure CLI.
First thing first, I am going to log in to Azure CLI with a privileged account. This can be done using az login
I have a windows VM setup under my subscription. I can view its details using az vm show --resource-group rebeladminrg01 --name REBLEVM101
In above --resource-group defines the resource group name and –name defines the VM name.

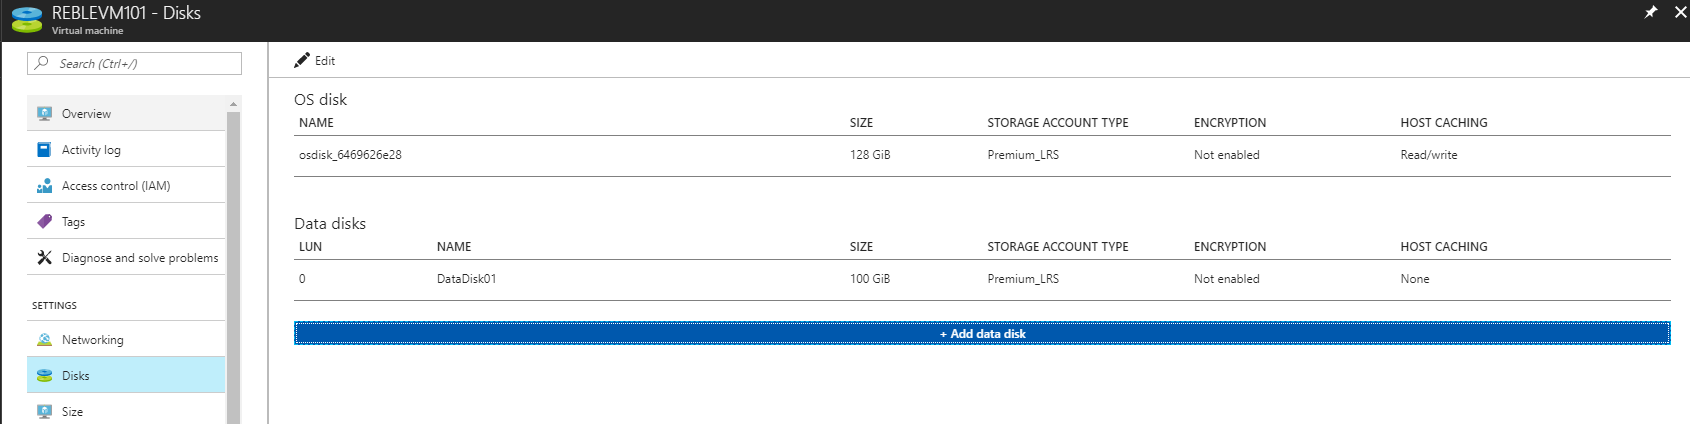
In this VM, I have a disk with size of 128 GB. It is azure managed disk.

I like to add couple of disks in to this VM. Adding “Azure Managed” disk is the simplest way. It simplifies the disk management process. The only thing you need to worry is disk type and size.
az vm disk attach -g rebeladminrg01 --vm-name REBLEVM101 --disk DataDisk01 --new --size-gb 100
above creates a managed disk called DataDisk01 under rebeladminrg01 resource group. it is 100 GB in size. It also attached to REBLEVM101 VM.
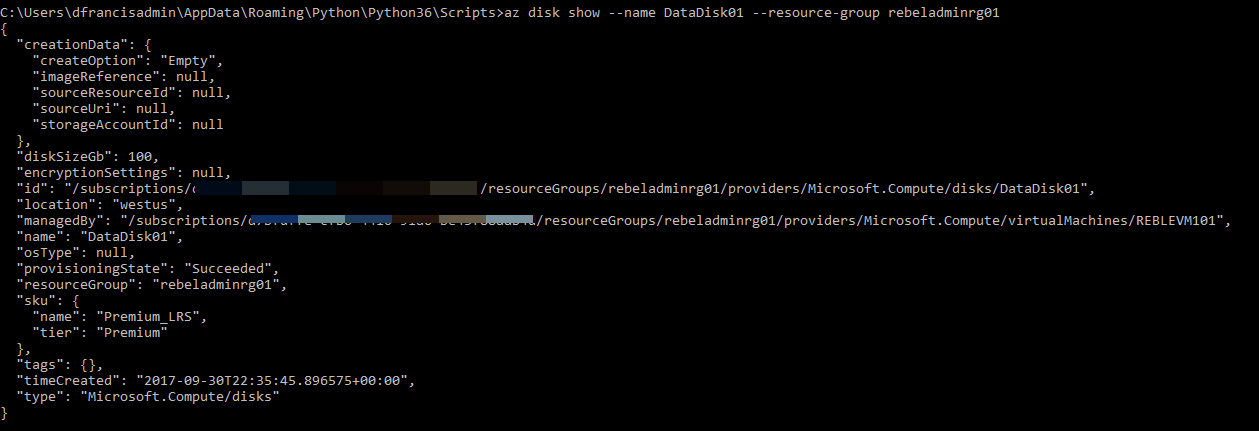
We can verify it by running,
az disk show --name DataDisk01 --resource-group rebeladminrg01
if need we can also use “unmanaged” disks. First, I am going to create a new storage account for it.
az storage account create --location westus --name rebelstorage01 --resource-group rebeladminrg01 --sku Standard_LRS
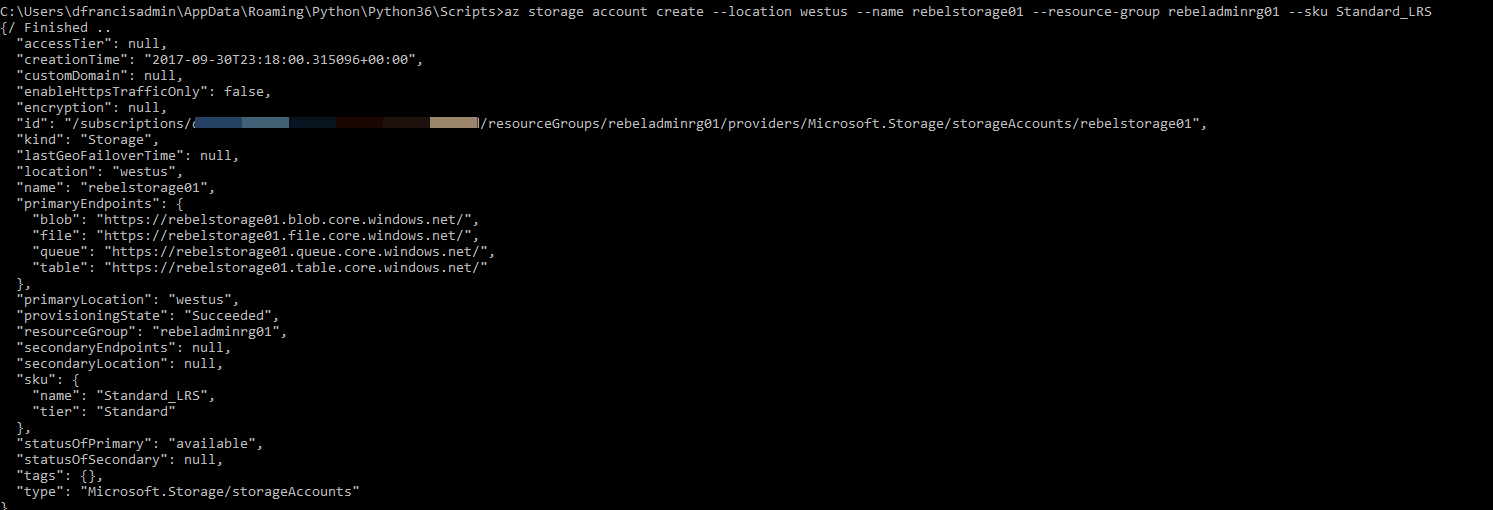
above creates a storage account called rebelstorage01 under westus region. Its created under rebeladminrg01 resource group. its Standard_LRS storage.
Before configure the storage, first we need to set environment variables so the it can be use with commands.
To do that need to type
az storage account show-connection-string --name rebelstorage01 --resource-group rebeladminrg01
then copy the connection string value and use it with
az storage container create --name data --connection-string "DefaultEndpointsProtocol=https;EndpointSuffix=core.windows.net;AccountName=rebelstorage01;AccountKey=oJOjFskwKlDBisEiGREBEsMRWnDbOA+q6stySqXKT1MsBiPZeJPThnfnkGgG9AgudKmJ/5CCl65cGcMIAZGQhg=="
above will create a container called data under the storage account.
Let’s go ahead and add a new unmanaged disk to a VM.
Note – You cannot add unmanaged disk to a VM created with managed disk.
az vm unmanaged-disk attach -g rebeladminrg01 --vm-name REBELVM3 --new -n DataDisk6 --vhd-uri https://rebelstorage01.blob.core.windows.net/data/2.vhd --size-gb 100
in above rebeladminrg01 is the resource group where azure VM located. REBELVM3 is the VM name. I am creating a new disk called DataDisk6 on data/2.vhd path. Its size is 100 GB.

In order to detach disk from VM we can use following commands.
If its unmanaged disk we can use,
az vm unmanaged-disk detach --name DataDisk6 --resource-group rebeladminrg01 --vm-name REBELVM3
above command will detach unmanaged disk called DataDisk6 from REBELVM3 VM.

If its managed disk we can use,
az vm disk detach -g rebeladminrg01 --vm-name REBLEVM101 -n DataDisk02
above will remove data disk called DataDisk02 from REBLEVM101 VM.
This is the end of the part 01 of this post. Hope this was useful and if you have any questions feel free to contact me on rebeladm@live.com also follow me on twitter @rebeladm to get updates about new blog posts.

