
In any infrastructure, users are using different applications, services, file shares in order to get their work done. each of these components may have periodic changes. In order to maintain integrity, provide faster IT support and identify risks, it is important to track all the changes against these components. Maintaining inventory (software level) will help engineers to verify if systems are running as expected with relevant software and services. Change tracking and inventory process can be done using software or workflows.
Operation Management Suite (OMS) provides solution called “Change Tracking” to capture changes in cloud only, hybrid or on-premises only environments. It can track changes on Files, Registry Entries, Software, Windows services and Linux Daemons.
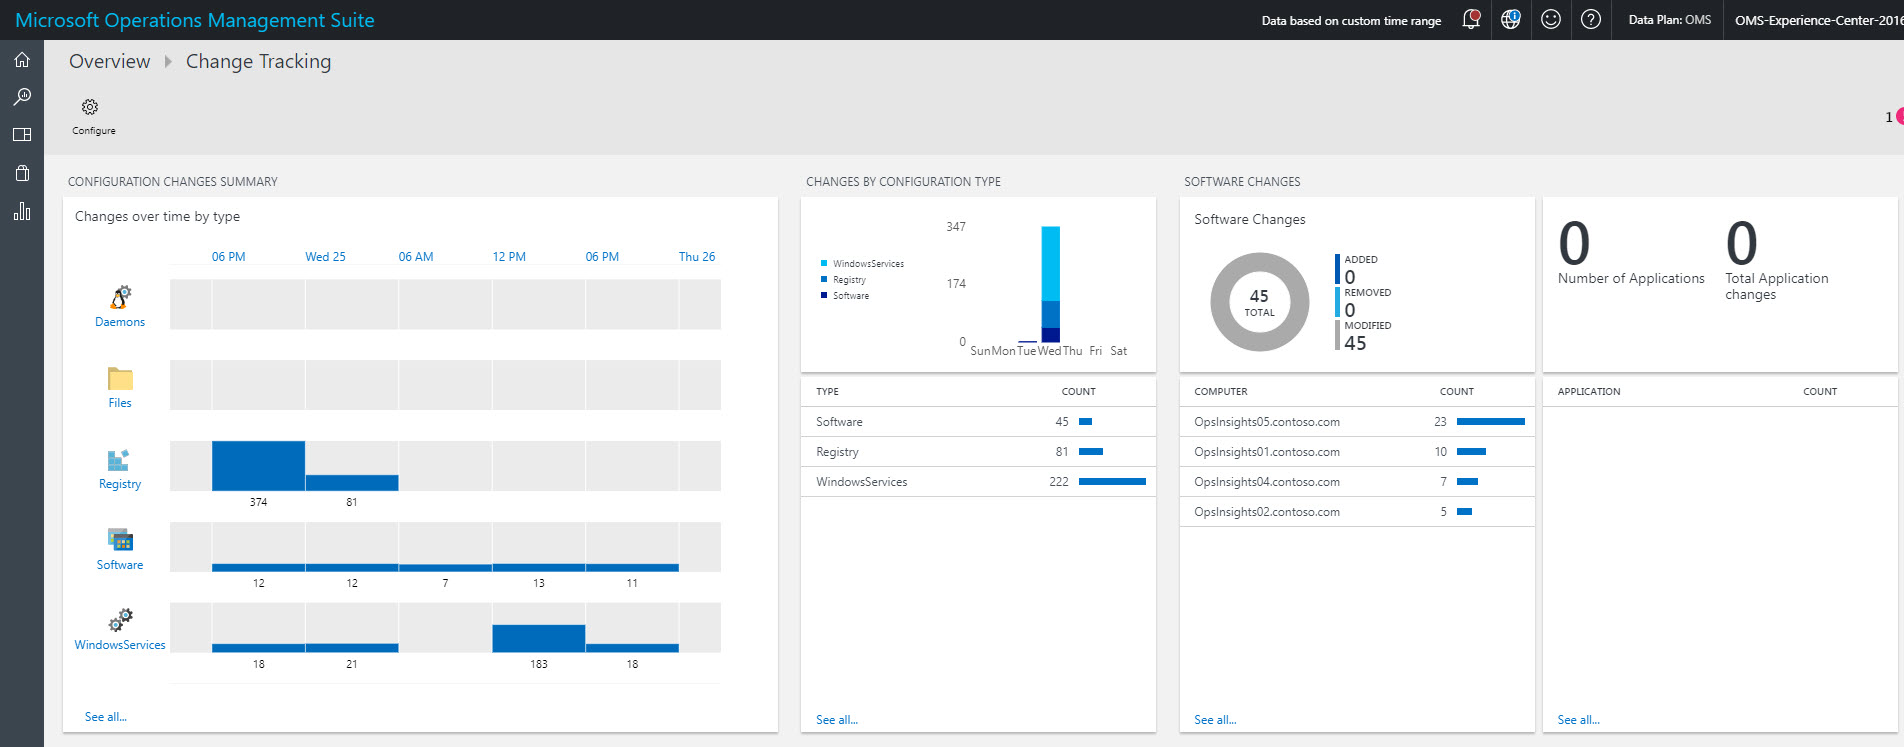
Microsoft recently release “Change tracking and Inventory” solution which can implement in Azure VM level. However, this is not replacement for OMS solution. OMS can track changes on any environment whiles this new solution is just for cloud only servers.
There are few things I like about this solution,
1. Easy to implement – with few clicks this feature can be enable in VM level.
2. No Agents – It doesn’t need agents to track changes or maintain inventory.
3. No need to log in to VM – It is not required any user interaction or system credentials, in order to use these features. Engineers can view visualized data without login to VM.
4. No scheduled scans – It tracks changes automatically. you do not need to manually create scan jobs or update schedules. (however, in background jobs are controlled by azure automation)
Please note this is still in preview mode, there for not recommended to use in production environment. But it is not too early to try its capabilities.
Let’s go ahead and see how we can enable and use this feature.
1. Log in to Azure portal (https://portal.azure.com) as Global Administrator.
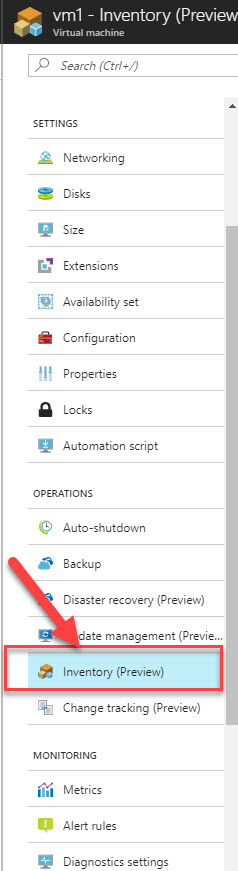
2. Go to Virtual Machines and click on the VM you like to get this feature enabled.
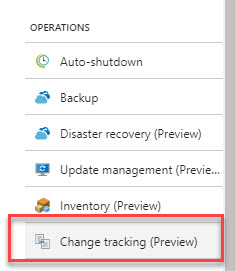
3. In VM panel, under OPERATIONS section click on Inventory (preview)
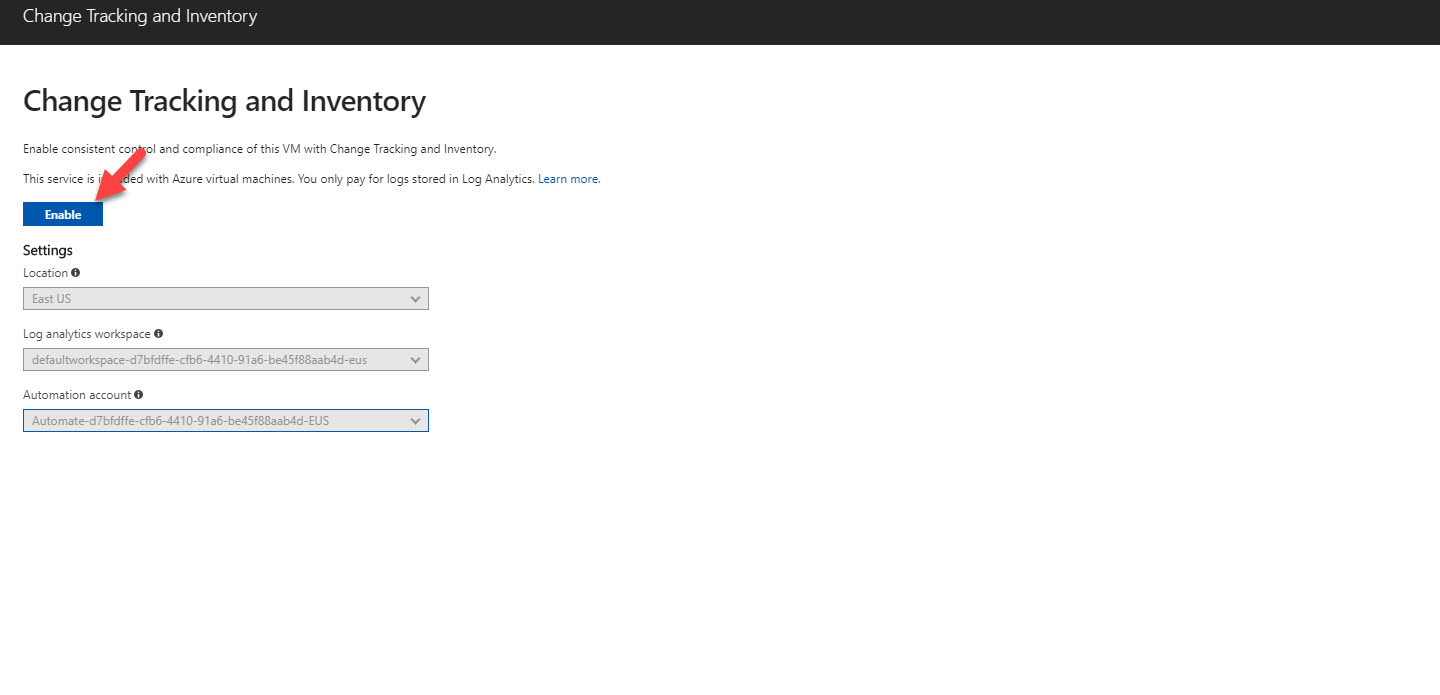
4. Then it will load up detail window, click on purple color bar like in below image to enable the feature.

5. Then it will load up new window with information such as log analytic workspace id and automation account id. Click on Enable to proceed.
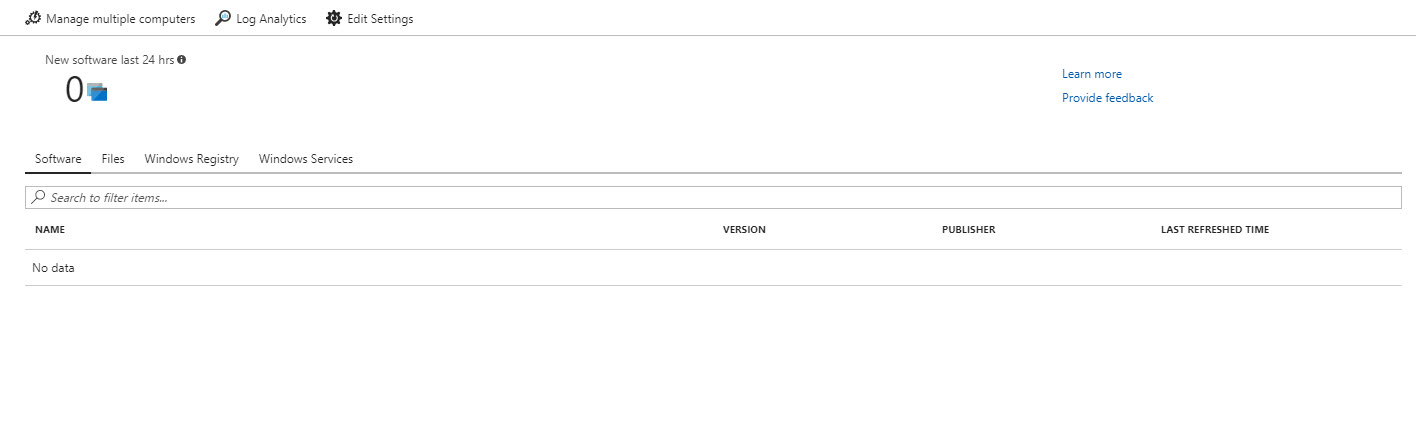
6. Once feature is enabled we can see following window. It will take while to populate data.
7. It also enables the Change tracking (preview) feature.
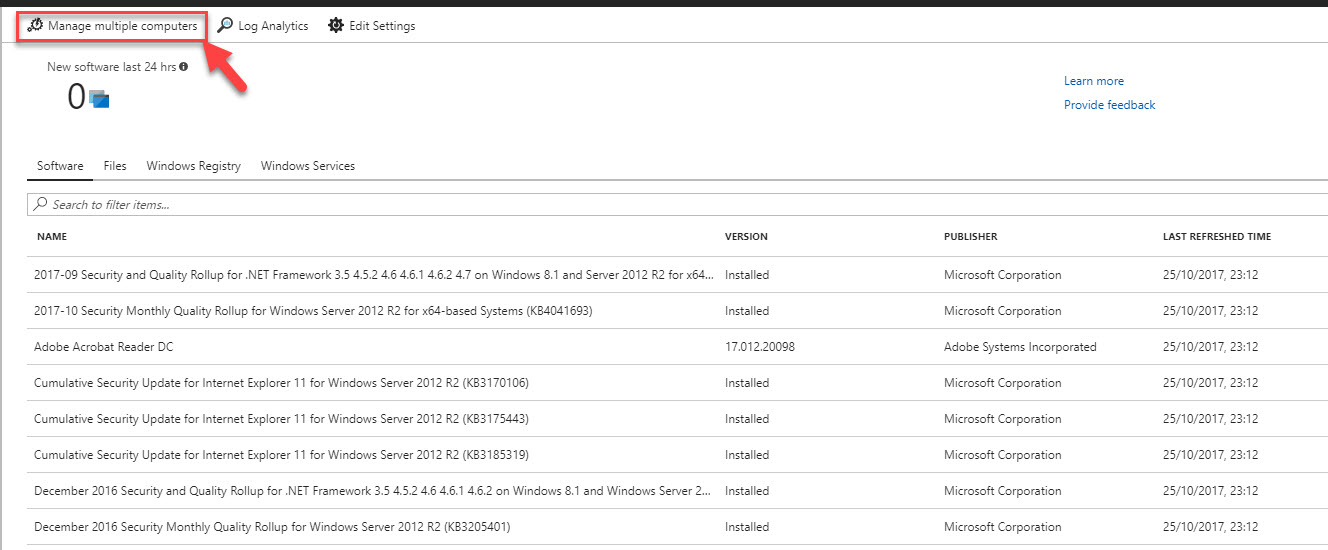
8. After sometime you will be able to see data under Inventory (preview) and Change tracking (preview) windows. Let’s start with Inventory (preview). When I load the window, first it lists down the software installed in the system.
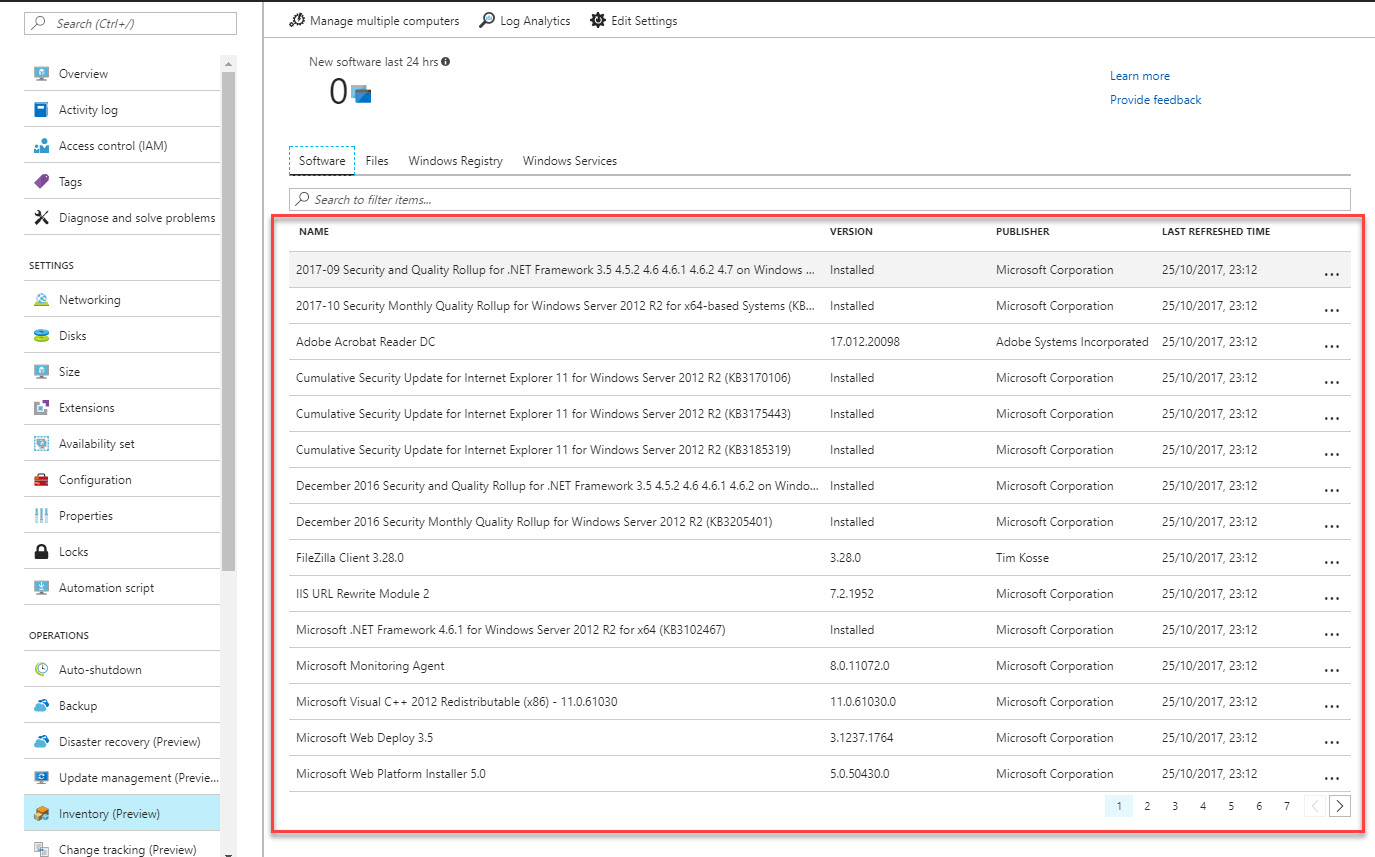
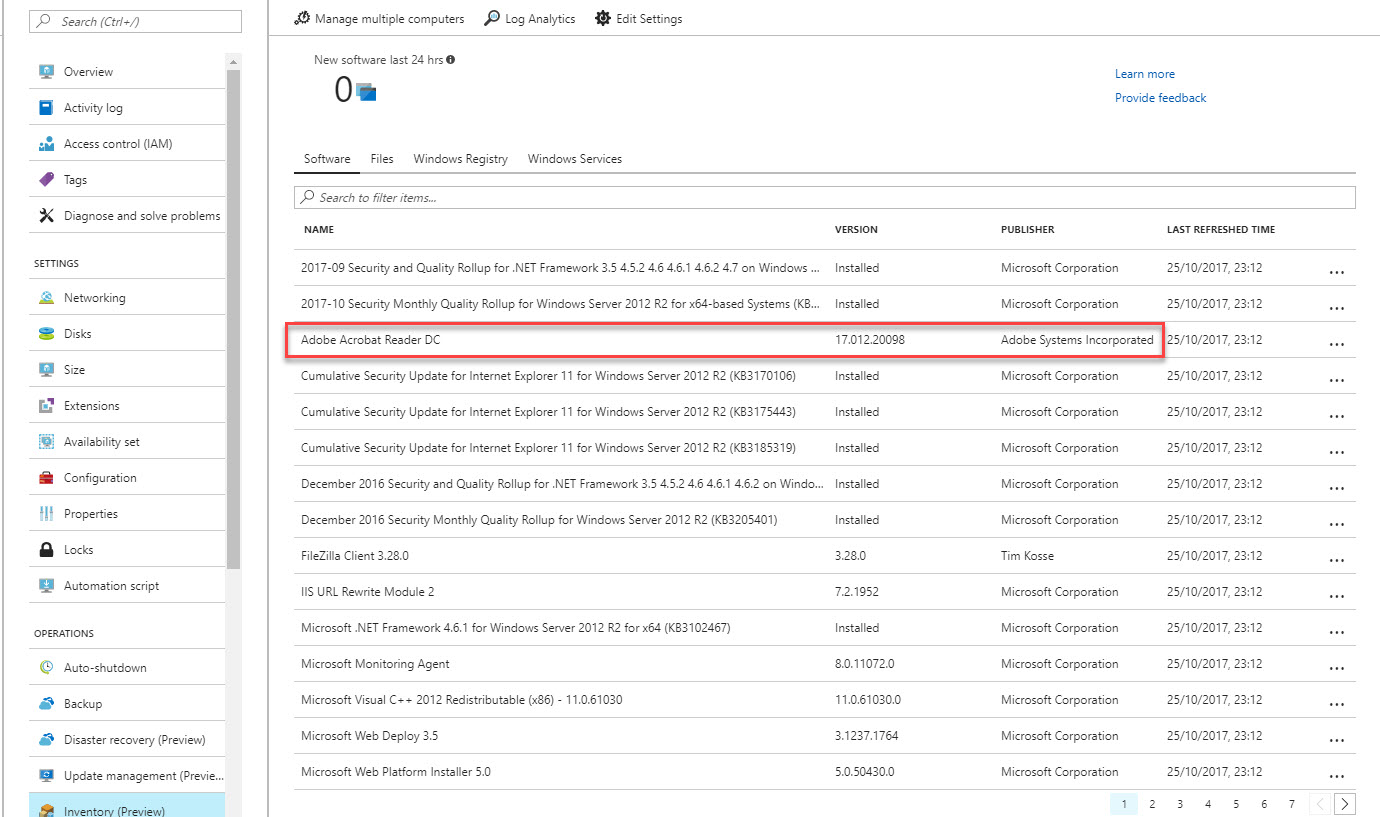
9. This includes information about windows updates and all other third-party applications. If it’s a software, it displays the version number and publisher’s info. As an example, I install acrobat reader and I can see its info as following.
10. Under the Files tab we can see the files details. By default, it doesn’t scan for any files. In system, there are thousands of files, it is no point to add all those to inventory. Instead of that users can define what folders and files to monitor and add to inventory. If its folder, it will list all these files under that particular folder automatically. In order to do that, click on Edit Settings Option.

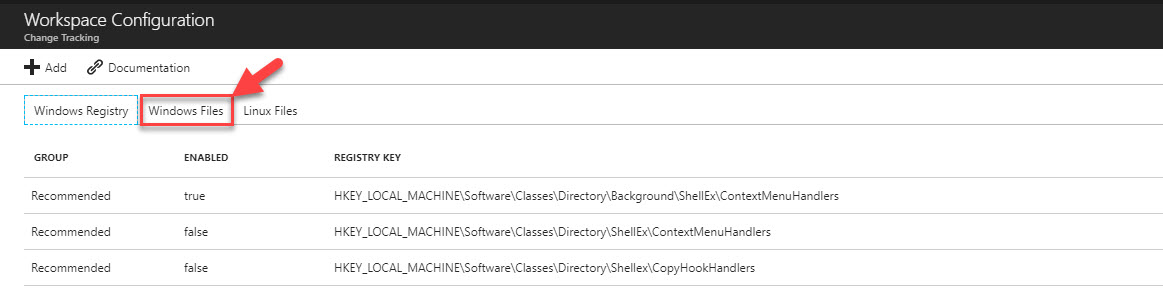
11. In next window, click on Windows Files tab.
12. Then click on Add in next window.

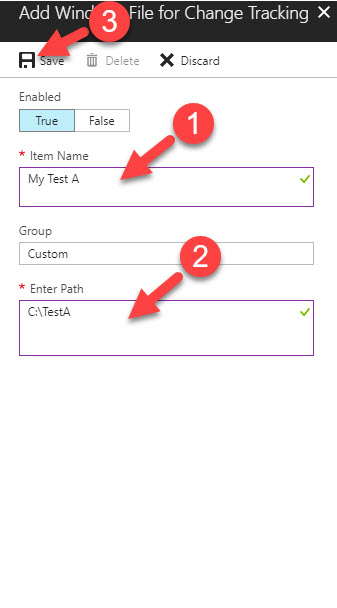
13. In next window, type a unique name for the file or folder under Item Name. Then type folder or file path under Enter Path. Once everything done, click on Save
14. Once its added it will show under Windows Files tab. If you need to disable inventory and change tracking for a file or folder all you need to do is click on it and click on false button under Enabled.

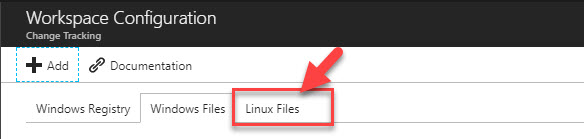
15. If it’s a Linux system, files and folder paths can add using Linux Files tab.
16. When we add files here, it is automatically enable change tracking for those files and folders. So, you do not need to add it again under change tracking feature.
17. Under Registry Files tab we can enable registry files tracking and inventory as well. It does have pre-defined registry path but at the moment I can see a way to add custom path. To enable feature, click on registry entry, then click on True under enabled. In the end click on Save.

18. This also enable tracking for windows registry files under change tracking feature.
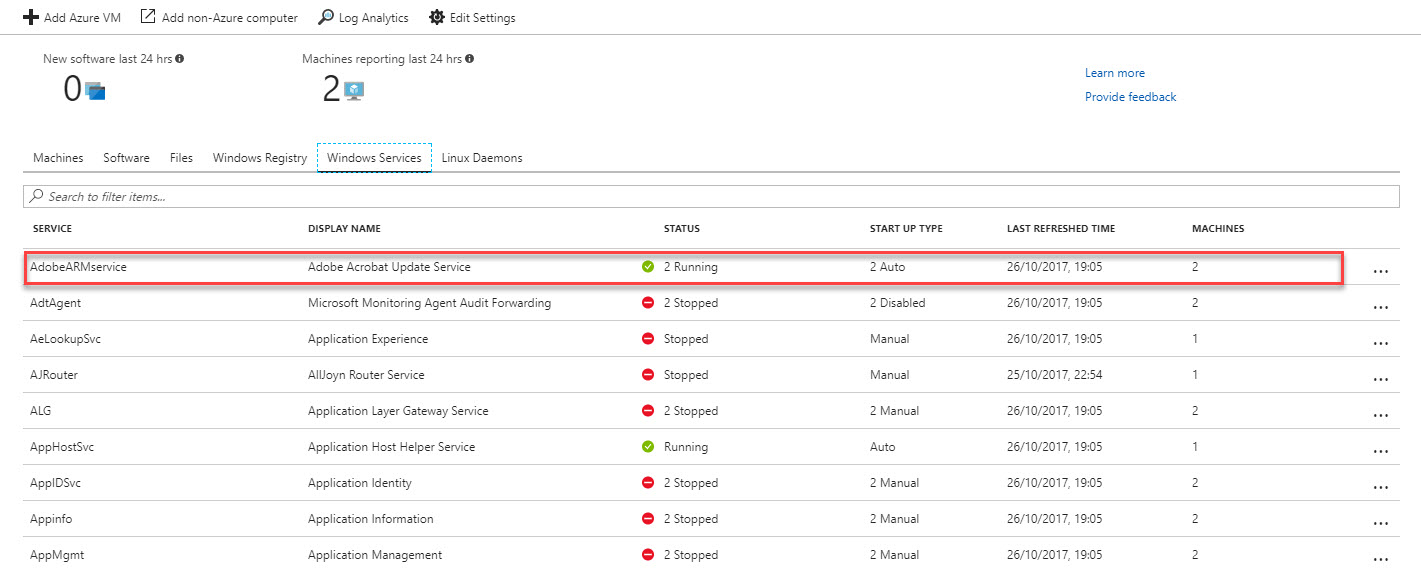
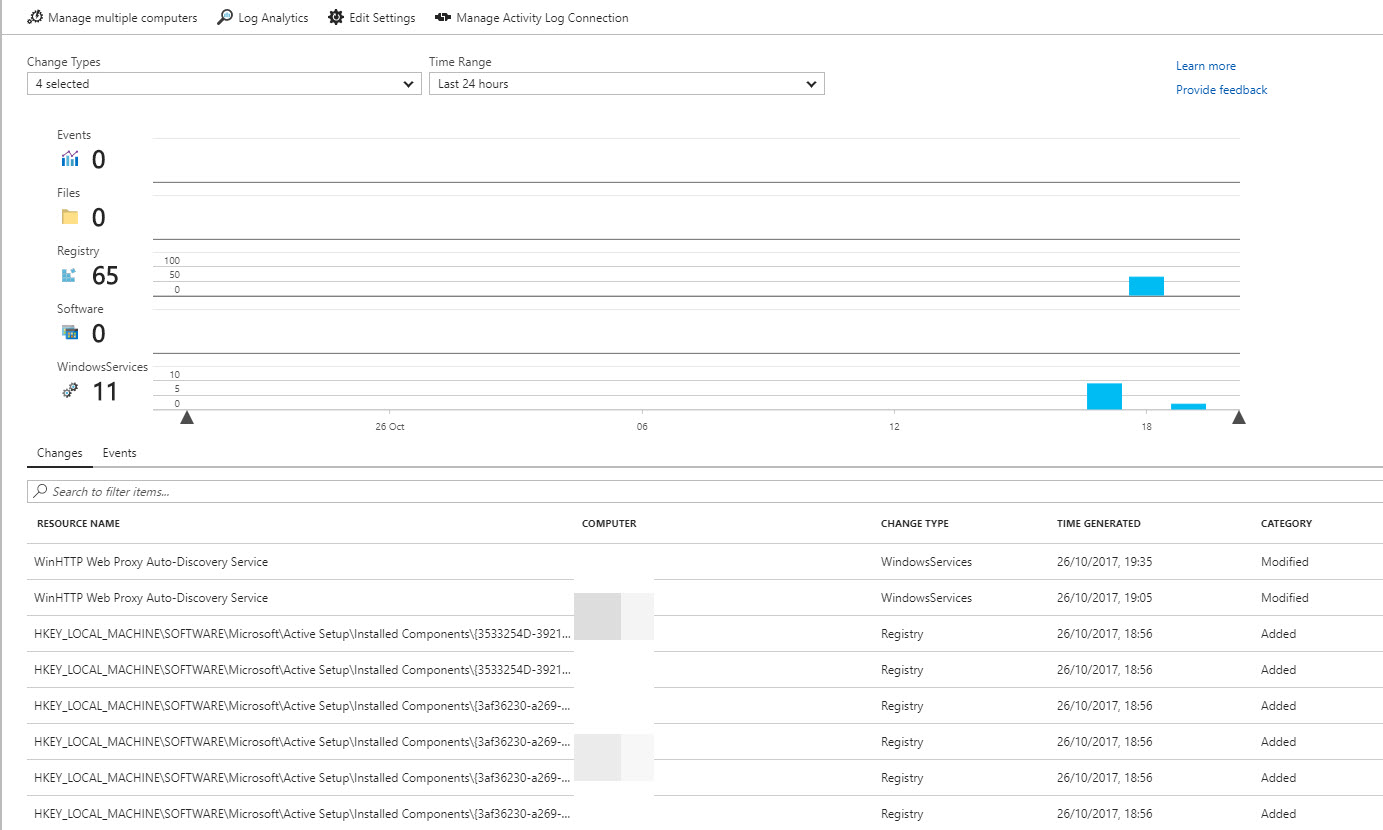
19. Under Windows services tab, it lists all services in the system. It also shows its current status and startup status.

20. This is just for one VM, if you need to view multiple VM inventory data, you need to click on Manage multiple computers.
21. In new window, it lists the machines which has this feature enabled.
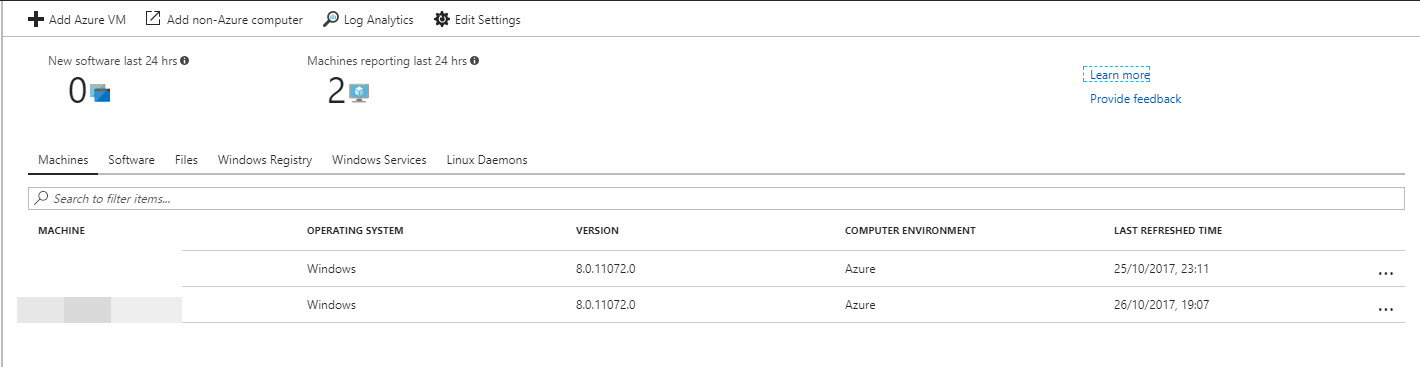
22. If you need to add new VMs to the list, it can be done using Add Azure VM option. Then it will allow you to enable inventory feature.
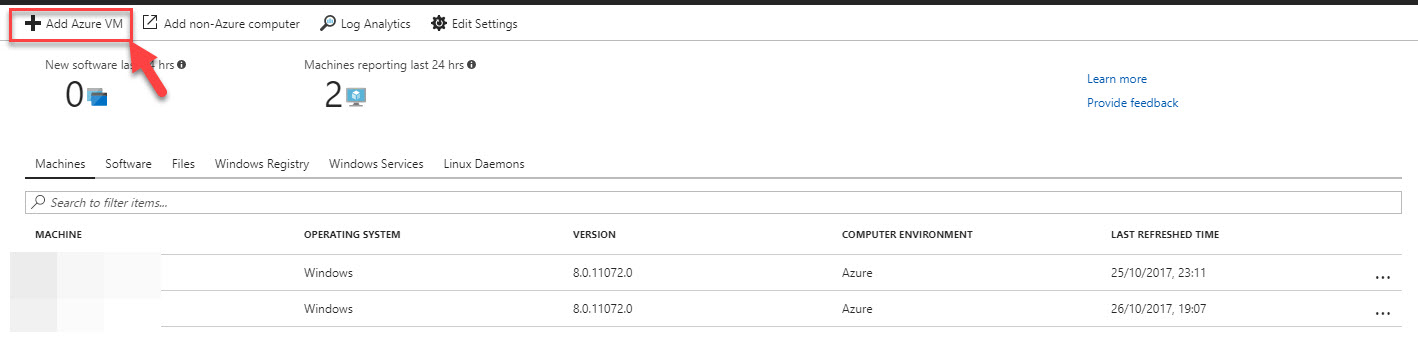
23. There is option to add non-azure virtual machines too. but that will lead you to OMS.
24. All other windows are familiar, only change here you can see if the same event is repeated in different computers.
25. All the events in here also can view using log analytics. In order to access that, click on Log Analytics option in main window.
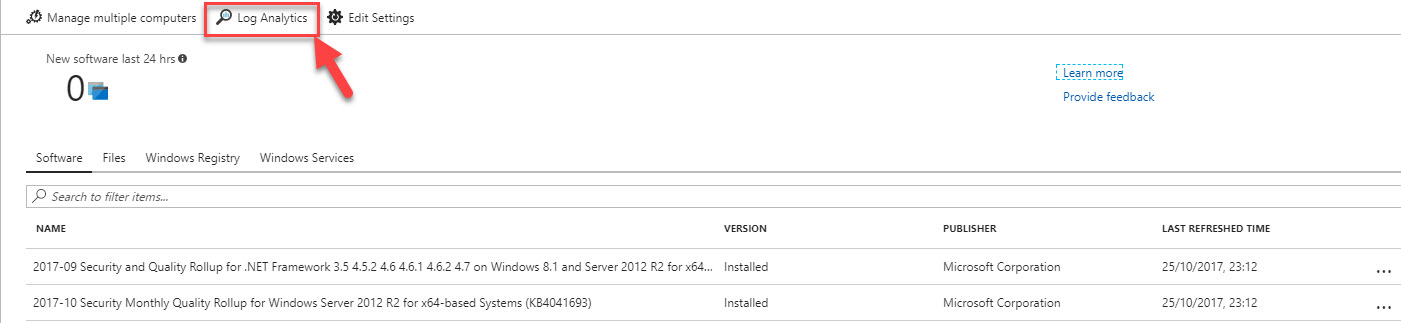
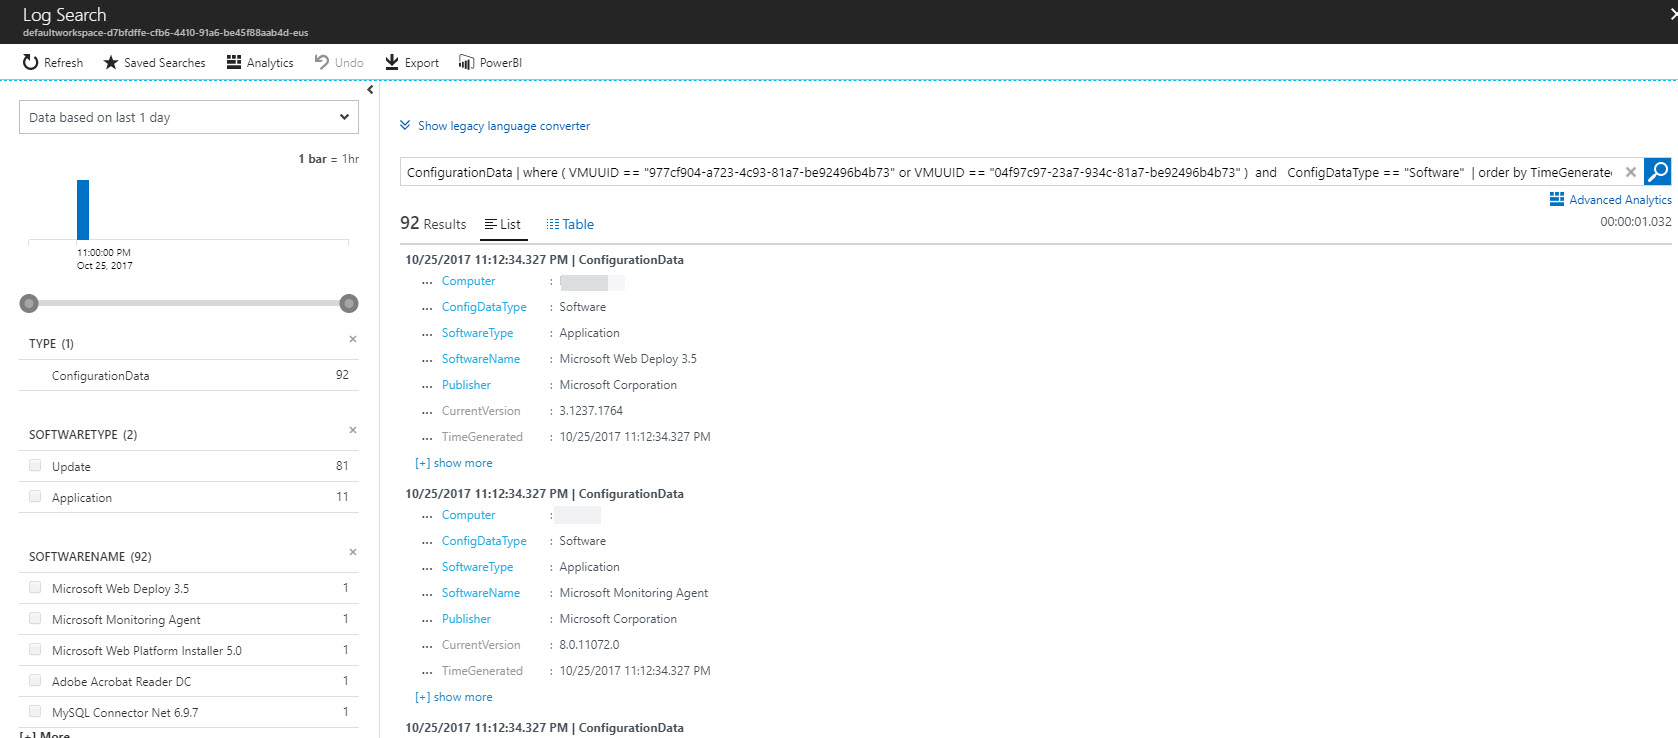
26. Then it will load all the events and we can find relevant info using queries or just browsing through filters.
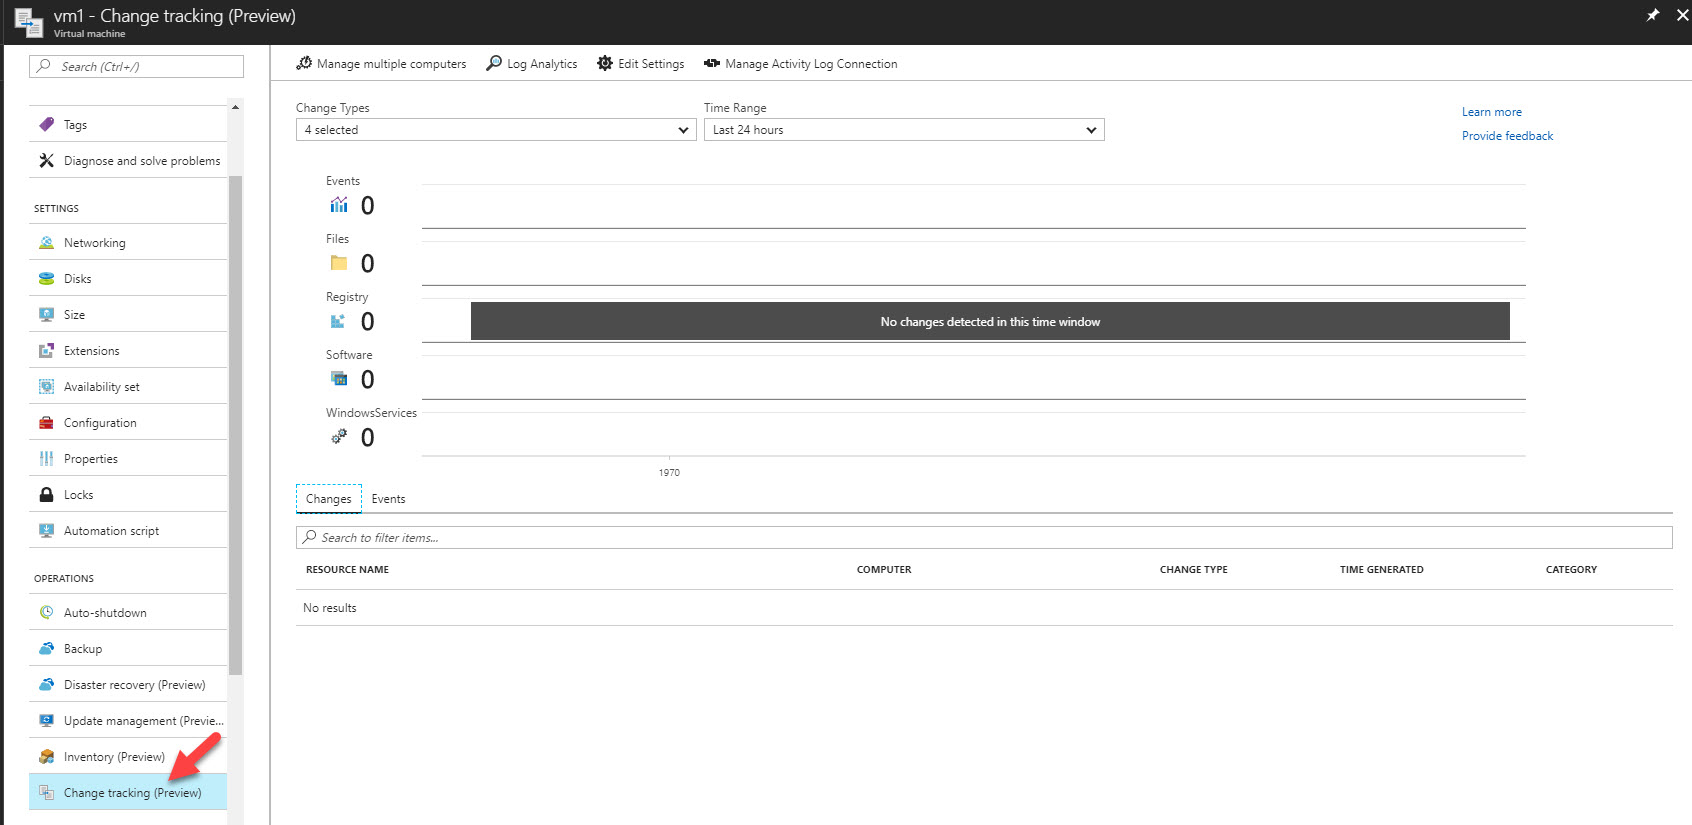
27. Now we done with inventory feature and let’s move in to Change tracking (preview) feature. In order to access the feature just click on Change tracking (preview) option under operations.
28. As soon as login it shows the changes for last 24 hours. It is shows as graph as well as a list.
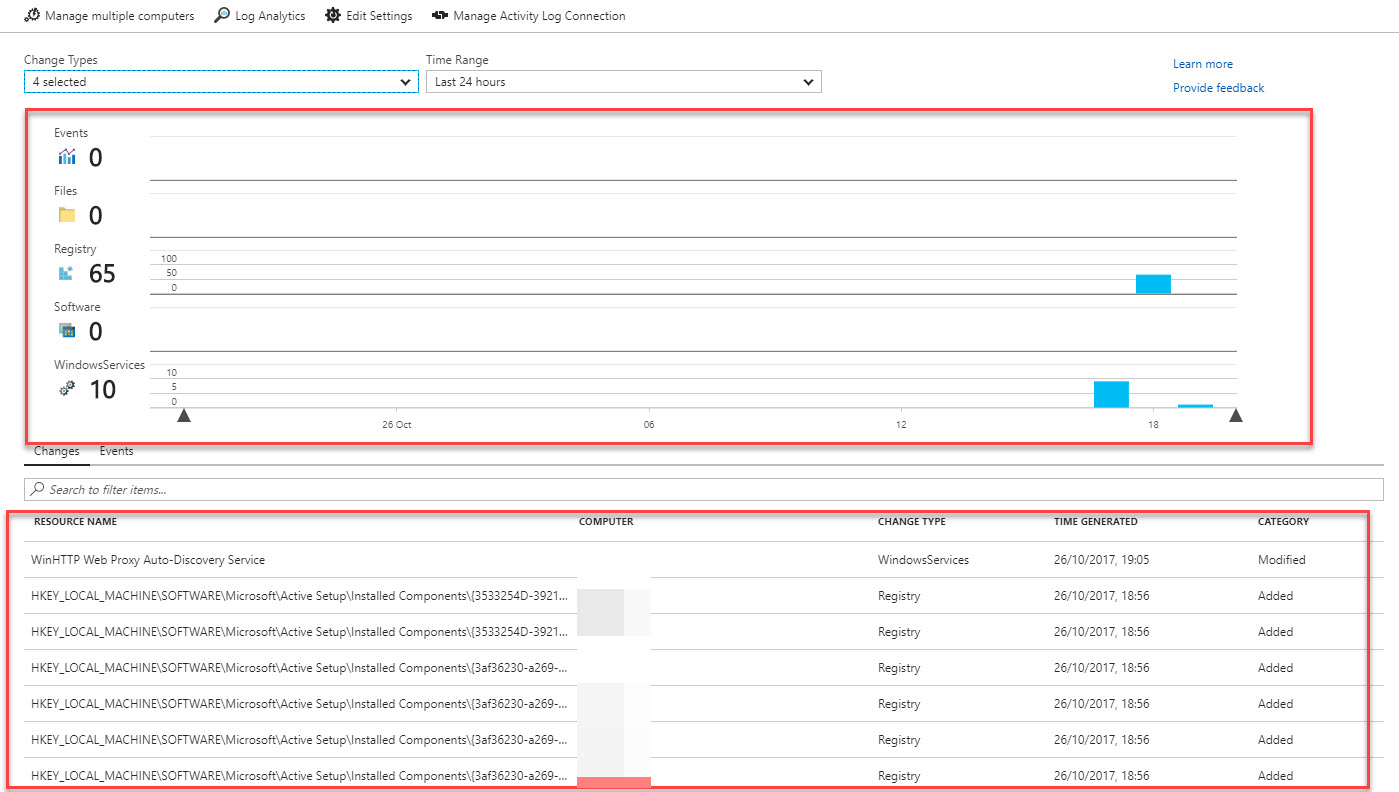
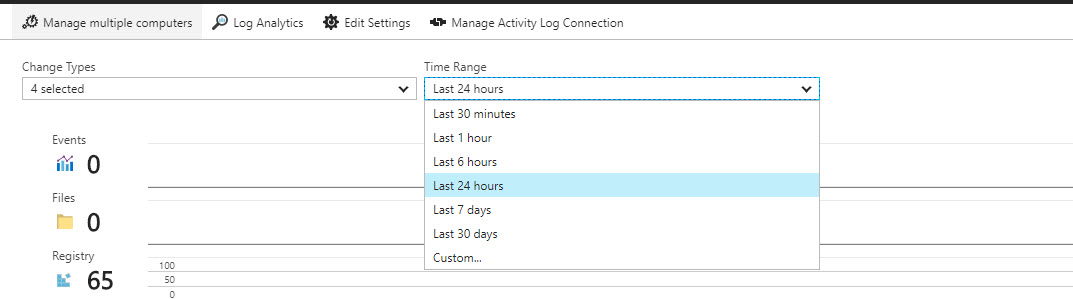
29. Using Time Range dropdown, we can define the time range for data.
30. Using Change Types dropdown, we can select which type of data to view.

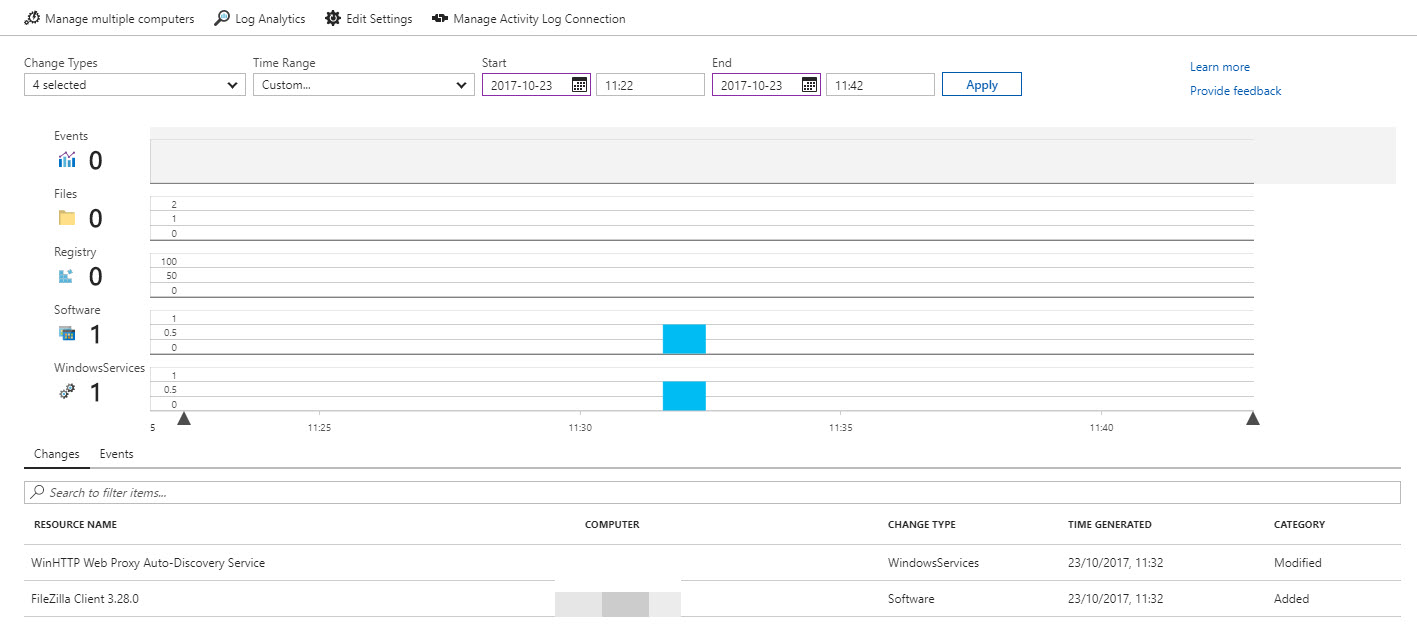
31. The graph itself really useful to narrow down a change quickly. All you need do is move mouse over the timeline and then select the area you like to dig in to by dragging the cursor. Then it simple list down the results for that particular time.
32. Using Manage multiple computers option we can view changes for multiple computers in same window. It works same way it works in inventory feature.
33. Edit Settings option also same as in inventory feature. So, I am not going to cover it here.
34. In main window, there is option to manage connection with azure activity log. There you can enable integration with azure activity log. You can find more info about activity log in https://docs.microsoft.com/en-us/azure/monitoring-and-diagnostics/monitoring-overview-activity-logs

This marks the end of this blog post. If you have any questions feel free to contact me on rebeladm@live.com also follow me on twitter @rebeladm to get updates about new blog posts.

