
This week I was testing Terraform , a simple tool which can use to automate Azure resource deployment.
It will be easier to explain terraform with a real-world example. I am developing a web application and as my resource provider I am using Azure. my first requirement is to setup a development environment. For that I need at least one web server, one database server and connectivity between these two servers. to setup the environment, I log in to the portal and then setup resource group, storage account and virtual network. After that I start to build servers. after I complete it, I setup web server application and database server. so even its looks like straight forward, its takes time. later on, in the development process I also required a test platform where I can try my application with different operating systems. Also, I like to test application by adding more components such as load balancers, web servers to the environment. These testing environments are temporally. So, each and every time I need to setup environment with all the different components and once testing process completes, needs to destroy it. when I need to sell it as a solution to people, I face another challenge as not everyone wants to run it on Azure. Even if it’s another service provider or on-premises environment, application should test in similar environment prior to sell as a solution. Each provider has their own way of setting up things.
On this given scenario I faced few challenges,
• To setup required resources for application takes time as each component need to configure in certain way.
• To setup integration between components, I need to log in to different systems and adjust the settings. A single mistake can cause hours of disruptions to the project.
• Due to the complexity of setting up environments, I may end up keep running test environments longer which probably increase my development cost.
How Terraform can help?
Using Terraform I can deploy the whole environment by executing a single script file. This script is basically a set of instructions explaining how to setup each and every component. If I need to setup a new server in azure from scratch there is a procedure for it. we need to setup relevant resource groups, network components, storage accounts before we start to build the server. terraform itself understand these dependencies and build the environment according to that. This also helps to standardize the resource setup process.
Terraform also can use to configure application settings as part of the environment setup. That means we do not need to log in to systems to make initial software configurations. This will prevent the human errors.
Once we setup an environment using terraform we can change it, destroy it using a single command. As an example, let’s assume we setup a test environment with two web servers (using terraform). I have a new requirement to add new web server to the same environment. To do that all I need to do is modify the same script and add new entry for new webserver. once I execute it, it will automatically detect the current environment and only add the missing components. When destroy, it is again a single command and it will remove each component in the proper order. As example, it will understand that before remove resource group, it need to remove all other components under it.
As setup and destroy process of resources is easy with terraform, we do not need to keep running non-critical resources. As an example, if I need to give a POC or show a demo to a customer, all I need to do is to execute the pre-created terraform script when needed and destroy it afterwards.
Terraform support different service providers. It is not only for cloud based solutions. It also supports on-premises solutions. As an example, terraform can use with Azure Pack and Azure stack to do the same thing in on-premises Hyper-V environment. It also supports to SaaS application configurations. The supported providers list can be found in here https://www.terraform.io/docs/providers/index.html
Terraform mainly have three functions.
Plan – Before execute the configuration, it should go for the planning stage. In here terraform will build the execution plan based on the configuration provided by the engineer. It will explain what will be created when configuration is executed.
Apply – In this phase it will apply execute the execution plan created on the “planning” stage. It will also report back once its completed the resource setup. If there were errors, it will also explain it in details.
Destroy – This is basically to undo the execution plan. By calling this, we can destroy all the resource created by a particular terraform configuration file.
I think it’s enough with the theory, let’s see why it’s so cool.
In my demo, I am going to show how to setup terraform and how to use it to create resource in azure.
Setup Terraform
In my demo, I am going to use windows 10 as the system. Terraform also supported on Linux, Mac and solaris systems.
1) Go to this link and download the file relevant to windows architecture.
2) Then create a folder and move the downloaded terraform.exe file.
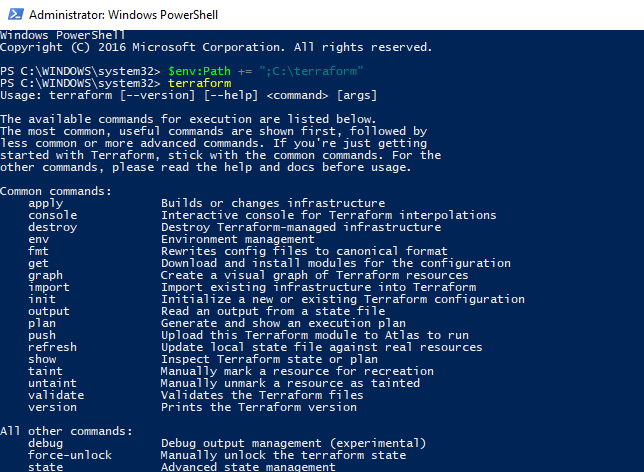
3) Next step is to setup the Binary path for the terraform so system knows when we use the terraform commands. To do that, run the PowerShell console as Administrator and then type
$env:Path += ";C:\terraform"
In here C:\terraform is the folder where I saved the terraform.exe

4) As next step, we can confirm terraform setup by running terraform in the PowerShell console.
Terraform uses Azure ARM API to connect and manage azure resources. To connect to Azure, terraform need to provide following Azure ARM environment variables using configuration file.
ARM_SUBSCRIPTION_ID
ARM_CLIENT_ID
ARM_CLIENT_SECRET
ARM_TENANT_ID
To get ARM_CLIENT_ID, ARM_CLIENT_SECRET and ARM_TENANT_ID we need to create a Service Principal in Azure.
To do the we can use Azure Cloud Shell.
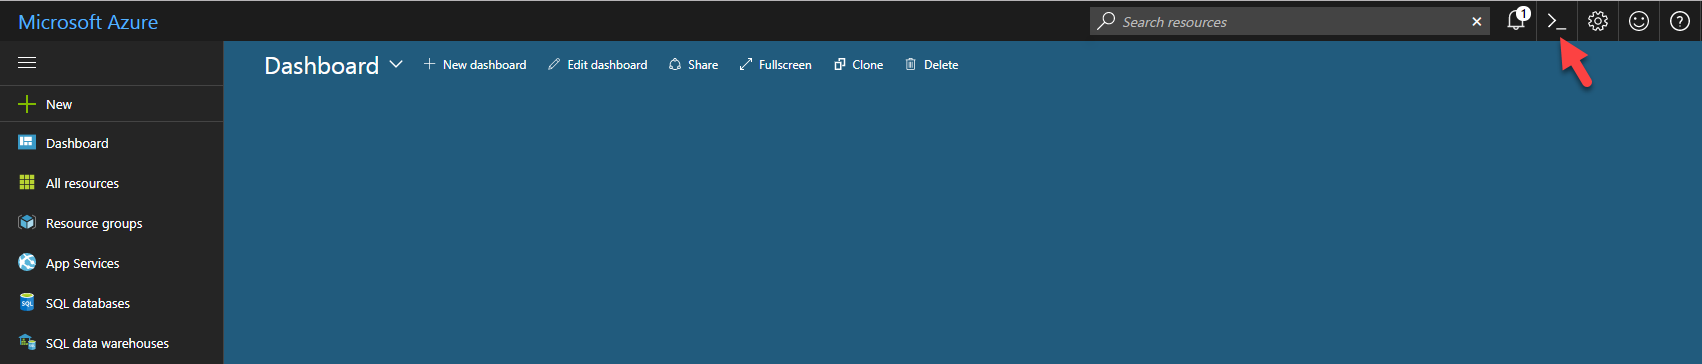
1) Log in to Azure Portal ( https://portal.azure.com ) as a Global Administrator
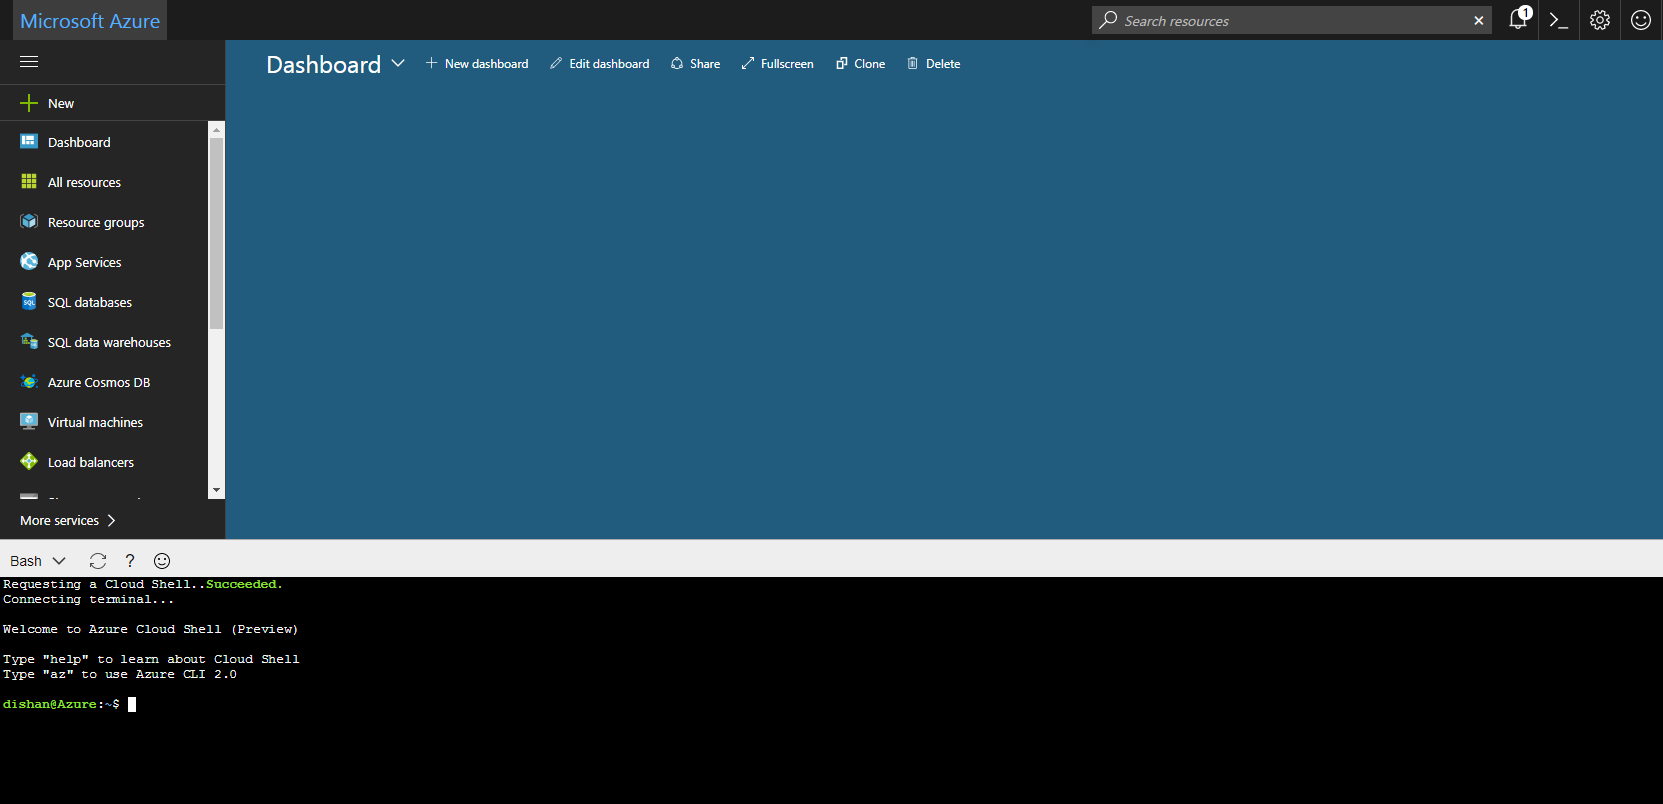
2) Click on Cloud Shell Button.
3) Then it will open the shell in the same window. If it’s your first time using this feature, it will ask to create a storage account.
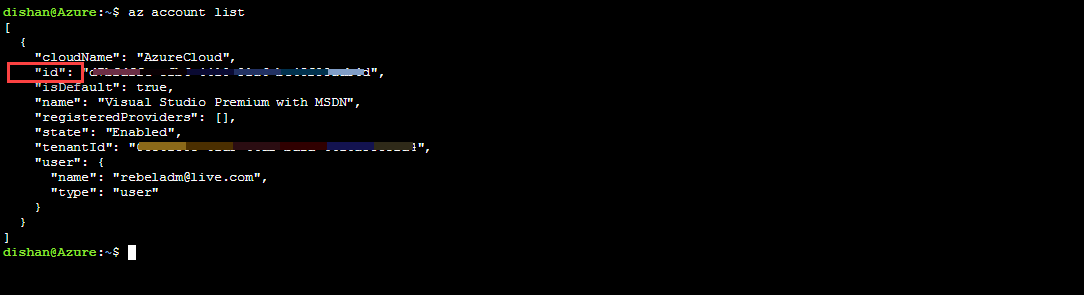
4) Next step is to fine the Subscription Id. To do that type following and press enter.
az account list
Then it will provide an output like following. In there “id” represent the Subscription ID we required.
5) Next step is to create the Service Principal. In order to do that use,
az ad sp create-for-rbac –role="Contributor" –scopes="/subscriptions/xxxxxxxxxxxx"
in above command xxxxxxxxxxxx should replace with the Subscription ID we found in the previous step.
Then it gives an output similar to following
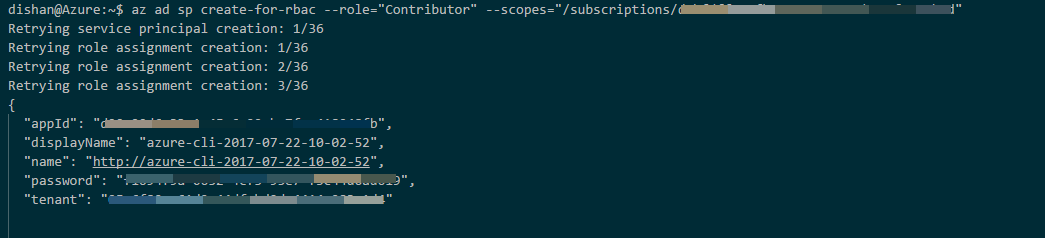
In above image
• appId is equal to Client ID.
• Password is equal to Client Secret
• Tenant is equal to Tenant ID
Now we have all the information we need in order to connect to Azure trough terraform.
Create first configuration
Next step is to create first terraform configuration file. The file is using the extension of .tf. You can use your favorite text editor to create the file. I am using Visual Studio code and it can be download from https://code.visualstudio.com/
The file no need to save on the same folder where your terraform.exe file. However, you need to navigate to that folder before execute the terraform commands. In my demo, it is C:\terraform
My first configuration is following
# Configure the Microsoft Azure Provider
provider "azurerm" {
subscription_id = "xxxxxxx"
client_id = " xxxxxxx "
client_secret = " xxxxxxx "
tenant_id = " xxxxxxx "
}
resource "azurerm_resource_group" "myterrapro1" {
name = "myterrapro1"
location = "West US"
}
resource "azurerm_virtual_network" "myterrapro1network" {
name = "myterrapro1vn"
address_space = ["10.11.12.0/24"]
location = "West US"
resource_group_name = "${azurerm_resource_group.myterrapro1.name}"
}
In above code,
provider "azurerm"
define the service provider as Azure ARM.
subscription_id = "xxxxxxx"
client_id = " xxxxxxx "
client_secret = " xxxxxxx "
tenant_id = " xxxxxxx "
the above values should replace by the values we found through the Azure.
resource "azurerm_resource_group" "myterrapro1" {
name = "myterrapro1"
location = "West US"
}
The above saying to create new azure resource group called myterrapro1 in West US region.
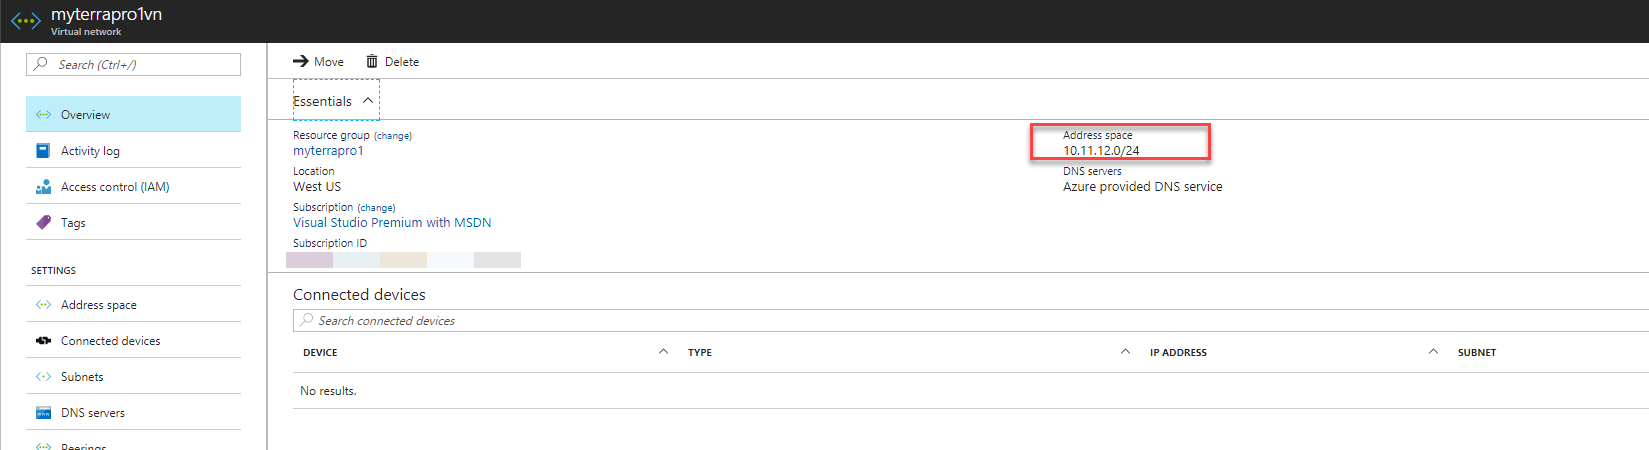
resource "azurerm_virtual_network" "myterrapro1network" {
name = "myterrapro1vn"
address_space = ["10.11.12.0/24"]
location = "West US"
resource_group_name = "${azurerm_resource_group.myterrapro1.name}"
in the next section, it is creating an Azure Virtual Network called myterrapro1vn. It got address space allocated as 10.11.12.0/24. This will create under resource group called myterrapro1. This virtual network also will be created under West US region.
Once script is ready, save it with .tf extension.
Then launch PowerShell as Administrator. Then change the folder path to where script file is saved. In my demo, its C:\terraform. After that type following,
terraform plan
This is step where terraform build the execution plan.
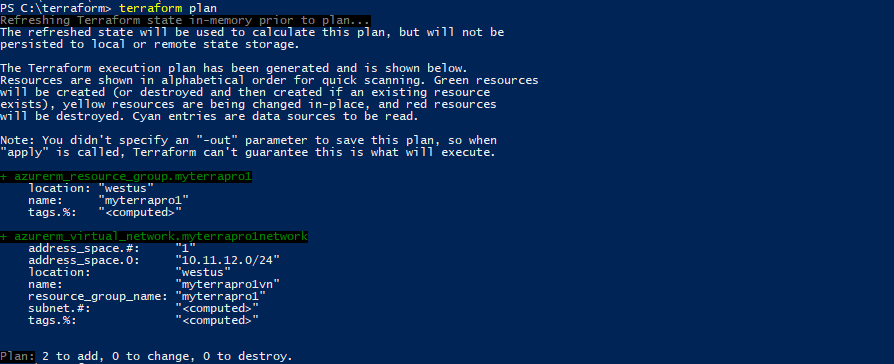
This output shows what will happen when apply the execution plan.
To apply the plan type following and press enter.
terraform apply
once process is started, it will also show the progress of setting up resources.
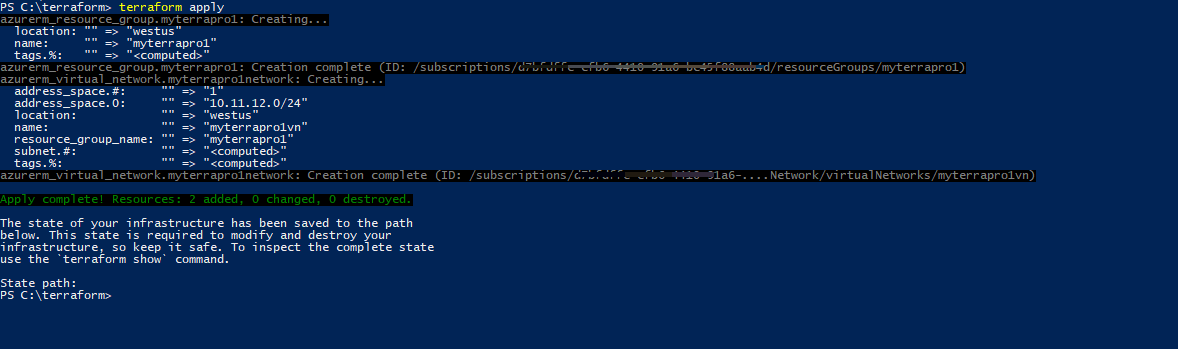
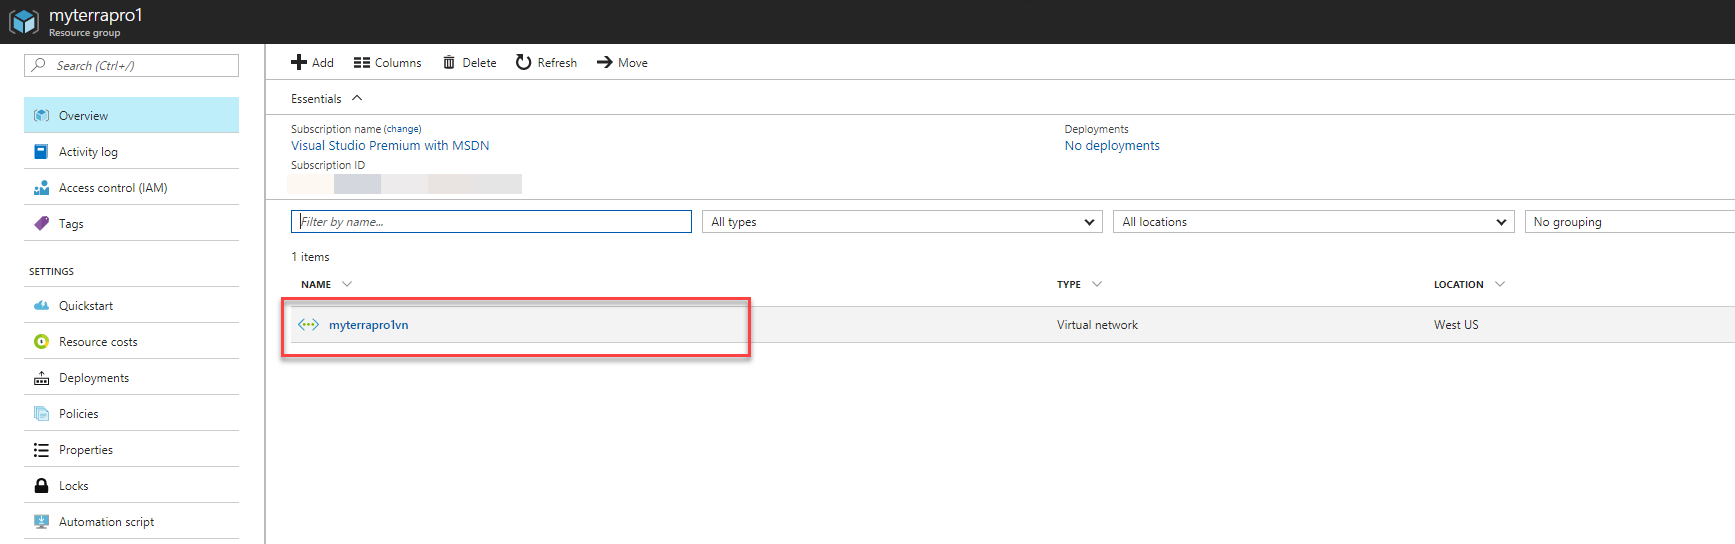
according to above image we can see its successfully created the resources. we can confirm it using the Azure portal.
Now we know how to create resource. Let’s see how to destroy the resources we created.
In order to do that you do not need to change anything in the script. All you need to do is to issue the command,
terraform destroy
once we run the command it will ask to confirm. Type yes and press enter to proceed with the destroy process.
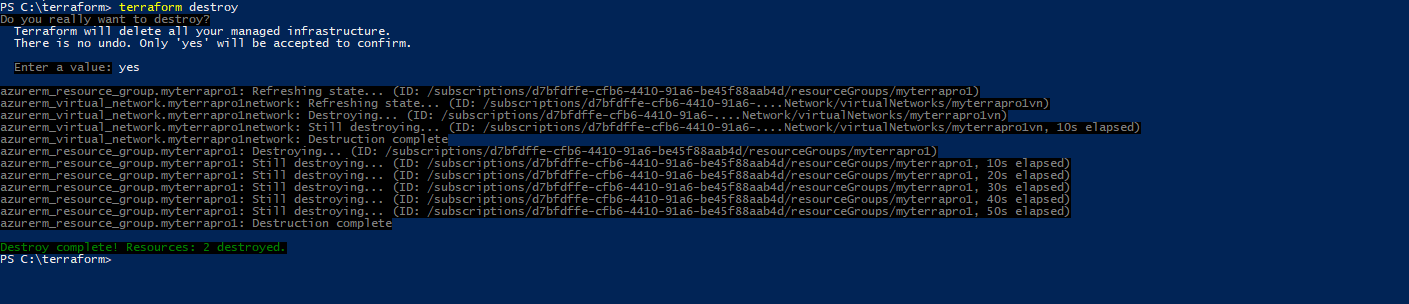
As we can see it remove all the resource in the configuration file. Once it done we can also log in to azure portal and confirm.
Isn’t this cool?
In this blog post I explained what is terraform and how we can use it to simplify resource setup in azure. in next blog post I will share more examples to show its capabilities.
Hope this was useful and if you have any questions feel free to contact me on rebeladm@live.com

