IIS is a services introduce by Microsoft which we can used to host internal, external web sites.
In this article I will demonstrate the following,
• Install IIS in server 02 which is member server of the domain environment. ( it doesn’t necessary to have domain environment to setup IIS, you also can use a standalone server in a workgroup environment as well )
• Create a website in server02
• Create a client computer the domain.
• View the webpage in client pc.
For the IIS installation I will be using the following setup.
I have installed windows 2008 R2 server and add it to the sprint.local domain and it will be operate with name IISSRV.sprint.local.
The server will be running on ip 192.168.128.3
The Plan is to deploy IIS on this server and create a website their and try to access it through a client pc.
To Start the IIS installation, log in to the server as domain admin or enterprise admin, then go to start > administrative tools > server manager. Once it opens right click on “roles” and click add roles.
Once the add roles wizard open up, select next to continue.
From next window from the available roles select “Web Server(IIS)”. If its prompt any additional module to install when you select this, add them too as well.
In next window it will give you the description about the role. Click next to continue.
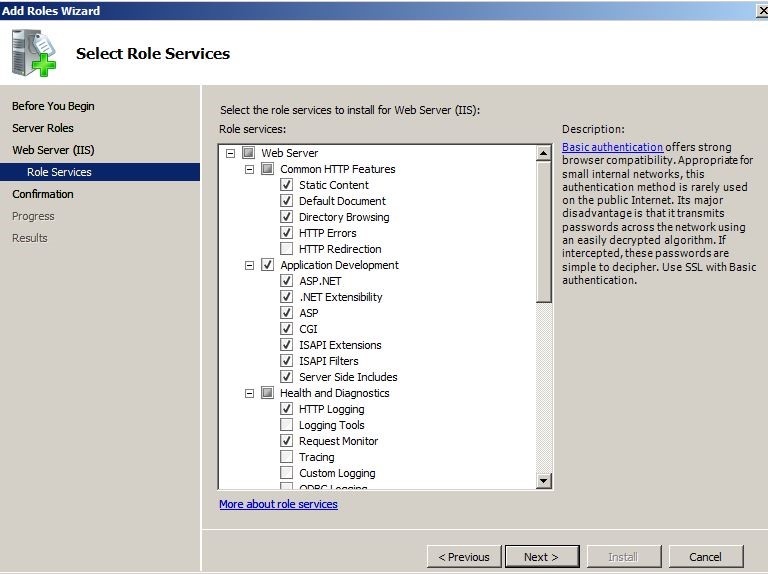
In next window you can select the role services as you required. The default selection is enough for the IIS basic functions. These services can add or remove later as per requirement. Once you select any role service in the right hand side it will give a brief description about the service. Here I have added all the services under “Application Development” and rest I keep default.
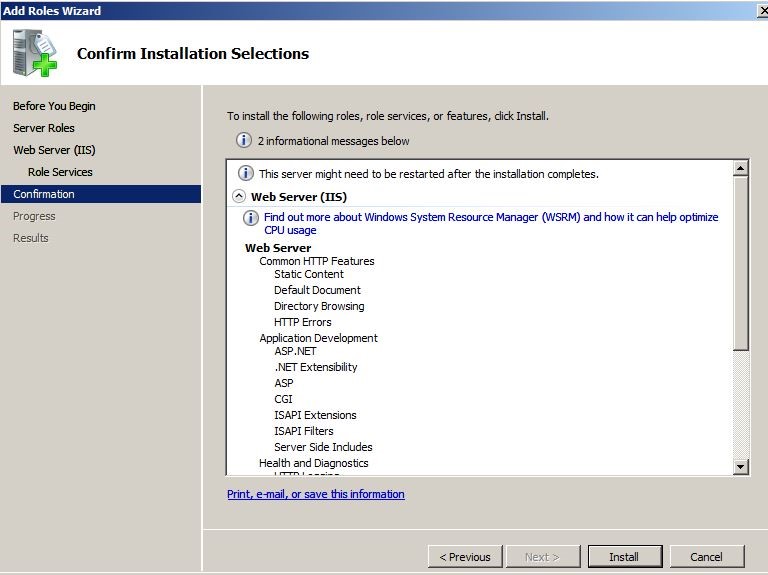
In next window it will give a confirmation about the install. Click install to begin the IIS install.
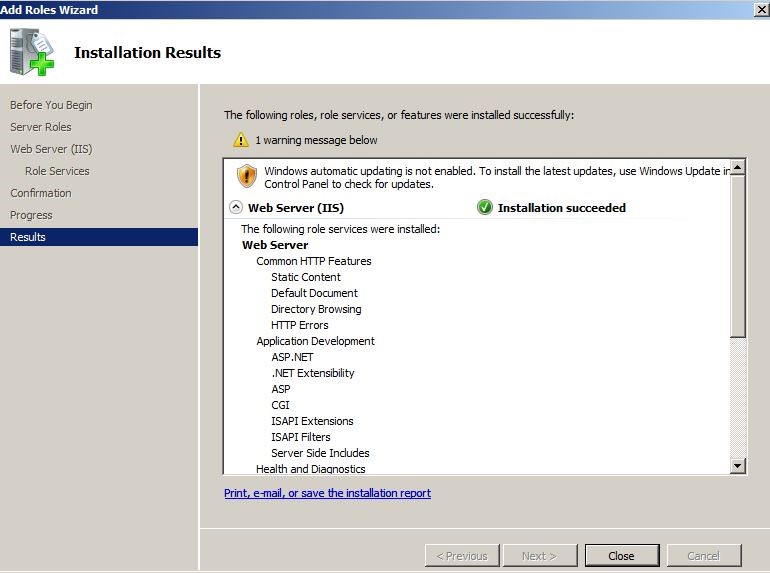
Once it finished the installation it will give the result page. Now we have installed IIS successfully.
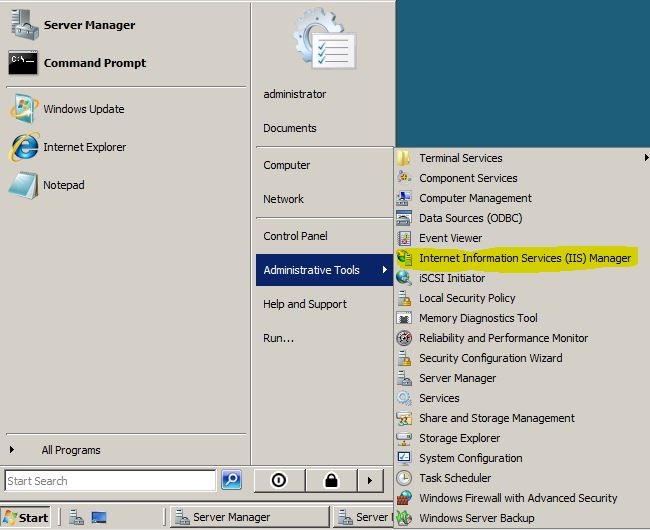
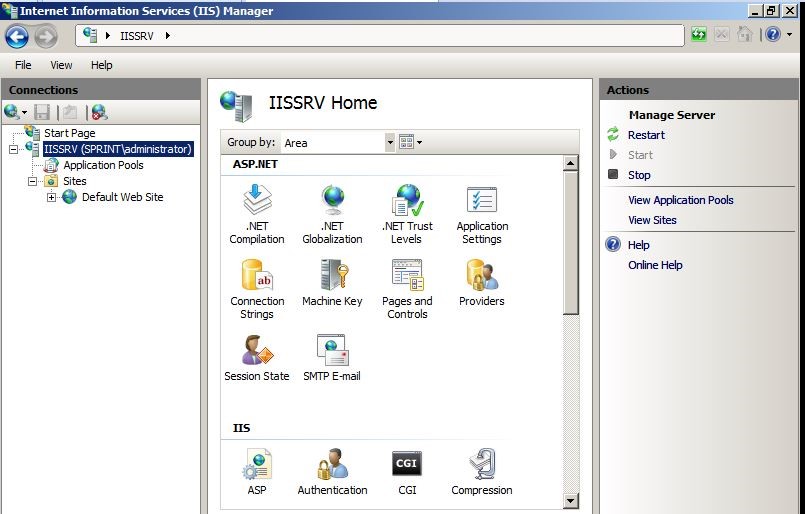
To open the IIS manager go to Start > Administrative tools > Internet Information Service (IIS) Manager
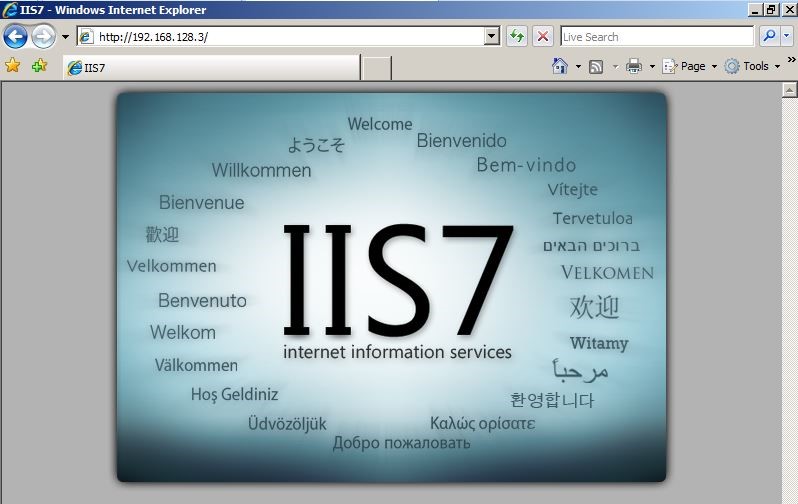
Now we have the IIS installed on the server. To check if the service is up, go to internet explorer and type http://192.168.128.3 or http://localhost from server.
It will show the default issue page and we can confirm the service also running fine.
The next step is to create a web site under IIS and then test it. For the demo I am going to use domain name www.rebeladmin.com and point it to the IISSRV.sprint.local IIS server. To do that first we need to point this www.rebeladmin.com to 192.168.128.3 which is the ip address of the IIS server. To do this we need to have DNS server to host the records.
But in this demo since I am only going to use this site internally I do not need make it public. So I will use the domain dns services and add a DNS Zone for rebeladmin.com and then create the A records to point the url to IIS server.
This DNS setup will be completely deferent setup if we going to provide external access too.
To do this I have log in to the domain server which host the active directory environment DNS server as domain admin. Then to open DNS server, go to Start > administrative tools > DNS
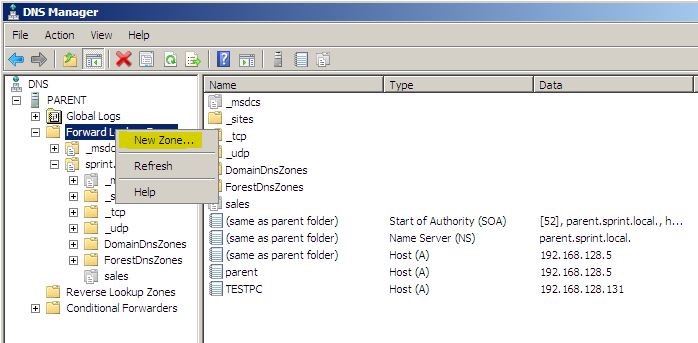
Once DNS snap in open, expand the tree and right click on “Forward Lookup Zone” and Click on “New Zone”
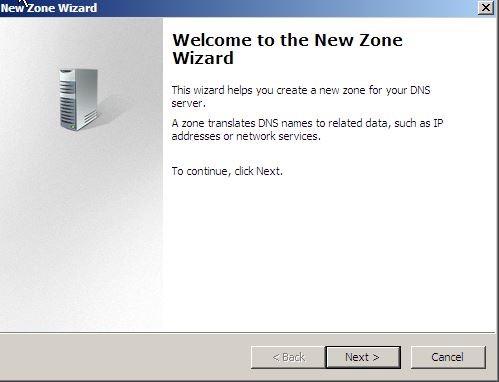
Next it will show the welcome screen. Click next to start.
In next window select the zone type as “Primary Zone”
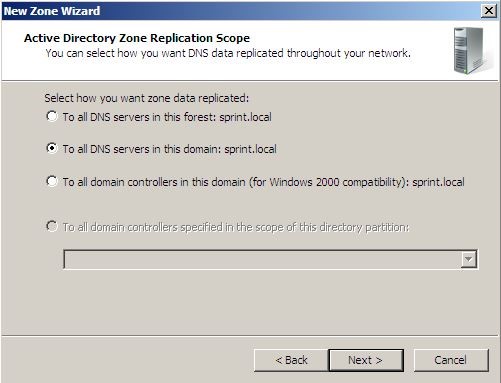
In next window keep the default for the replication scope.
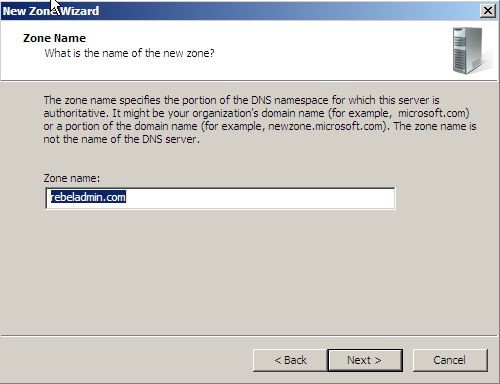
For the zone name type rebeladmin.com and click next.
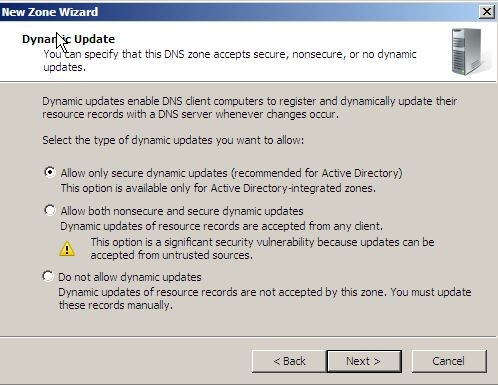
In next window for the dynamic updates keep the default and click next.
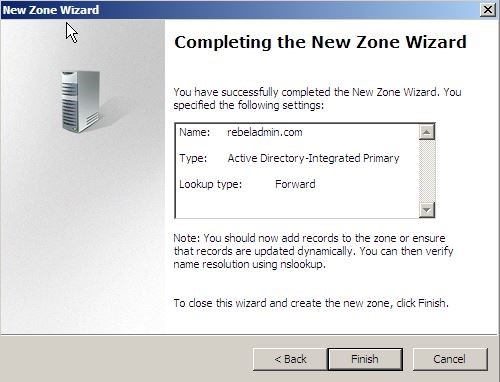
Next window is the confirmation and click finish to create the zone.
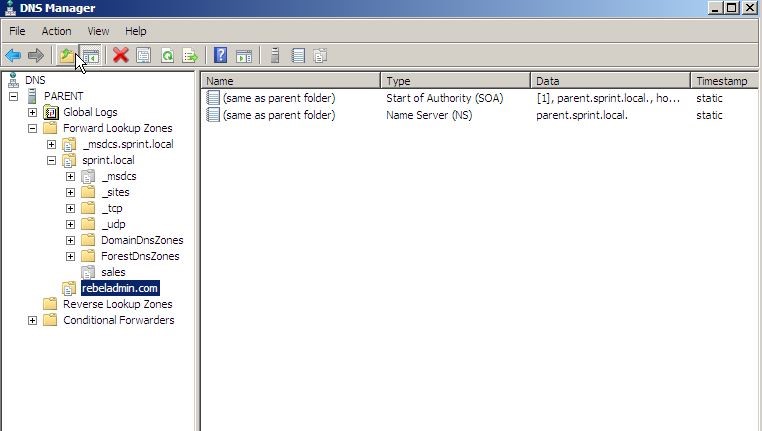
Then it will add to the DNS Zone list. Then click on the zone name to go in to it.
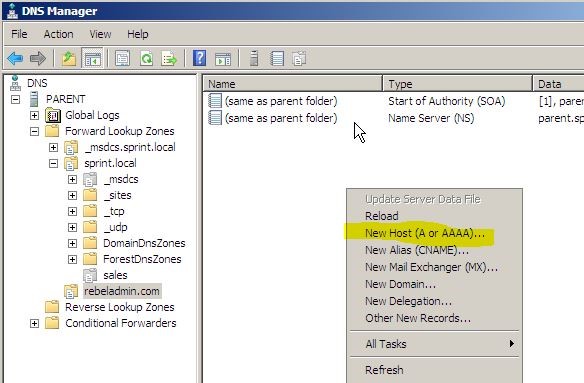
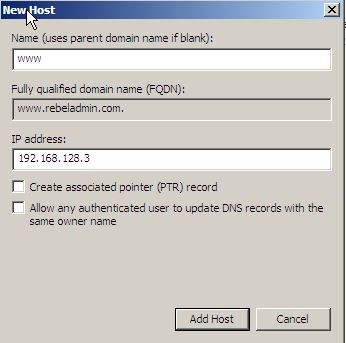
Now to create the A record right click on the right hand record area, and from the list select “New Host”
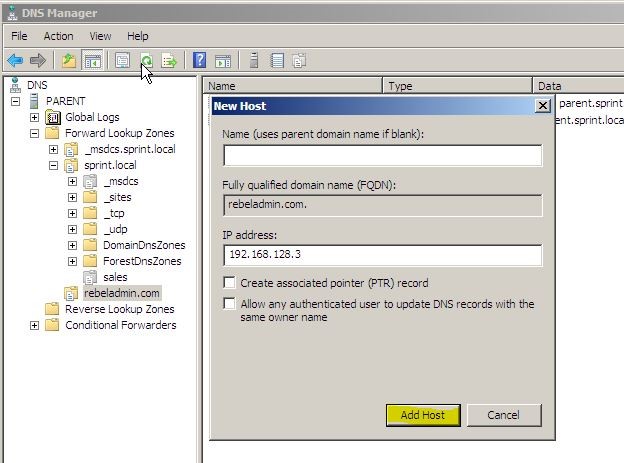
In new window let “Name” field blank and in ip field put the ip 192.168.128.3. and then click on add host.
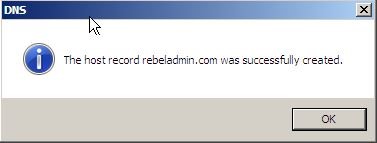
Then next window it will give the confirmation.
We also need to create A record for WWW. So if someone type rebeladmin.com or www.rebeladmin.com both will display the web page.
To do it use the same way but in Record window select type as following.
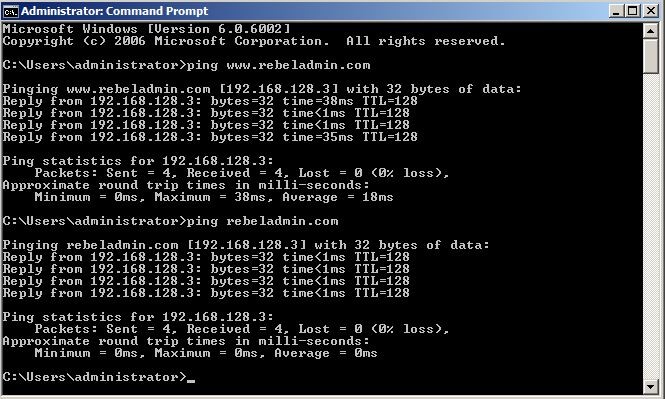
Once it is done we ready with dns. Now from a pc in domain try to ping to rebeladmin.com and www.rebeladmin.com to see if its resolves to 192.168.128.3
This confirms now the DNS is resolving fine.
The next step is to create the website for the rebeladmin.com.
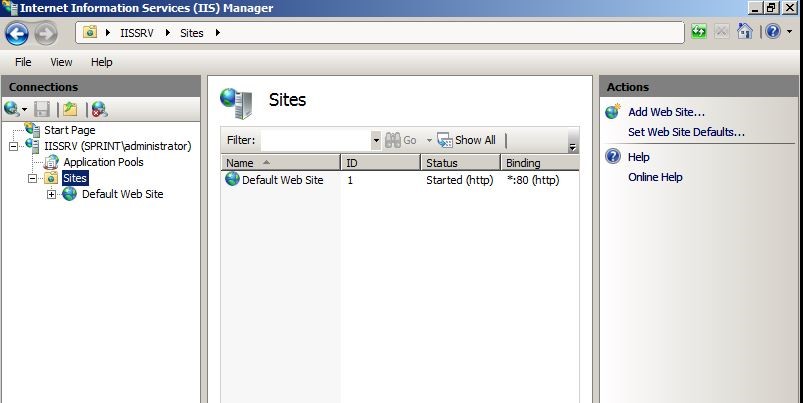
To do that we need to go back to the IIS server. Then open the IIS Manager and select sites.
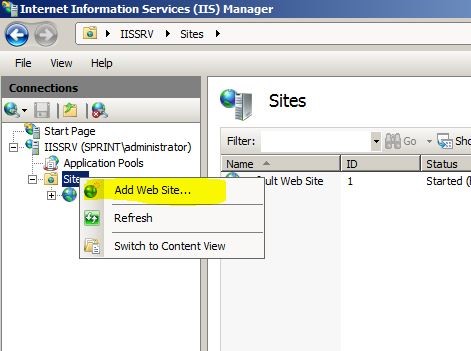
Then right click on the sites, and select add web site.
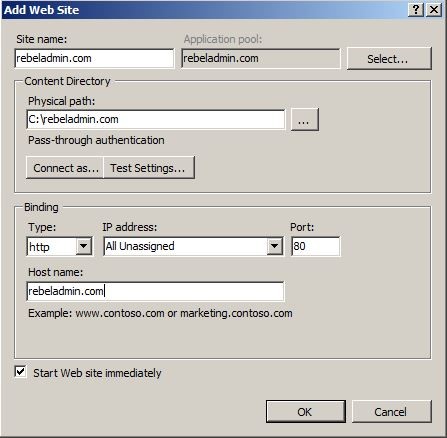
The next window is to define the parameters for the website. Put the site name as rebeladmin.com and from physical path section select a folder as home folder for the site. This is where we need to put the source files for the website to display.
Then in host name put the hostname as rebeladmin.com. Click ok at the end to setup the website.
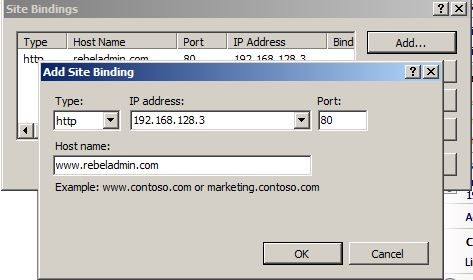
For the Host mappings we only add the rebeladmin.com. So we need to add www.rebeladmin.com as well. Then only users can access the web site with or without WWW.
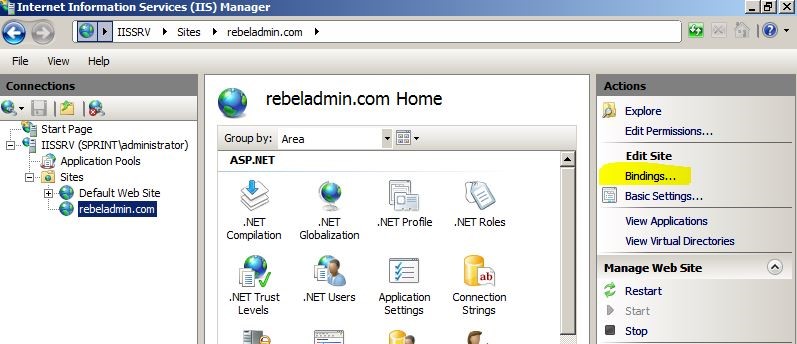
To do it select the website and from the right hand panel click on bindings
Once the binding window opens, click on add and in new window select the ip details and then put www.rebeladmin.com in to host name and click on ok.
Now we have everything set. Next is to create test html page to test the website.
I have created new HTML called index.html with following test code.
<!DOCTYPE html>
<html>
<body>
<h1>WWW.REBELADMIN.COM</h1>
<p>The web site is working fine.</p>
</body>
</html>
The created file is copied to the rebeladmin.com home folder which has define with the website setup.
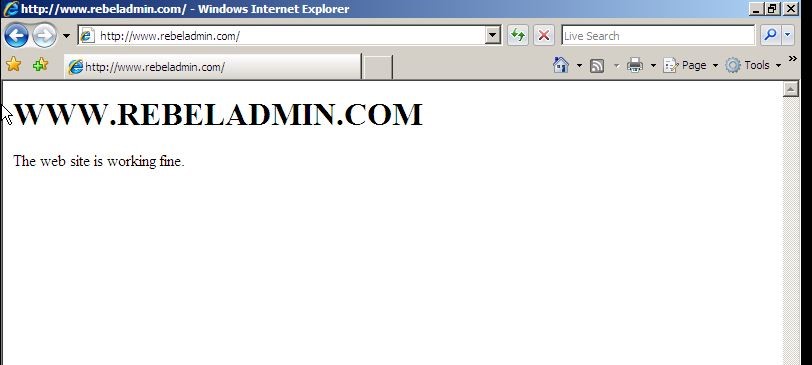
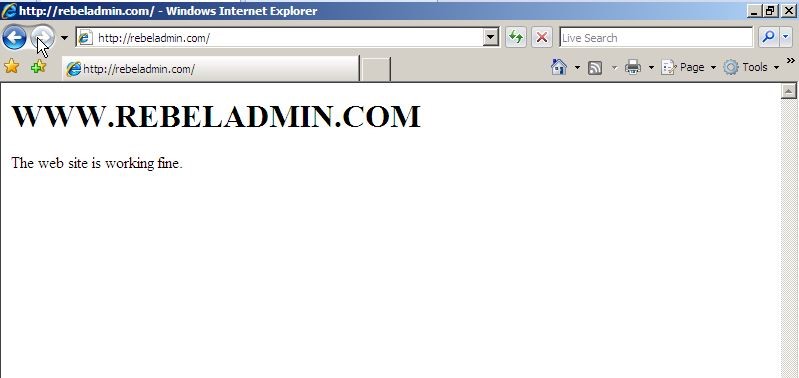
Now everything is ready. Now let’s go to pc called “TESTPC.sprint.local” which is in same domain and go to internet explorer and type www.rebeladmin.com or rebeladmin.com then it should display the page we created.
As we expected the page was displayed with and without www.





This is great tutorial.This is what i was really looking for .
Thanks for sharing , god bless you my friend.
Very good Tutorial – " A record " creation – very helpful – Thanks