
JML (Joiners/Movers/Leavers) process of an organization has a major impact on its security and efficiency. When a new employee joins the organization or an existing employee change the job role, if they do not have access to relevant services/tools to start their job, it is just a waste of resource. Also when someone leaves the company, their access permission to data/services should revoke and accounts should be disabled. If not it creates a security risk. As we can see it’s quite important to make sure organizations have robust, practical JML processes in place. If the process has a lot of manual tasks and people dependencies it may not deliver the expected results.
Microsoft Entra lifecycle workflows allow an organization to automate JML process and reduce human errors and people dependencies. Workflow is built upon two pillars – Tasks & Execution conditions.
Task – List of actions that run automatically when a workflow is “triggered”
Execution conditions – Defines the trigger scope of a workflow (impacted users, “what” executes the workflow, and when)
There are many benefits of using lifecycle workflows. Such as,
- Reduce/remove manual tasks of JML process.
- Centralize identity lifecycle tasks/process management. In one portal we can create and manage workflows.
- Measure the success of workflows or identify issues in workflows by using workflow history and audit logs.
- Allows using pre-built templates which cover most common identity management tasks.
- integrate workflows with logic apps to address more complex scenarios.
In this article, I am going to demonstrate how we can create a “joiner” workflow based on a pre-built template. This includes,
1. Create lifecycle workflows using the “Onboard pre-hire employee” pre-built template to automate onboarding tasks of new employees before their first day.
2. Create a new user in Azure AD
3. Assign Manager to user
4. Validate the completed workflow tasks
Pre-requisites
Before we start, we need to make sure the following prerequisites are in place.
1. Azure AD Premium P2 Licences
2. Global Administrator Account
3. Users with employeeHireDate attribute value – This attribute value will use as a trigger condition for the workflow. At the moment this value cannot be set using UI and can only update using MS Graph. In this blog post, I will show how to set up a new user with this attribute. Also, note that a lifecycle workflows will not trigger when the employee hire date value is prior to the workflow creation date.
4. Office 365 Licences – If the workflow includes tasks to send email notifications to users, make sure the recipients have a valid mailbox in place (prior to the workflow execution)
Once we have the above prerequisites in place, we can go ahead with the configuration tasks.
Create a lifecycle workflows
To create this workflow I am going to use the “Onboard pre-hire employee” pre-built template as the baseline. It comes with one automation task (Generate TAP and Send Email) but I will add an additional automation task to the workflow. The list of tasks are as follows,
1. Enable Account – I like to enable the new user account as part of the workflow.
2. Add user to Group – The new user account will be added to an already existing security group called “New Hire”
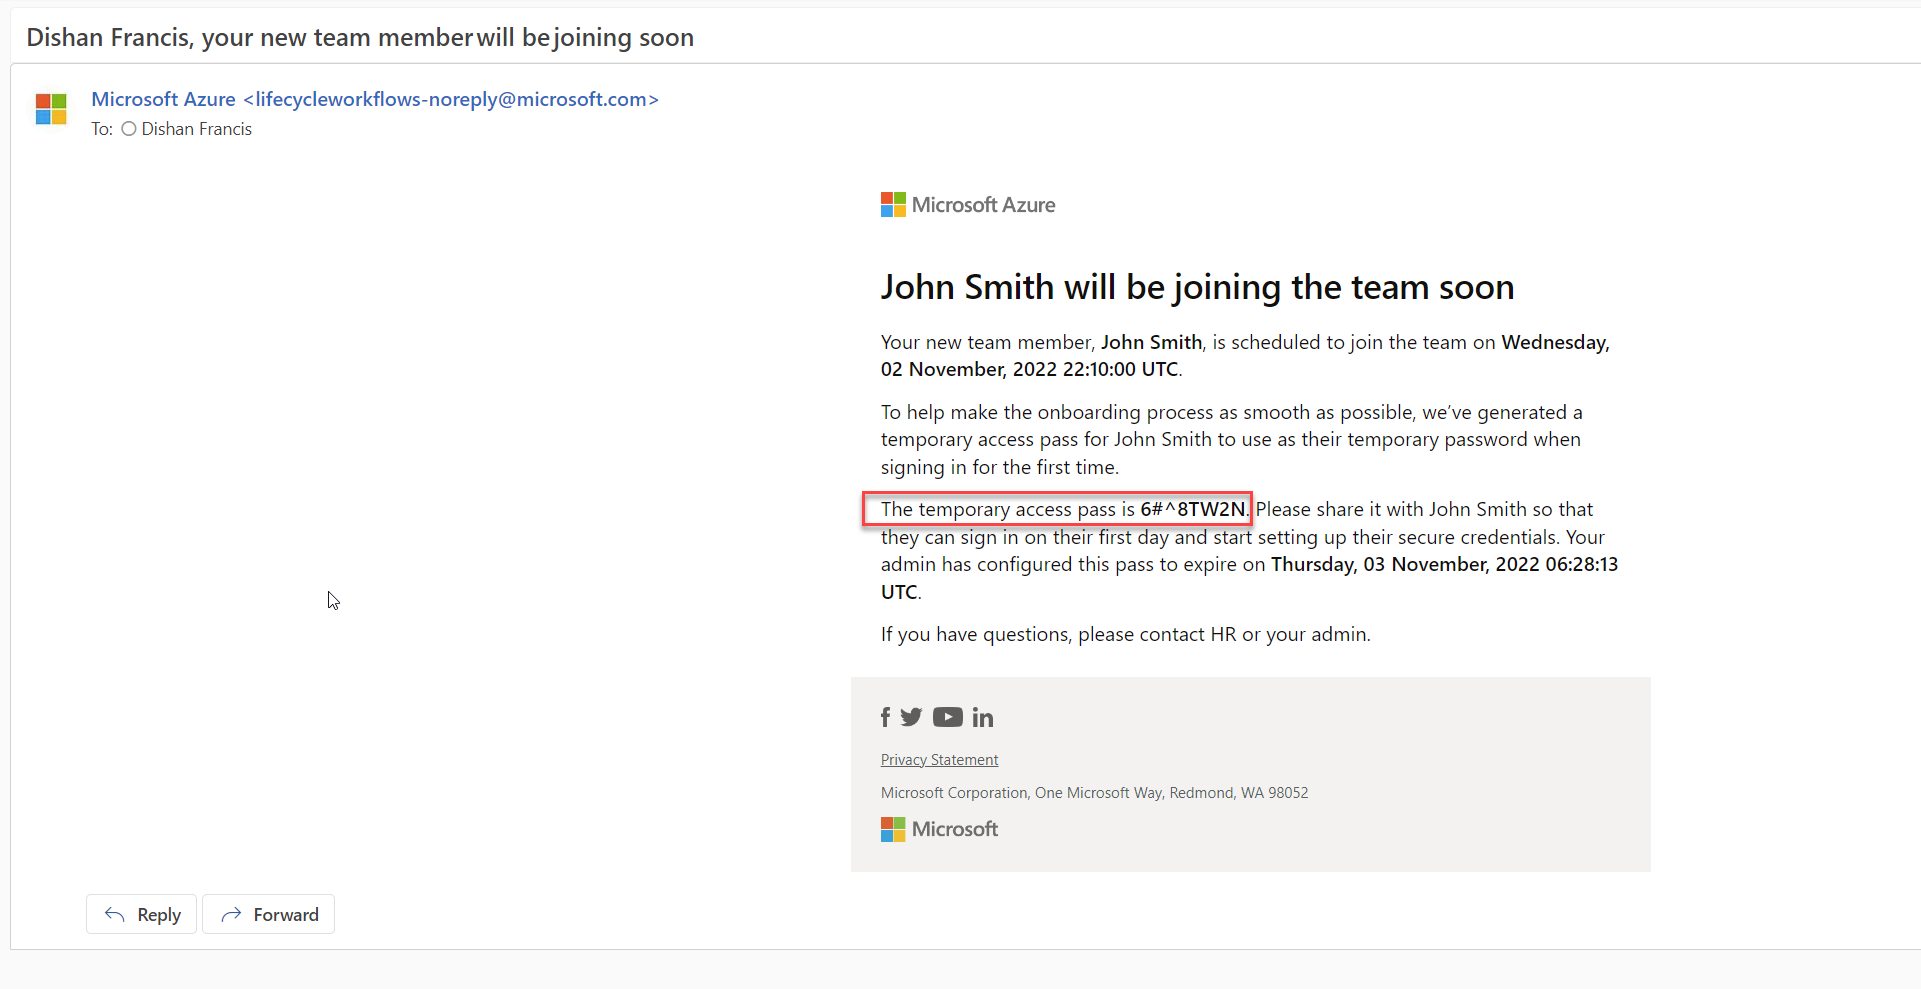
3. Generate TAP and Send Email – Generate Temporary Access Pass and send it via email to the new user’s manager. Microsoft encourages organizations to use passwordless authentication as traditional authentication methods are weak in security. Temporary Access Pass is a time-limited passcode that can be used by users to log in to https://aka.ms/mysecurityinfo and onboard authentication methods. This code can be single-use or multi-use. Before using this feature, we need to enable Temporary Access Pass policy. For configuration details please follow https://learn.microsoft.com/en-us/azure/active-directory/authentication/howto-authentication-temporary-access-pass . In this demo environment, I already have this policy configured.
4. Send Welcome Email – Send a welcome email to new user
To set up the workflow,
1. Log in to MS Entra portal https://entra.microsoft.com/
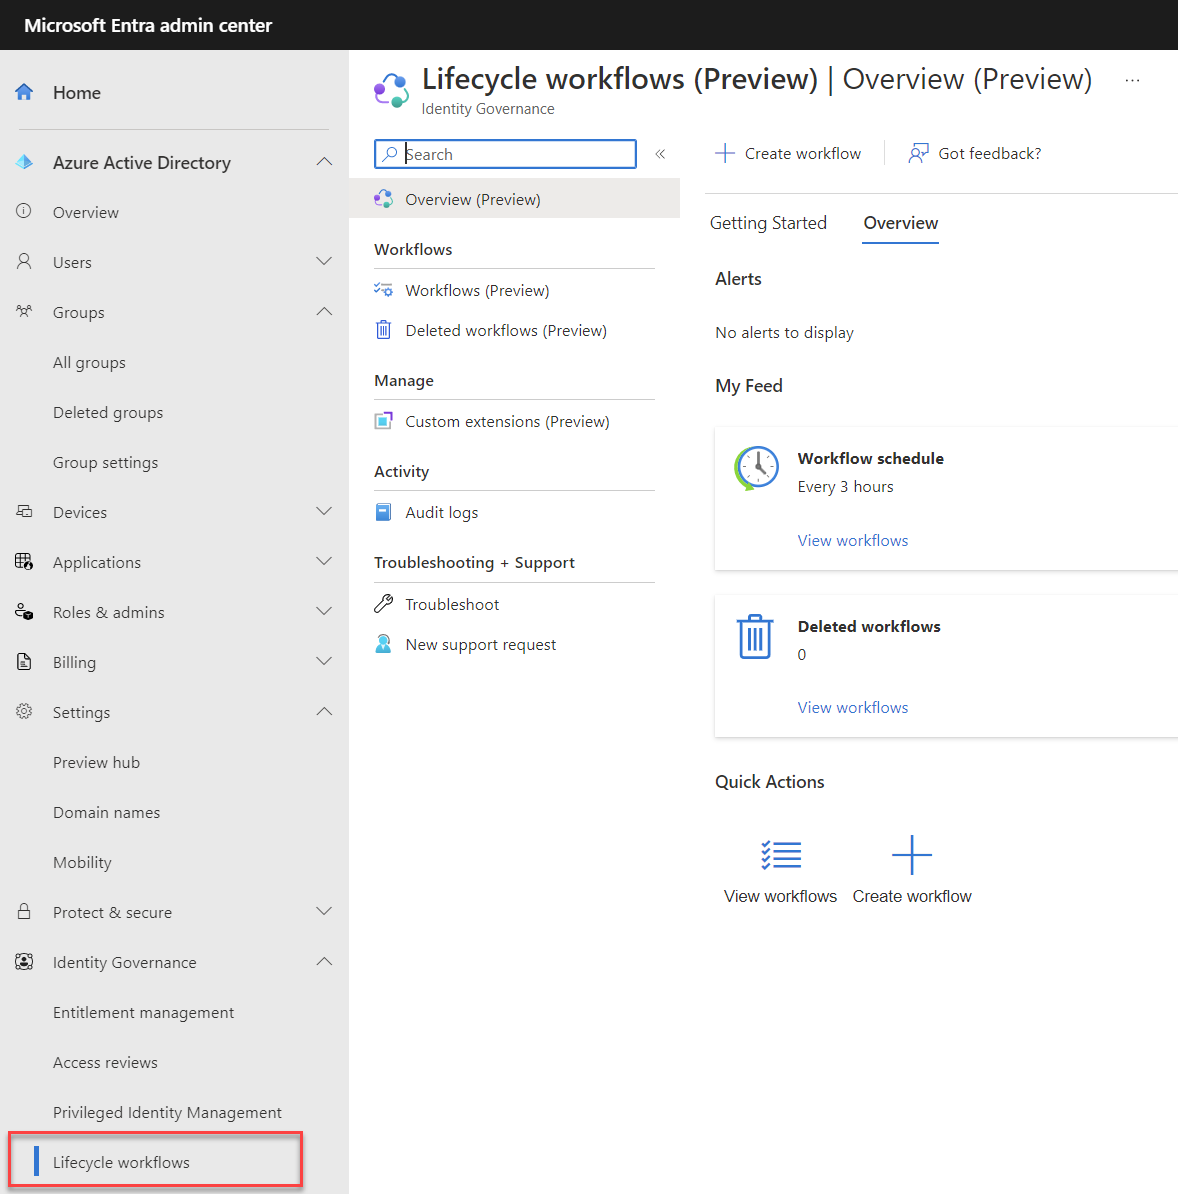
2. Go to Identity Governance | Lifecycle workflows
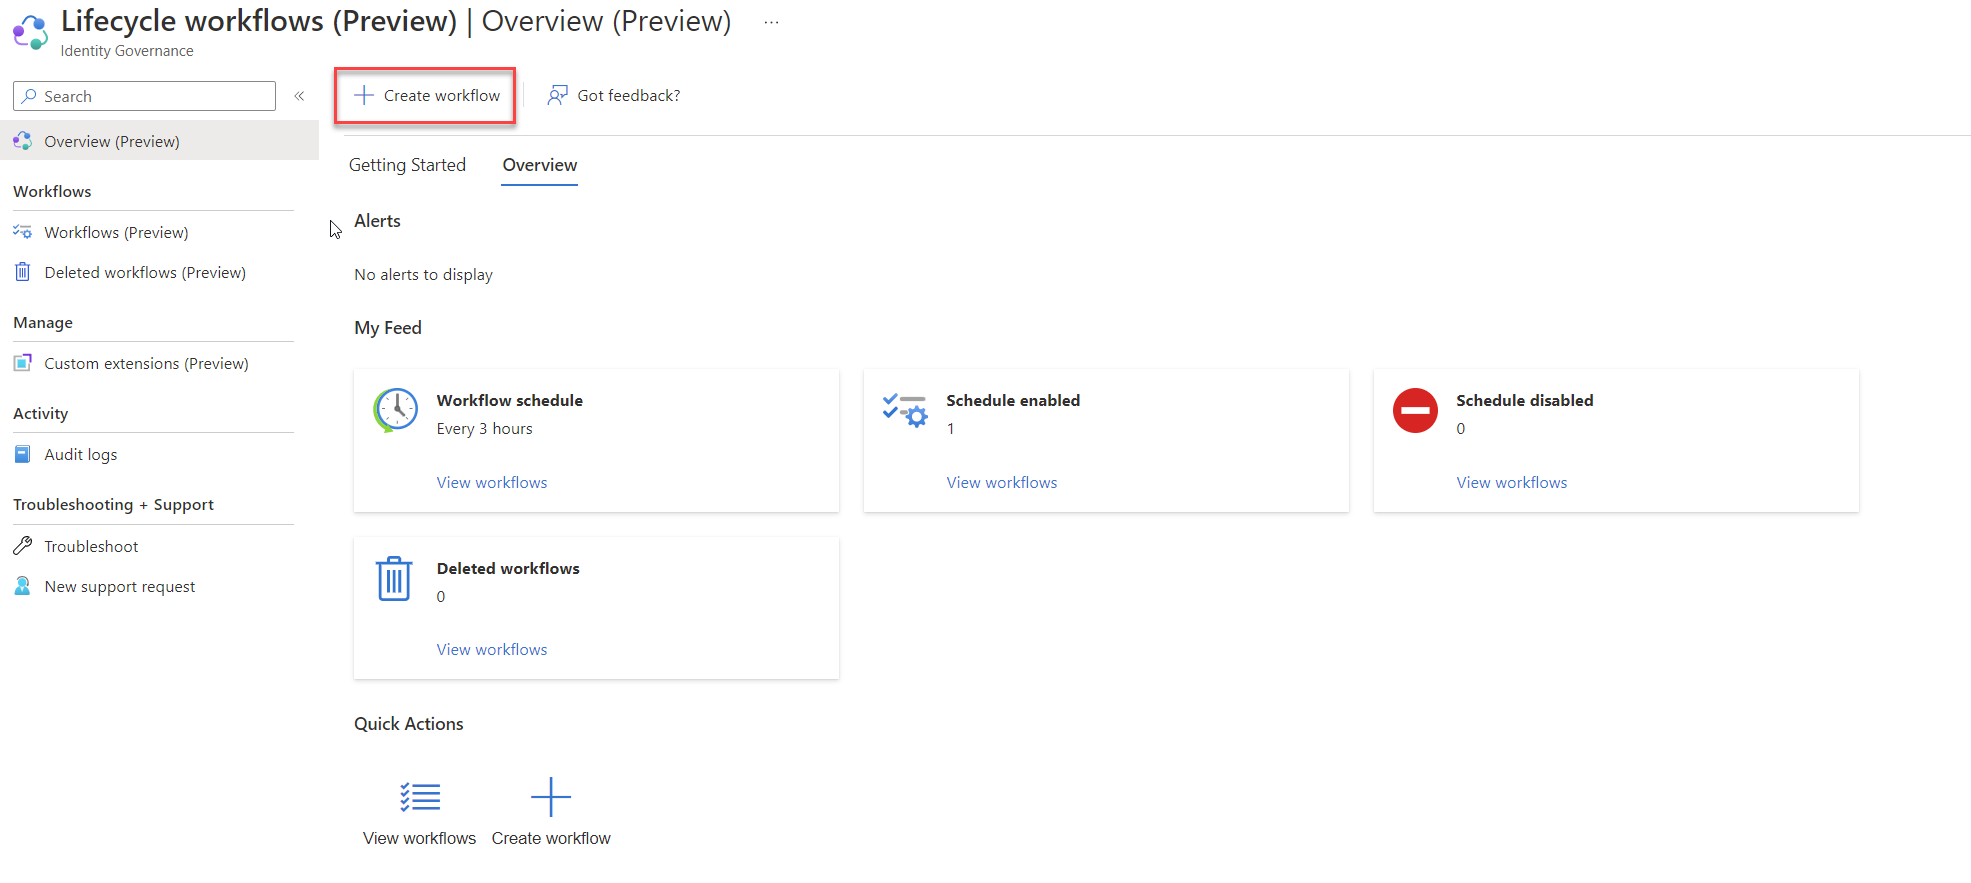
3. Next click on + Create workflow
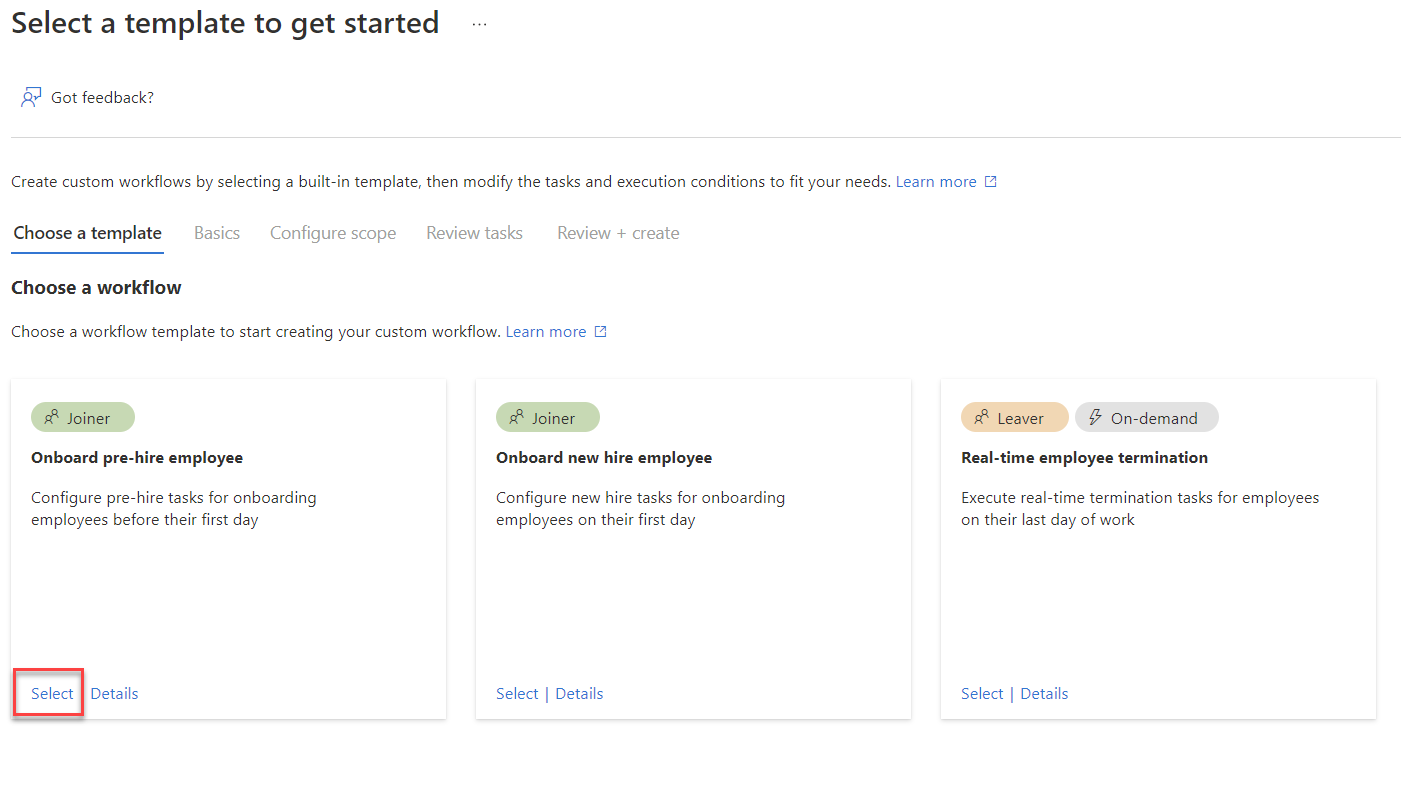
4. In the new window, we can see the pre-built templates. For this demo, I am selecting “Onboard pre-hire employee”
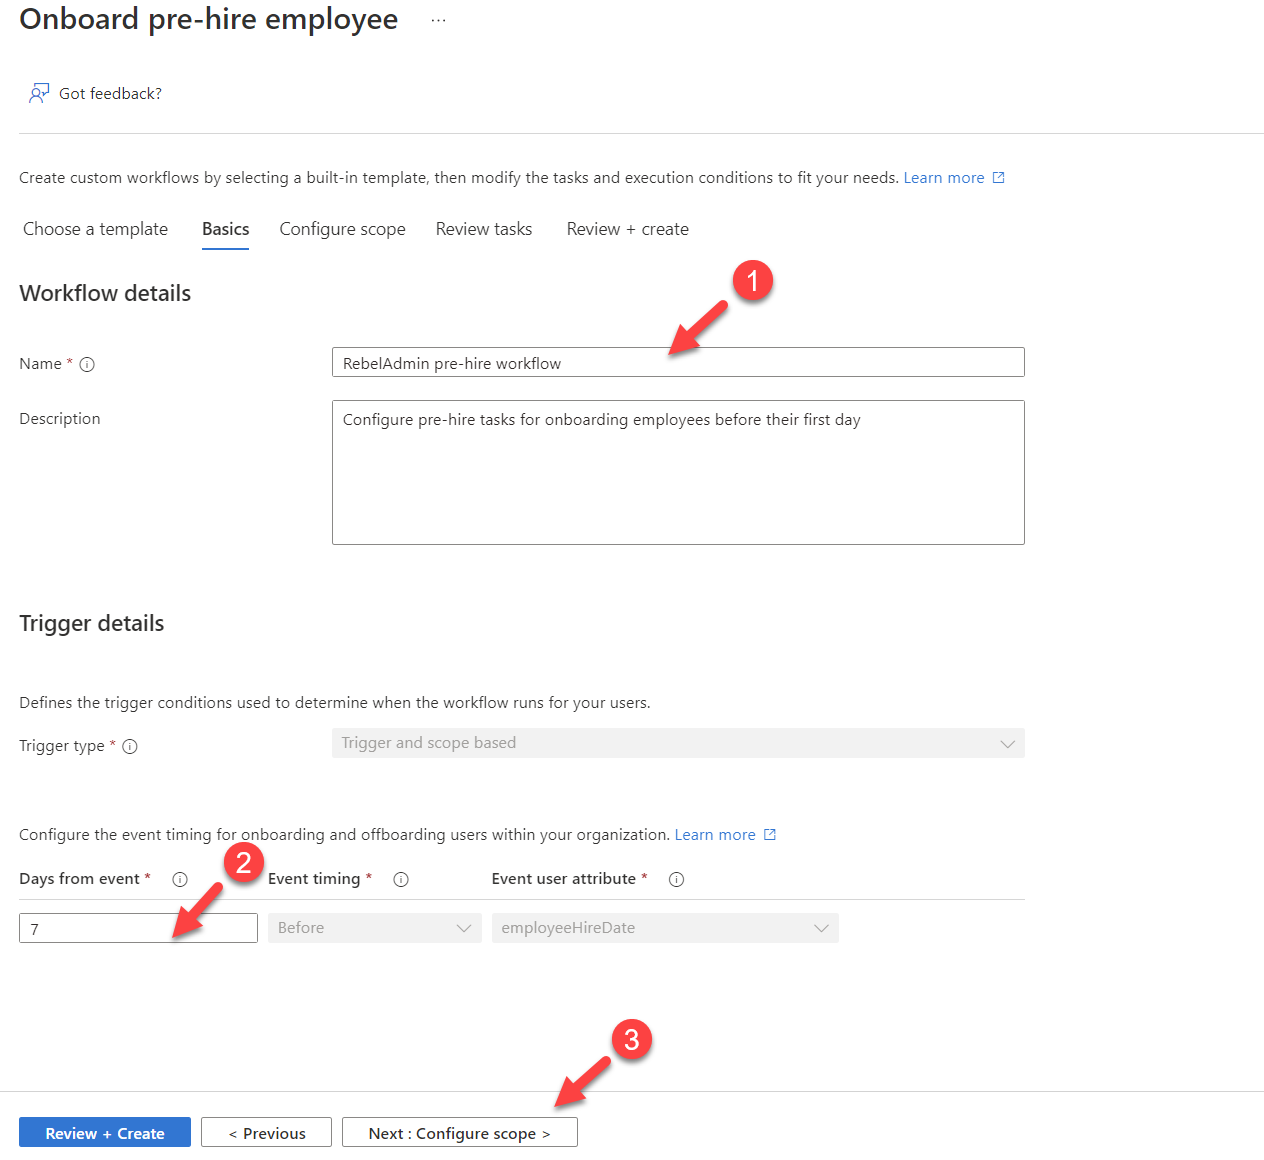
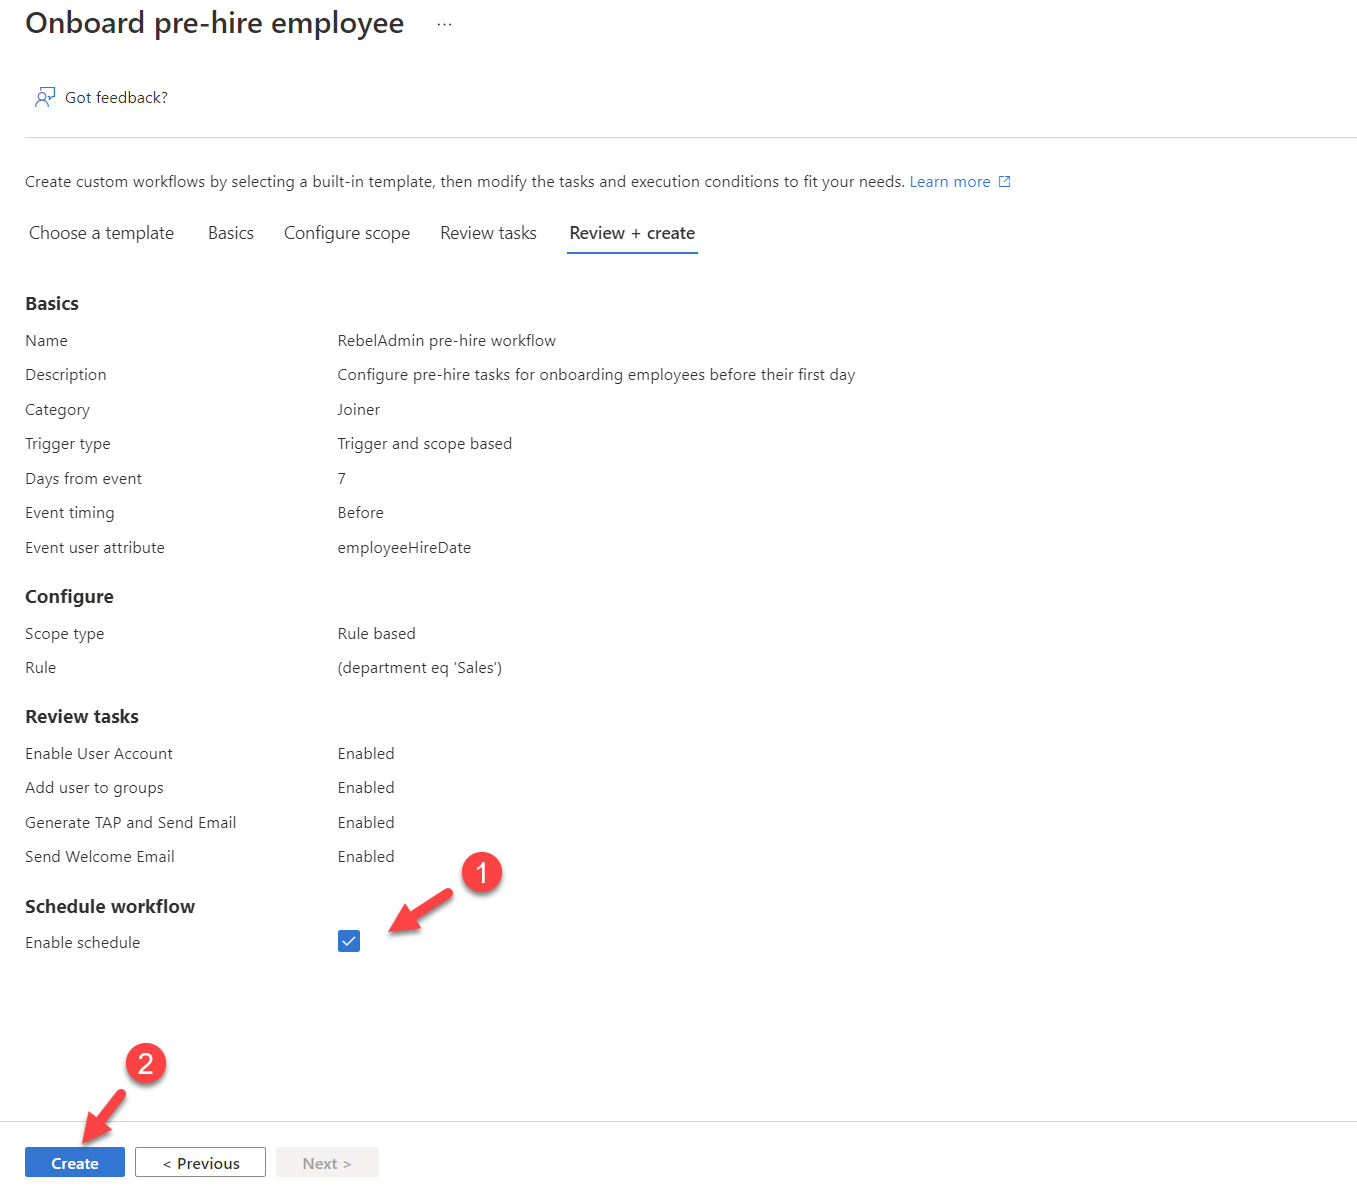
5. This will open the template settings. Provides a name for the workflow first and then change the event timing settings for onboarding. This workflow will depend on the employeeHireDate attribute value and we can decide how many days we should run the workflow. To keep it simple I am going to use the default value which is 7 days. Once settings are in place, click on Next: Configure scope to continue.
6. In the next window, we can use expressions to define the user scope for the workflow. Here I am going to run this workflow for new users in “Sales” department.

7. In the workflow task window, we can see “Generate TAP and Send Email” task is already in the list. We can add new tasks by clicking + Add tasks
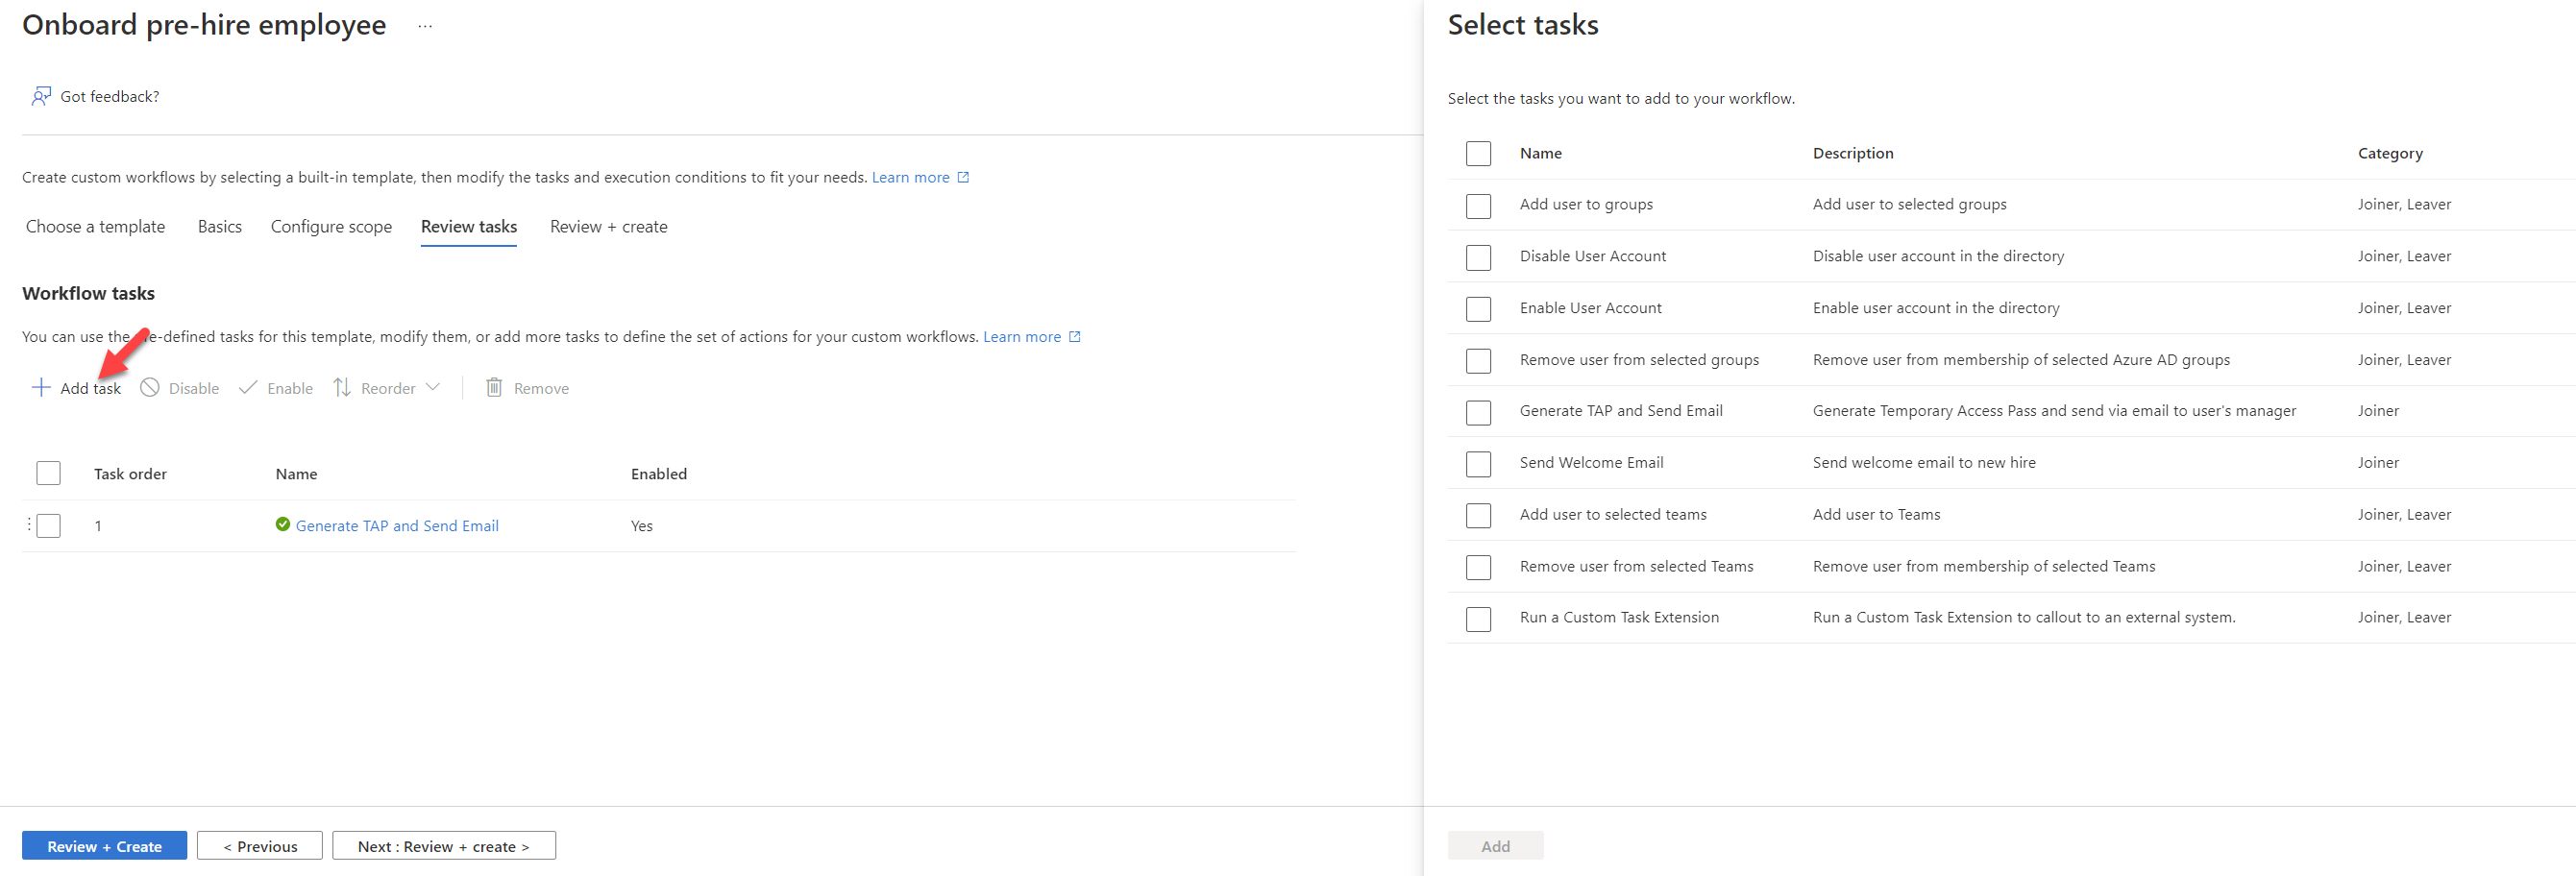
8. From the list I have added, Enable Account, Add user to Group, and Send Welcome Email tasks. For the groups, I have selected the already existing security group called “New Hire”. I also change the logical order of the tasks.
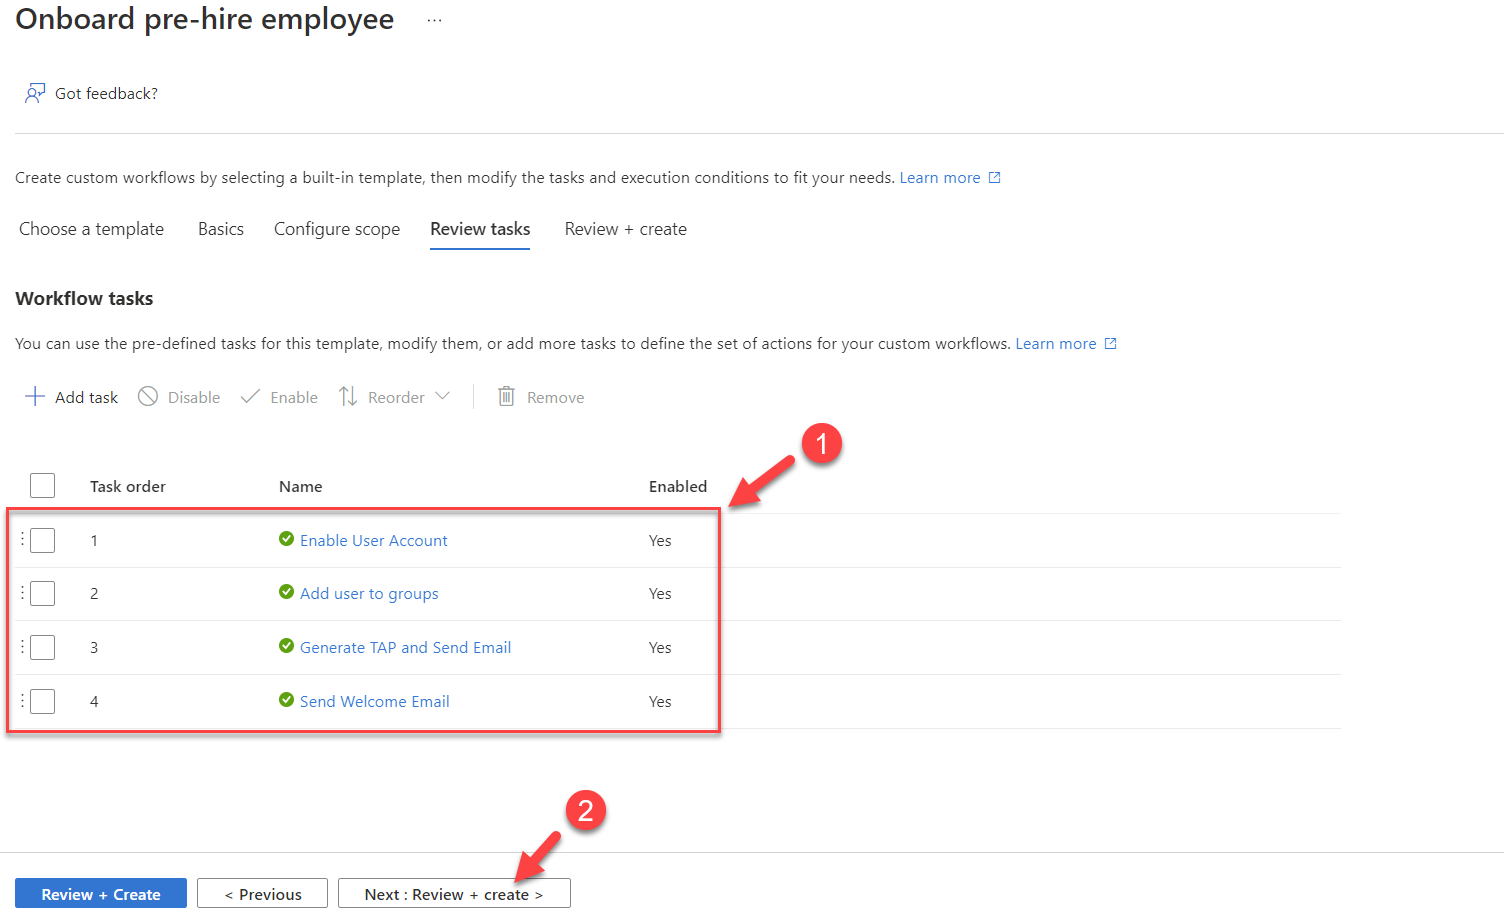
9. In the final window, select Schedule workflow to run the workflow every 3 hours. Then review the settings and click on Create.
Create a new user in Entra ID
The next step of the configuration is to create a user account for the new employee. There are many ways to create a user account but as I need to set a value for employeeHireDate attribute I am choosing the Microsoft Graph method to create the new user account. employeeHireDate attribute cannot be set currently by using UI.
To create a new user,
1. Go to Graph explore https://developer.microsoft.com/graph/graph-explorer and log in as Global Administrator
2. At the top, change the method to POST.
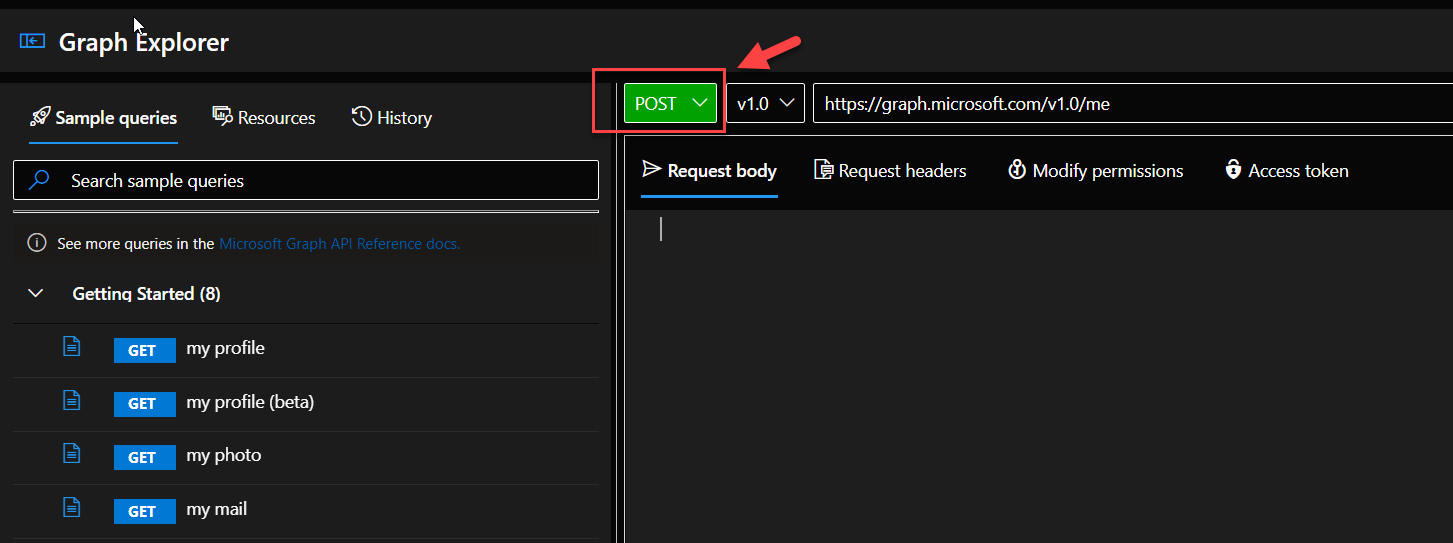
3. Then change the address to https://graph.microsoft.com/v1.0/users/

4. Modify the below code to match your requirement and then paste it to Request body section.
{
“accountEnabled”: false,
“displayName”: “John Smith”,
“mailNickname”: “jsmith”,
“department”: “Sales”,
“mail”: “jsmith@rebelsecurityadmin.com”,
“employeeHireDate”: “2022-11-02T22:10:00Z”,
“userPrincipalName”: “jsmith@rebelsecurityadmin.com”,
“passwordProfile” : {
“forceChangePasswordNextSignIn”: true,
“password”: “xsdRdFSwesAsr!”
}
}
In the above, I am creating a new user account called jsmith@rebelsecurityadmin.com . For this account, employeeHireDate is set to 2022-11-02. I also like to keep the account disabled by using “accountEnabled“: false. I am also setting an initial password but will not be using the password method to log in.
5. After the code is copied, click on the Run Query button.
6. This will create a new user account.
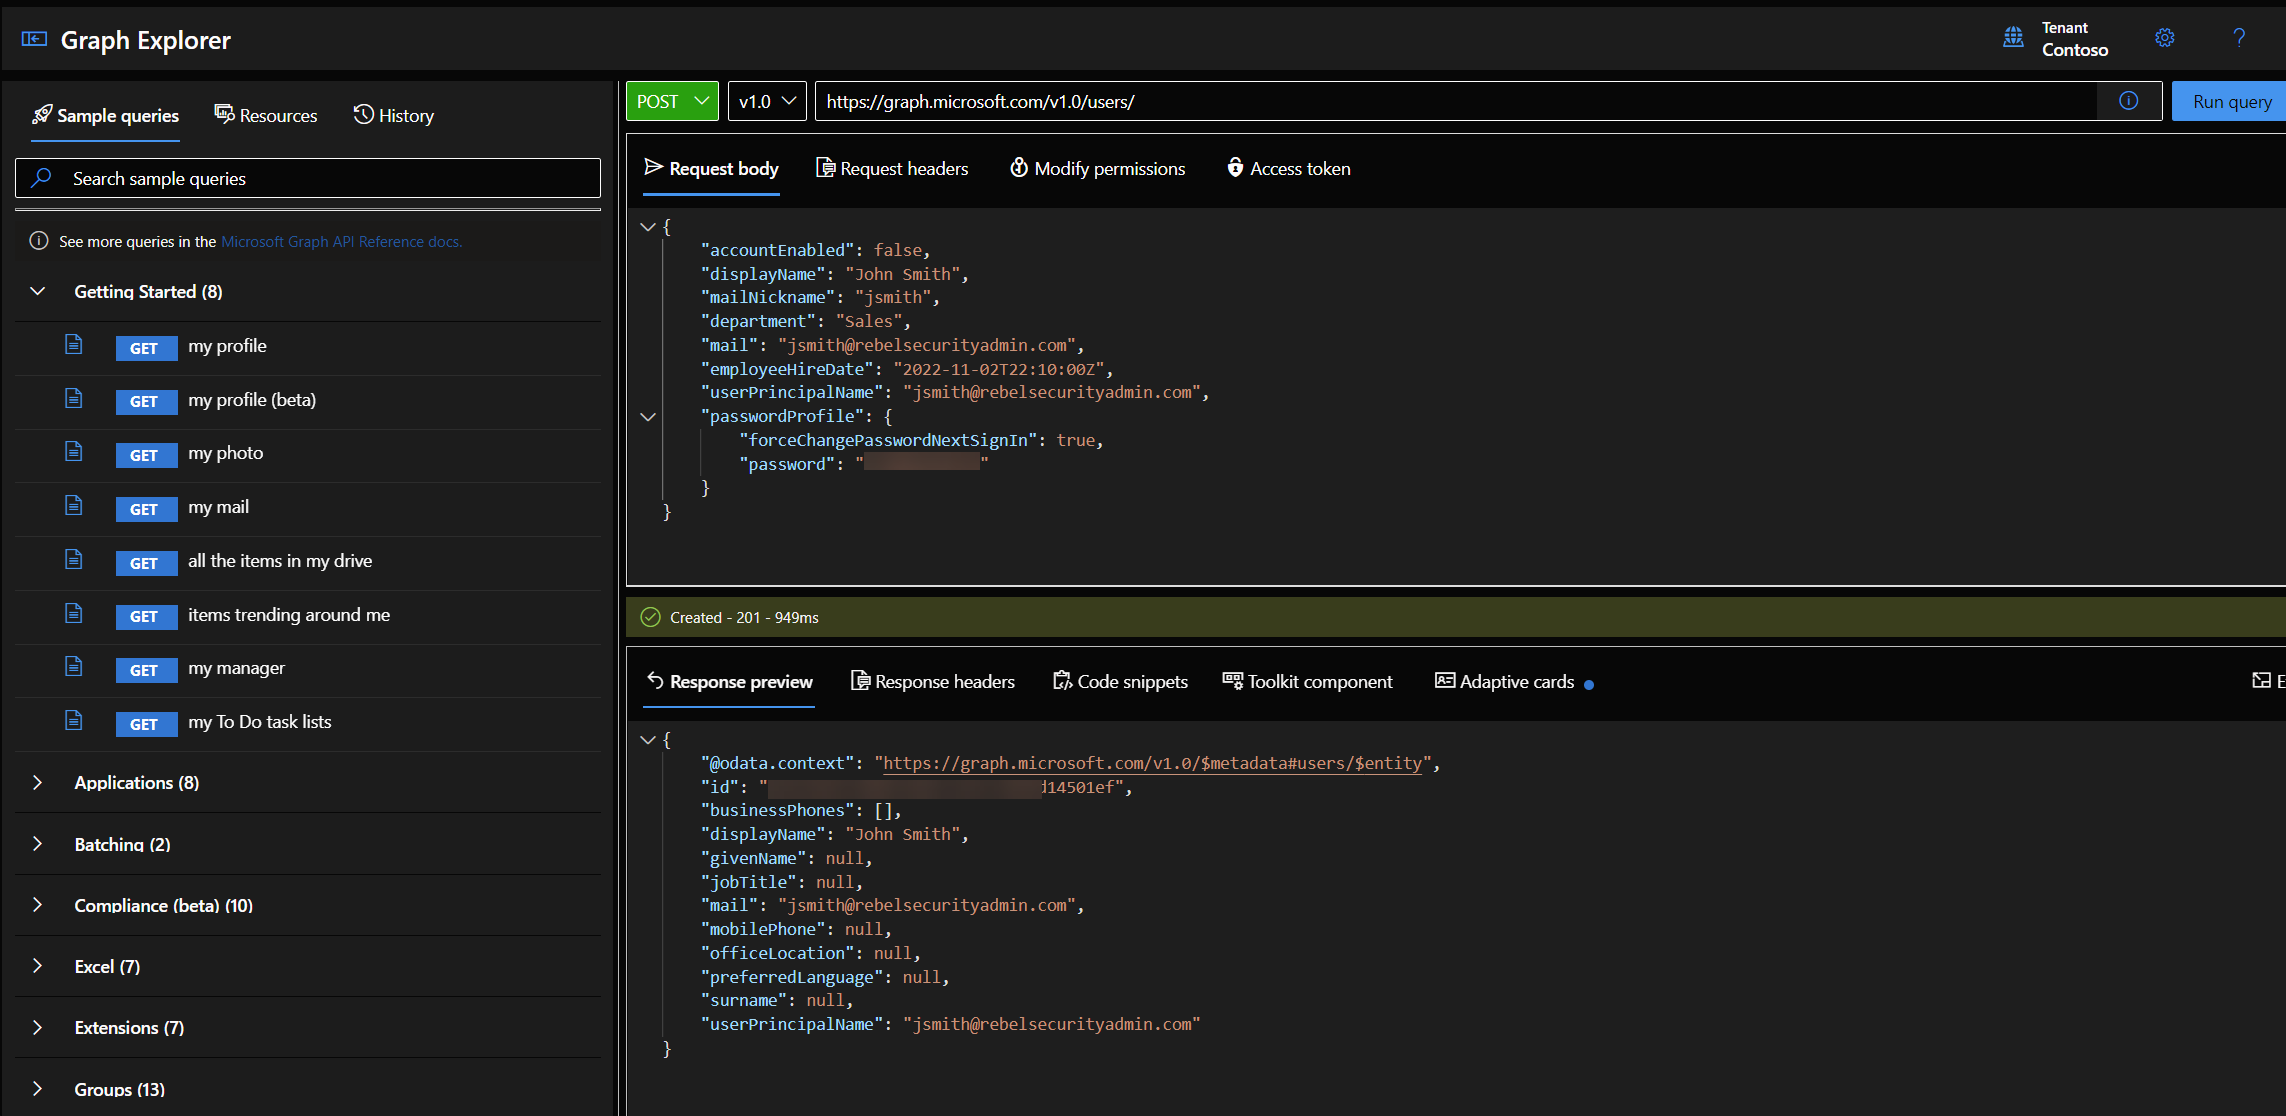
7. From the above output, copy the object id value for the new user as we need it to assign the manager.
Assign Manager to user
As the next step, we need to assign a manager to the new user. According to the workflow, the TAP code for the new user account will be issued to the Manager.
We can assign a manager to a user by using the user properties window or PowerShell commands but here I am going to use the Microsoft Graph method.
Before starting the configuration, we need two object ID values.
1. User’s object ID
2. Manger’s Object ID
Once we have the above details, we can assign a manager to the new user by using the following steps.
1. Go to Graph explore https://developer.microsoft.com/graph/graph-explorer and log in as Global Administrator
2. At the top, change the method to PUT.
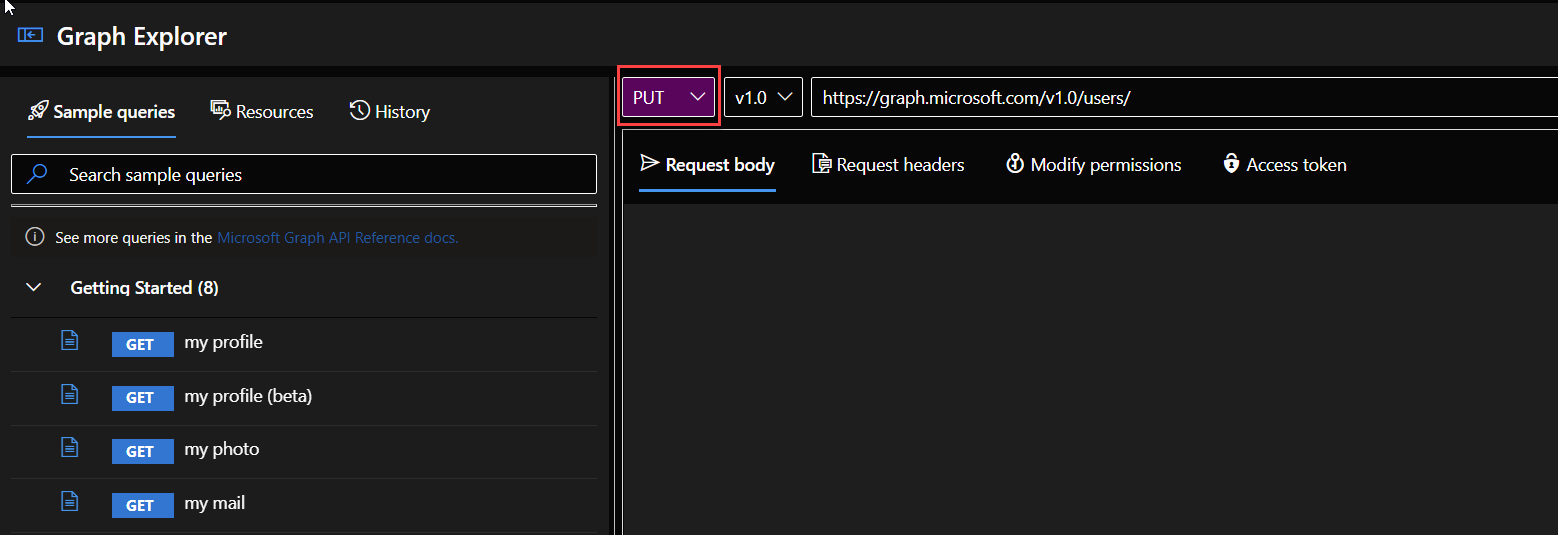
3. Then change the address to https://graph.microsoft.com/v1.0/users/
In the above change the
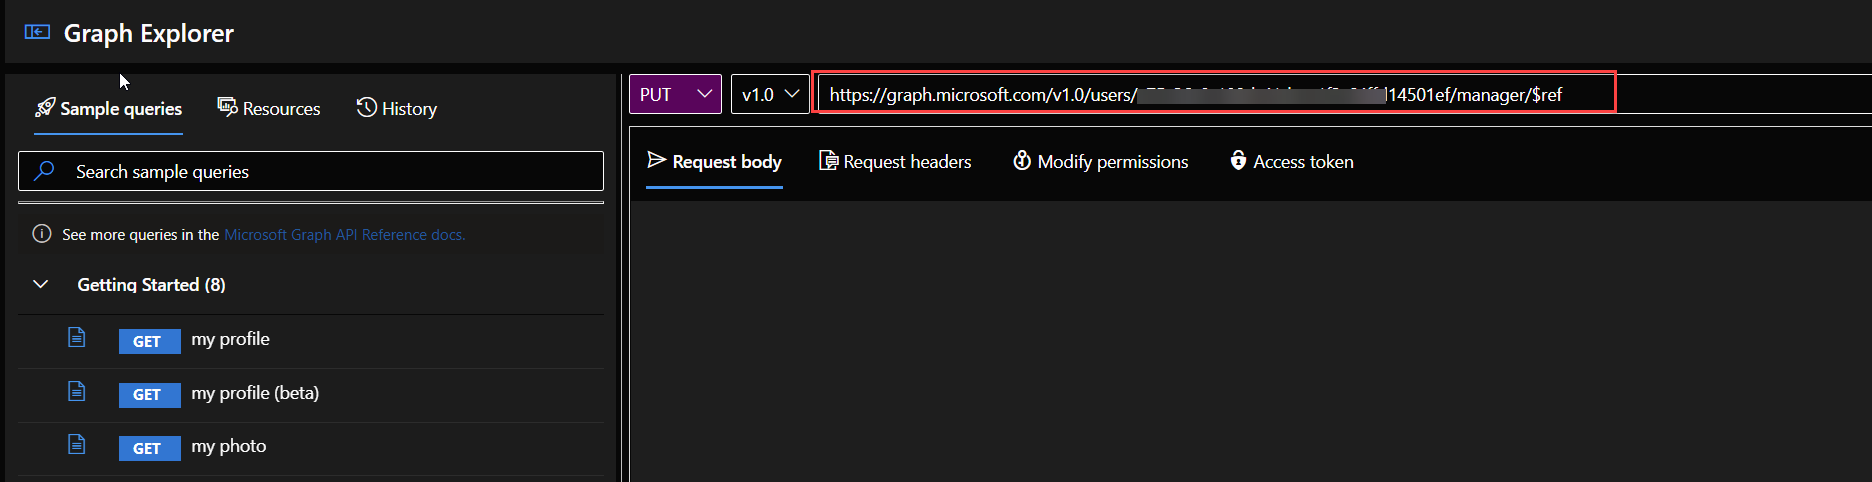
4. Next, update the following code and paste it to the Request body section.
{
“@odata.id”: “https://graph.microsoft.com/v1.0/users/
}
In the above code, replace
Once the code is pasted, click on the Run query button to execute the command.
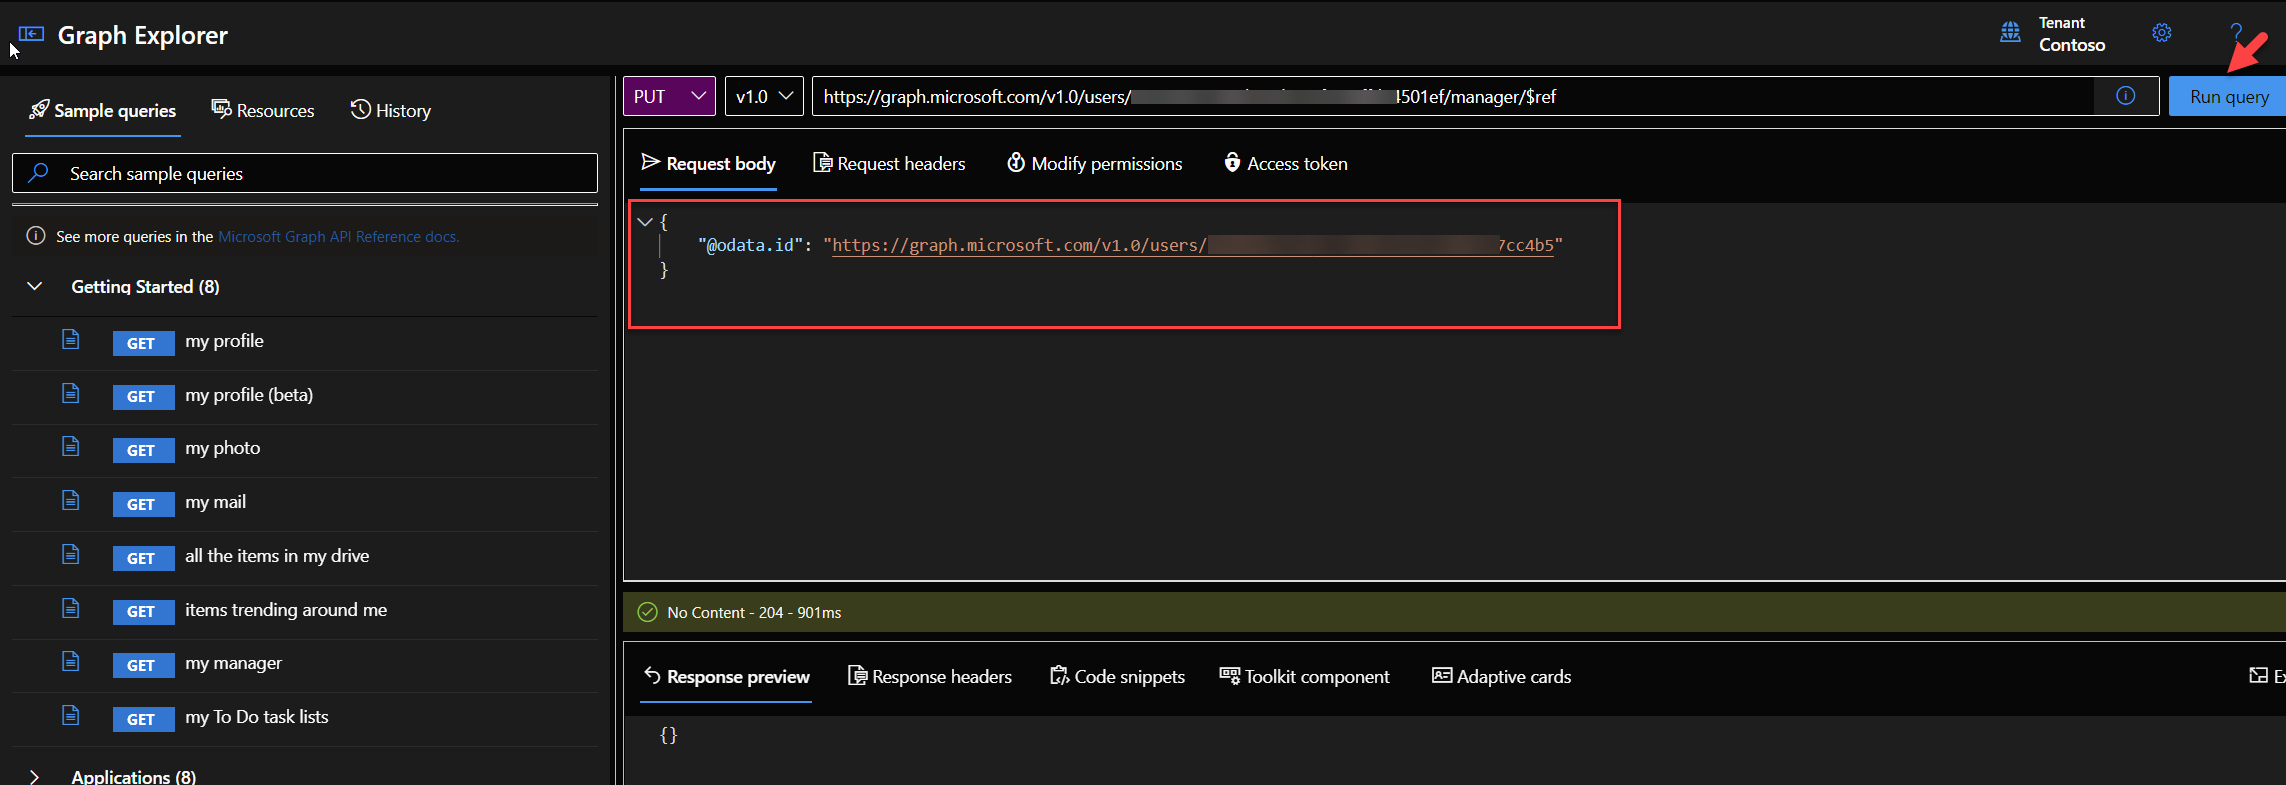
5. This will assign a manager to the new user.
Run lifecycle Workflows Manually
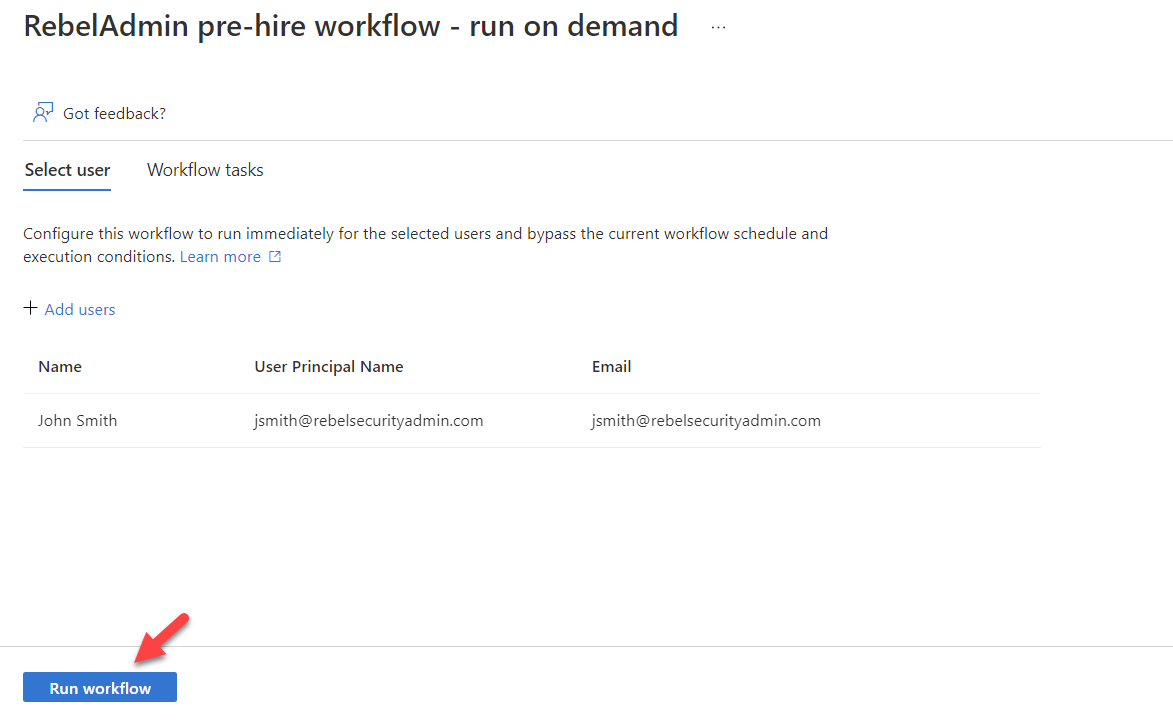
A scheduled workflow by default runs every 3 hours. We also can run lifecycle workflows manually (on-demand) for any selected users. When the workflow is processed manually, it will not validate the workflow execution condition. For this demo, I am going to run the lifecycle workflows manually for user John Smith.
To do that,
1. Log in to MS Entra portal https://entra.microsoft.com/
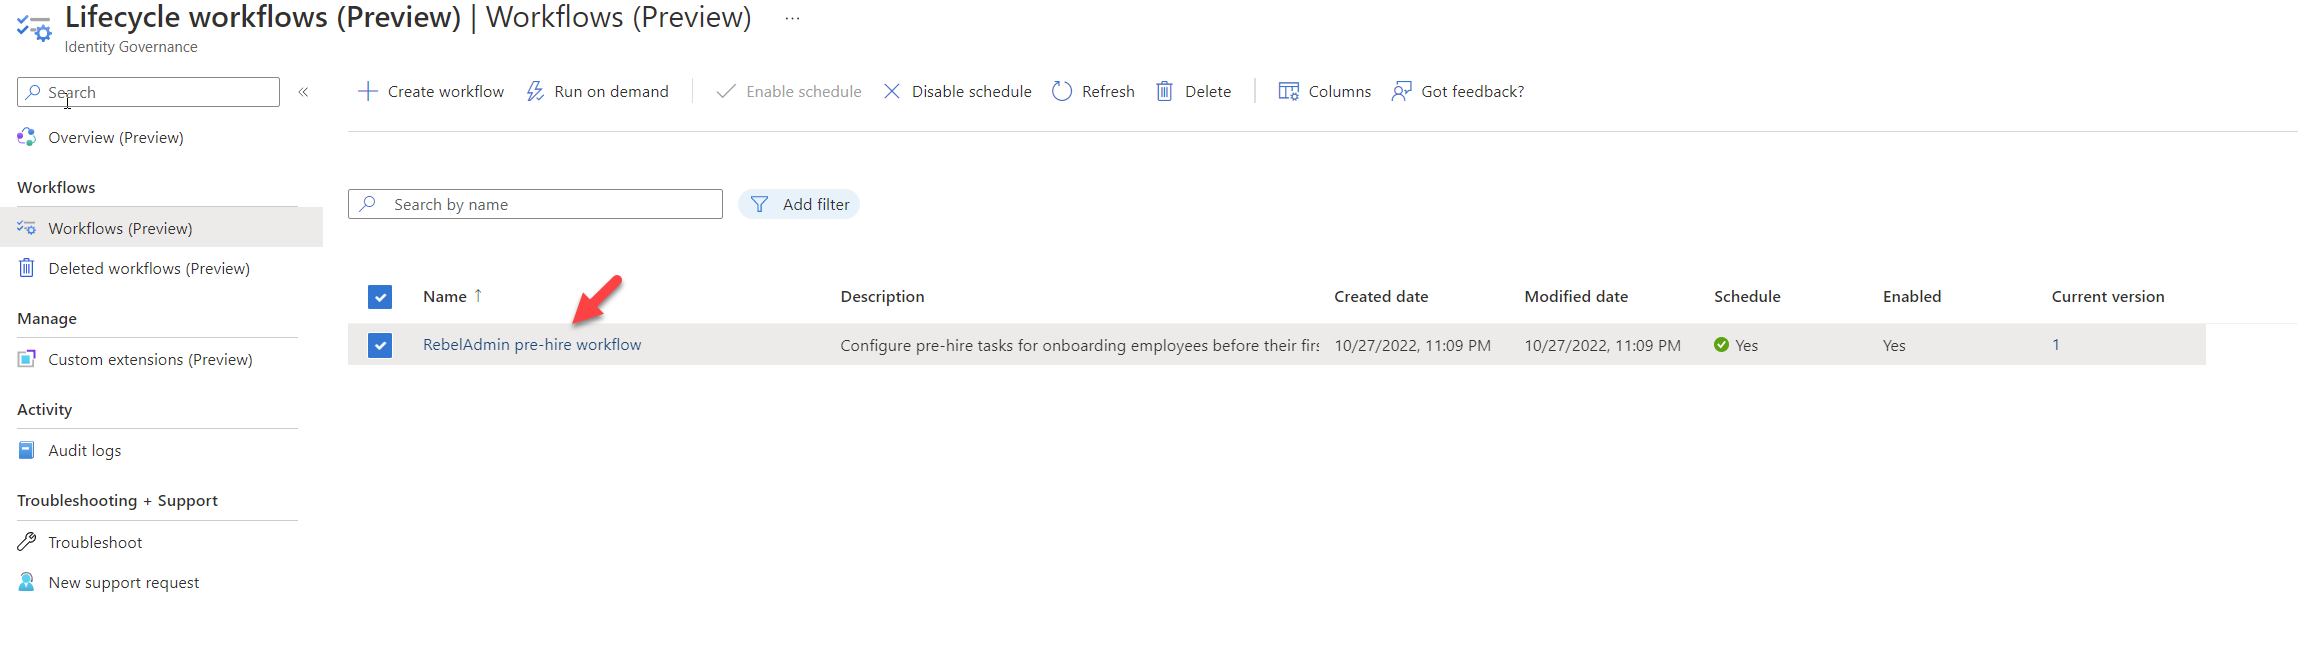
2. Go to Identity Governance | Lifecycle workflows | Workflows (preview)
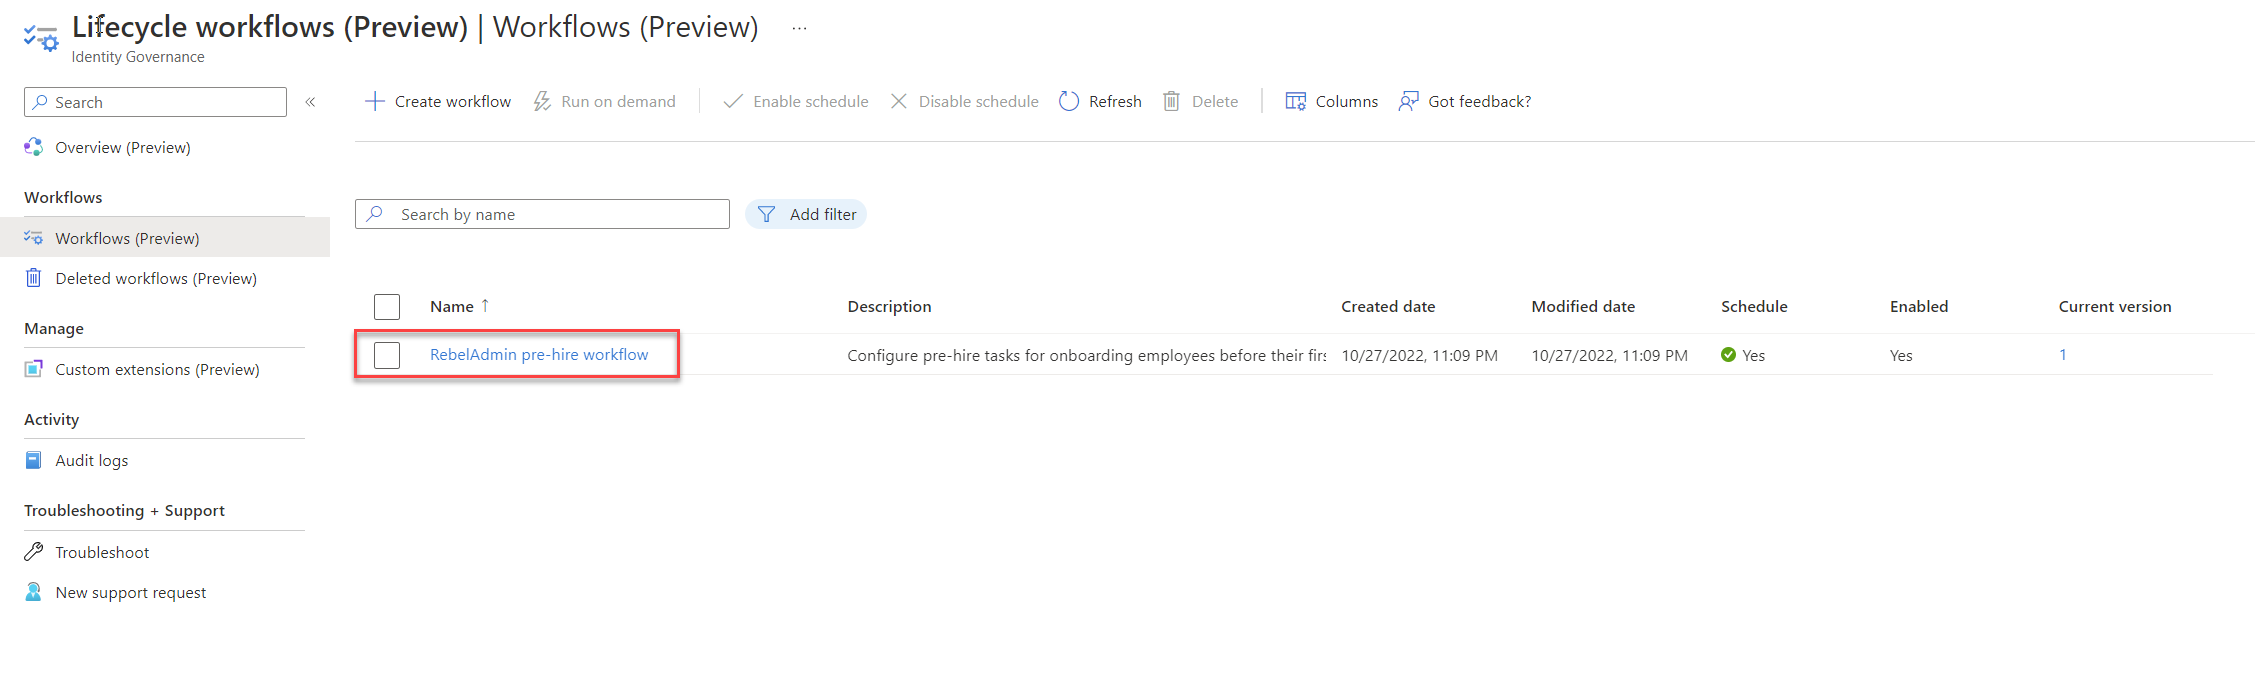
3. Then select the newly created workflow from the list
4. Click on Run on demand.
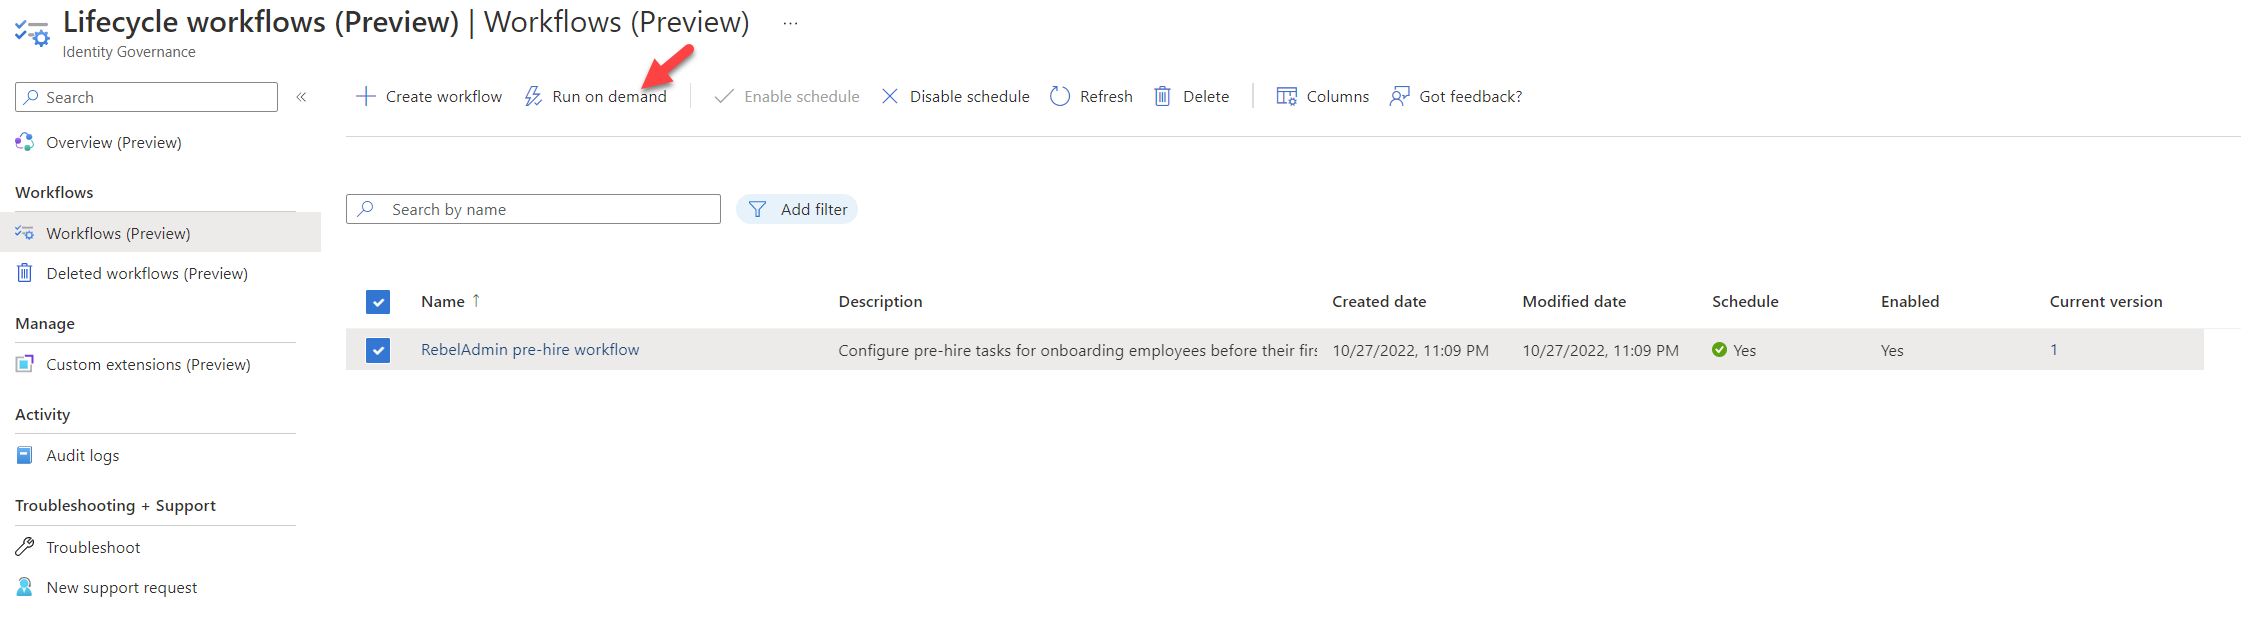
5. In the new window, click on + Add users
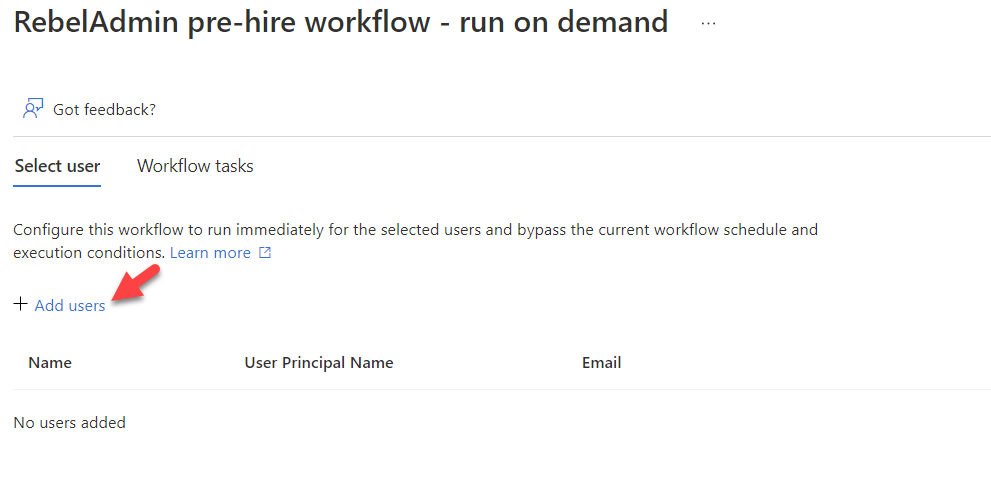
6. From the list of users, select the newly created user and click on Select
7. Next, click on Run Workflow
8. This will execute the workflow and we can monitor the progress on the workflow history page.
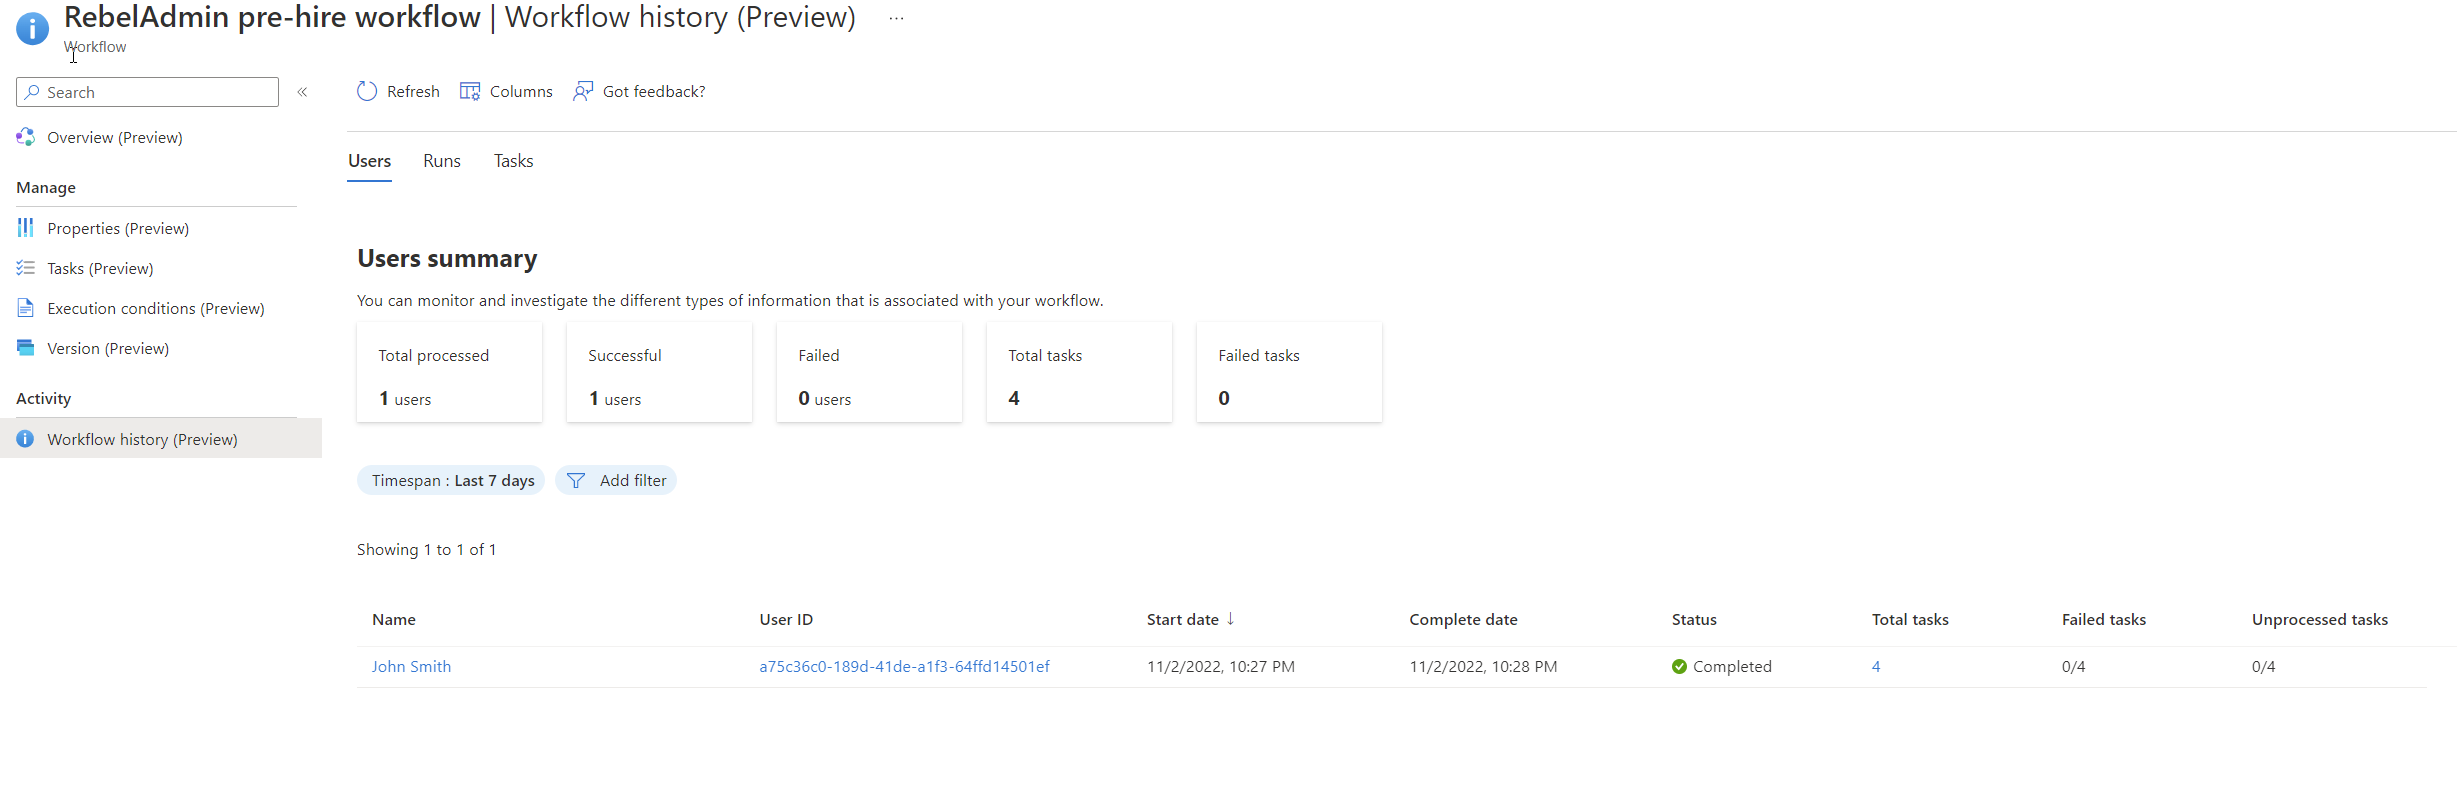
As we can see above the workflow was processed successfully.
Validate the completed lifecycle workflows tasks
In the previous step, we successfully processed the workflow for the new user John Smith. Now it is time to validate if the lifecycle workflows worked as expected.
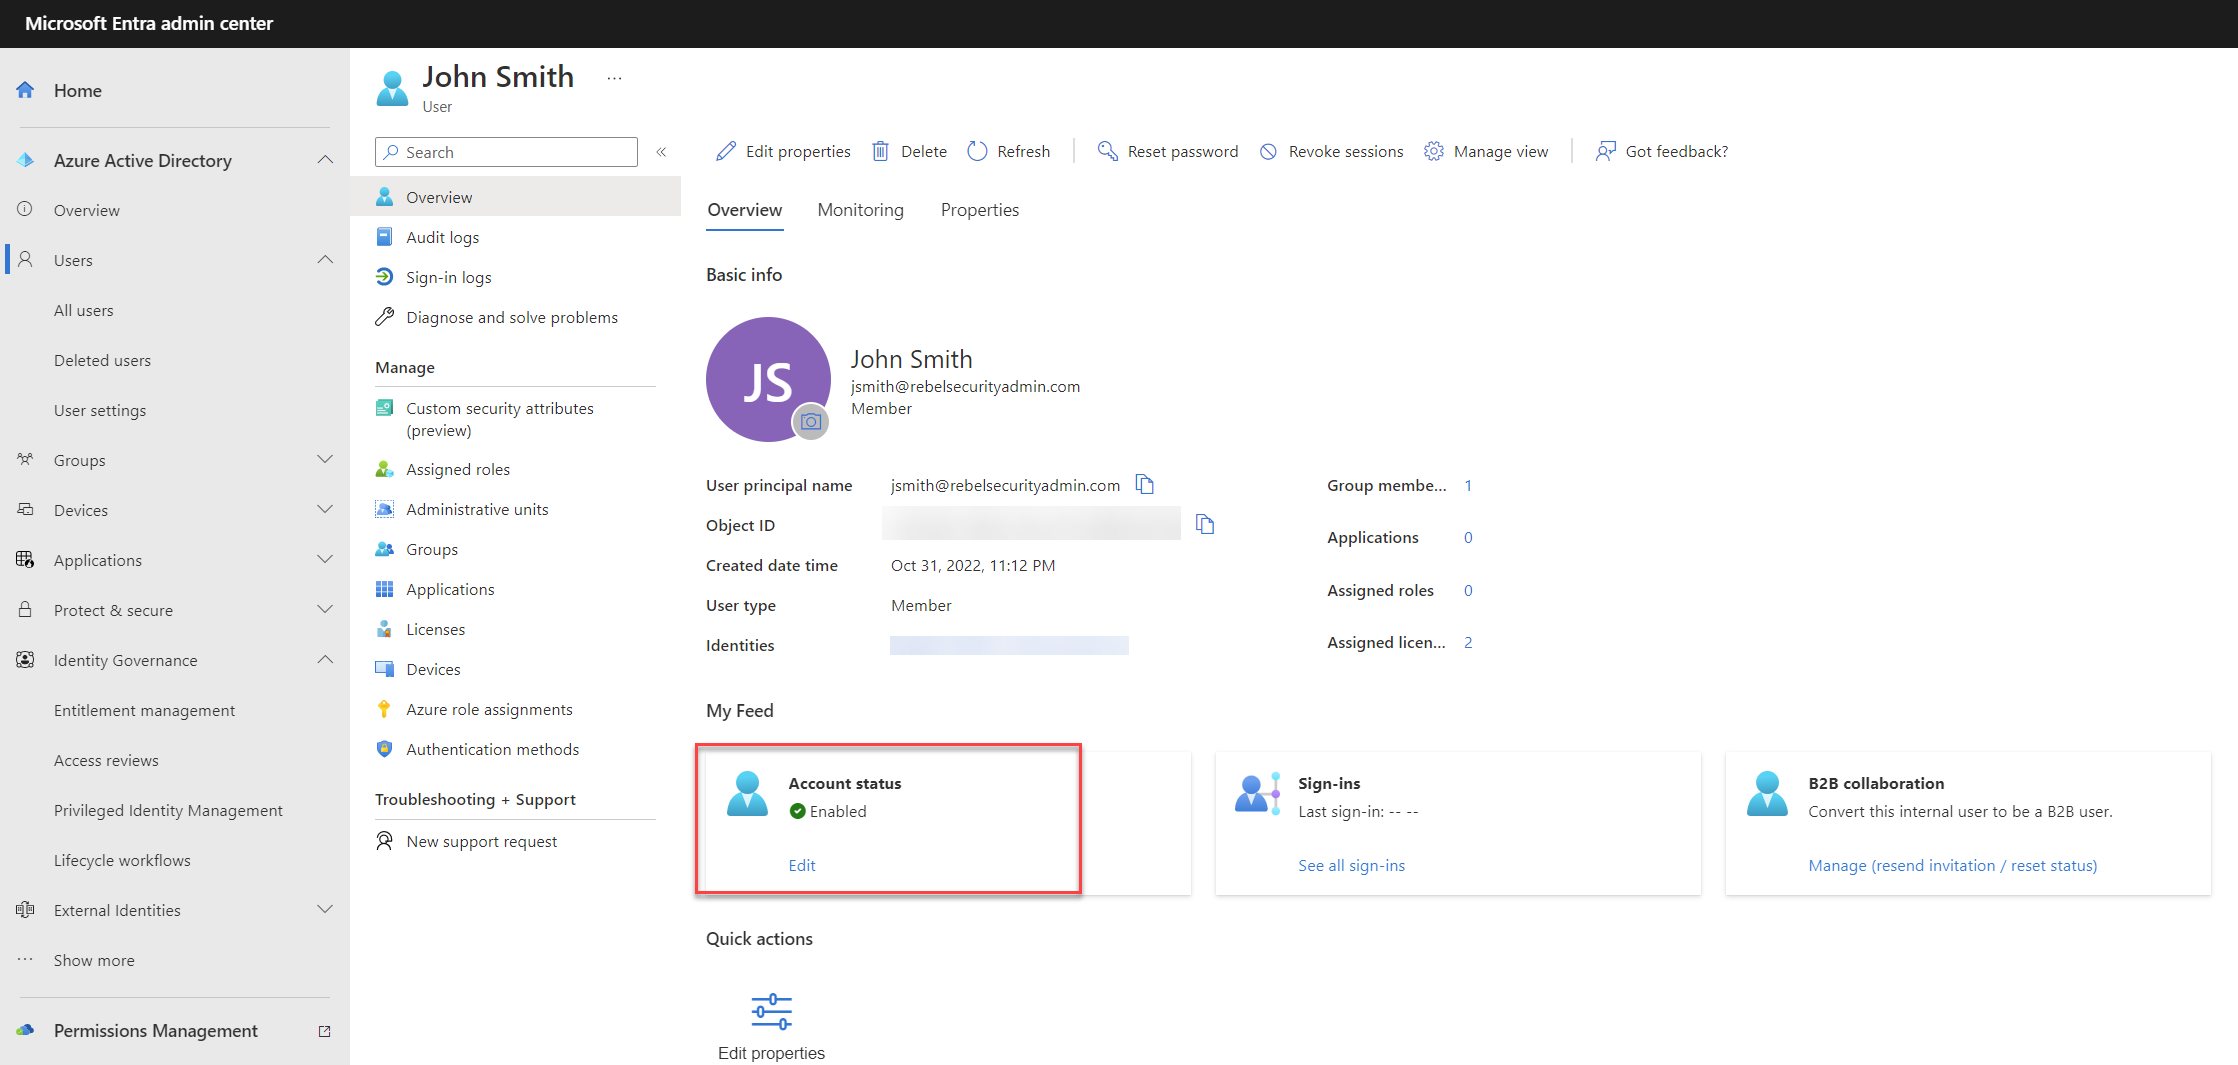
The first task of the workflow is to enable the user account. When I go to the user account, now I can see the account is enabled.
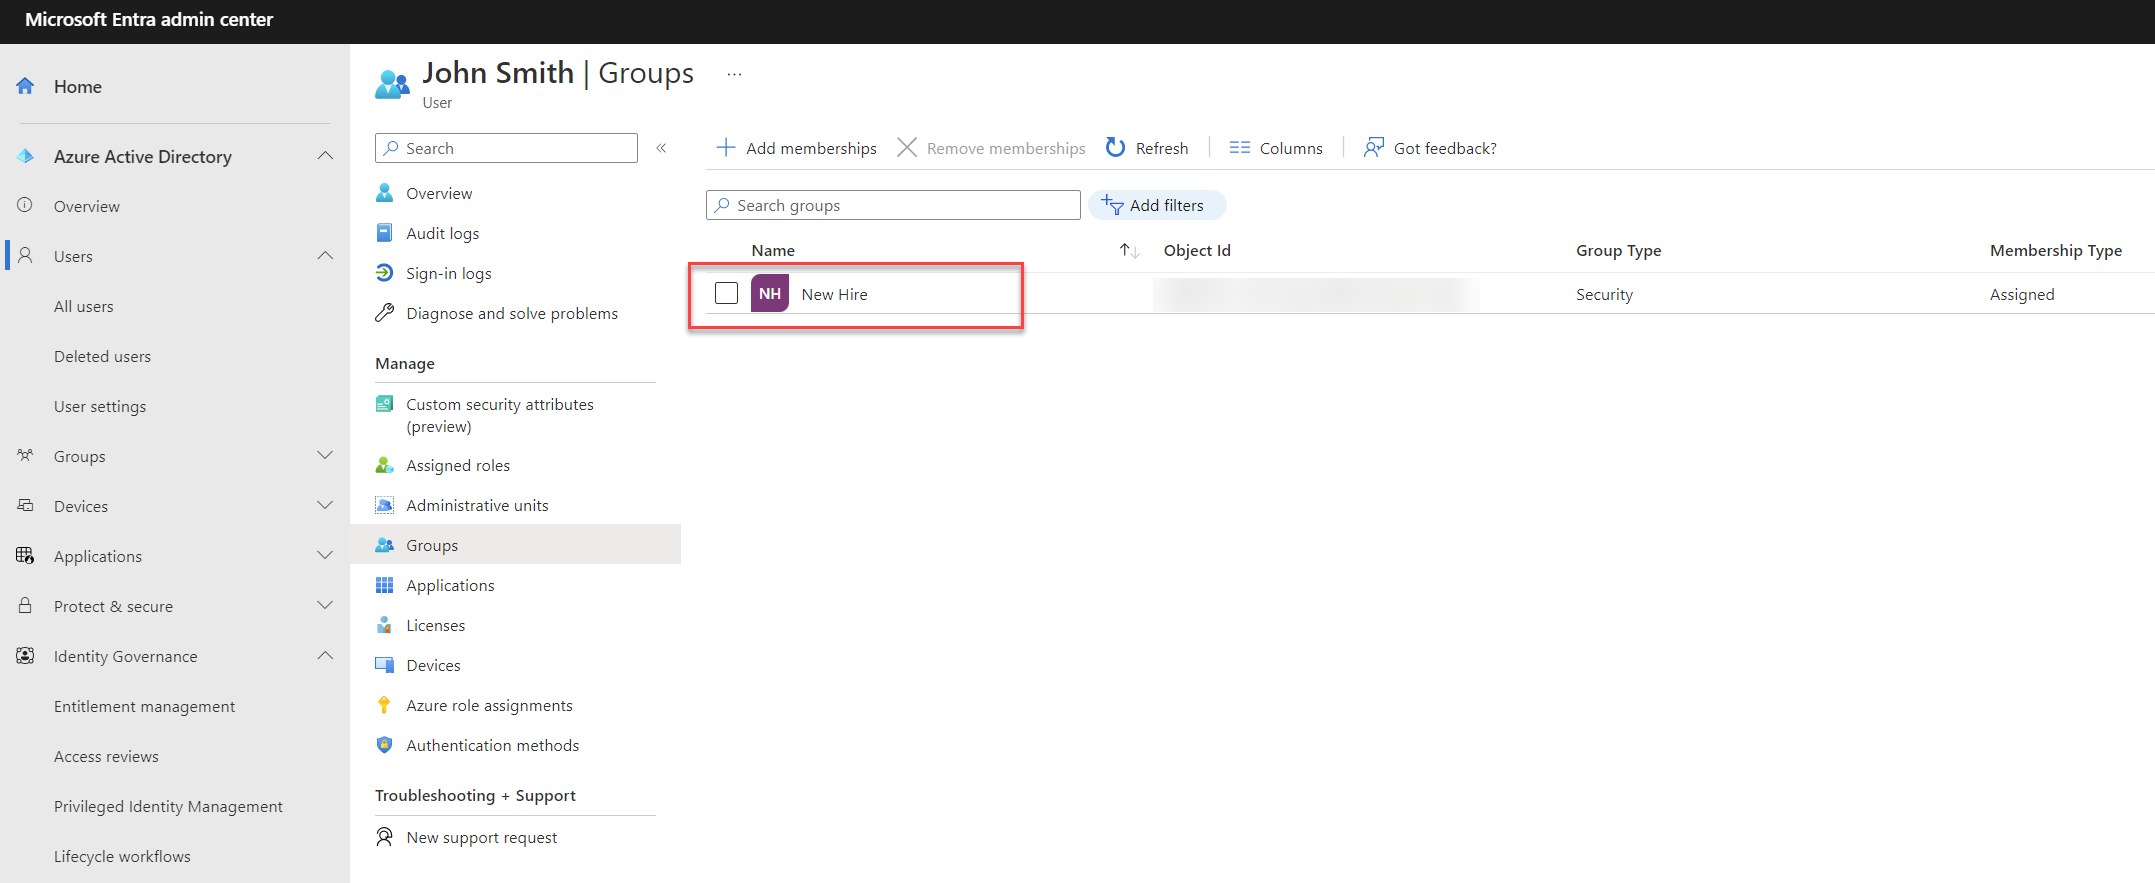
As the second task, I wanted to add the user to a security group called “New Hire”.
The third task in the workflow is to generate TAP and send an email to the manager. As we can see below, the manager received a TAP for the new user.
The last task in the lifecycle workflow is to send a welcome letter to the new user.
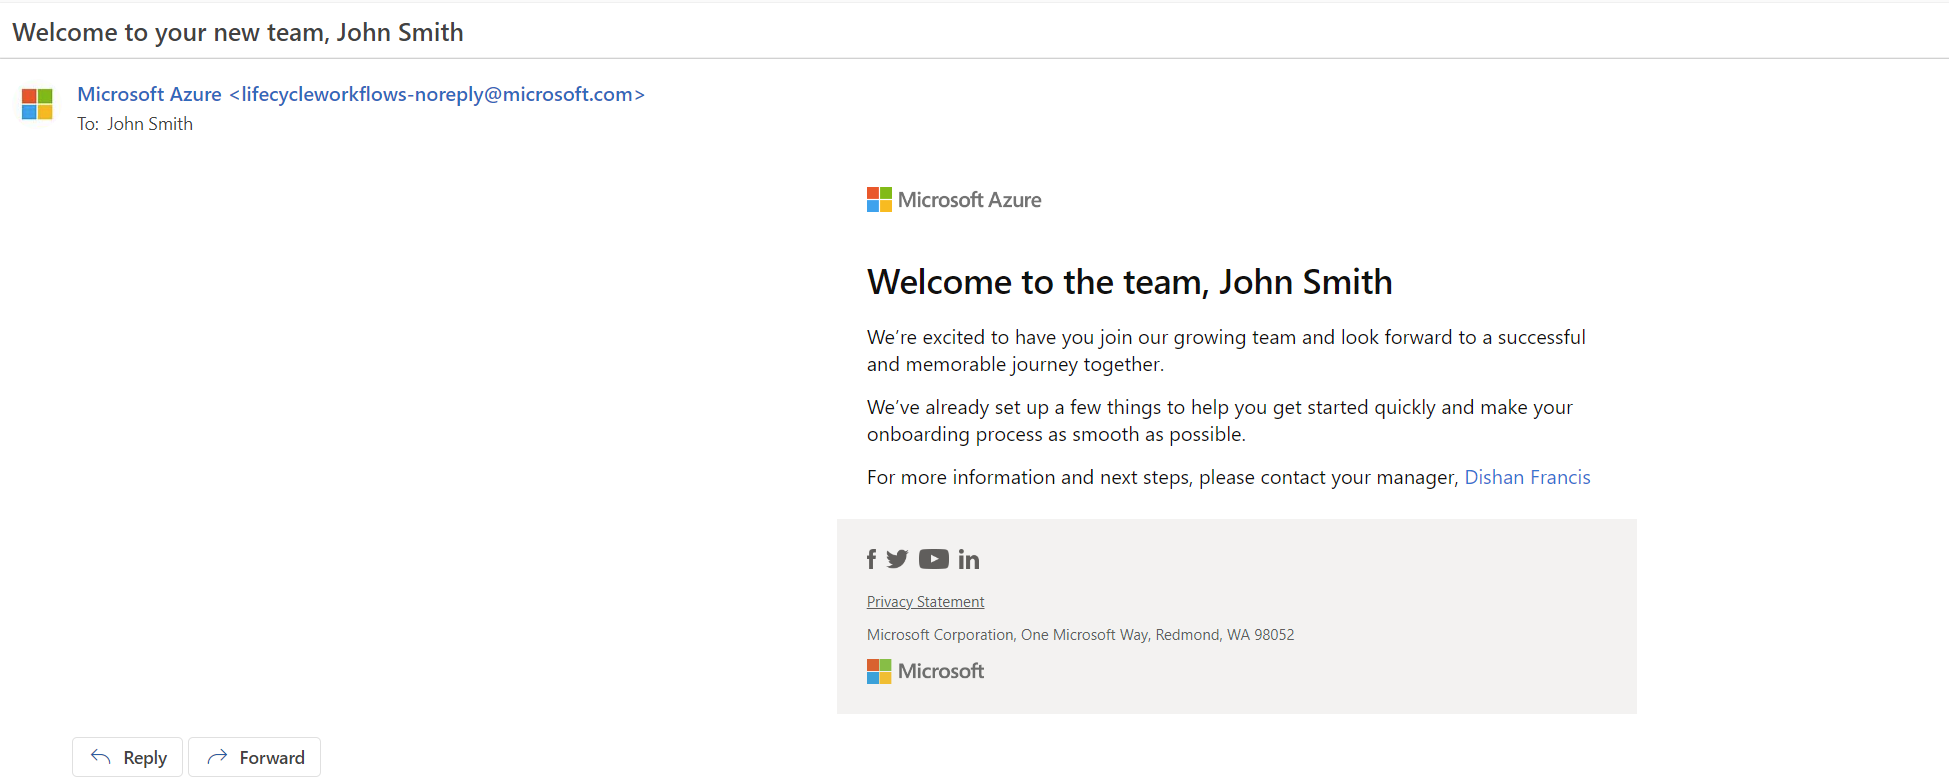
As we can see the lifecycle workflow worked as expected and was able to automate onboarding tasks for new employees easily.
This marks the end of this blog post. Hope now you have a better understanding of using Microsoft Entra lifecycle workflows to automate JML process. If you have any further questions, feel free to contact me at rebeladm@live.com

