
Azure AD Privileged Identity Management allows organizations to manage, monitor, audit access to sensitive Azure resources. One of the main features of PIM is the ability to provide just-in-time (JIT) access to Azure AD and Azure resources. As an example, a user can request to be a Global Administrator for 1 hour. Once a user requests it through the portal, Approver will receive a notification. Then approver can review the request and approve/deny the request based on justifications. Once the request is approved, the user will have Global administrator privileges for one hour. After one hour, the privileges will remove from the user automatically. Instead of individual users, we also can make cloud groups eligible for the Azure AD role assignment. More info about this configuration is available under one of the previous blog post. So far, we had to manage members or owners of these privilege cloud groups using Azure AD, but now we can provide JIT membership to privilege group using Azure AD PIM.
Note : To use Azure AD PIM, you need to have Azure AD Premium P2 licenses. So, make sure you have the relevant license in place before we go ahead with this config.
In my demo environment, I am going to create a new group called “Temp Administrators“. Then I am going to make it active for Global Administrator role for 3 months. After that configuration, if a user needs to get Global Admin rights, they need to be part of “Temp Administrators” group. I plan to show you how we can manage members of this group using Azure AD PIM.
Create a role-assignable group
As the first step of the configuration, I need to create a cloud group. This group must have the “Azure AD roles can be assigned to the group” option turned on. Otherwise, we can’t assign roles to it.
To do this,
1. Log in to Azure Portal as Global Administrator
2. Search for Azure Active Directory and click on it
3. Go to Groups and click on + New group

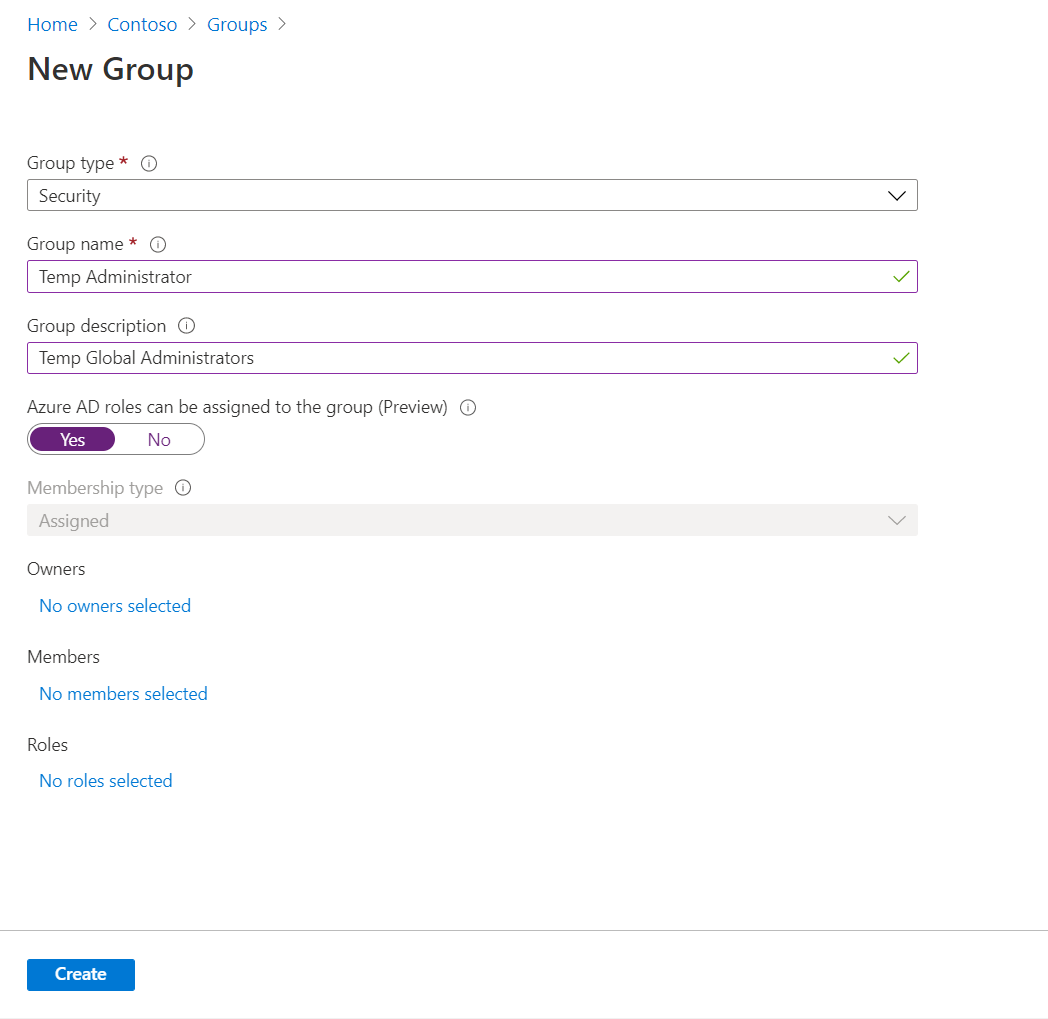
4. In the new form, set Group type to Security. Then provide a name and description for the group. Next, set Azure AD roles can be assigned to the group (Preview) option to Yes. After, click on create to complete the group setup process
Enable privileged access for a group
The next step of the configuration is to enable privileged access for the newly created group. To do that,
1. Go to Azure Active Directory home page
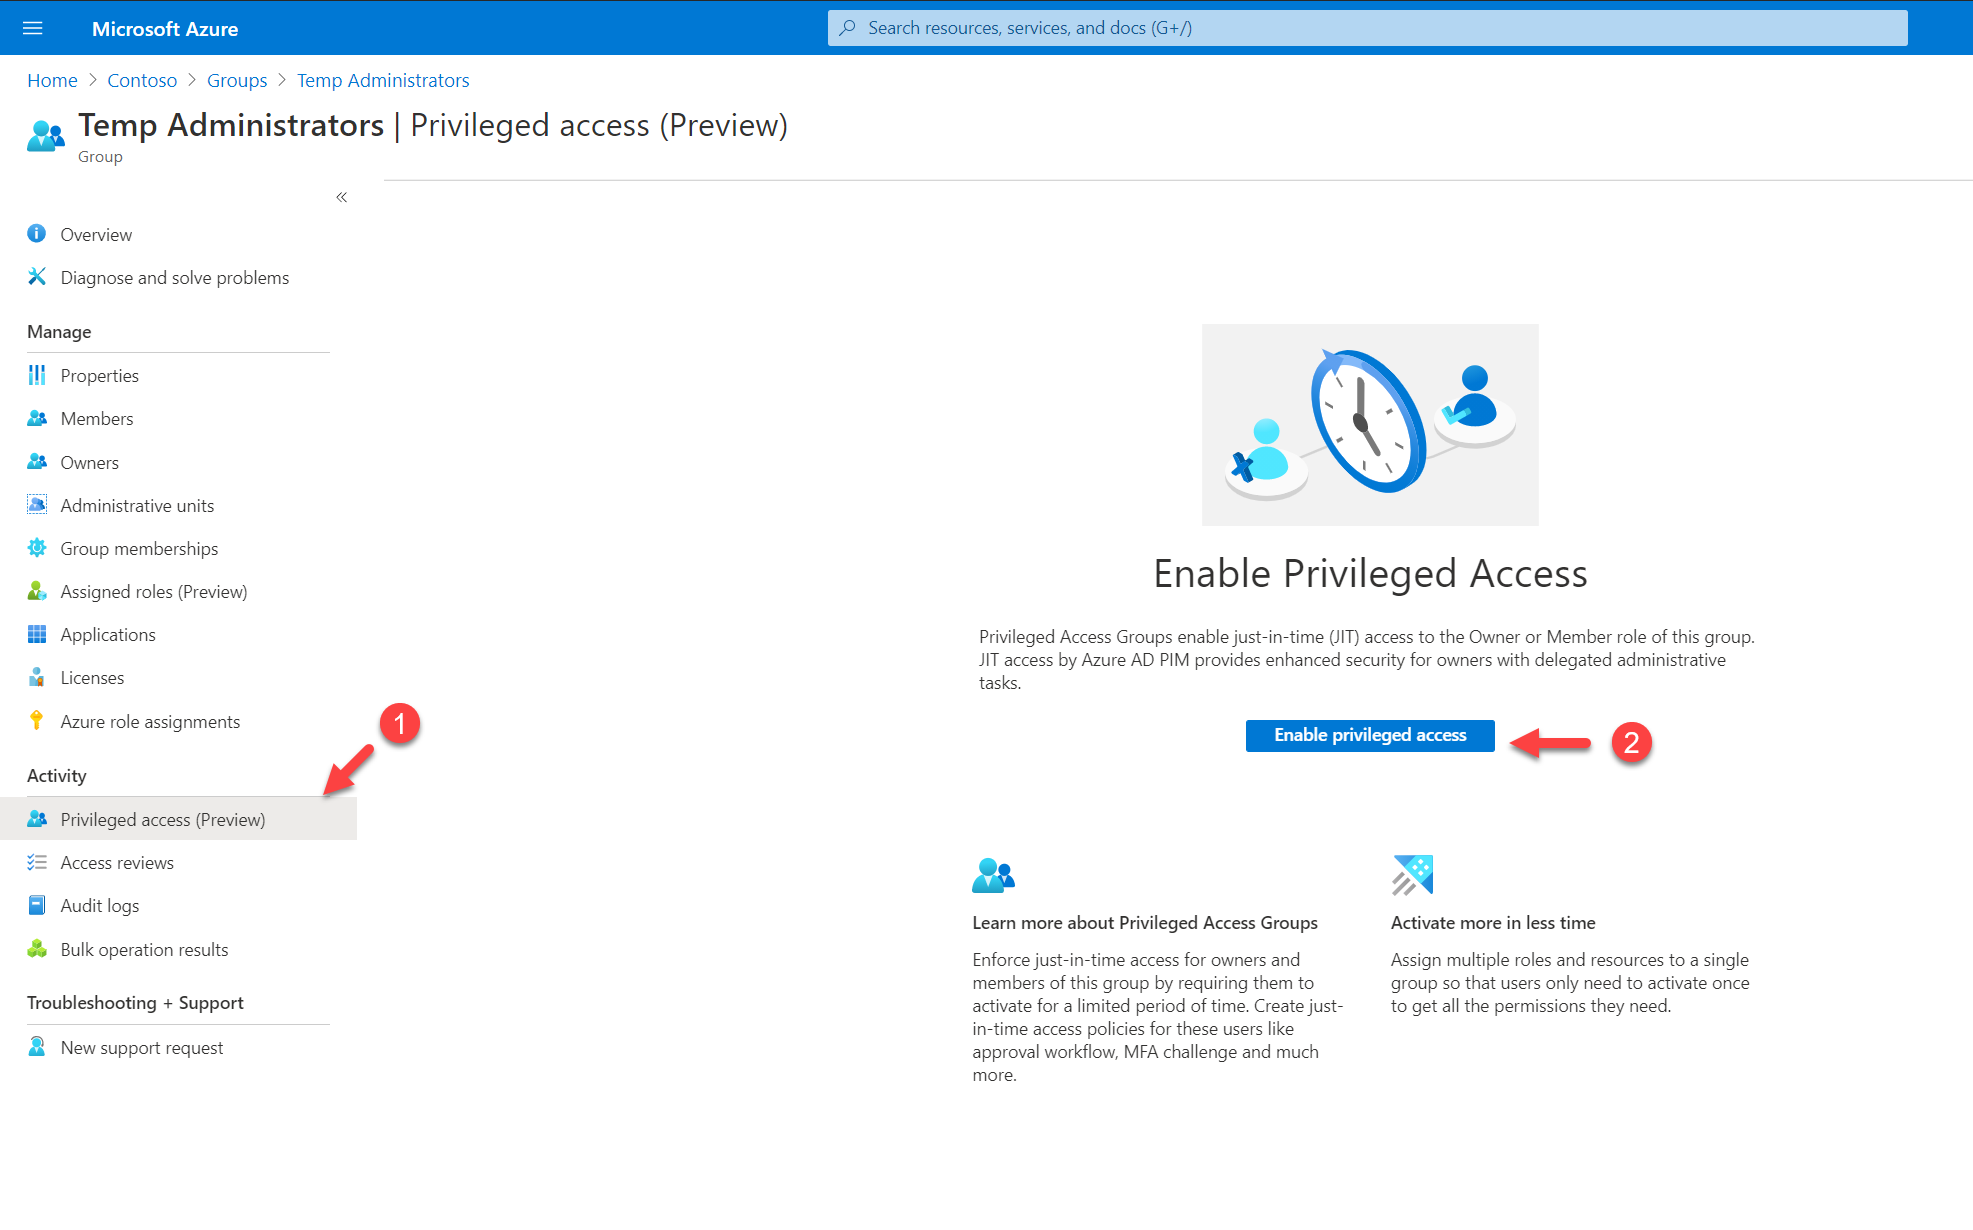
2. Then go to Groups and click on the group we created in the previous section. On the group properties page, click on Privileged access (preview). Next, click on Enable privileged access button.
Configure role settings
Next, we need to configure the role settings of the group. To do that,
1. Log in to Azure Portal
2. Search for Azure AD Privileged Identity Management and click on it
3. Then click on Privileged access groups (Preview)
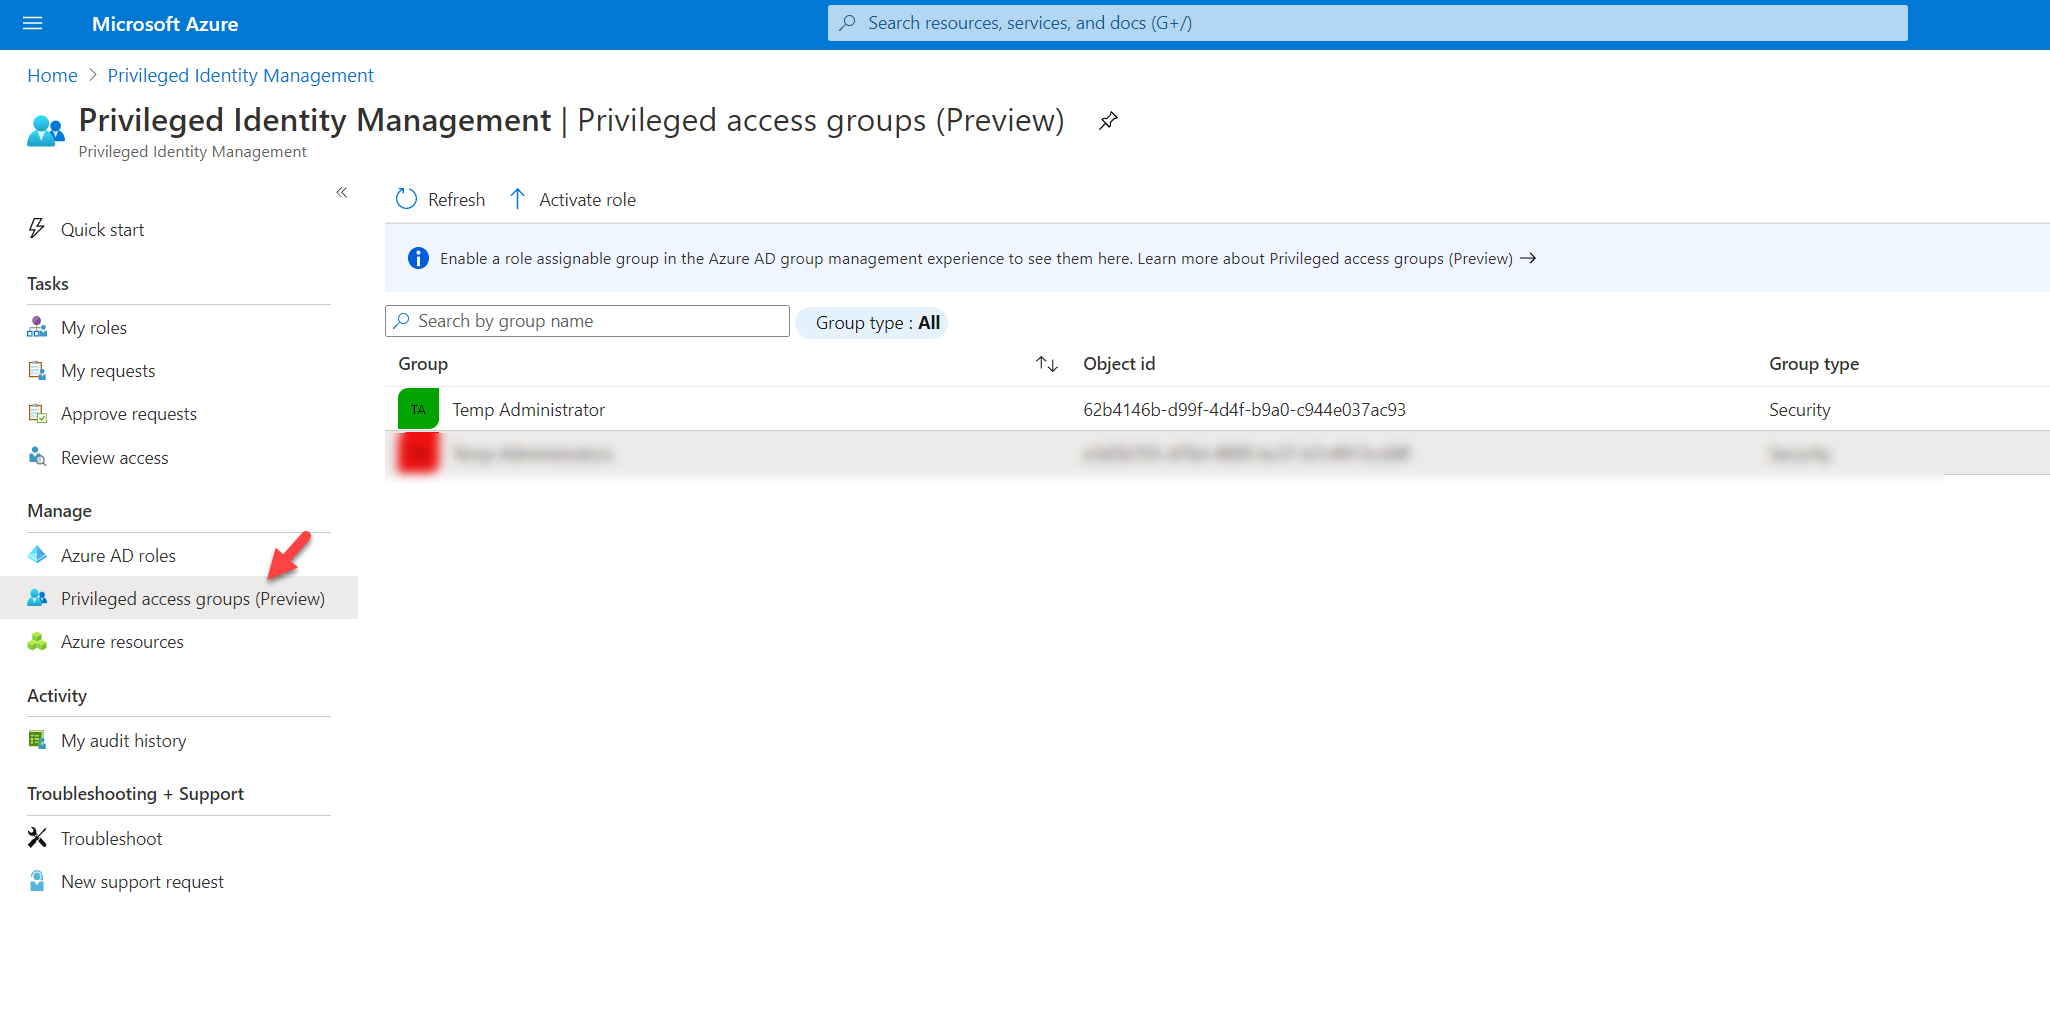
4. In there, we should be able to see the group we just created. Click on it.
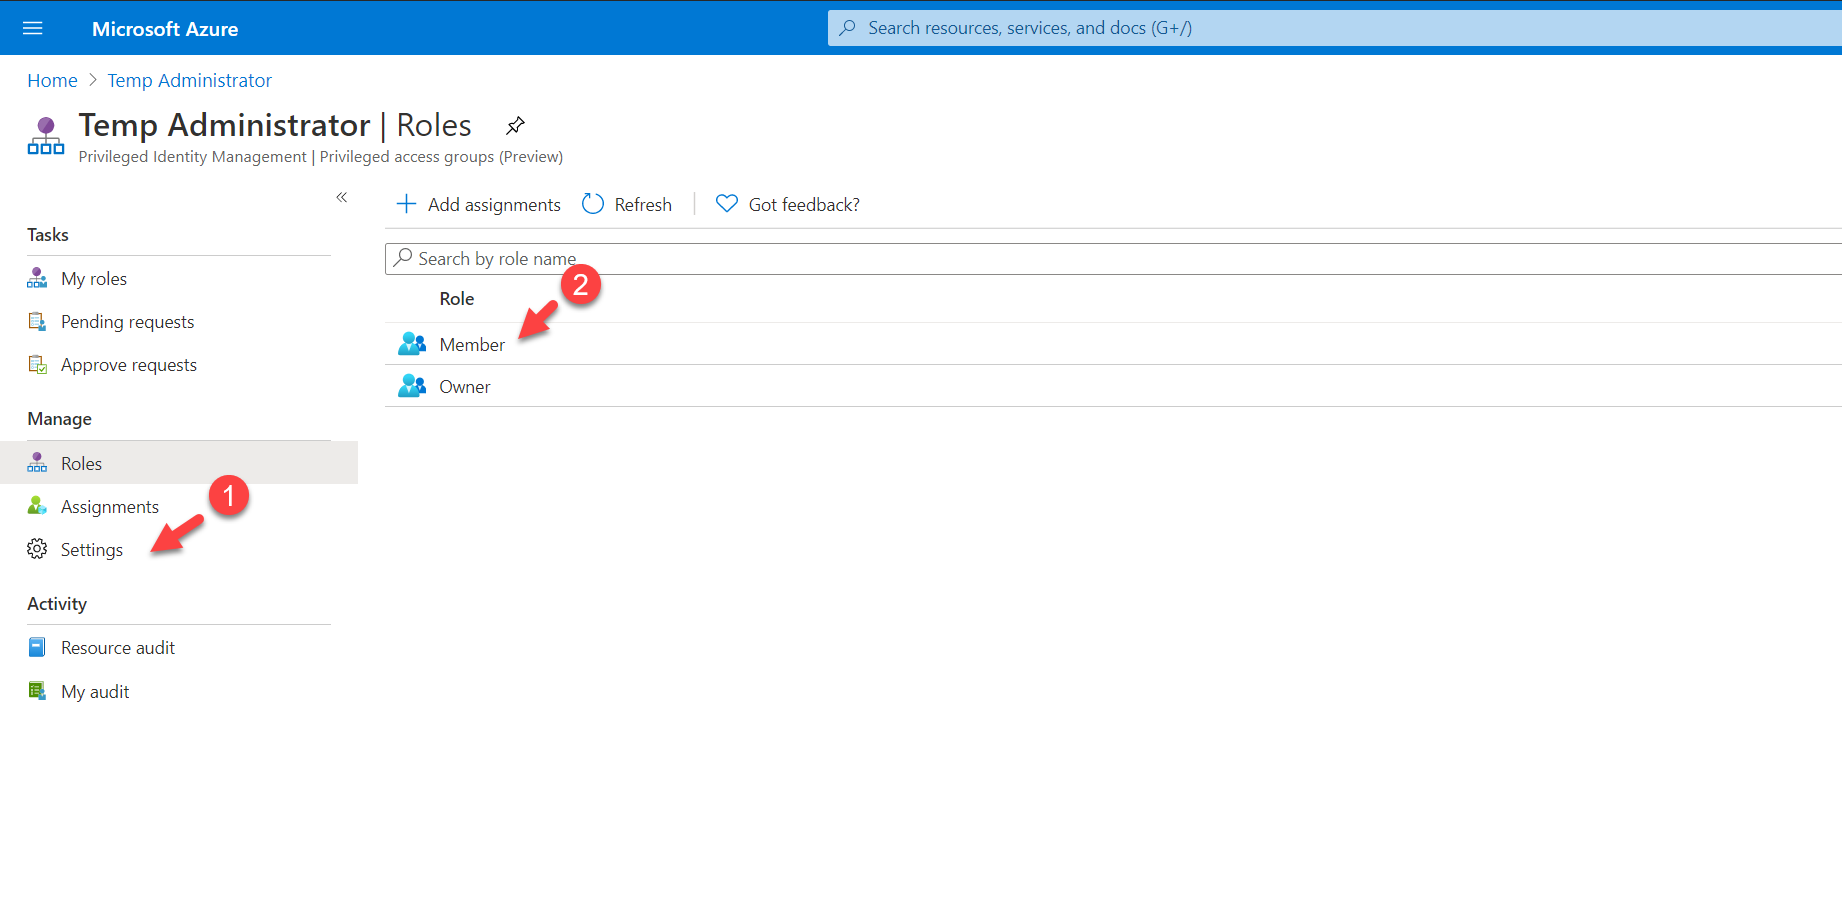
5. Then in the properties page, click on Settings | Member
6. Next, click on Edit
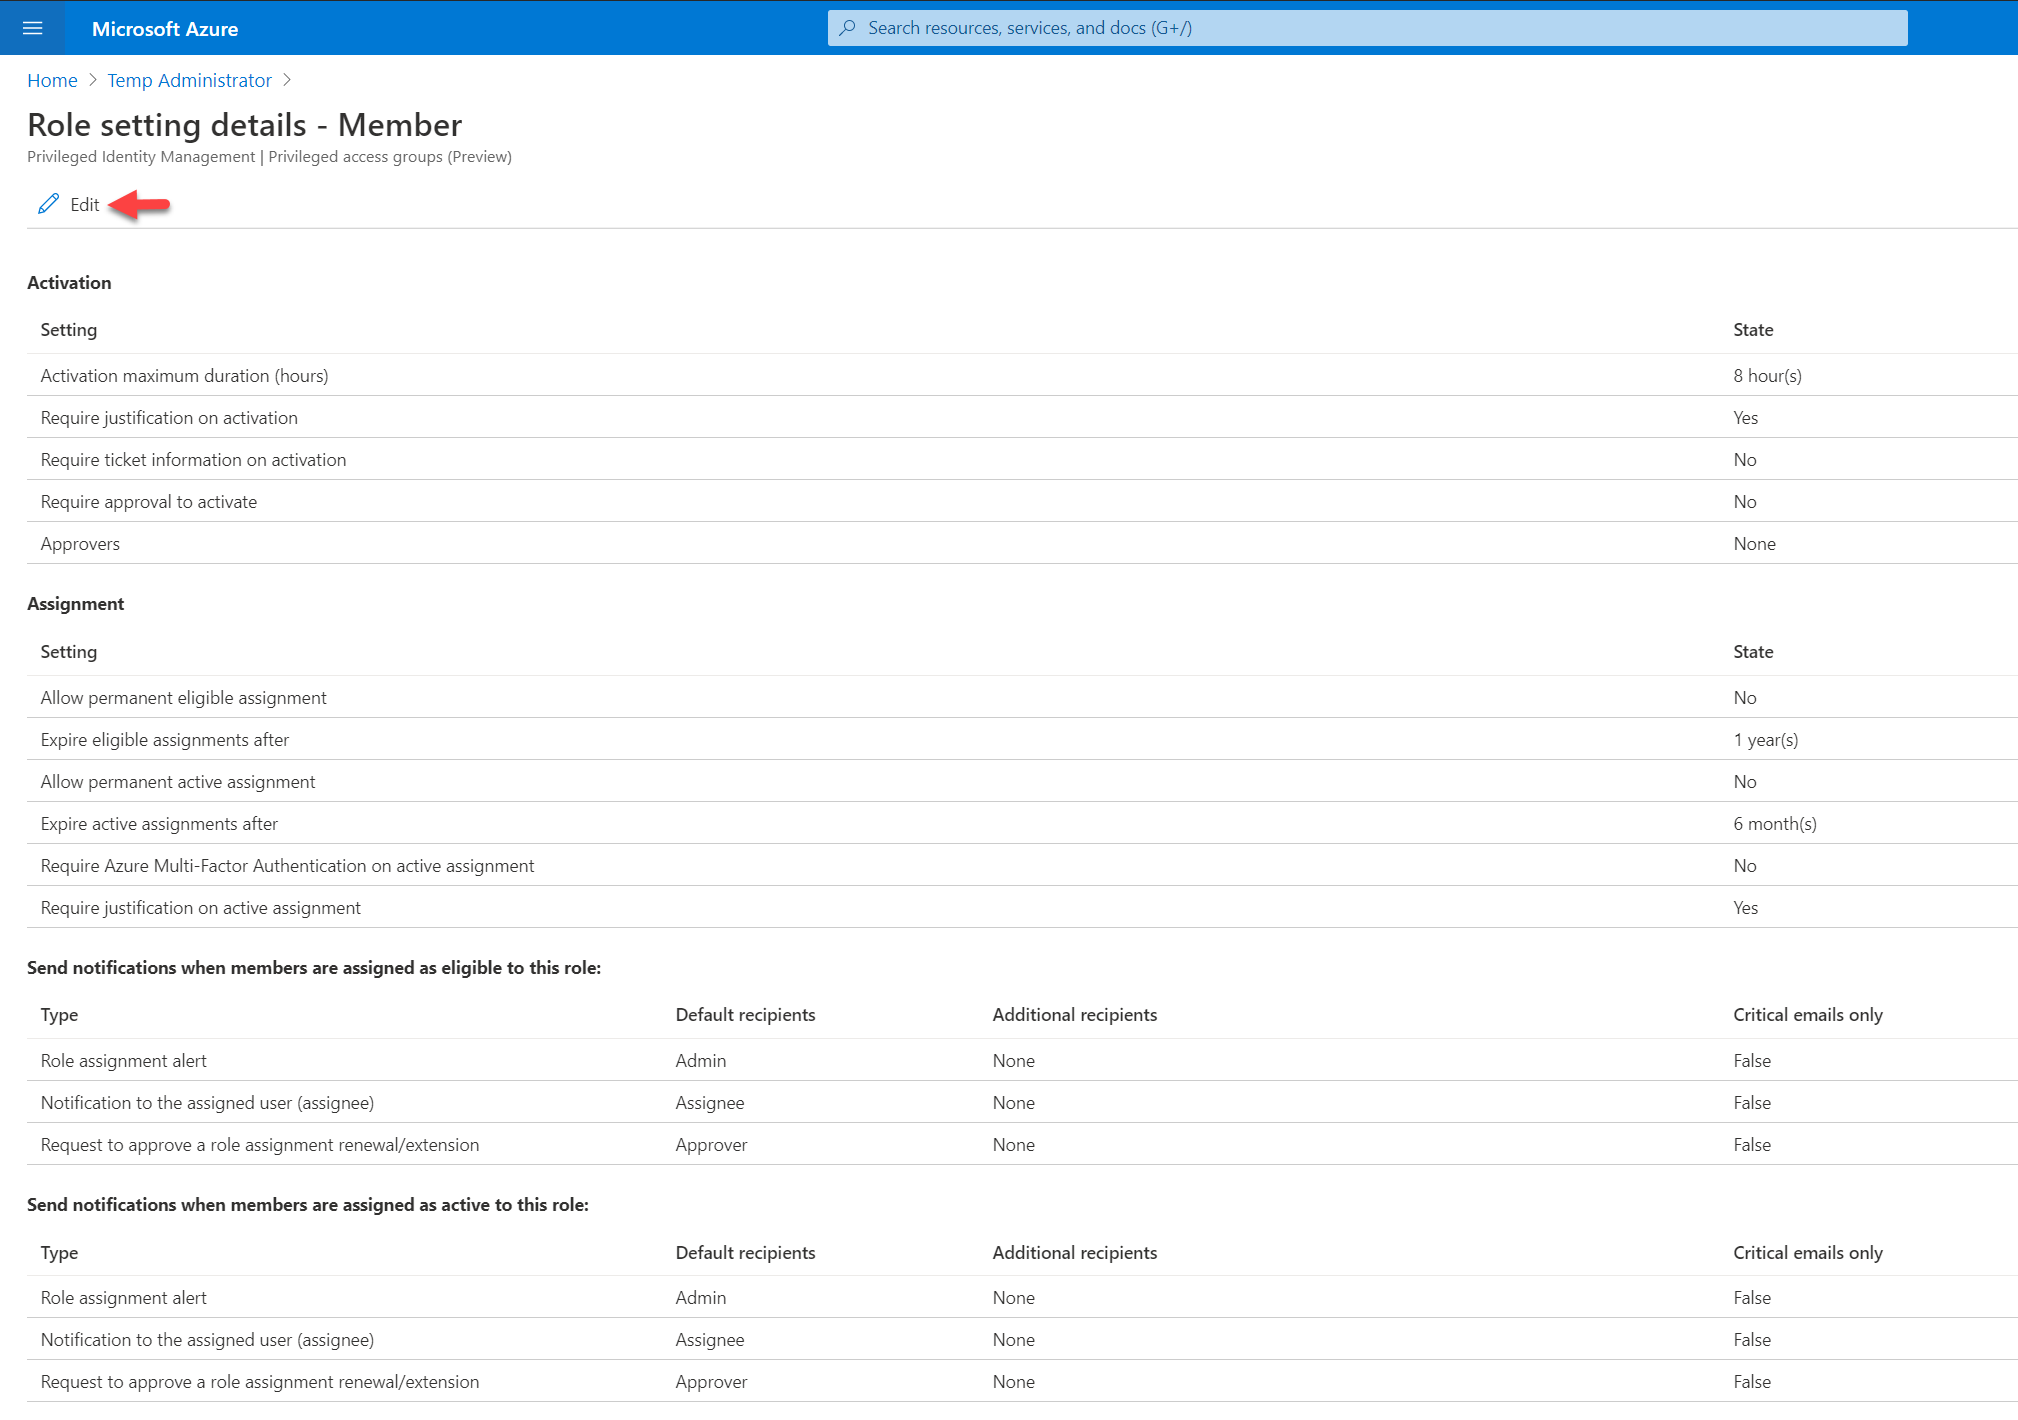
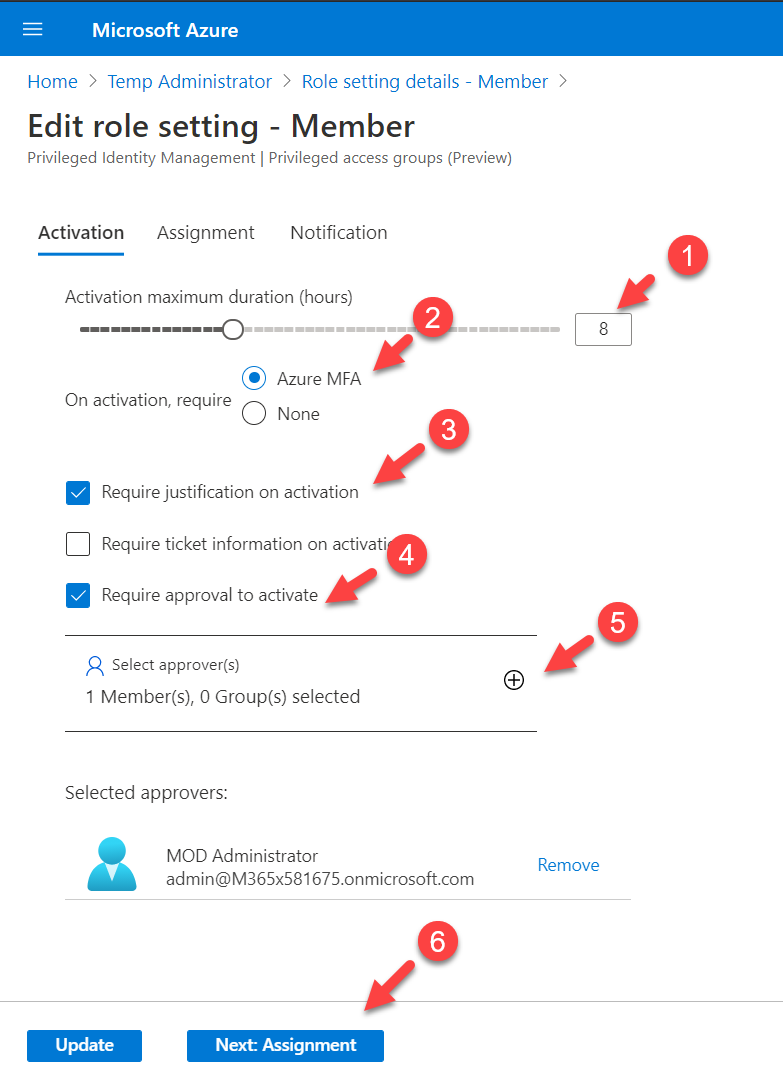
7. In there we can start changing settings for the role as per requirements. In this demo, I am going to keep Activation maximum duration (hours) to 8. On activation, I also want to verify Azure MFA. I also like the user to justify the request. Also, the request must be approved by an approver. Once the above settings are in place, I click on the select approvers option and define an approver. At the end, I click on Next: Assignment
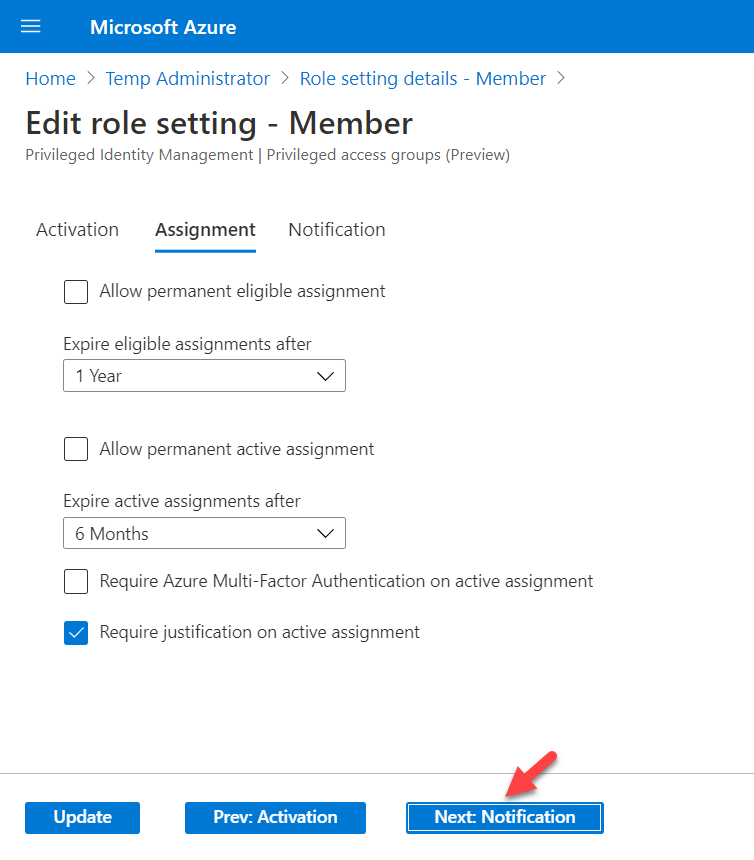
8. In the Assignment page, I will keep default settings and click on Next: Notifications
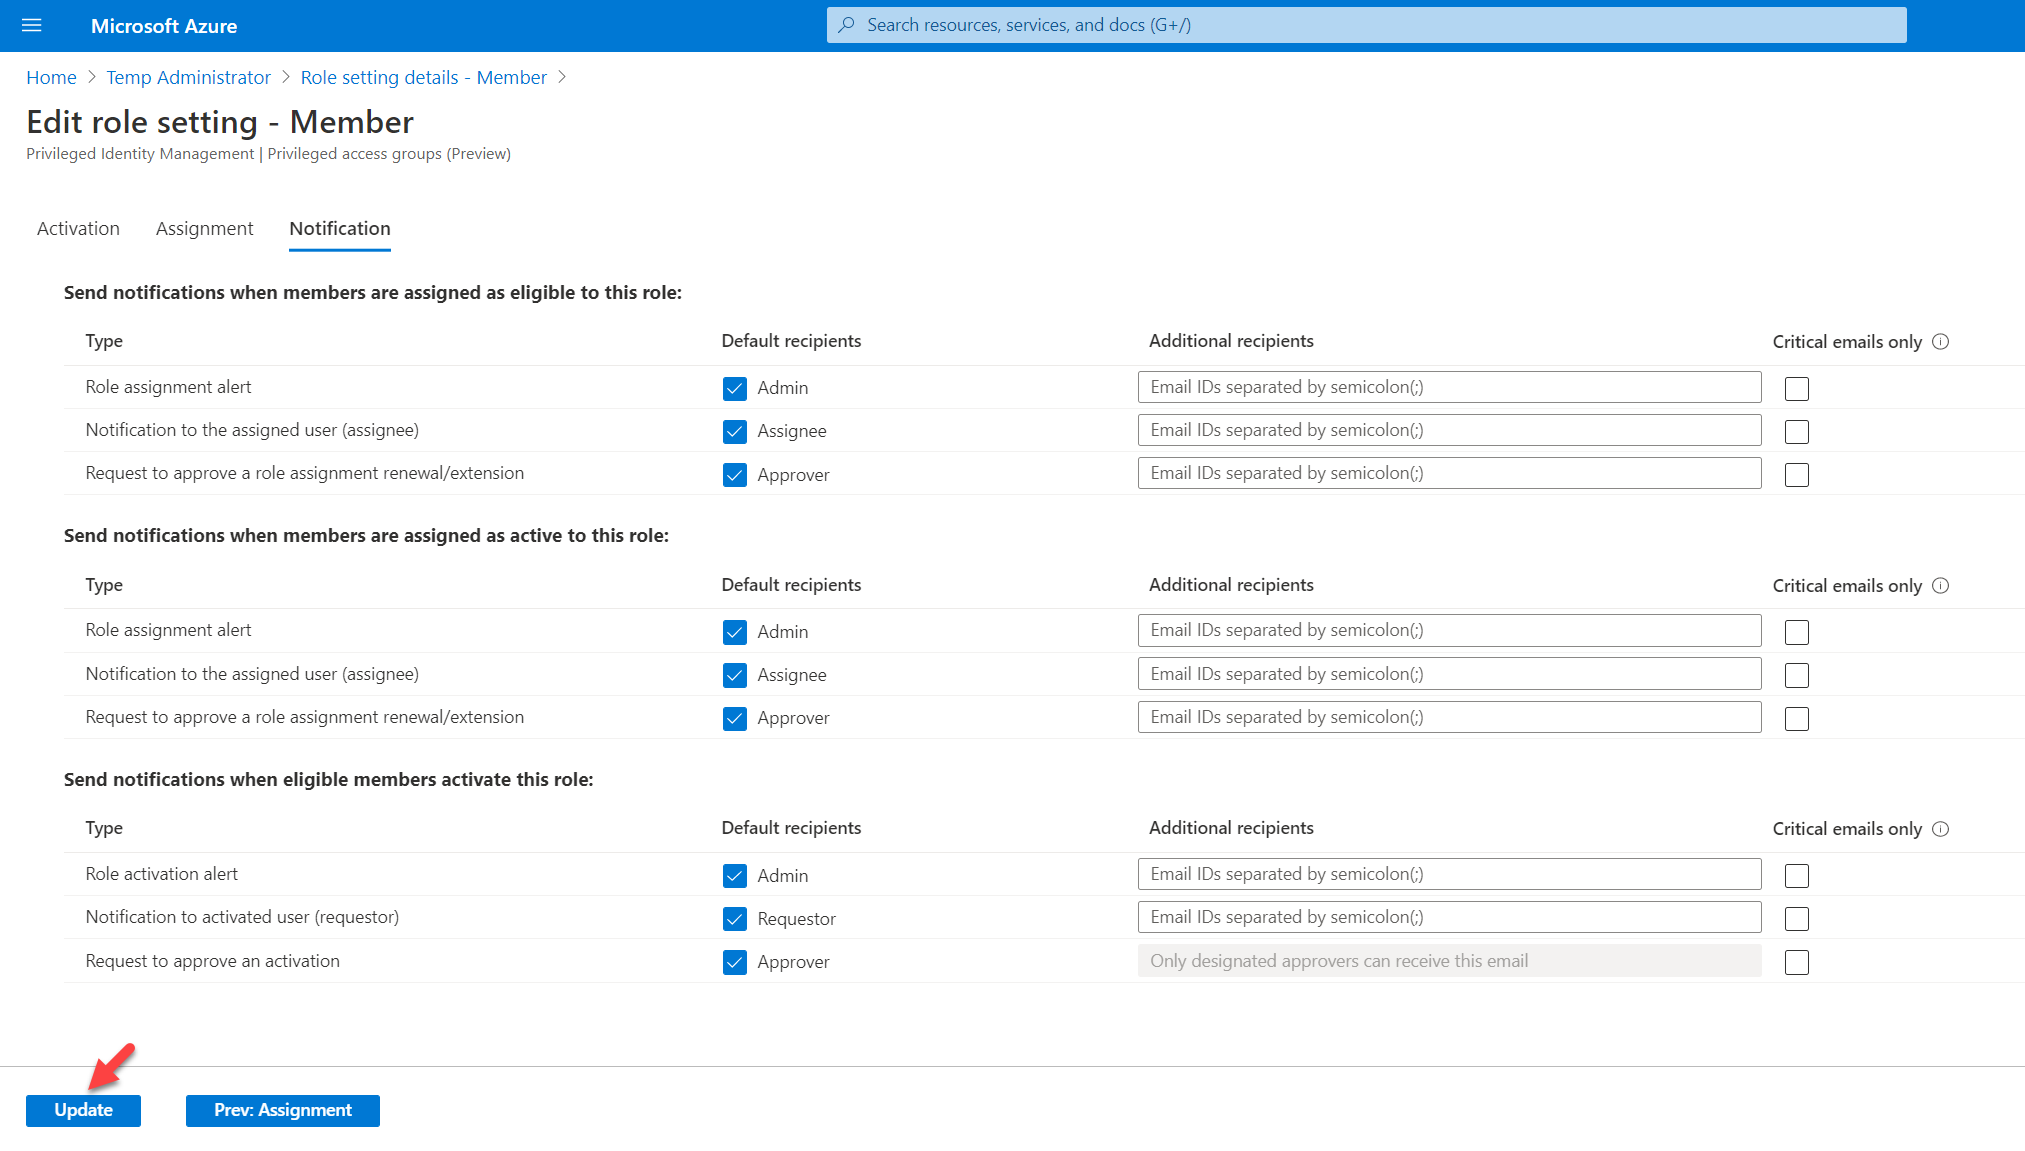
9. In the notification page, we can define who will be notified of different actions. For this demo, I am going to keep the default settings and click on Update to apply the changes.
Make user eligible for the membership
As the next step, we need to decide who is going to be eligible for the group membership. In my demo environment, I have a user called Isaiah Langer and I am going to make him eligible for the group membership. To do that,
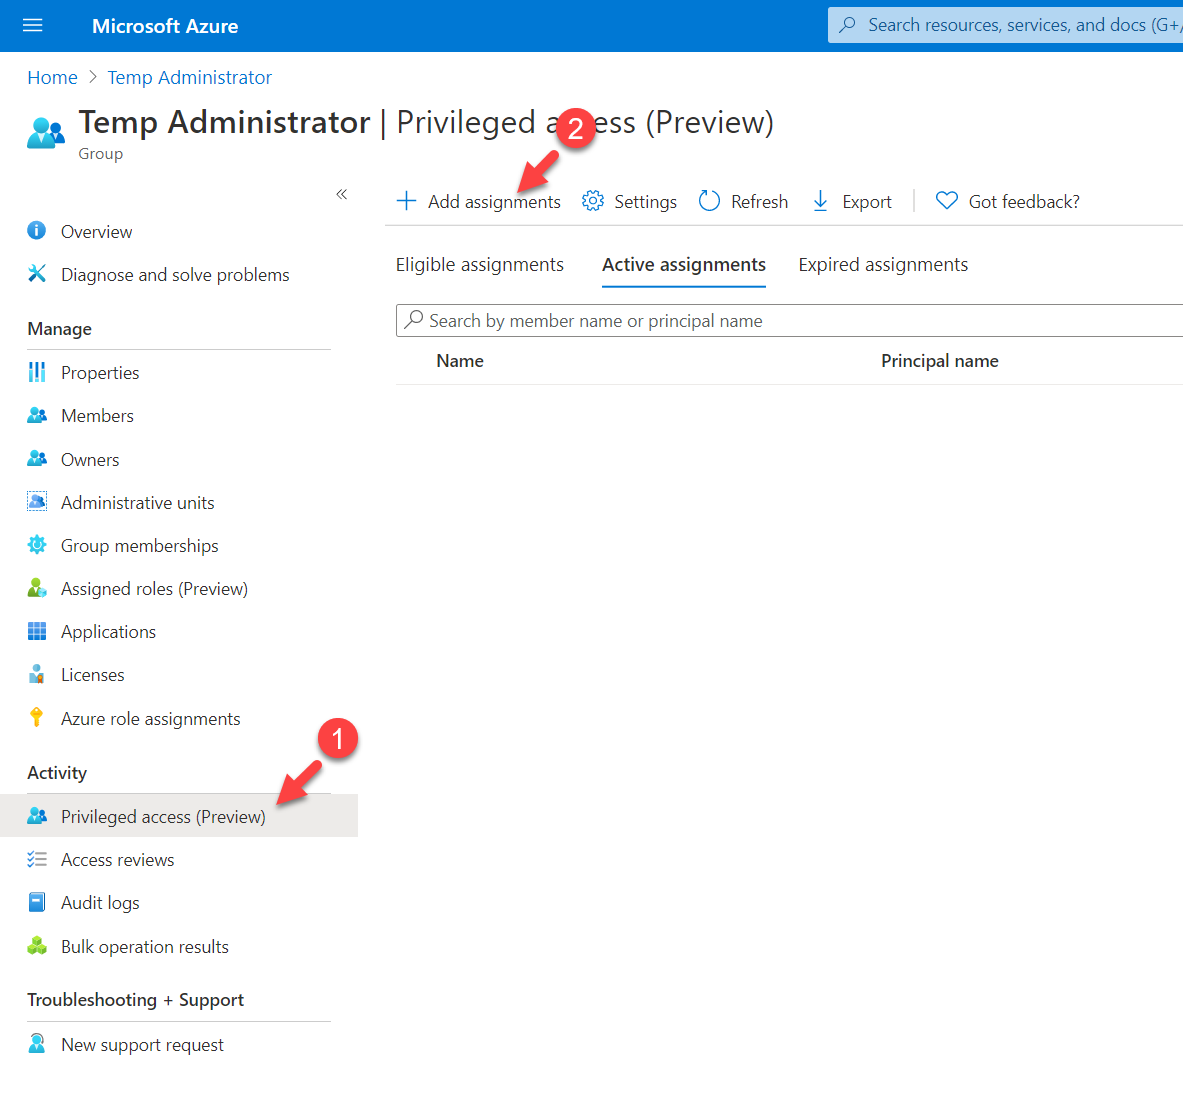
1. Go to the Azure AD group we previously created
2. Click on Privileged access (preview) | + Add assignments
3. On the next page select Member under the Select role option. Then click on the No member selected link under Select member(s) and select the eligible user(s). Once settings are in place click on Next.

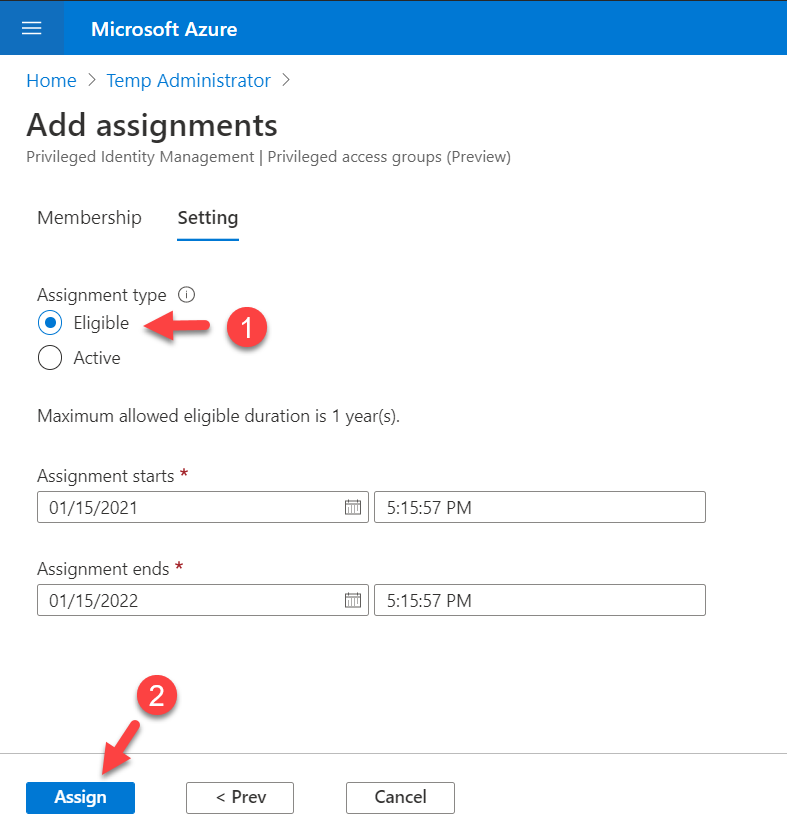
4. Then make the user eligible and click on Assign.
Assign Global Administrator role to the privileged group
The final step of the configuration is to assign Global Administrator role to the group we created by using Azure AD PIM. To do that,
1. Log in to Azure Portal
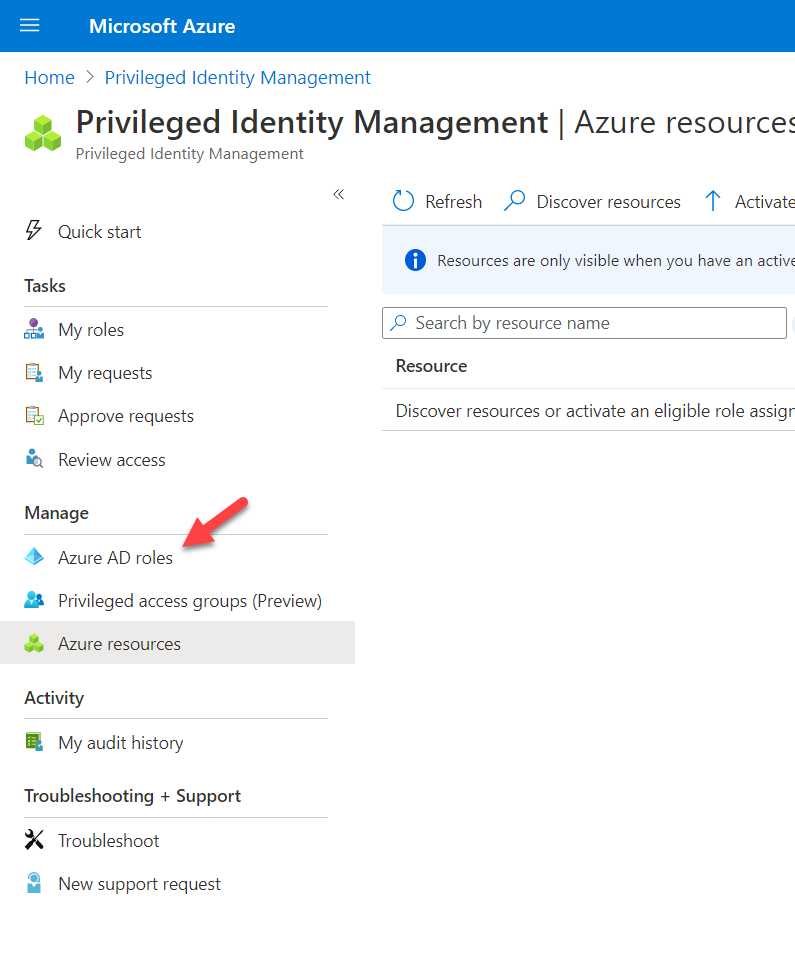
2. Search for Azure AD Privileged Identity Management and click on it
3. Then click on Azure AD roles
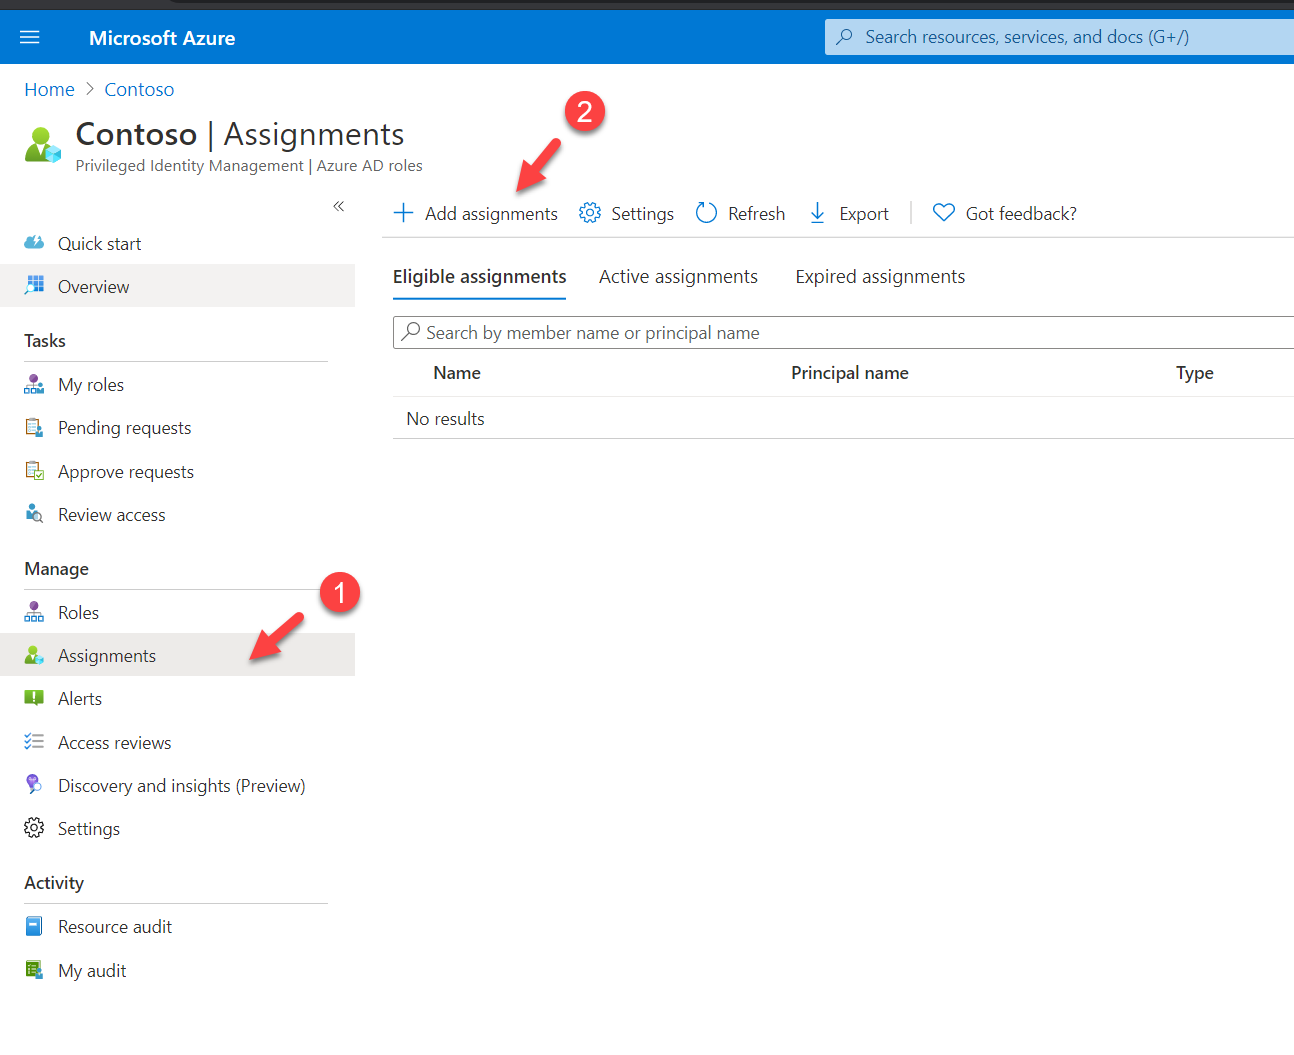
4. In the next page click on Assignments | + Add assignment
5. Then, select Global Administrators under the Select role. Then assign “Temp Administrators” group to the members and click on Next.
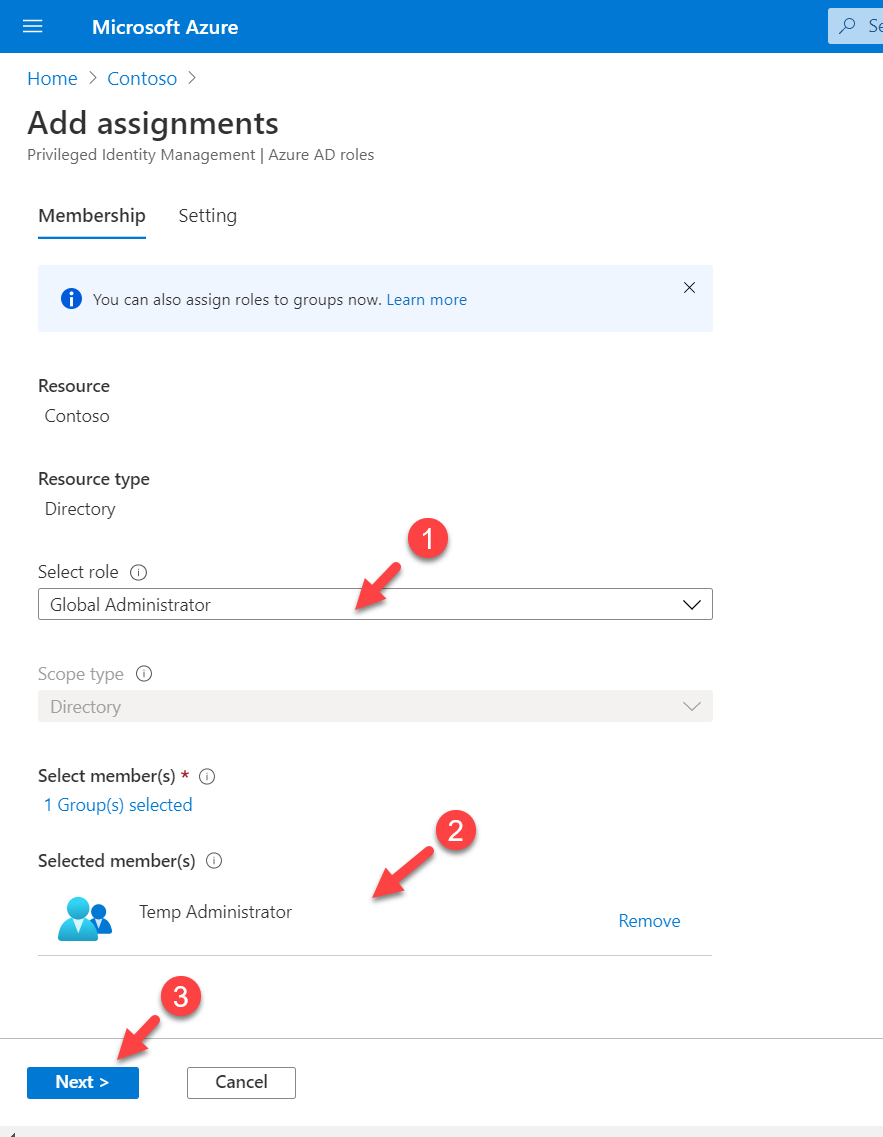
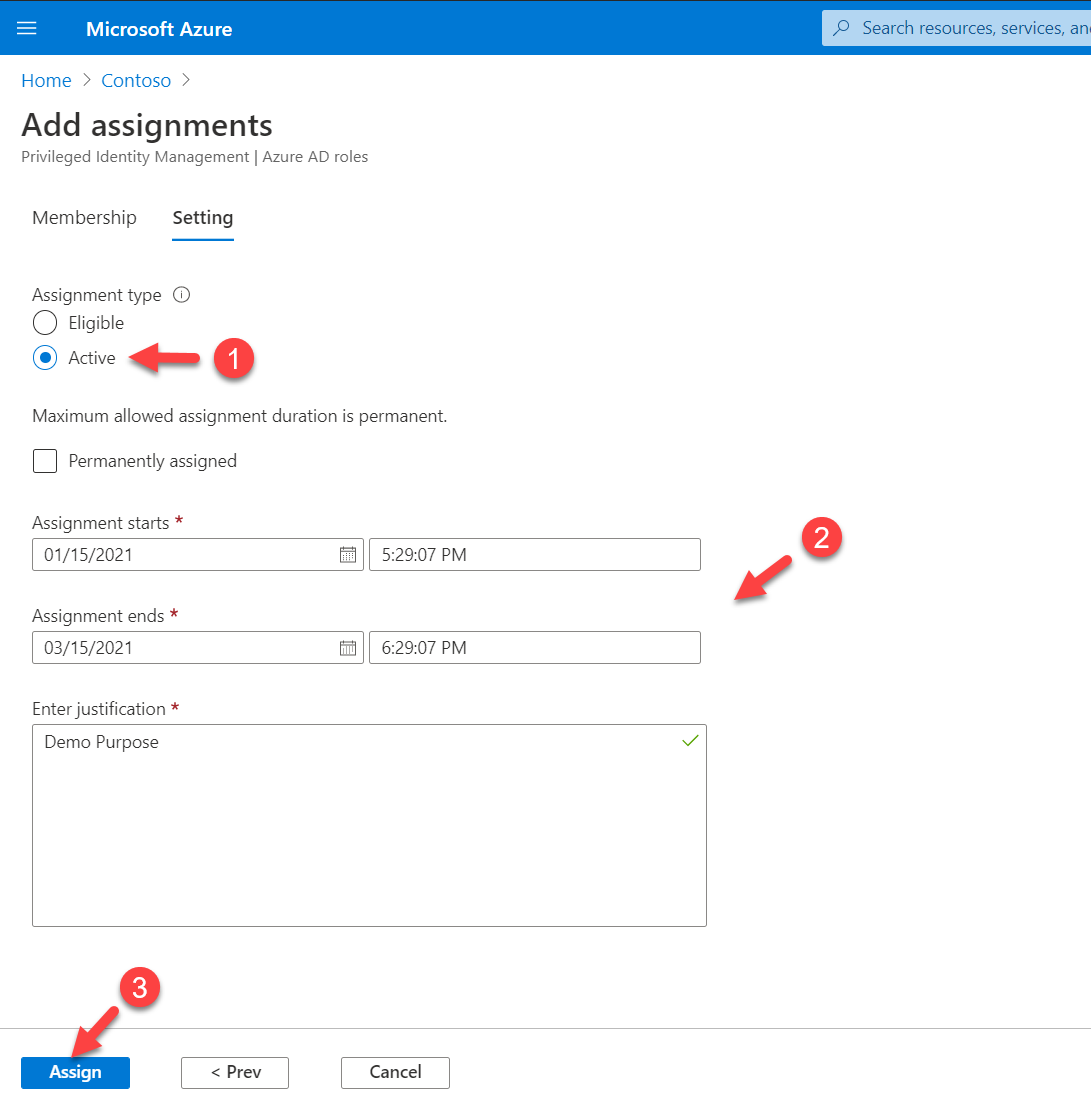
6. On the next page, select Active under assignment type. Then select the assignment start date and assignment end date. In this demo, I am setting it up for 3 months. Once settings are in place click on assign to complete the configuration process.
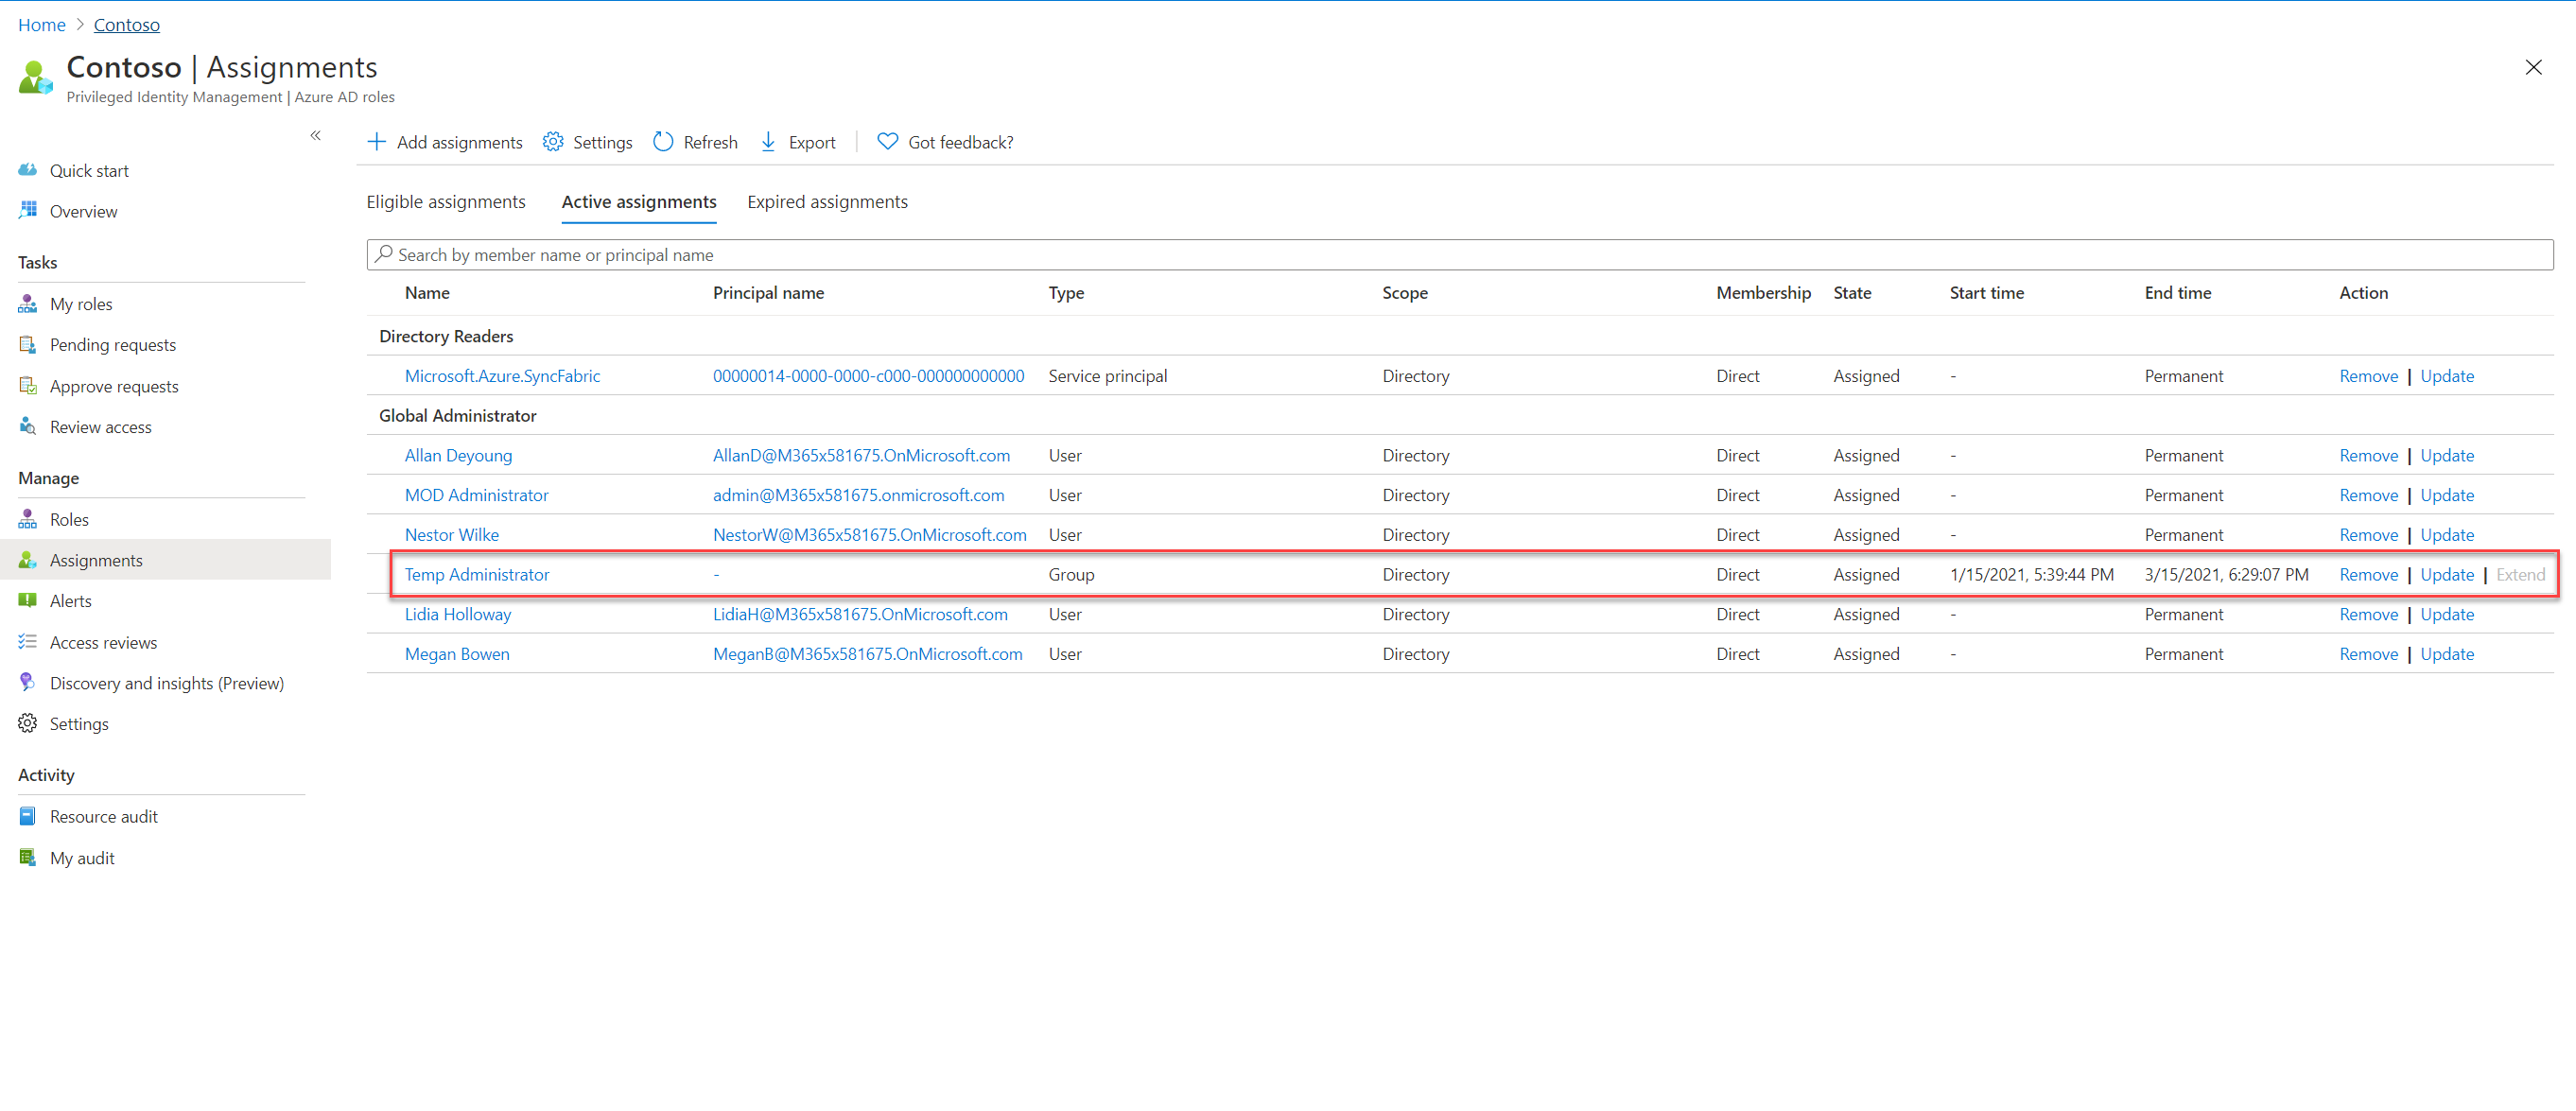
This completes the configuration process. The next phase is to do the testing.
Testing
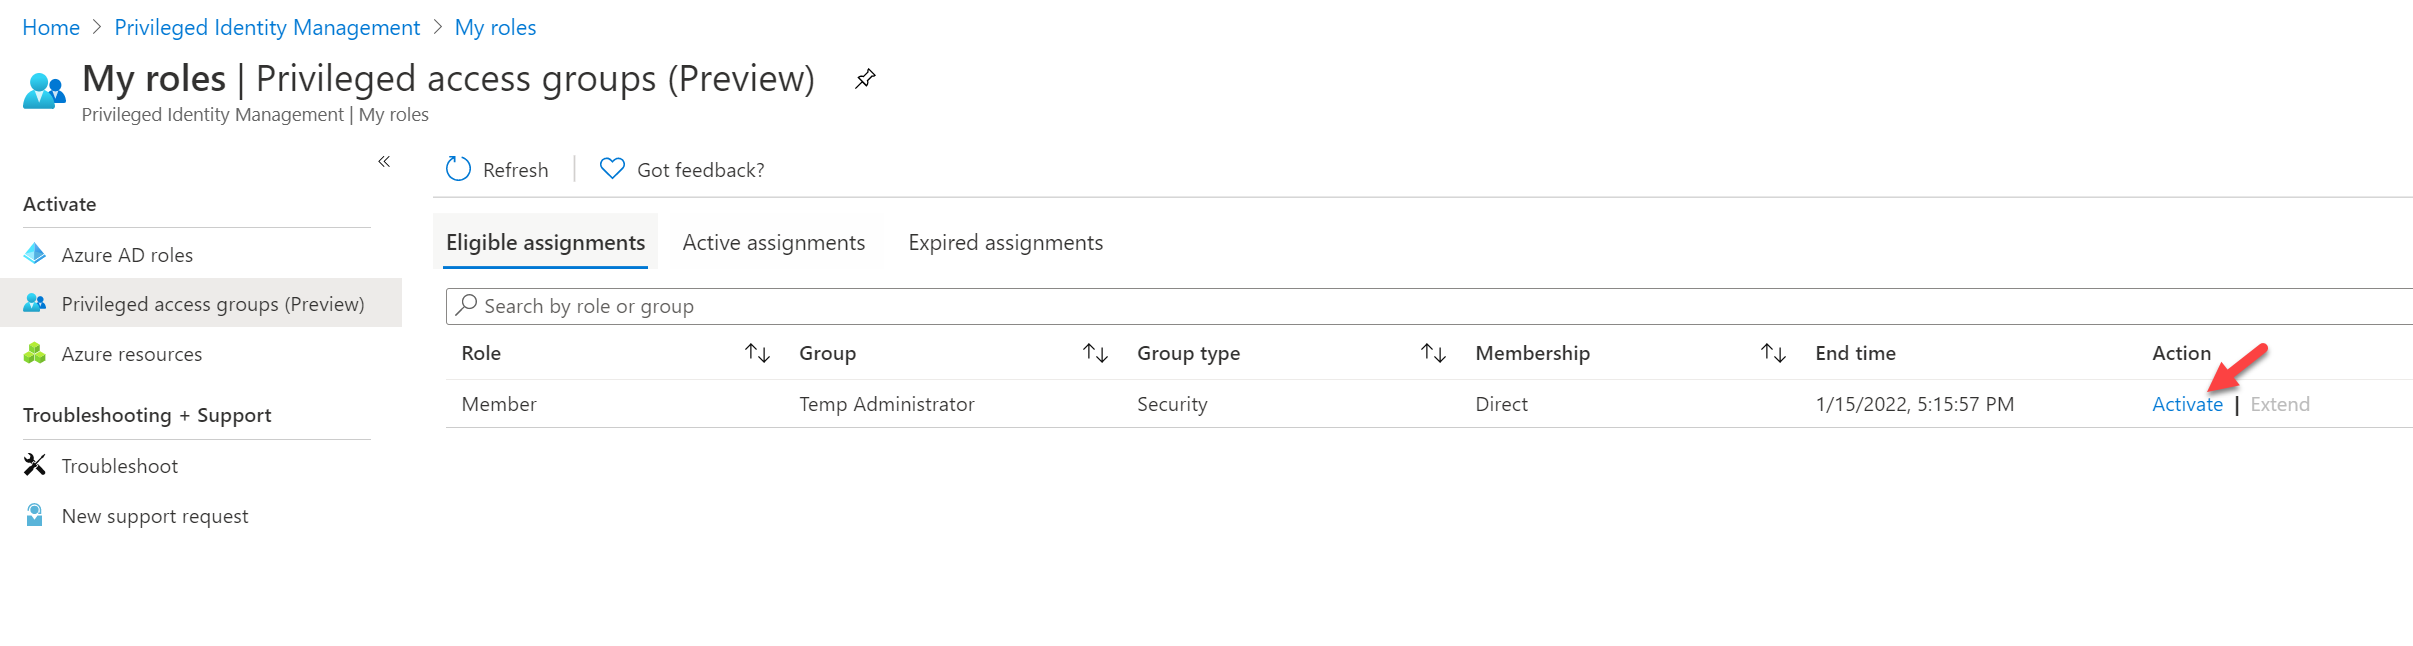
To test the configuration, I log in to the Azure portal as Isaiah Langer. Then I went to Azure AD Privileged Identity Management | My roles | Privileged access groups (Preview). In there we can see the eligible group membership.
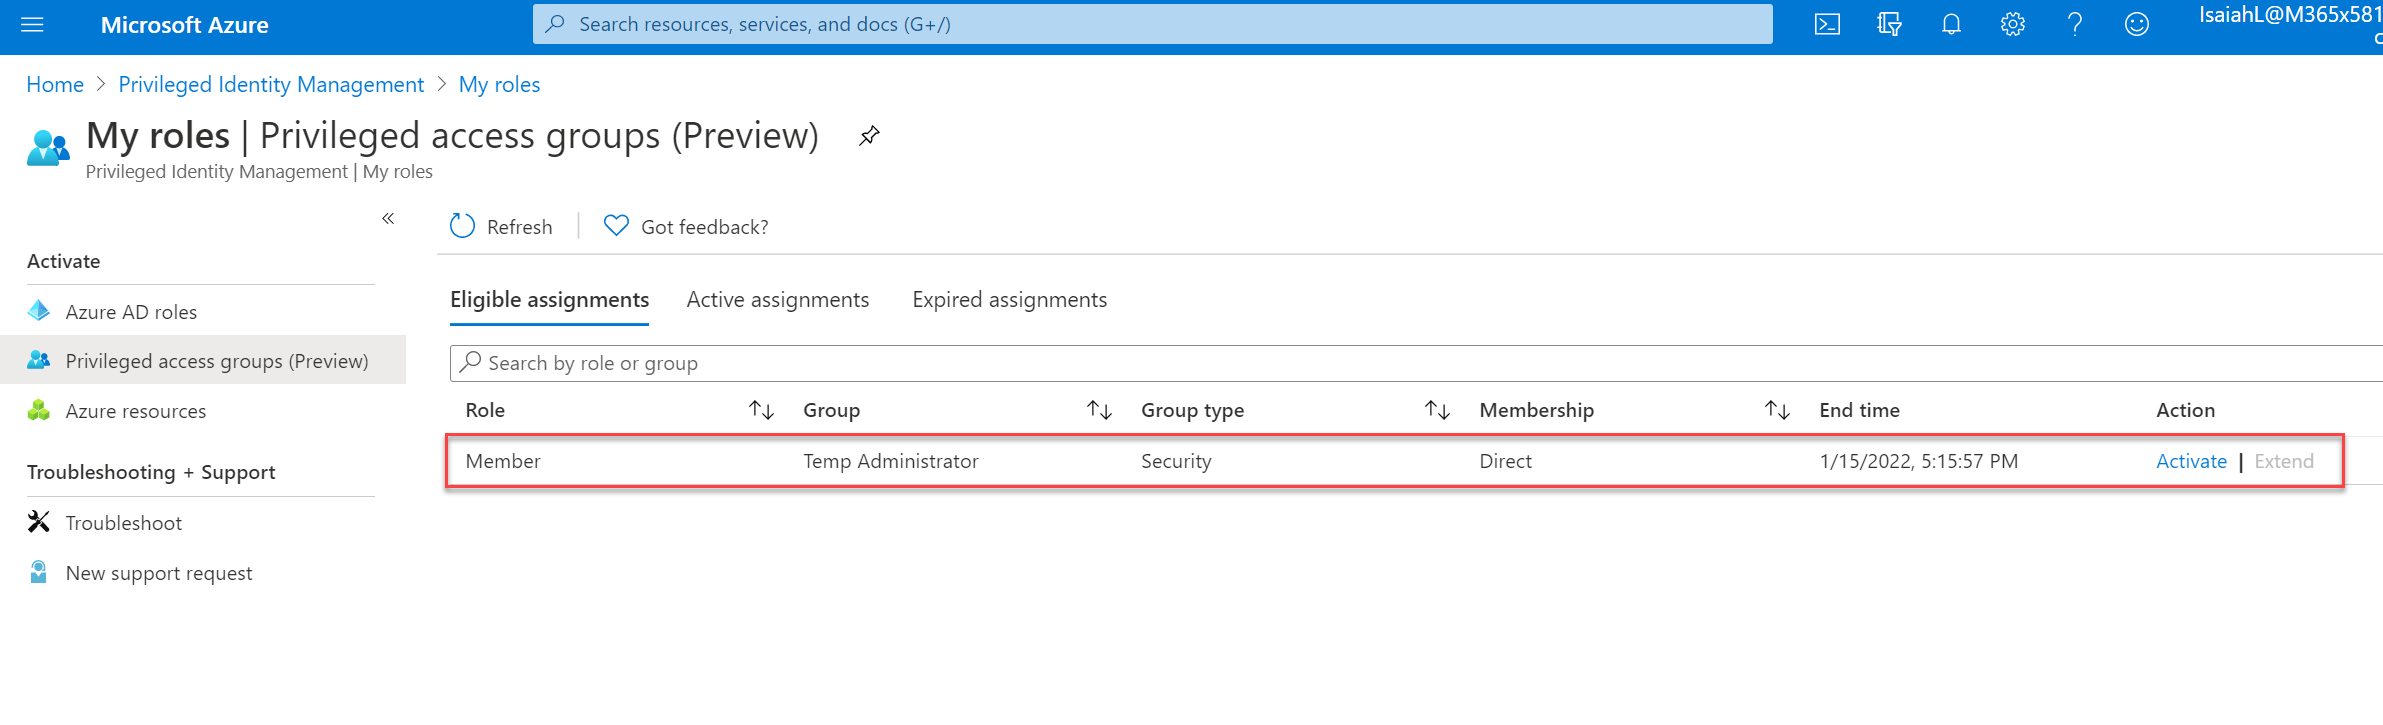
To proceed further with testing, click on Activate.
Then in the new window, I am requesting to activate membership for 2 hours. I also provide a reason as it is mandatory.
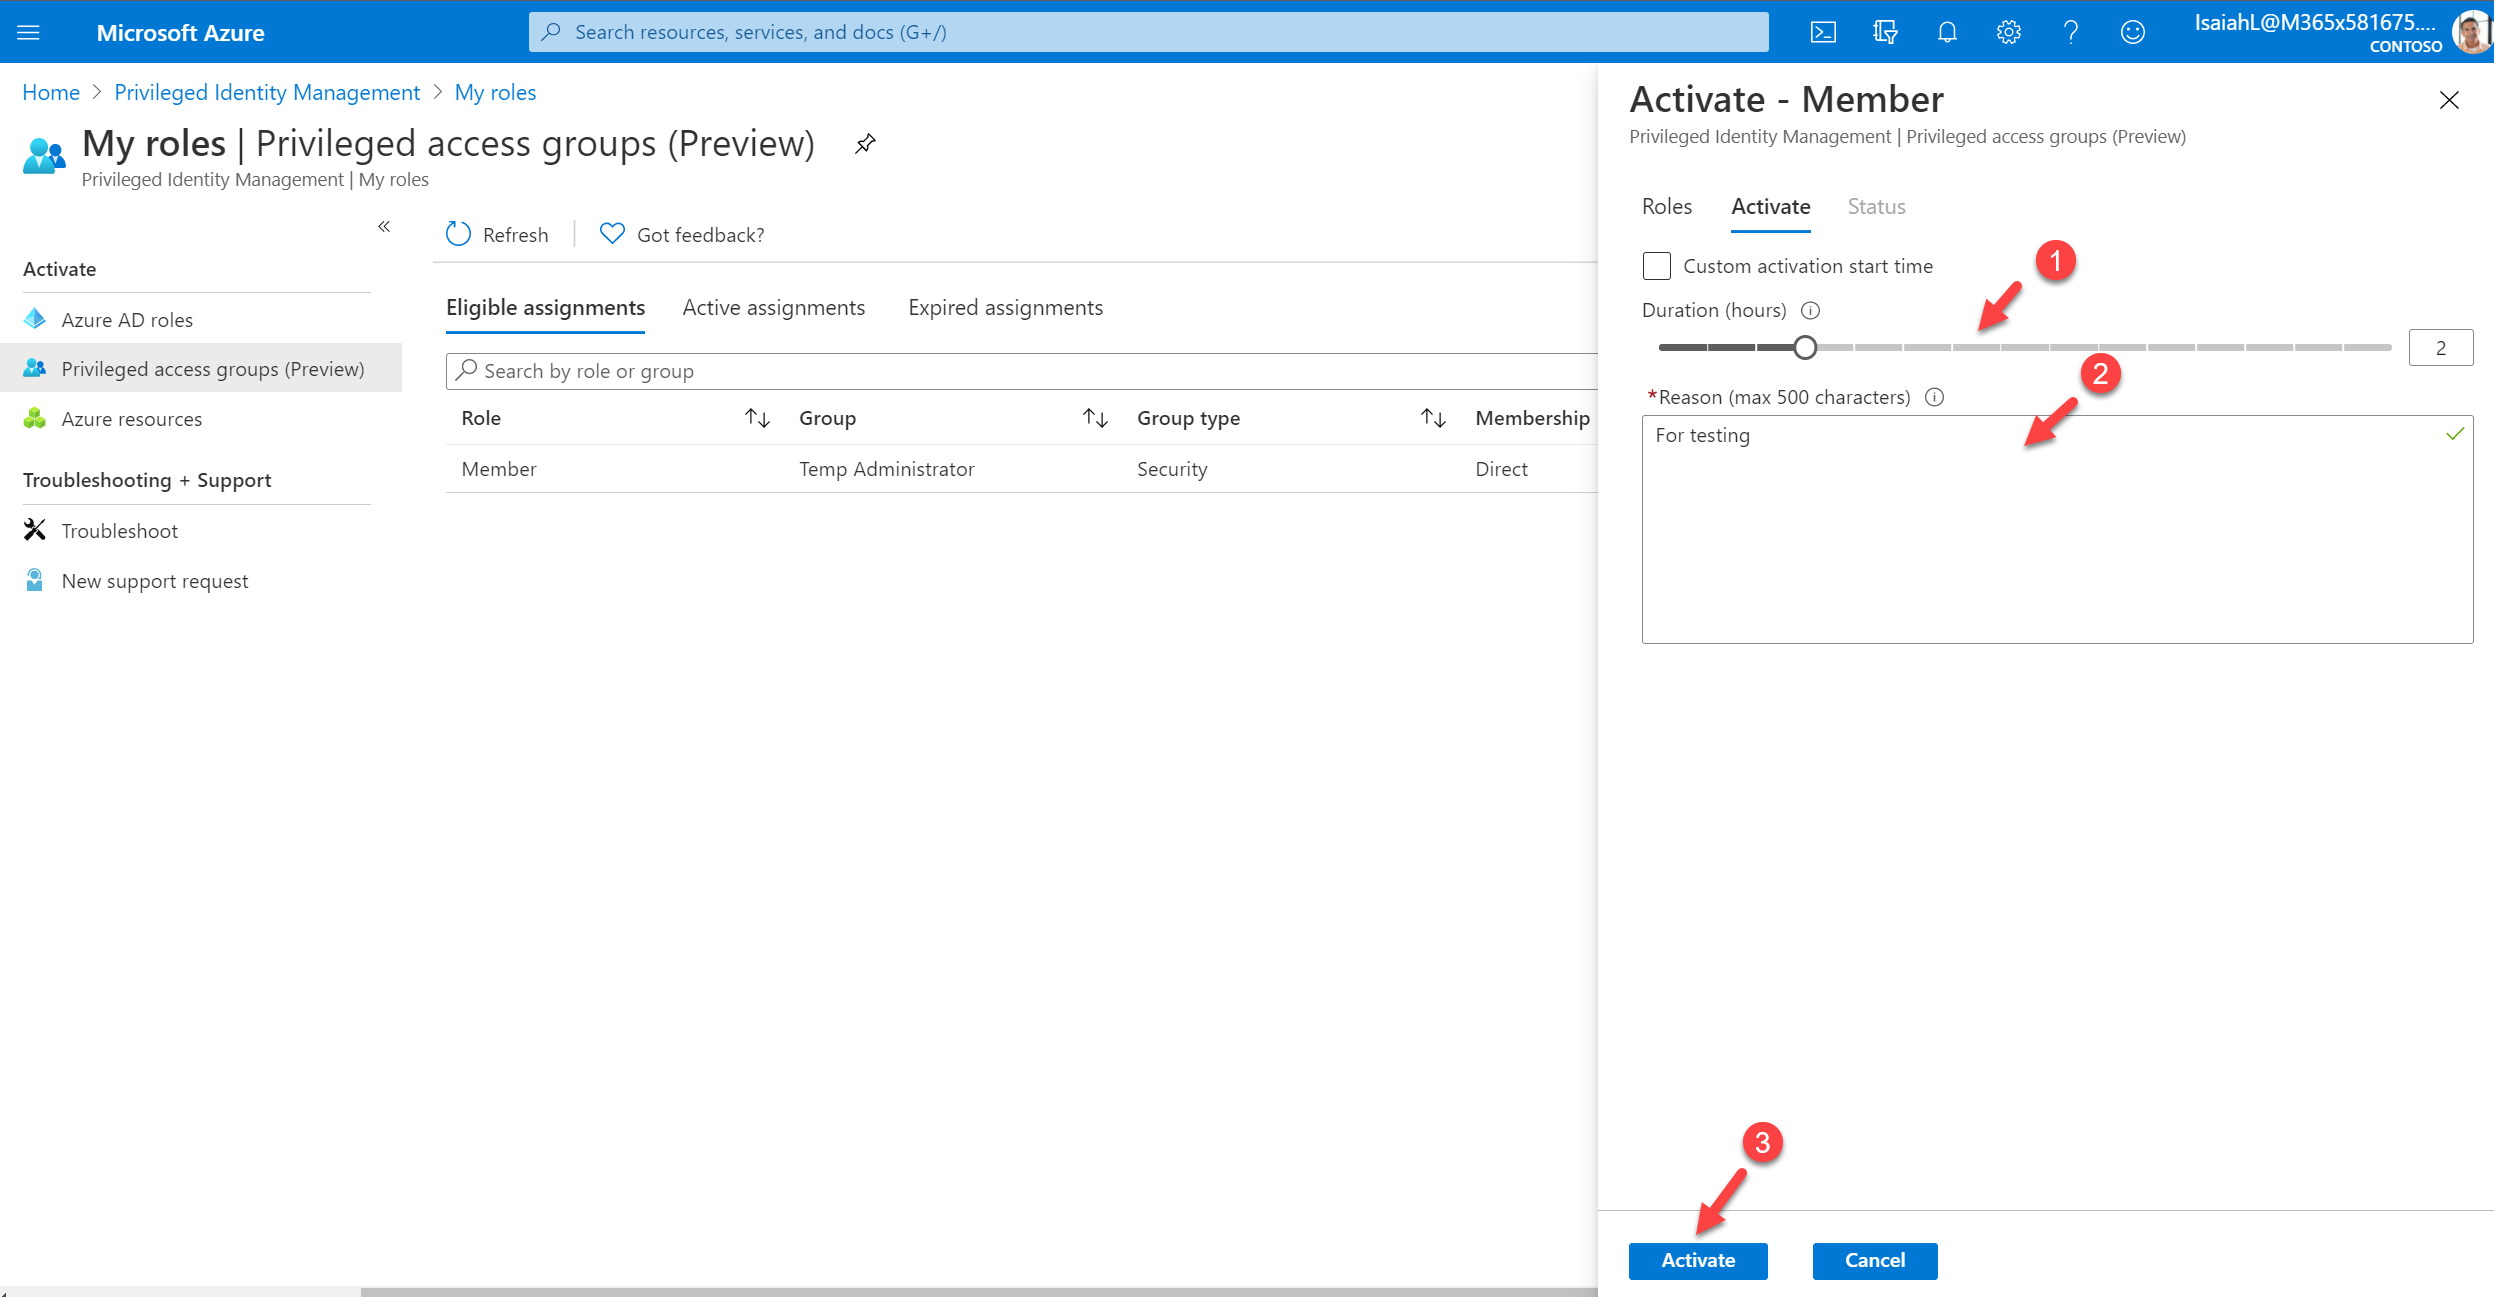
After I click on Activate, the approver received an email notification regarding the request.
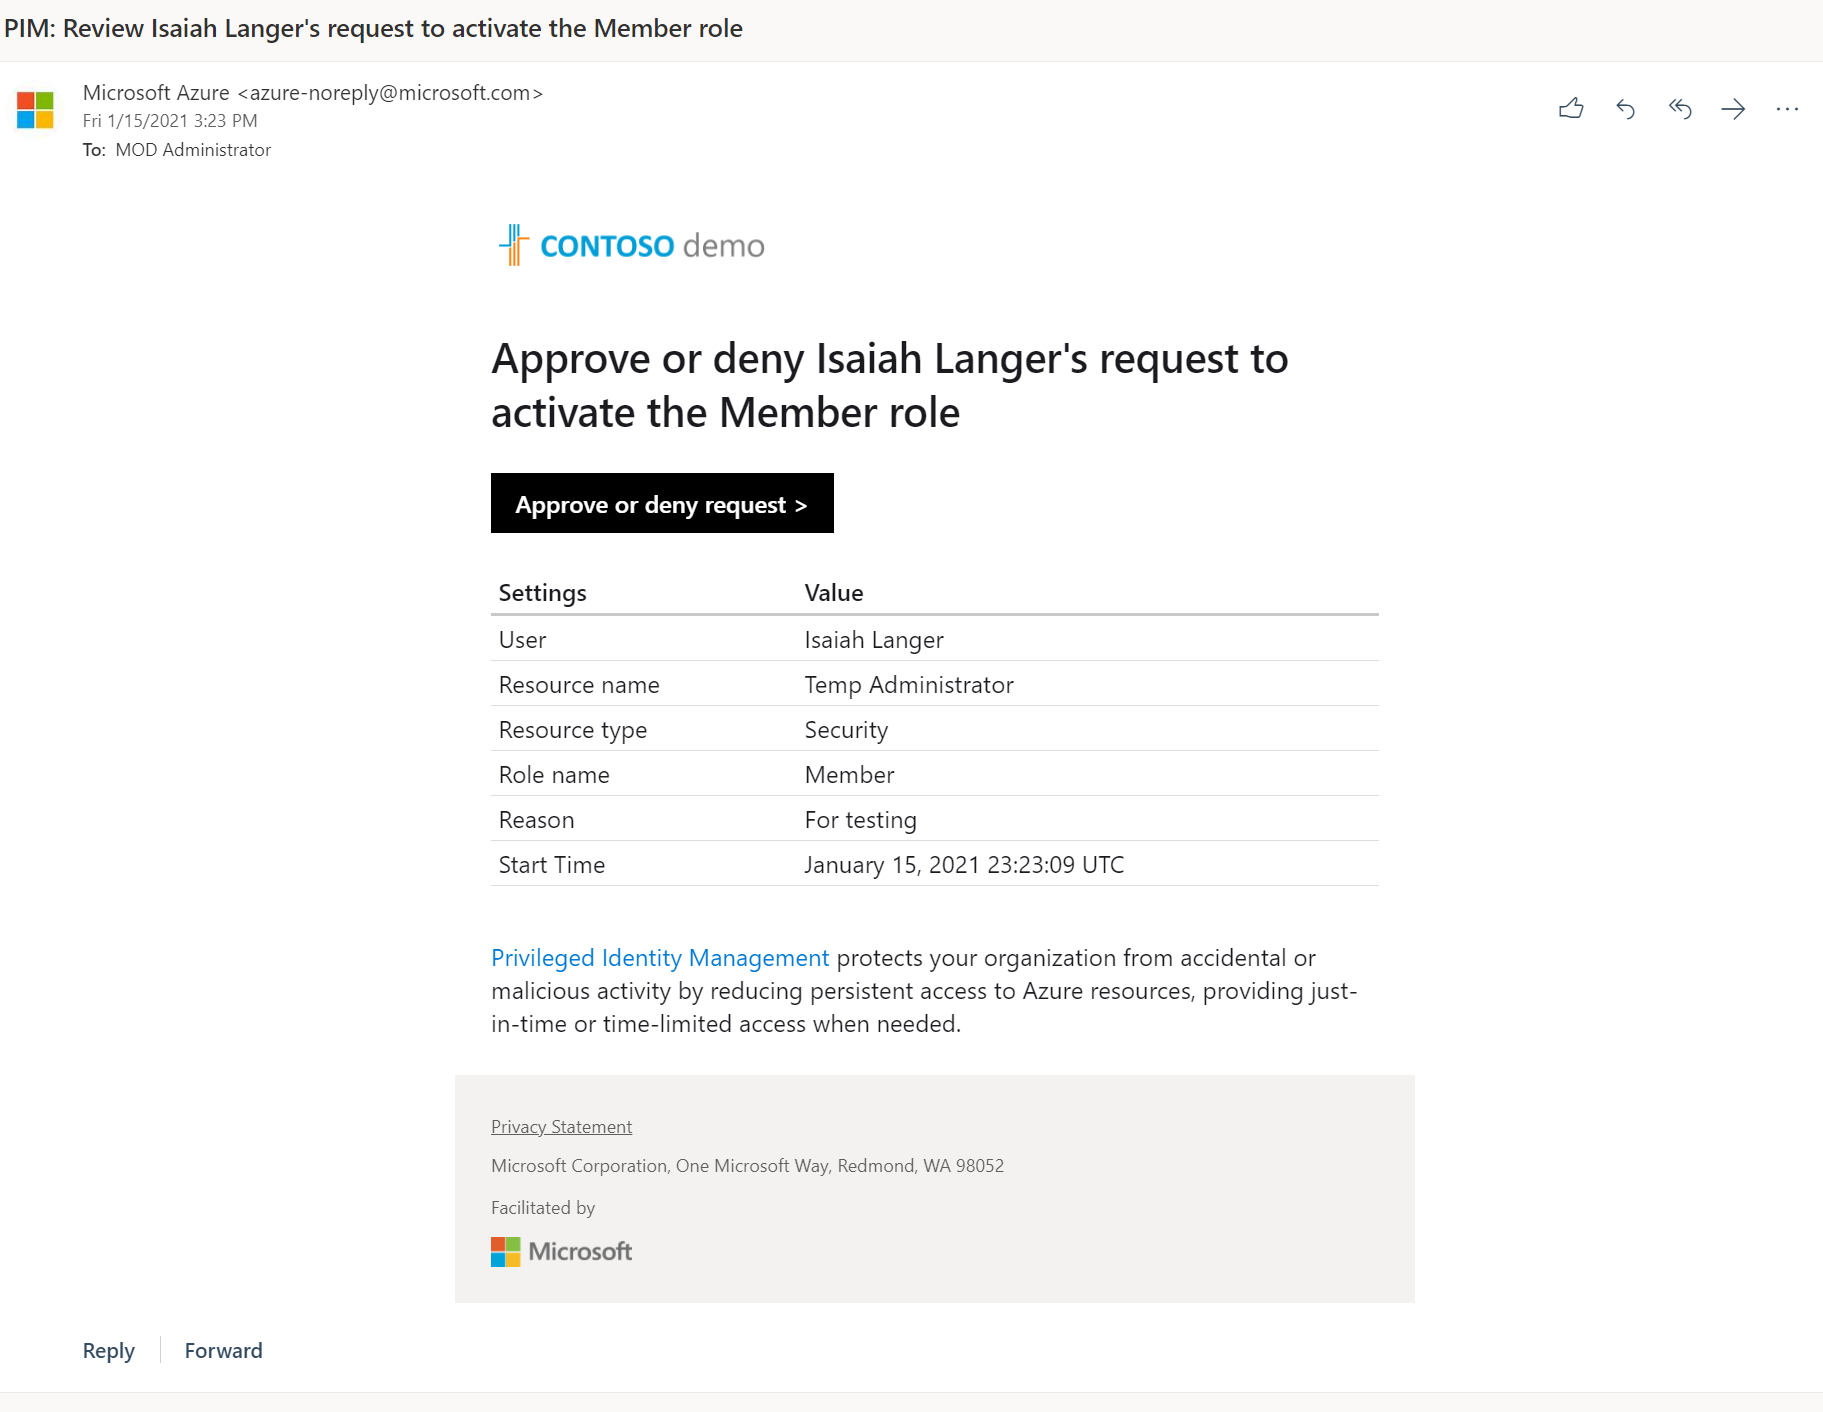
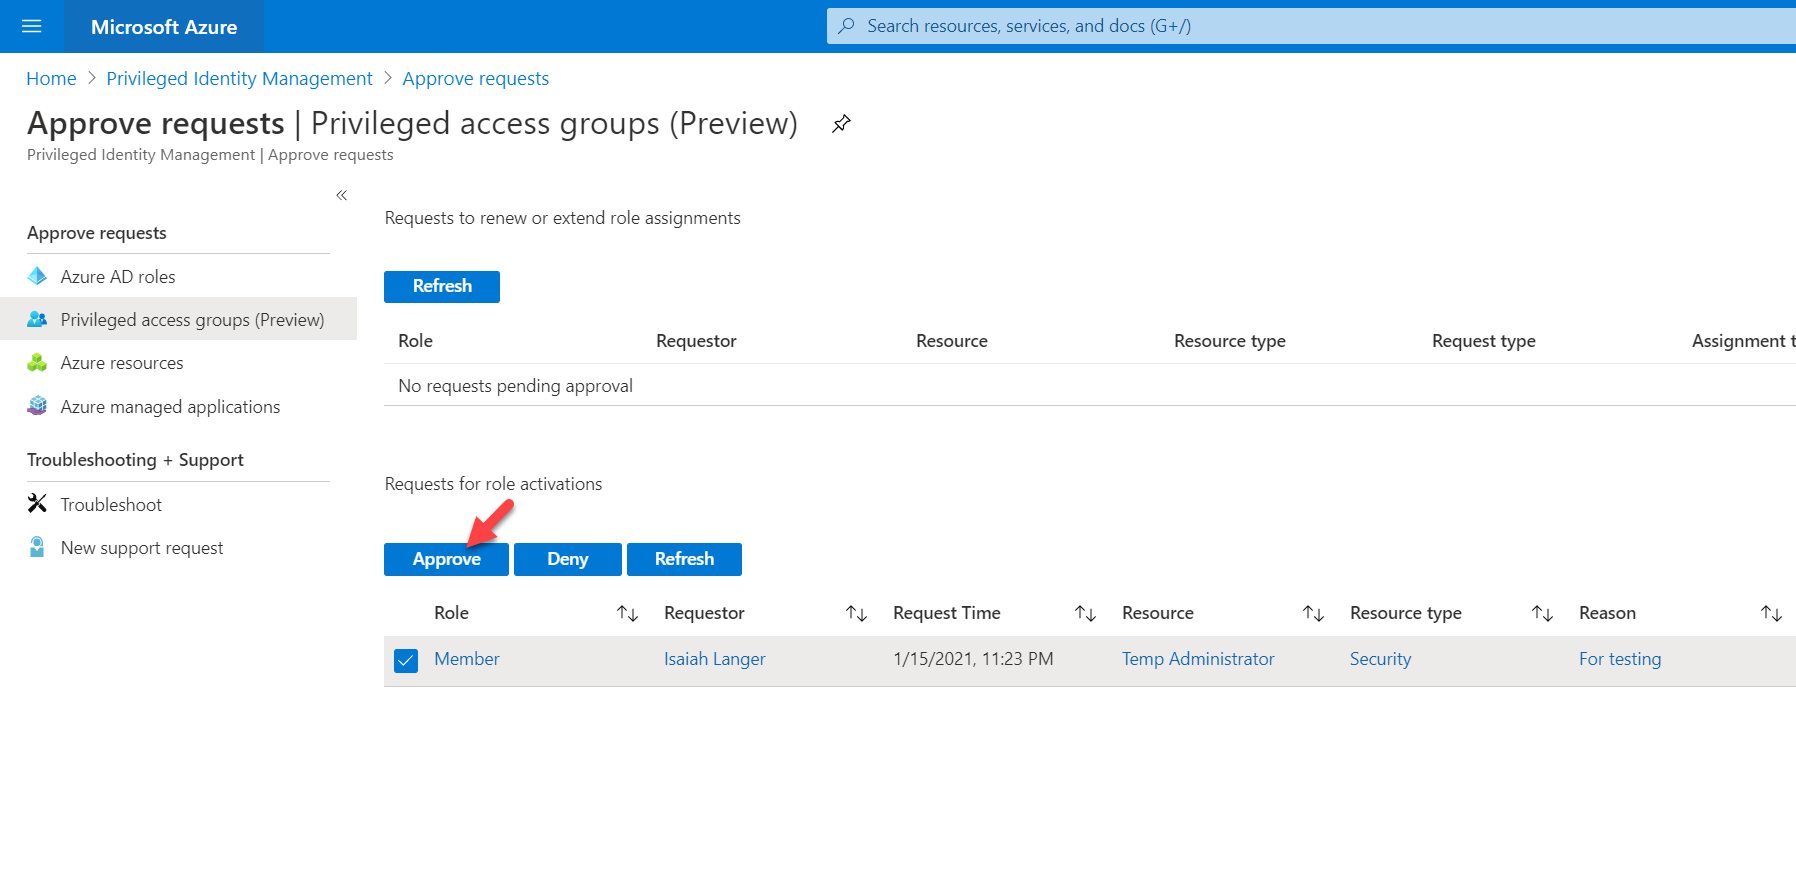
Then I log in to the Azure portal as approver and went to Azure AD Privileged Identity Management| Approve requests | Privileged access groups (Preview). As expected, I can see the request from Isaiah.
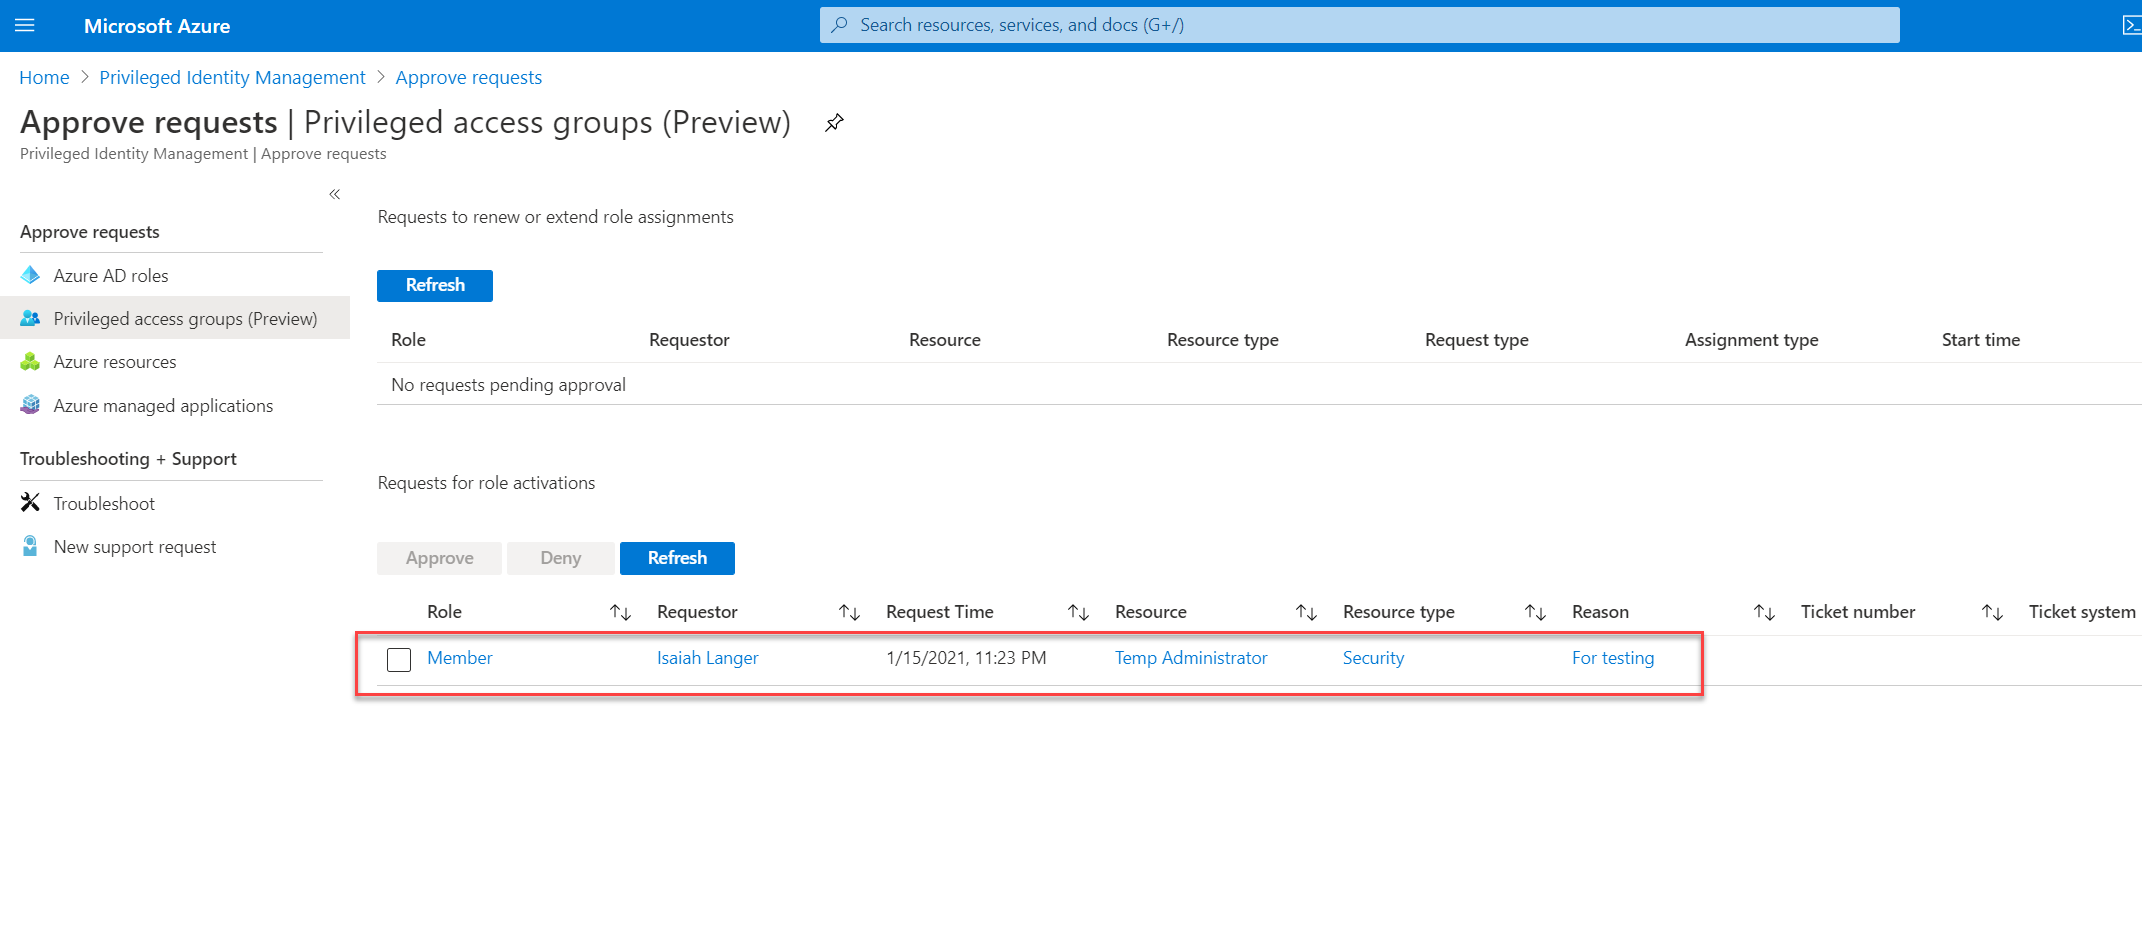
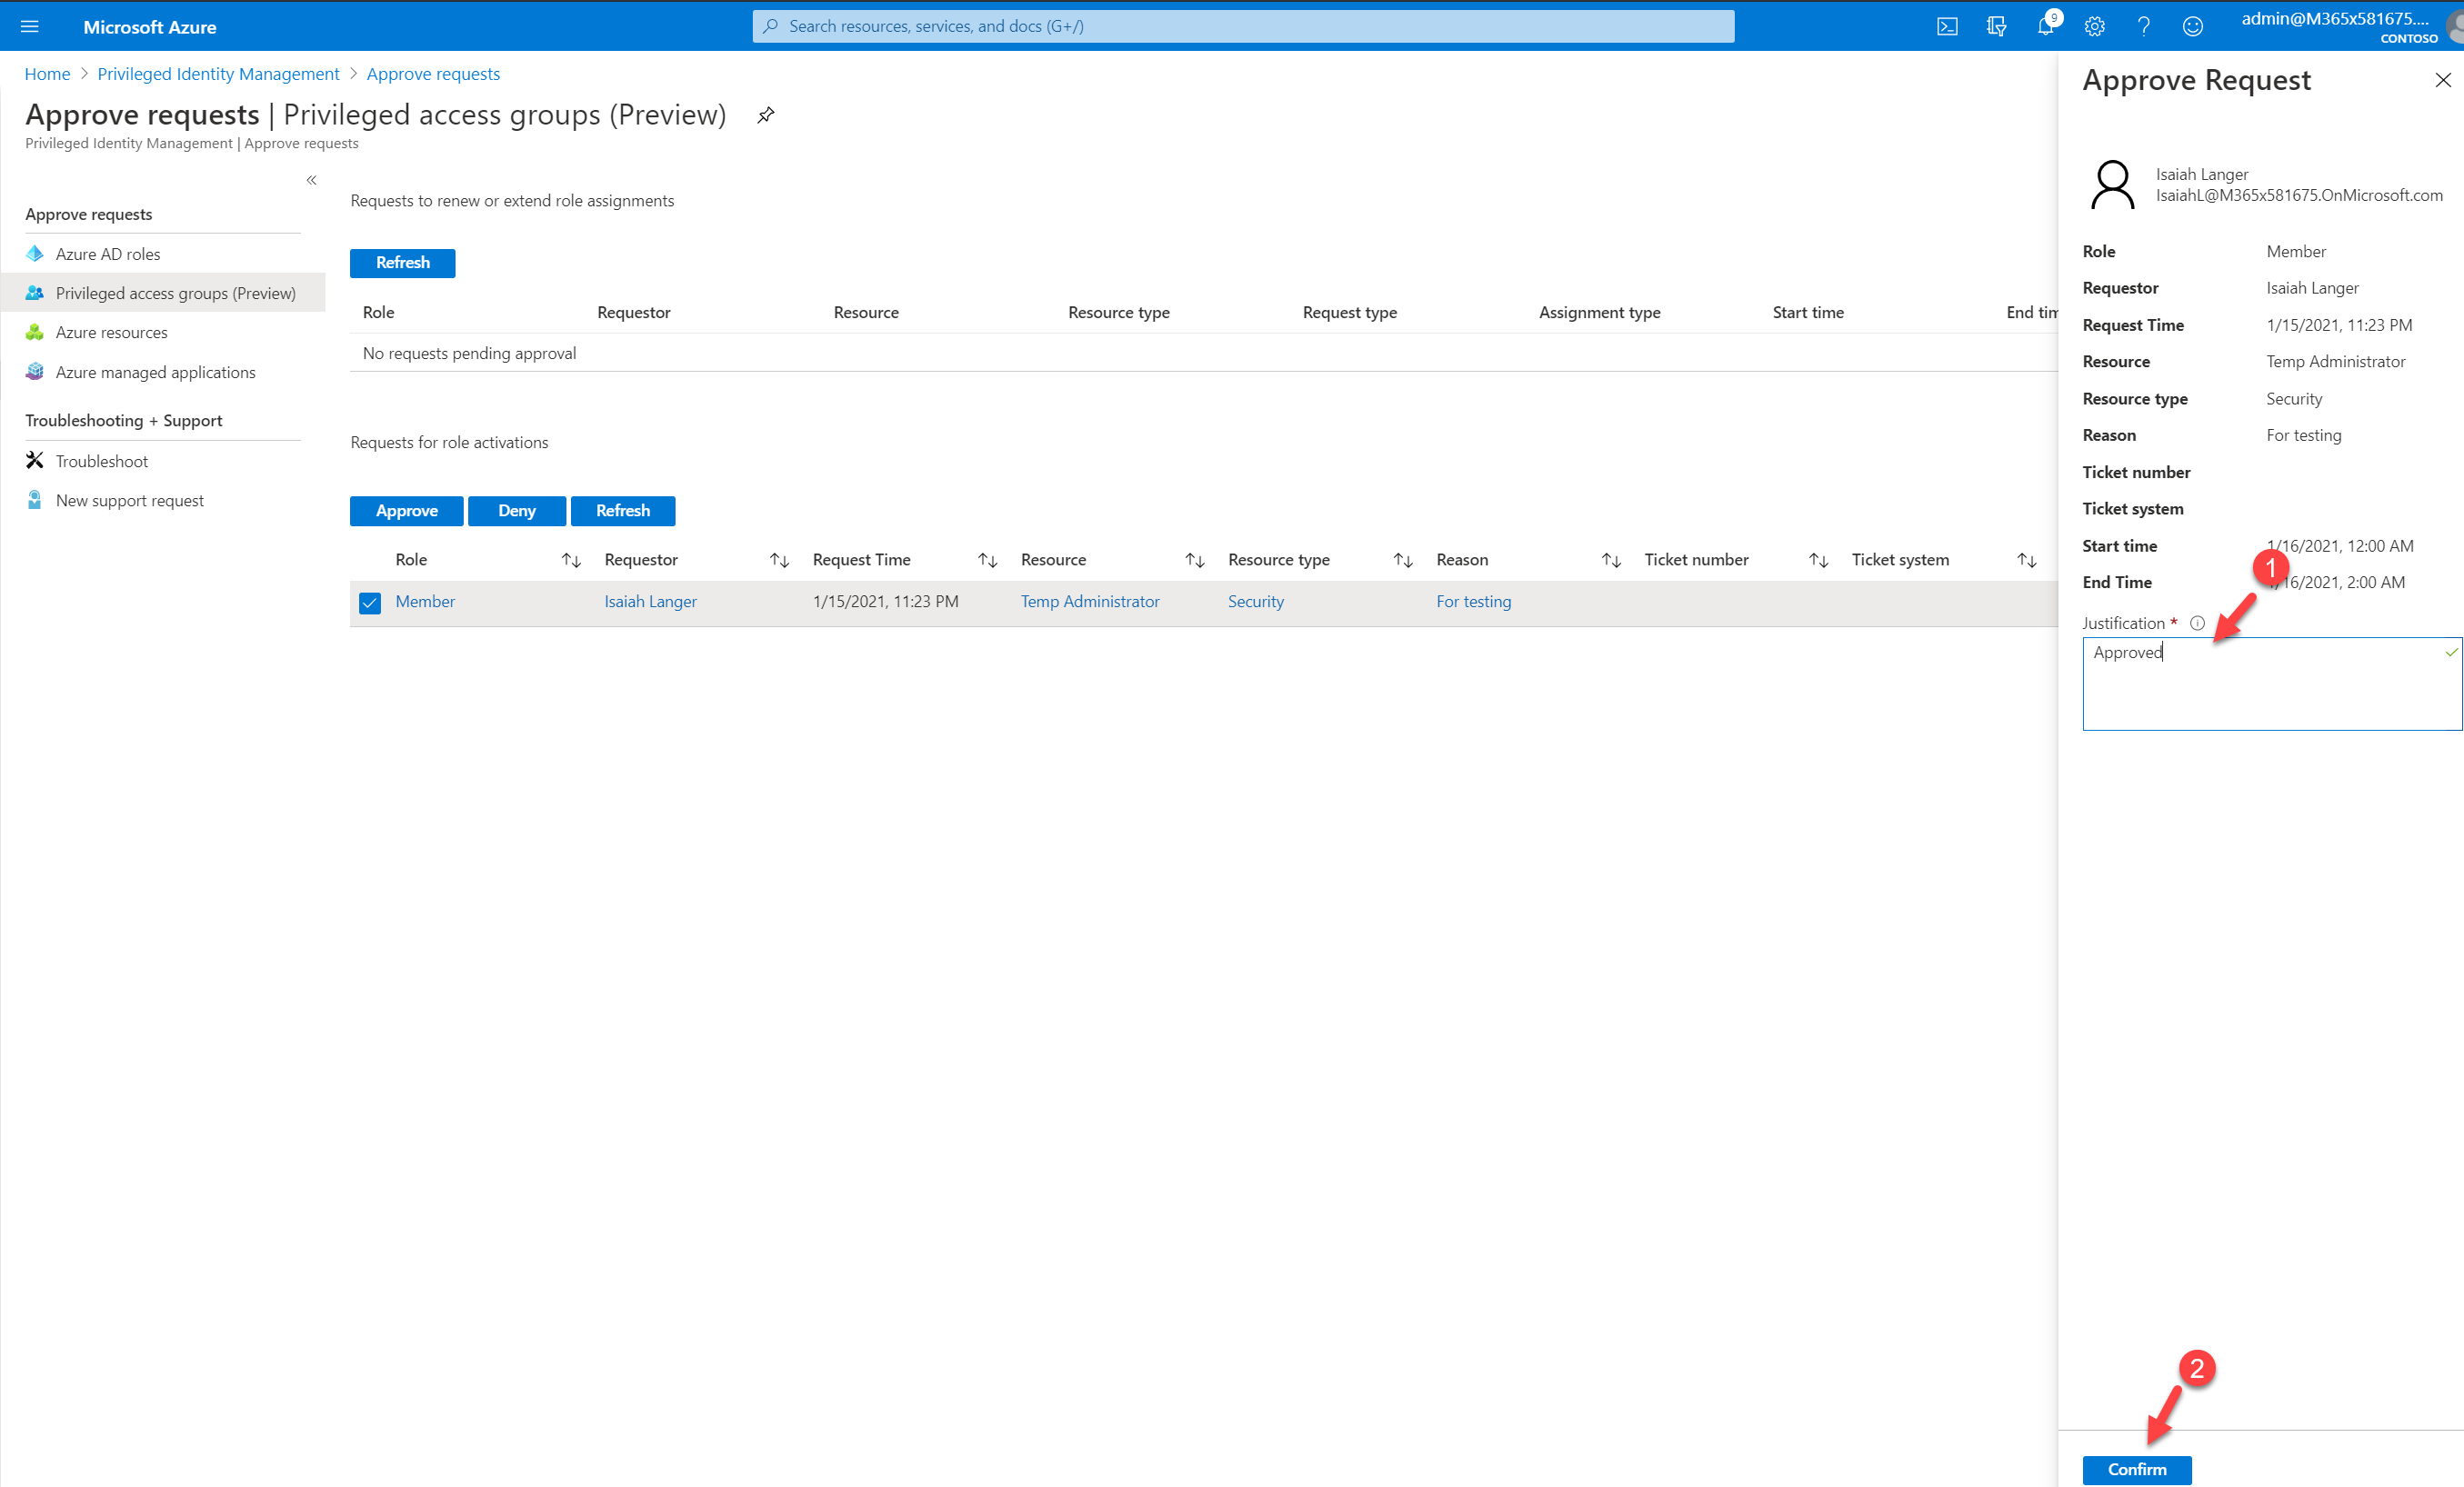
To approve the request, select the request first and then click on Approve.
Once it is approved, I went back to the user and check. Now I can see he got an active assignment.
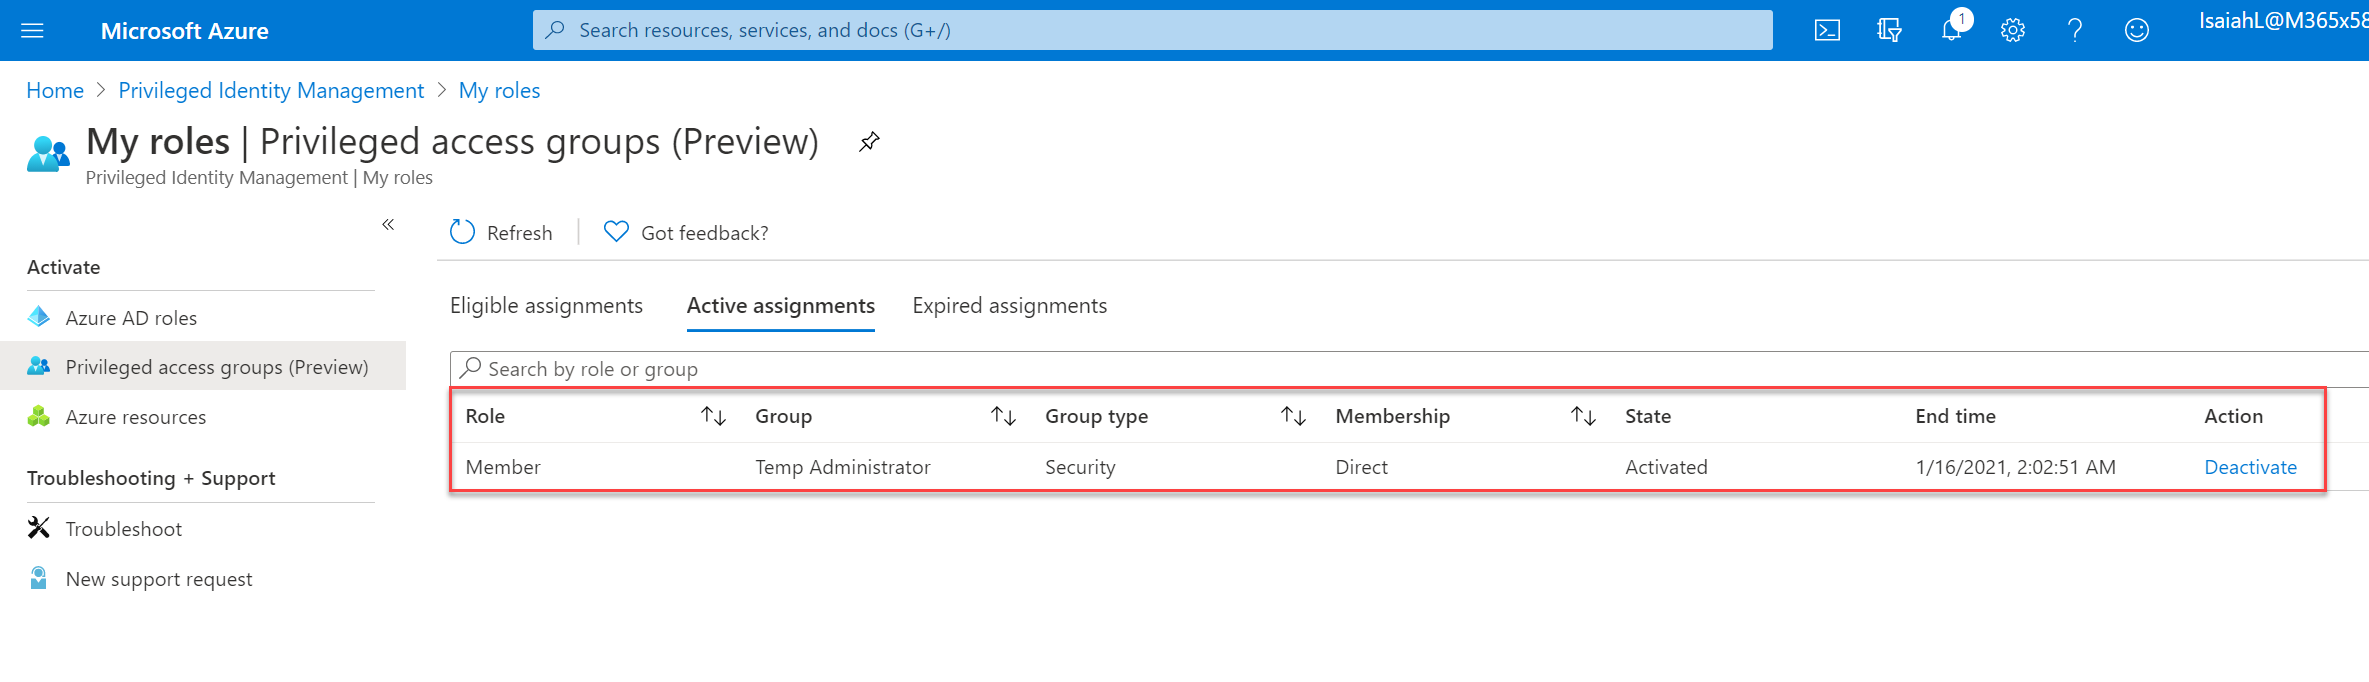
As expected, the user Isaiah will have Global Administrator rights for 2 hours. After two hours, he will be removed from the “Temp Administrators” group automatically.
I hope now you have a better understanding of how we can manage memberships of privileged groups by using Azure AD PIM. If you have any further questions about this feel free to contact me at rebeladm@live.com also follow me on Twitter @rebeladm to get updates about new blog posts.


Thank you for a practical, step- by -step guide on this. You saved me time in research.