
In my previous blog post, I explained how to set up sign-in risk-based Azure conditional access policy. This article can be accessed using this link. As I explained in the article, sign-in risk is calculating based on user access behavior. If the user access behavior is flagged as risky, most probably the user account is also compromised. Most of the time, these compromised accounts are sold or shared on the dark web. Now with help of Microsoft, we can check if the corporate accounts are appearing in risky places. Microsoft uses various sources to identify risky user accounts. Such as,
- Public paste sites
- Dark web research groups
- Law enforcement agencies
We can use Azure conditional access policies to verify if the sign-in request is coming from a known compromised account. User account risks are calculated offline, which means it can take 2- 24 hours to appear in reports.
Let’s go ahead and see how we can create a user risk-based Azure conditional access policy.
Configure Azure conditional access policy
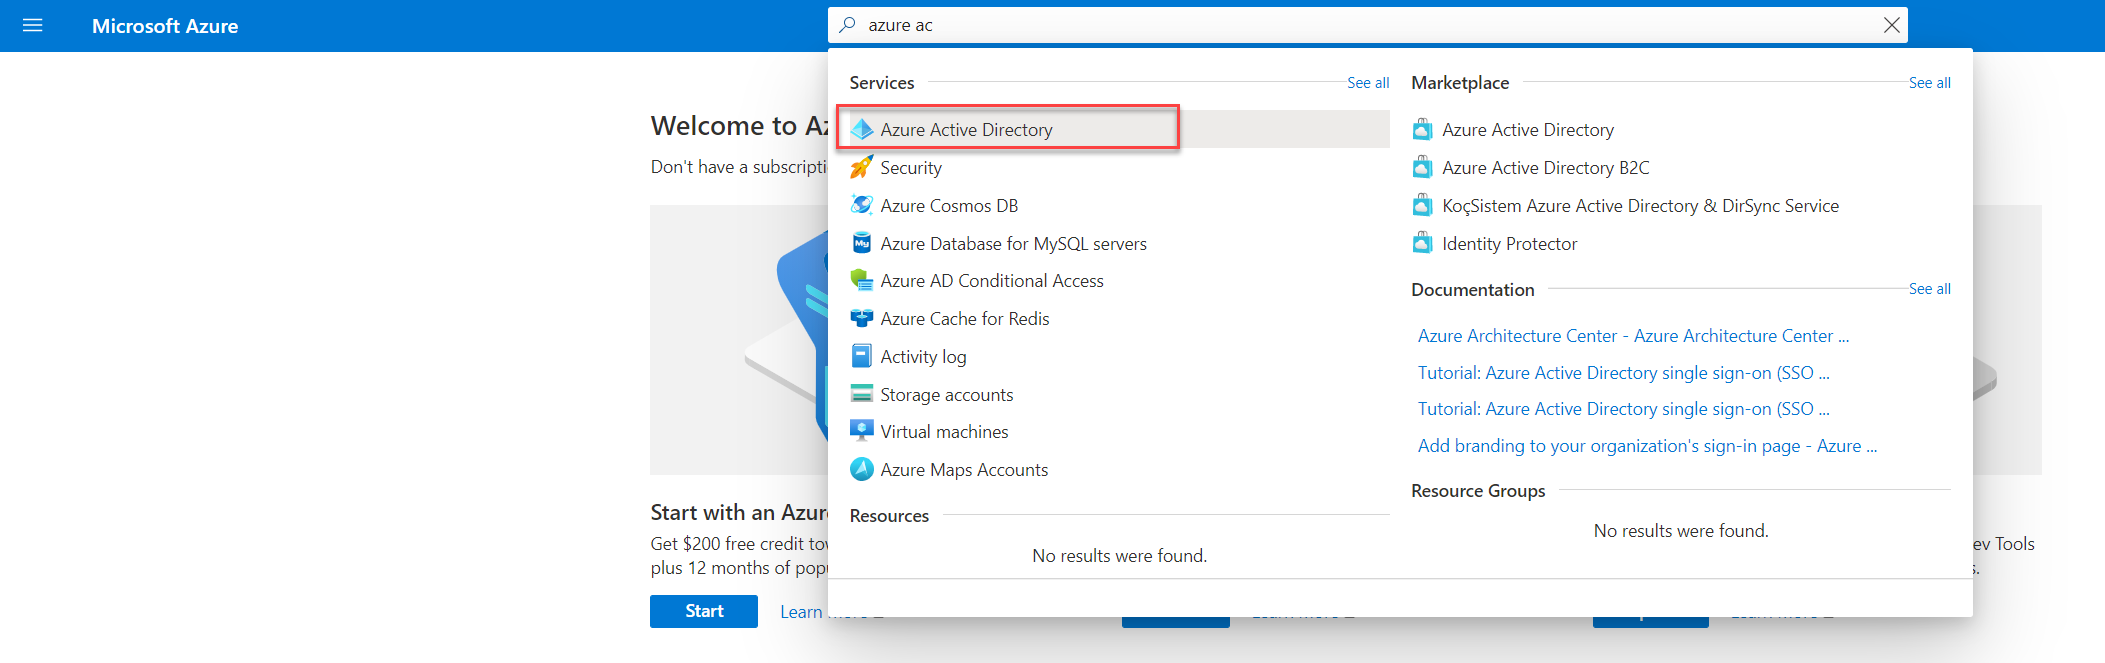
1. Log in to Azure Portal (https://portal.azure.com/) as Global / Security / Conditional Access Administrator
2. Then go to Azure Active Directory
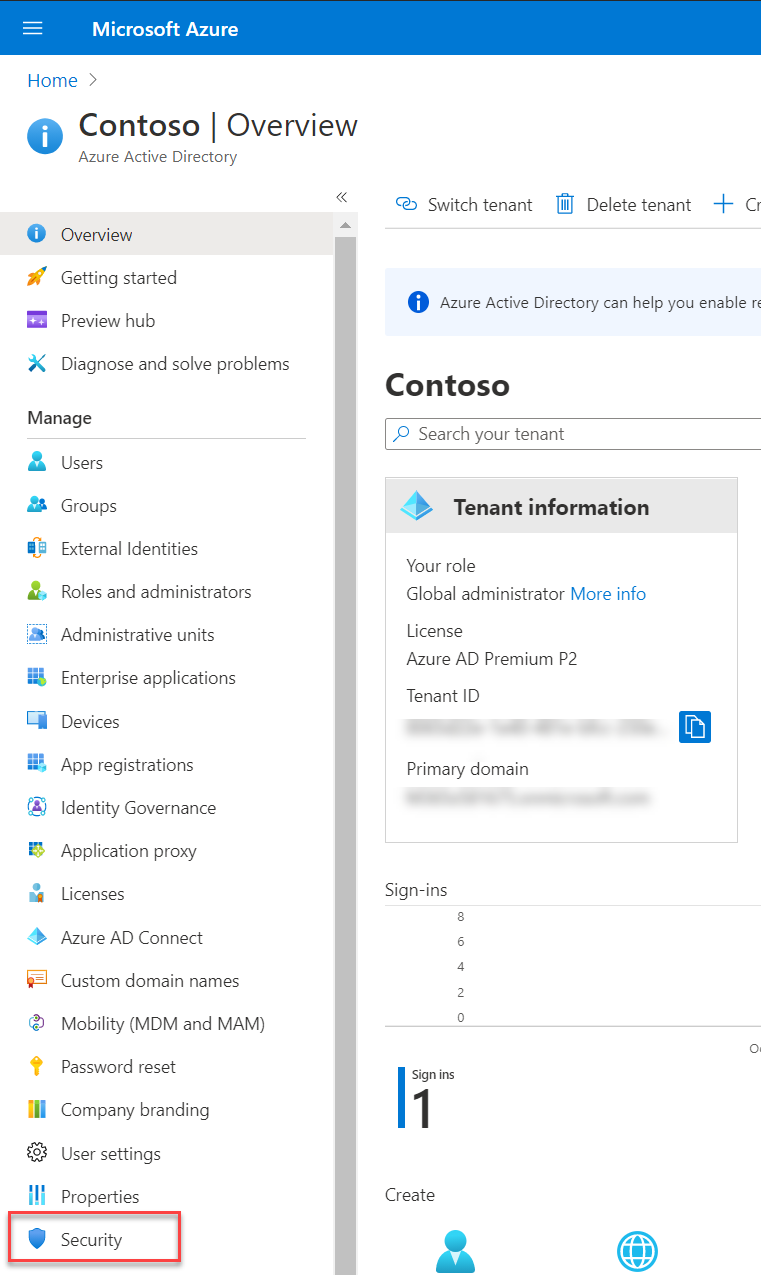
3. On the Azure Active Directory page click on Security
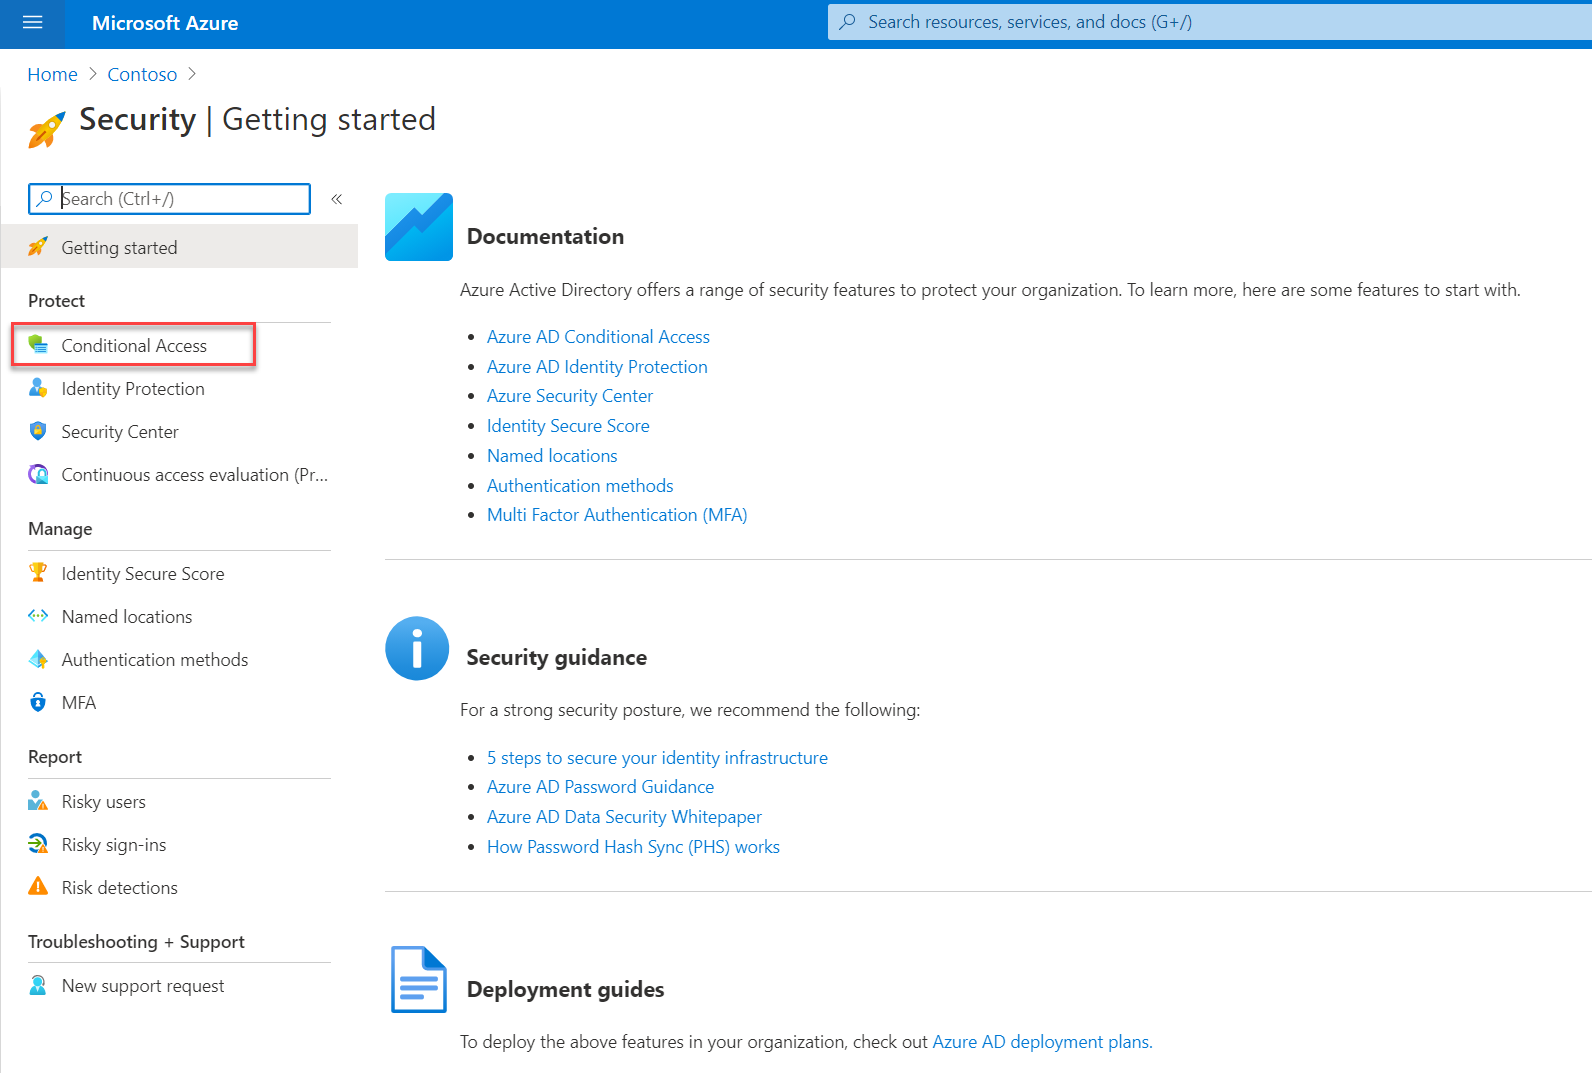
4. On the Security Home page, click on Conditional Access
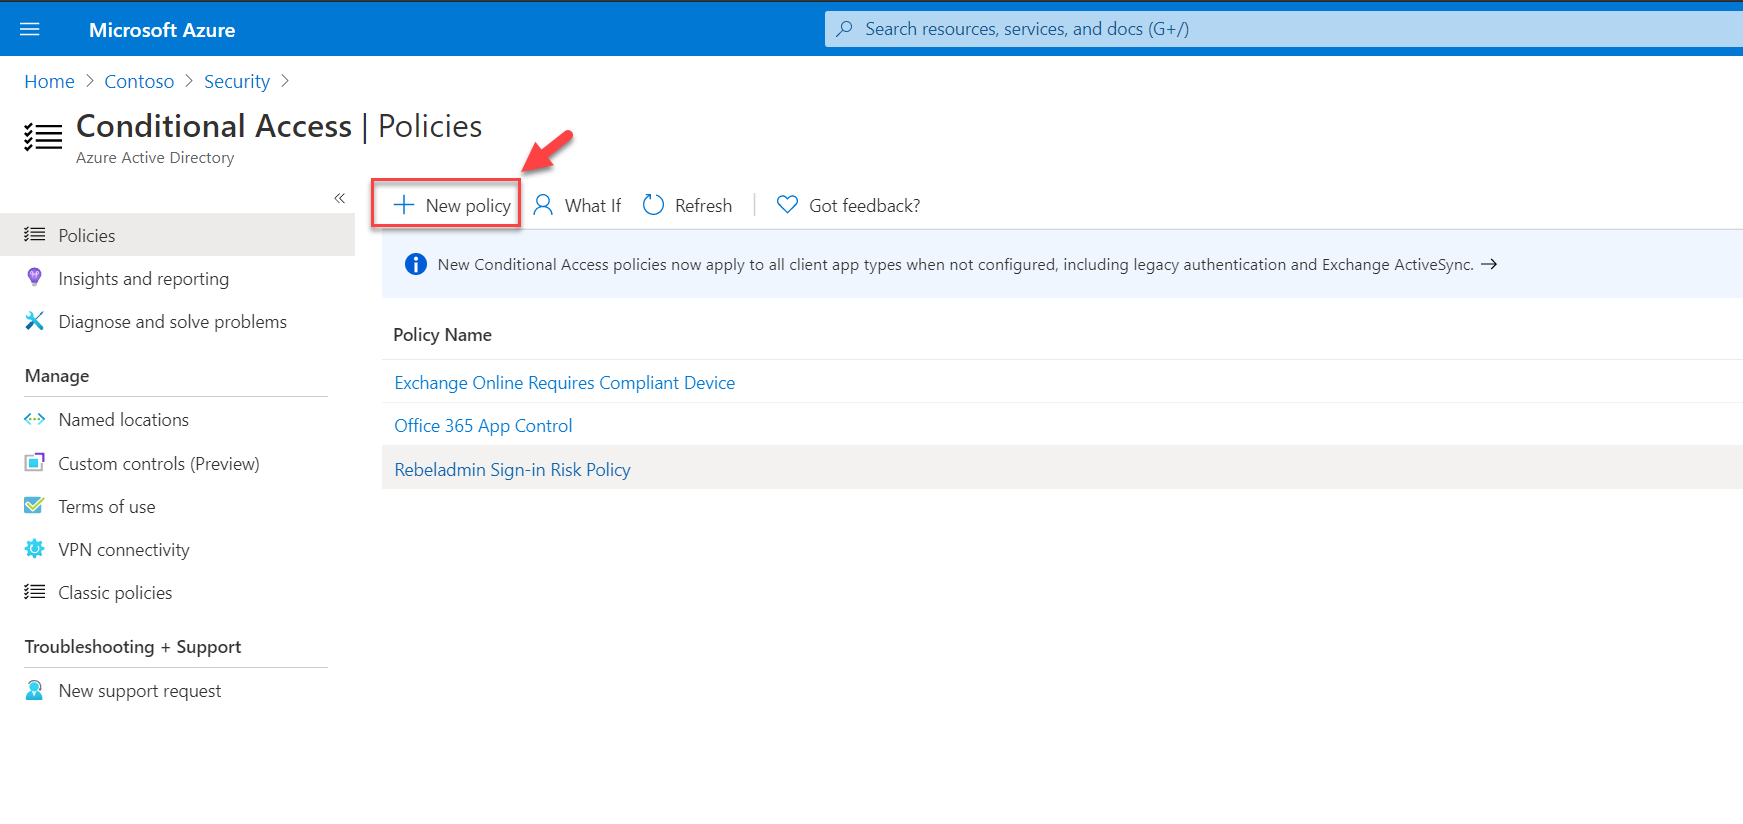
5. Then click on + New Policy
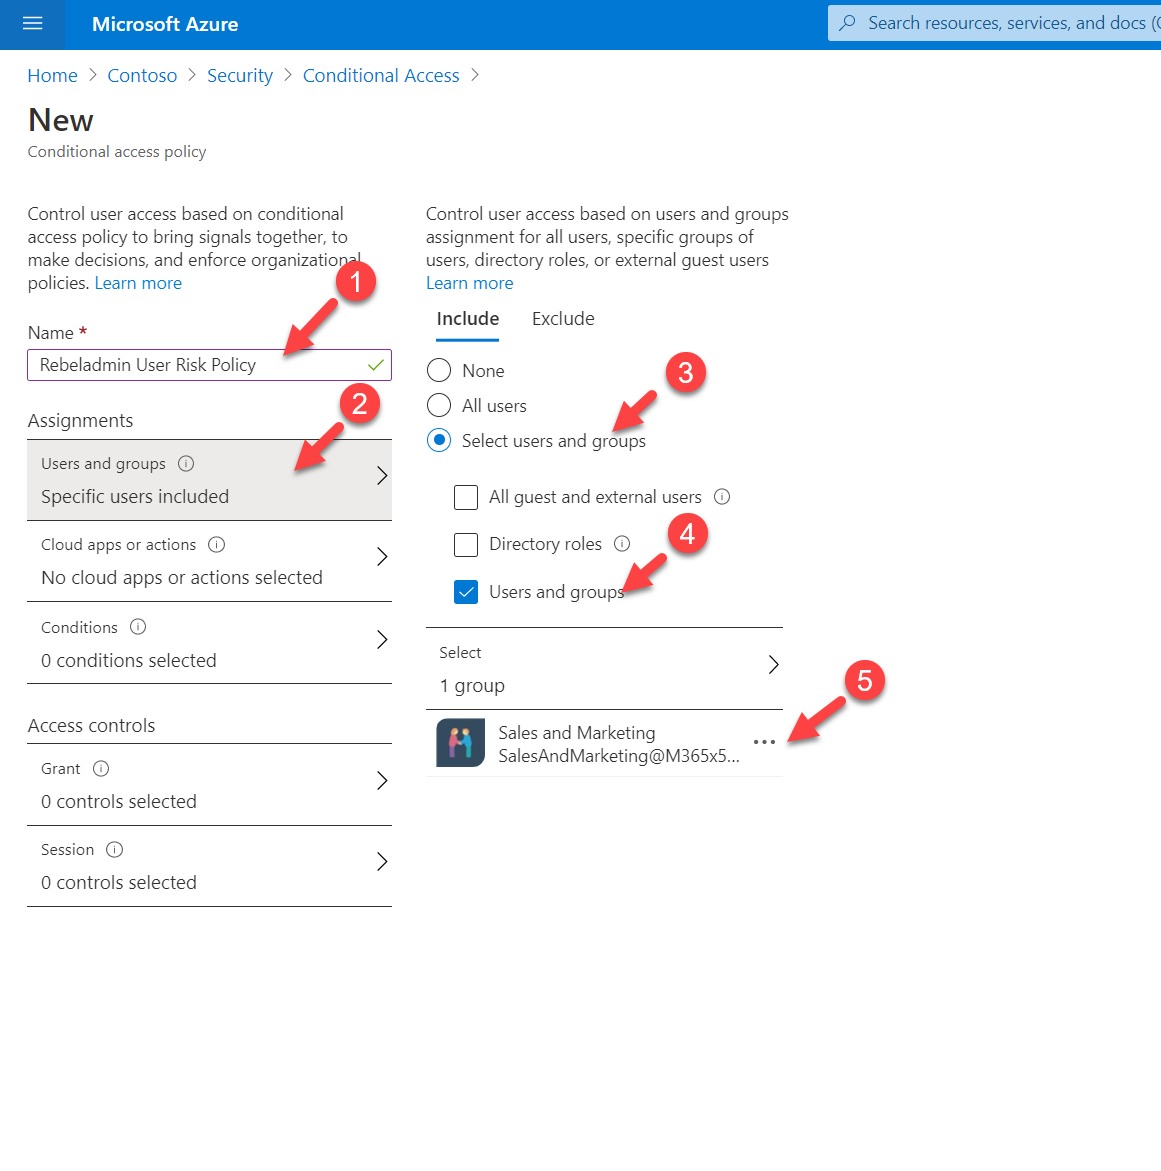
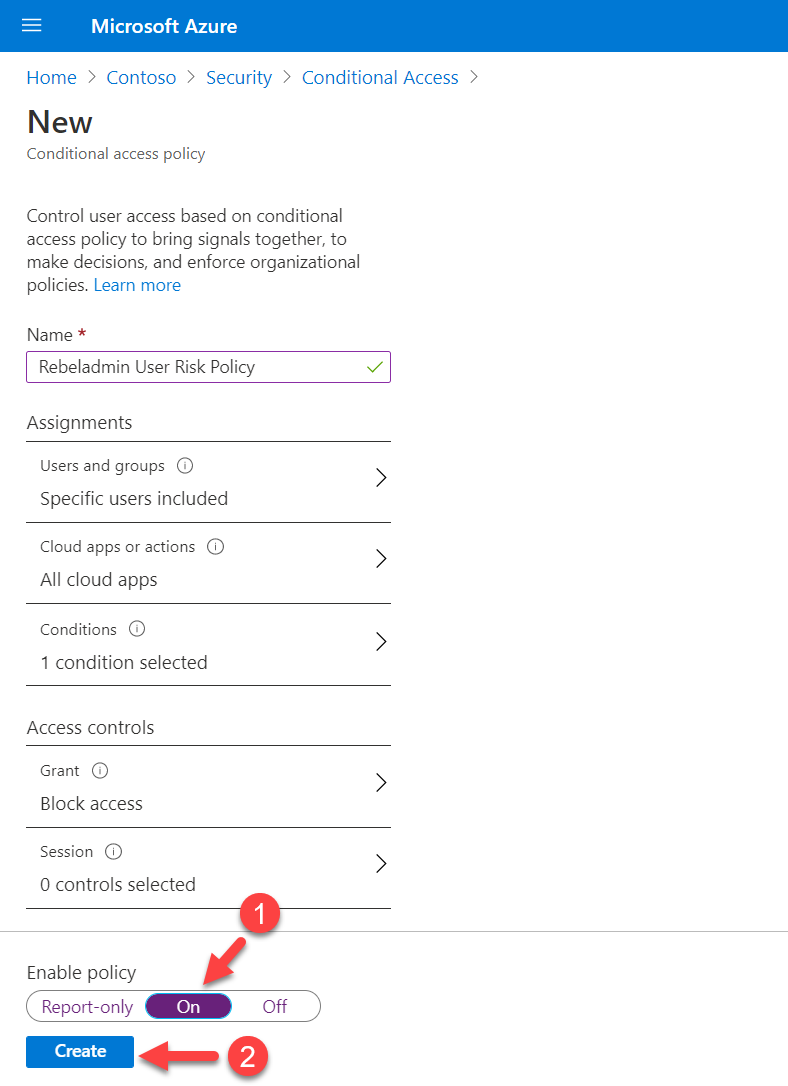
6. This will open up a new policy window. Provide a name for the policy and then click on Users and Groups. Here I am going to apply the policy to Sales & Marketing team. To do that click on the Users and groups option and then select Sales & Marketing team
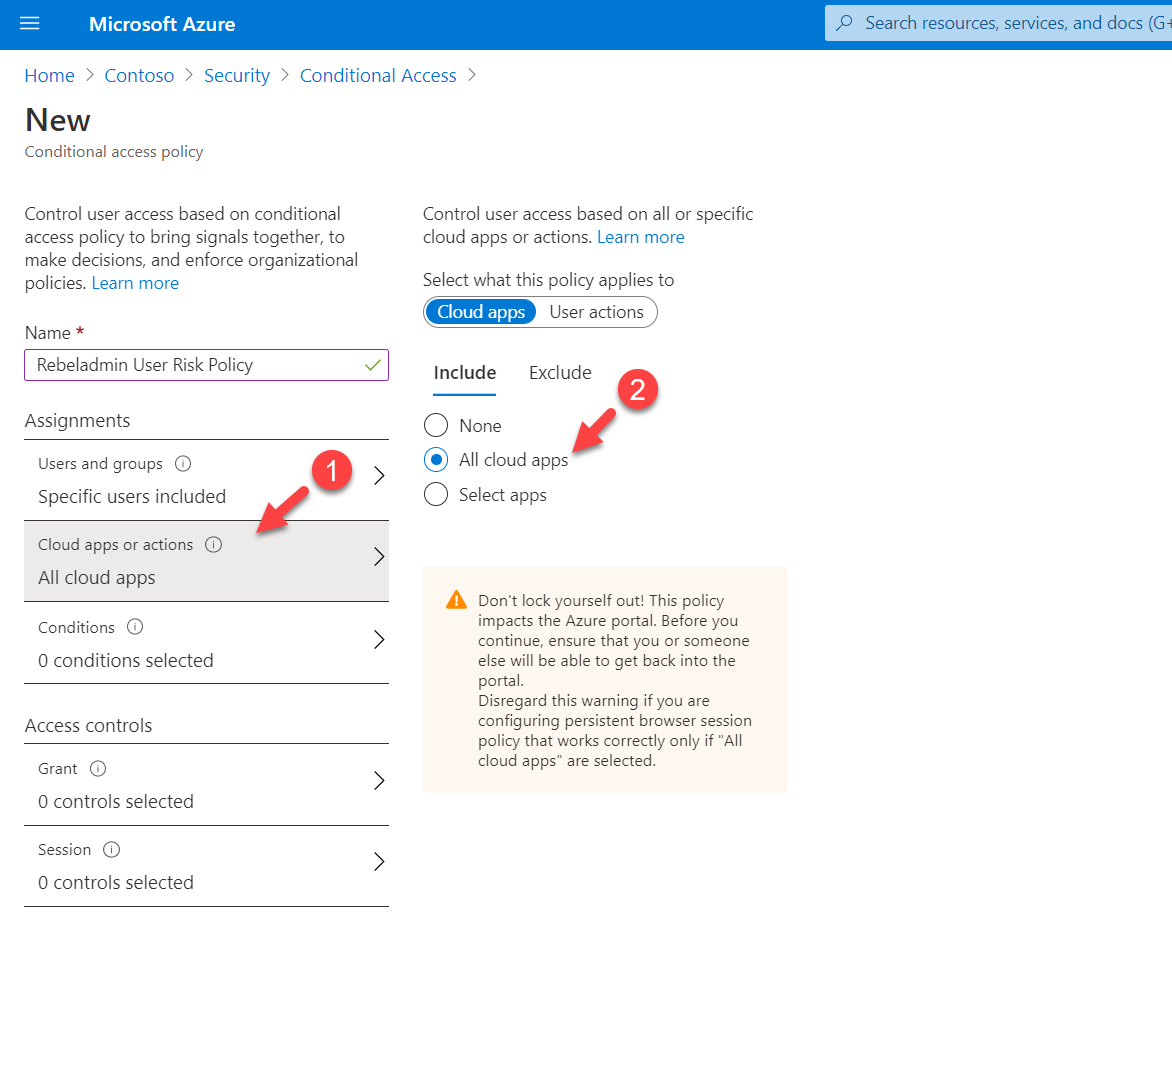
7. As the next step, click on cloud apps or actions. I am going to apply this policy to all cloud apps access. To do that, select All cloud apps from the list.
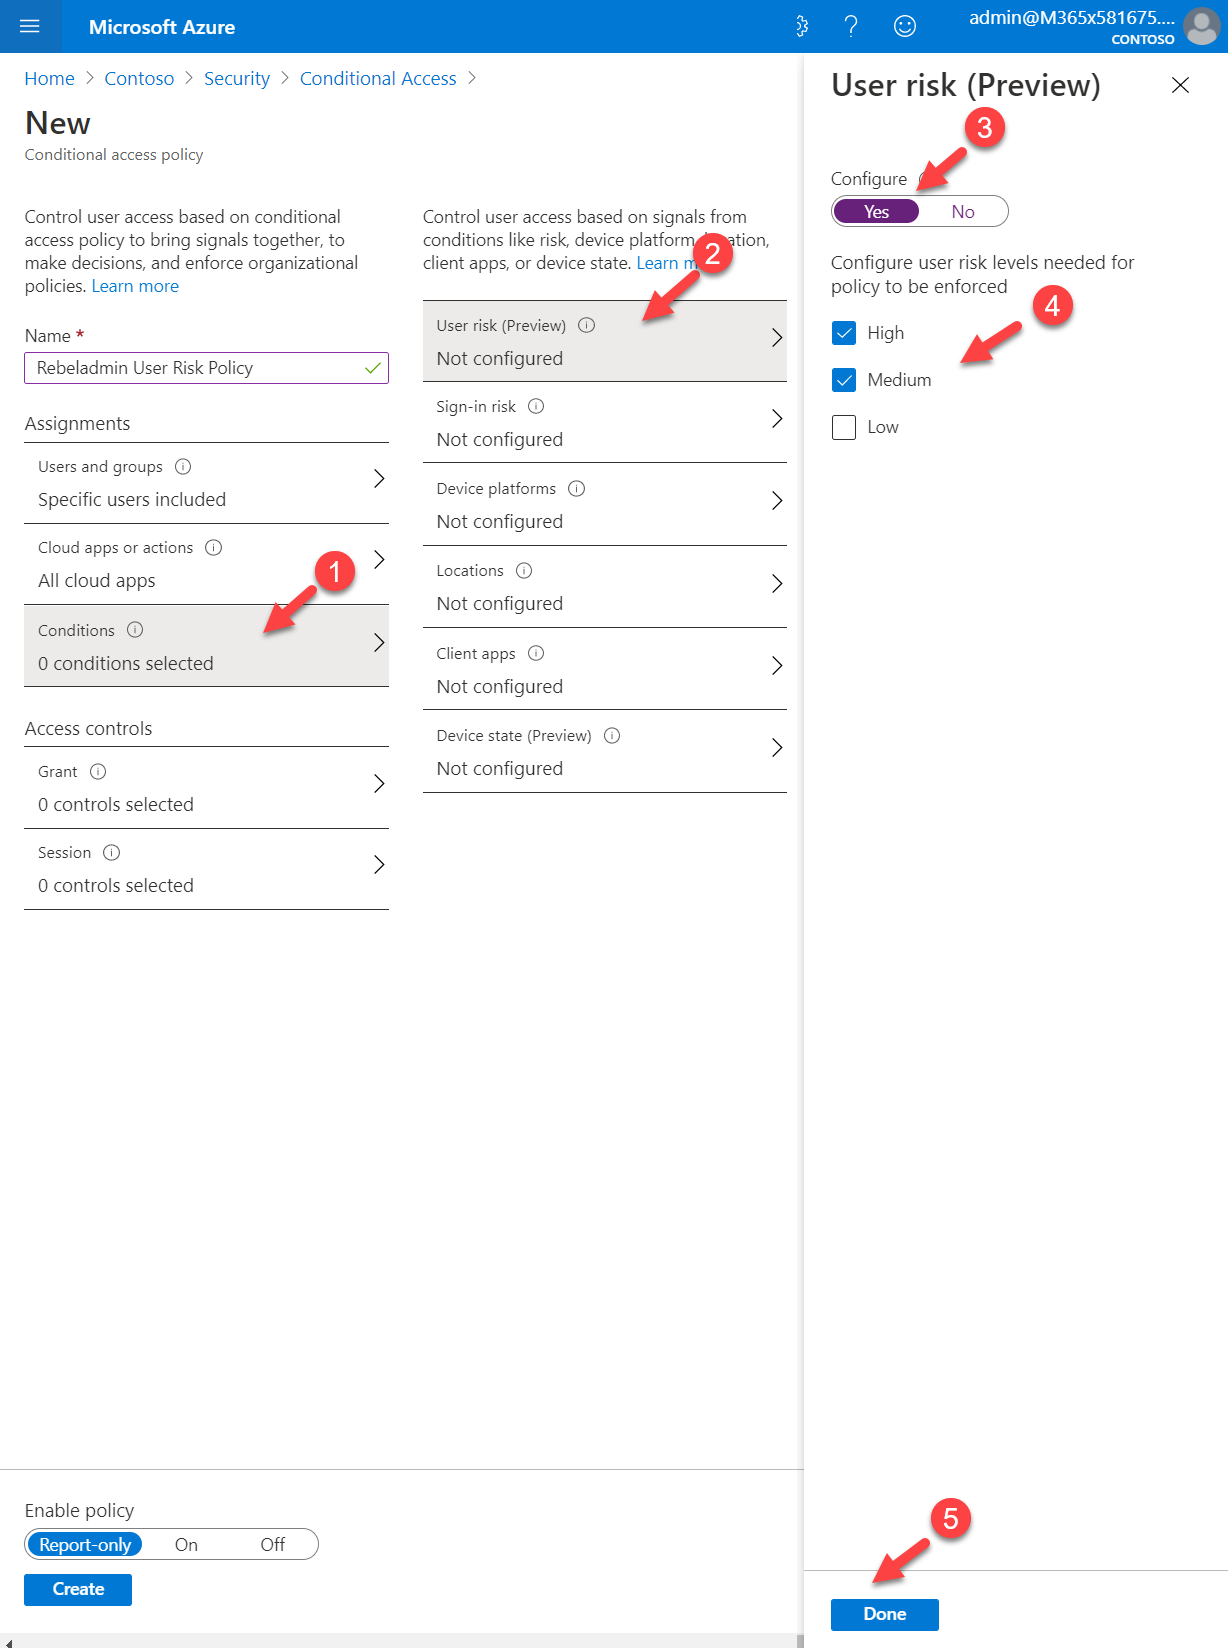
8. Next, click on Conditions | User risk (Preview). To proceed with the configuration, set Yes under the Configure option. In this policy, I am going to target High and Medium level risks. For that, from the list choose relevant options and click on Done to complete the configuration.
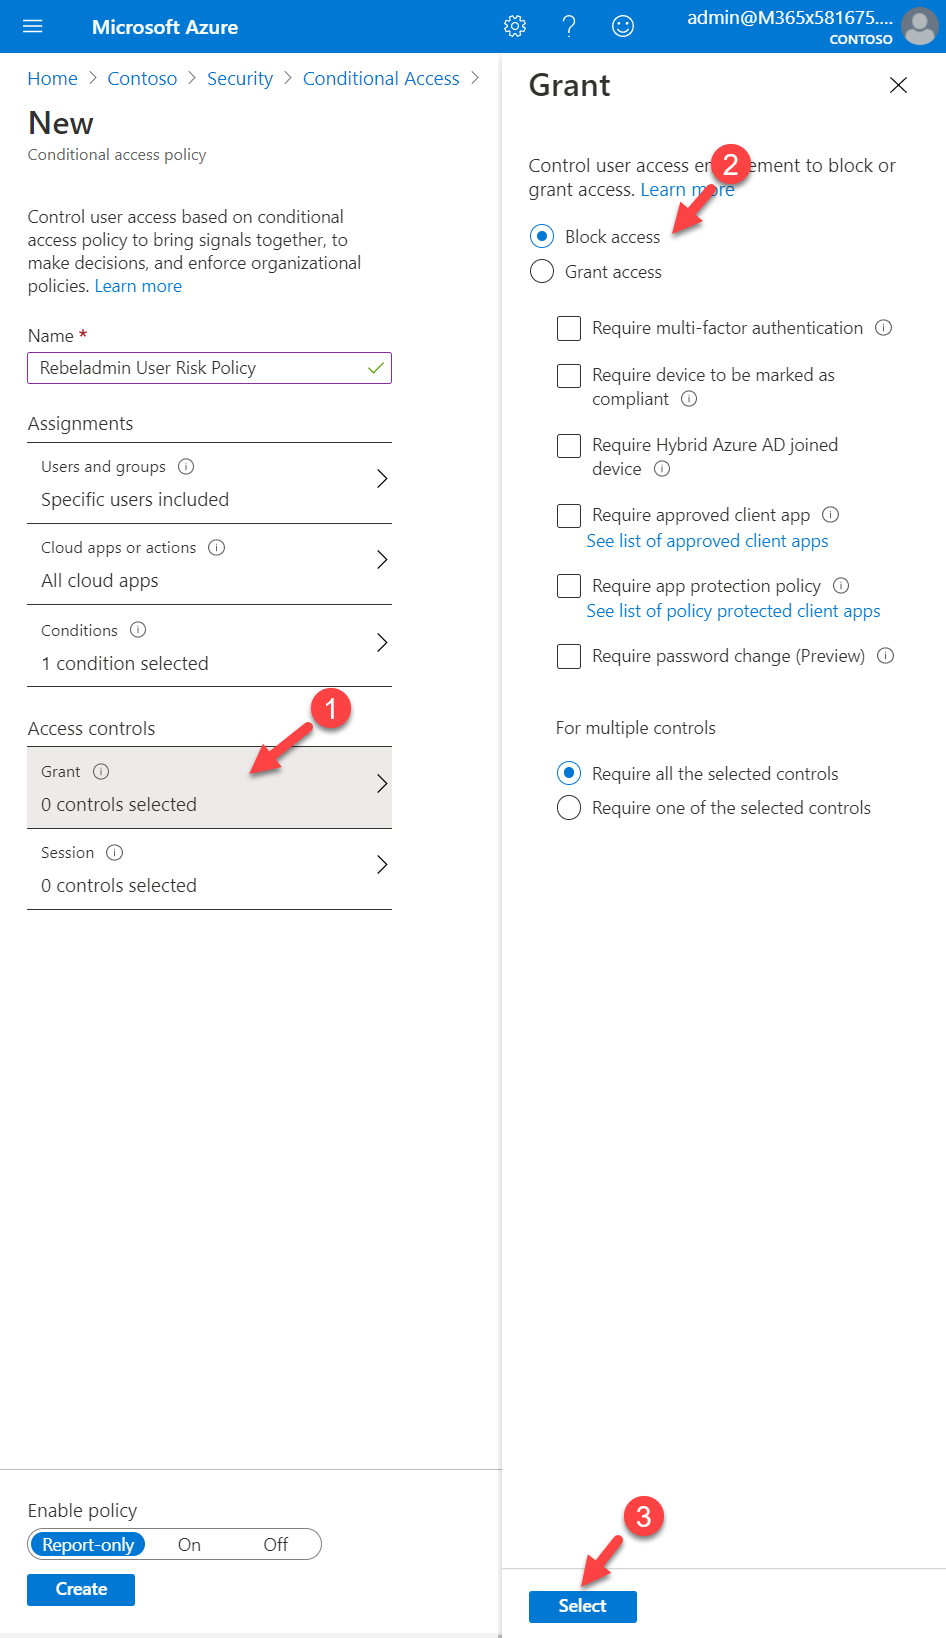
9. Then under the Access control section, click on Grant. I like to block all the High and Medium risk sign in attempts. To do that I click on the Block Access option.
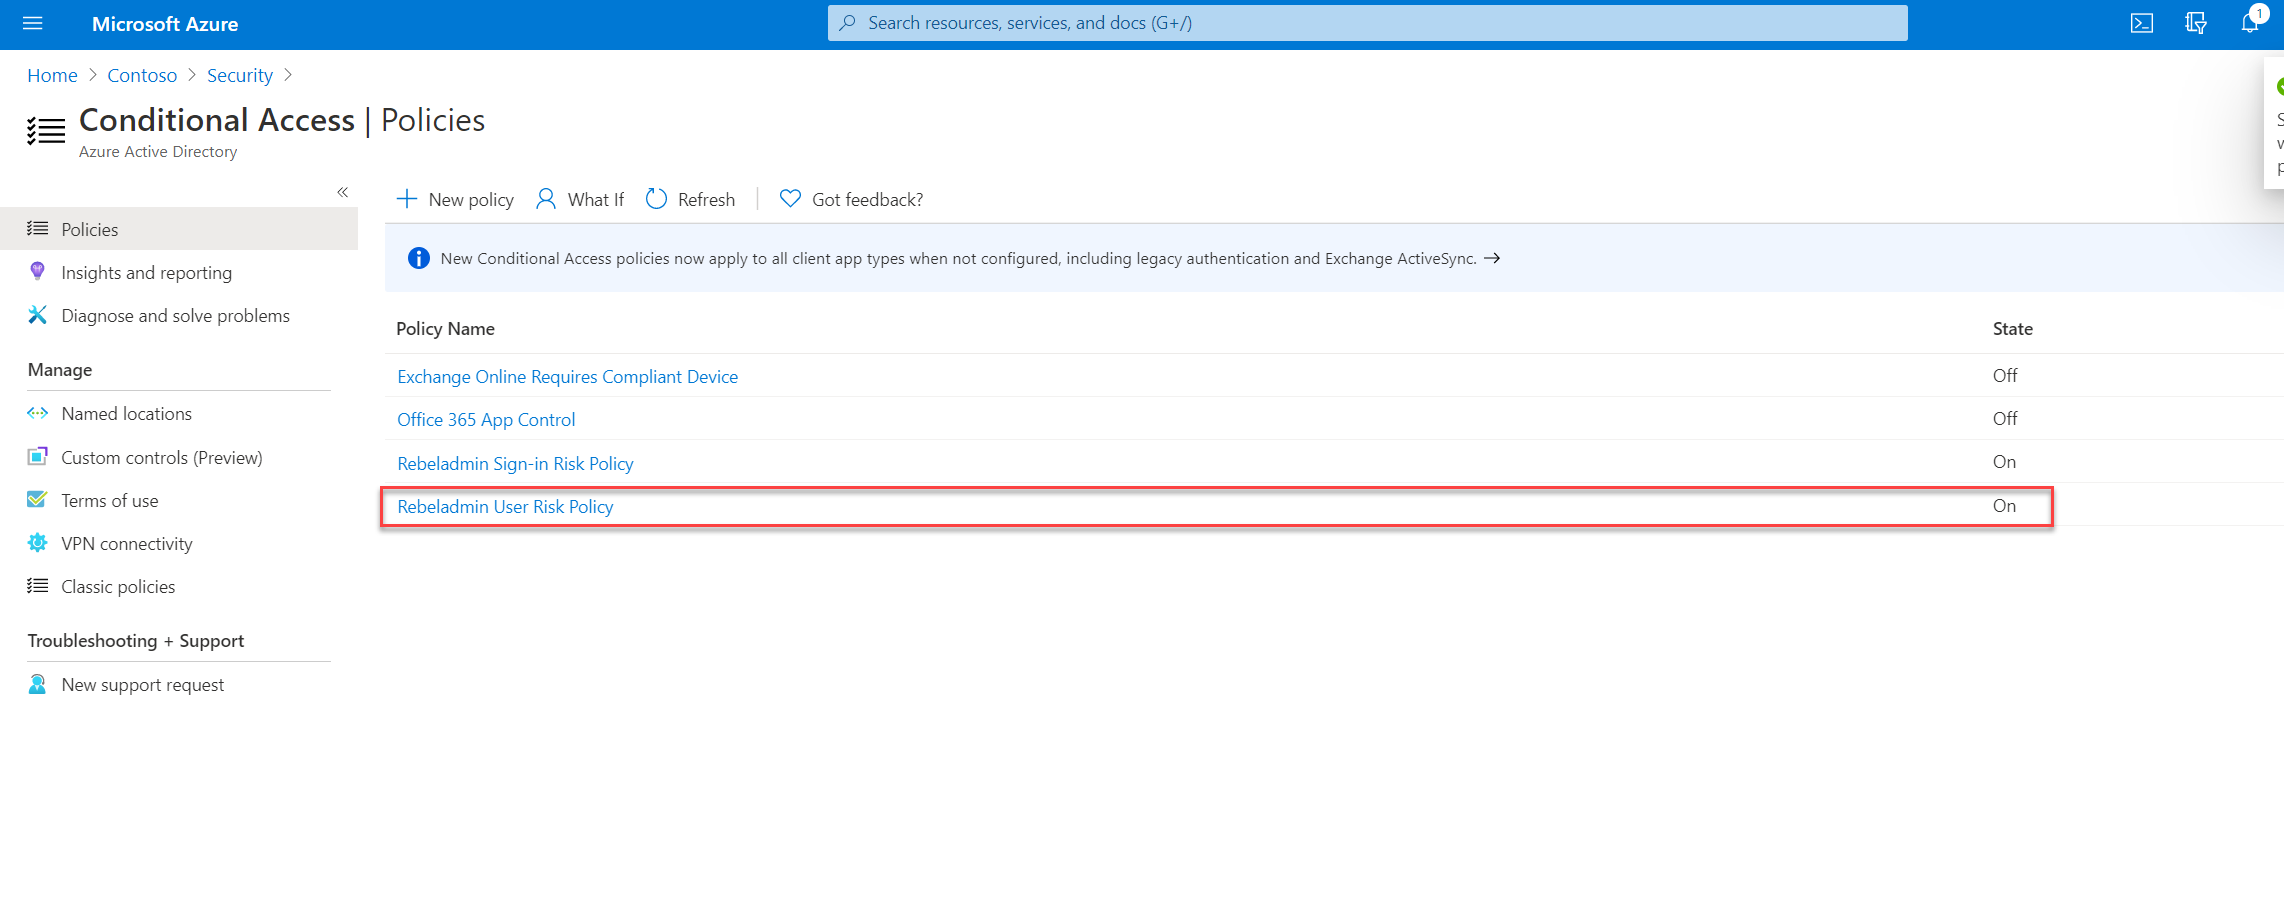
10. To complete the policy configuration, set Enable Policy to On and click Create
Testing
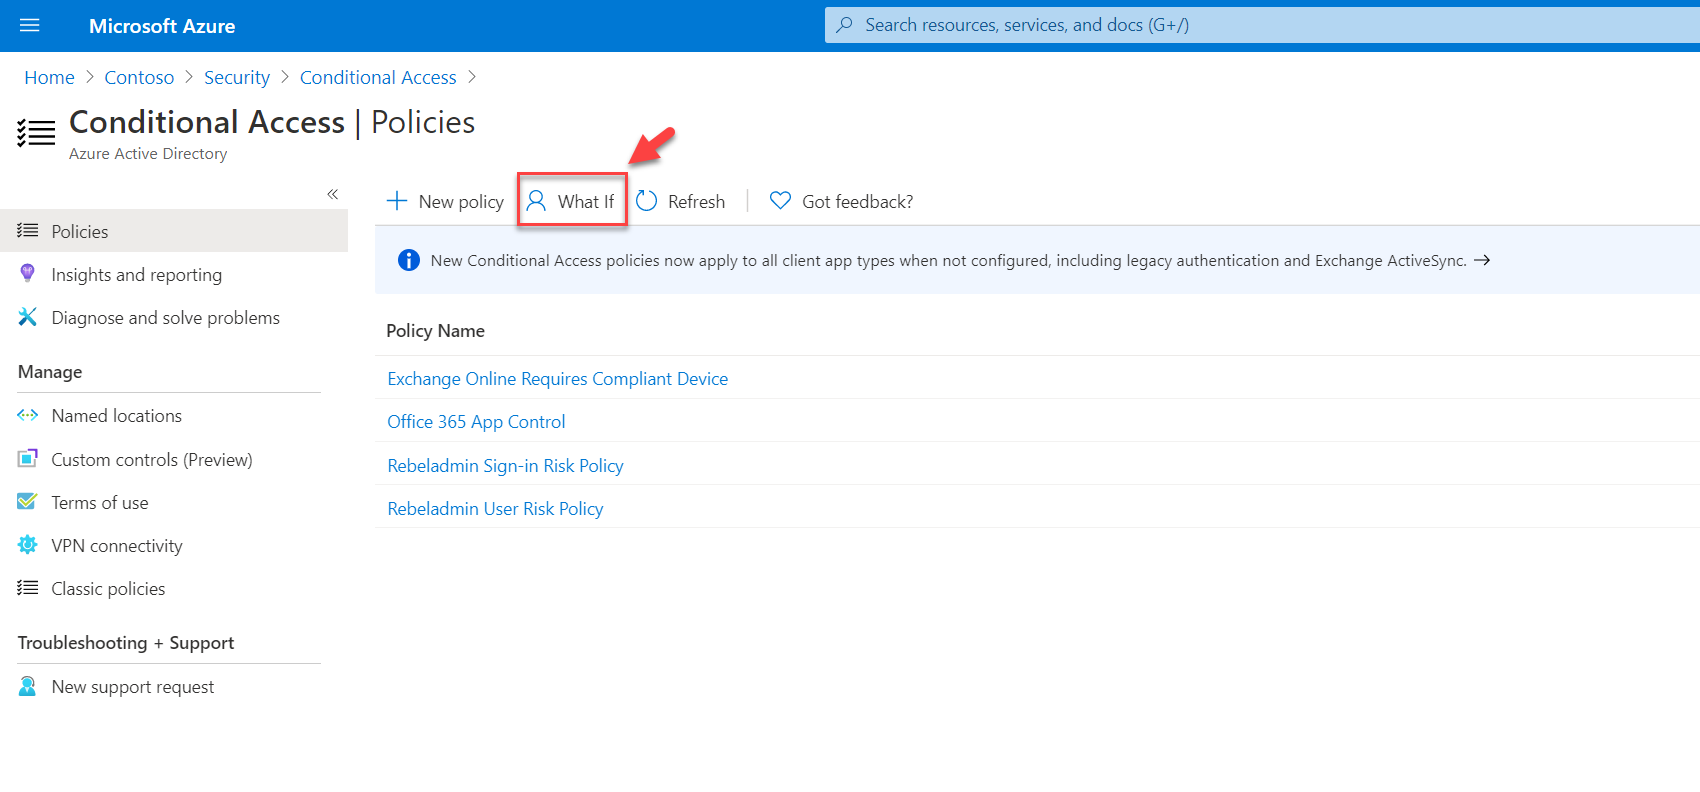
To verify the policy, I am going to use conditional access what if tool.
Then in the selection, I used the following values and execute what if tool.
- User from sales team – MeganB@M365x581675.OnMicrosoft.com
- IP address – 40.121.153.69
- Sign-in risk – None
- User risk (Preview) – Medium
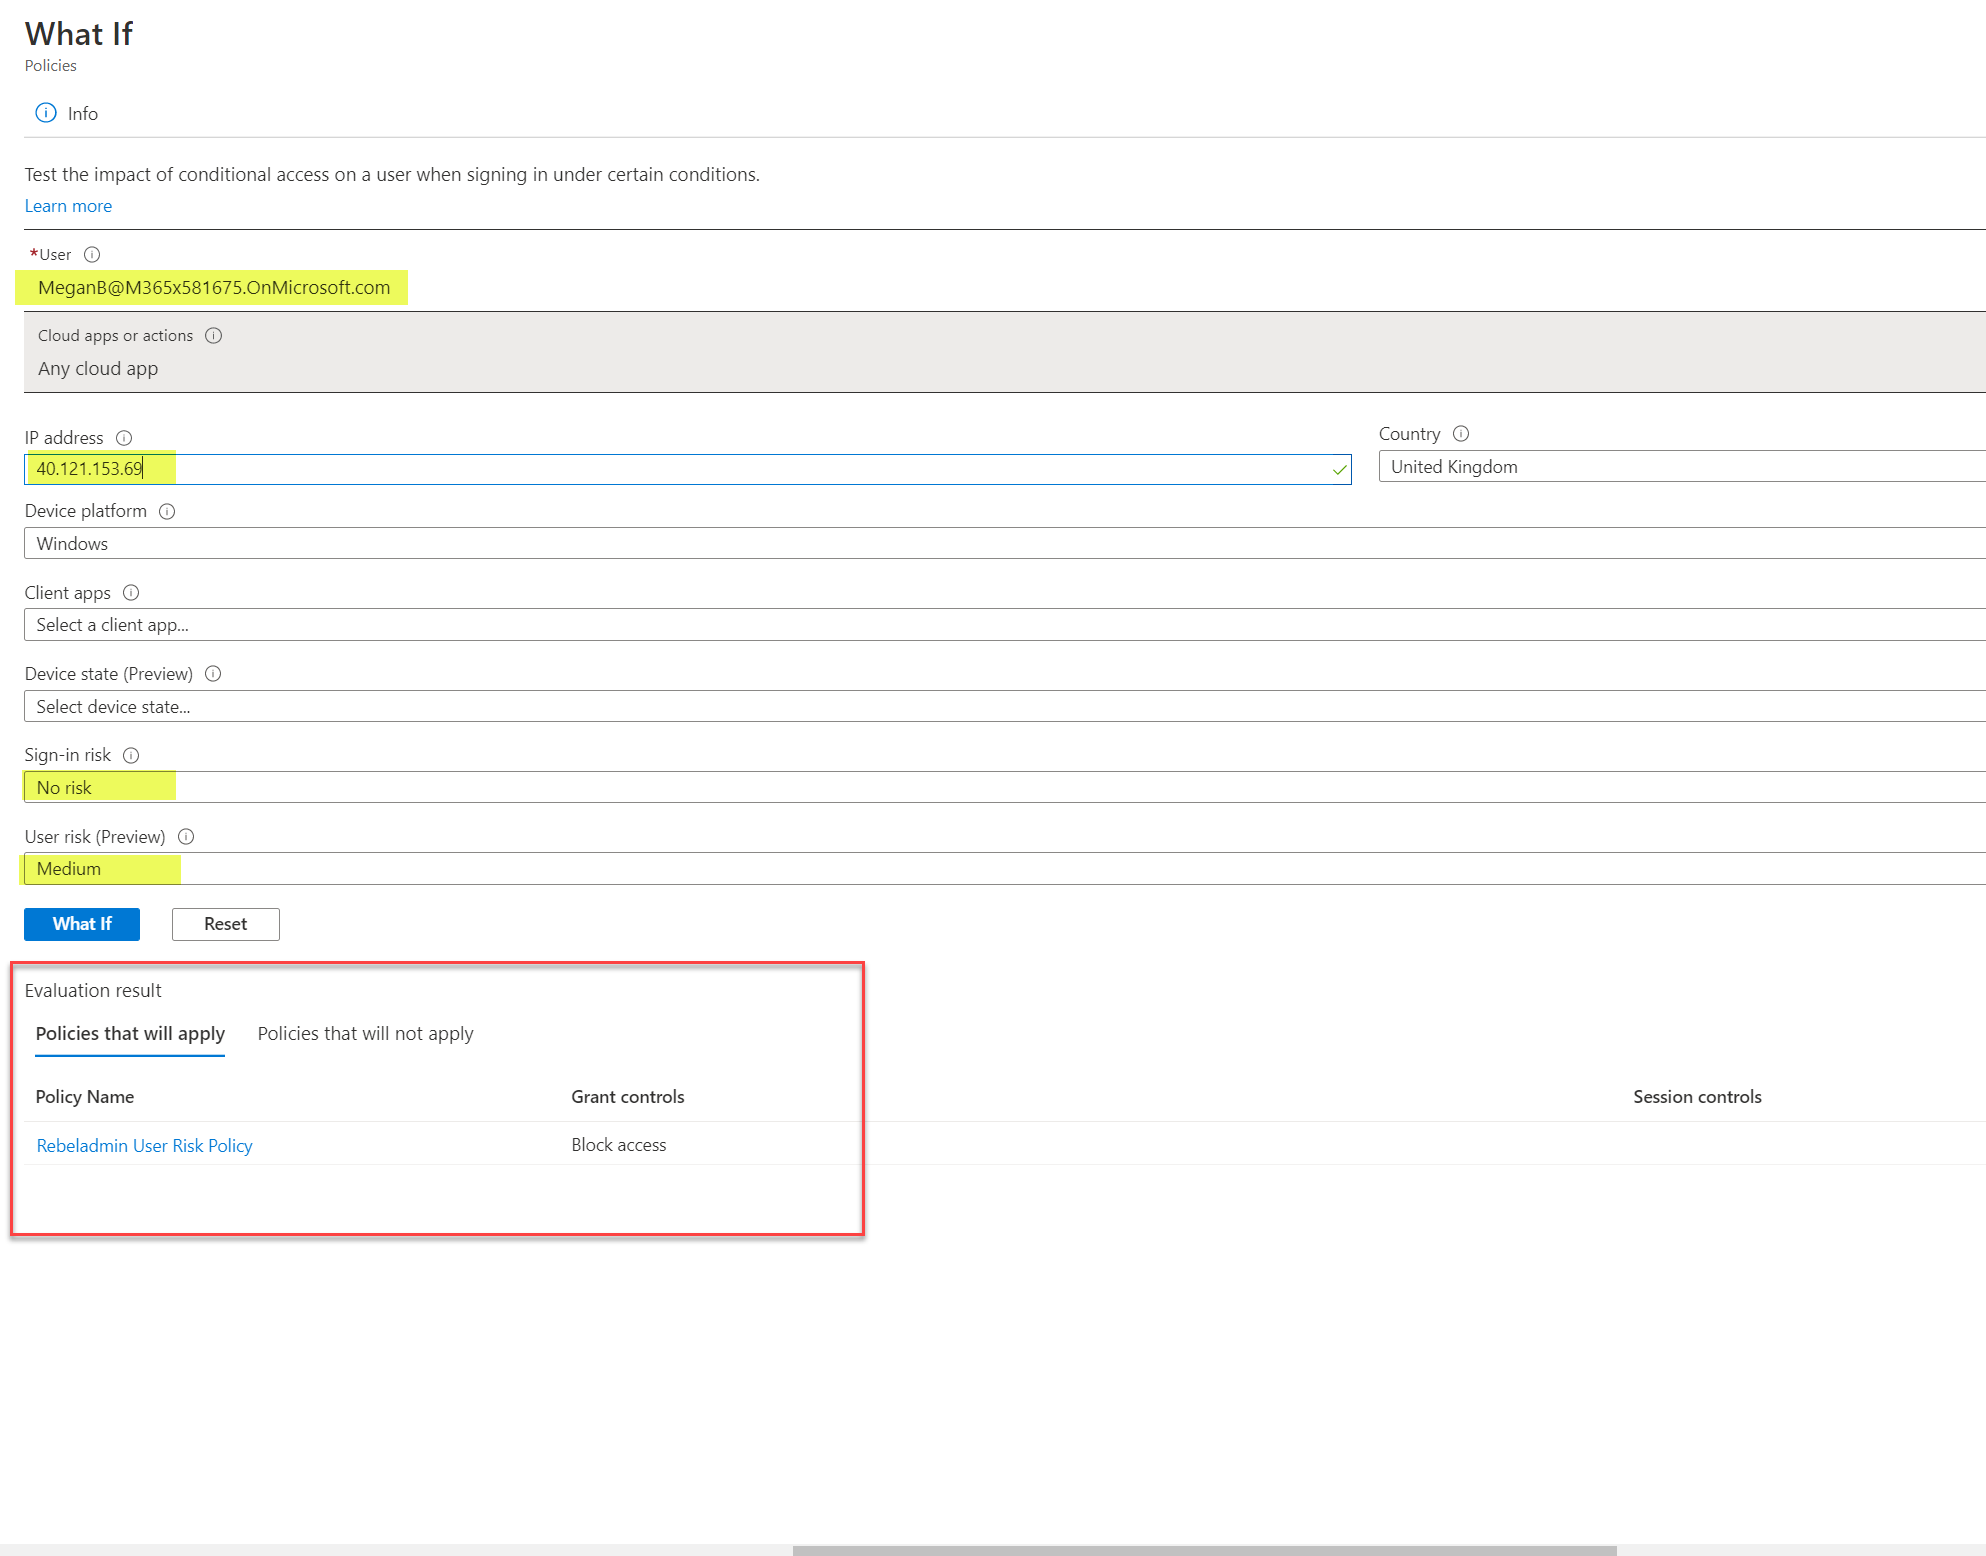
As expected, the Evaluation result verifies that the policy is working.
Hope now you have a better understanding of how to configure user risk-based azure conditional access policies. If you have any questions feel free to contact me at rebeladm@live.com also follow me on twitter @rebeladm to get updates about new blog posts.

