
There are certain situations where we may need to move Azure resources from one Azure region to another, such as,
• Take advantages of the service offering in different Azure regions
• Business mergers or acquisitions
• Legal or compliances requirements
• Deployment errors
Now using Azure Resource Mover, we can simply move resources from one Azure region to another. Azure resource mover also can use to,
• Move resources from one resource group to another
• Move resource from one Azure subscription to another
In this blog post, I am going to demonstrate how to move Azure Resources from one Azure region to another by using Azure Resource Mover. At the time this article was written, this service was on public preview.
What resources we can move across Azure regions?
Azure resource mover support the following types of resources,
• Azure VMs and associated disks
• NICs
• Availability sets
• Azure virtual networks
• Public IP addresses
• Network security groups (NSGs)
• Internal and public load balancers
• Azure SQL databases and elastic pools
In this demo, I am going to create a new resource group, virtual network, and windows VM in East US Azure region and later move those to Canada Central Azure region.
For the configuration process, I will be using PowerShell as well as GUI. Therefore, please make sure you have an Azure PowerShell module installed. More info about it can find under https://docs.microsoft.com/en-us/powershell/azure/install-az-ps?view=azps-3.8.0
Create an Azure VM to use as Source
We can begin the configuration process by creating a Test VM. To do that,
1. Launch PowerShell console and connect to Azure using Connect-AzAccount
2. Then create a new resource group using,
New-AzResourceGroup -Name REBELRG1 -Location “East US”

In the above, REBELRG1 is the resource group name and its created-in East US Azure region.
3. The next step is to create a new virtual network under REBELRG1 resource group.
$vmsubnet = New-AzVirtualNetworkSubnetConfig -Name vmsubnet -AddressPrefix “10.0.2.0/24”
New-AzVirtualNetwork -Name REBELVN1 -ResourceGroupName REBELRG1 -Location “East US” -AddressPrefix “10.0.0.0/16” -Subnet $vmsubnet
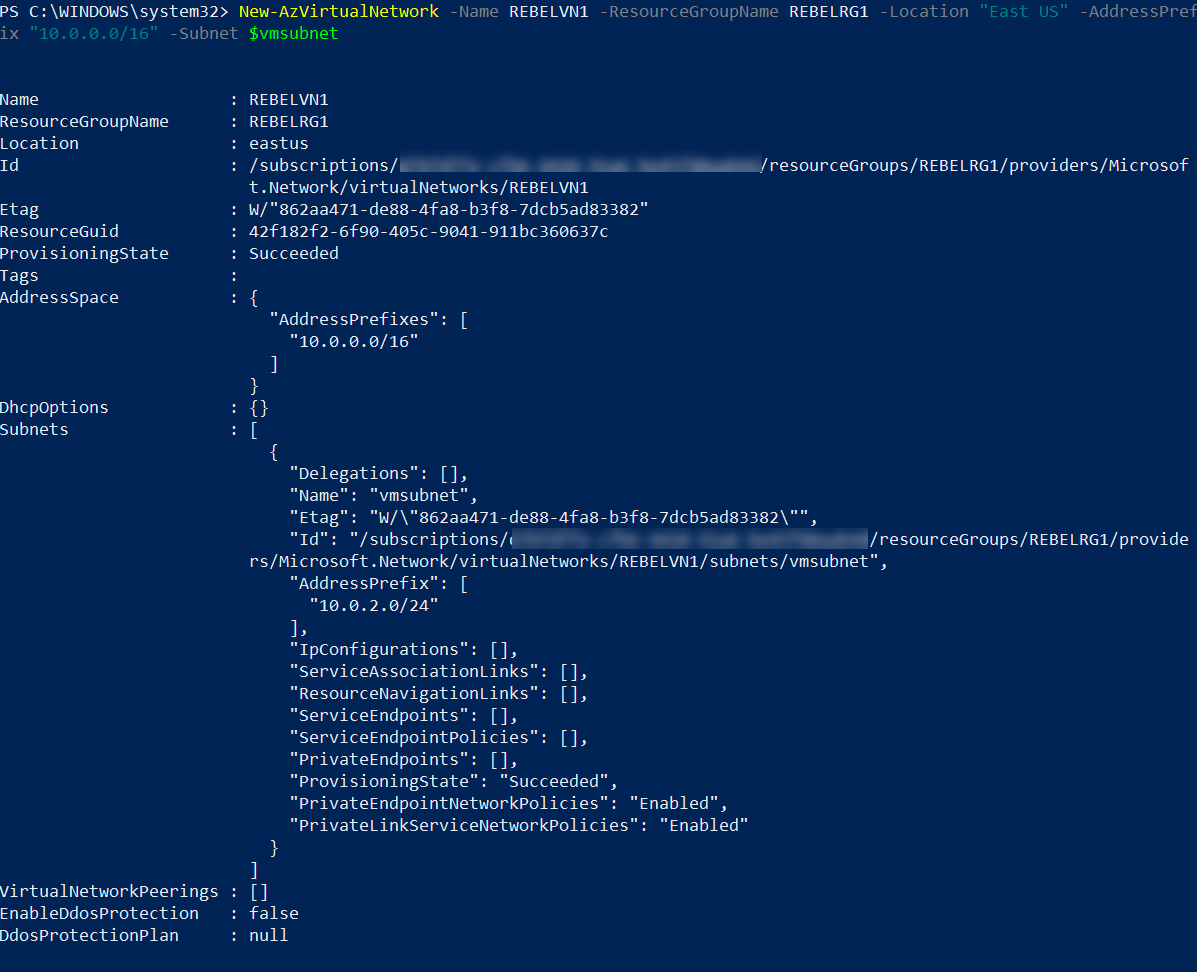
In the above, REBELVN1 is the new virtual network name. It has 10.0.0.0/16 address space. It also has a new subnet 10.0.2.0/24 (vmsubnet) for virtual machines.
4. As the next step of the configuration, I am going to create a new virtual machine under REBELRG1 resource group. This will be used for testing purposes.
$mylogin = Get-Credential
New-AzVm -ResourceGroupName REBELRG1 -Name “REBELTVM01” -Location “East US” -VirtualNetworkName “REBELVN1” -SubnetName “vmsubnet” -addressprefix 10.0.2.0/24 -PublicIpAddressName “REBELVM01IP1” -OpenPorts 3389 -Image win2019datacenter -Size Standard_D2s_v3 -Credential $mylogin
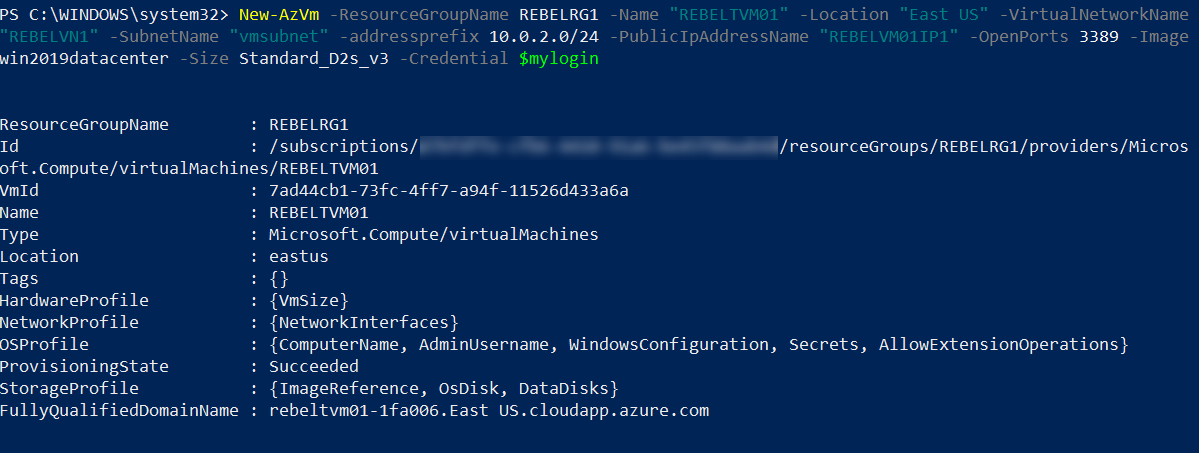
In the above, I am creating a virtual machine called REBELTVM01 in East US Azure region. It is running windows server 2019 data center edition. I have specified it using -Image parameter. It also using Standard_D2s_v3 vm size. For networking, it uses REBELVN1 virtual network and subnet 10.0.2.0/24.
Prepare Azure Resources for Move
The next step of the configuration is to select the Azure resources that we need to move. To do that,
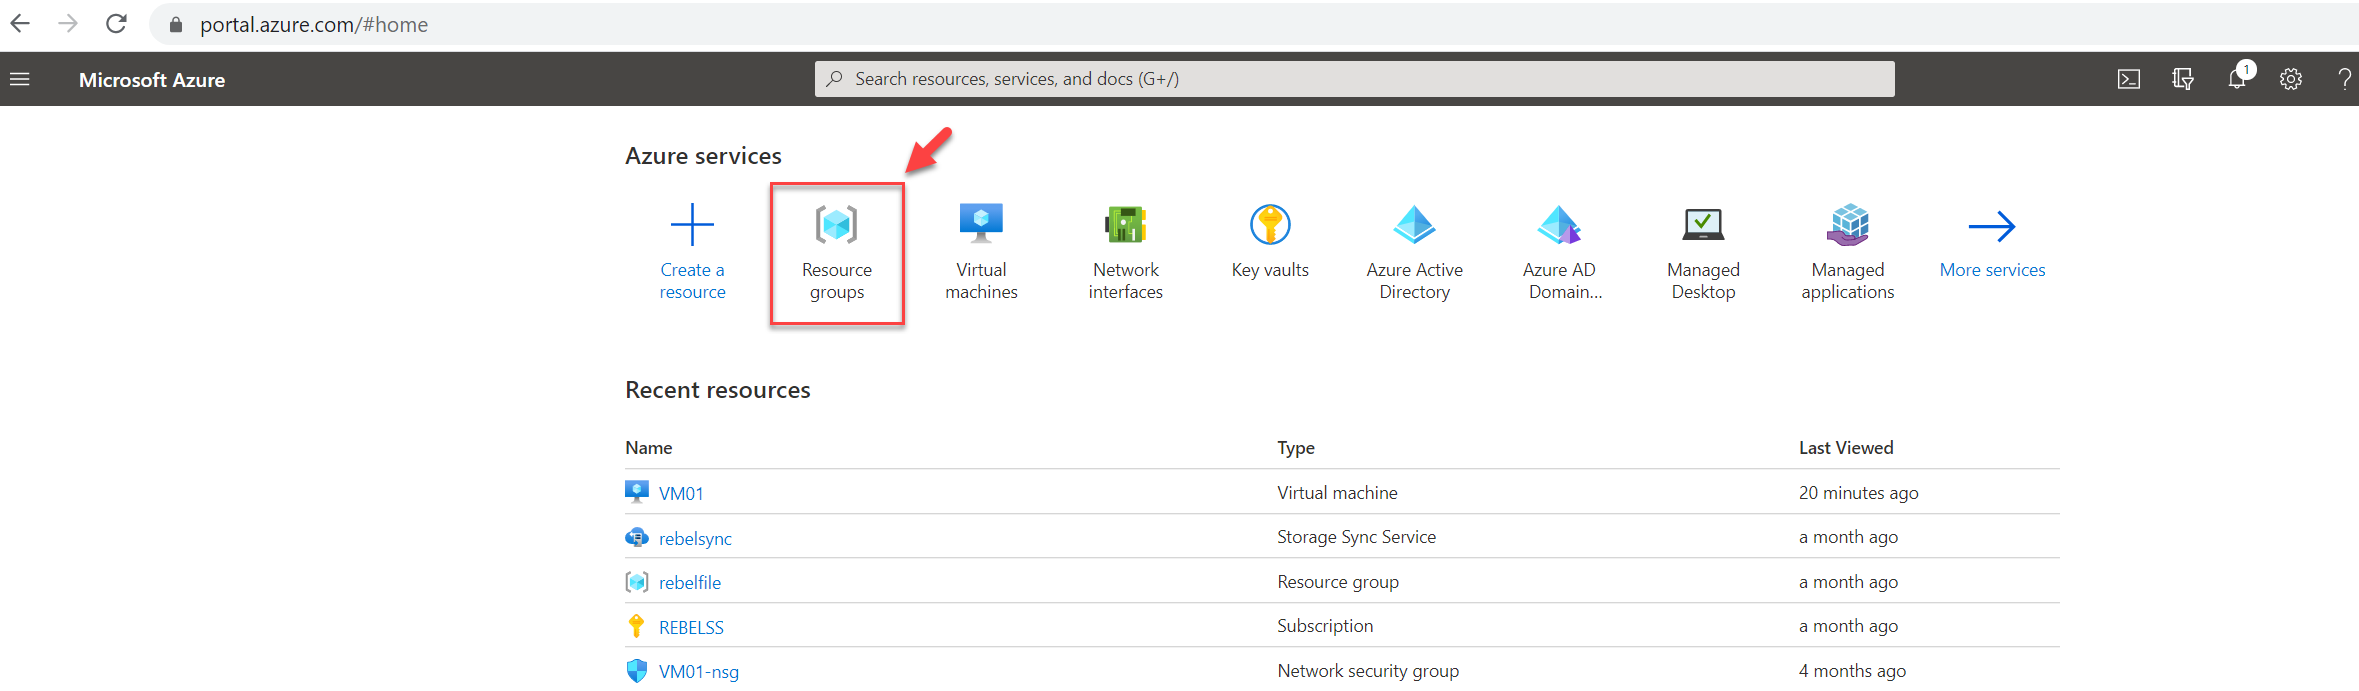
1. Log in to Azure Portal as Global Administrator
2. Click on Resource groups
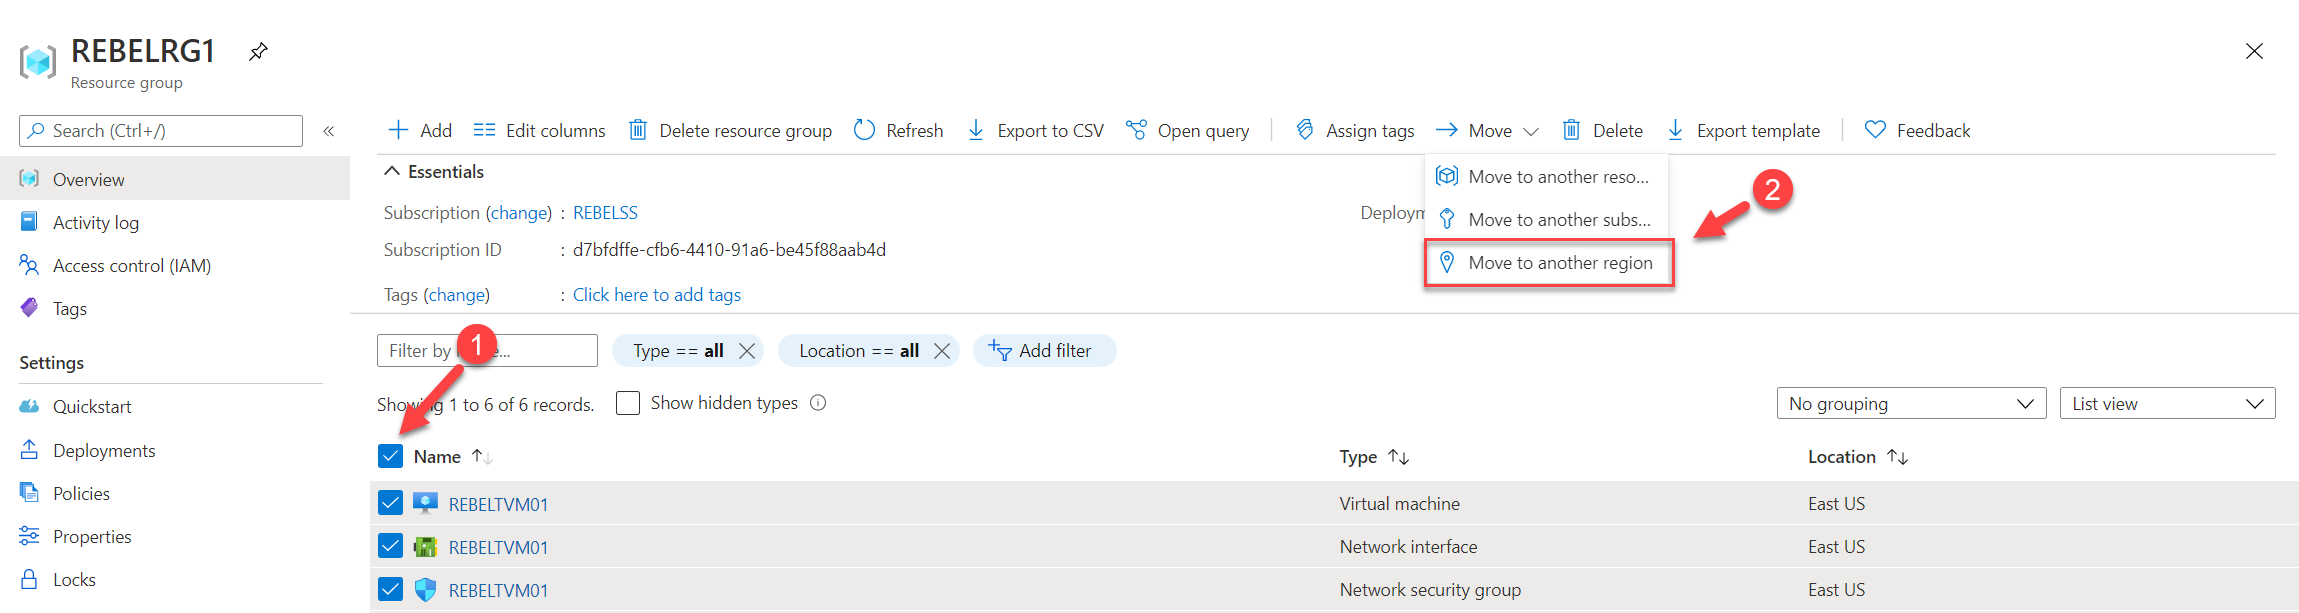
3. Click on the Source Resource group
4. Then Select resources and click on Move | Move to another region
Note: If you are moving an Azure VM, DO NOT select VM disk separately. Only select the Azure VM you want to move. Otherwise, it will give an error during the validation. VM disks are moved as part of the VM
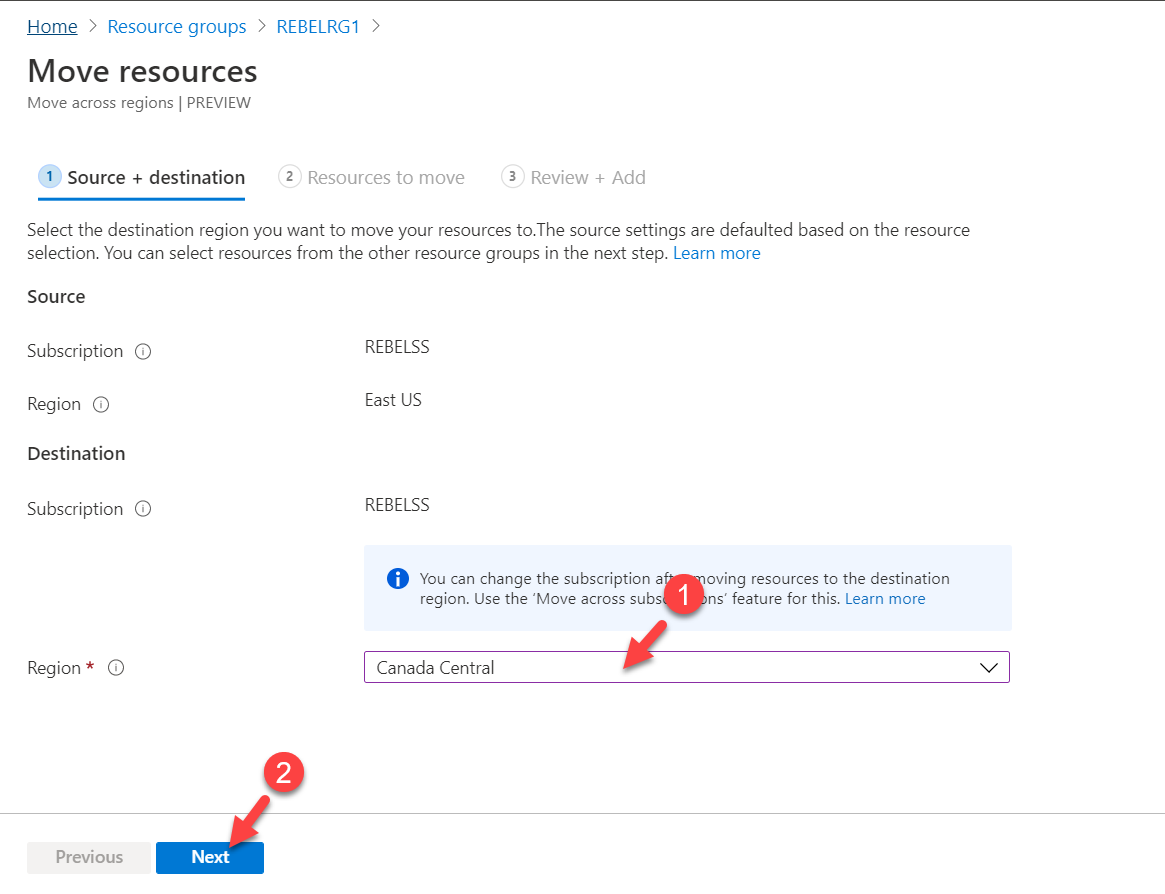
5. In new windows, Select Canada central as the destination region. Then click on Next to proceed.
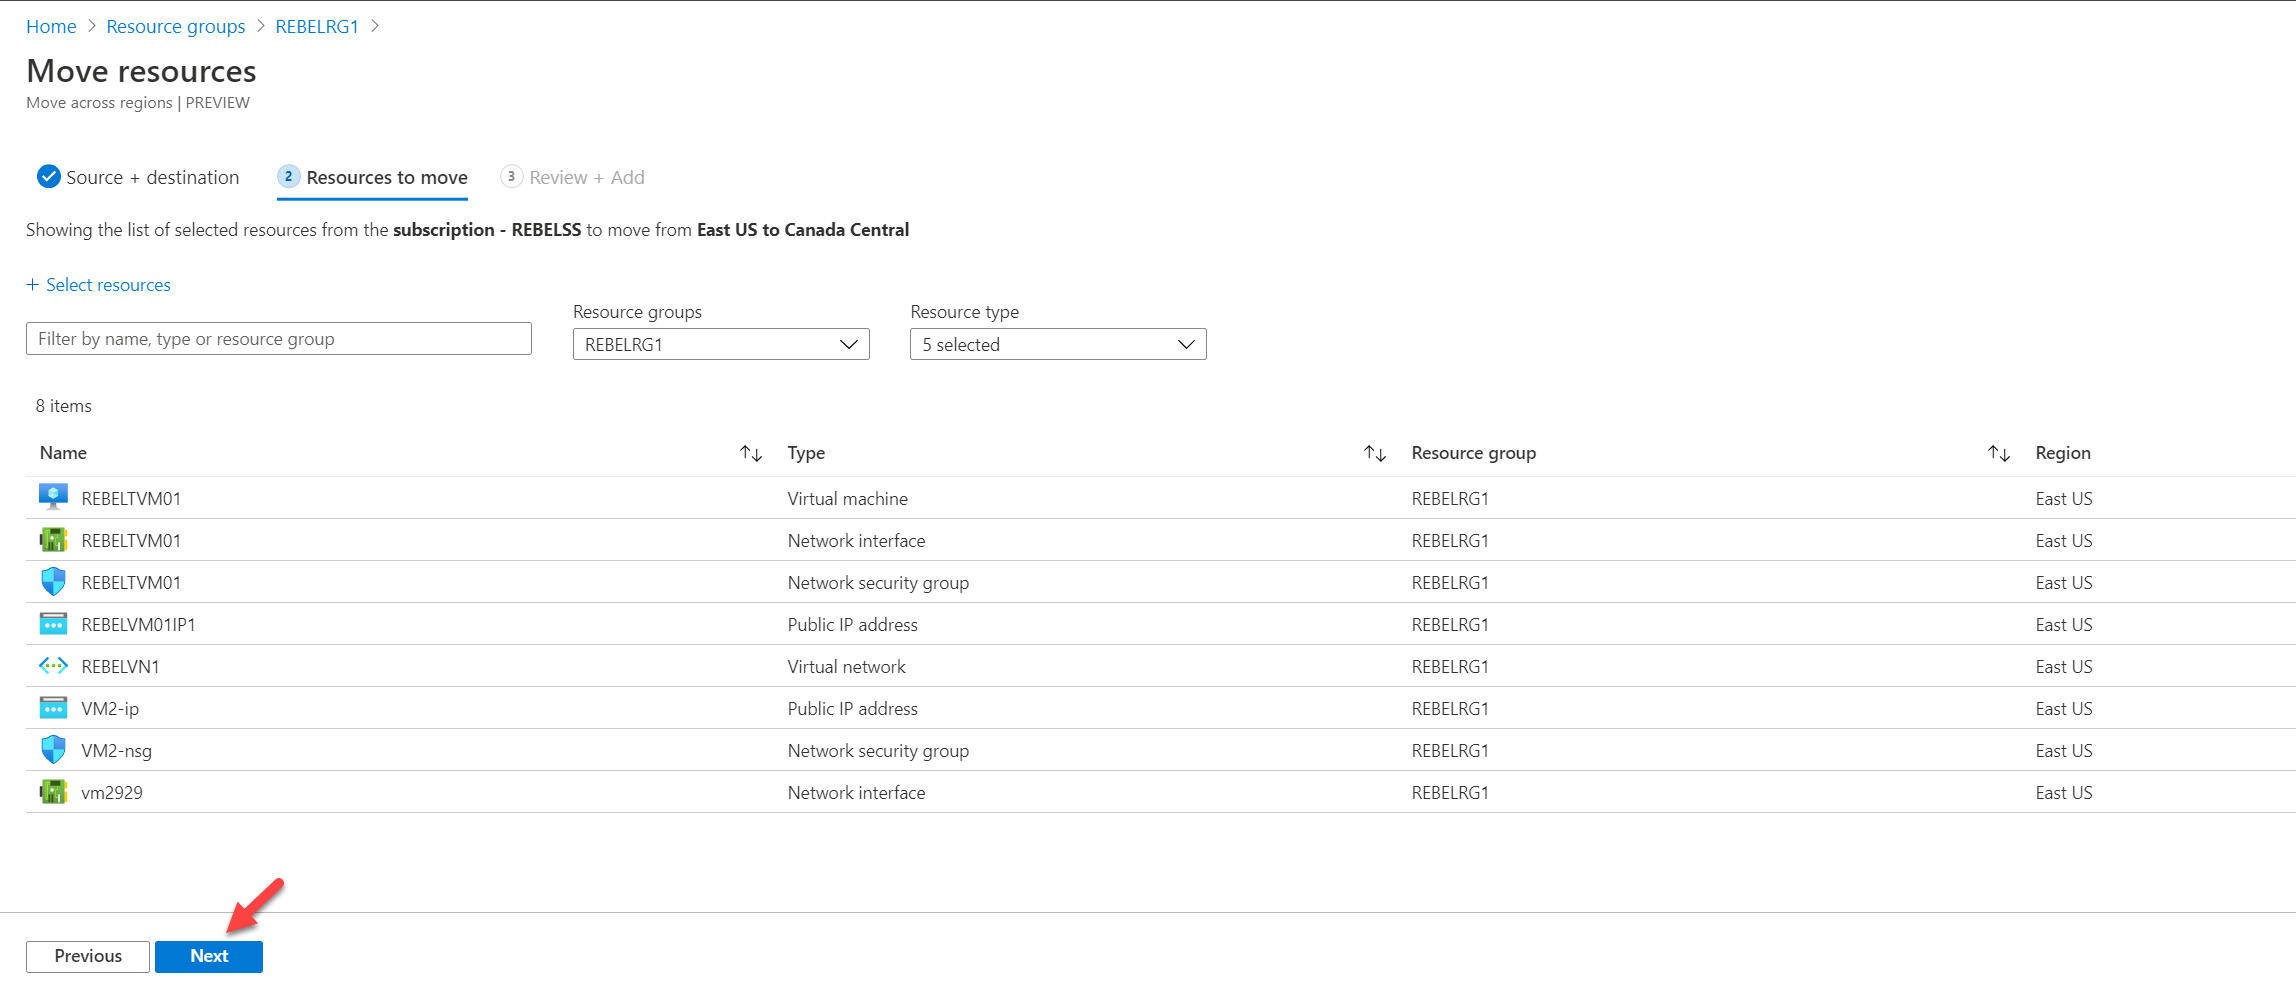
6. In Resources to Move window, verify there are no errors. Then click Next to proceed.
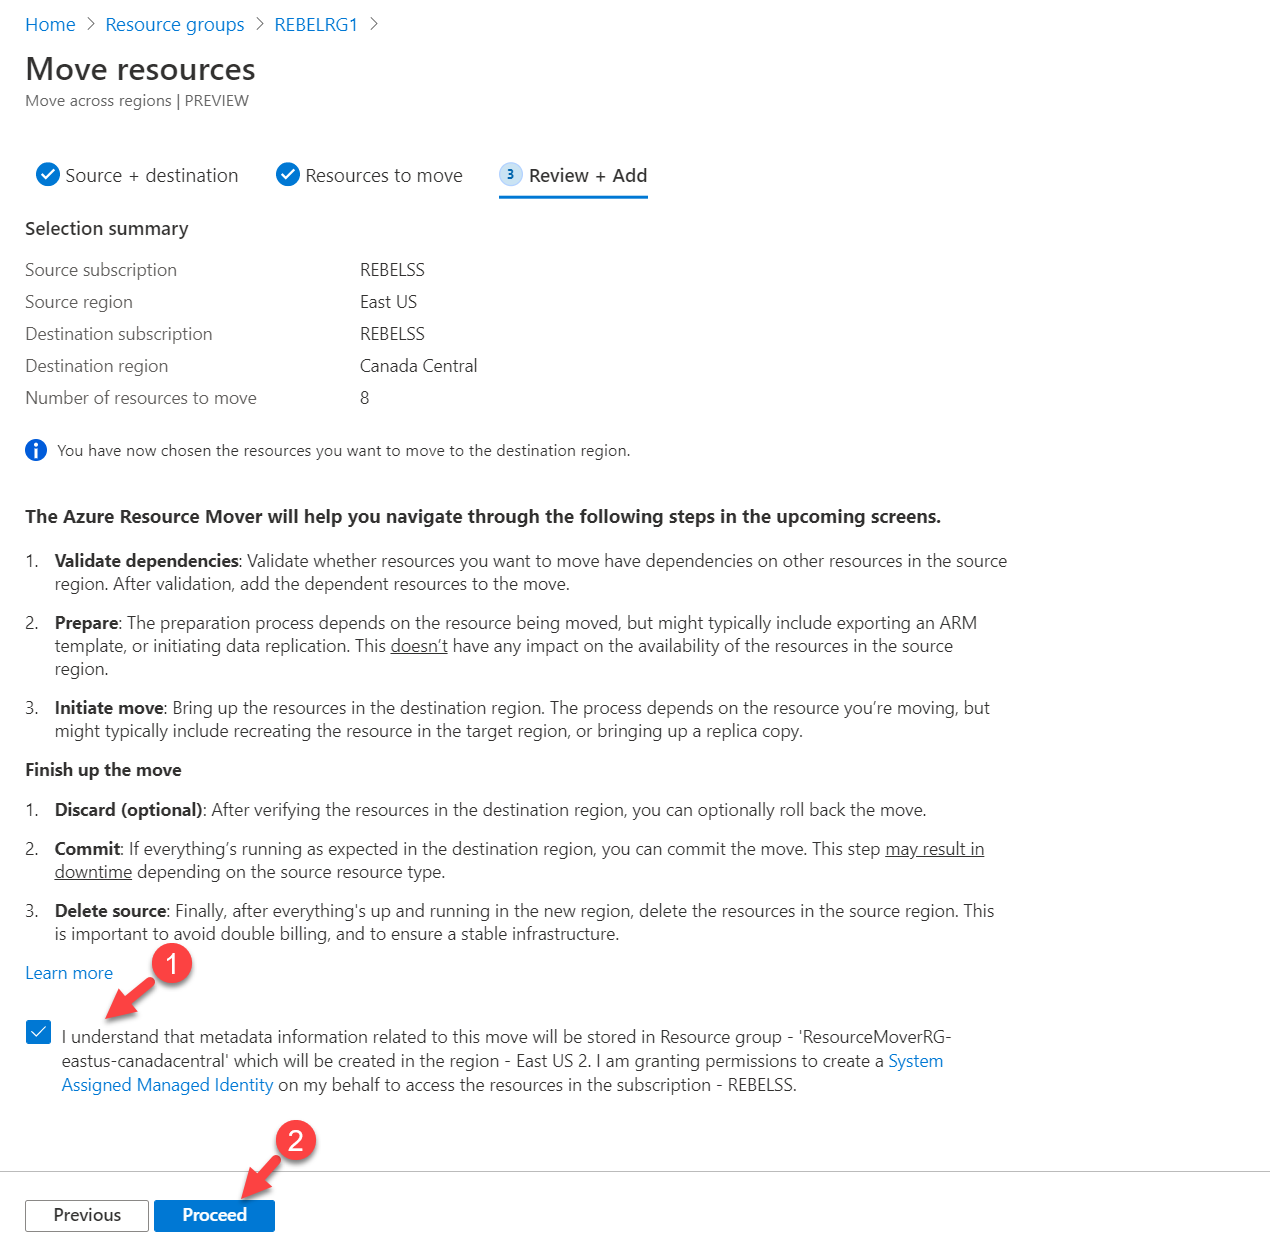
7. In the Review page, accept the changes and click on Proceed.
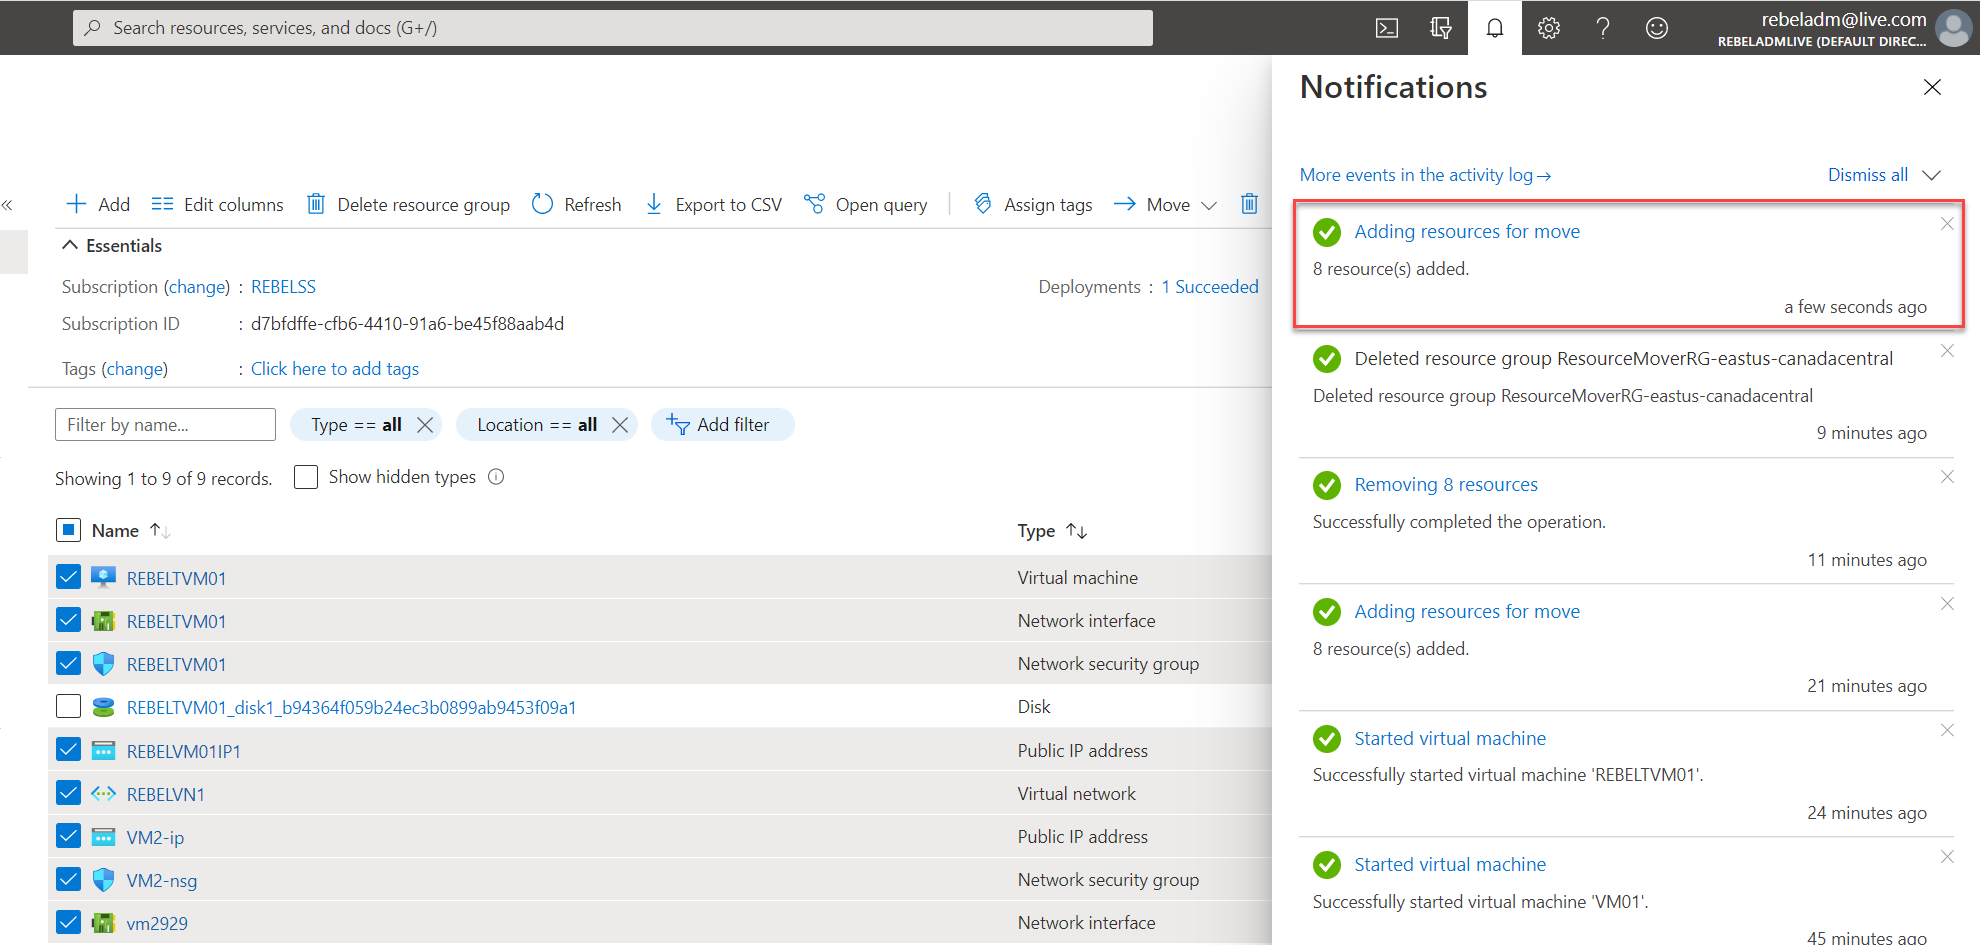
8. Then click on Adding resources for move notification link.
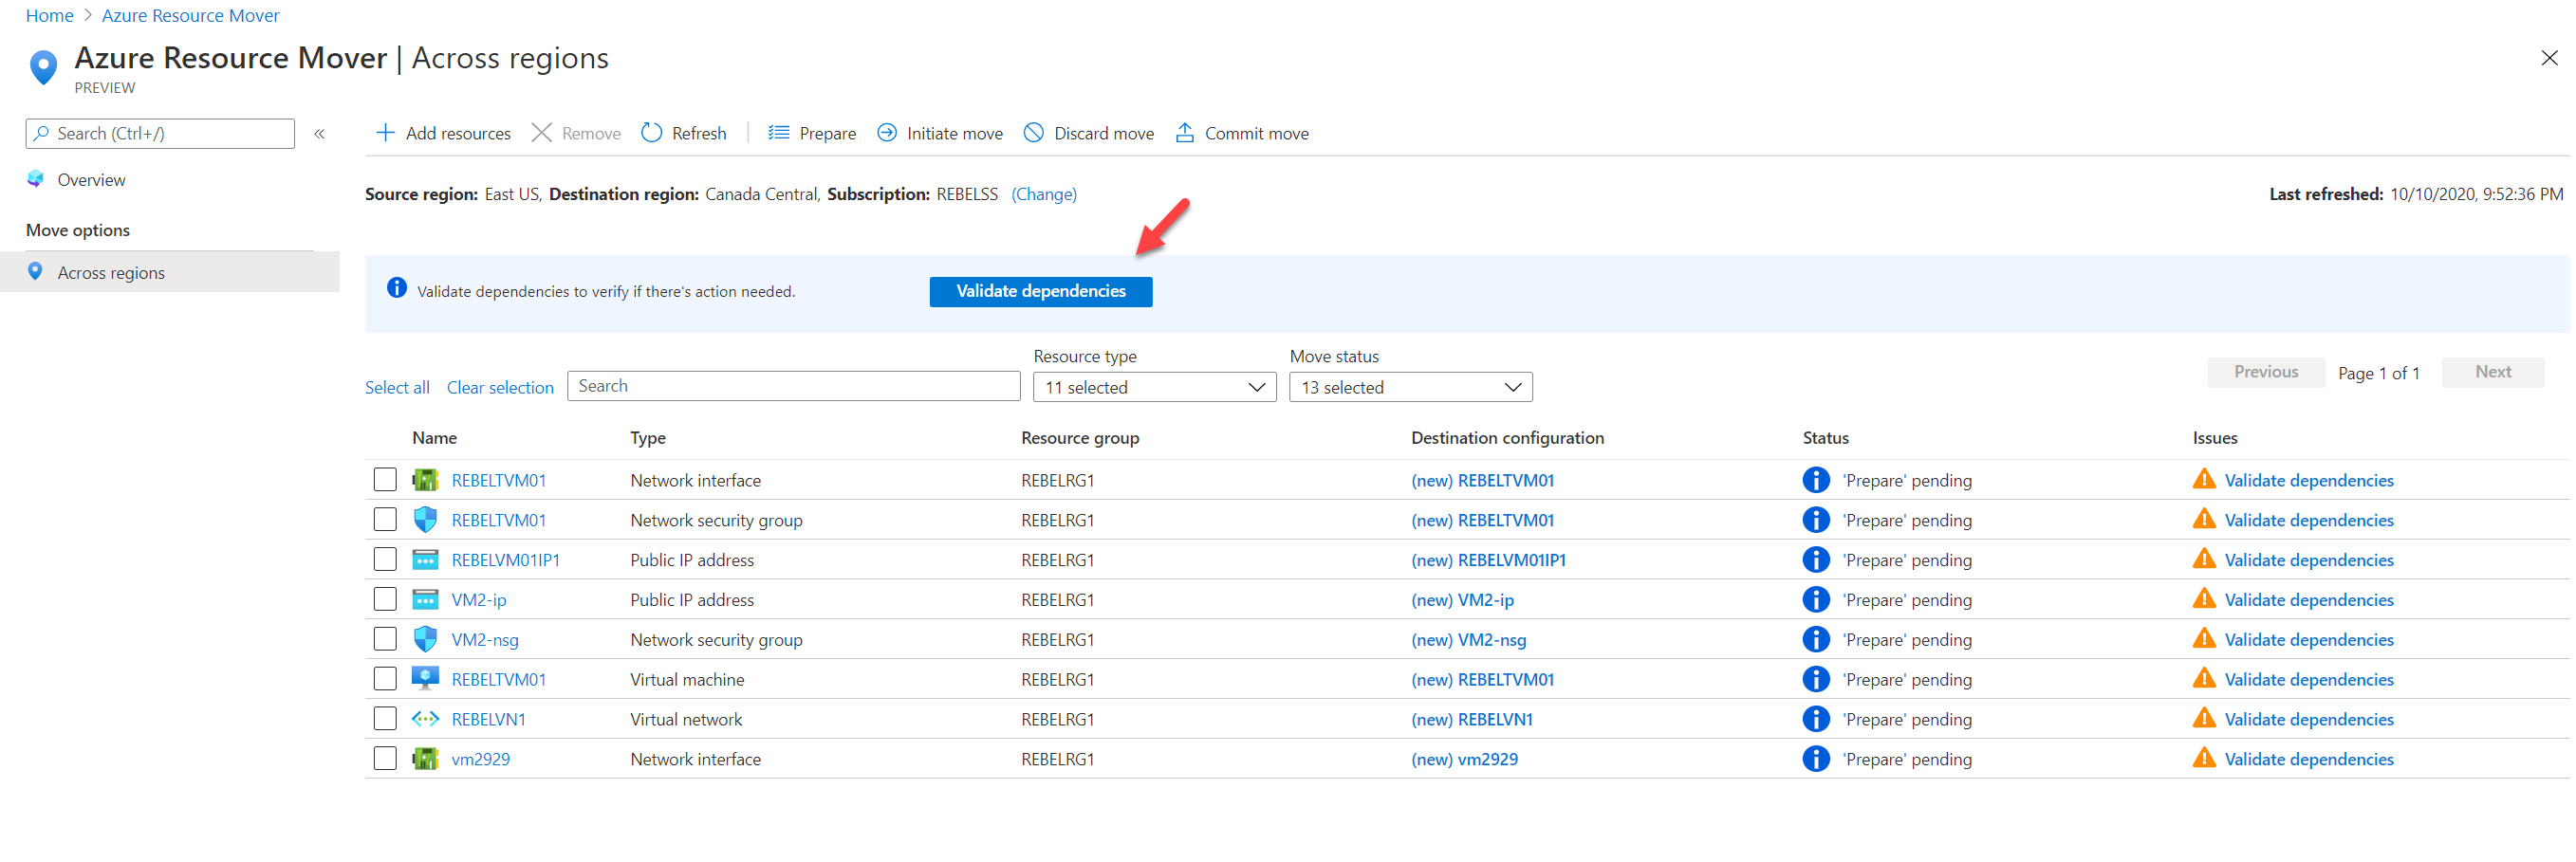
9. It will take you to Azure Resource Mover | Across regions page. Click on Validate dependencies
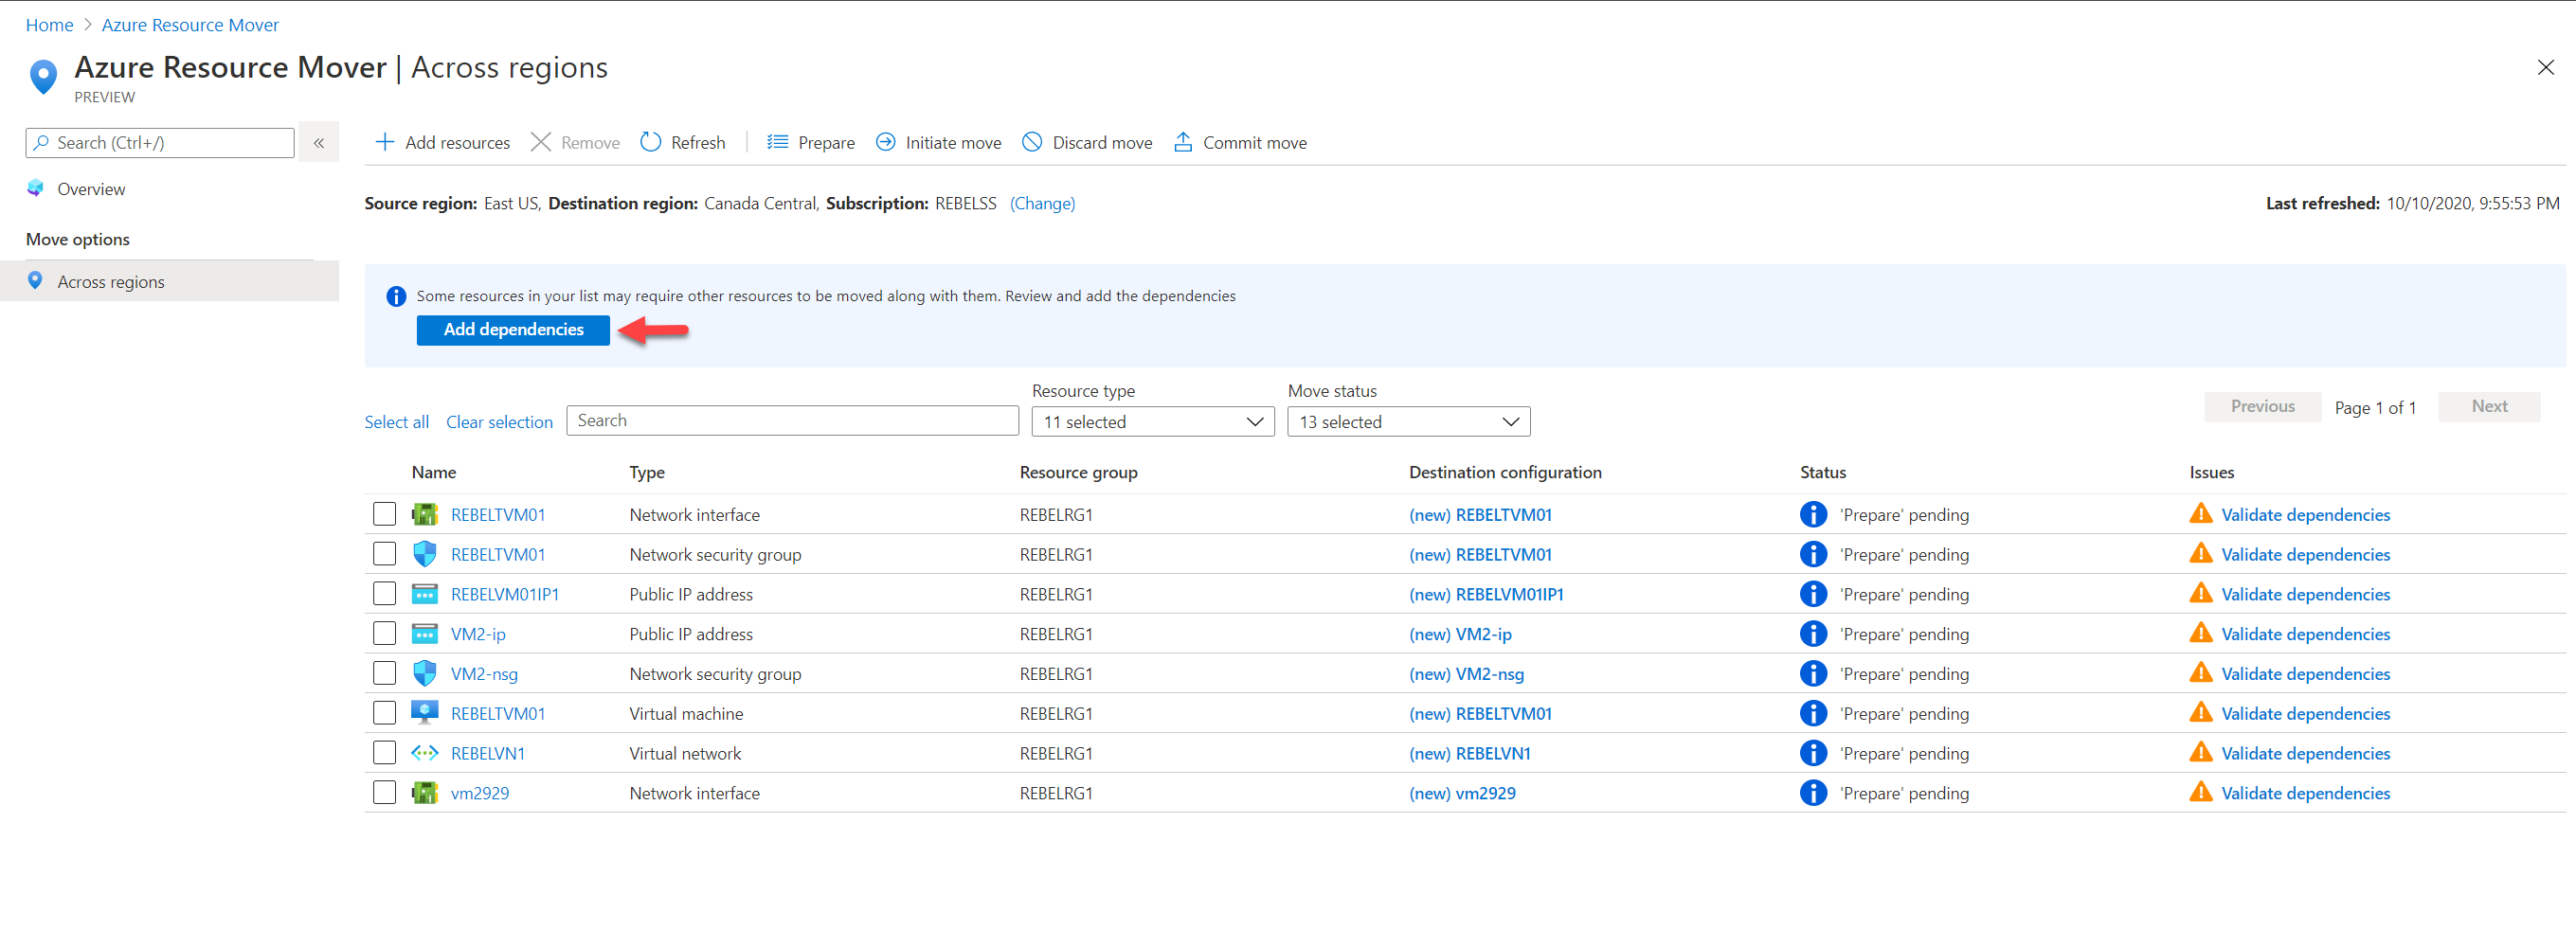
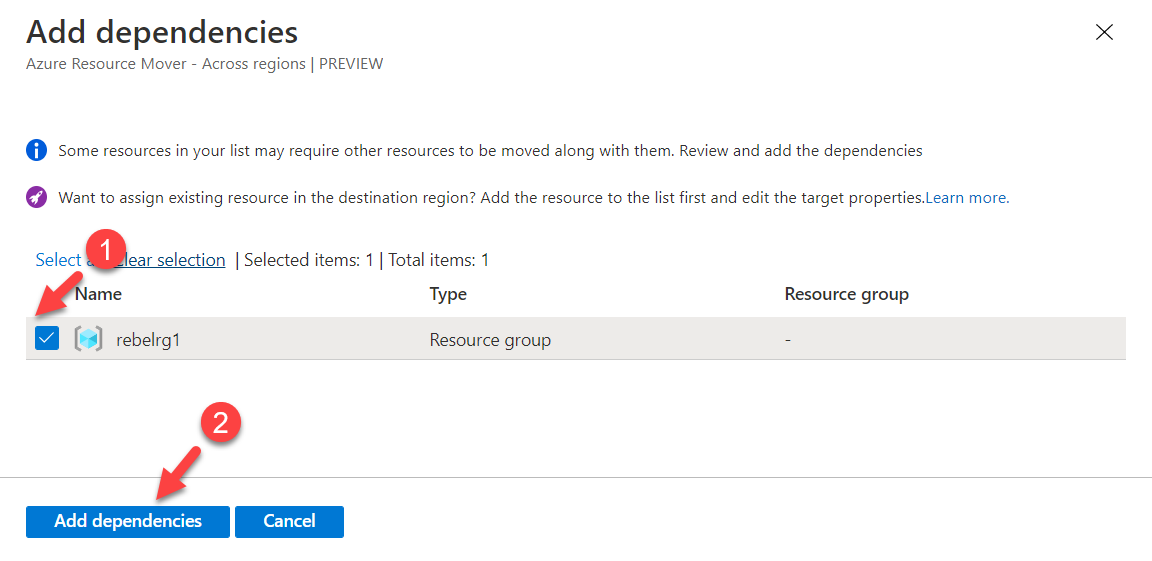
10. If the system found any dependencies, click on Add dependencies
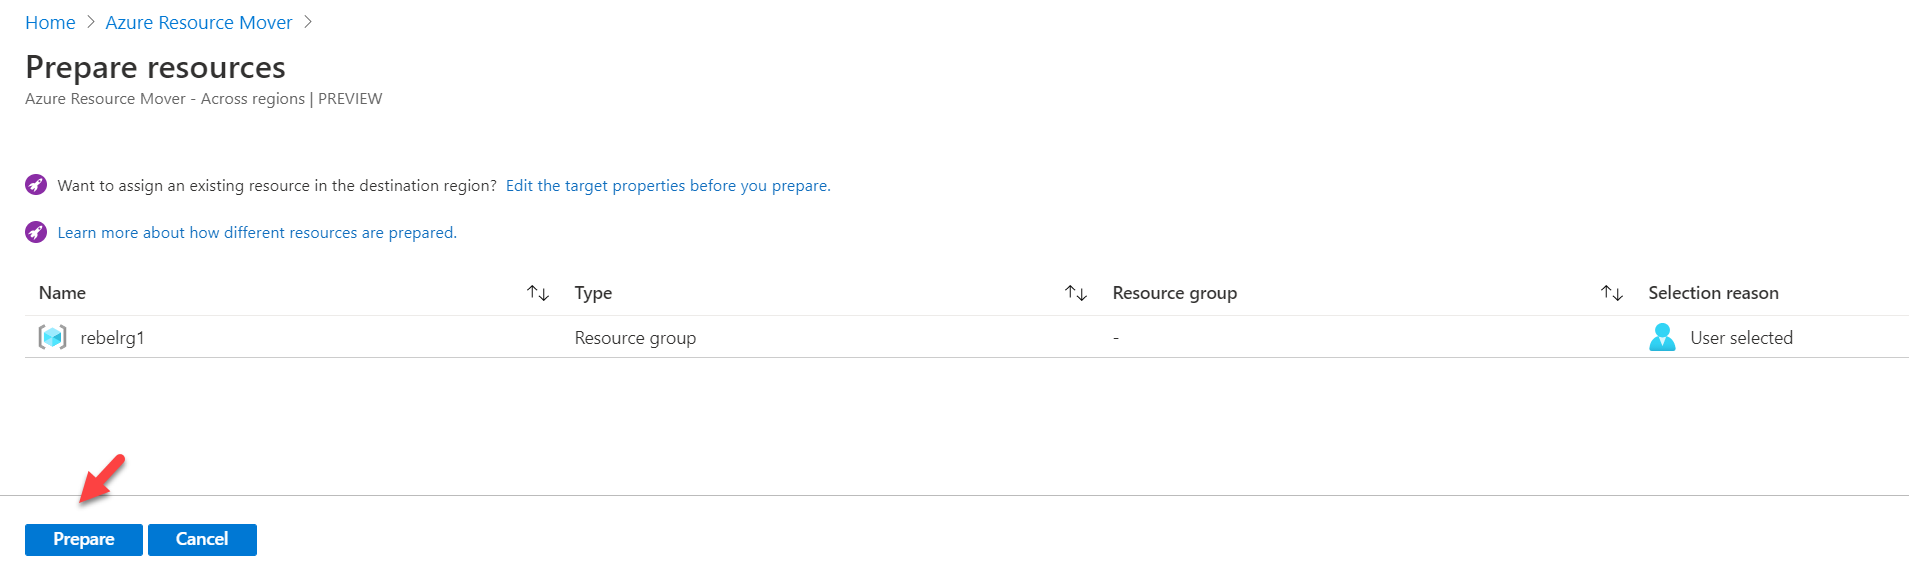
11. Once dependencies are added, select the source resource group you want to move and click on Prepare.
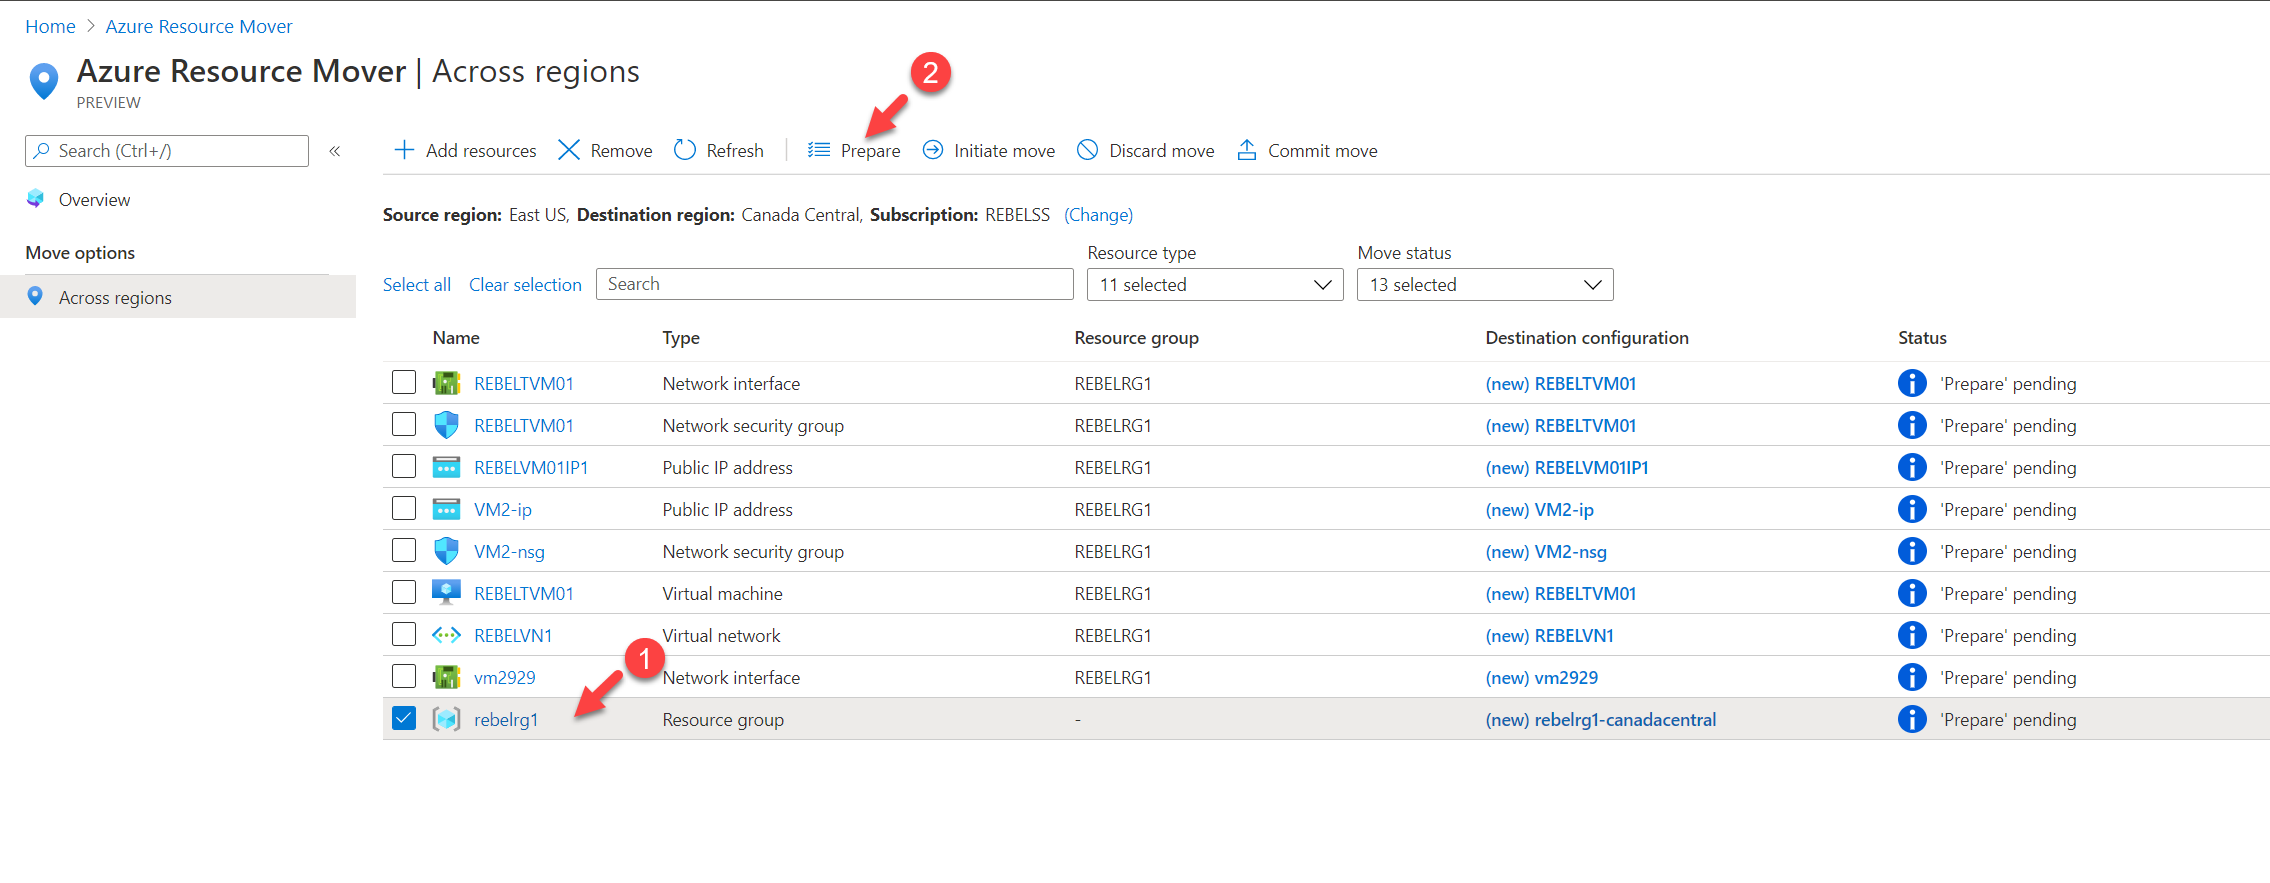
12. On the next page, verify the selection of resources and click on Prepare.
13. Once resource group status is changed to ‘Initiate move‘ pending, select it and click on Initiate move
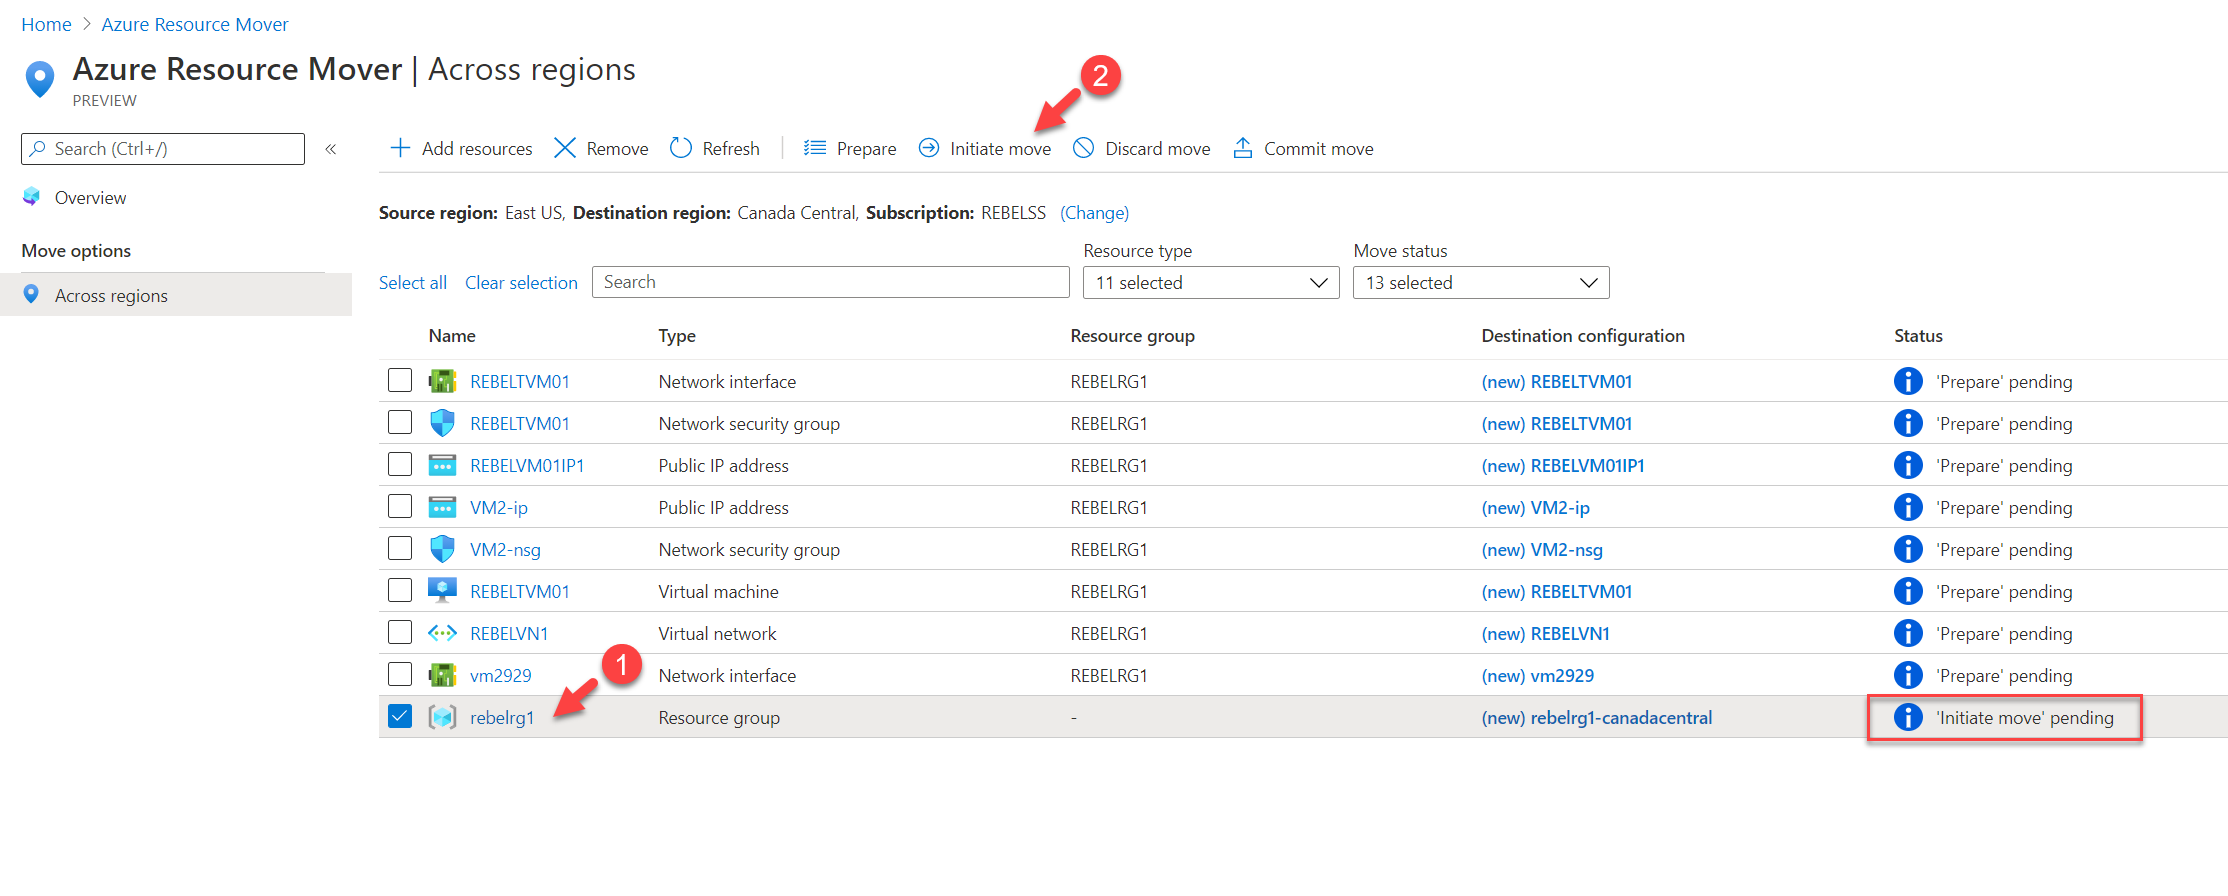
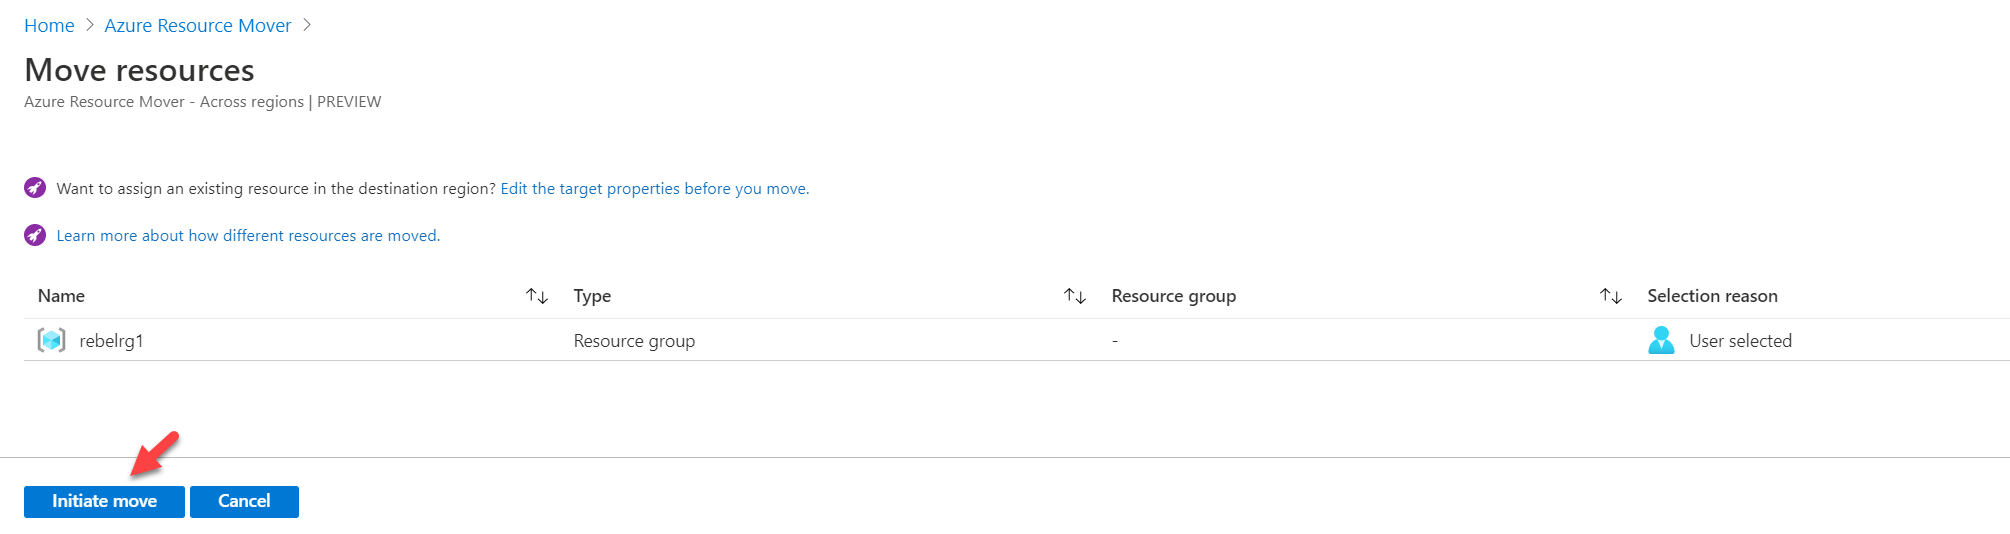
14. On the next page, verify the selection of resources and click on Initiate Move
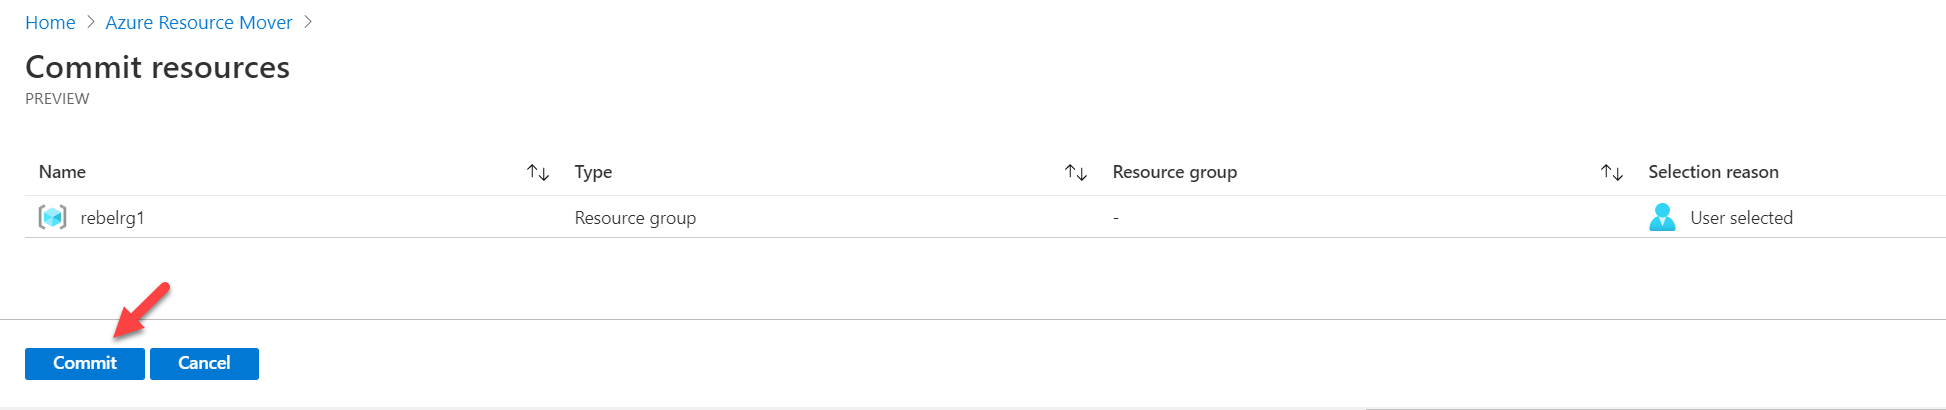
15. After a few minutes the status of the resource group will change to ‘Commit move‘ pending. Then select it and click on Commit Move.
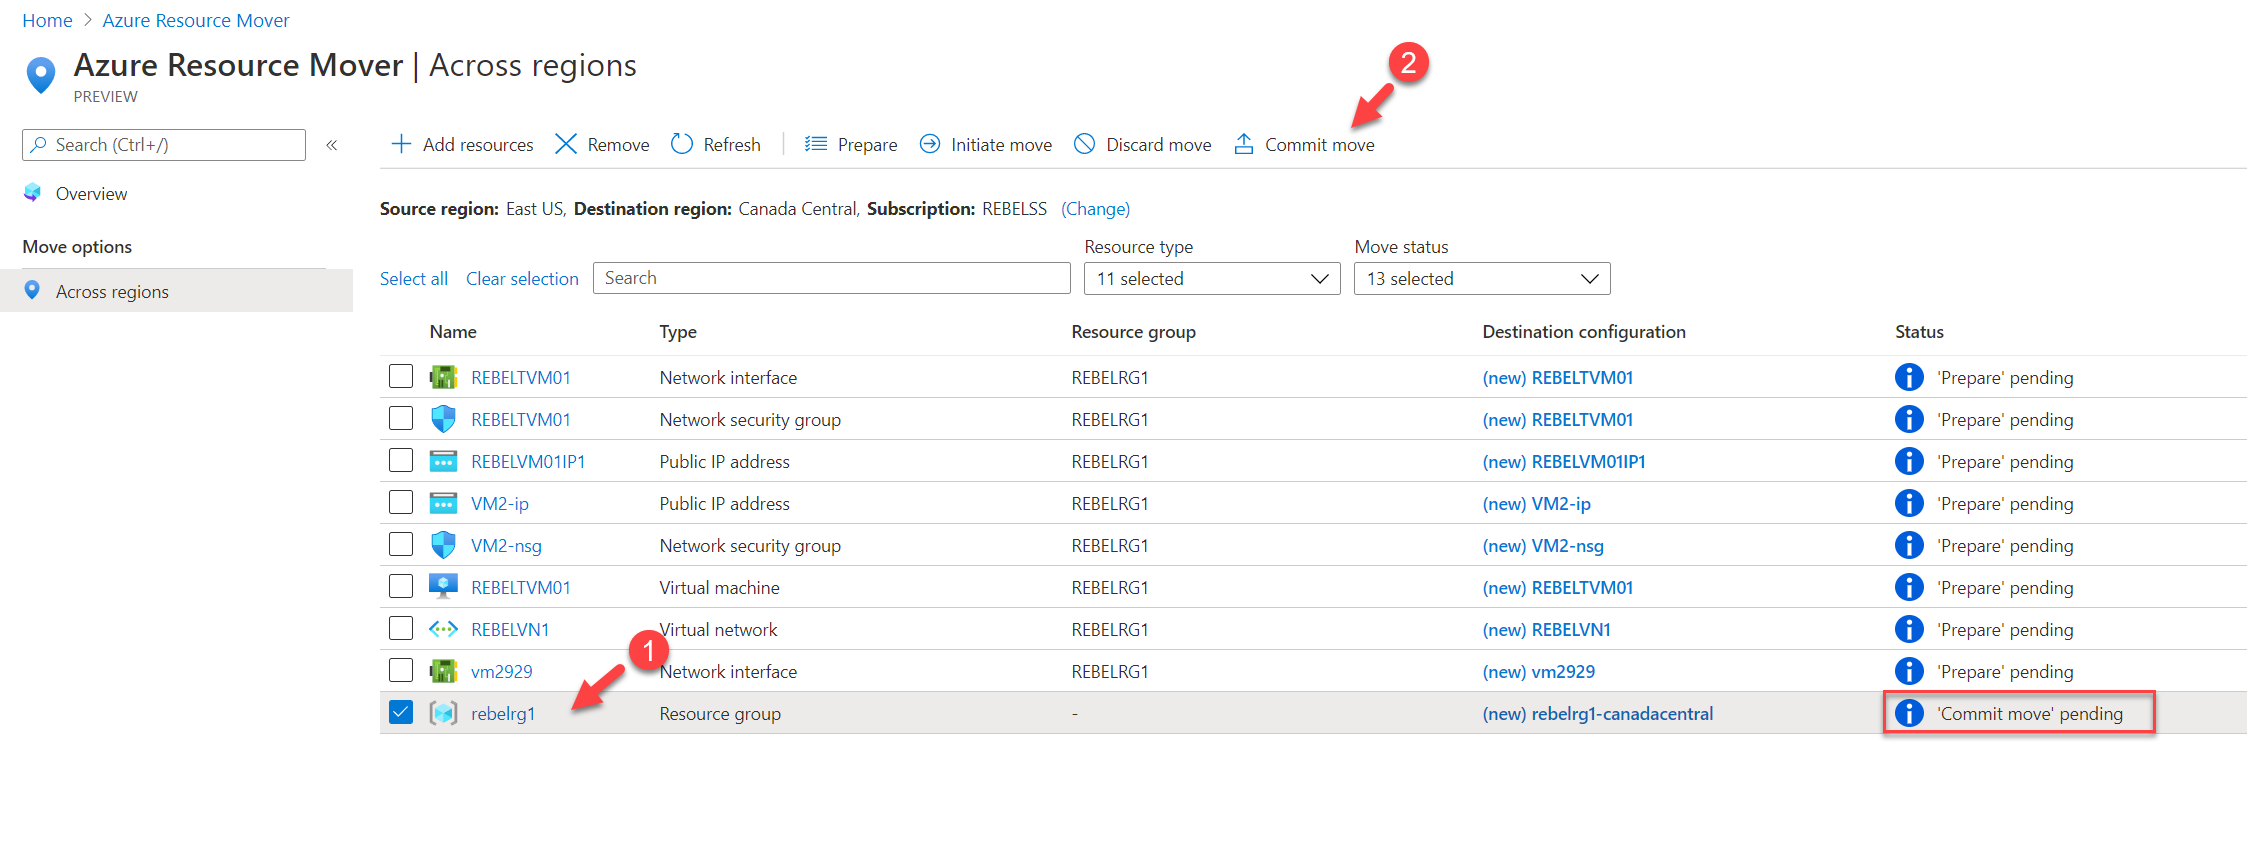
16. On the next page, click on Commit
17. After a few minutes, you can see the resource group status changed to ‘Delete source‘ pending. This means the move is completed for the resource group.
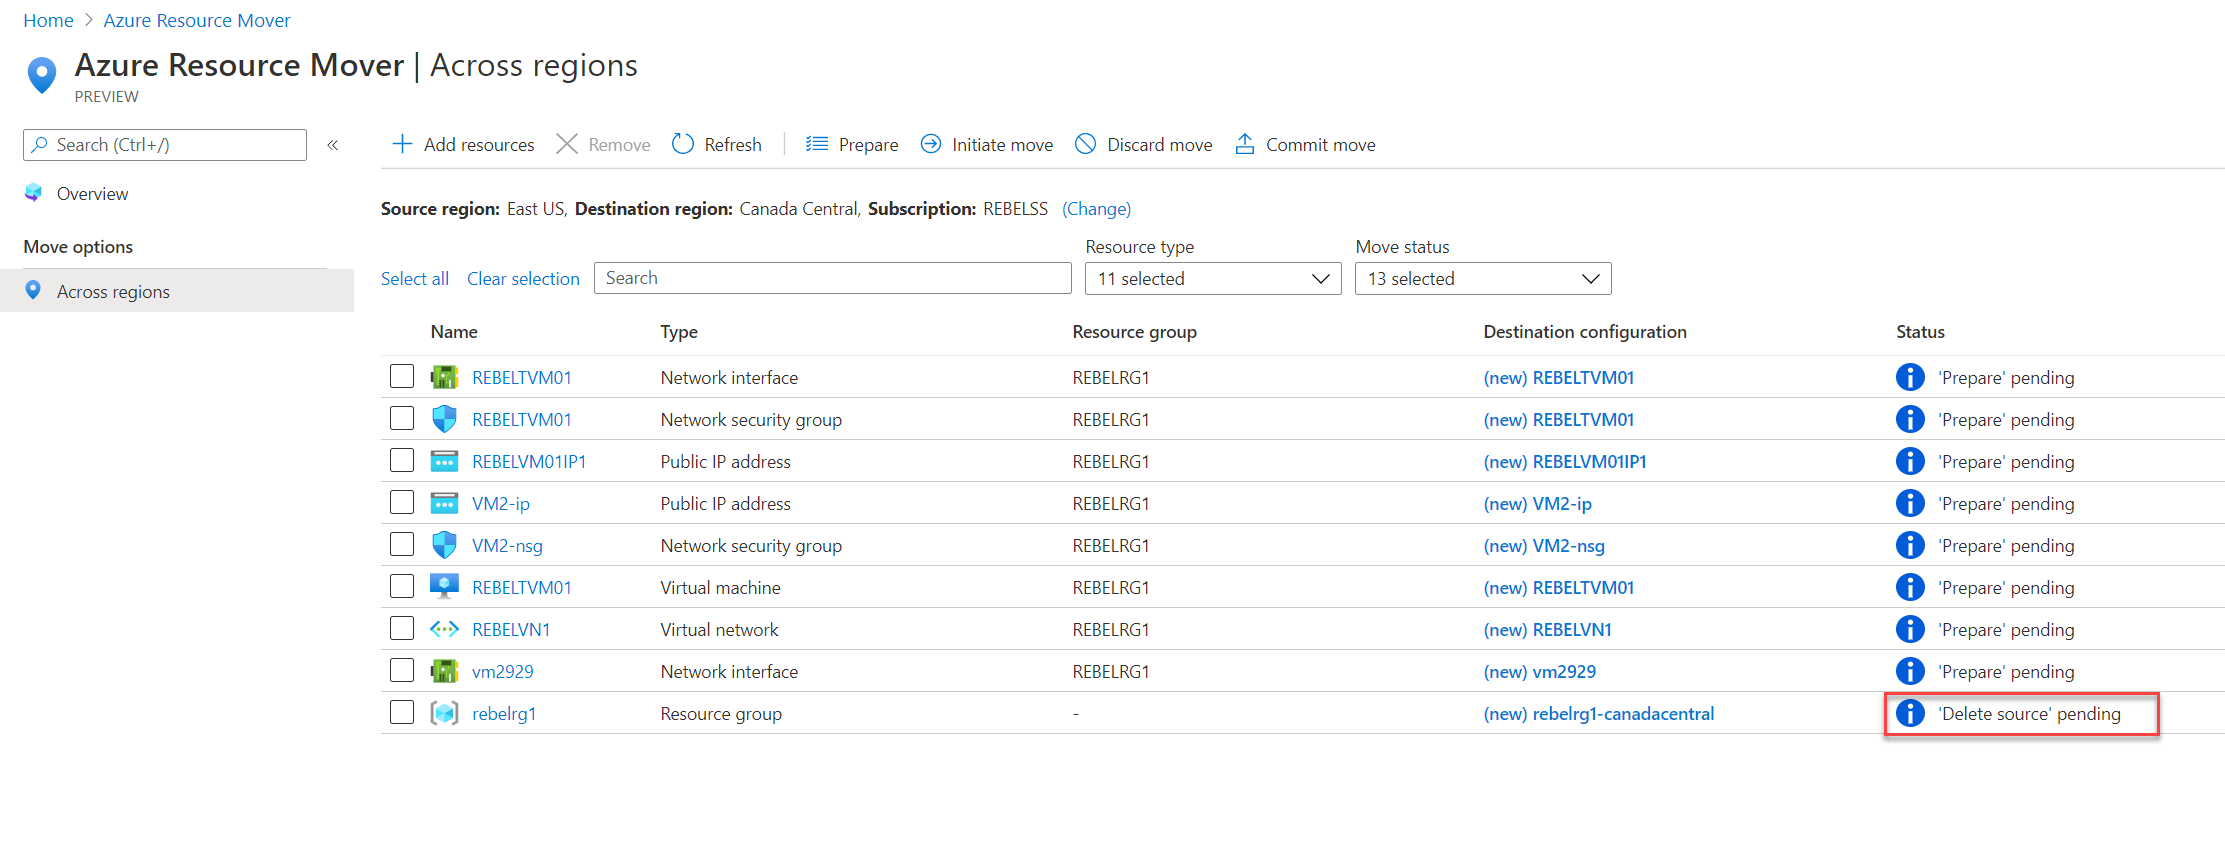
18. Next, follow the same steps and move other resources.
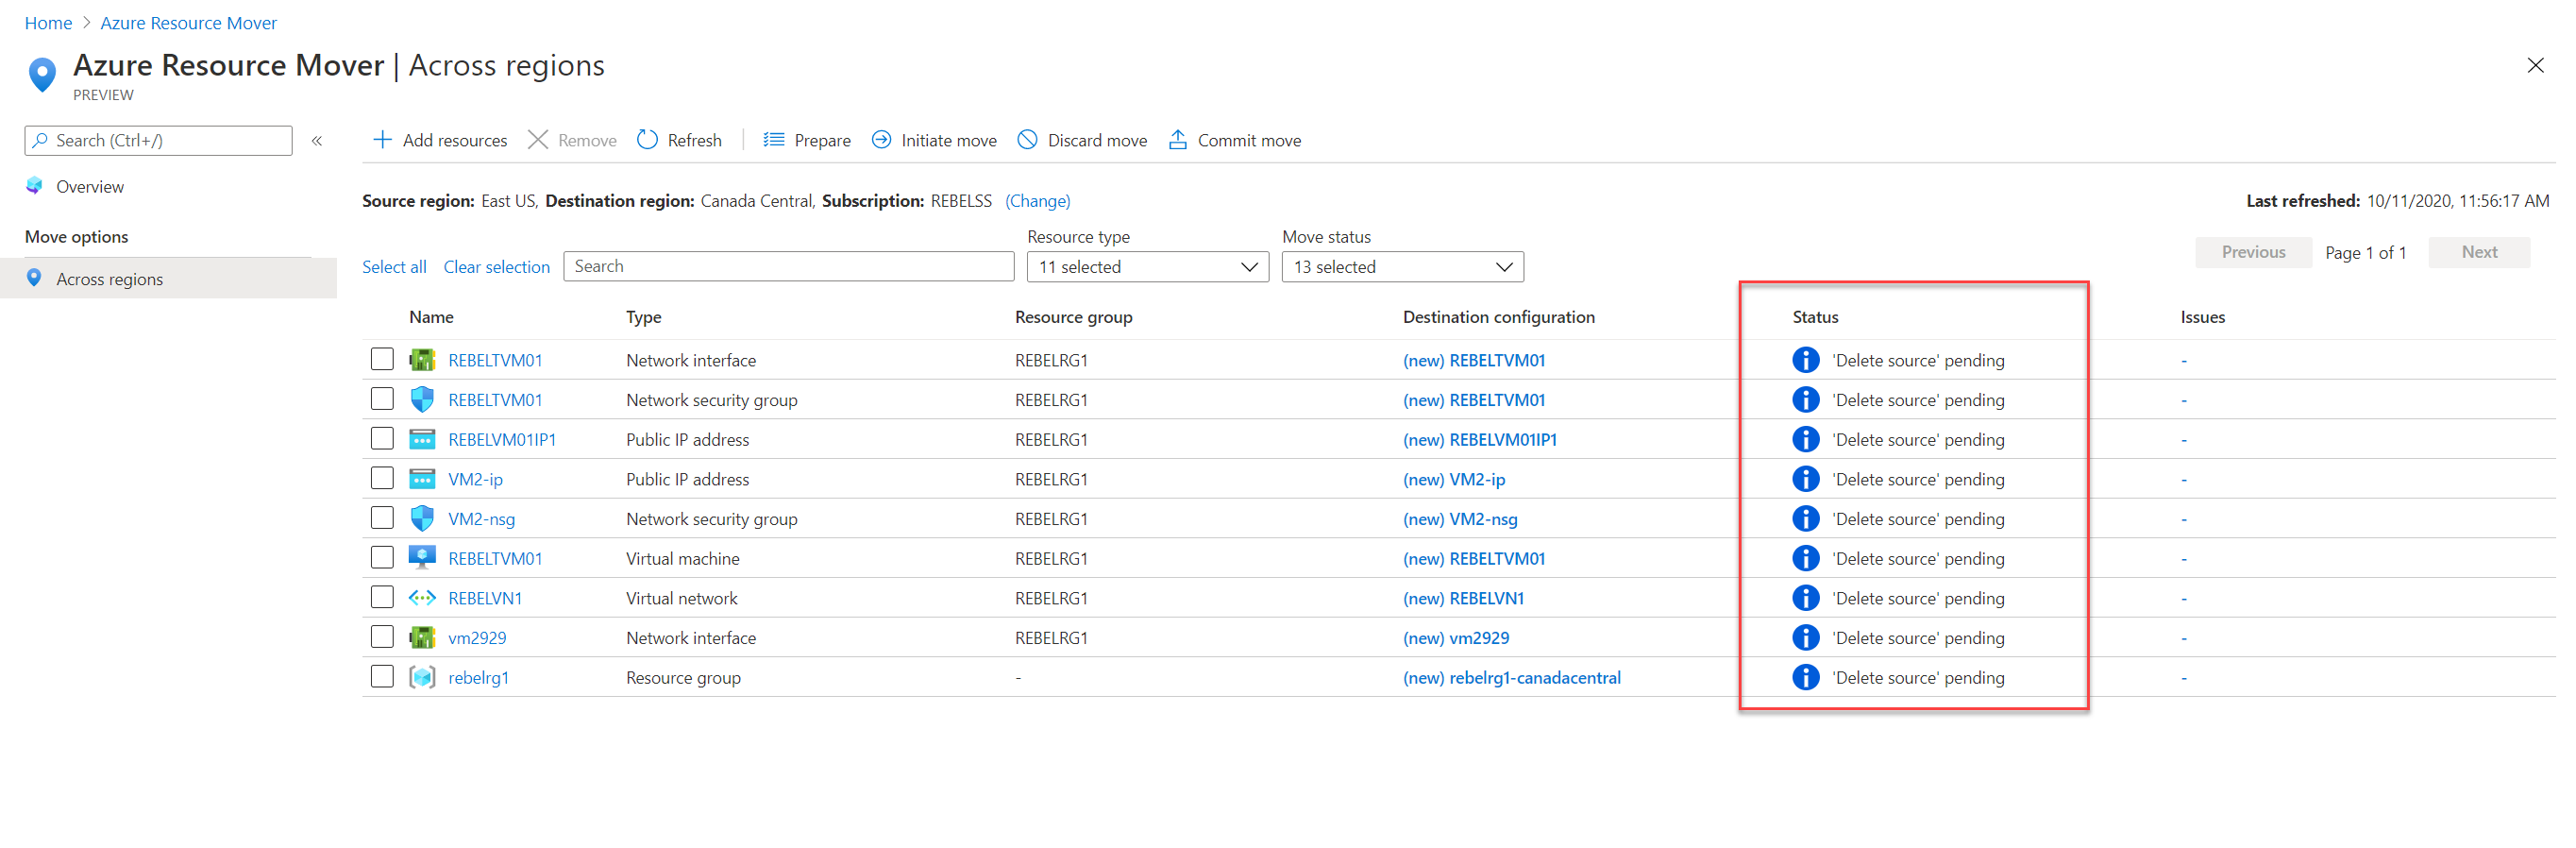
19. Once the move is completed, we can see all the resources under the new resource group.
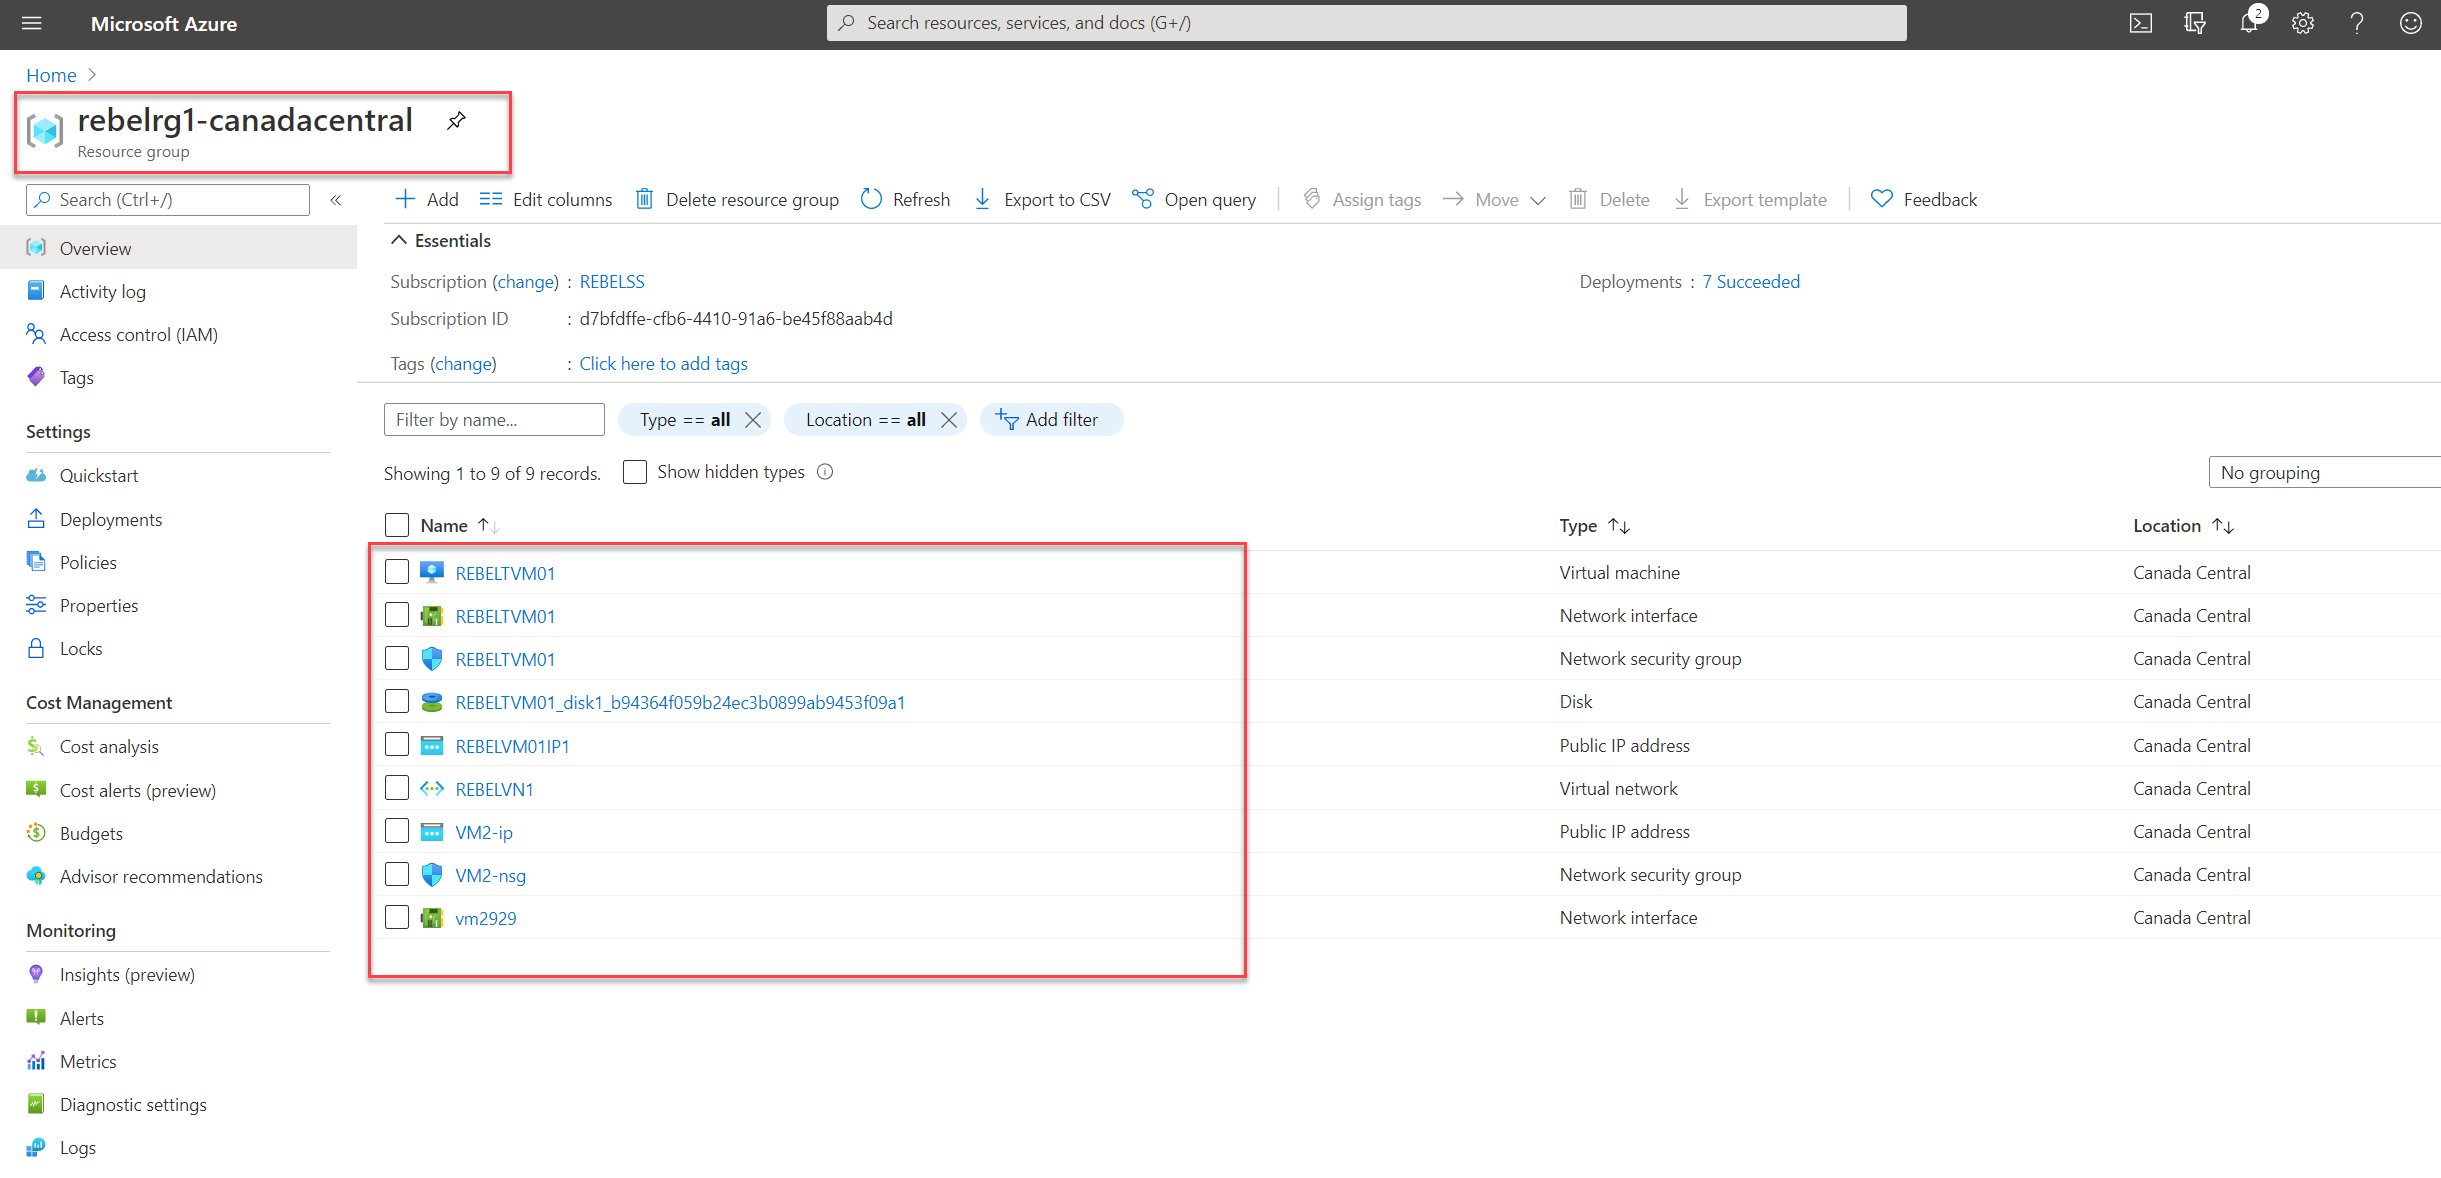
20. Then I went ahead and log in to the VM in the new resource group. As expected, it is working and connected through Canada IP address.

21. Once all testing is completed, you can safely remove the source resource group and all resources.
I hope now you have a better understanding of how to move Azure resource group from one Azure region to another using Azure Resource Mover. If you have any further questions about this feel free to contact me at rebeladm@live.com also follow me on twitter @rebeladm to get updates about new blog posts.


Thanks good walk through. The Azure documentation leaves a lot to be desired as usual.