
In my previous post, I have explained how we can replicate Azure VM to a secondary Azure region, But what if we need to replicate an encrypted Azure VM? Azure VM encryption uses the Azure Key Vault to store encryption keys and secrets. If we are replicating encrypted Azure VM, we also need to copy encryption keys to the target region. In this demo, I am going to demonstrate how we can replicate encrypted Azure VM (Windows) to a secondary Azure Region
For the configuration process, I will be using PowerShell as well as GUI. Therefore, please make sure you have an Azure PowerShell module installed. More info about it available on this link.
As the first part of the configuration, I am going to create a new Azure VM and encrypt it using BitLocker.
Setup Azure Resource Group
The first step of the configuration is to create a new resource group.
To do that,
1. Launch PowerShell console and connect to Azure using Connect-AzAccount
2. Then create a new resource group using,
New-AzResourceGroup -Name REBELRG1 -Location “East US”
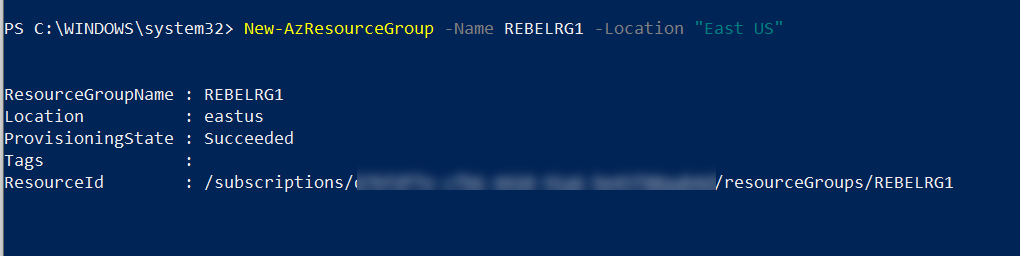
In the above, REBELRG1 is the resource group name and East US is the resource group location.
Configure Azure Key Vault
Next, we need to create a new key vault and encryption key.
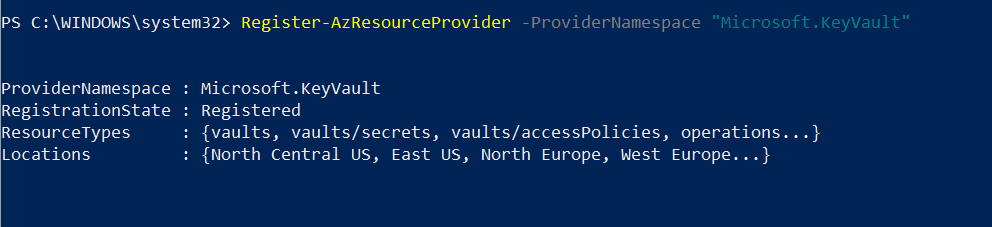
1. As the first step, let’s go ahead and enable Azure Key Vault provider within the subscription by using,
Register-AzResourceProvider -ProviderNamespace “Microsoft.KeyVault”
2. Then, let’s go ahead with Azure Vault setup,
New-AzKeyVault -Location “East US” -ResourceGroupName REBELRG1 -VaultName REBELVMKV2 -EnabledForDiskEncryption
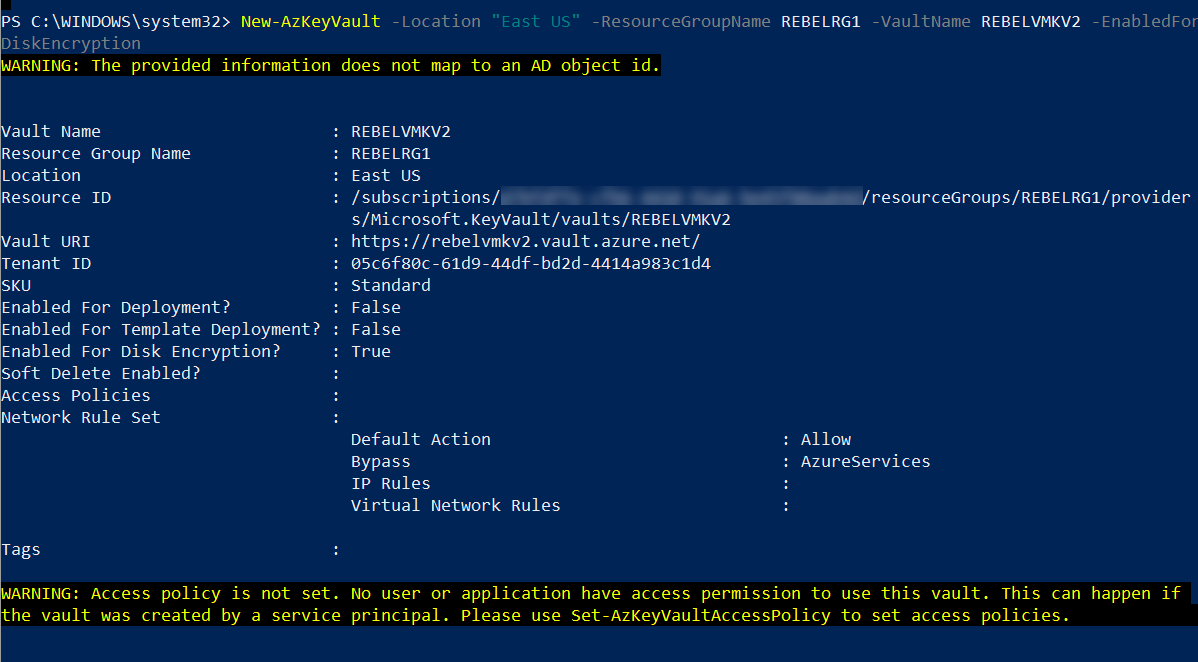
In the above, REBELVMKV2 is the key vault name and it is created under REBELRG1 resource group. -EnabledForDiskEncryption parameter is used to prepare the key vault to use with disk encryption.
3. As the next step, we need to create an access policy so currently logged in user can create encryption keys.
Set-AzKeyVaultAccessPolicy -VaultName REBELVMKV2 -ObjectId xxxxxxxxxxxxxxxx -PermissionsToKeys create,import,delete,list -PermissionsToSecrets set,delete -PassThru
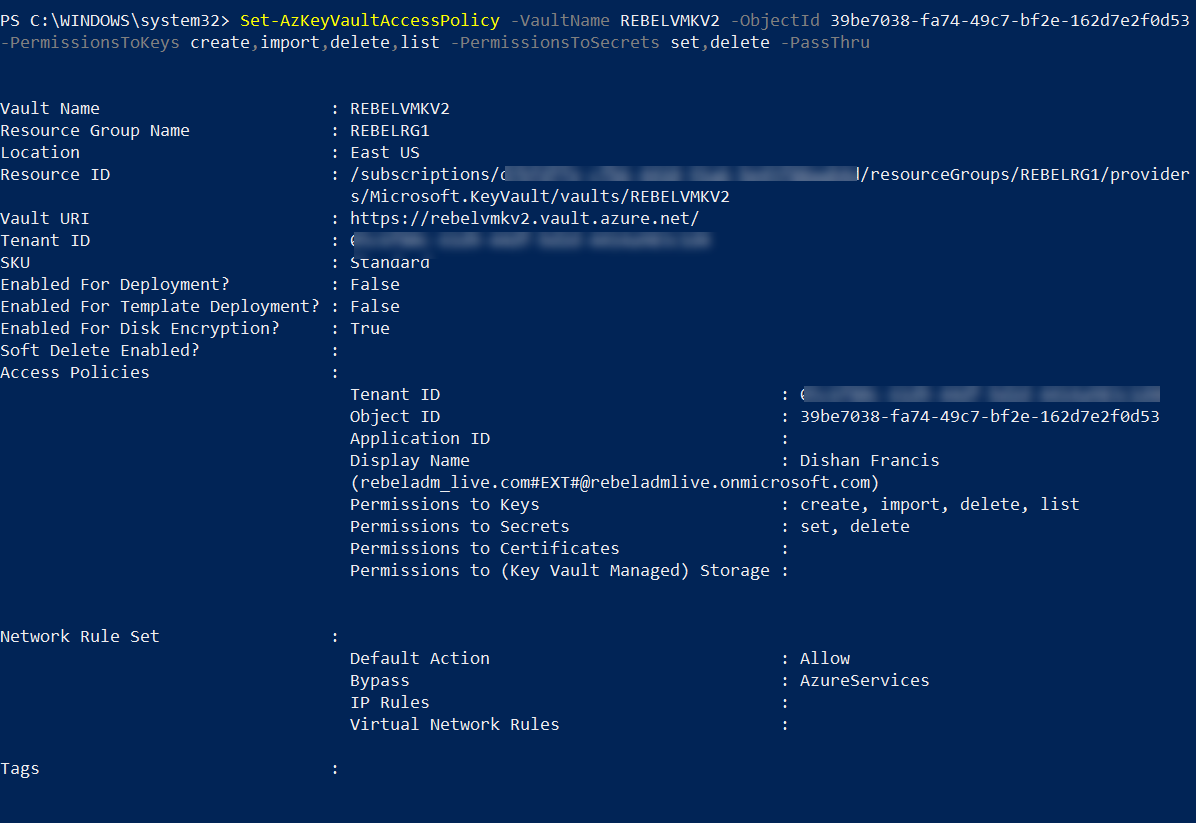
In above -Objectid value should replace with the actual objectid value of the currently logged in global admin account. In here -PermissionsToKeys define the permissions allocated for keys and -PermissionsToSecrets defines the permissions allocated for secrets.
4. Next, we need a new encryption key to use with disk encryption.
Add-AzKeyVaultKey -VaultName REBELVMKV2 -Name “REBELVMKey” -Destination “Software”
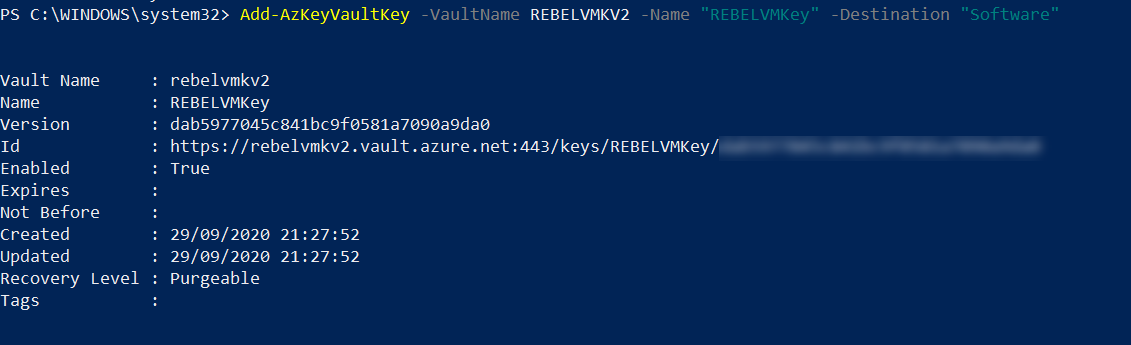
In the above, REBELVMKey is the key name. -Destination is defined as Software as we creating the standard encryption key. If required it can be set to Hardware Security Model (HSM) but it comes with additional cost.
Create Azure VM
In this demo, I am going to create a new VM for testing. If required we also can encrypt any existing VM.
To create new VM,
$mylogin = Get-Credential
New-AzVm -ResourceGroupName REBELRG1 -Name “REBELVM01” -Location “East US” -VirtualNetworkName “REBELVNET1” -SubnetName “REBELVMSubnet1” -PublicIpAddressName “REBELVM01IP1” -OpenPorts 80,3389 -Image win2019datacenter -Size Standard_D2s_v3 -Credential $mylogin
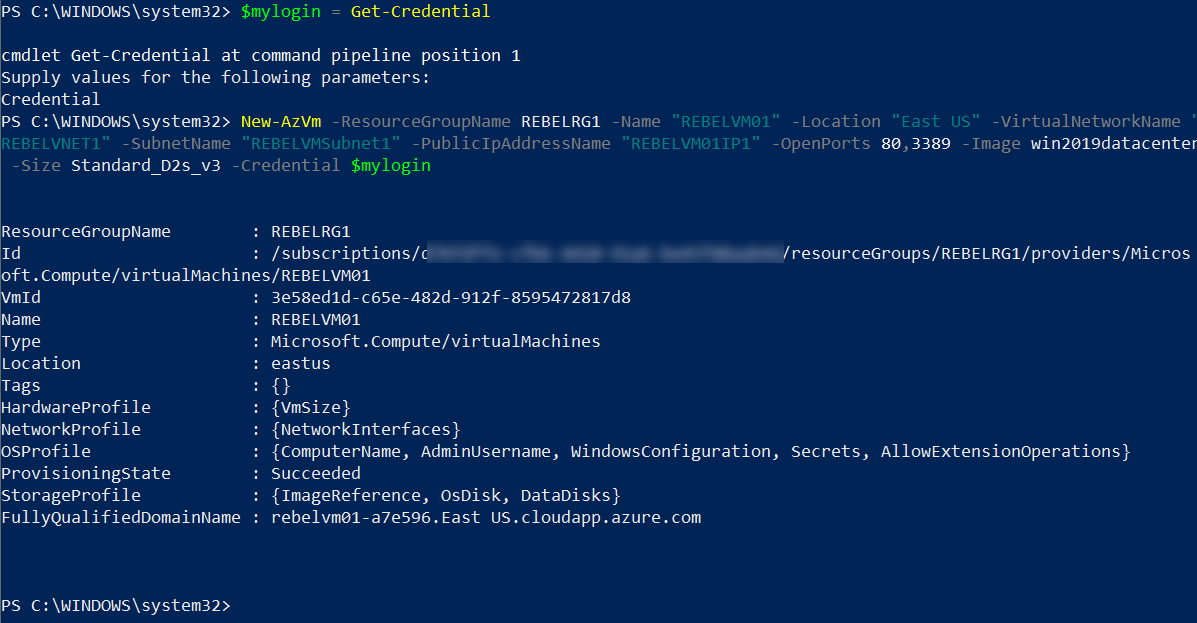
In the above, REBELVM01 is the VM name. It is running windows server 2019 data center edition. I have specified it using -Image parameter. It also using Standard_D2s_v3 vm size.
Encrypt Azure VM
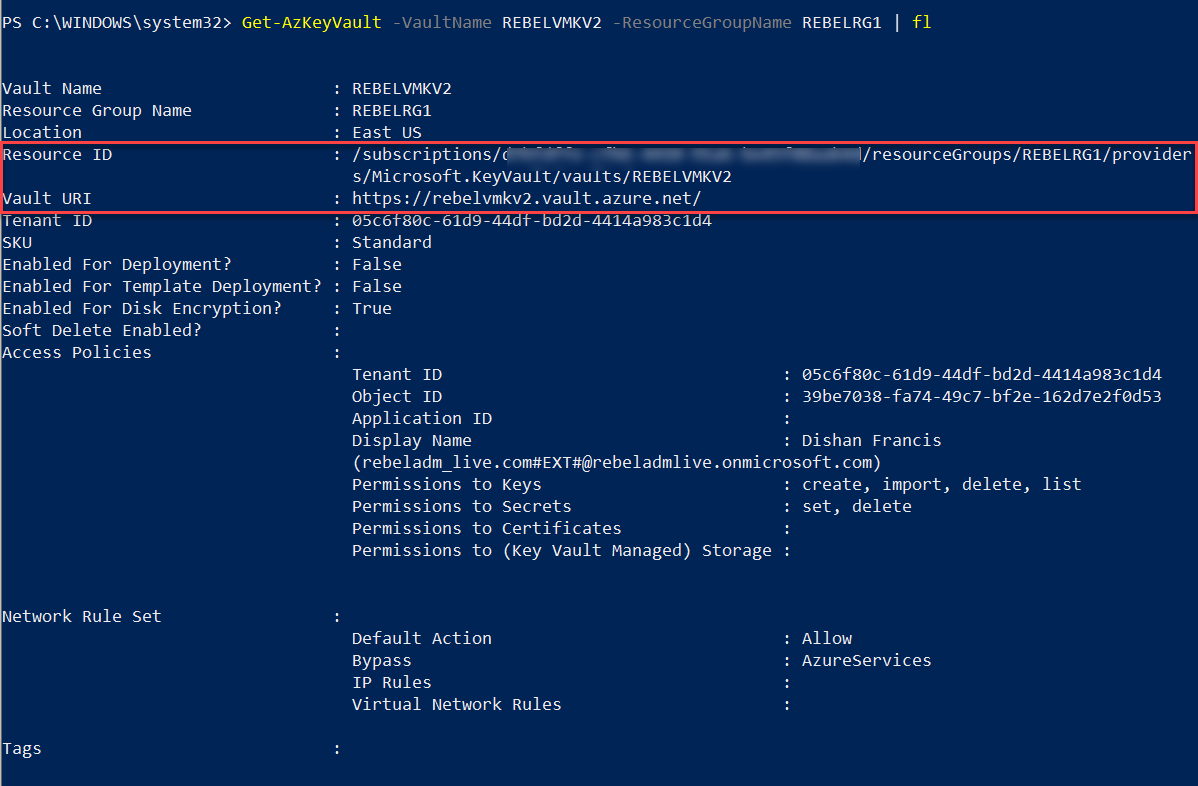
The next step of the configuration is to encrypt the VM. To do that we need the following values,
1. Azure Key Vault Resource ID
2. Azure Key Vault URI
3. Azure Key vault key ID
We can find the above values using,
Get-AzKeyVault -VaultName REBELVMKV2 -ResourceGroupName REBELRG1 | fl
Get-AzKeyVaultKey -VaultName REBELVMKV2 -Name REBELVMKey
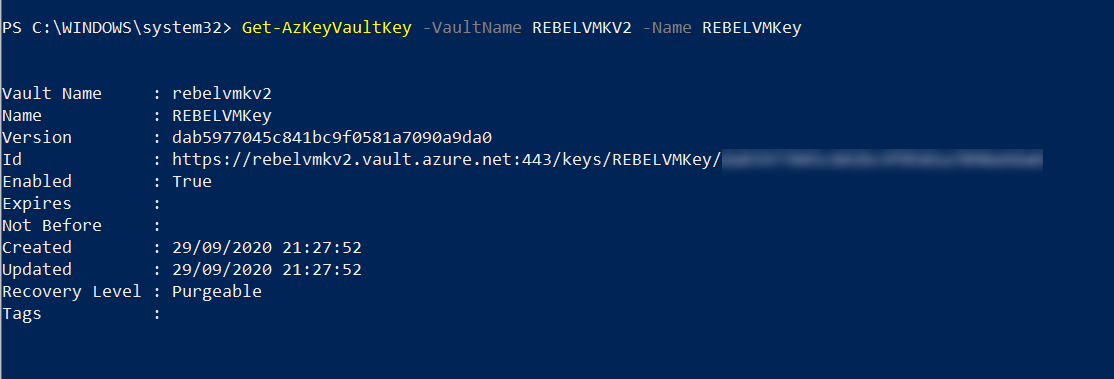
You will require GET permissions to retrieve this key value. you have to update it under access policy properties. Or else you also can find this info from the output of the key creation command we used in the previous step.
Finally, we can encrypt the VM using,
Set-AzVMDiskEncryptionExtension -ResourceGroupName REBELRG1 -VMName “REBELVM01” -DiskEncryptionKeyVaultUrl (value of Azure Key Vault URI) -DiskEncryptionKeyVaultId (value of Azure Key Vault Resource ID) -KeyEncryptionKeyUrl (value of Azure Key vault key ID) -KeyEncryptionKeyVaultId (value of Azure Key Vault Resource ID)
In above, replace the parameter values according to your setup.
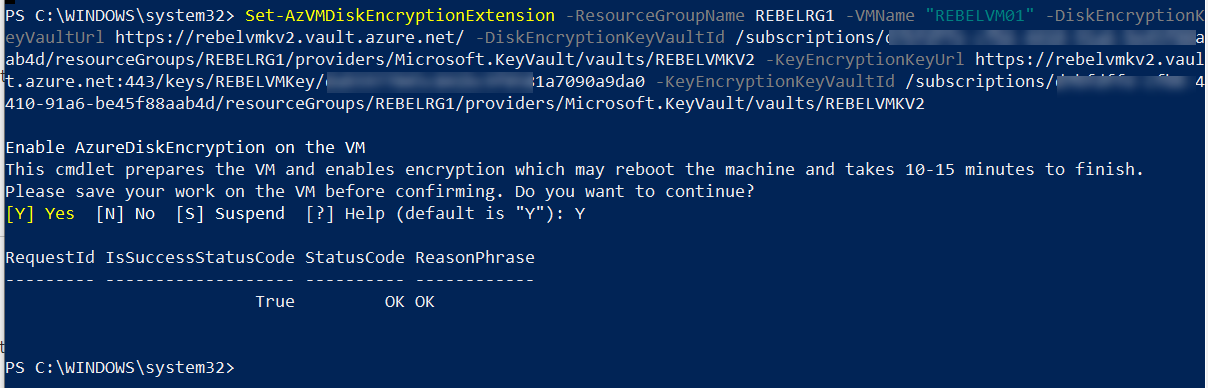
Once encryption is completed, VM will be rebooted.
After reboot, we have a VM with encrypted disks.

Create Azure Resource Group and Azure Virtual Network for Target
In this demo, I am going to replicate Azure VM to “Canada Central” Azure region. Before I start replication, I like to create a new resource group and virtual network for it.
1. Create a new resource group using,
New-AzResourceGroup -Name RECOVERRG1 -Location “Canada Central”

In the above, RECOVERRG1 is the resource group name, and its created in “Canada Central” Azure region.
2. The next step is to create a new virtual network under RECOVERRG1 resource group.
$vmsubnet2 = New-AzVirtualNetworkSubnetConfig -Name vmsubnet2 -AddressPrefix “10.1.3.0/24”
New-AzVirtualNetwork -Name REBELVN2 -ResourceGroupName RECOVERRG1 -Location “Canada Central” -AddressPrefix “10.1.0.0/16” -Subnet $vmsubnet2
In the above, REBELVN2 is the new virtual network name. It has 10.1.0.0/16 address space. It also has a new subnet 10.1.3.0/24 (vmsubnet2) for virtual machines.
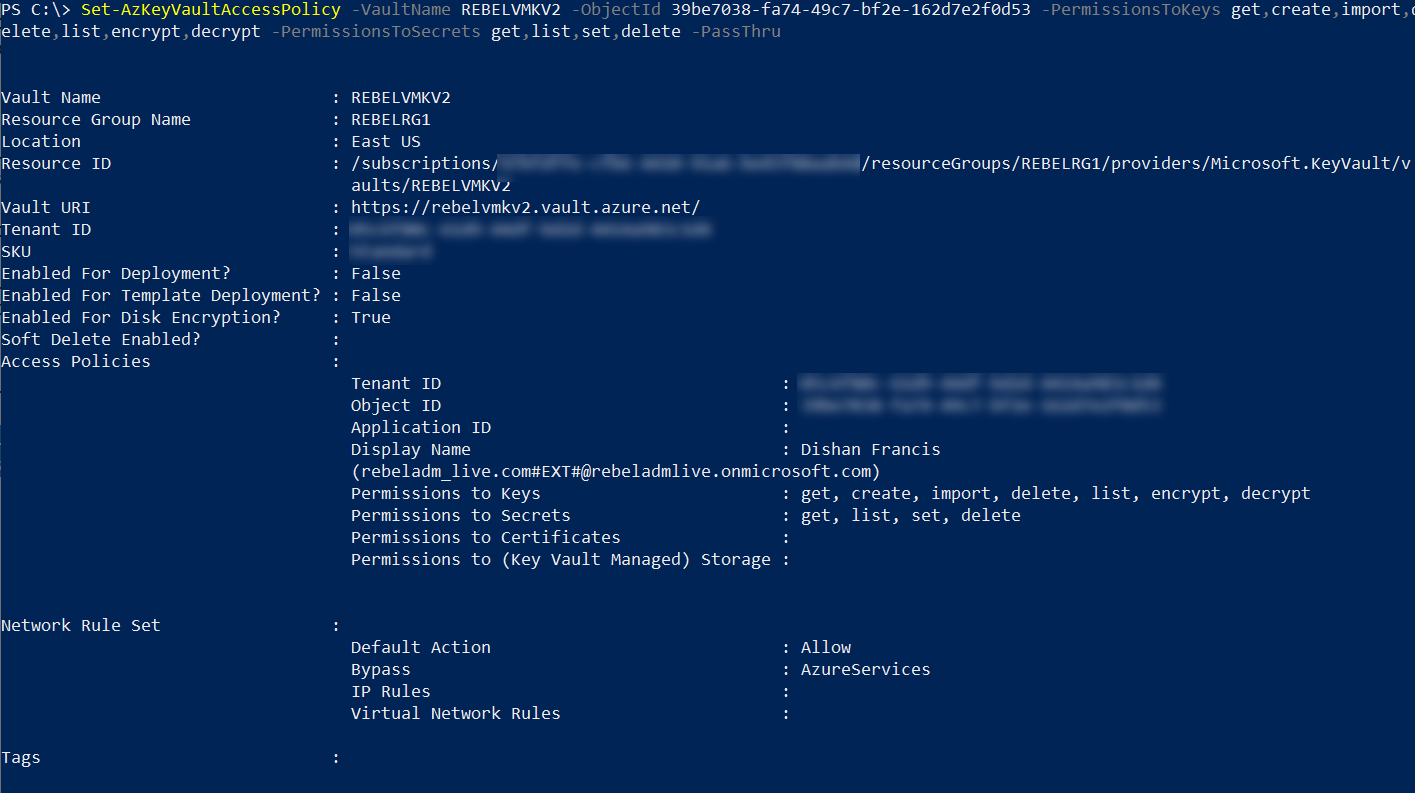
Add additional permissions to Azure Key vault user
To copy keys to the target region, the user required permission for Cryptographic Operations. To update the permissions for the user we can use,
Set-AzKeyVaultAccessPolicy -VaultName REBELVMKV2 -ObjectId xxxxxxxxxx -PermissionsToKeys get,create,import,delete,list,encrypt,decrypt -PermissionsToSecrets get,list,set,delete -PassThru
In above objectid should replace with the actual objectid value of the currently logged in global admin account.
Enable Azure VM Replication
Now we have the test VM and resource group ready. Let’s go ahead and enable the replication.
To do that,
1. Log in to Azure portal (https://portal.azure.com/) as a global administrator
2. Then go to the properties page of REBELTVM01 Virtual Machine.
3. Then click on Disaster recovery
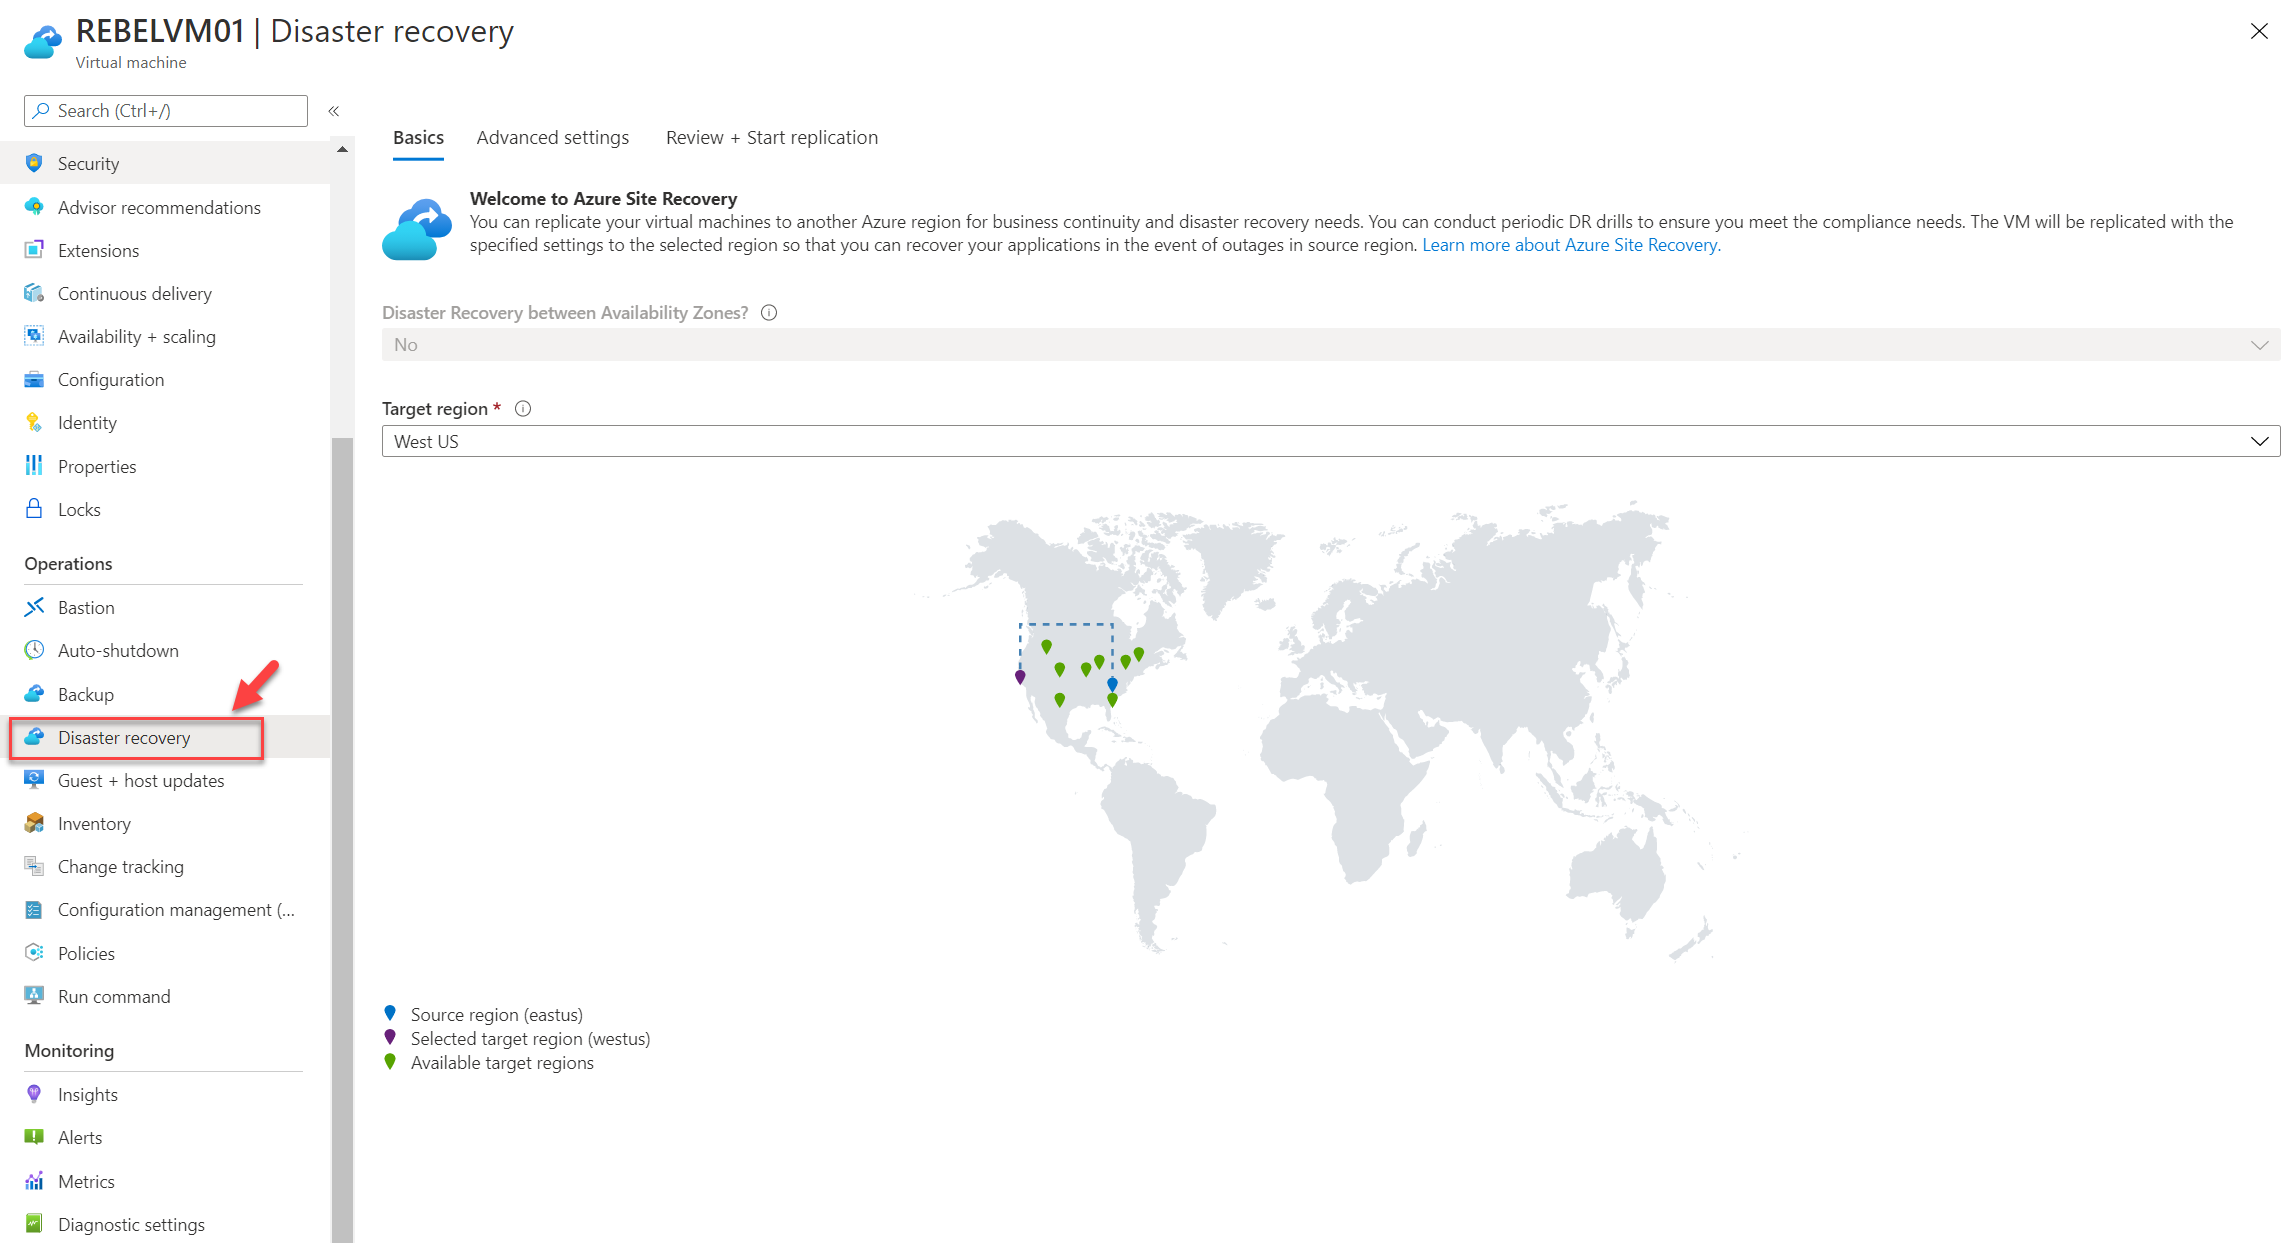
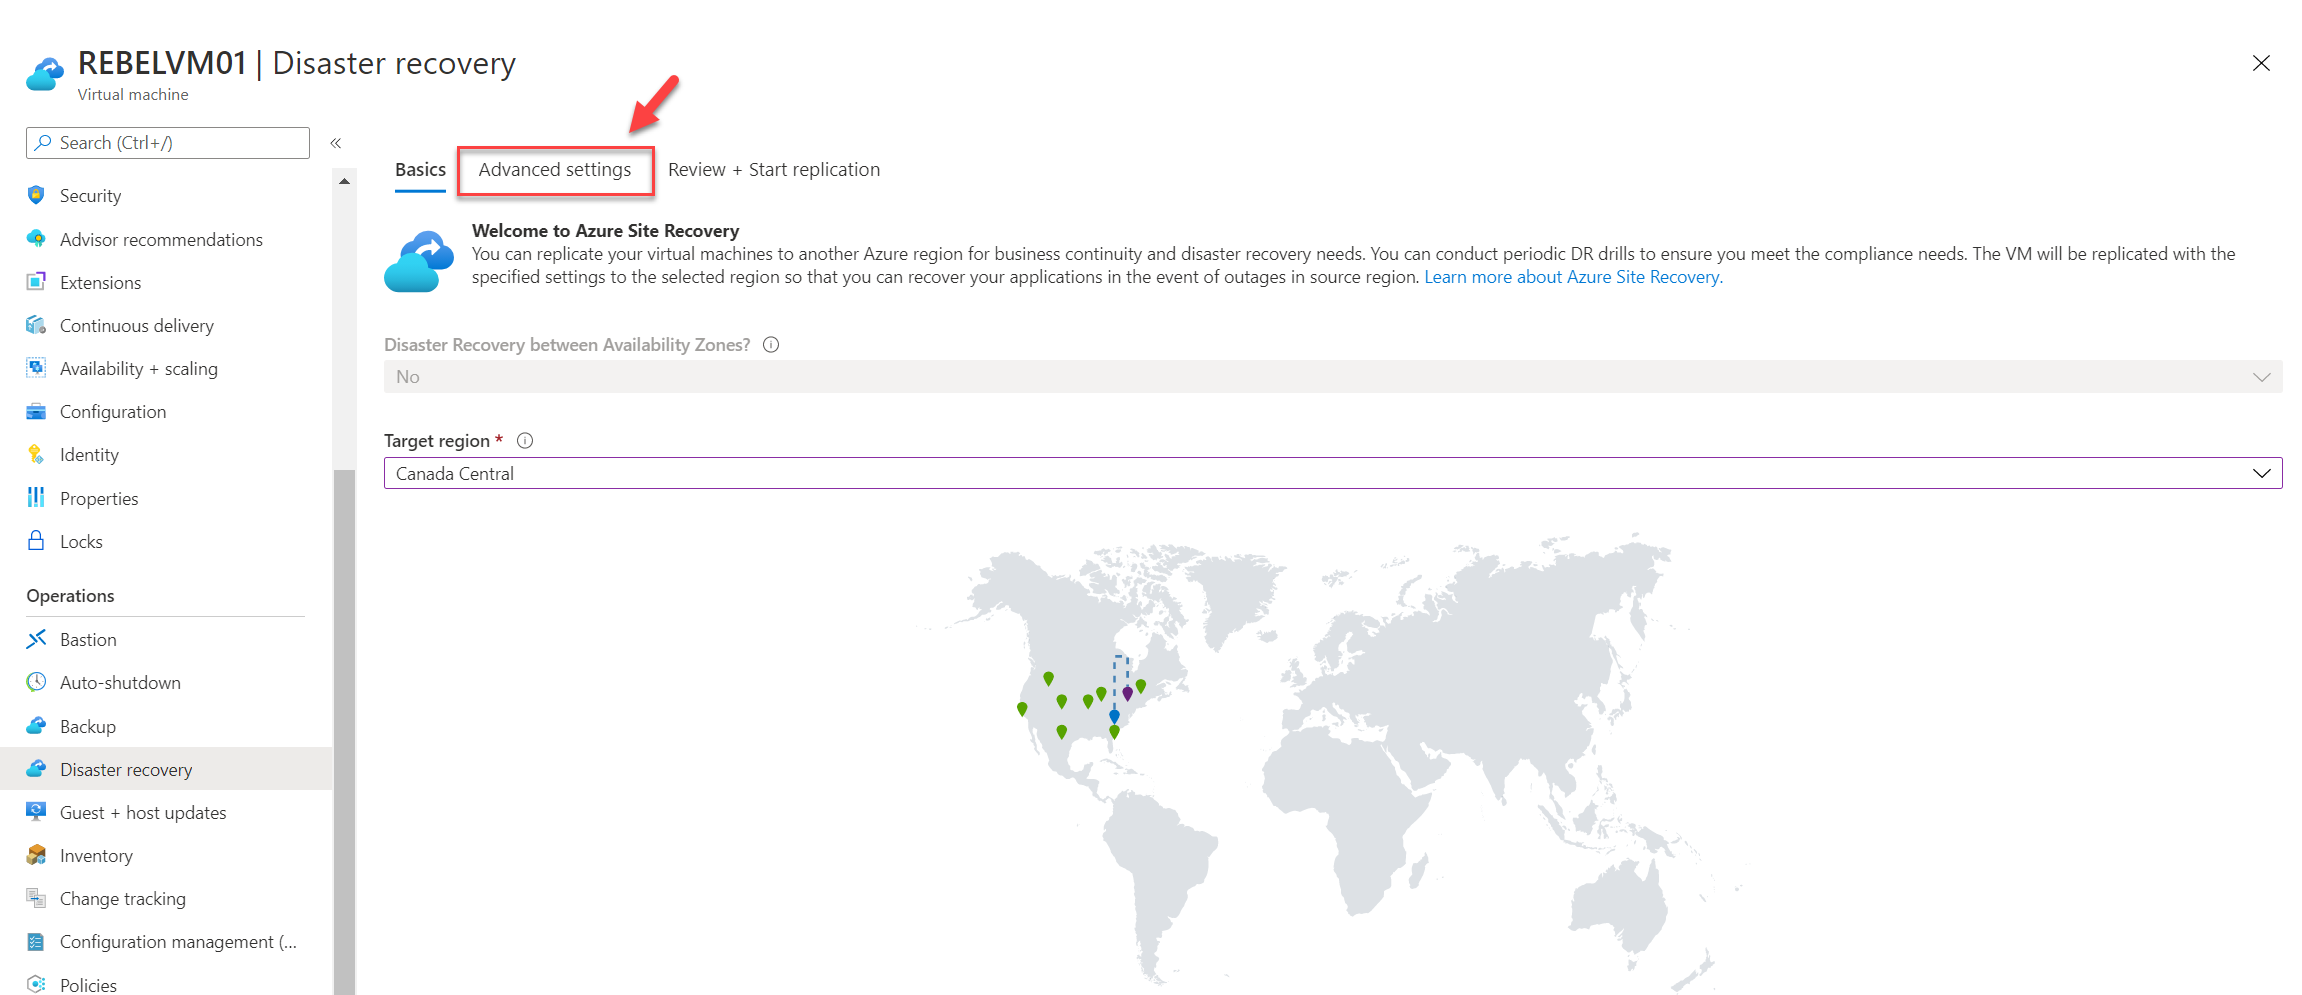
4. This will open the Azure Site Recovery configuration page. In the Target region option select Canada Central
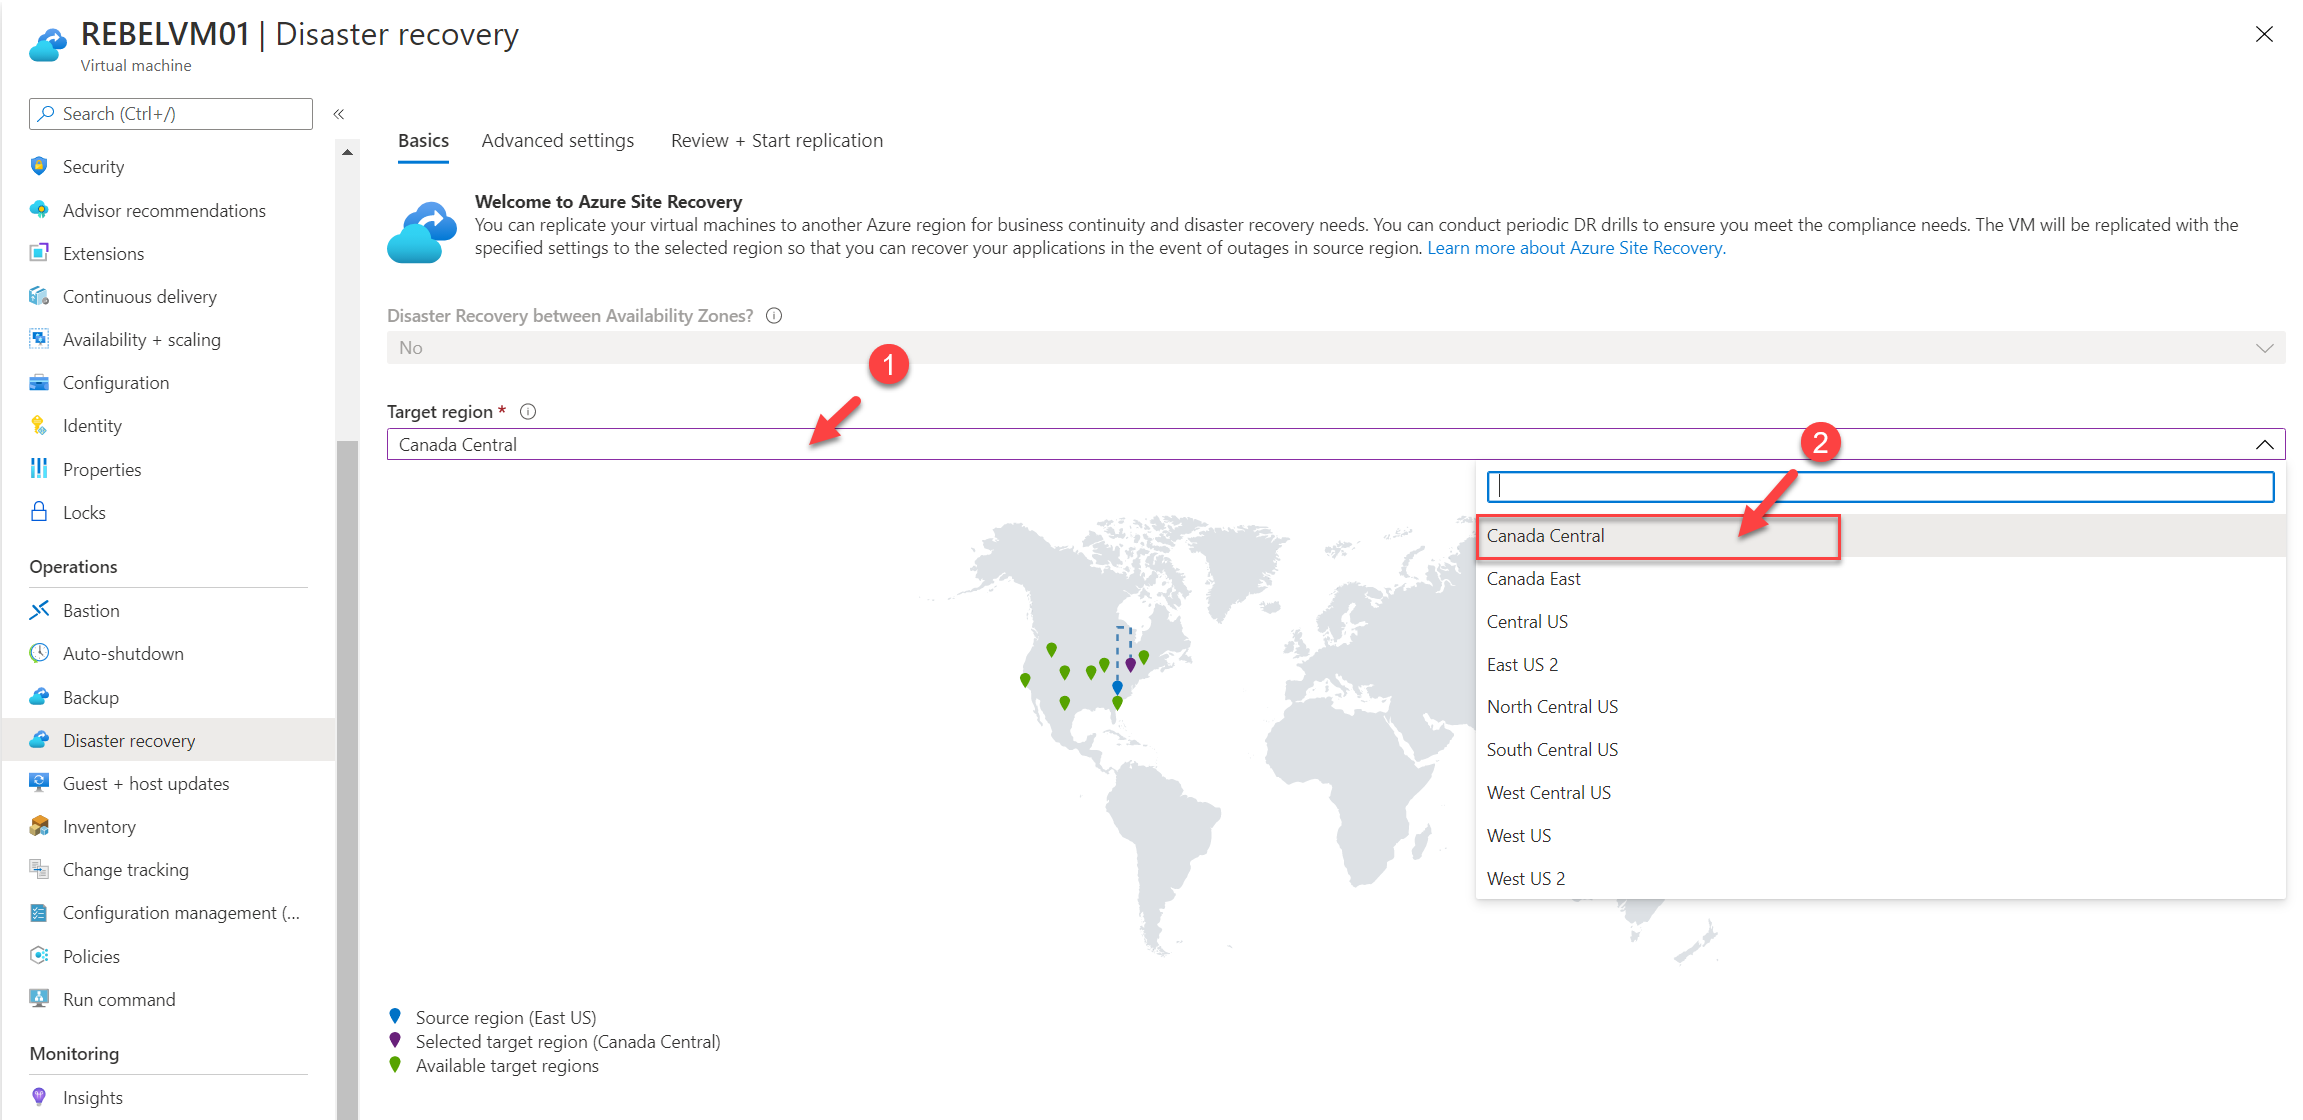
5. Then click on the Advanced settings tab.
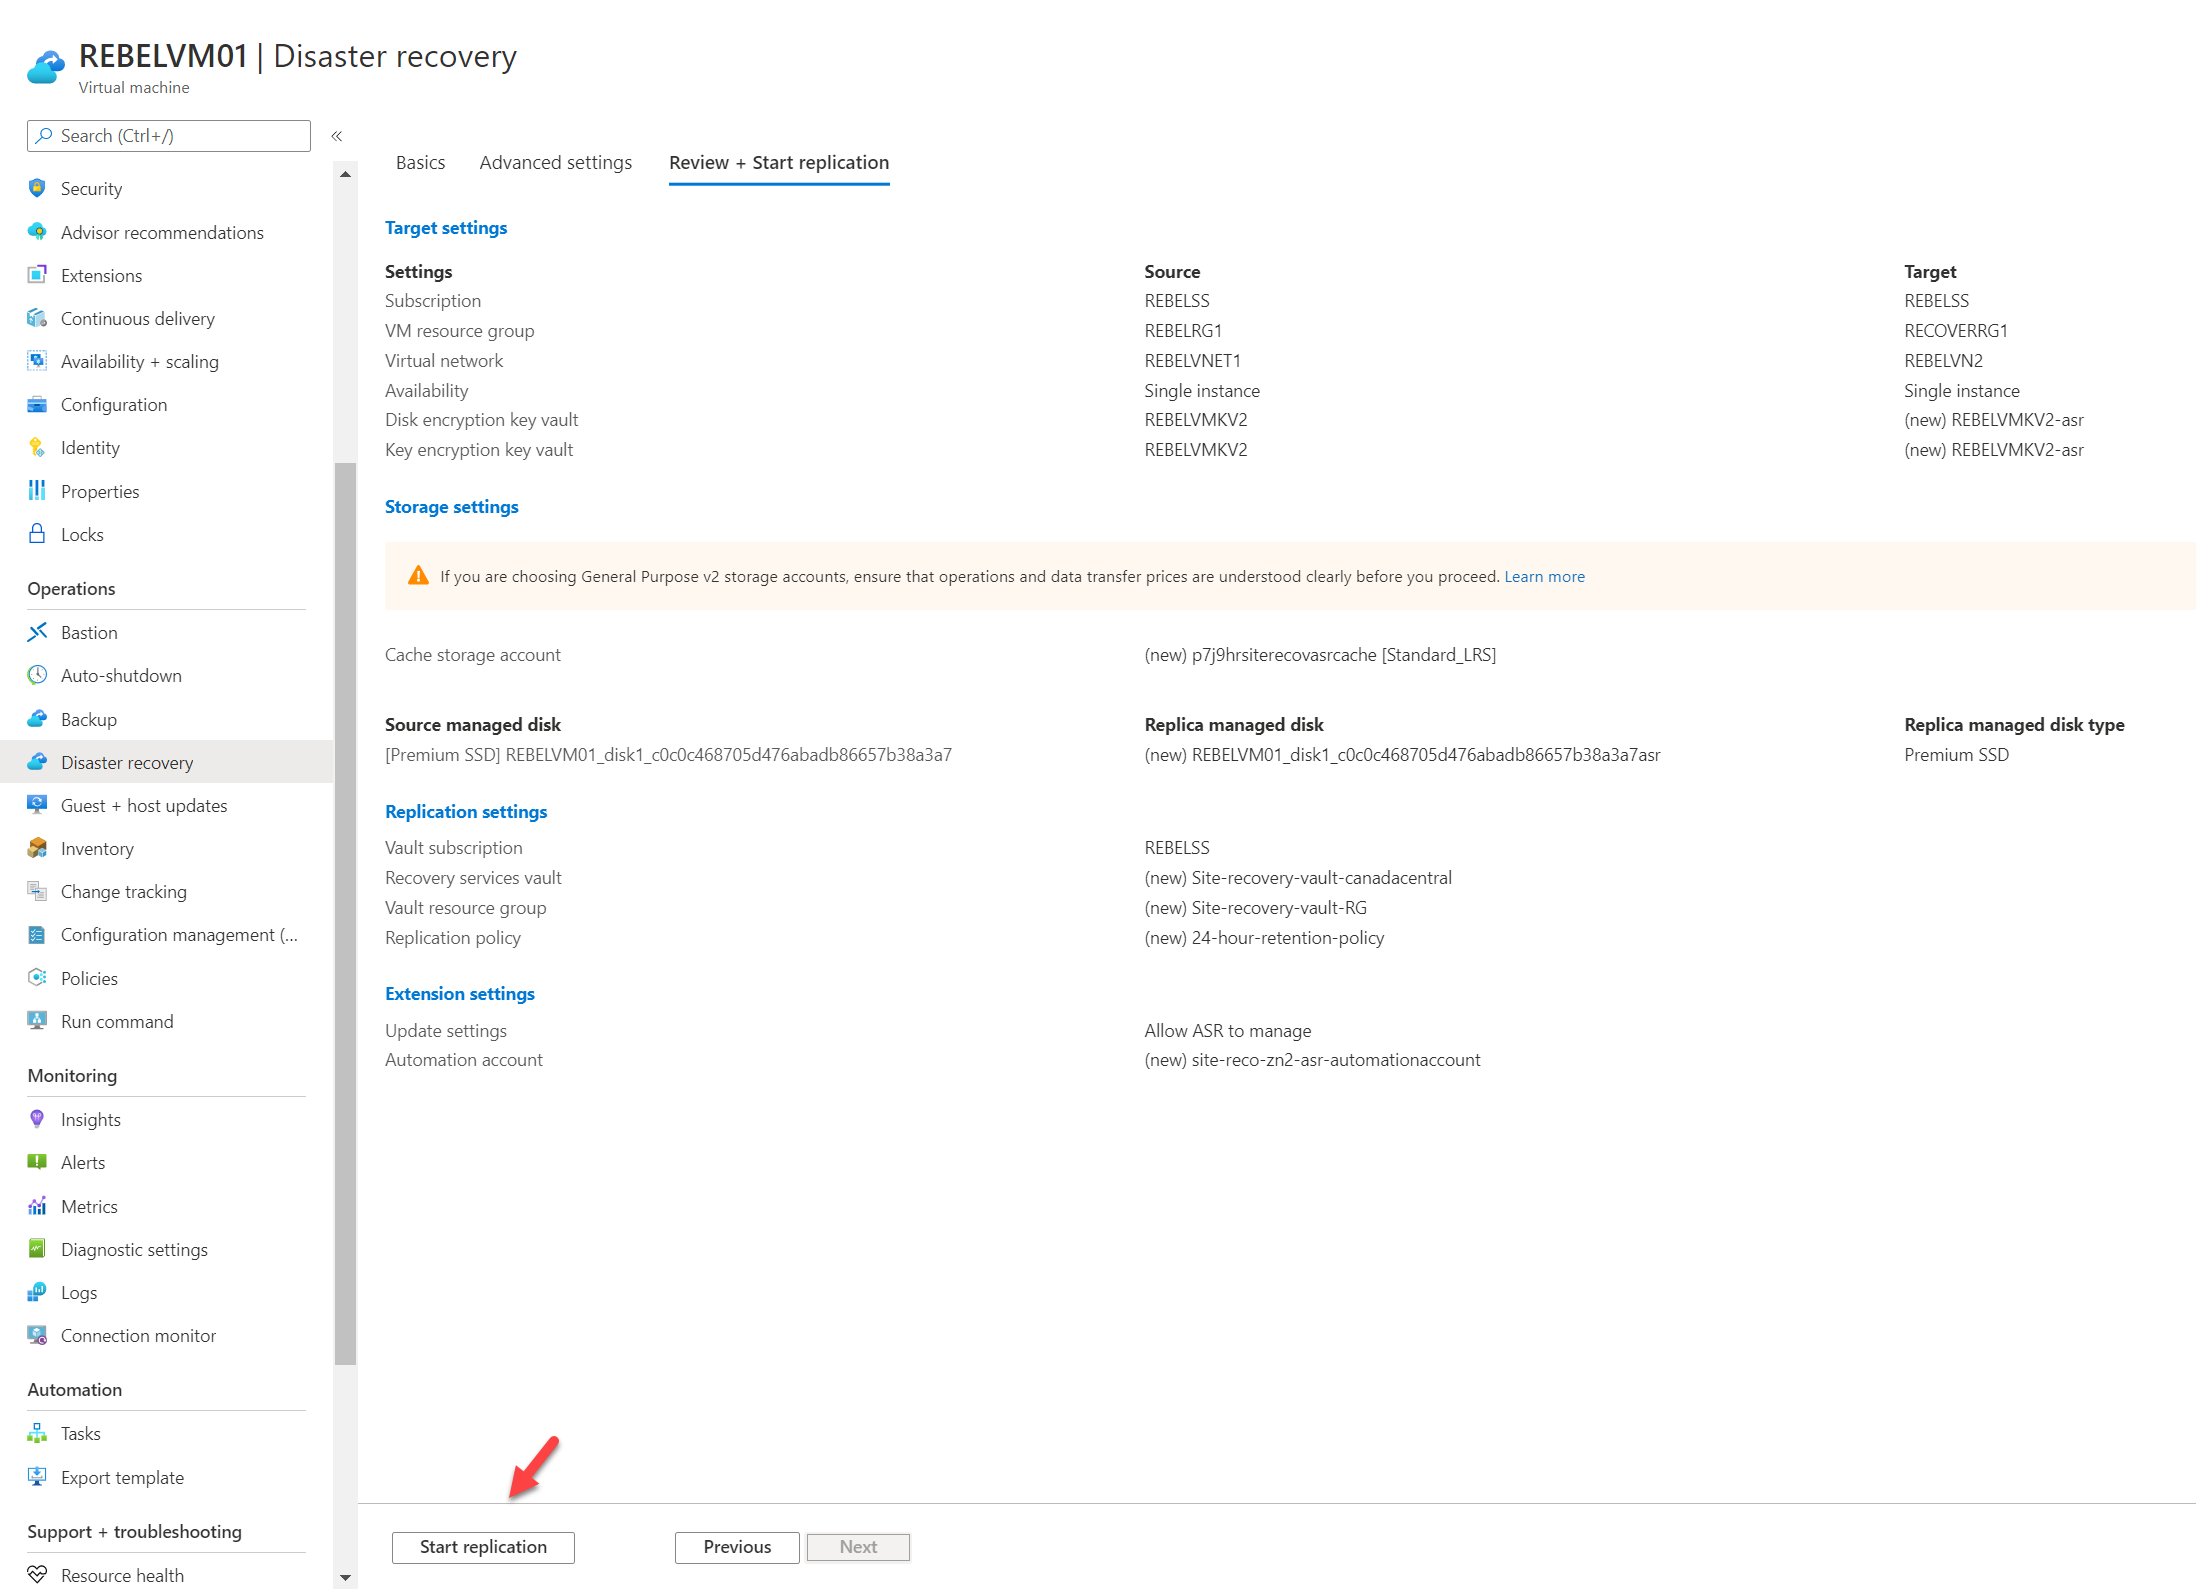
6. Under VM resource group option select RECOVERRG1. This is the resource group we created for target resources. For the Virtual network option select REBELVN2, the virtual network which we created in the previous section. Under the Disk encryption key vault, we can see a new key is defined for the target with “asr” suffix. We also can see a similar entry for Key encryption key vault value. Once settings are in place click on Review + Start replication

7. Review the configuration settings on the next page and click on Start replication to complete the process.
Testing
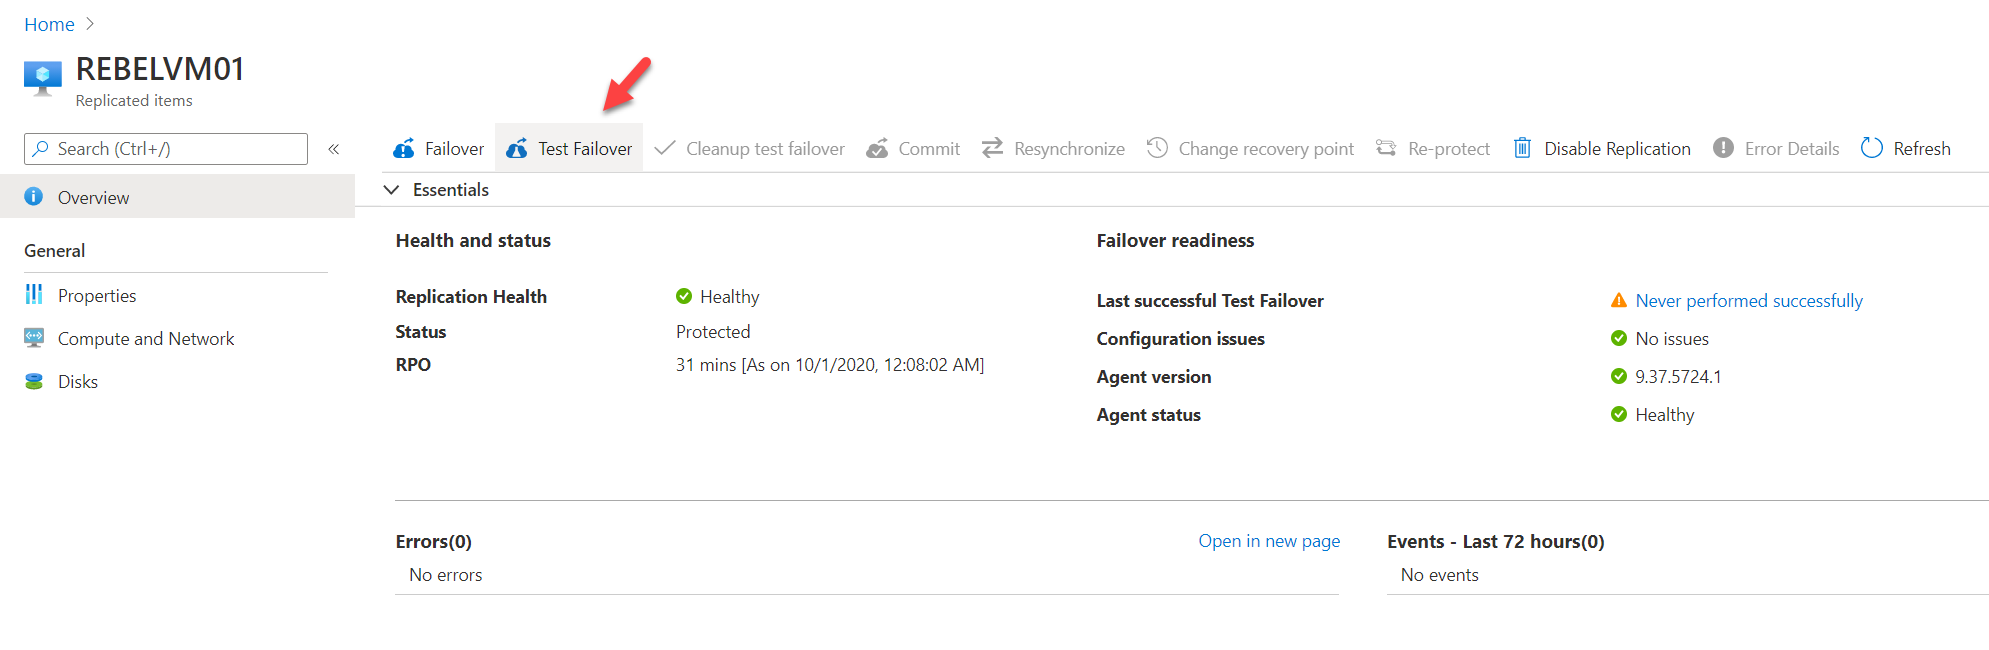
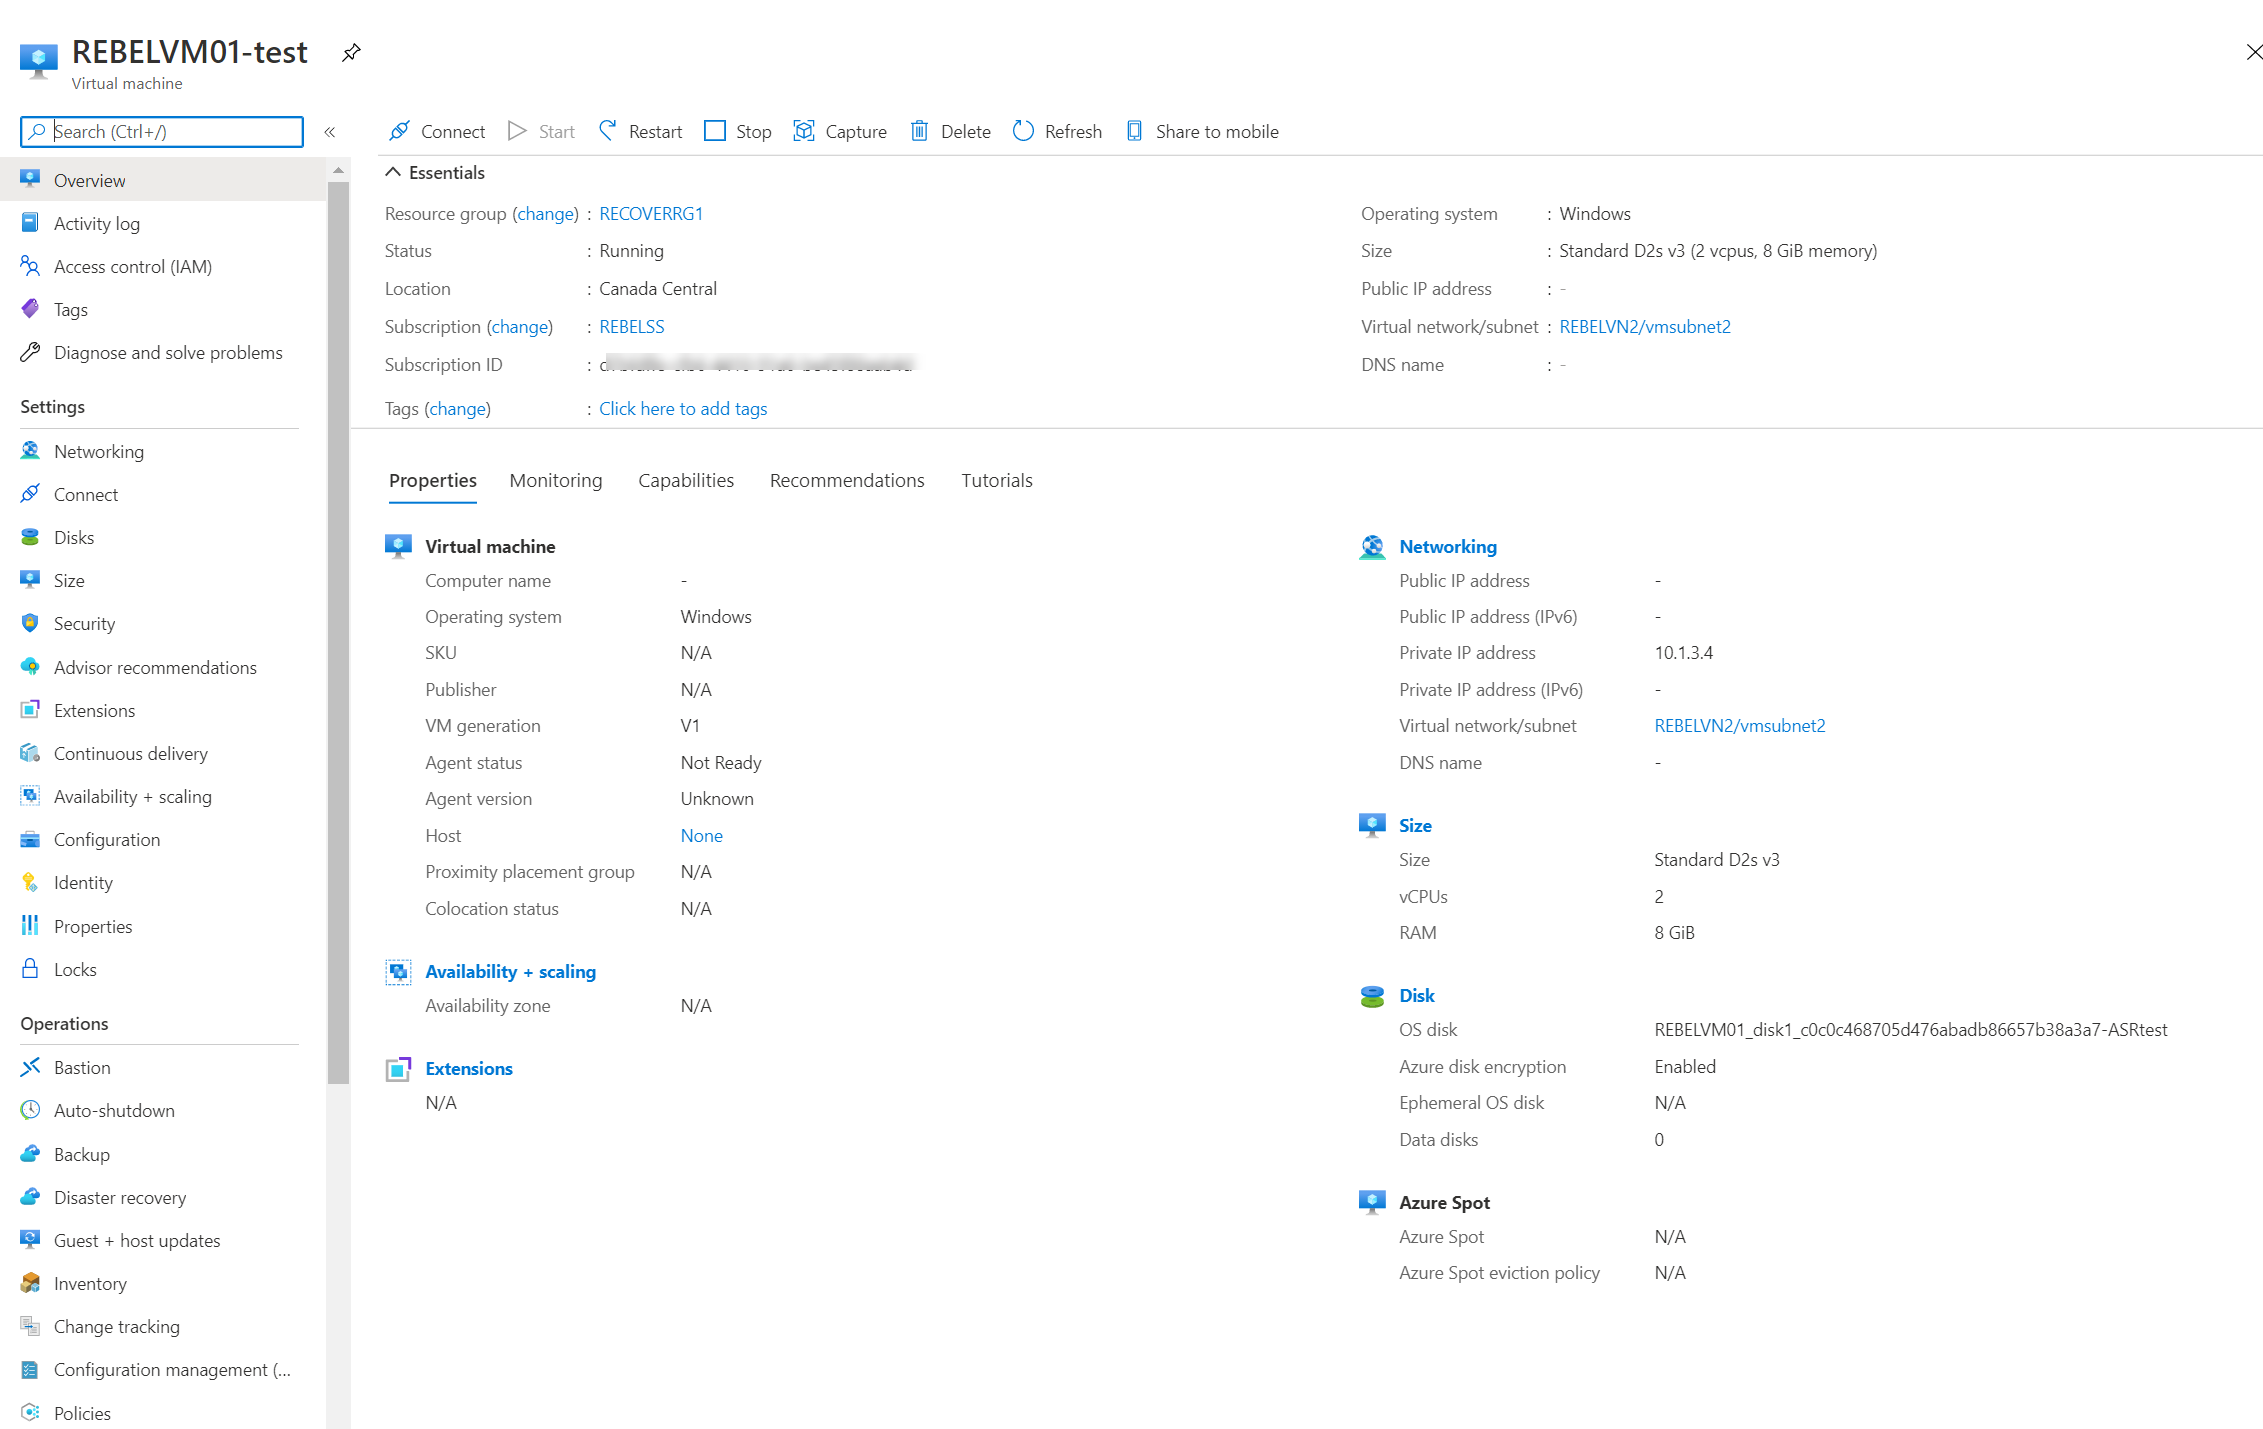
Once replication is enabled, we can verify replication health by going into the virtual machine properties page | Disaster Recovery

We can test the failover process by doing a test failover. To do that, click on the Test Failover option
Then select recovery point, virtual network, and then click on OK.
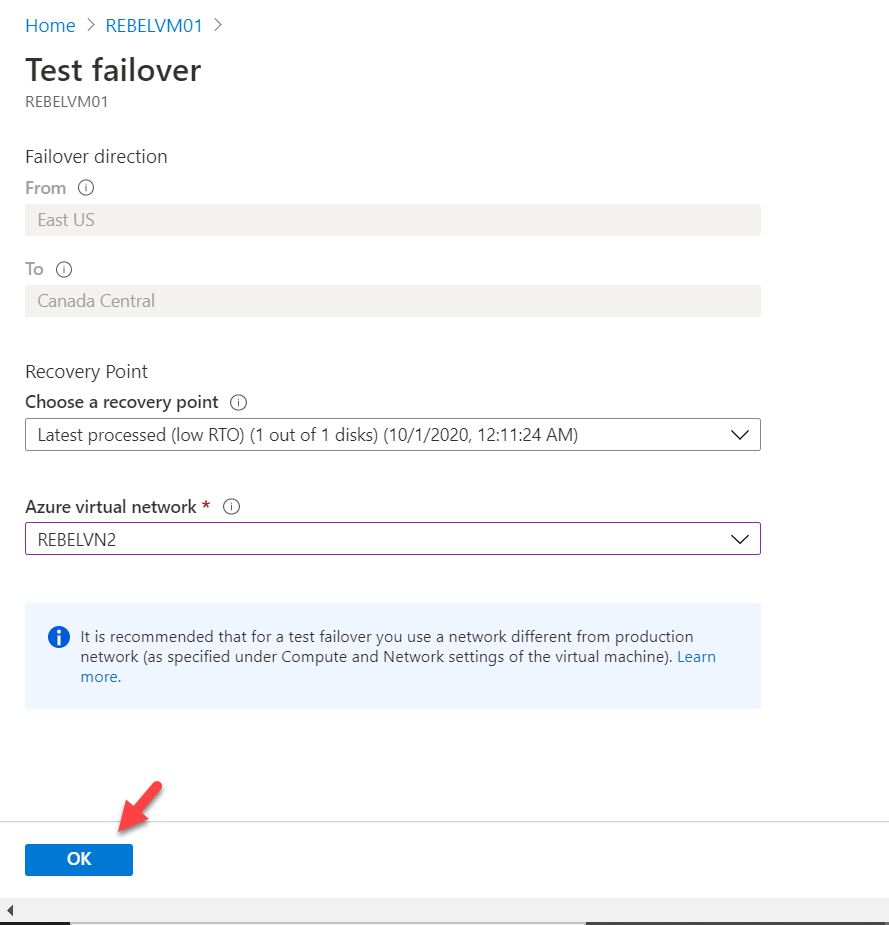
After few minutes I can see Azure spin-up test VM.
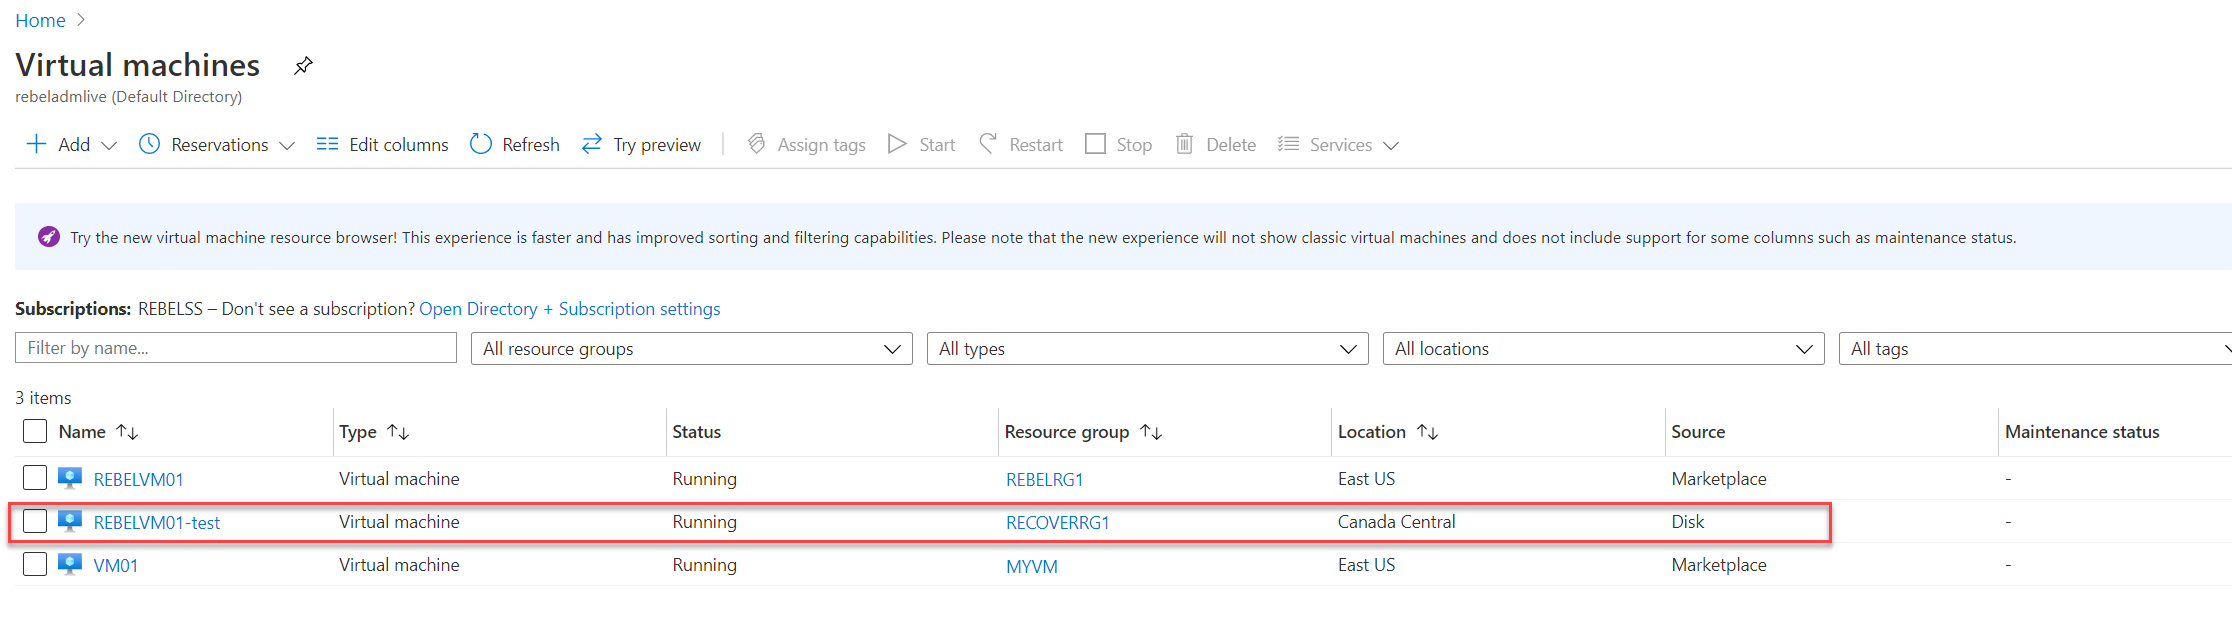
With failover, VM will not have a public IP address. We need to assign public IP manually or using a runbook after the failover (unless you have a jump box in the target network).
To assign public ip to VM, search for a network interface in the portal search box.
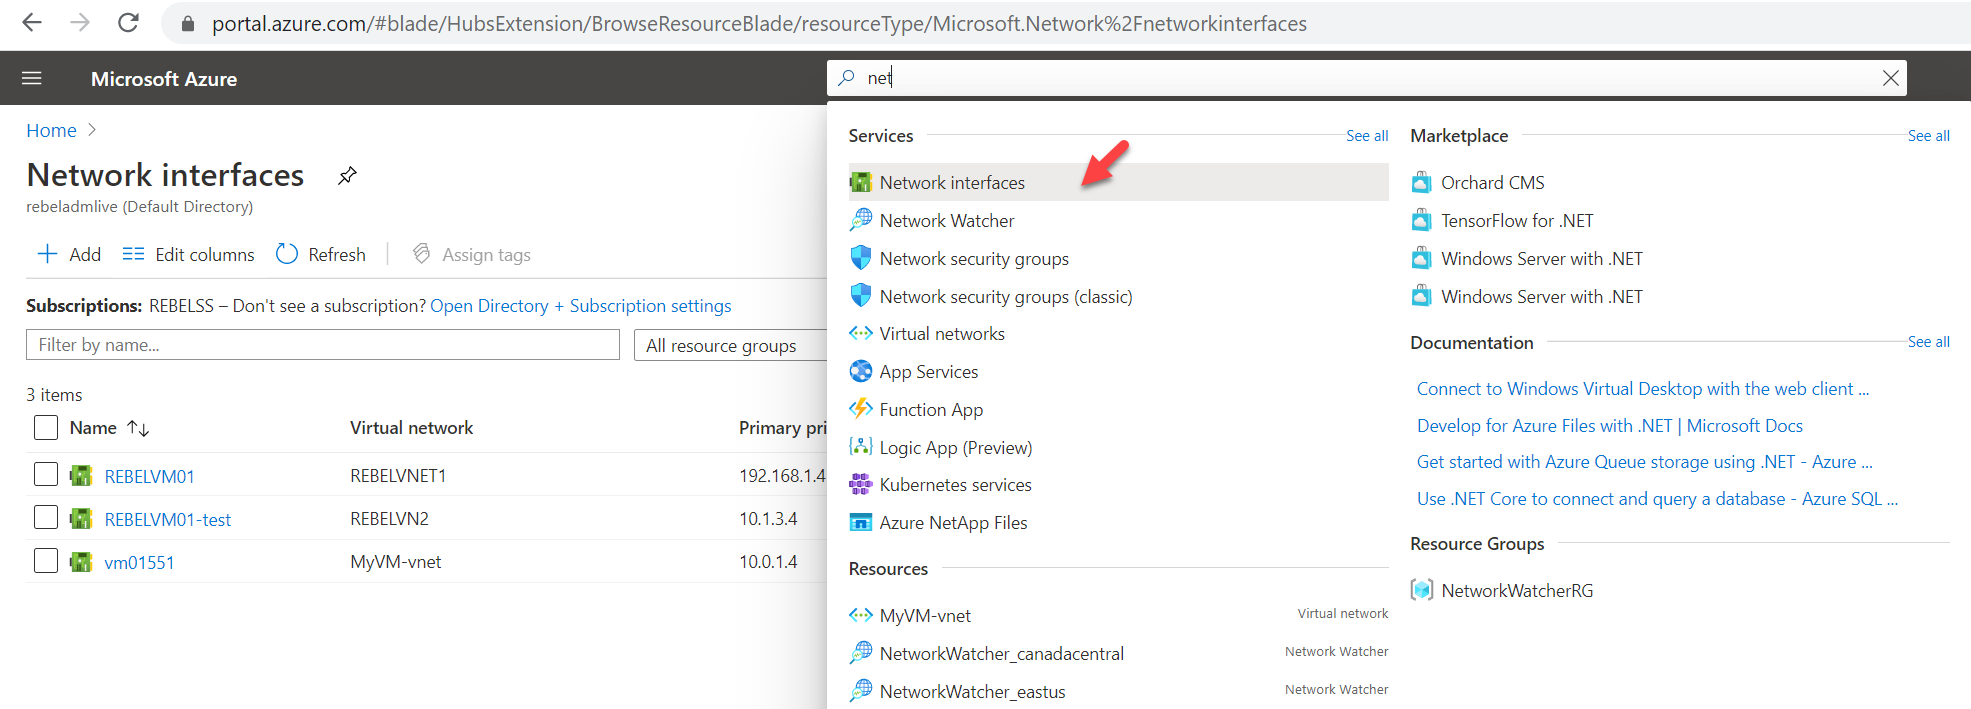
From the list, click on the interface belong to failover VM.
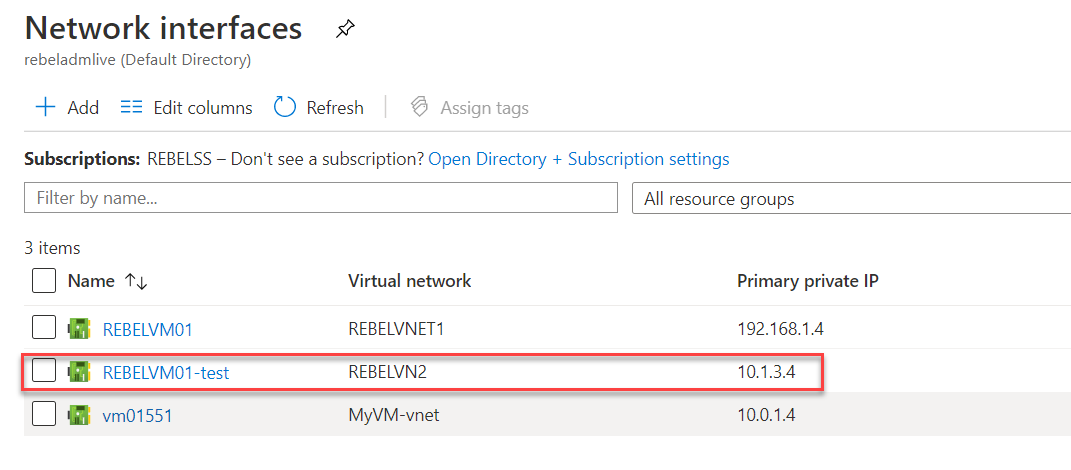
Then go to IP configuration and click on the already existing IP address.
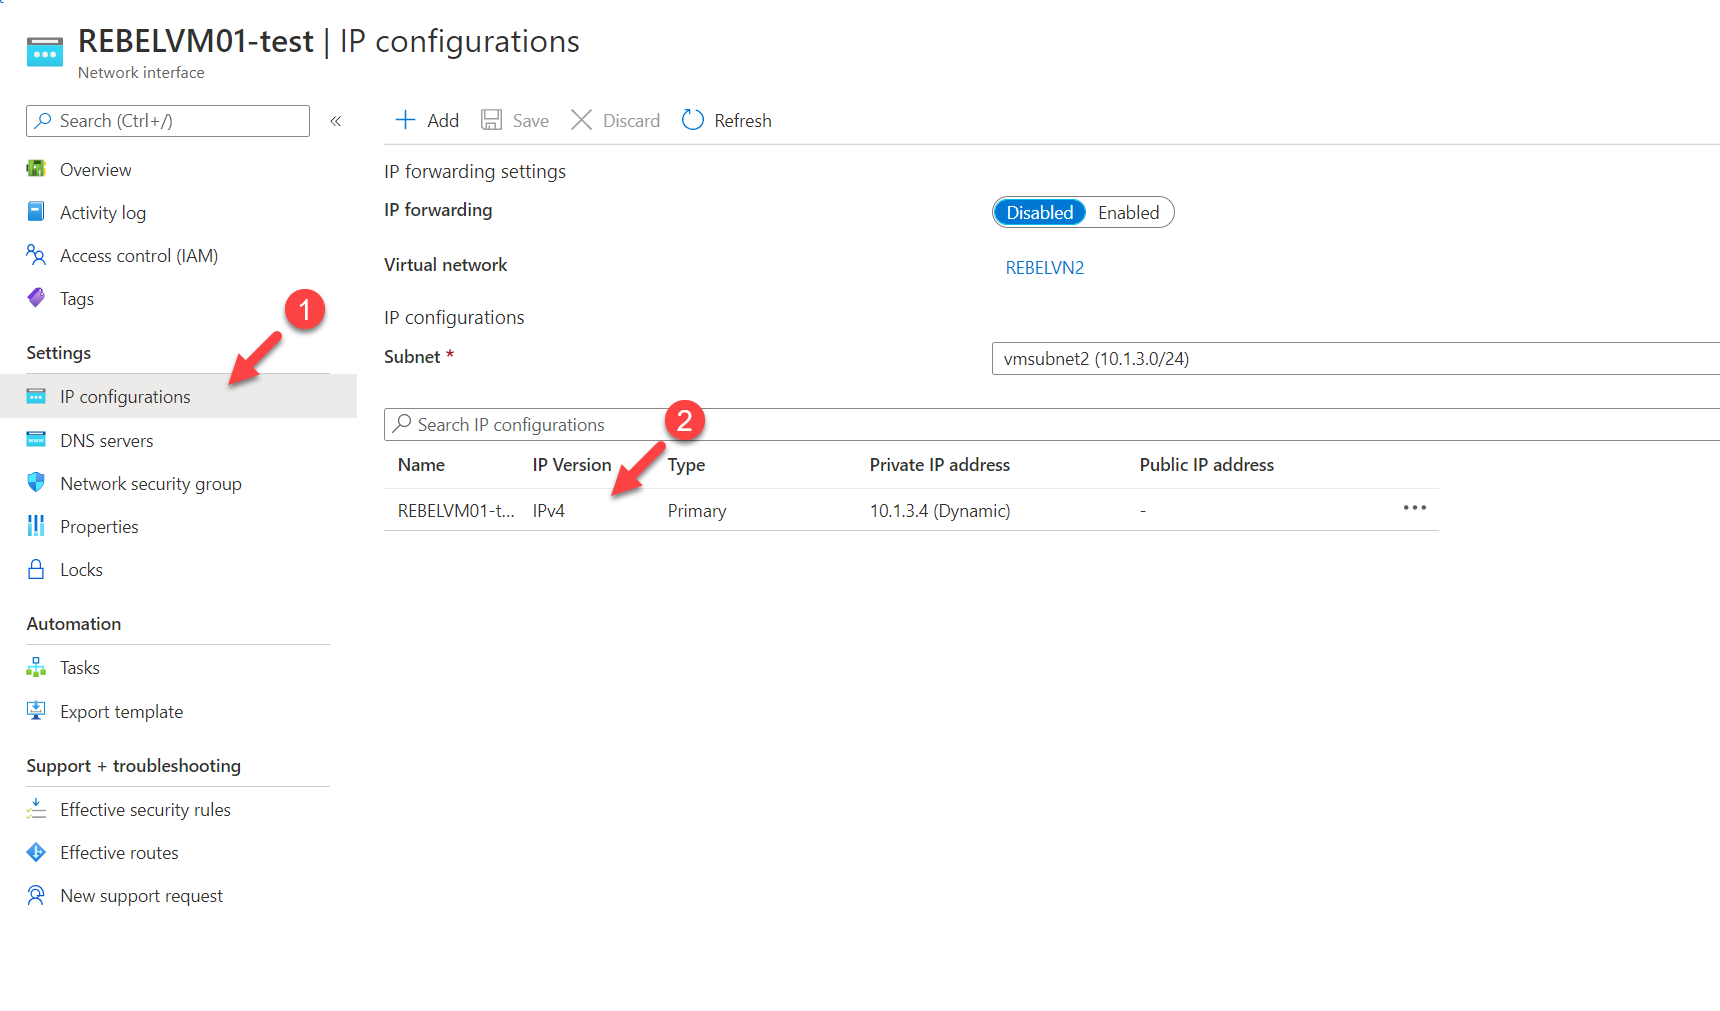
In the properties page associate new public IP to it.
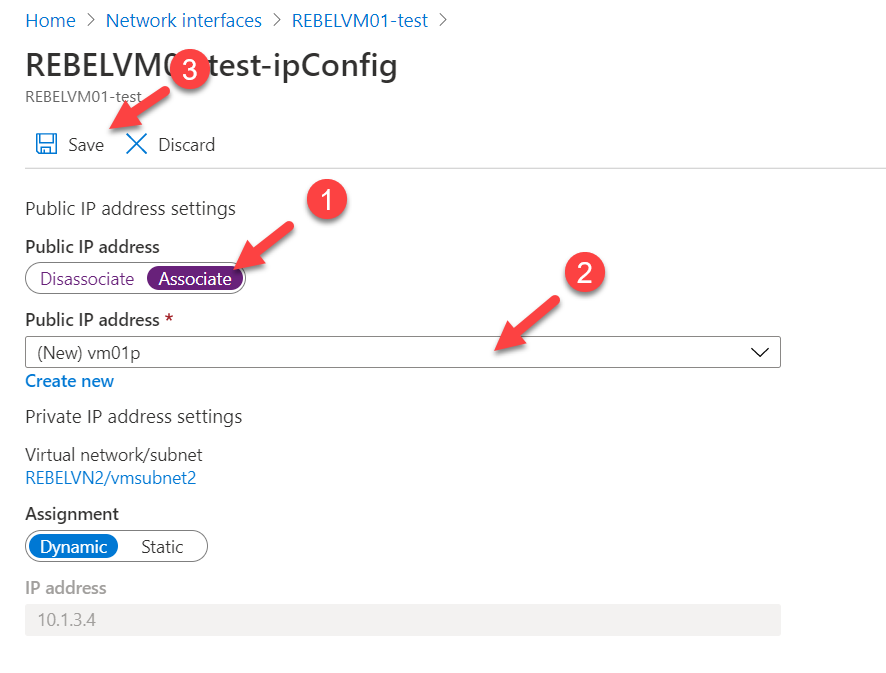
Once the allocation is completed, log in to VM using new public IP.
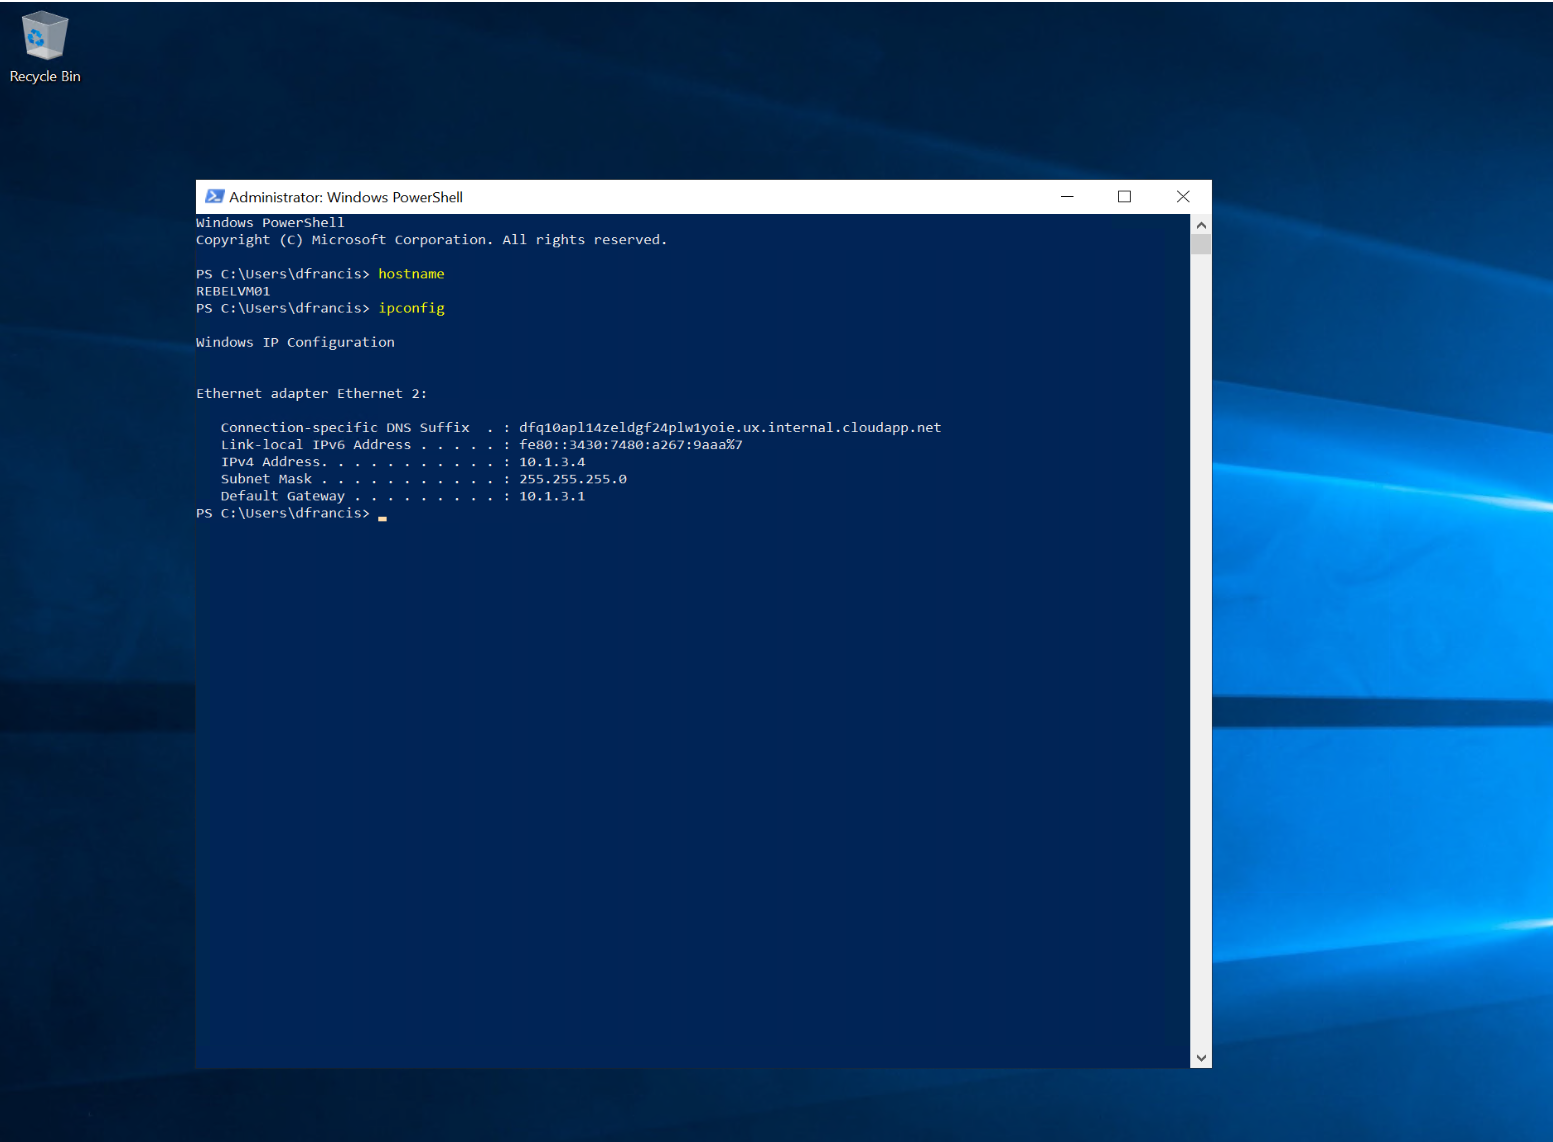
As expected, the encrypted Azure VM is a failover to the secondary Azure region successfully.
I hope now you have a better understanding of how we can replicate Encrypted Azure VM to a secondary Azure region using Azure Site Recovery Service. If you have any further questions about this feel free to contact me at rebeladm@live.com also follow me on twitter @rebeladm to get updates about new blog posts.

