
In an on-premises Active Directory environment, there can be application or service which required integration with Active Directory. With AD integration, the application can search for AD users, allow login, assign permissions, etc. This integration part is usually done using the Lightweight Directory Access Protocol (LDAP). By default, traffic over LDAP is not encrypted. Due to the vulnerabilities, Microsoft now recommends only to use secure LDAP (LDAPS, LDAP over SSL) connections to Domain Controllers. Azure Active Directory Domain Services (Azure AD DS) also support for secure LDAP connections. Most of the time the LDAP connection to Azure AD DS will be initiated over the public internet. So, it is important to have encryption in place to prevent man-in-the-middle attacks.
In this post, I am going to demonstrate how to enable secure LDAP for Azure AD DS. Before we start make sure you have the following prerequisites in place.
1. Valid Azure Subscription
2. Valid Azure Active Directory Domain Services
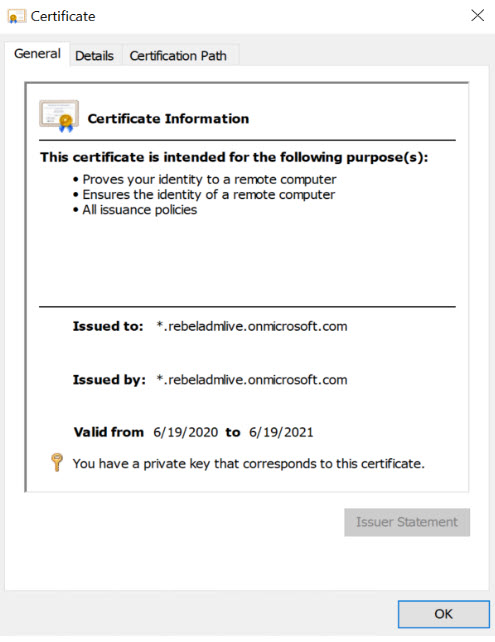
Azure Directory Domain Service instance is using default Microsoft domain name rebeladmlive.onmicrosoft.com. So, I have to use a self-sign certificate for it. To generate a self-sign certificate, we can use the following PowerShell commands. This can be run from any PC.
$domainname=”rebeladmlive.onmicrosoft.com”
$certlife=Get-Date
New-SelfSignedCertificate -Subject *.$domainname -NotAfter $certlife.AddDays(365) -KeyUsage DigitalSignature, KeyEncipherment -Type SSLServerAuthentication -DnsName *.$domainname, $domainname
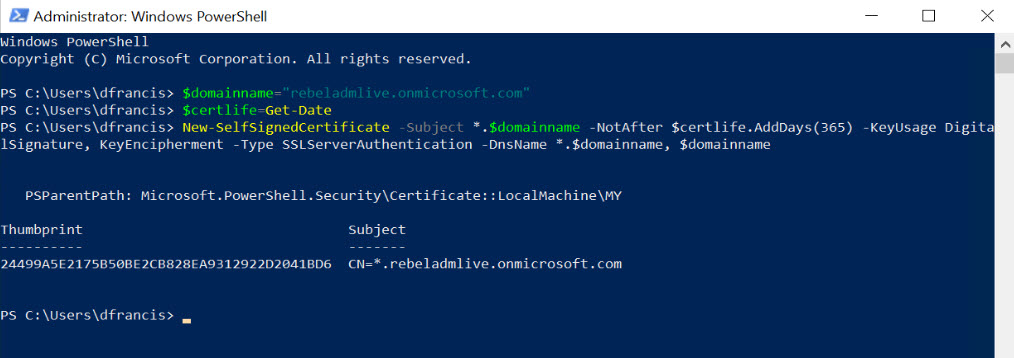
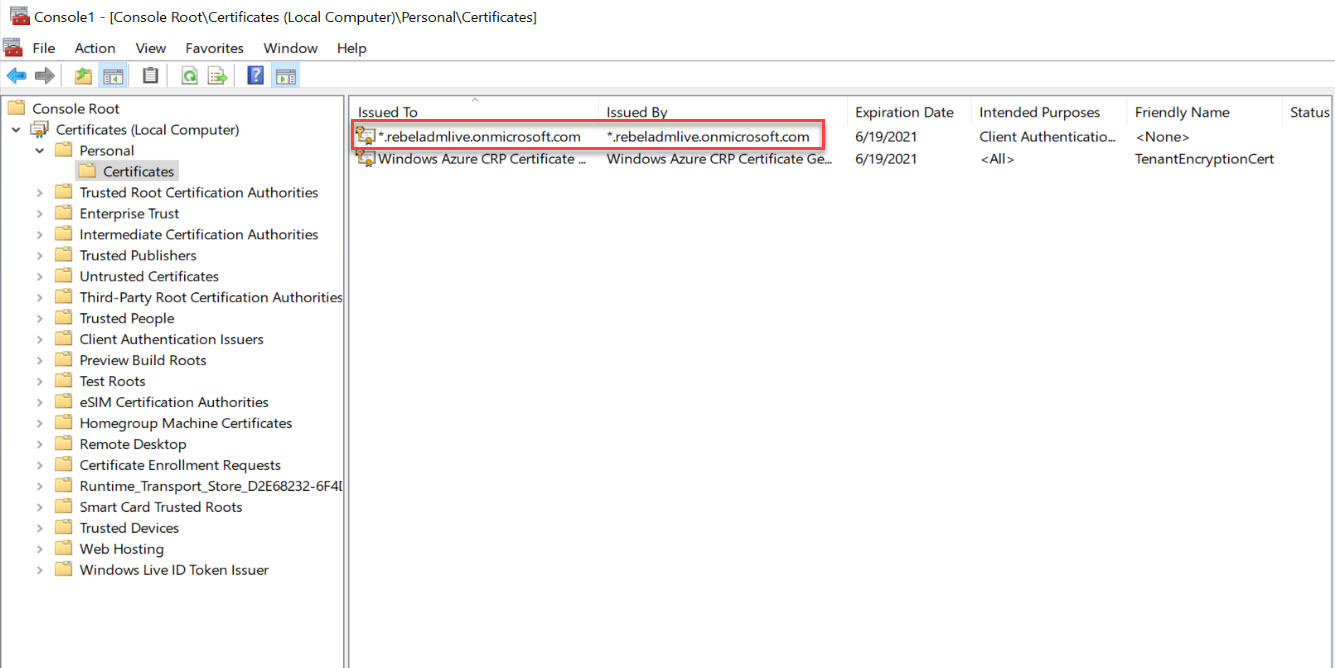
In above, replace rebeladmlive.onmicrosoft.com with your Azure Active Directory Domain Service instance name. As we can see, it created a wild card SSL for rebeladmlive.onmicrosoft.com under Computer account.
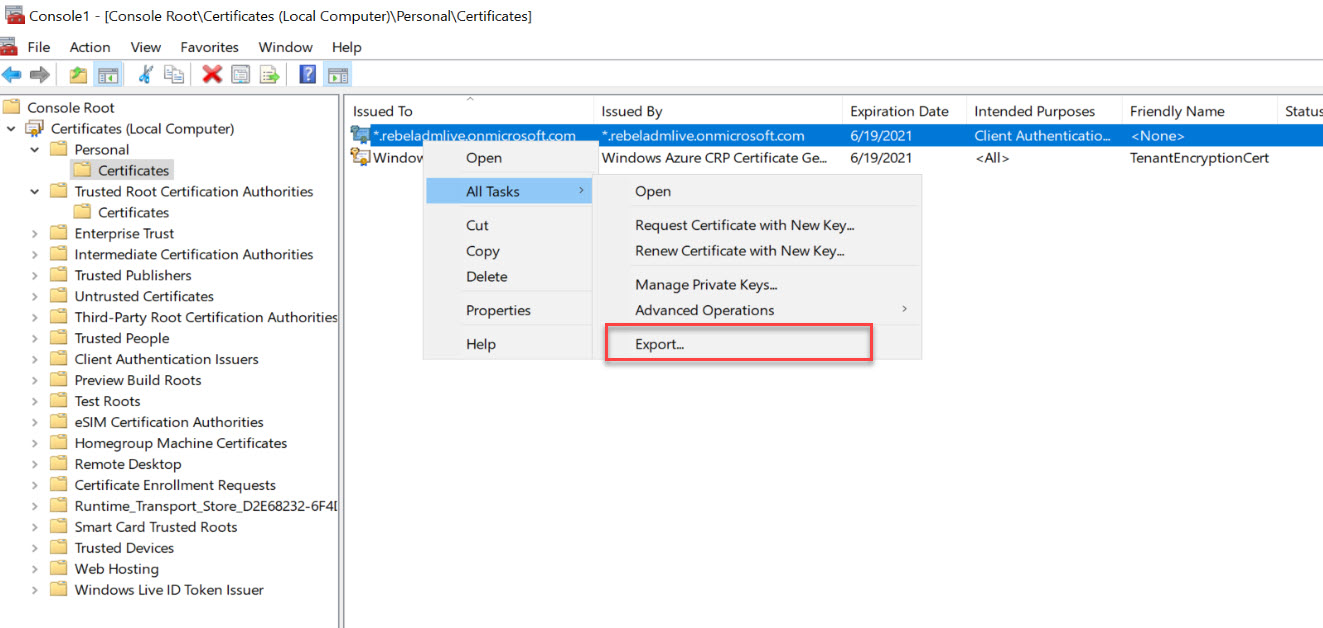
We need to export this certificate as .PFX file with private key to,
1. Use it during the secure LDAP setup and upload it to Azure
2. Import it to any other PC which like to initiate secure LDAP connection (The certificate must be imported into Computer Account\Personal\Certificates as well as Trusted Root Certification Authorities\Certificates. This is because the certificate is self-sign cert and it doesn’t have trusted root certificate)
To export certificate,
1. Right-click on the certificate and go to All Tasks | Export
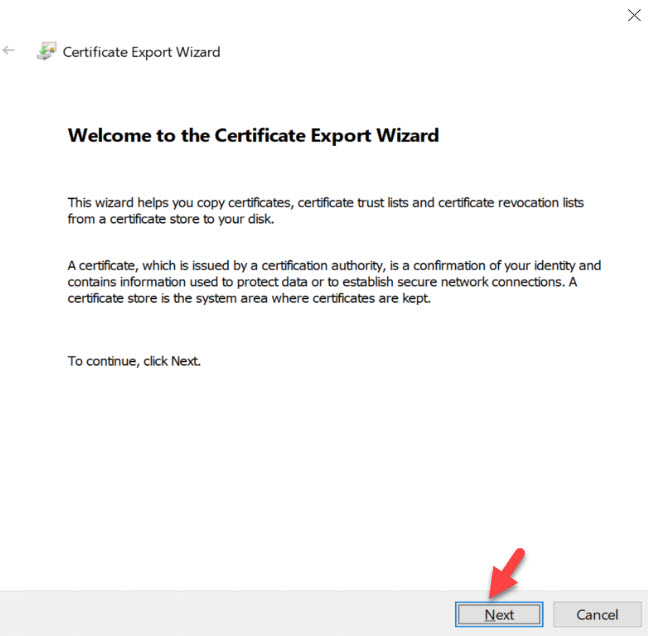
2. It will open up the certificate export wizard, click on Next to start the process.
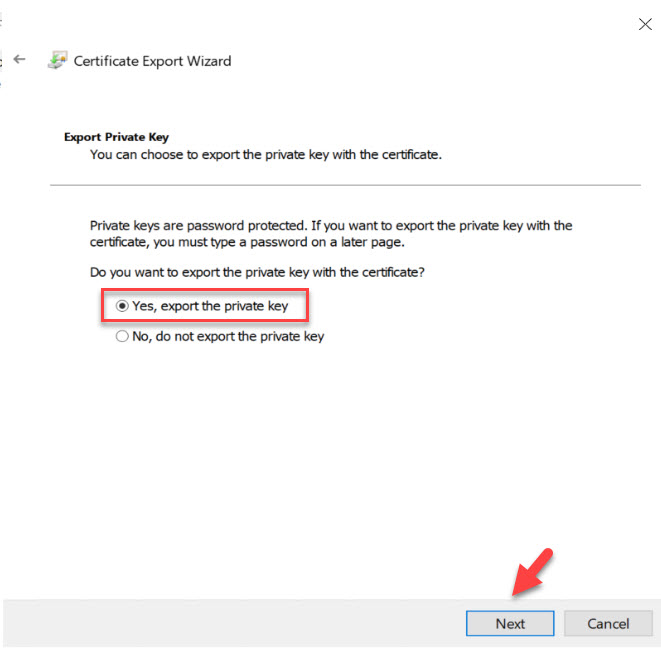
3. In the next window select Yes, export the private key, and click on Next.
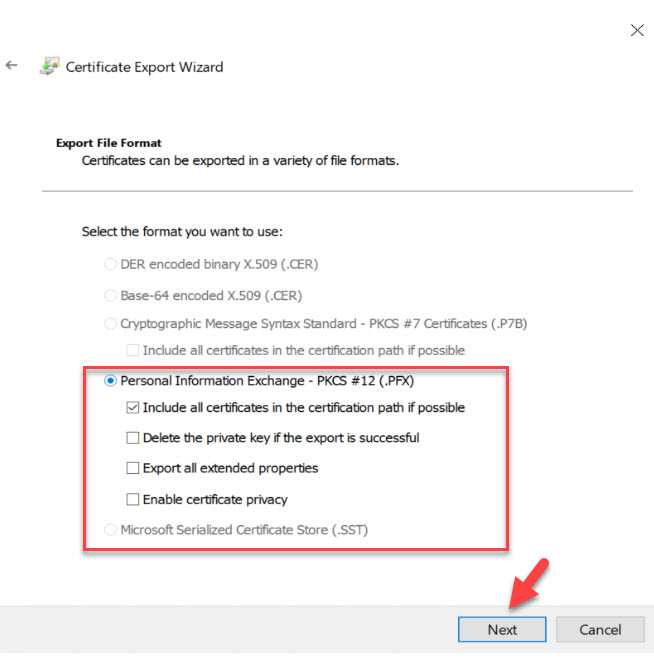
4. In the Export file format window, match the following selection, and click on Next.
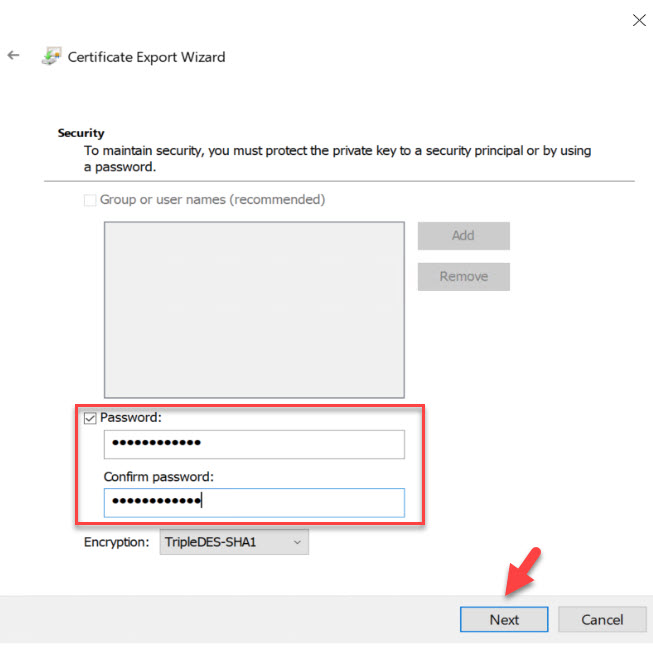
5. In the next window, define the password for the export file and click on Next.
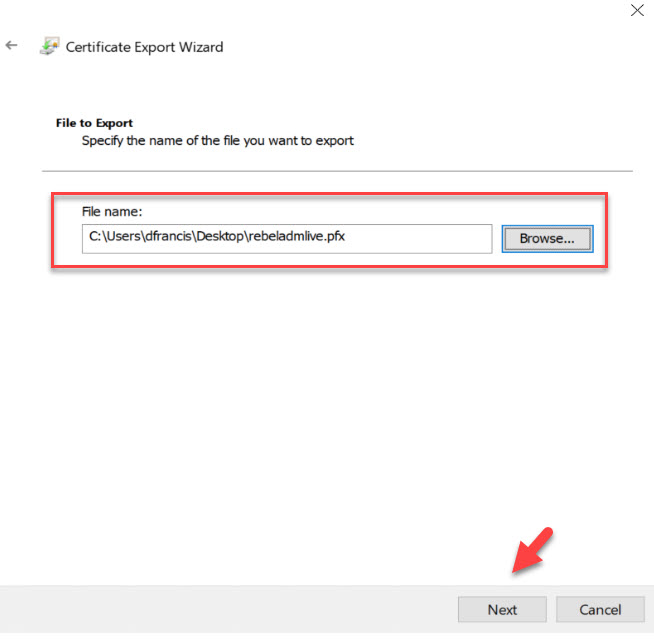
6. Then, select the file path for the output and click on Next.
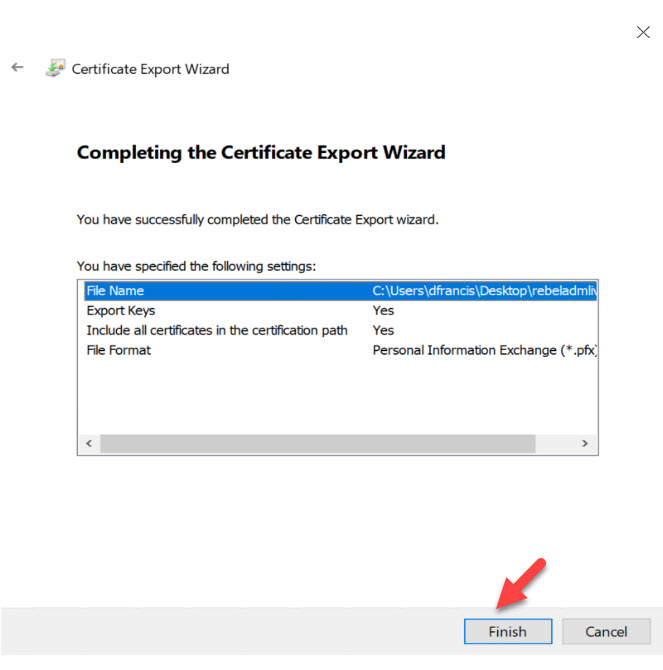
7. In the next window, click on Finish to complete the Export process.
Now we have the .PFX file. The next step is to import it again to Trusted Root Certification Authorities\Certificates. This is required as we are using a self-sign certificate for the exercise.
To do that,
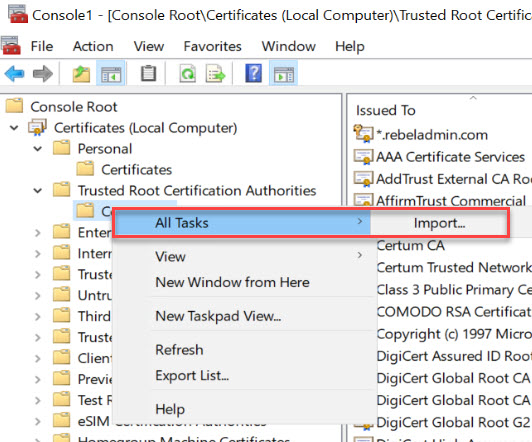
1. Go back to certificate mmc and then Trusted Root Certification Authorities\Certificates
2. Right click and then go to All Tasks | Import
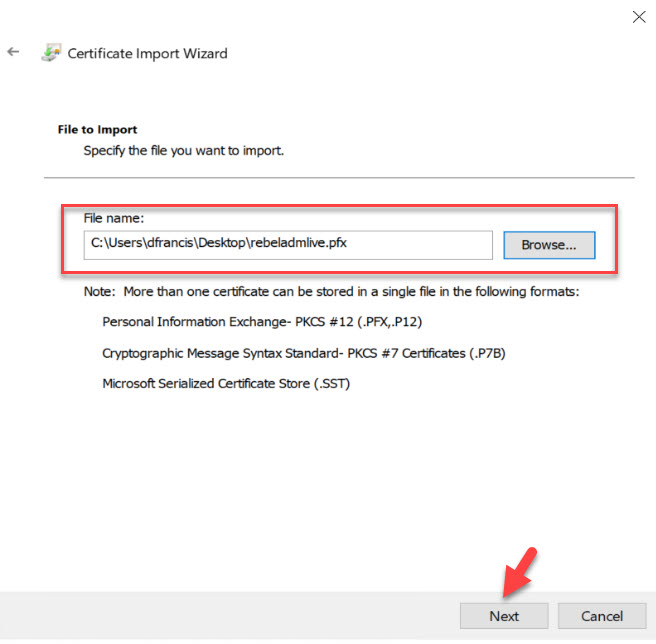
3. It will open a new wizard for cert import, Click on Next to initiate the import process.
4. In the next window, select the PFX file we created, and click on Next.
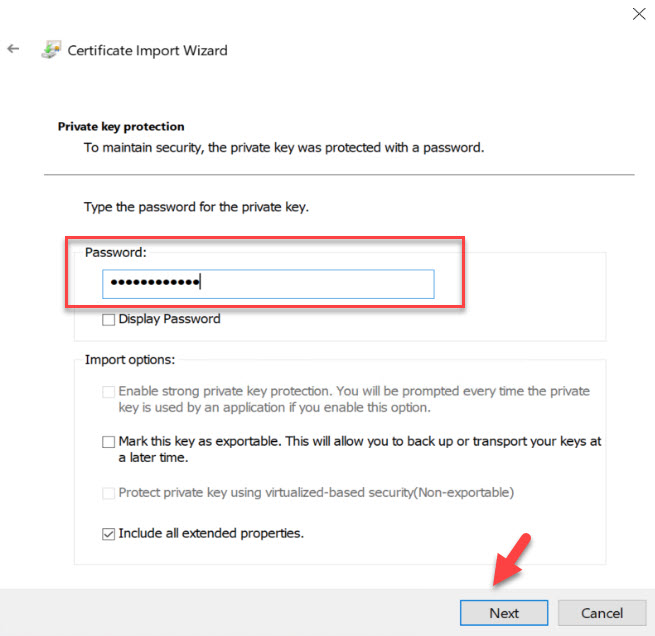
5. Then type the password we define for the certificate file and click on Next.
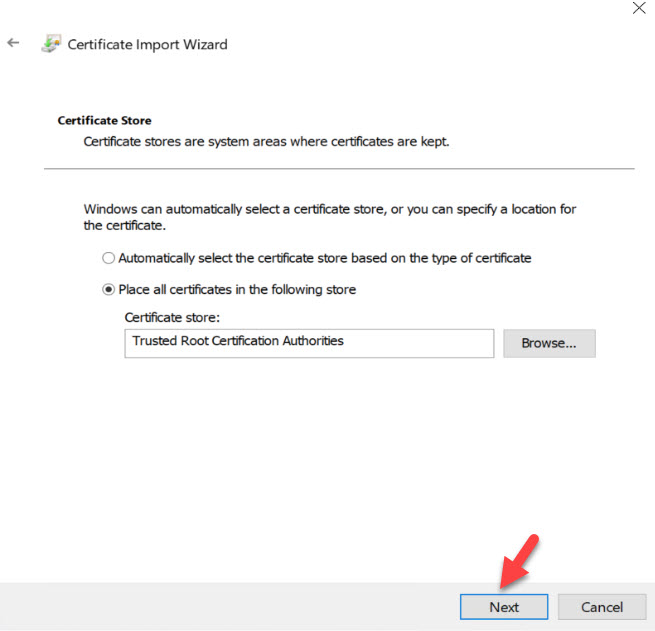
6. In the certificate store window, leave the defaults and click on Next.
7. Then click on Finish to complete the import process.
Now we have a trusted self-sign certificate in place.
Enable secure LDAP (LDAPS)
The next step of the configuration process is to enable secure LDAP. To do that,
1. Log in to Azure portal (https://portal.azure.com) as Global Administrator
2. Then go to Azure AD Domain Service
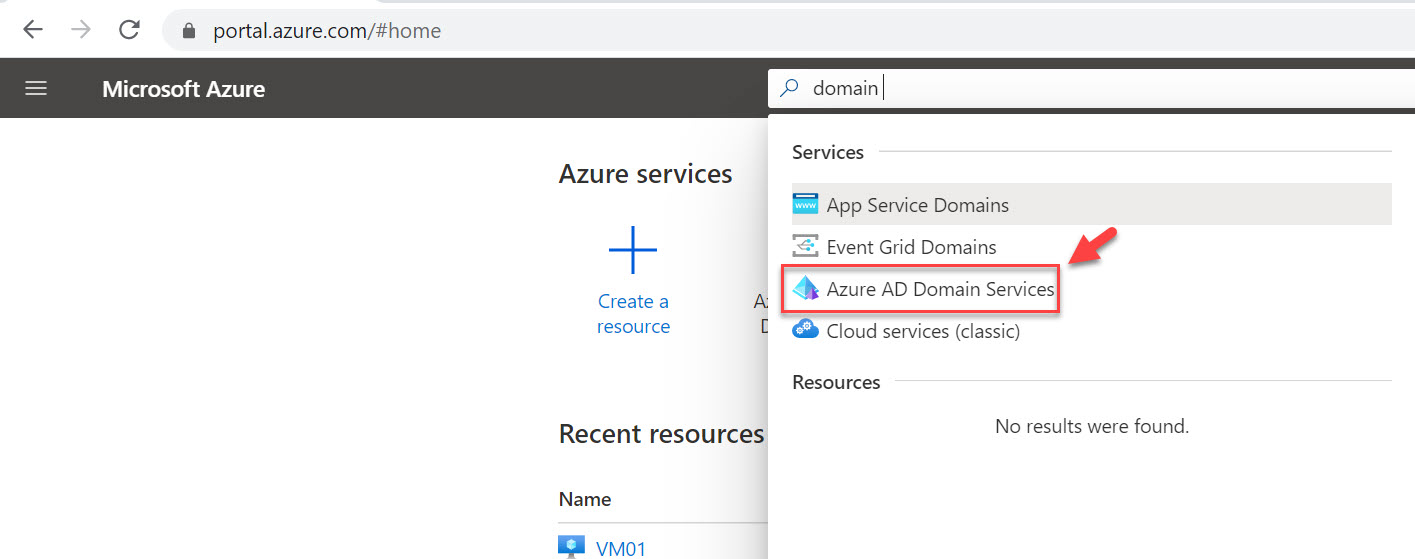
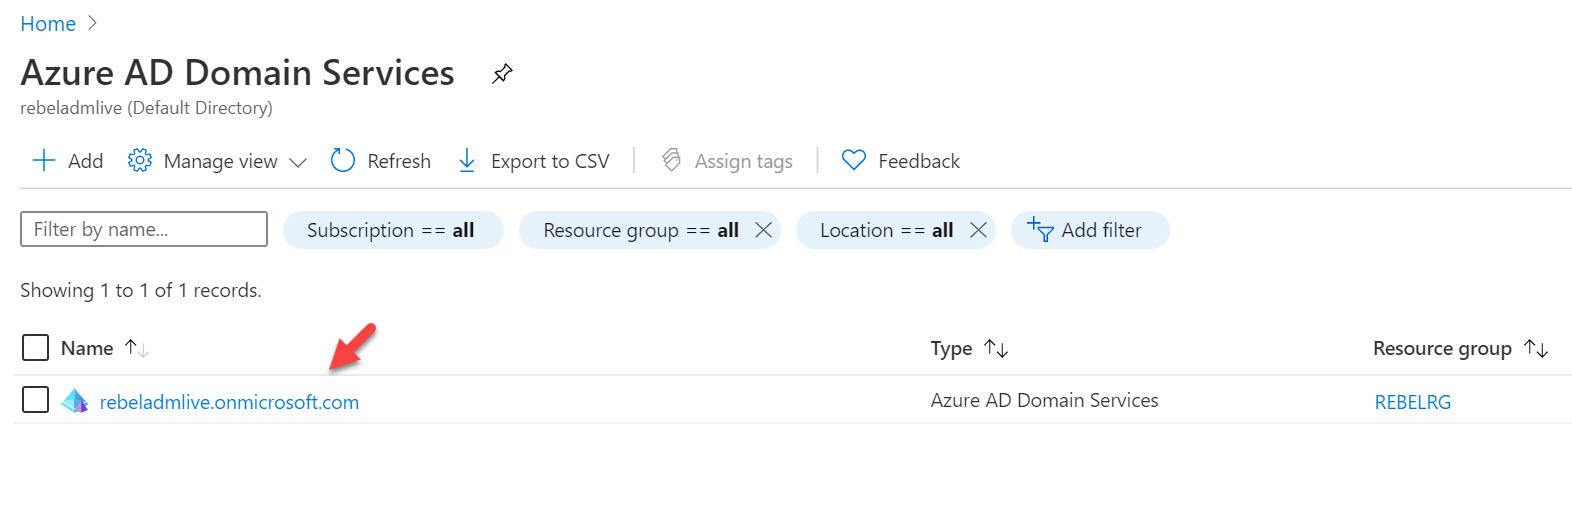
3. Click on the Azure Active Directory Domain Services instance.
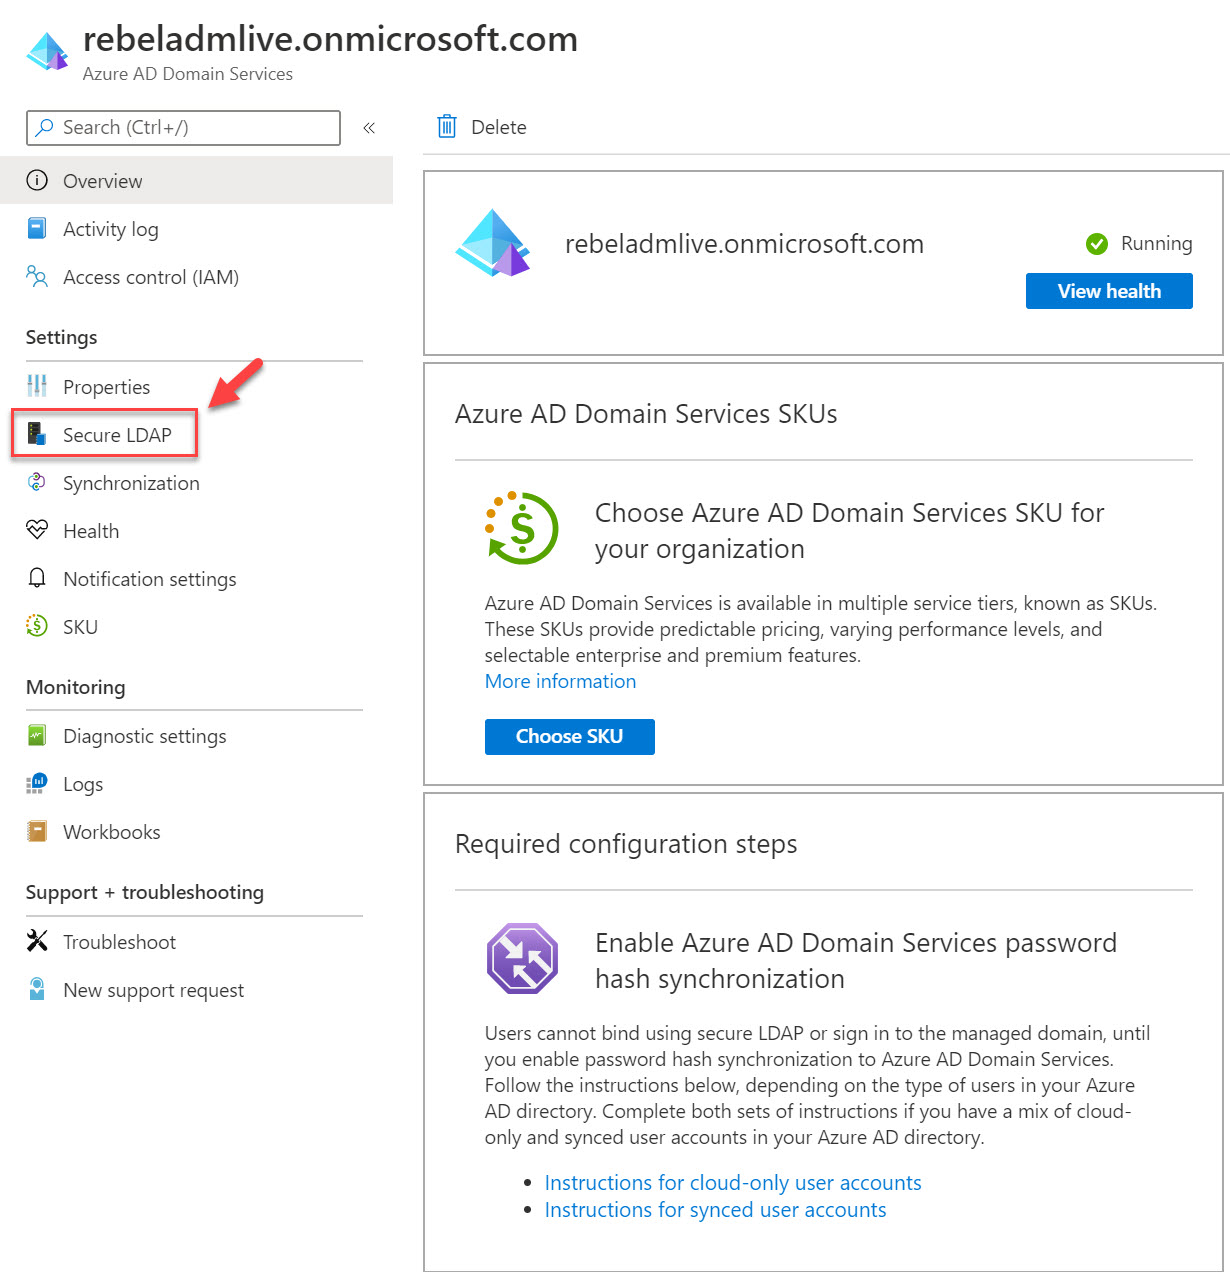
4. It will open up the Azure Active Directory Domain Service settings page. In this page, click on Secure LDAP. It will open up a new window.
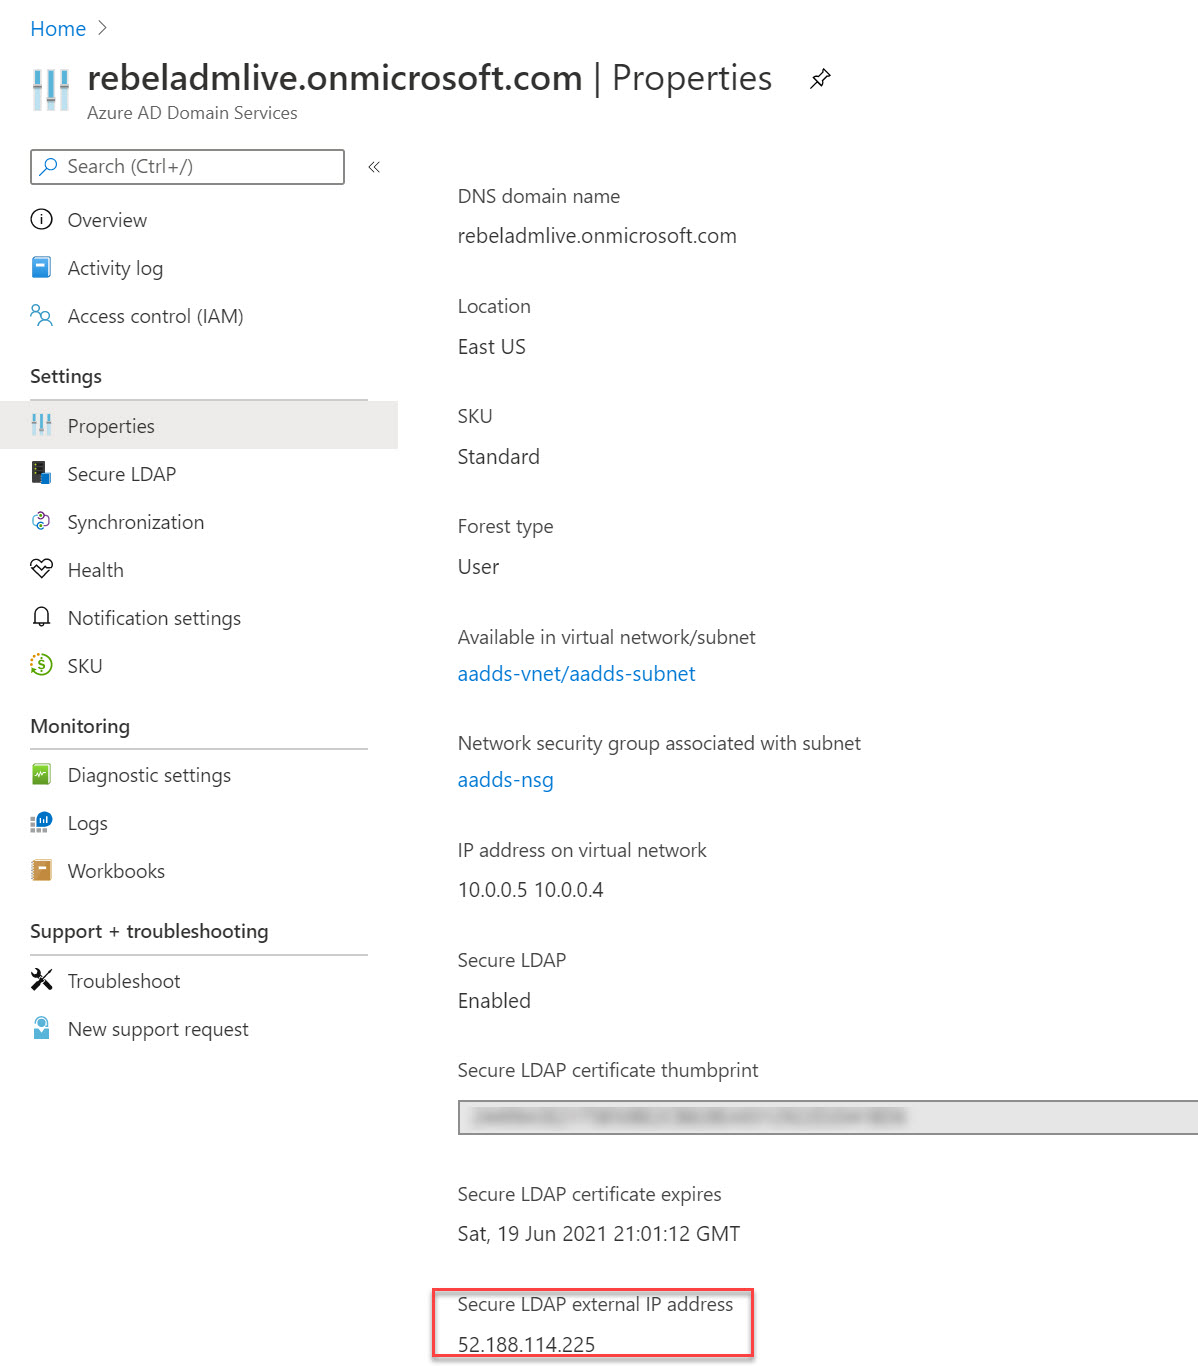
5. To enable secure LDAP, click on Enable under Secure LDAP. We also need to enable secure LDAP over the internet as in this demo I am going to access it via public internet. To do that click on Enable under Allow secure LDAP access over the internet. We also need to upload the PFX file we created. We can do that under option .PFX file with a secure LDAP certificate. Click on the file icon and select the .PFX file. Under Password to decrypt .PFX file option, type the password for the PFX file. Finally, click on Save to apply changes.

6. It will take a few minutes to enable secure LDAP. Once it is enabled, we can see public IP is assigned for the secure LDAP communication. This info is available under the properties page.
Allow secure LDAP traffic
Now we have Azure AD DS instance with secure LDAP. The next step of the configuration is to allow secure LDAP traffic via NSG (Network security group).
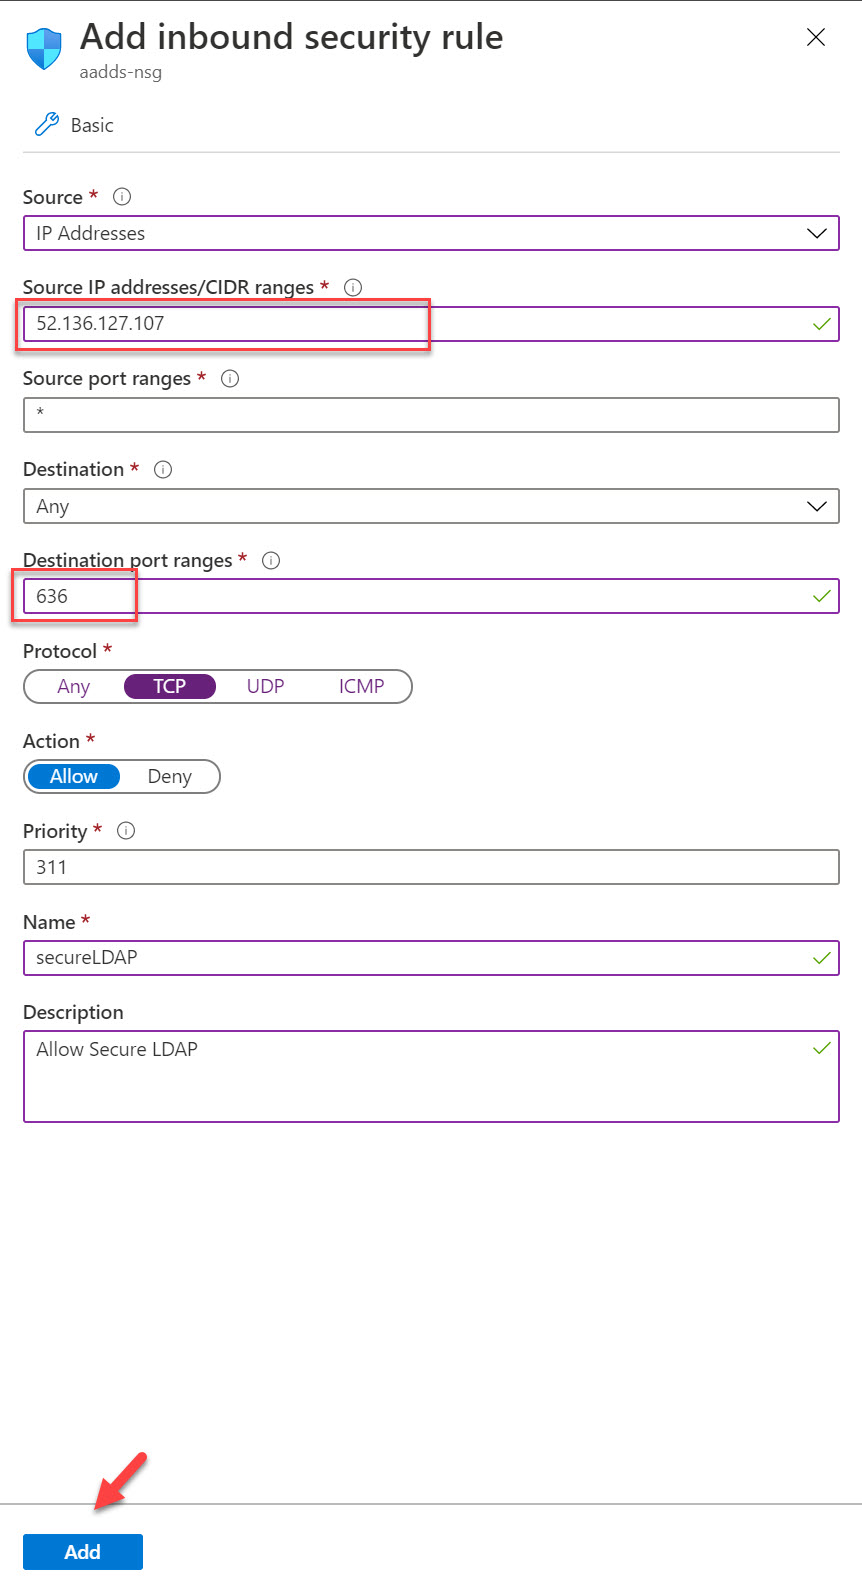
It is recommended to use point-to-point communication rather than allowing complete subnet. Especially if it is over the public internet. In this demo, I got a virtual machine behind public IP 52.136.127.107. Let’s go ahead and create NSG rule to allow secure LDAP communication.
To do that,
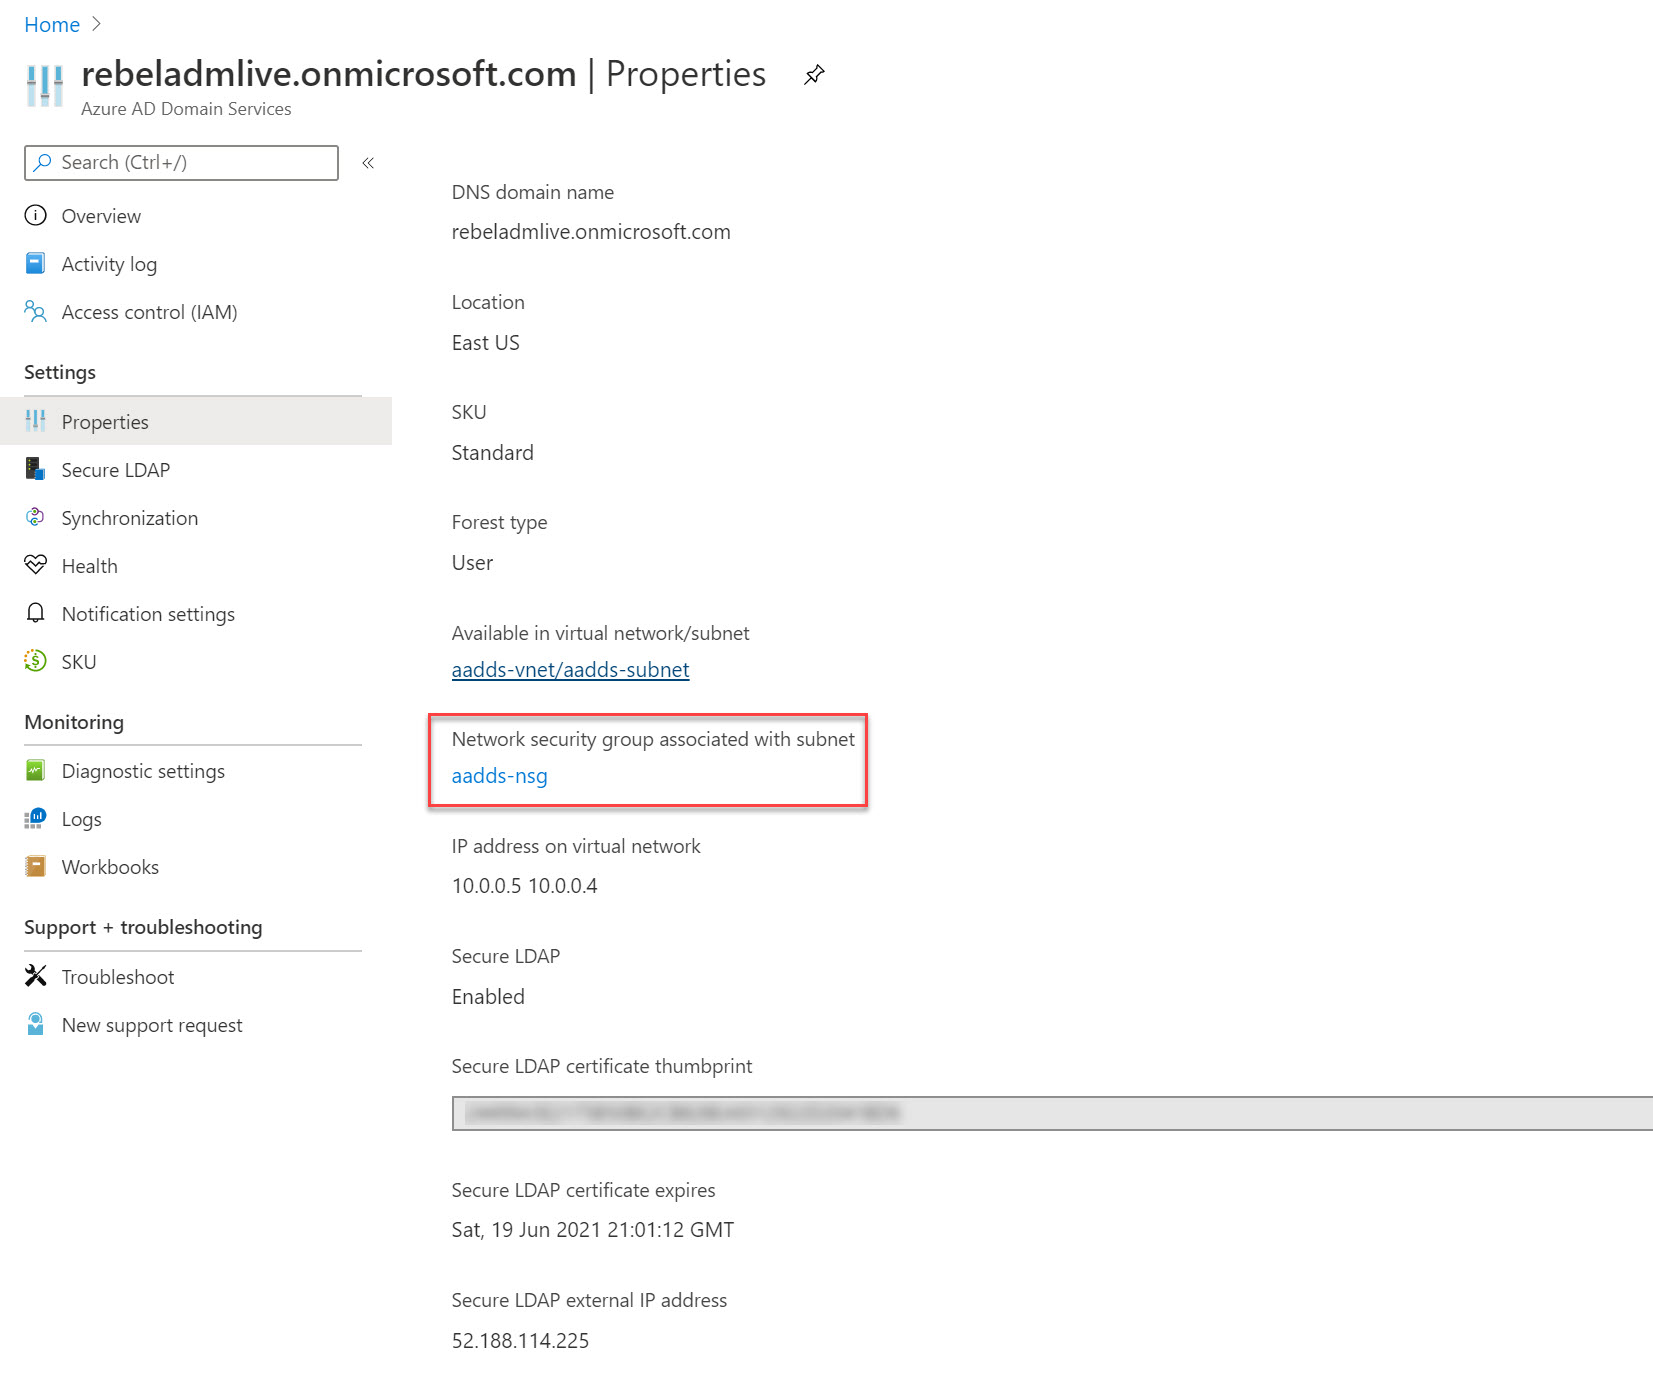
1. Go to the Azure AD DS instance properties page.
2. Click on the NSG associated with subnet.
3. In NSG page click on Inbound security rules
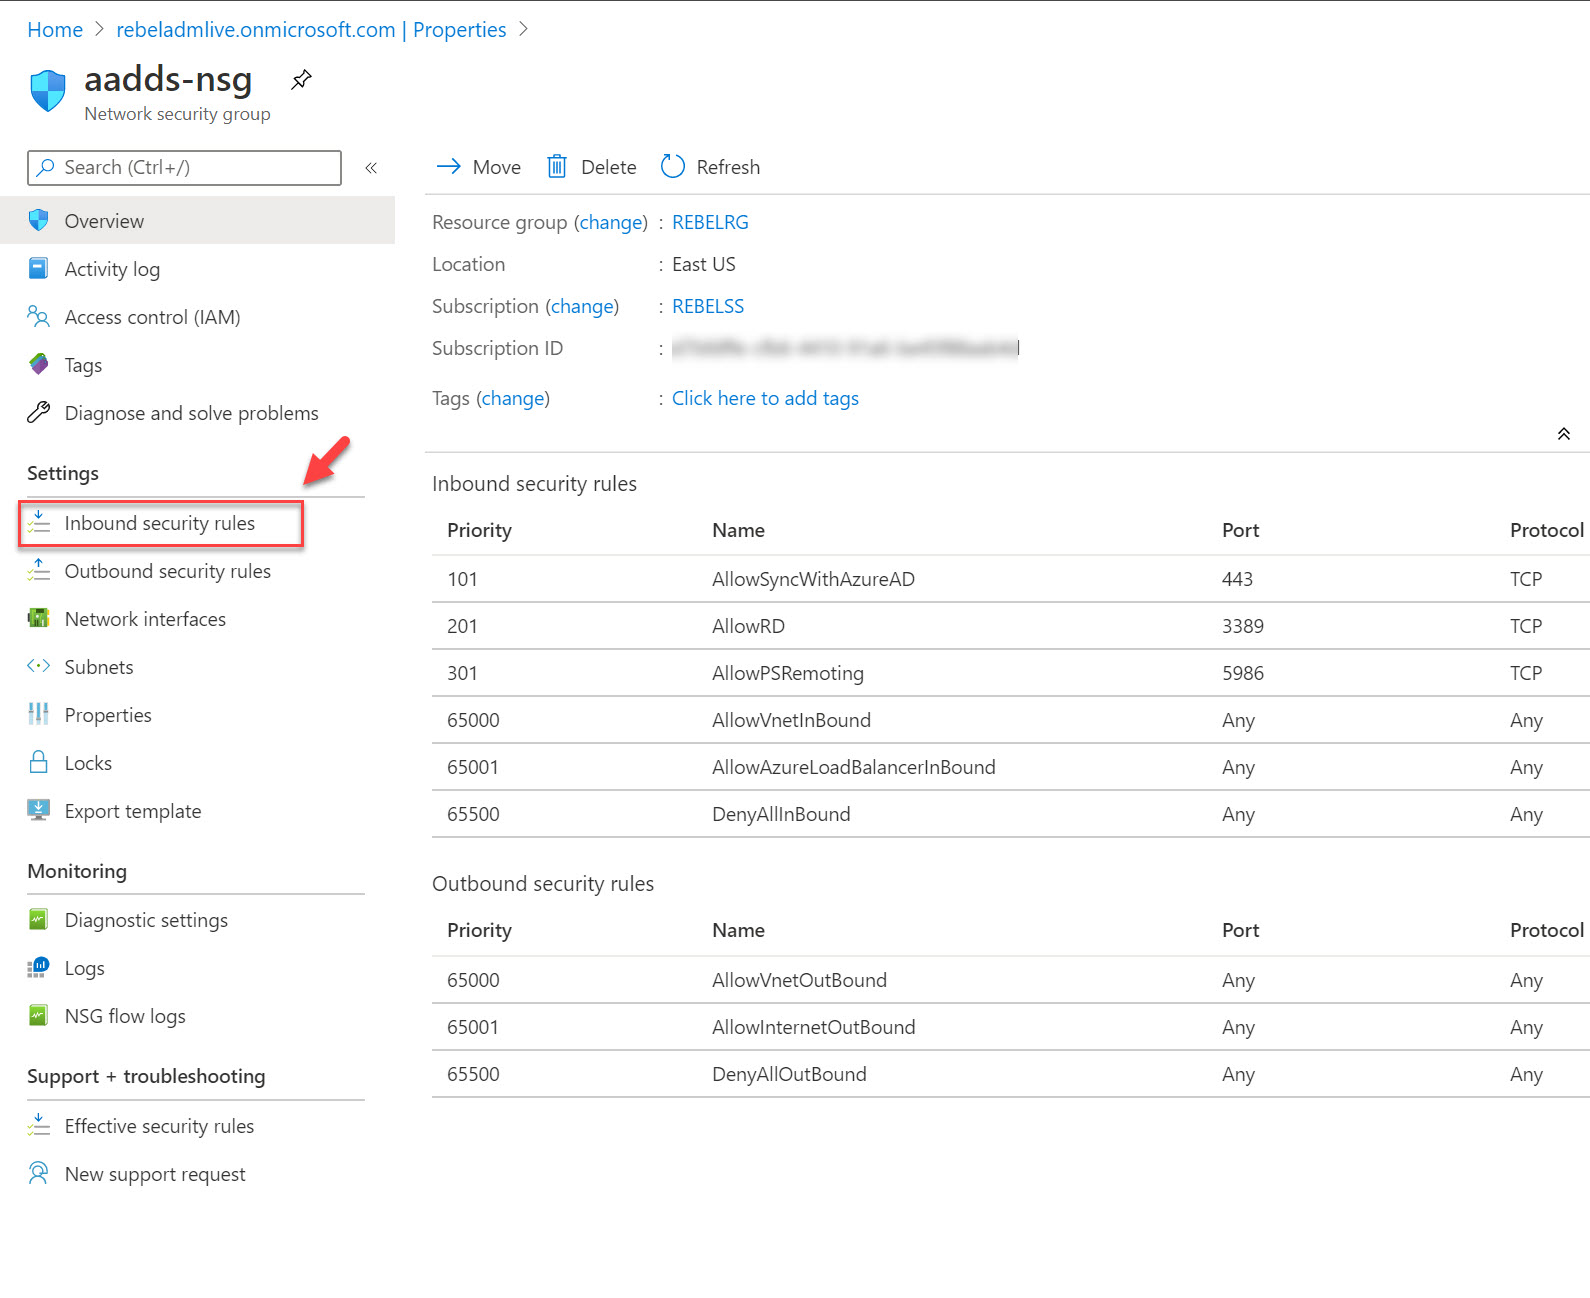
4. Then click on +Add to create new rule.
5. In rule, properties allow TCP port 636 access from 52.136.127.107. Once settings are in place, click on Add to create the rule.
Testing
It is time to test the secure LDAP access. To do that, first, we need to install RSAT tools https://docs.microsoft.com/en-us/windows-server/remote/remote-server-administration-tools. We need to use ldp.exe to test the connectivity.
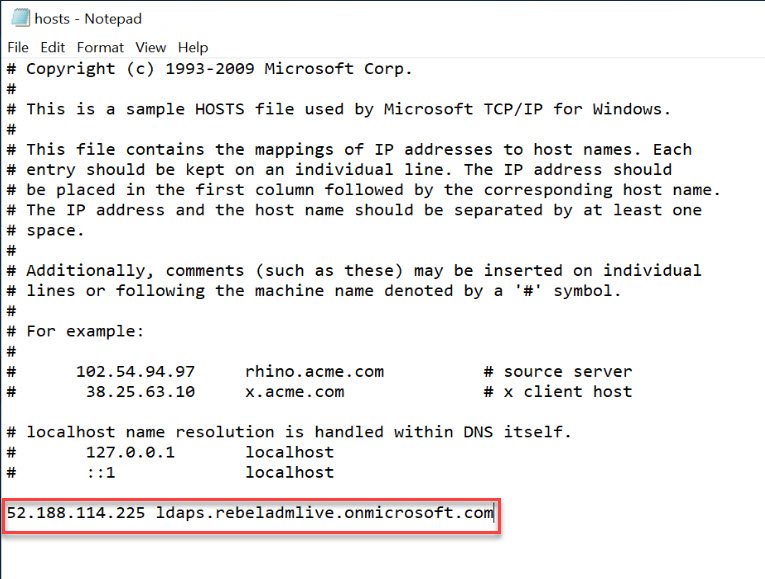
Once tools are installed, we need to create host entry (we can create DNS entries if required) to map Secure LDAP external IP address to a hostname.
In my demo environment, I create the following host entry.
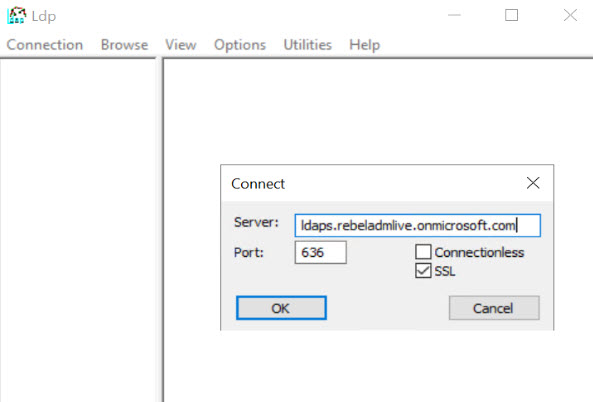
I open ldp.exe and went to Connections | Connect. Then type ldaps.rebeladmlive.onmicrosoft.com in Server field. Use 636 for Port. Also, select SSL for secure LDAP connection. Once values are in place click on OK.
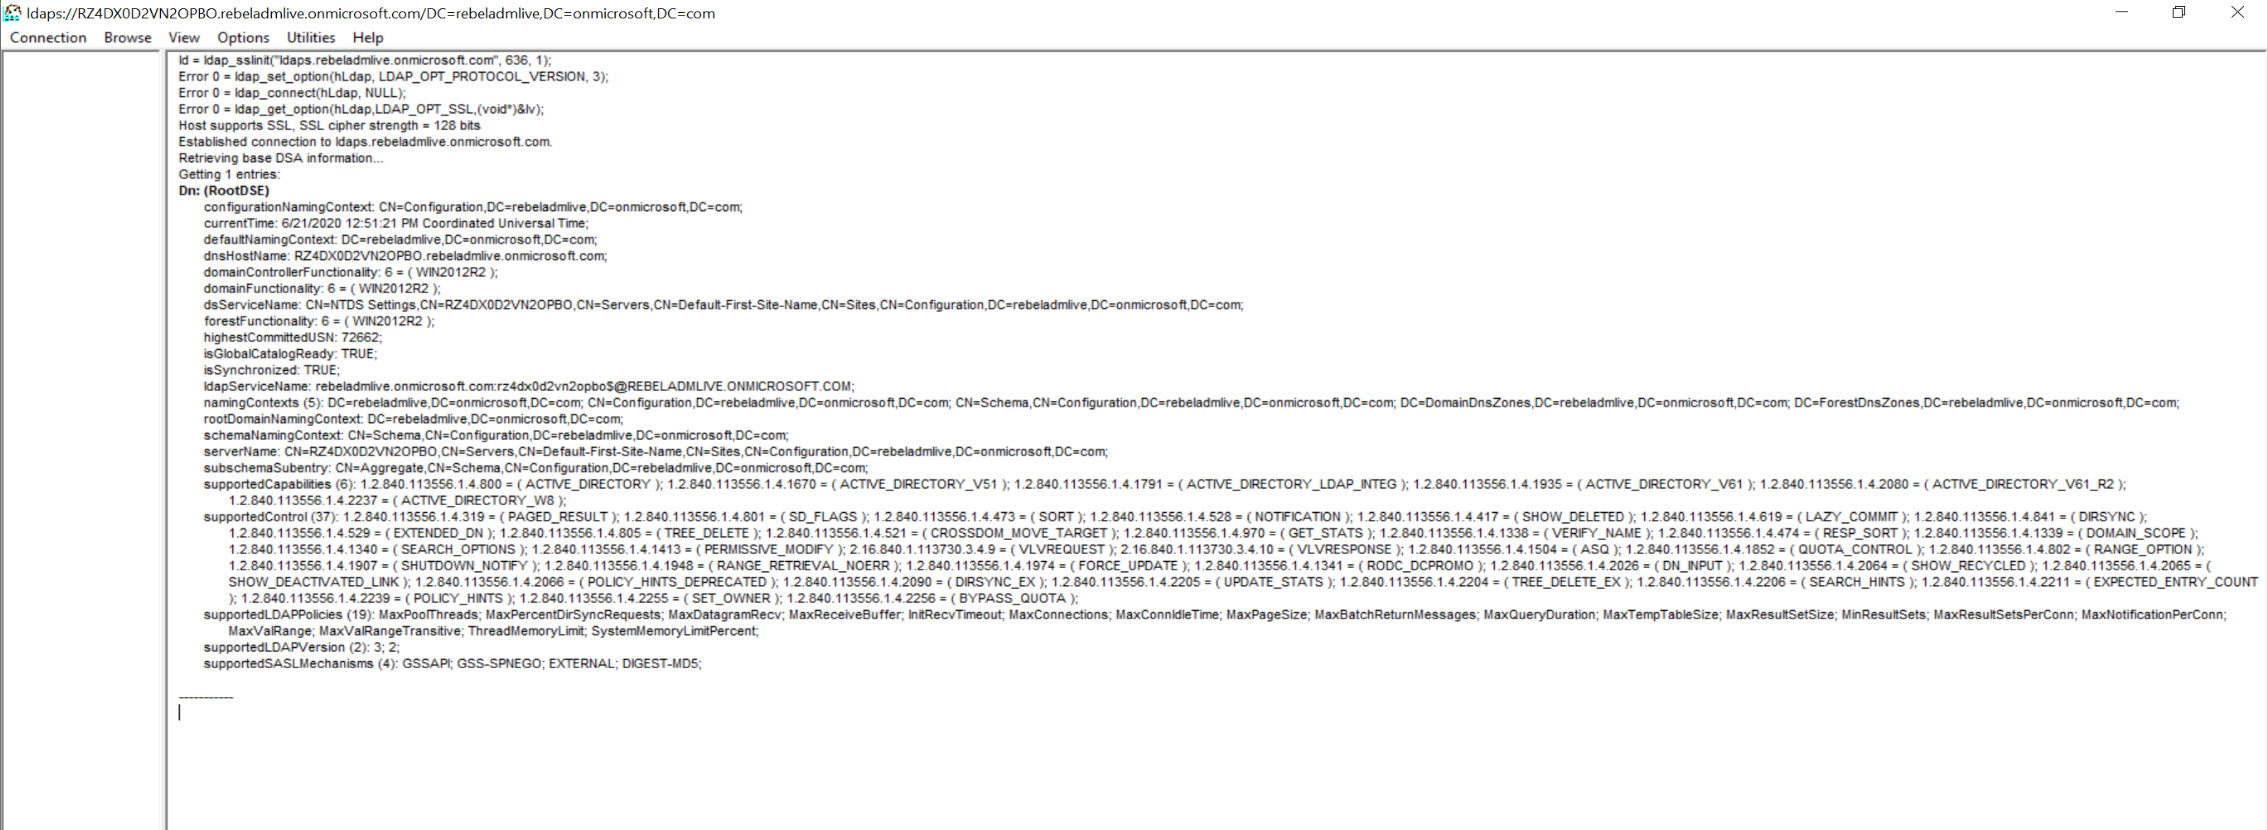
As expected, I was able to connect successfully.
Let’s also try the binding. To do that go to Connections | Bind
Note – You can’t perform LDAP simple binds if you have disabled NTLM password hash synchronization on your Azure AD DS instance. You can use following PowerShell commands to enable NTLM password hash synchronization for your Azure AD DS instance.
Login-AzAccount
$DomainServicesResource = Get-AzResource -ResourceType “Microsoft.AAD/DomainServices”
$securitySettings = @{“DomainSecuritySettings”=@{“NtlmV1″=”Disabled”;”SyncNtlmPasswords”=”Enabled”;”TlsV1″=”Disabled”}}
Set-AzResource -Id $DomainServicesResource.ResourceId -Properties $securitySettings -Verbose -Force
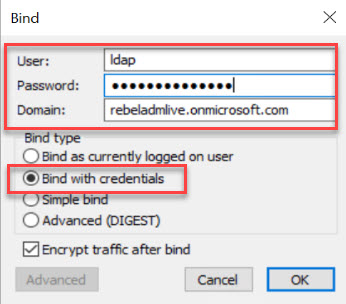
Then in the connection window, use a user from AAD DC Administrators. As domain, use the Azure AD DS instance name. For Bind type, choose the option Bind with credentials.
At the end select OK to bind.
On a successful bind, you will see a message like below.

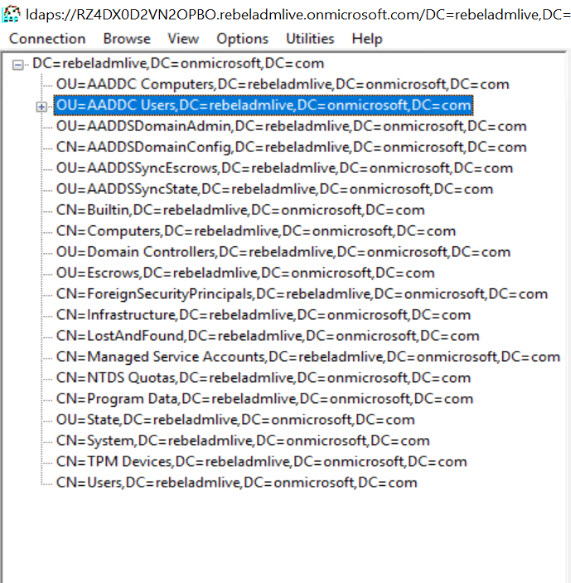
Then go to View | Tree. Leave BaseDN empty and click OK.
In ldp window you can now see the data. Expand OU=AADDC Users,DC=xxxxxxx,DC=onmicrosoft,DC=com and see if you can see the user accounts under it.
As we can see we were able to initiate a secure LDAP connection to Azure Active Directory Domain Service successfully.
This marks the end of this blog post. If you have any further questions about this feel free to contact me on rebeladm@live.com also follow me on twitter @rebeladm to get updates about new blog posts.

