
Disk encryption is a basic data protection method for physical & virtual hard disks. In one of my previous posts, I explained how we can encrypt Azure Windows VM using Azure Key Vault & BitLocker. This post can access via http://www.rebeladmin.com/2019/09/step-step-guide-encrypt-azure-windows-vm-using-bitlocker-powershell-guide/ . Similarly, we also can encrypt Azure Linux VM by using Azure Key Vault & dm-crypt. In this post, I am going to demonstrate how we can encrypt Azure Linux VM.
Things to Consider
Before we move forward, make sure your Azure VM configurations comply with following,
• Azure disk encryption for Linux VM is only going to work if you are running Azure-endorsed Linux distribution such as,
Ubuntu 14.04.5, 16.04, 18.04
RHEL 6.7, 6.8, 7.2, 7.3, 7.4, 7.5, 7.6
CentOS 6.8, 7.2n, 7.3, 7.4, 7.5, 7.6
openSUSE 42.3
SLES 12-SP3, 12-SP4
• If you encrypting OS & Data volume in Linux VM and its root (/) file system usage is 4GB or less you need a minimum of 8GB Ram. Also, if root (/) file system usage is more than 4GB, it needs 2 * (/root file system usage). This is only required during the initial encryption process.
• Azure Linux VM must have dm-crypt & vfat modules running.
• Data disks of Linux VM (which required encryption) must be listed under /etc/fstab correctly.
In this demo, I will be using PowerShell. Therefore, please make sure you have Azure PowerShell module installed. More info about it can find under https://docs.microsoft.com/en-us/powershell/azure/install-az-ps?view=azps-2.6.0
Setup Resource Group
The first step of the configuration is to create a new resource group.
To do that,
1. Launch PowerShell console and connect to Azure using Connect-AzAccount

2. Then create a new resource group using,
New-AzResourceGroup -Name REBELRG1 -Location "East US"
In the above, REBELRG1 is the resource group name and East US is the resource group location.

Configure Azure Key Vault
Next, we need to create a new key vault and encryption key.
1. As the first step, let's go ahead and enable Azure Key Vault provider within the subscription by using,
Register-AzResourceProvider -ProviderNamespace "Microsoft.KeyVault"
2. Then, we go ahead with Azure Vault setup,
New-AzKeyVault -Location "East US" -ResourceGroupName REBELRG1 -VaultName REBELVMKV1 -EnabledForDiskEncryption
In the above, REBELVMKV1 is the key vault name and it is created under REBELRG1 resource group which we created in the previous step. -EnabledForDiskEncryption is used to prepare the key vault to use with disk encryption.
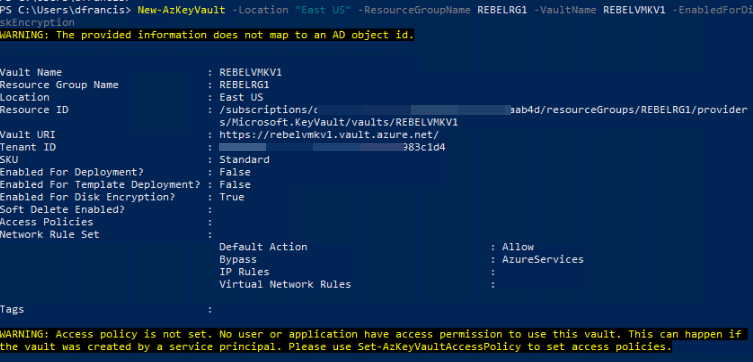
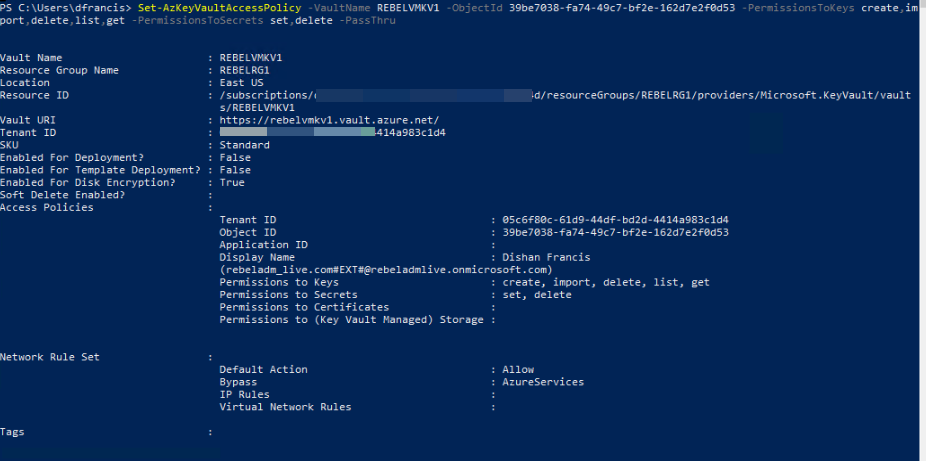
3. Then we need to create access policy so currently logged in user can create encryption keys.
Set-AzKeyVaultAccessPolicy -VaultName REBELVMKV1 -ObjectId xxxxxxxxxxxxxxxx -PermissionsToKeys create,import,delete,list,get -PermissionsToSecrets set,delete -PassThru
In above objectid should replace with the actual objectid value of the currently logged in global admin account. In here -PermissionsToKeys define the permissions allocated for keys and -PermissionsToSecrets defines the permissions allocated for secrets.
4. Now we need a new encryption key to use with disk encryption.
Add-AzKeyVaultKey -VaultName REBELVMKV1 -Name "REBELVMKey" -Destination "Software"
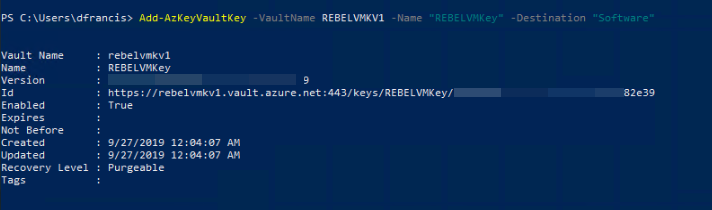
In the above, REBELVMKey is the key name. -Destination is defined as Software as we creating the standard encryption key. If required it can be set to Hardware Security Model (HSM) but it comes with additional cost.
Create VM
In this demo, I am going to create a new VM for encryption testing. It is not a must; we still can encrypt any existing VM.
To create new VM I am using,
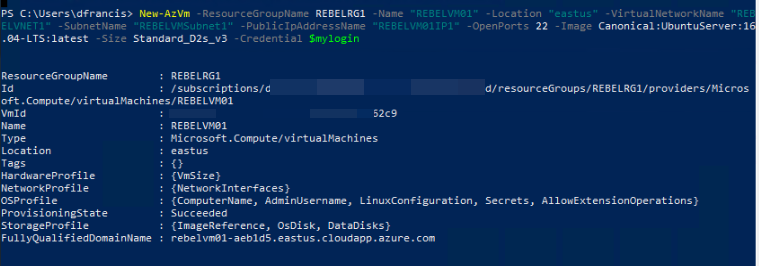
$mylogin = Get-Credential
New-AzVm -ResourceGroupName REBELRG1 -Name "REBELVM01" -Location "eastus" -VirtualNetworkName "REBELVNET1" -SubnetName "REBELVMSubnet1" -PublicIpAddressName "REBELVM01IP1" -OpenPorts 22 -Image Canonical:UbuntuServer:16.04-LTS:latest -Size Standard_D2s_v3 -Credential $mylogin
In the above, REBELVM01 is the VM name. It is running UbuntuServer:16.04 edition. I have specified it using -Image parameter. It also using Standard_D2s_v3 vm size.
Encrypt VM
The next step of the configuration is to encrypt the VM. To do that we need the following values,
• Azure Key Vault Resource ID
• Azure Key Vault URI
• Azure Key vault key ID
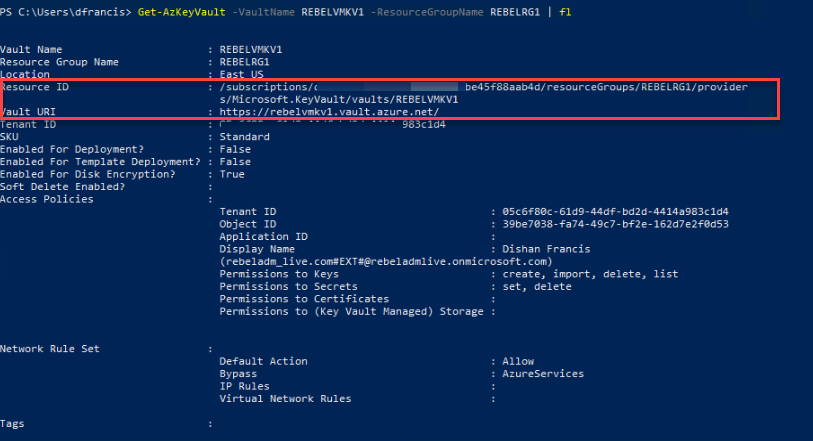
We can find Key Vault Resource ID & Key Vault URI values using,
Get-AzKeyVault -VaultName REBELVMKV1 -ResourceGroupName REBELRG1 | fl
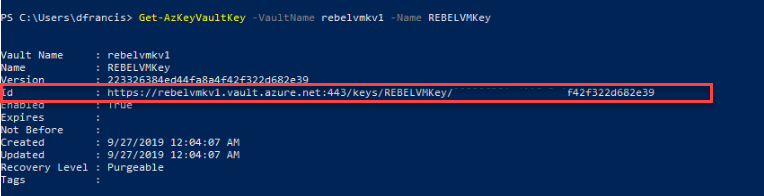
We can find Key vault key ID using,
Get-AzKeyVaultKey -VaultName rebelvmkv1 -Name REBELVMKey
Now we can go ahead with the encryption,
Set-AzVMDiskEncryptionExtension -ResourceGroupName REBELRG1 -VMName "REBELVM01" -DiskEncryptionKeyVaultUrl (value of Azure Key Vault URI) -DiskEncryptionKeyVaultId (value of Azure Key Vault Resource ID) -KeyEncryptionKeyUrl (value of Azure Key vault key ID) -KeyEncryptionKeyVaultId (value of Azure Key Vault Resource ID) -VolumeType All –SkipVmBackup
In above, replace the parameter values according to your setup. In there -VolumeType defines which type of disks need to be encrypted. In this demo I am encrypting OS & Data disks.
[su_note]VMBackup extension is a recovery safeguard for encrypted disks. However, this is not compatible with the managed disks. Therefore, the encryption will fail if you not using –SkipVmBackup[/su_note]

Once encryption is completed, VM will be rebooted.
Verifications
Once the reboot is completed, we can verify the encryption status using,
Get-AzVmDiskEncryptionStatus -VMName REBELVM01 -ResourceGroupName REBELRG1

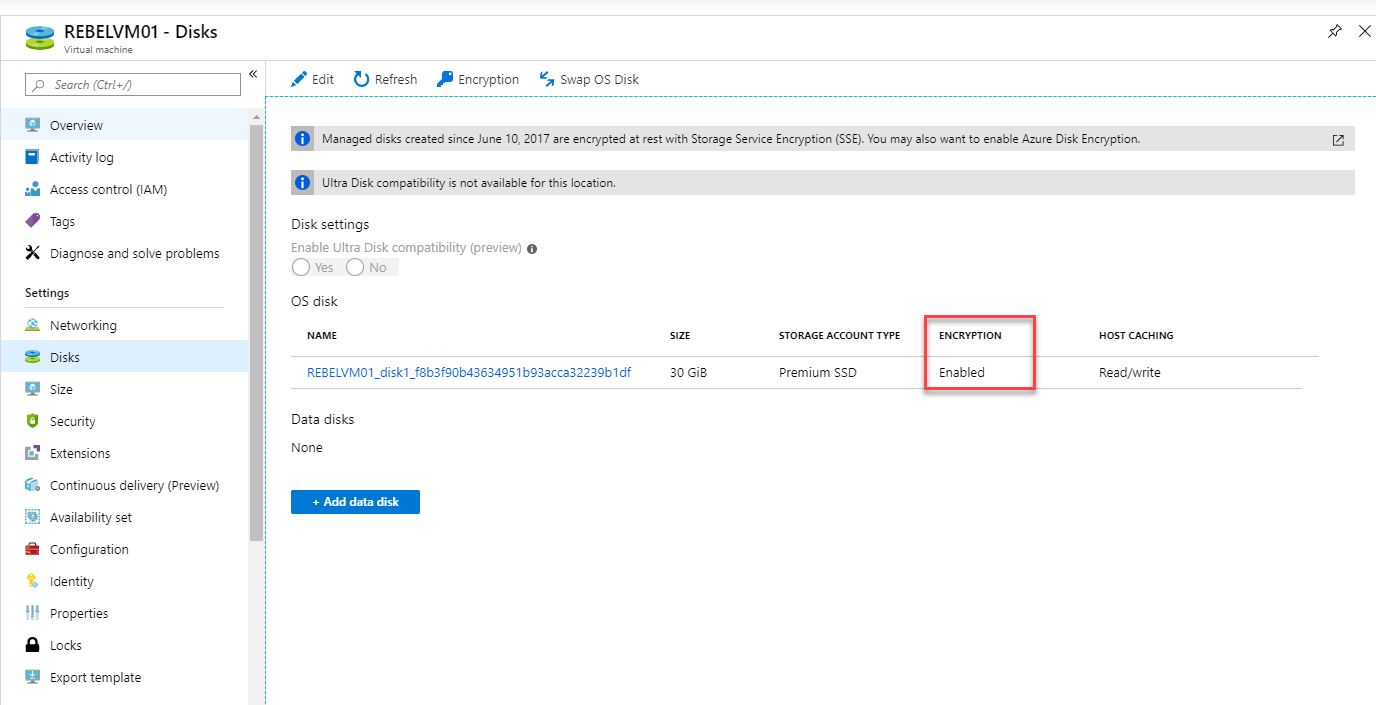
Also, when I go to VM properties | Disks, I can see encryption is enabled as expected.
As we can see the encryption for Azure Linux VM is working as expected. This marks the end of this blog post. If you have any further questions feel free to contact me on rebeladm@live.com also follow me on twitter @rebeladm to get updates about new blog posts.

