
In on-premises Active Directory environments, we use “trusts” to establish identity infrastructure collaboration between businesses. In that way, partner organization can use their own user accounts to authenticate in to trusted organization resources. When it comes to cloud/hybrid identity, Azure AD B2B allow organizations to establish cross-organization identity connections. Unlike on-premises, it is not required additional infrastructure changes. In my previous article about Azure B2B explains how we can allow external users to authenticate in to cloud app using their own accounts. You can find it here http://www.rebeladmin.com/2018/11/cross-organization-collaboration-azure-ad-b2b/ . However, when external user’s sign up process it is asking to create “Microsoft Account” to continue.
If users are having Google Accounts, now Azure AD B2B can initiate federation with google to allow users to use their own google accounts to authenticate instead of Microsoft Accounts. In this demo I am going to demonstrate how we can initiate federation with google.
Prerequisites
• Valid Azure AD B2B Subscription – If the guest users are going to use Azure AD paid services, make sure you have enough licenses allocated. More info about licensing can find here https://docs.microsoft.com/en-us/azure/active-directory/b2b/licensing-guidance
• Shared Google Account – During the setup we need to create credentials at Google APIs. To do that we need to use existing google account. It is recommended to use separate google account for this instead of existing user account.
To start the configuration,
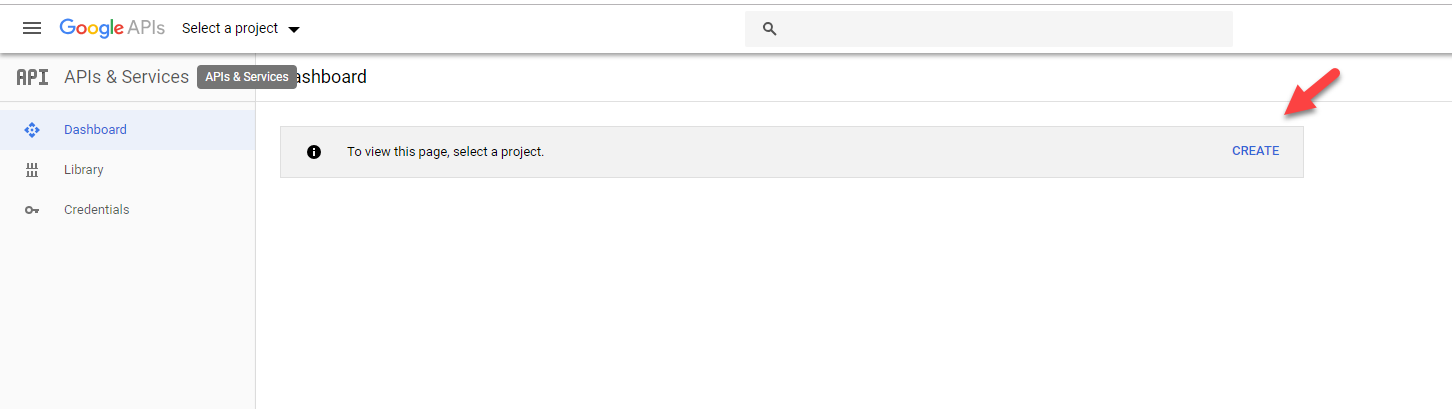
1. Go to https://console.developers.google.com and log in with the Google account you have selected for the task.
2. In Dashboard, Click on Create to start new project.
3. Then in new window, give unique name to project and click on Create.
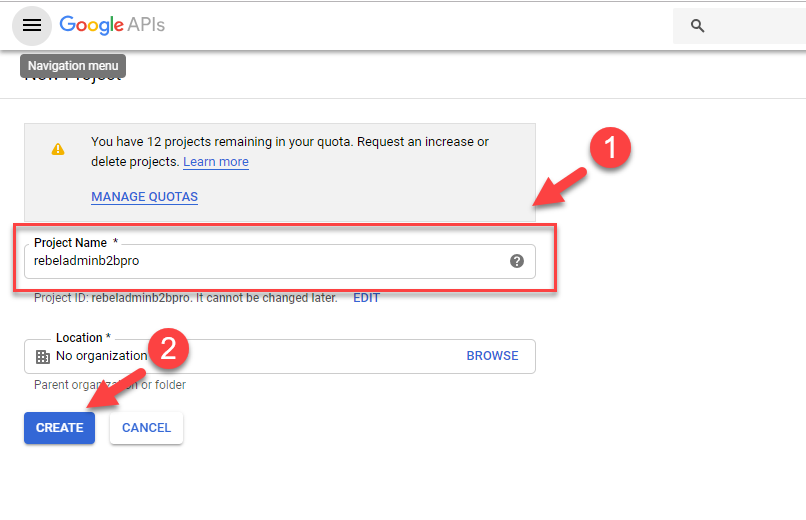
4. Once project is created, select it from the project drop down box.
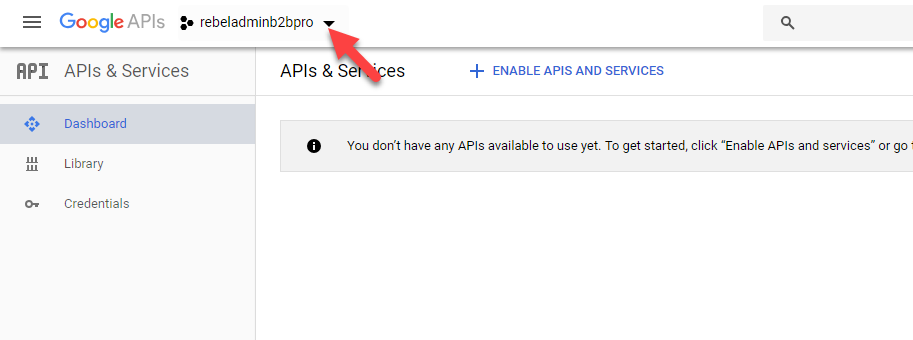
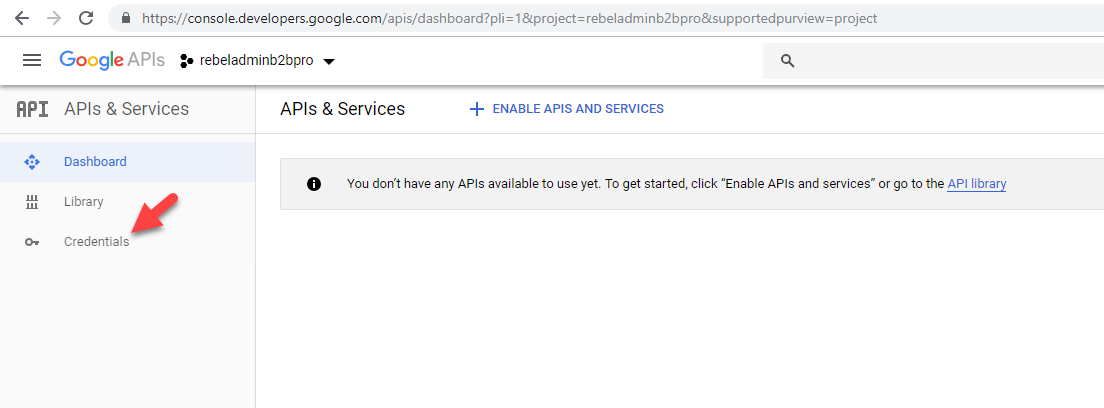
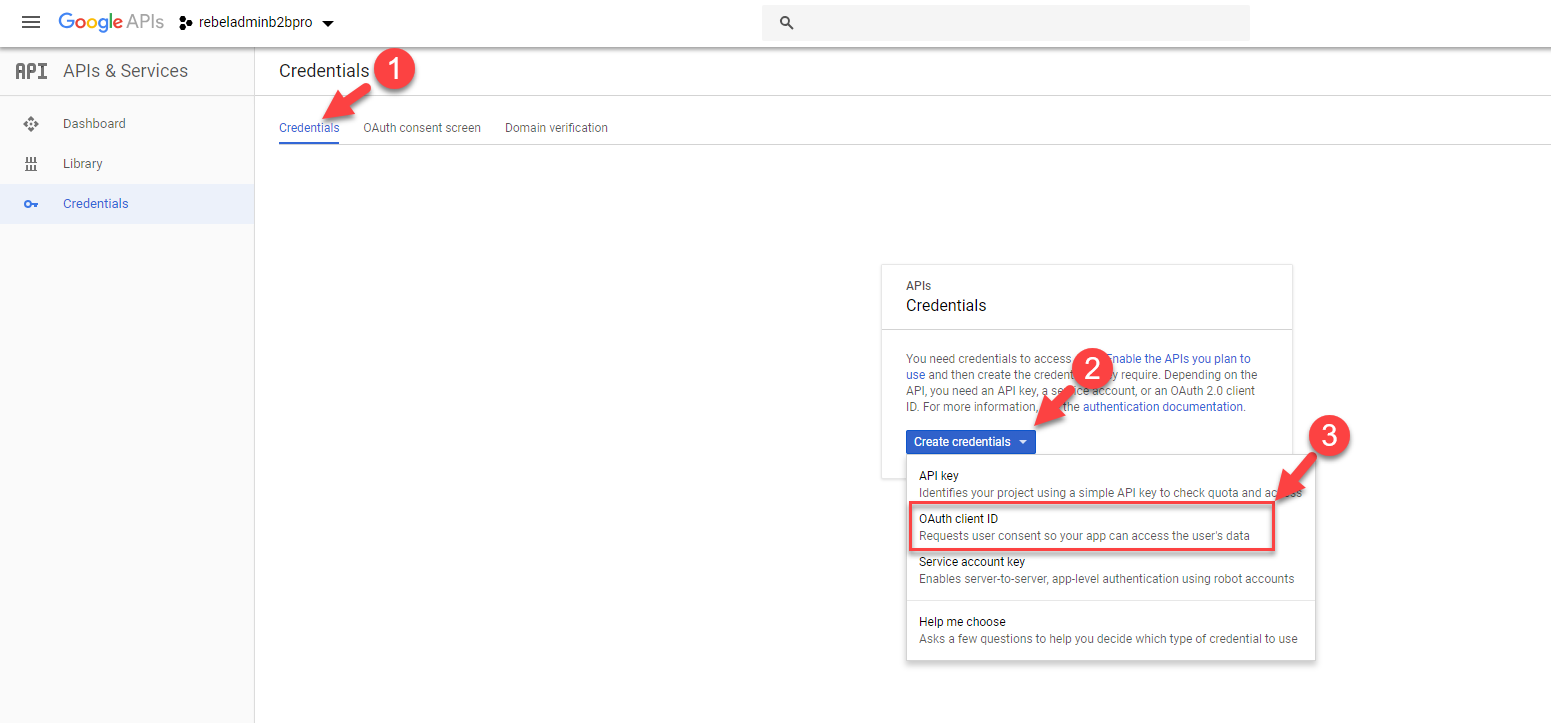
5. Then click on Credentials.
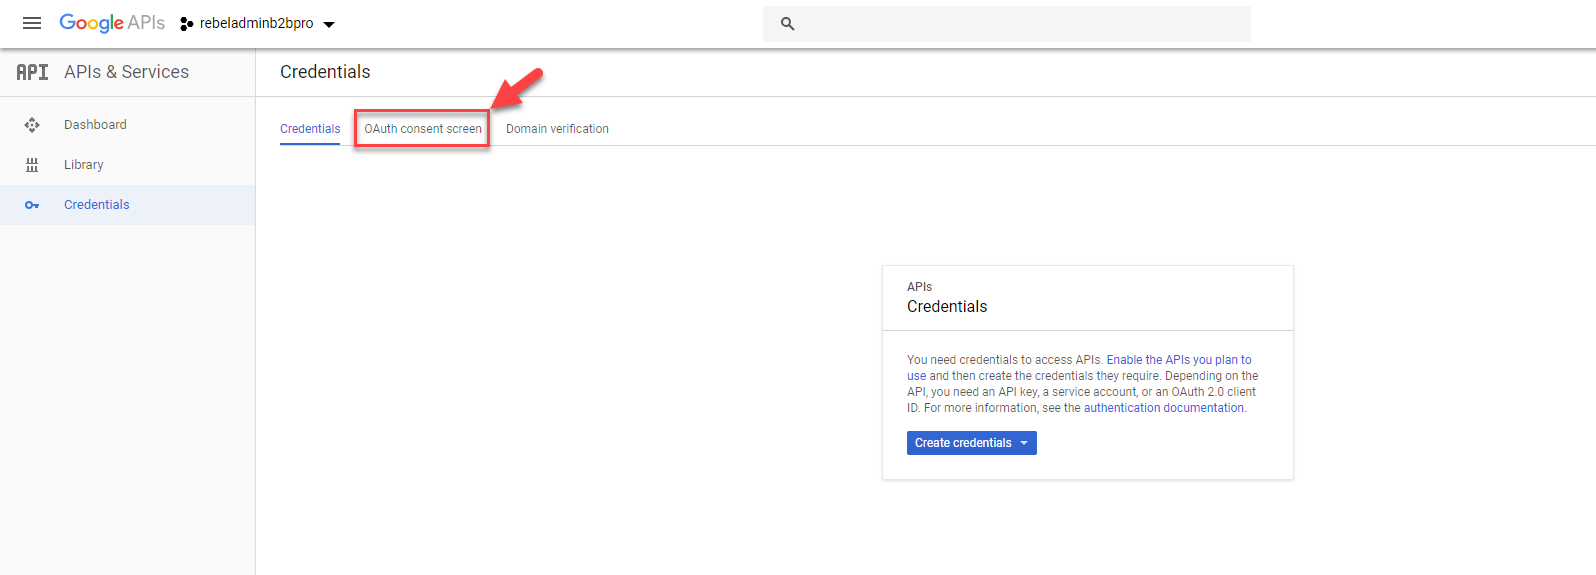
6. In new window, select OAuth consent screen
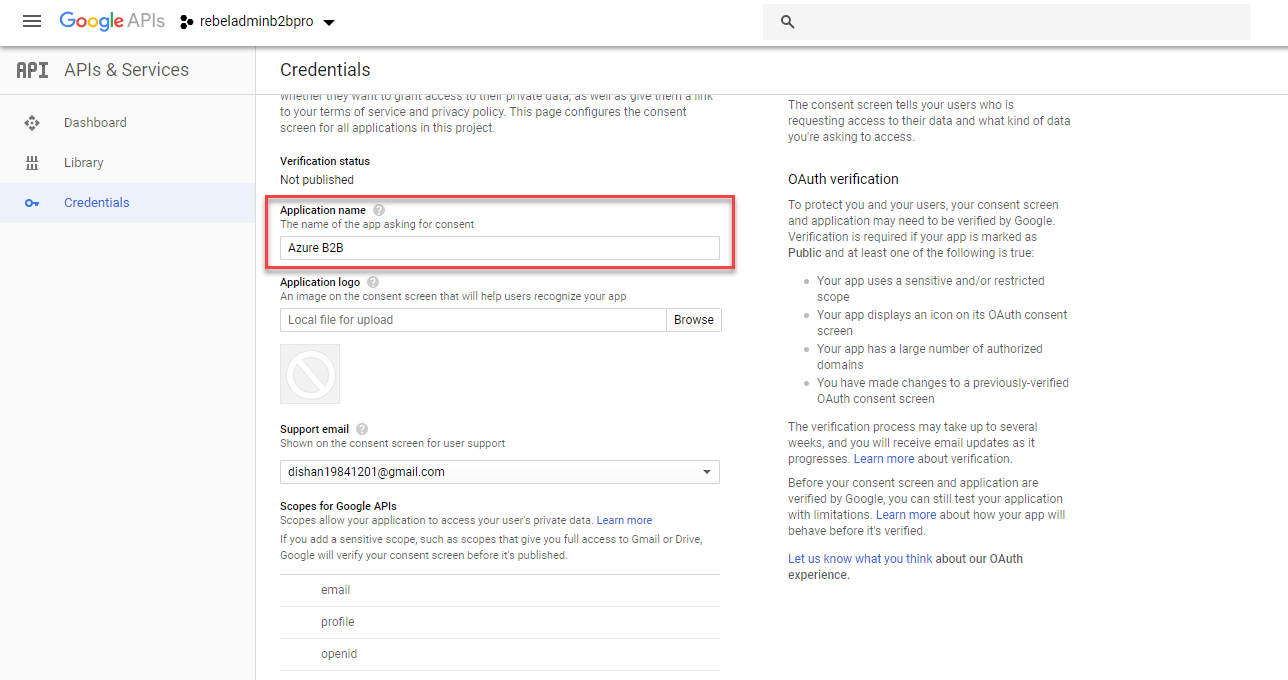
7. Then type a name for the application
8. Go to Authorized domains section and type microsoftonline.com
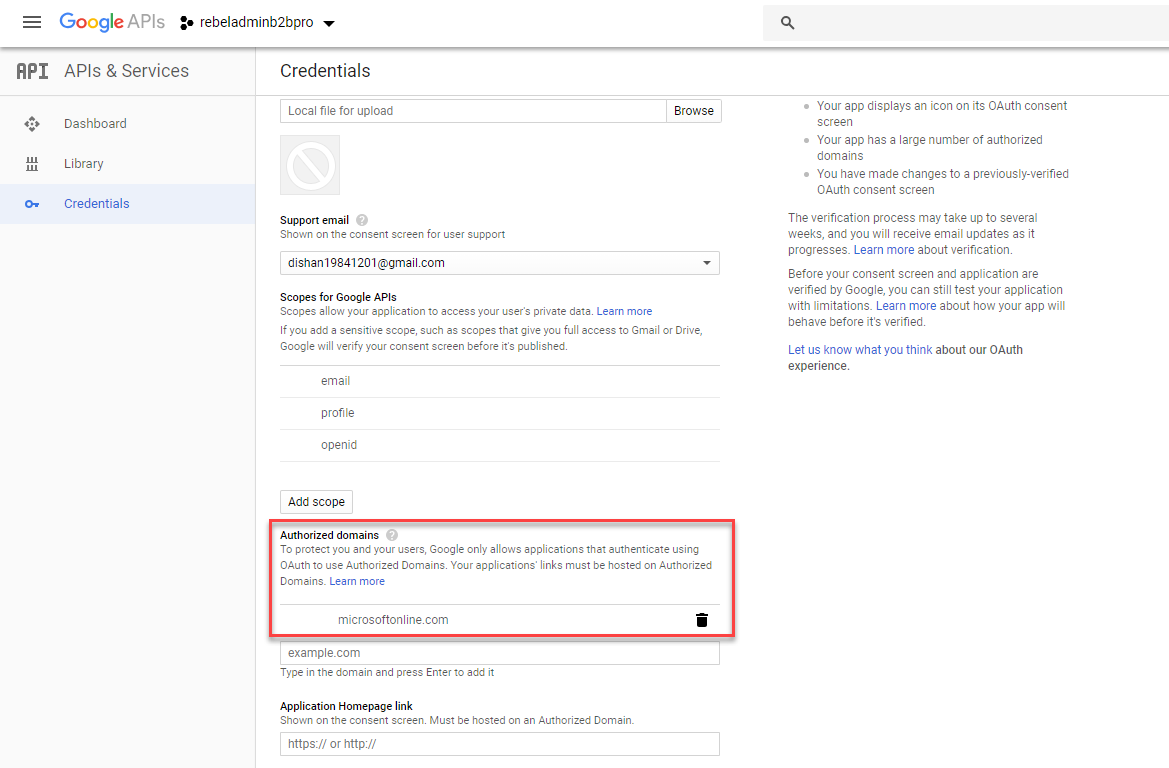
9. Then click on Save to apply settings.

10. Once settings are saved, go back to Credentials tab. Then click on Create Credentials drop down and select OAuth client ID
11. Then in new window, click on Web Application option. Go to Name section and define name for the application.
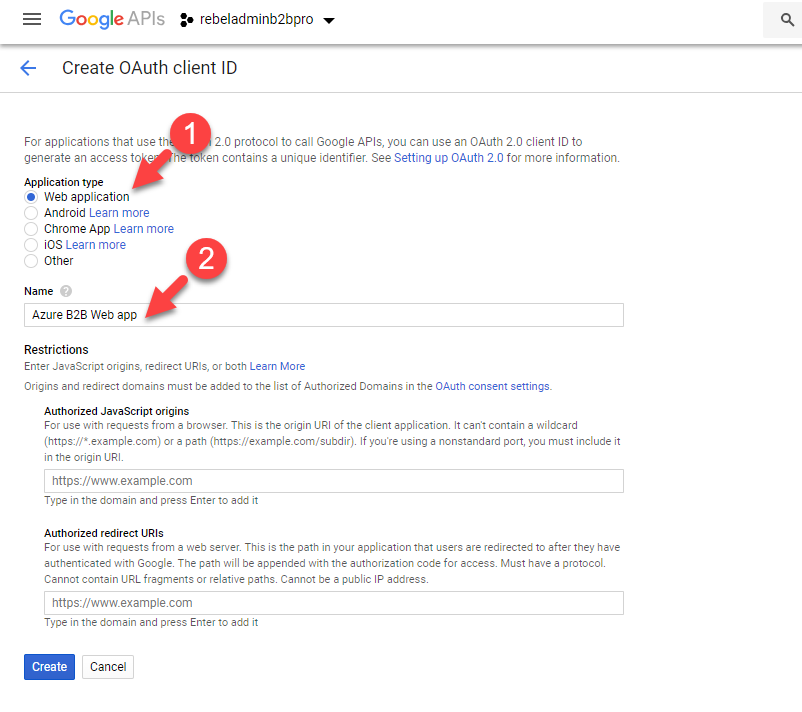
12. Go to Authorized redirect URIs section and type,
https://login.microsoftonline.com and,
https://login.microsoftonline.com/te/<azuread id>/oauth2/authresp
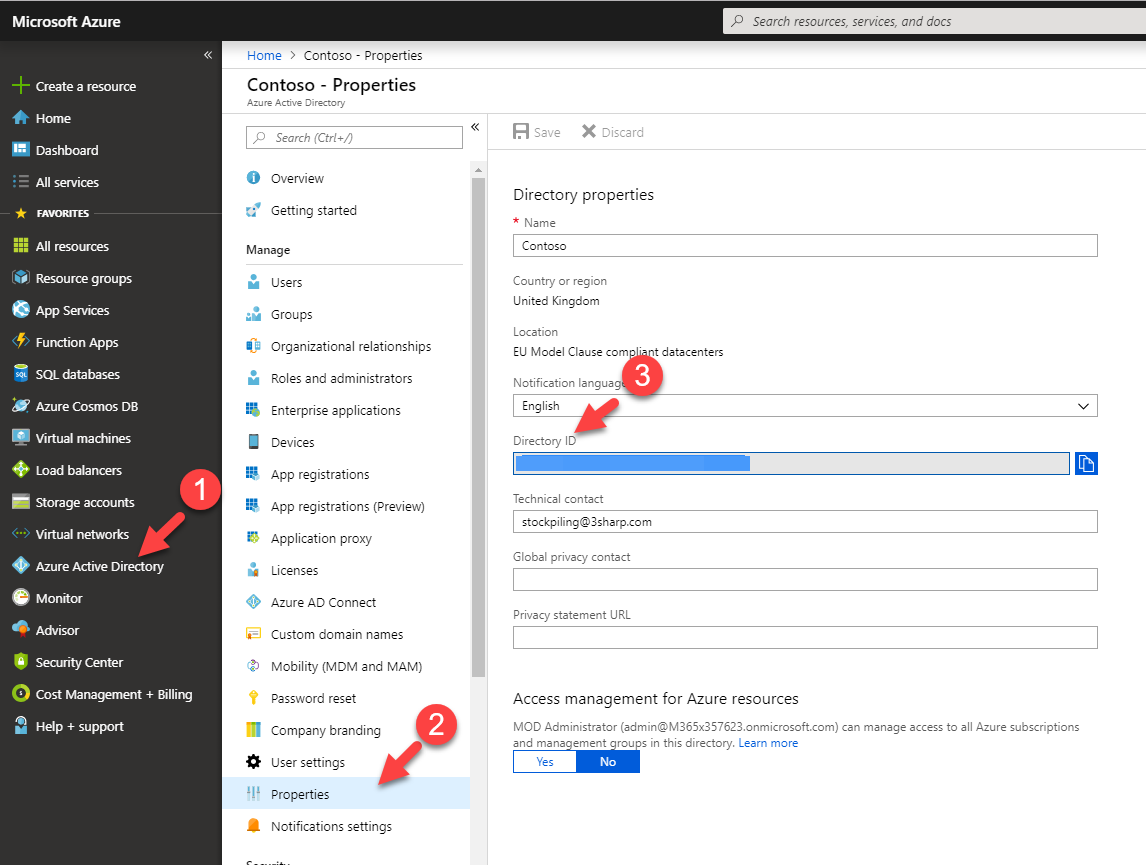
in above url, <azuread id> value is related to Azure AD. It can be find using,
Azure Portal | Azure Active Directory | Properties | Directory ID
Once URLs are ready, type them and click on Create.
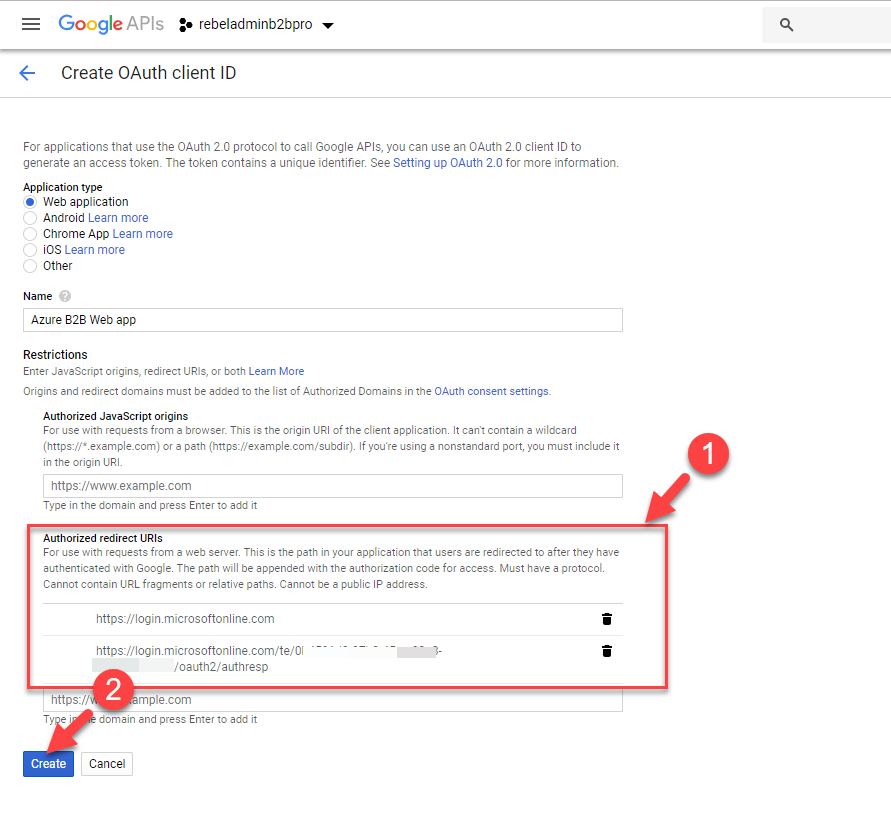
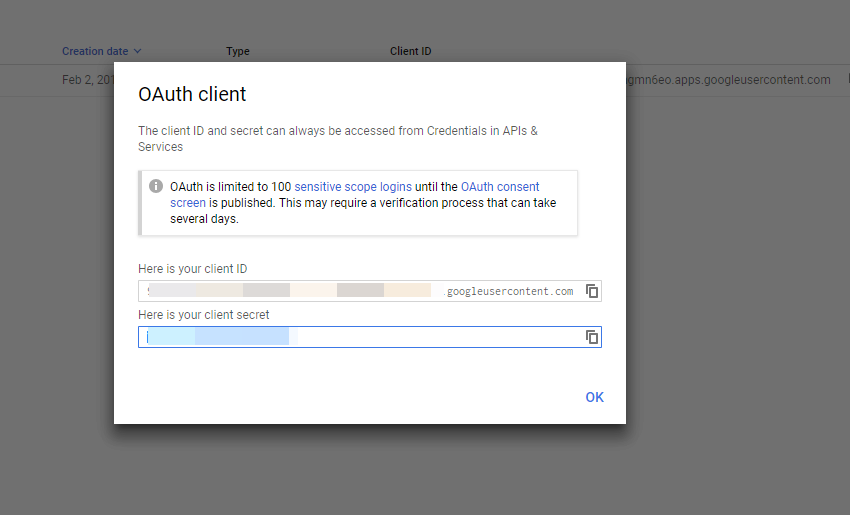
13. Then it issues a client id and client secret. Copy it and save it.
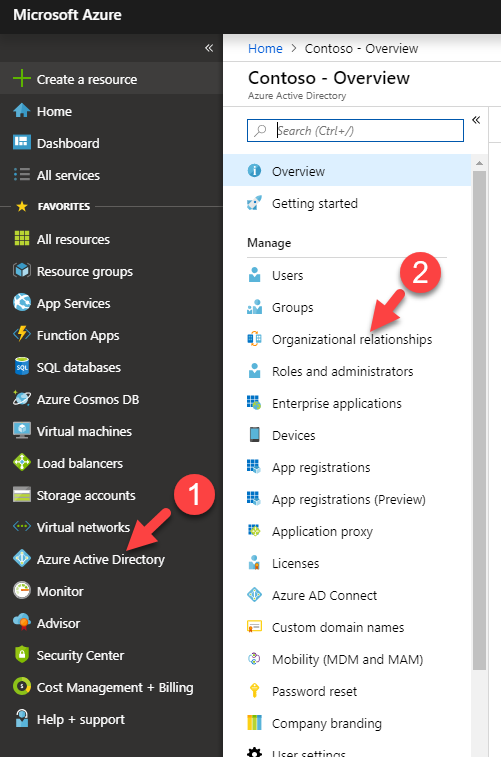
14. To configure it in Azure AD end, log in to https://portal.azure.com as Global Administrator.
15. Then go to Azure Active Directory | Organizational relationships
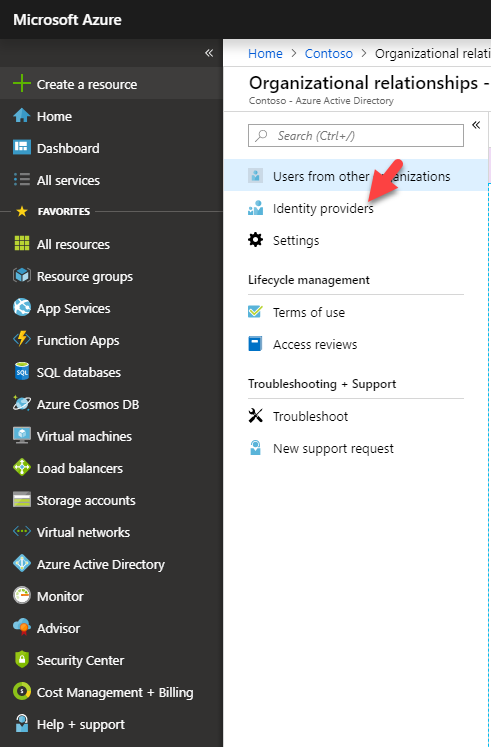
16. Go to Identity providers
17. Then click on + Google
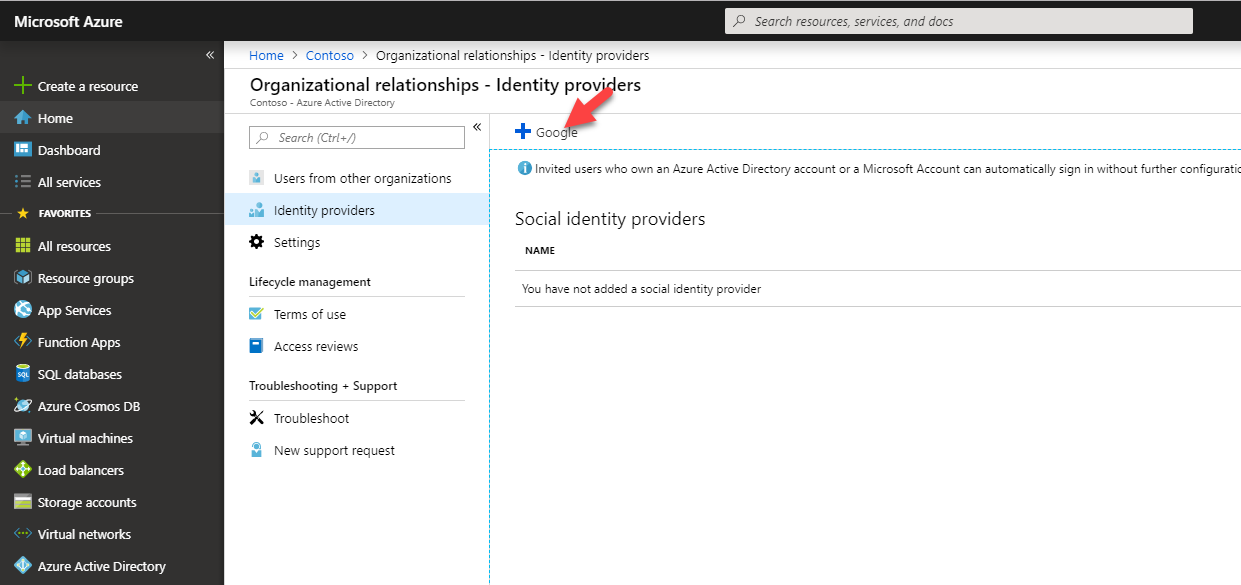
18. In new window paste the copied client id and client secret from the Google web app. Then click on Save to complete.

19. This completes the configuration. next step is to test it.
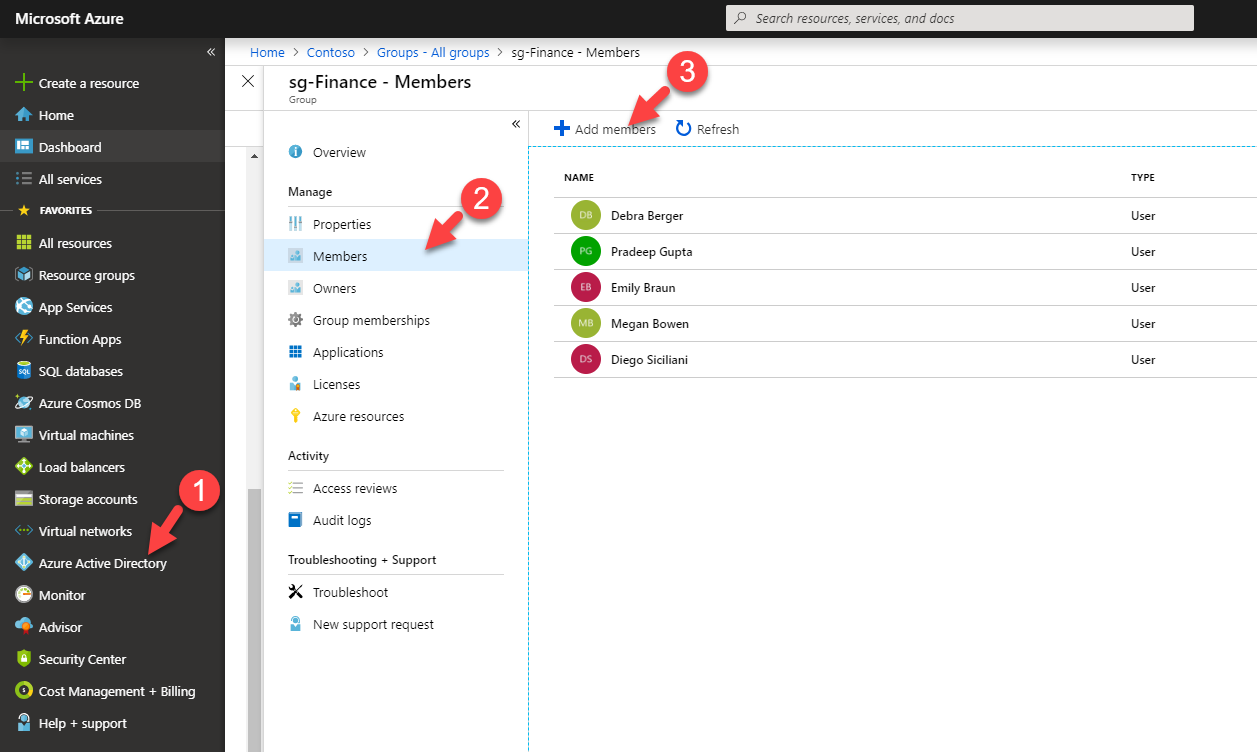
20. In Azure AD I already have a group called sg-Finance and I like to add external user to it. so, he also can access the apps belongs to group members.
To do that, I go to Azure Active Directory | Groups | sg-Finance | Members | + Add members
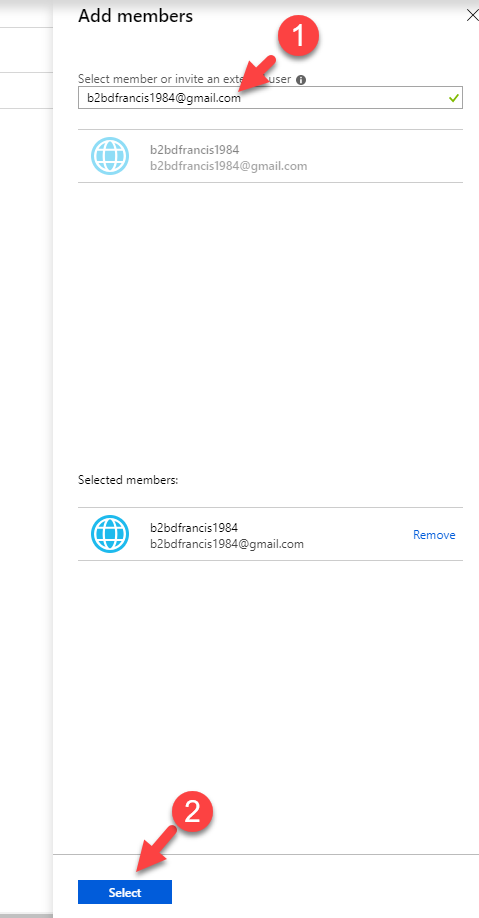
21. In new window, type the google user and click on Select.
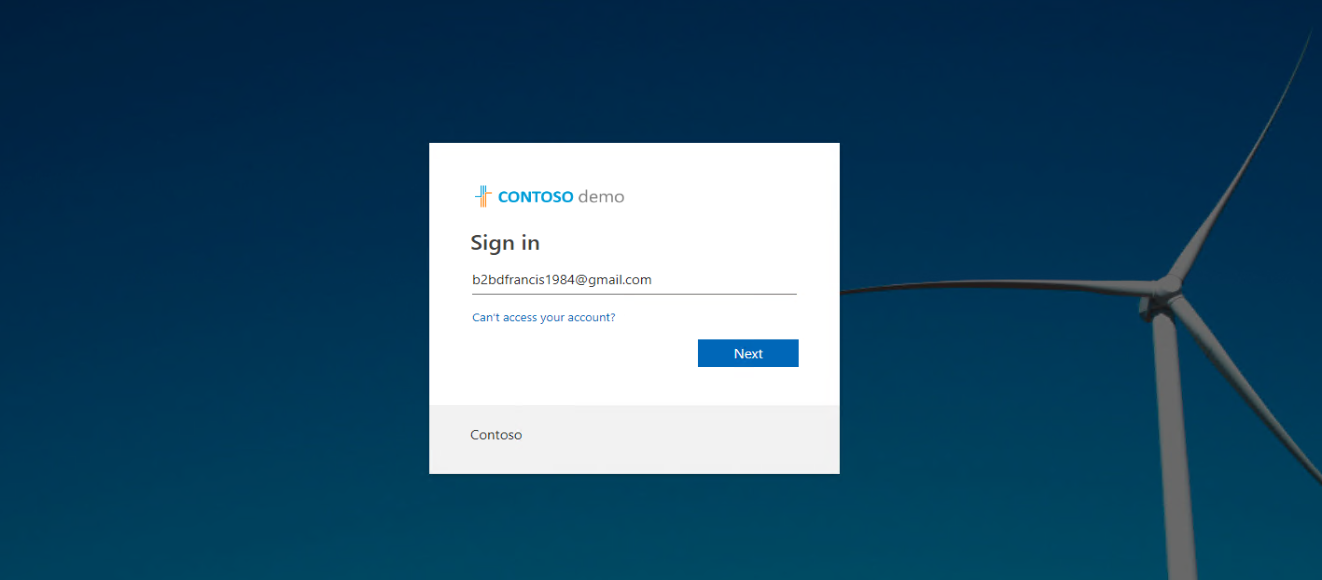
22. Then go to https://myapps.microsoft.com/M365x357623.onmicrosoft.com as the google user. In here M365x357623.onmicrosoft.com is the verified domain for my subscription. Google authentication is not working if you use the direct link such as https://myapps.microsoft.com
23. Then it will go to login page. Type the google account we just invited and click on Next.
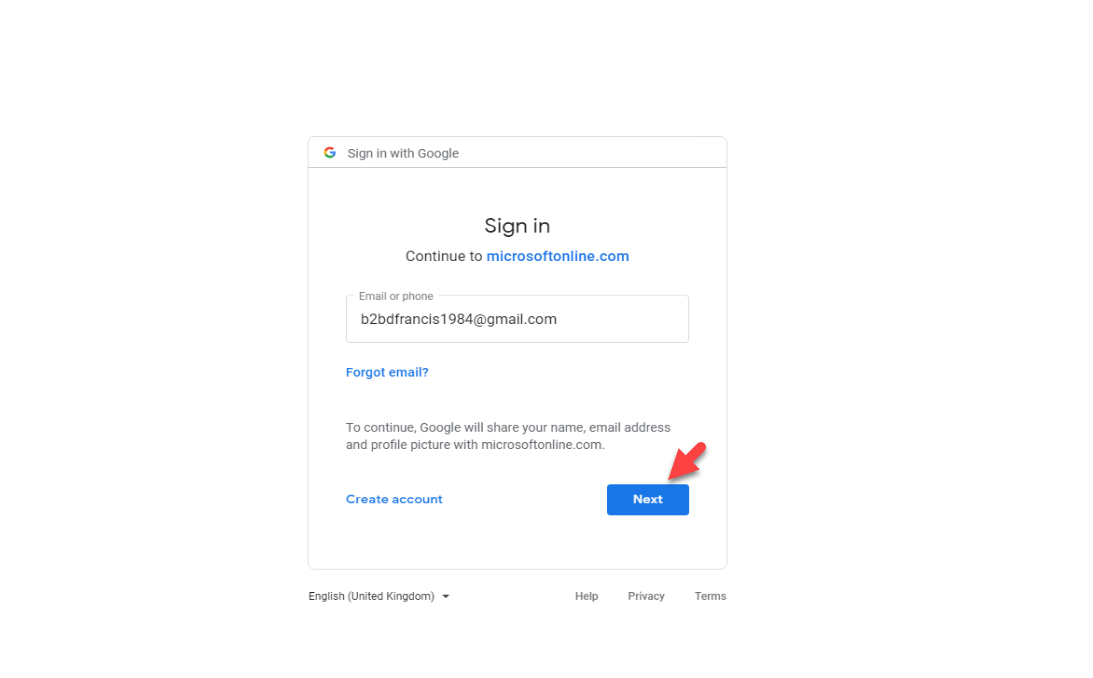
24. Then it goes to Google authentication page as expected, click on Next to continue.
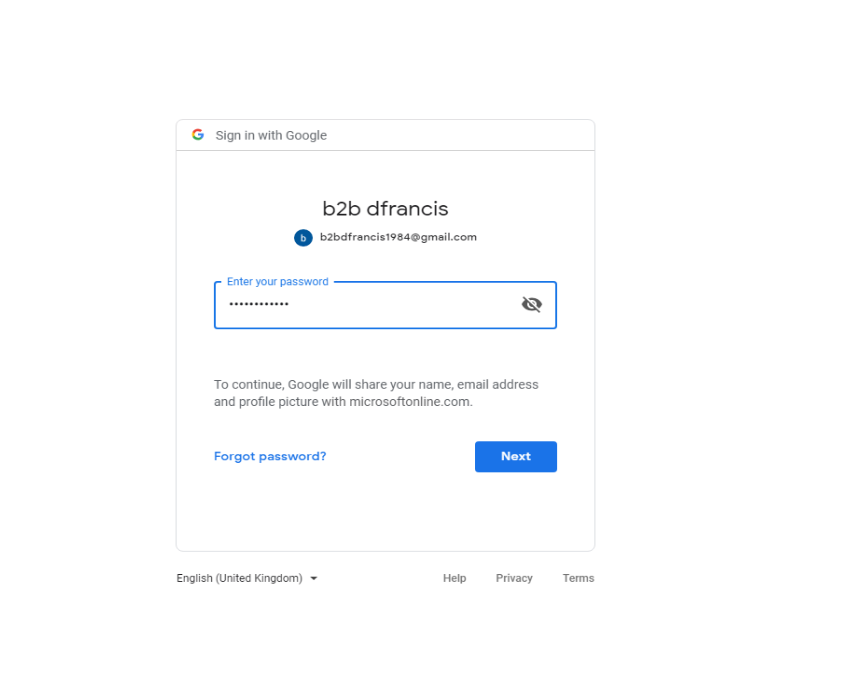
25. In next window, type the password and click on Next.
26. Voila! User is authenticated to myapp portal as expected with out creating Microsoft Account.

This marks the end of this blog post. If you have any questions feel free to contact me on rebeladm@live.com also follow me on twitter @rebeladm to get updates about new blog posts.

