
Complex passwords are a basic requirement to protect a system from cyber-attack. Even today most of the cyber-attack could have prevented if users were using complex, un-guessable passwords. I agree this is not the best solution especially as we are moving towards password-less authentication (Azure AD already released preview for it you can find more about it via http://www.rebeladmin.com/2018/09/step-step-guide-azure-ad-password-less-authentication-public-preview/). However, attackers always try the low hanging fruits first. In on-premises AD environment we can force users to use complex passwords via group policy. however, we couldn’t ban passwords using this method. Now Azure AD support banned password lists and smart lockout for Azure AD & on-premise AD in hybrid setup. Smart lockout is using cloud intelligence to detect password spoofing attempts from attackers. In this demo I am going to demonstrate, how to enable this feature in hybrid environment to protect both sides.
As the first step, let’s enable the password protection.
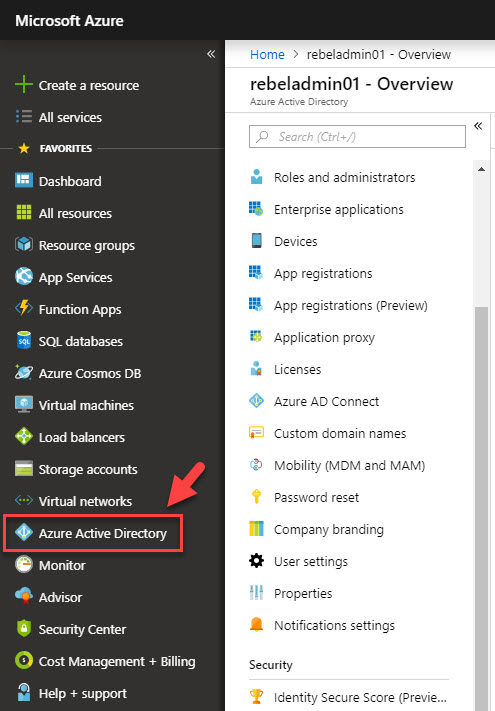
1. Log in to Azure Portal as global admin
2. Click on Azure Active Directory
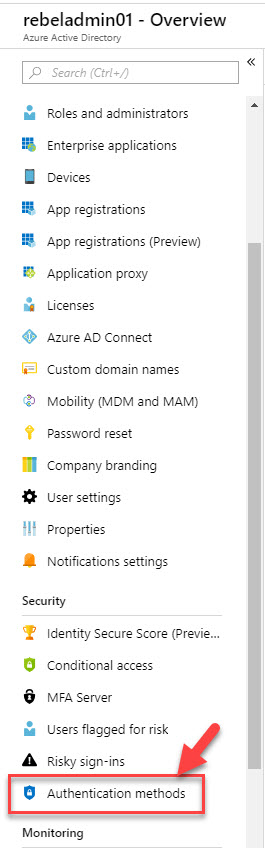
3. Then Authentication Method
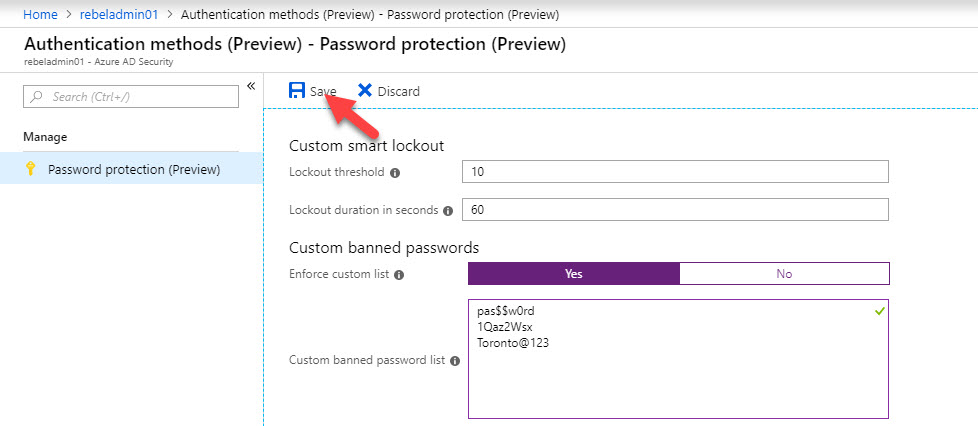
4. New window is to define password protection settings. In this demo, I am keeping the default thresholds for custom smart lockout. To define ban password list, click on Yes for Enforce custom list and then type the passwords you like to ban.
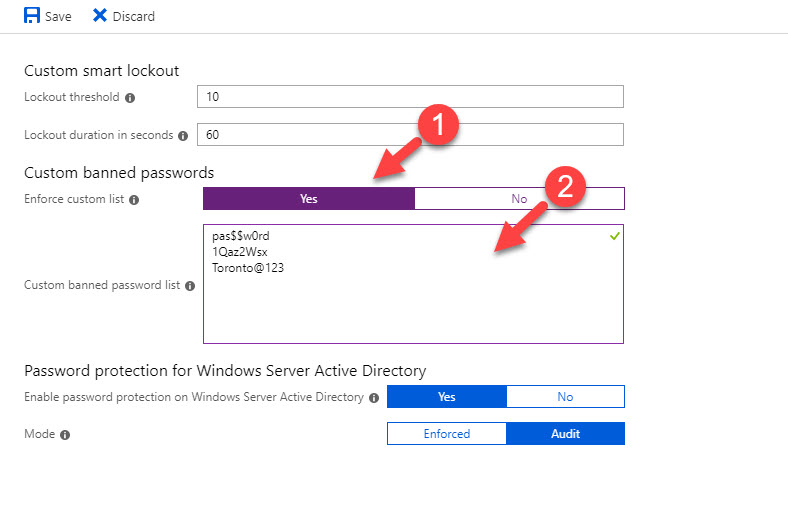
5. To extend same policy for on-premise AD, click on Yes for Enable password protection on Windows Server Active Directory
6. Also, we must set the mode to Enforced.
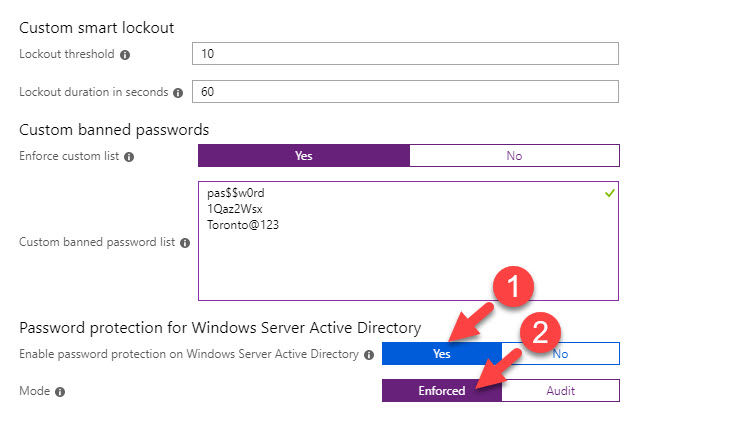
7. At the end click on Save to commit the changes.
Install Azure AD password protection proxy service & Azure AD password protection DC agent
In order to extend password protection to on-premises AD we need to install two components.
1. Azure AD password protection proxy service
2. Azure AD password protection DC agent
These service placement & way it works is explained in below image.
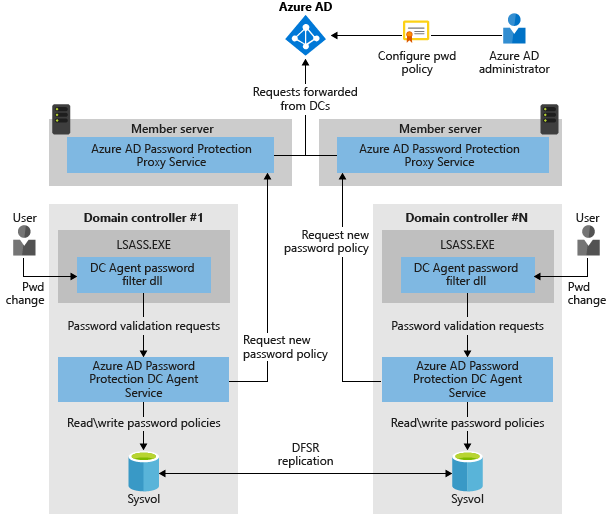
Source : https://docs.microsoft.com/en-us/azure/active-directory/authentication/media/concept-password-ban-bad-on-premises/azure-ad-password-protection.png
Before we install Azure AD password protection proxy service, we need to consider following,
• In public preview, it is supported up to 2 proxy servers under one forest.
• It is supported to install it in Domain Controller, but then DC need to have internet connection.
• To register the proxy service, you need to log in as Domain Administrator
• Proxy servers should have uninterrupted communication between DC agents.
• RPC over TCP is used by the DC Agent to communicate with the Azure AD password protection proxy service. This will use any available RPC port. For firewall requirements if needed we can force it to use specific port.
• You need to use tenant administrator account to register the proxy service. In preview, it only support tenant admin accounts which doesn’t have MFA.
To start the installation,
1. Log in to server as Domain Administrator
2. Go to https://www.microsoft.com/download/details.aspx?id=57071 & download AzureADPasswordProtectionProxy.msi
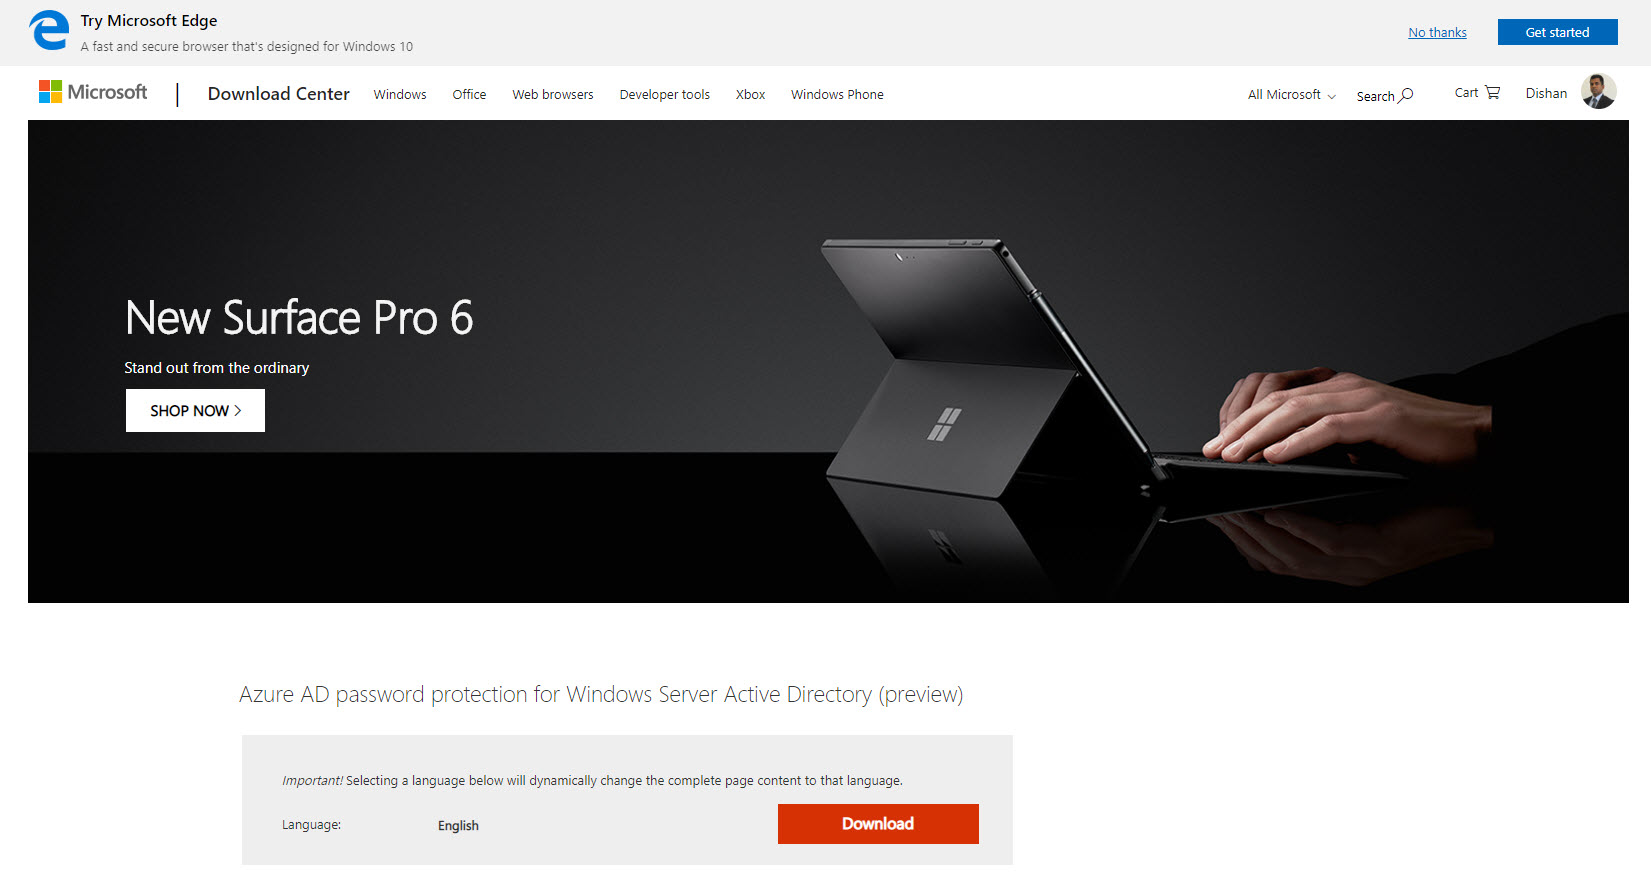
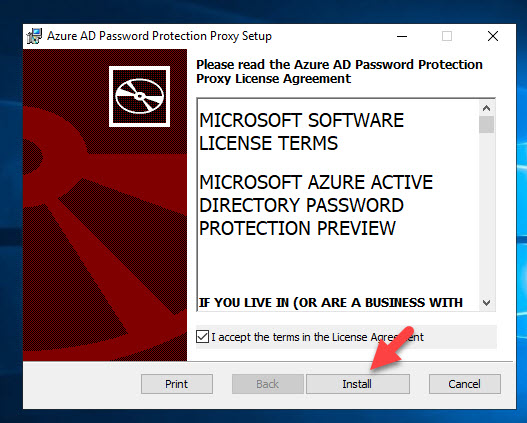
3. Then double click on it and proceed with the installation.
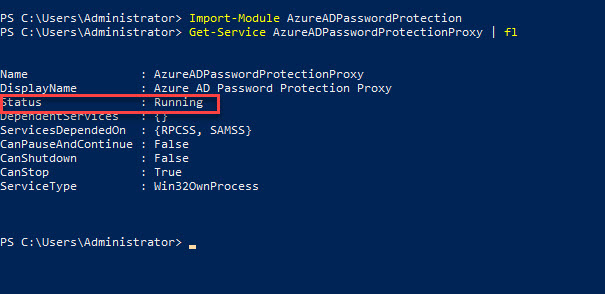
4. To review service status, first go to PowerShell console and run Import-Module AzureADPasswordProtection to import the new PowerShell module. Then run Get-Service AzureADPasswordProtectionProxy | fl
5. Next step is to register the proxy with the Azure AD. To do that run,
$ADadmin = Get-Credential
Then run,
Register-AzureADPasswordProtectionProxy -AzureCredential $ADadmin
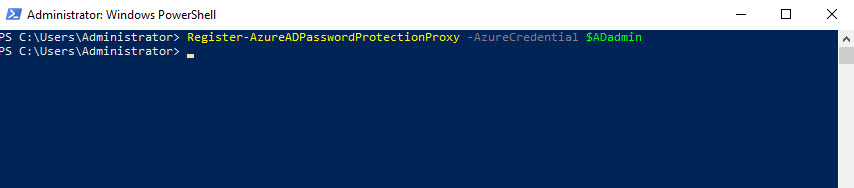
[su_note]In here you need to use Global Admin account for successful registration.[/su_note]
6. If you want to change RPC port number you can use Set-AzureADPasswordProtectionProxyConfiguration –StaticPort <rpcportnumber>
rpcportnumber should replace with RPC port number you like to use.
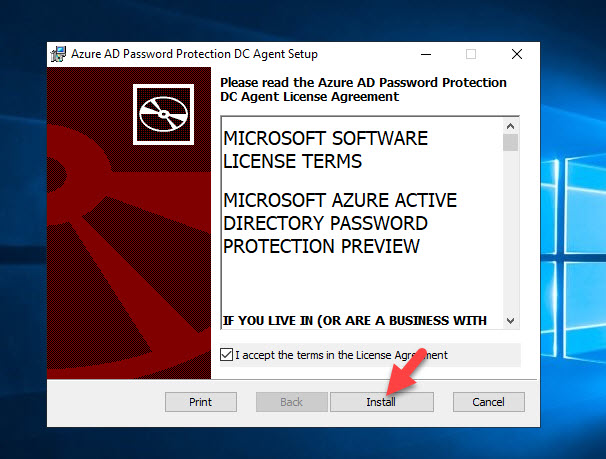
Next step is to install Azure AD password protection DC agent, this must run from the domain controller. Also, this installation required restart.
To proceed,
1. Log in to server as Domain Administrator
2. Go to https://www.microsoft.com/download/details.aspx?id=57071 & download AzureADPasswordProtectionDCAgent.msi
3. Then double click on it and proceed with the installation.
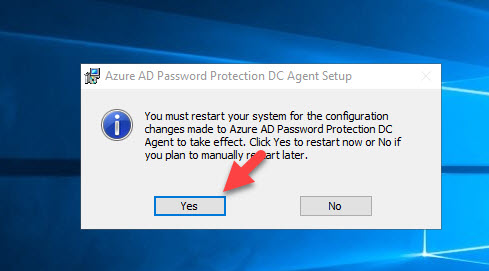
4. At the end reboot DC to complete the installation.
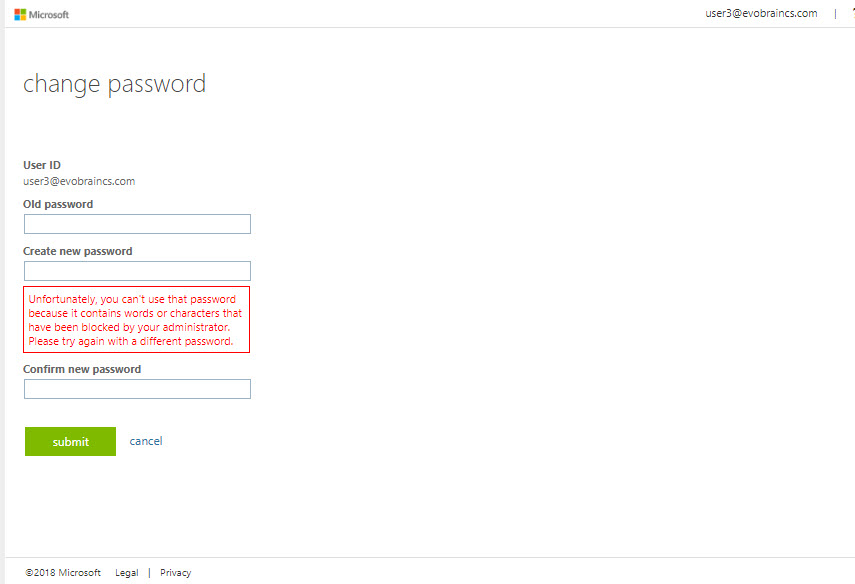
Now it is all ready for testing, I am trying to reset password for a user from Azure AD console. I am trying to use one of the ban password.
As expected it gives an error,
I tried it in on-premise and same thing happened.
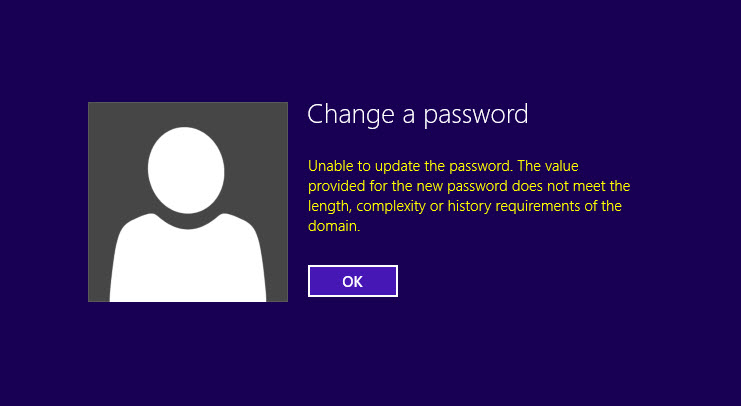
[su_note]The message you see in here is “Unable to update the password. The value provided for the new password does not meet the length, complexity, or history requirements of the domain.” but hopefully in future it will change in to more meaningful message. [/su_note]
This marks the end of this blog post. If you have any further questions feel free to contact me on rebeladm@live.com also follow me on twitter @rebeladm to get updates about new blog posts.


1 Comment