
Every business has different regulations, compliances that they need to comply with. These regulations and compliances are different from one industry to another. As an example, if its financial institute they will need to comply with PCI (Payment Card Industry Data Security Standard), if it’s a healthcare service they will need to comply with HIPPA (Health Insurance Portability and Accountability Act). Some of these compliances are must to comply and some will just add extra value to business. ISO certifications are good example for that. Some of these regulations and compliances are directly apply to computer infrastructures as well. Especially related to data protection and data governance.
Apart from that most business has their own “Policies” to protect data and workloads in their infrastructures. Most of the time end goal of these policies is to make sure if “IT department” done their part to support business compliance requirements. There are two great tools available from Microsoft to make it easier for enterprises to reach their corporate compliance requirements with in Azure environments.
1. Compliance Manager – This service can scan your azure environment and provide report of your compliance level against most common industry standard such as GDPR, ISO 27000 etc. I already wrote detail article about it http://www.rebeladmin.com/2017/11/microsoft-compliance-manager-makes-easy-deal-compliance-challenges/
2. Azure Policy – This is more to review continues compliance in corporate infrastructure policies. As an example, a corporate need to make sure all their Azure resources are deployed under west us region. With help of Azure policy, we can continuously monitor resources and make sure it does stay compliance with that policy. in event of breach it will flag it up as well.
In this post we are going to look in to Azure Policies and how it can help.
Azure Policy does have 34 inbuilt policy definitions (at the time this article written). These are covering most infrastructure Management, Audit, and security requirements. Users can use these inbuilt policies or build their own.
Azure Policy definition are JSON based. Each policy has following elements.
• mode
• parameters
• display name
• description
• policy rule
– logical evaluation
– effect
Mode
This is to define the resource type considered in the policy. There are two modes can use in a policy.
All – All resource types. This is the recommended mode for policies
Indexed – Resource types that support tags and locations
Parameters
If you work with programming language or PowerShell I am sure you already know what parameter is. In here also it’s the same meaning. Parameter is special kind of variable which refer to piece of data. It simply the policy by reducing code. Following is extracted from a policy to show the parameter usage.
"parameters": {
"publisher": {
"type": "String",
"metadata": {
"description": "The publisher of the extension",
"strongType": "type",
"displayName": "Extension Publisher"
}
Display name & Description
It is just to identify the policy. description also can use to add more meaning.
{
"type": "Microsoft.Authorization/policyDefinitions",
"name": "allowed-custom-images",
"properties": {
"displayName": "Approved VM images",
"description": "This policy governs the approved VM images",
"parameters": {
"imageIds": {
"type": "array",
"metadata": {
"description": "The list of approved VM images",
"displayName": "Approved VM images"
}
In above example, Approved VM images is policy display name and This policy governs the approved VM images is policy description.
Policy Rule
It’s the heart of the policy. it is where it describes the policy using logical operators, conditions and effect.
Under the policy rule following logical operators are supported.
– "not"
– "allOf"
– "anyOf"
It also accepts following conditions types
– "equals"
– "notEquals"
– "like"
– "notLike"
– "match"
– "notMatch"
– "contains"
– "notContains"
– "in"
– "notIn"
– "containsKey"
– "notContainsKey"
– "exists"
Under a policy rule, following effects can use,
– Deny – Generate event in audit log and fail the request
– Audit – Only for auditing purpose and no request decision made
– Append – Add additional fields to the request
– AuditIfNotExists – Enable auditing if the resource not existing
– DeployIfNotExists – Deploy if resource is not existing (at the moment this only supported in built-in policies)
"policyRule": {
"if": {
"allOf": [
{
"field": "type",
"equals": "Microsoft.Compute/virtualMachines"
},
{
"not": {
"field": "Microsoft.Compute/imageId",
"in": "[parameters('imageIds')]"
}
}
]
},
"then": {
"effect": "deny"
}
In above example, it uses if, not and then policy blocks been used. It checks images id of virtual machines and if it’s not matching it will deny request based on effect.
More info about policy templates can be found under
https://docs.microsoft.com/en-us/azure/azure-policy/policy-definition
https://docs.microsoft.com/en-us/azure/azure-policy/json-samples
Policy Initiatives
Azure Policy also allows to group policies together and apply it one scope. This is called Policy Initiative. This reduce the complexity of policy assignment. As an example, we can create policy initiative called “Infrastructure Security” and include all infrastructure security related policies to it.
Using Azure Policy
Let’s see how we can use Azure Policy feature.
1. Log in to Azure Portal as Global Administrator
2. Go to All Services and type Policy then click on policy tile.
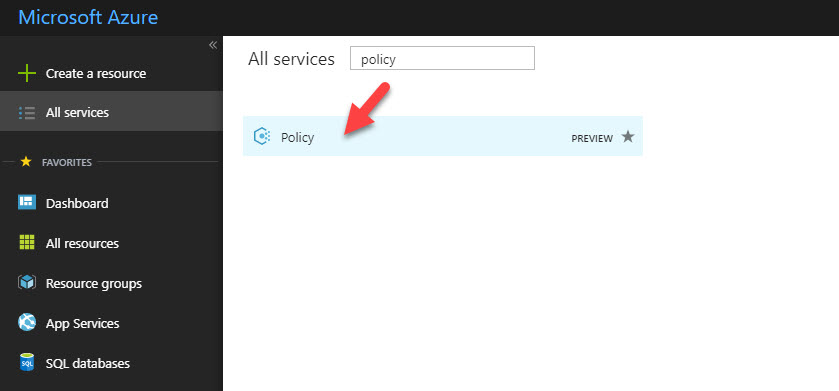
3. Then it will open up the feature tile.
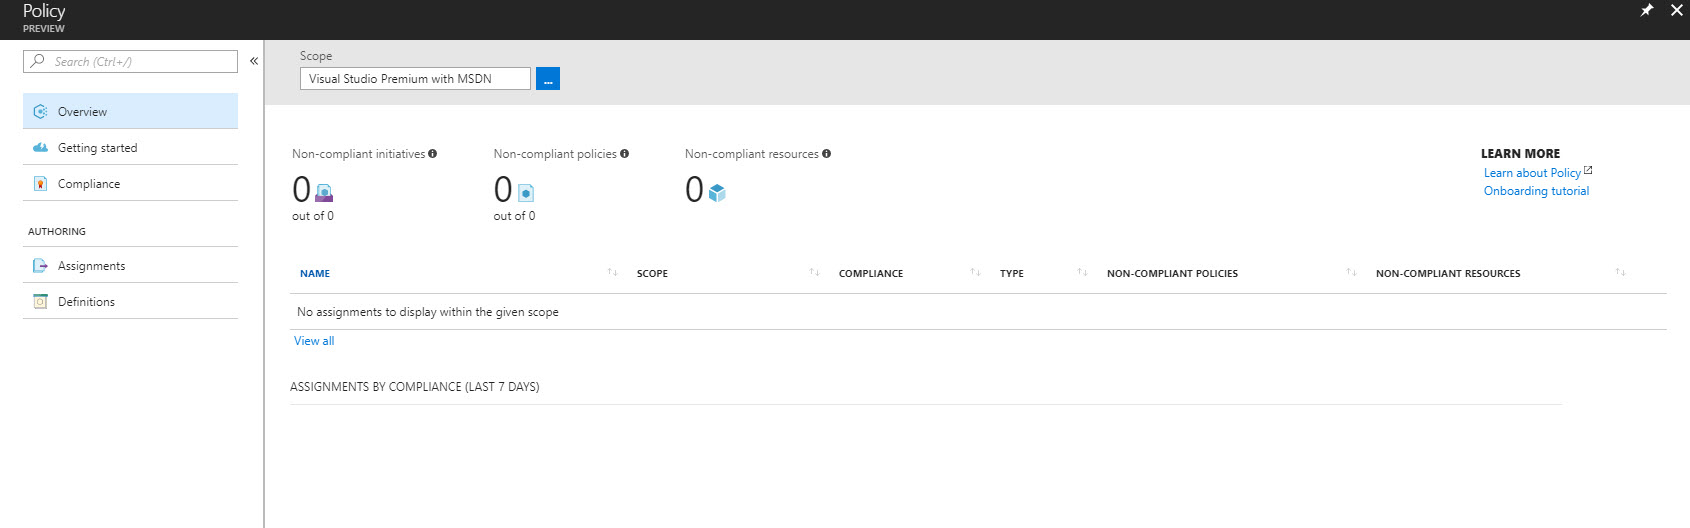
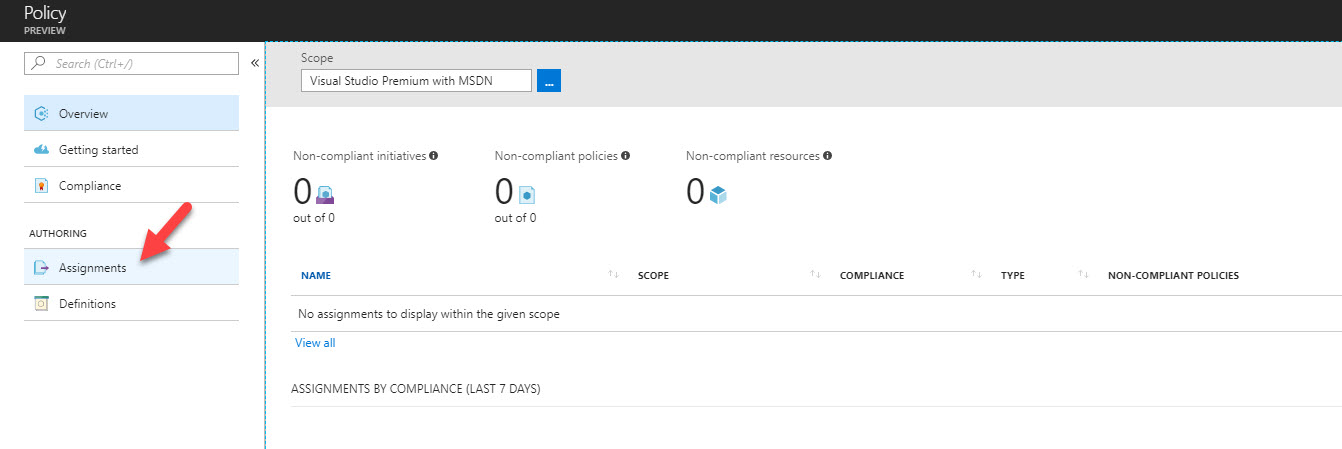
4. In my demo I am going to assign pre-built policy to restrict resource region. In order to assign policy, click on Assignment
5. Then click on Assign Policy
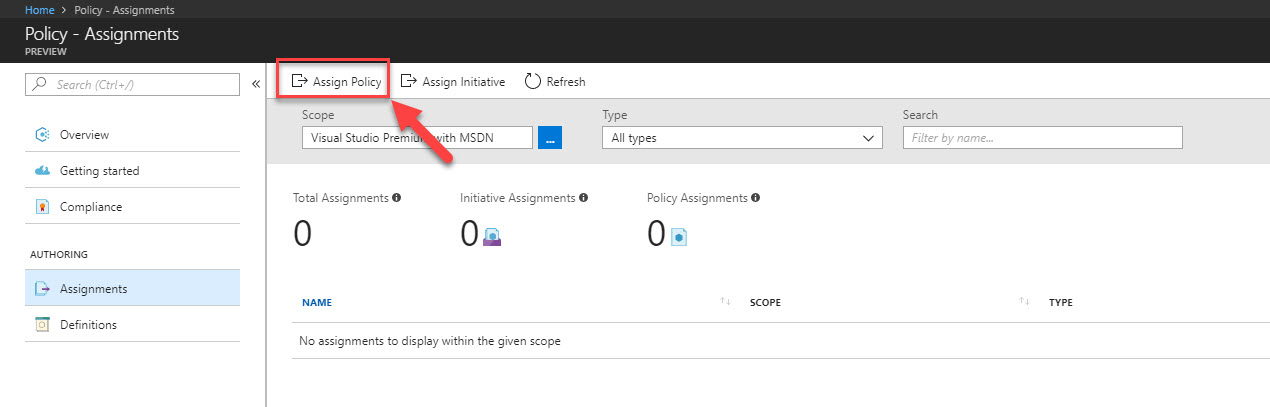
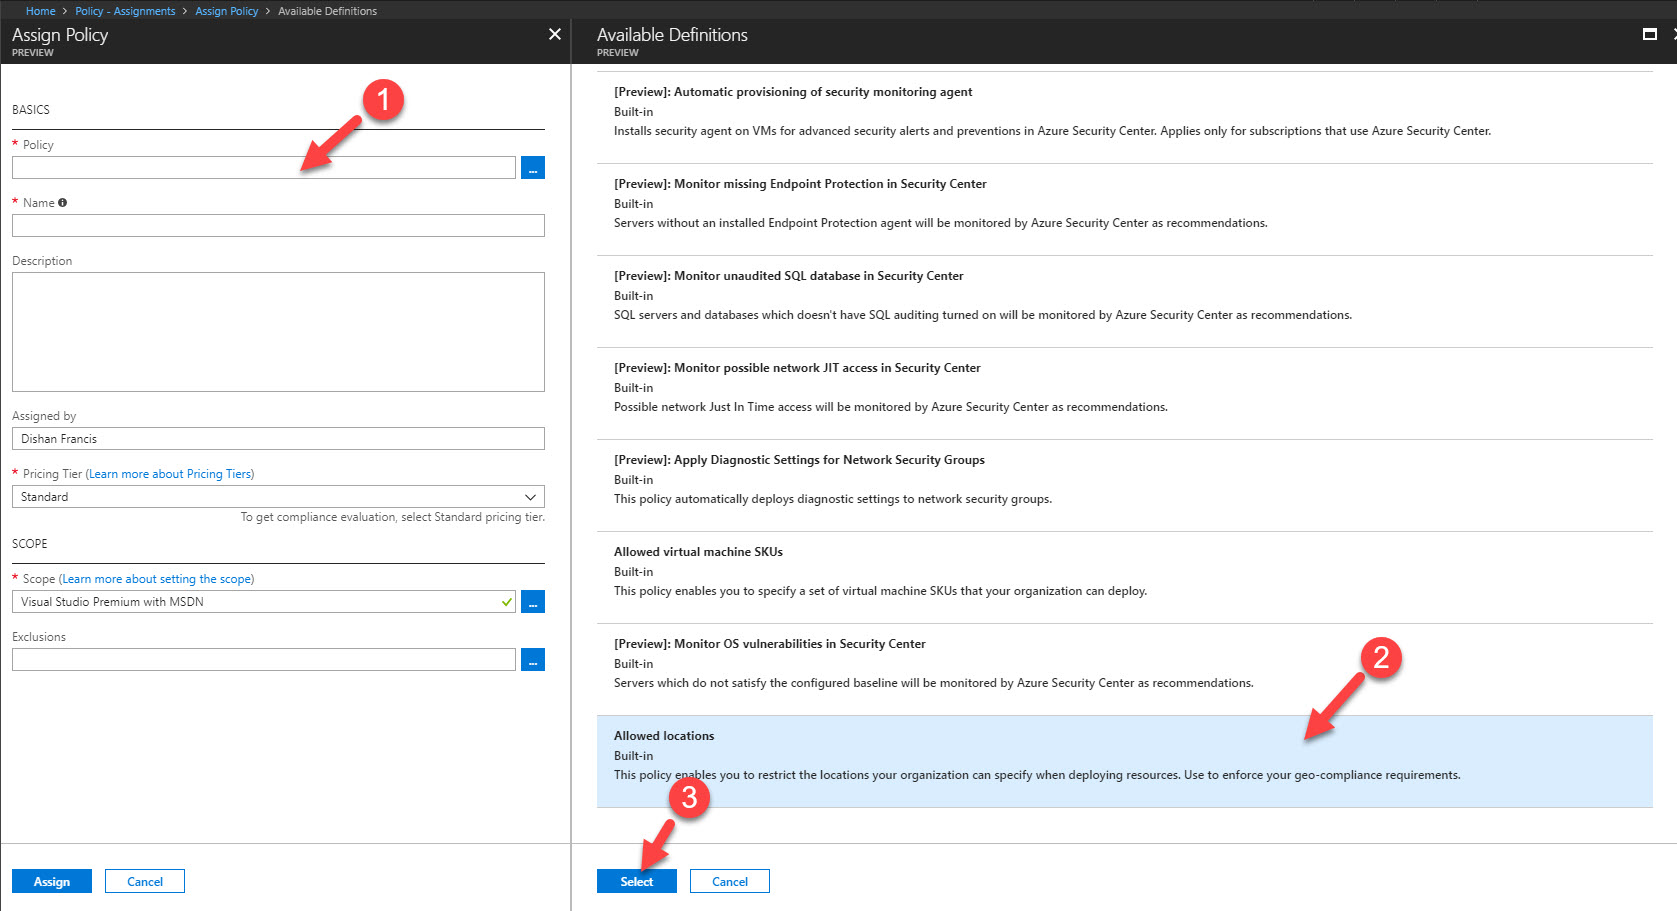
6. Then in it will open up Assign Policy Wizard. Click on Policy to list and select the relevant policy. in my demo I am using policy called “Allowed Locations”. Select the policy from list and then click on select to complete the action.
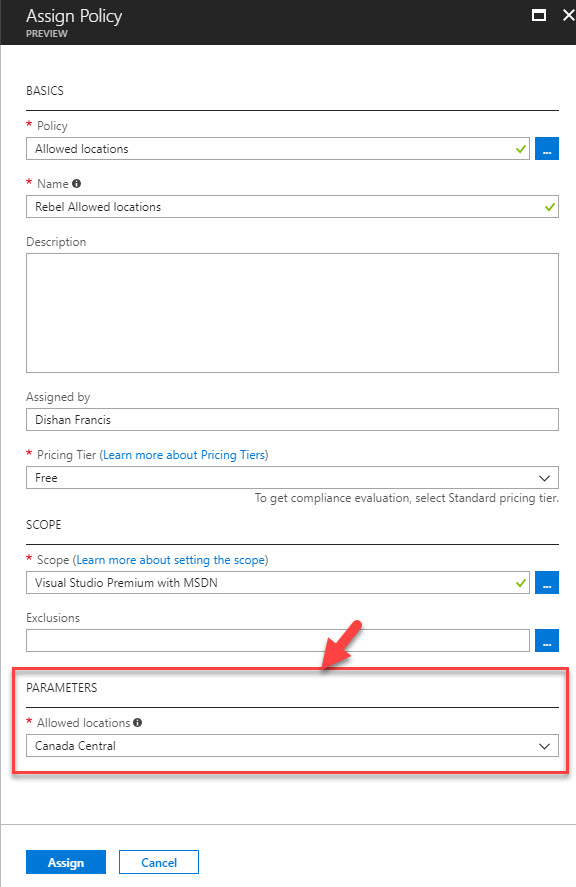
7. Under Name and Description fields define policy name and description which explain its characteristics.
8. Under the Pricing Tier select the pricing tier for evaluation.
9. Scope field defines the scope of the policy. it will be subscription in use.
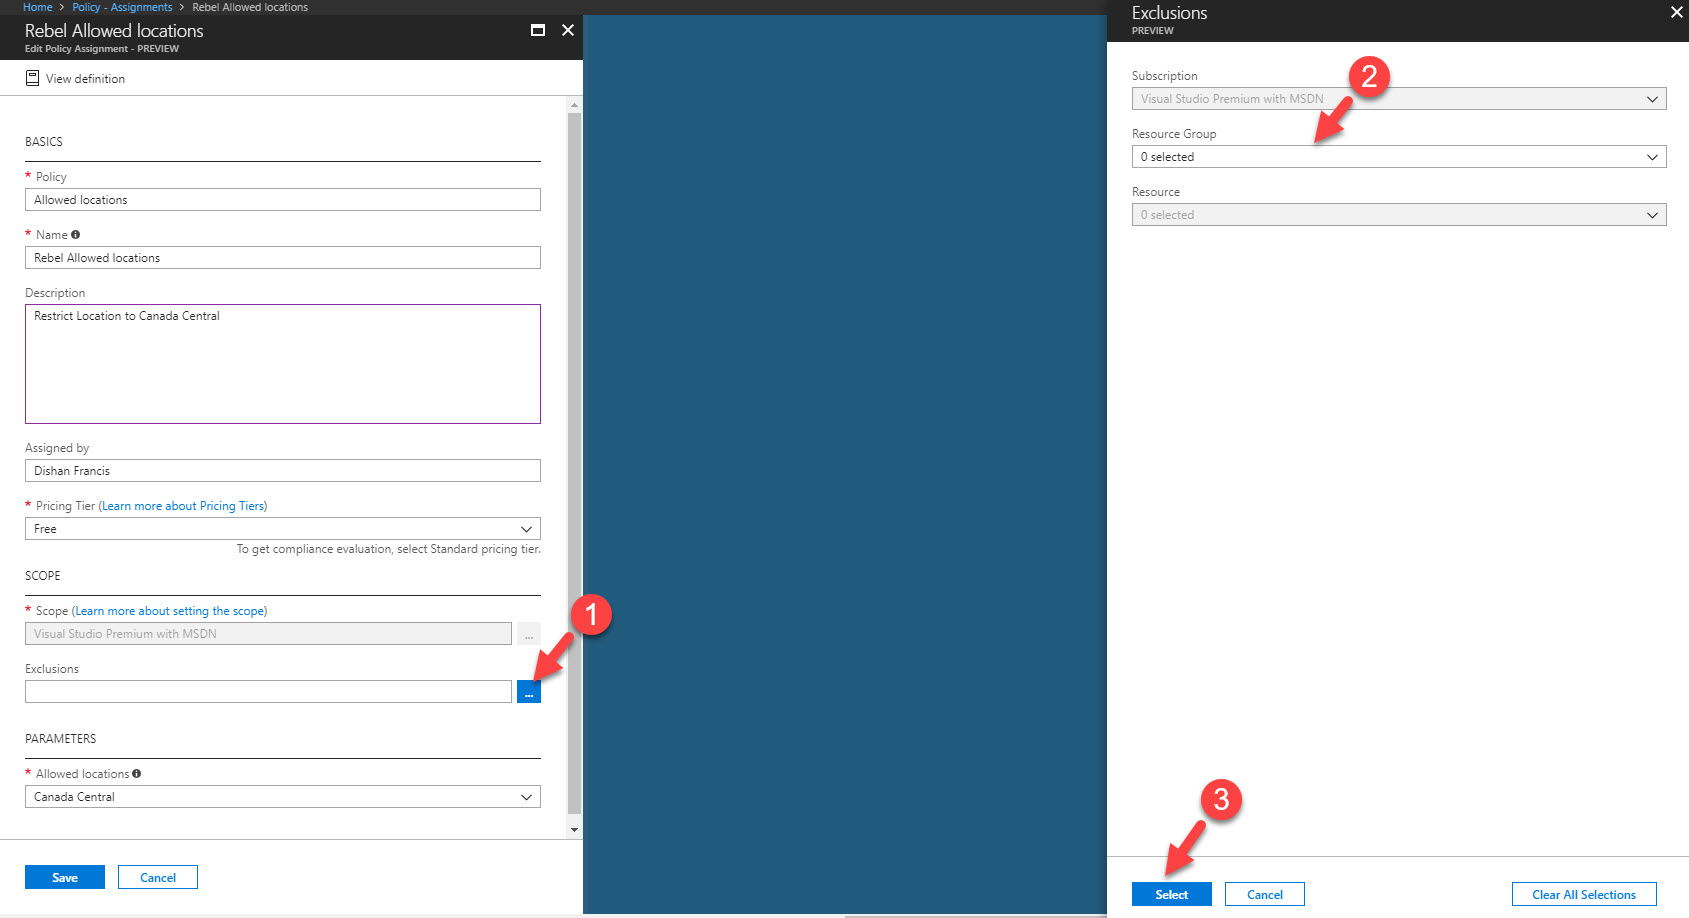
10. Using exclusion, we can exclude resource groups which not going to exclude from the policy. in this demo I am not going to exclude any.
11. Then under the Parameters I select the region I like to use for my resources (In my demo I am using Canada Central as the region).
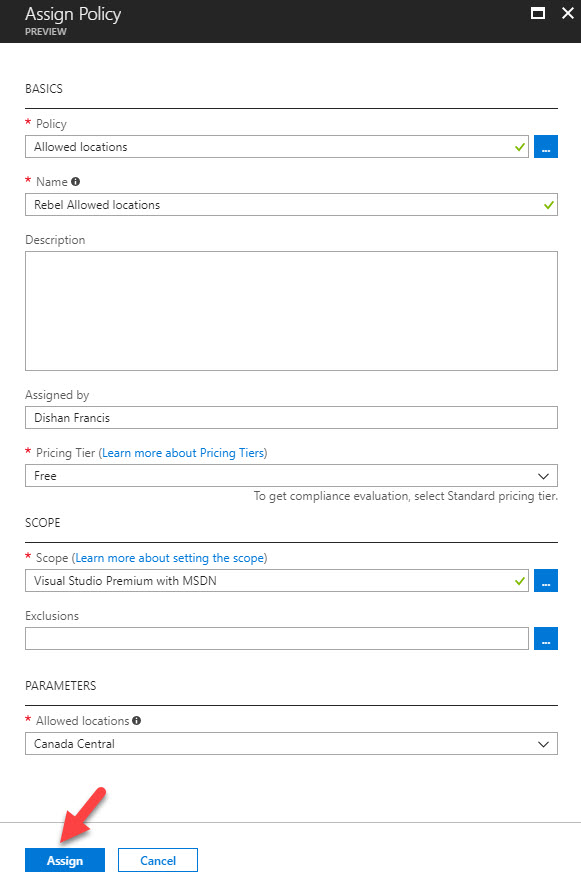
12. At the end click on Assign to complete the policy assignment process.
13. Not it is time for testing. In my demo I am trying to create a storage account under west us region. When I do that it gives me error saying “There were validation errors. Click here to view details”
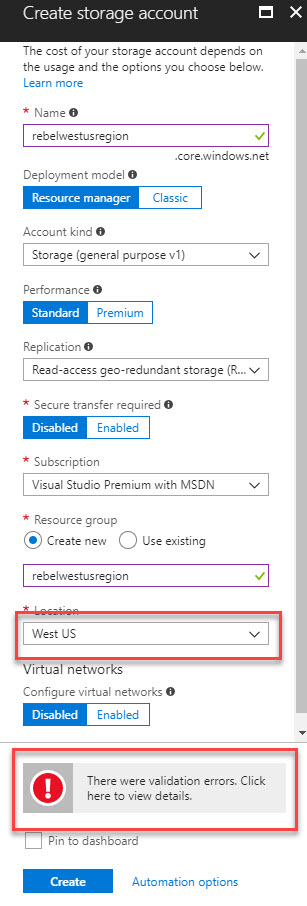
When I click on it, it says it didn’t deploy as policy violation. (hope I will see more details when its GA)
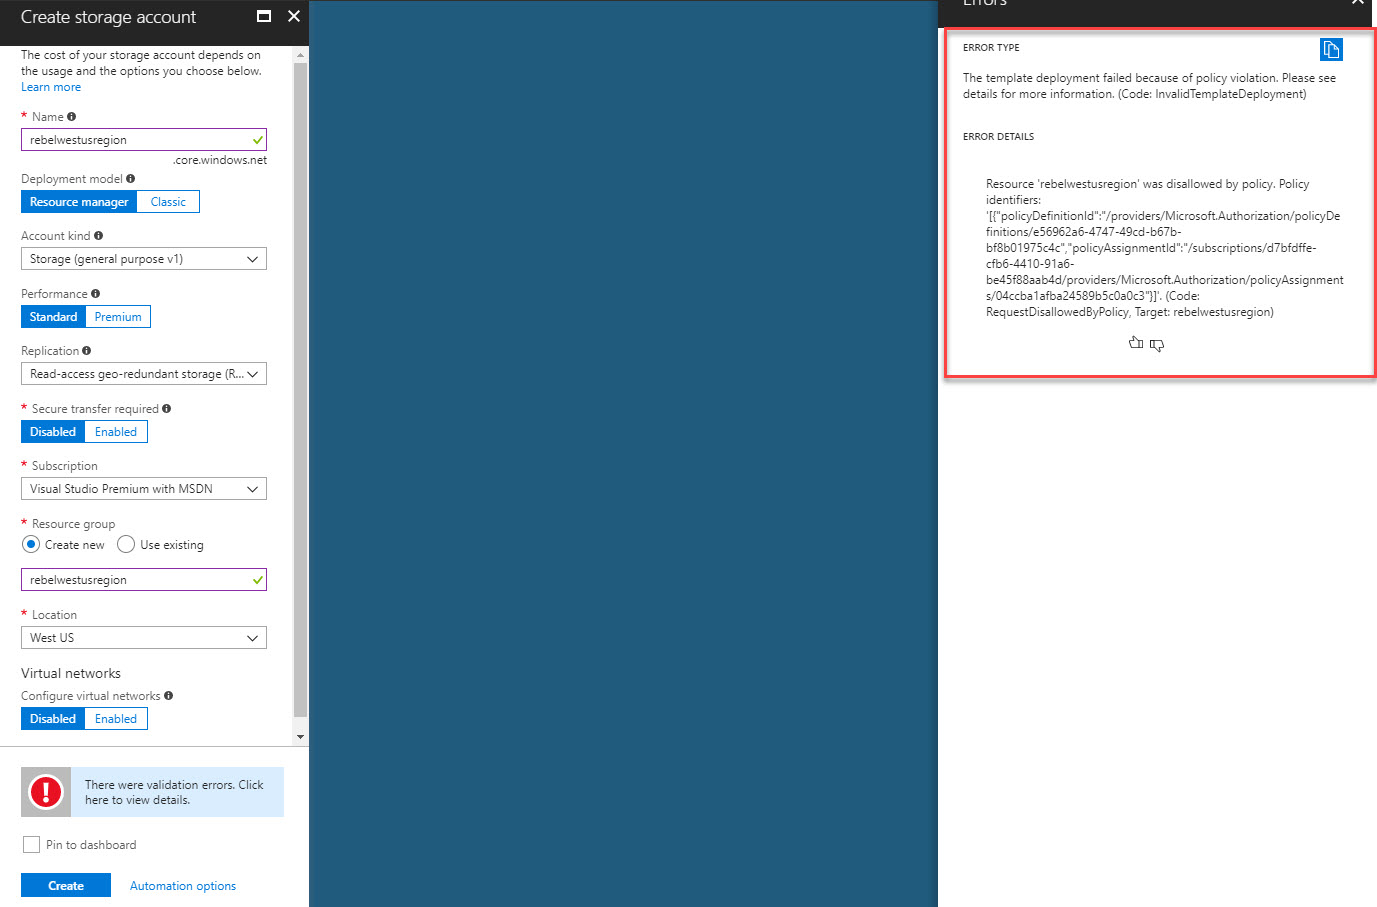
Cool ha? It’s doing the job it supposed to do. Since policy effect is “deny” it should deny my request to create resource under other regions.
Initiative Assignment
Assigning Initiative is same process as Policy assignment. But before do that you need initiative in place. There is only one in-built initiative in place currently.
In order to create initiative,
1. Log in to Azure Portal as Global Administrator
2. Go to All Services and type Policy then click on policy tile.
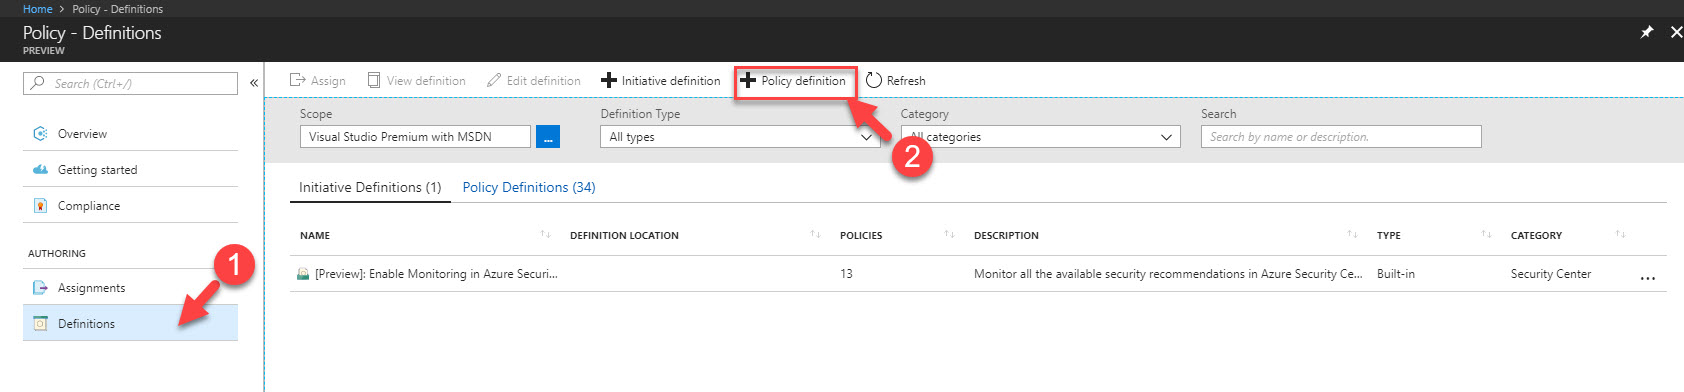
3. Then in policy feature window, click on Definition
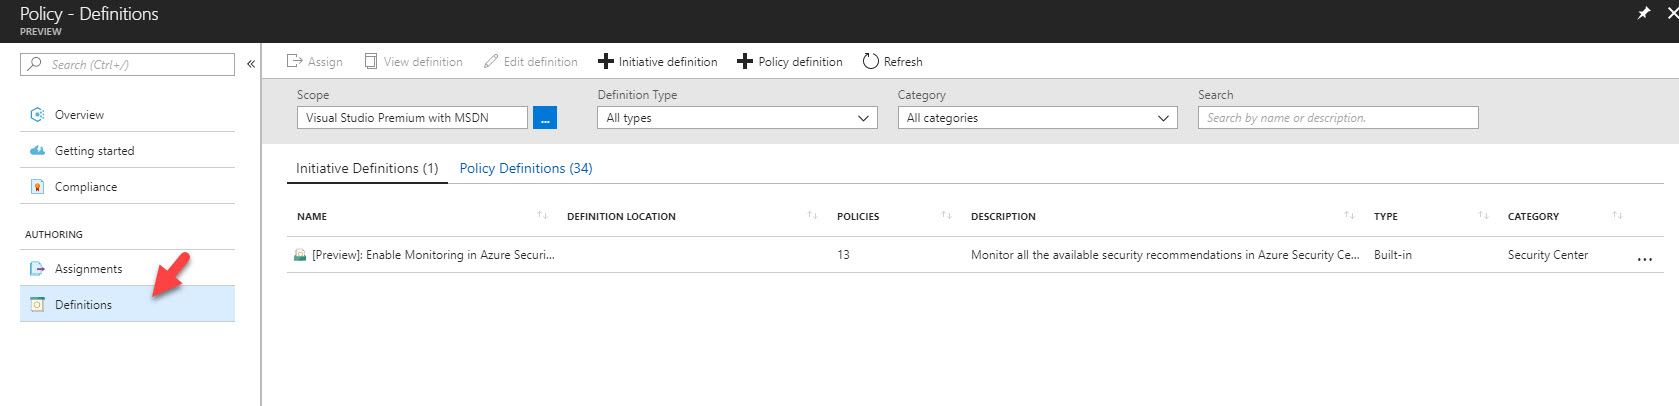
4. After that click on Initiative definition option.

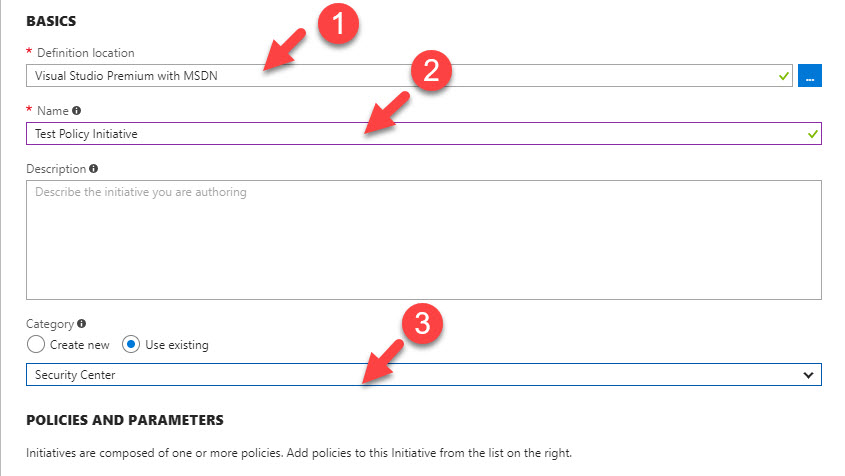
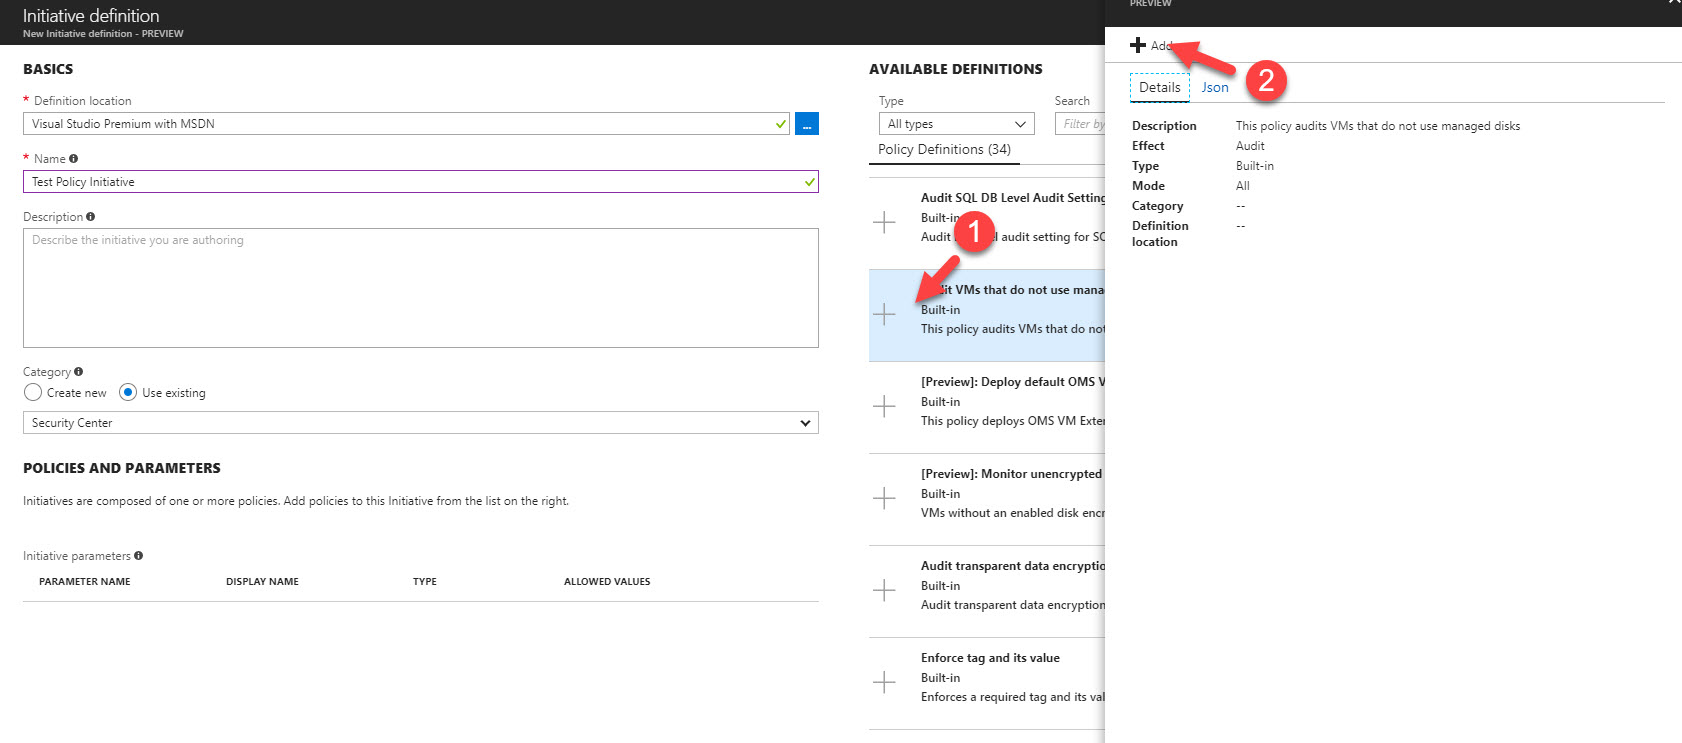
5. in new window to start with, select Definition location. This is basically the targeted subscription.
6. Under Name, define name for policy initiative.
7. Under the category, you can either create new category or select existing one.
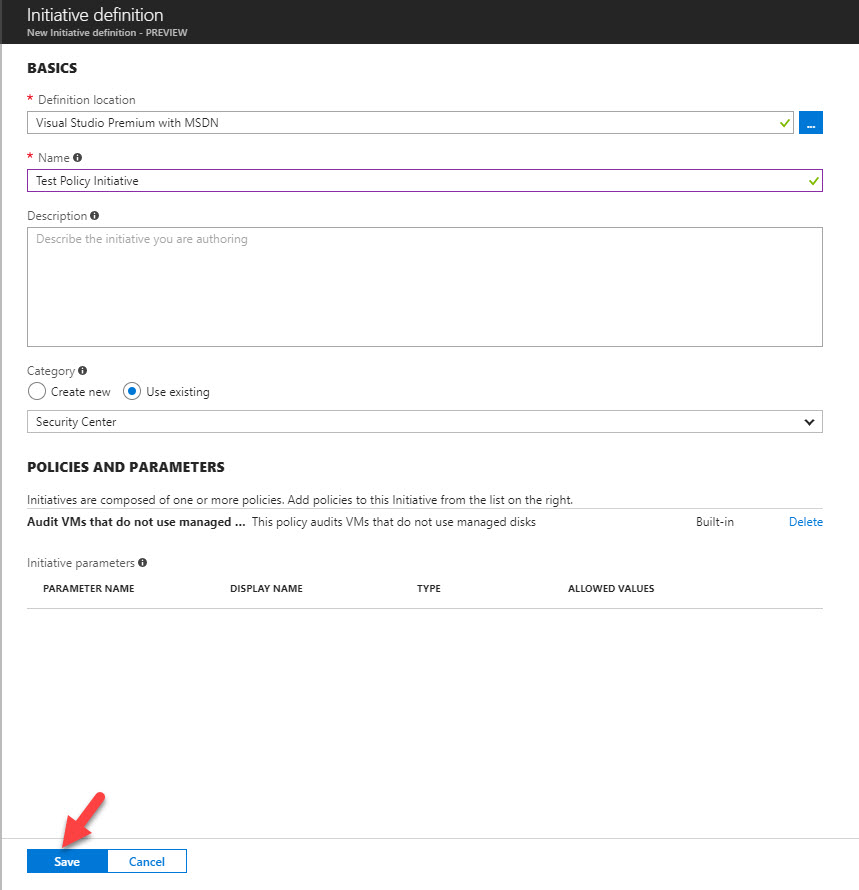
8. After that click on available policy in left hand panel and click on Add it to initiative.
9. Once it’s all done, click on Save to complete to process.
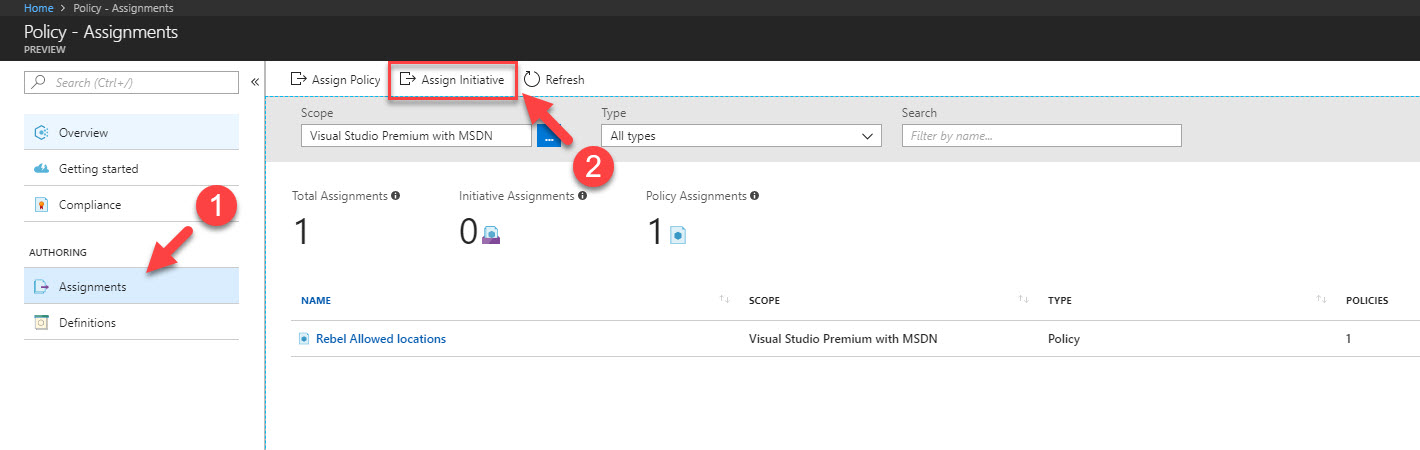
10. Once it’s done, we can assign initiative, using Assignment | Assign Initiative Option
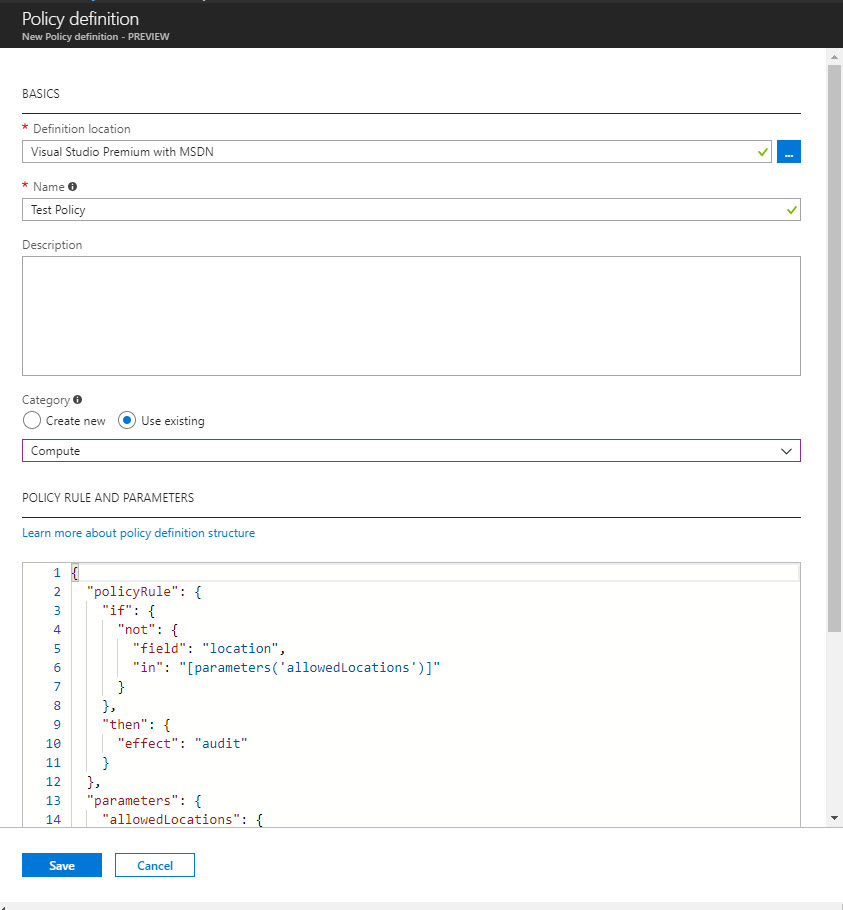
Create New Policy
Creating new policy is similar to creating initiative process. I can be done using Definition | Policy Definition option.
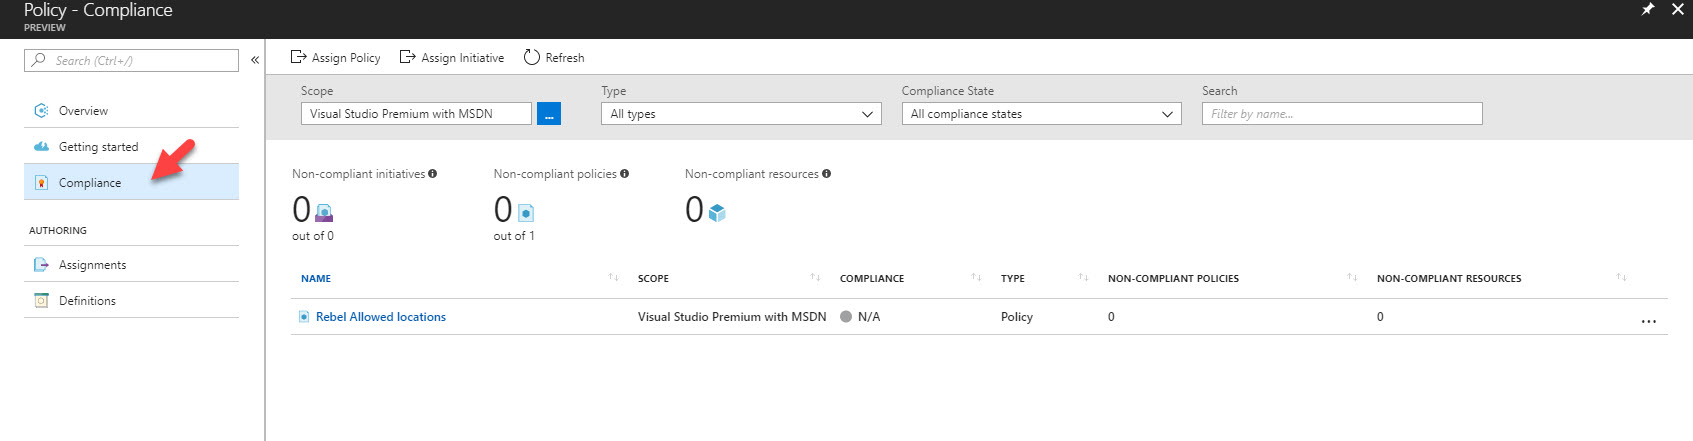
Apart from that, using compliance option we can see the overall policy and initiative compliant status. It also allows to assign policies and initiative.
This marks the end of this blog post. Hope it was useful for you. If you have any questions feel free to contact me on rebeladm@live.com also follow me on twitter @rebeladm to get updates about new blog posts.

