
There are many ways to create, manage, remove resources from Azure subscription. For the users who prefer GUI has Azure Classic portal and Azure Resource Manager. For PowerShell lovers Azure has Azure PowerShell module. Apart from that there are other methods such as terraform (I already wrote articles about it, if you want to know more about it, search for “terraform” in the blog) which simplifies Azure resource management. Azure CLI is also a command-line tool introduced by Microsoft which can use to manage azure resources. This is allowing to use from multiple platform such as Linux, Mac OS and Windows. This blog post is to explain how we can configure windows system to use Azure CLI.
There are two ways which we can use to connect to Azure CLI.
Using Azure Portal
Azure also allow to use web based version of Azure CLI with name of “Cloud Shell”. This is easily can open through the browser. In order to access it,
1) Log in to Azure Portal
2) Click on Cloud Shell icon on top right-hand side

3) When you do this for first time it will ask to create Azure file share. You can select relevant subscription and click on “Create Storage”
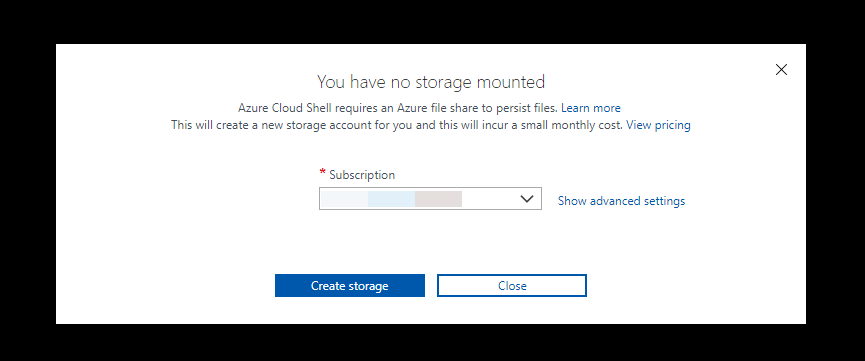
4) Once it is created the storage, it will load up the shell access through the browser.

Using Windows Computer
We also can use Azure CLI from the local computer. as I said this is not only supported to use with windows systems. it is supported to use with Linux and Mac OS. In this demo, I am going to demonstrate how to configure it with windows system.
Azure CLI uses python so out configuration will be based on python installation.
1) Log in to computer as an administrator
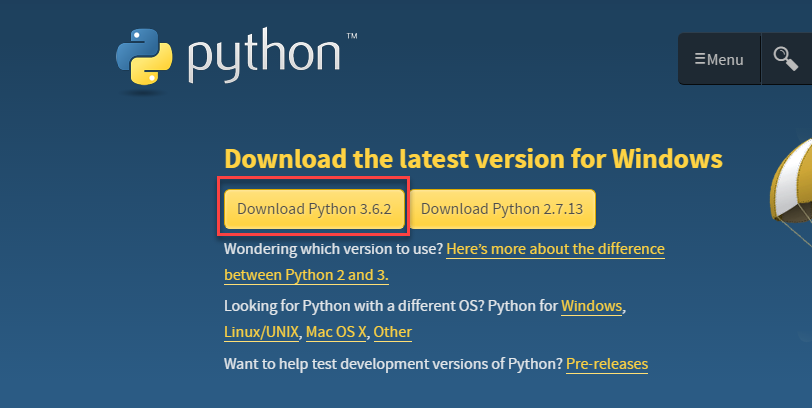
2) Go to https://www.python.org/downloads/ and download python
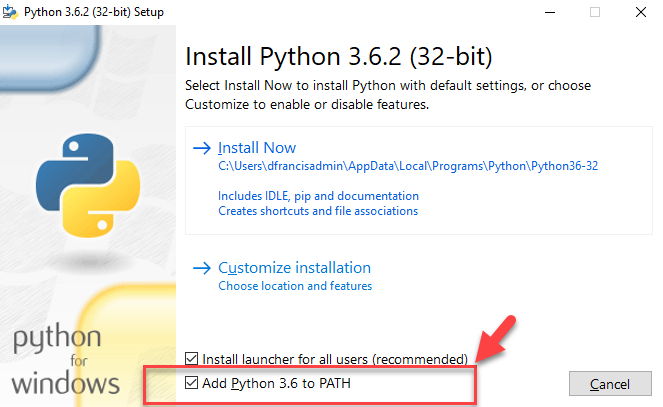
3) Once file is downloaded, run it as administrator to install. During the installation, make sure to select option “Add Python 3.6 to PATH” option. Then it will allow to use python commands without navigating to installation location.
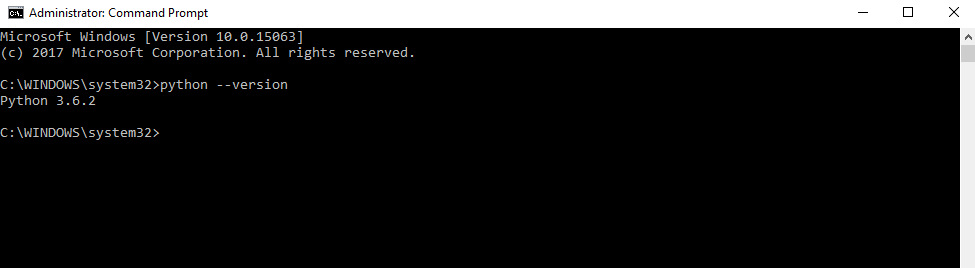
4) Once installation completed, open windows command-line and type python –version. this will confirm the python installation. (it is recommended to open command line as administrator, otherwise it will say PATH records are not added as we ran the installation as Administrator)
5) Next step is to install Azure CLI libraries. In order to do that run pip install –user azure-cli
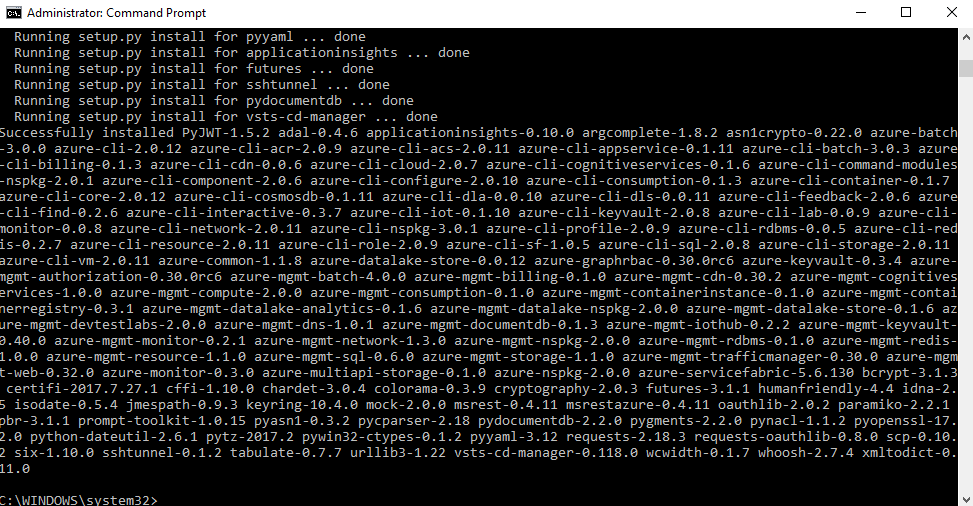
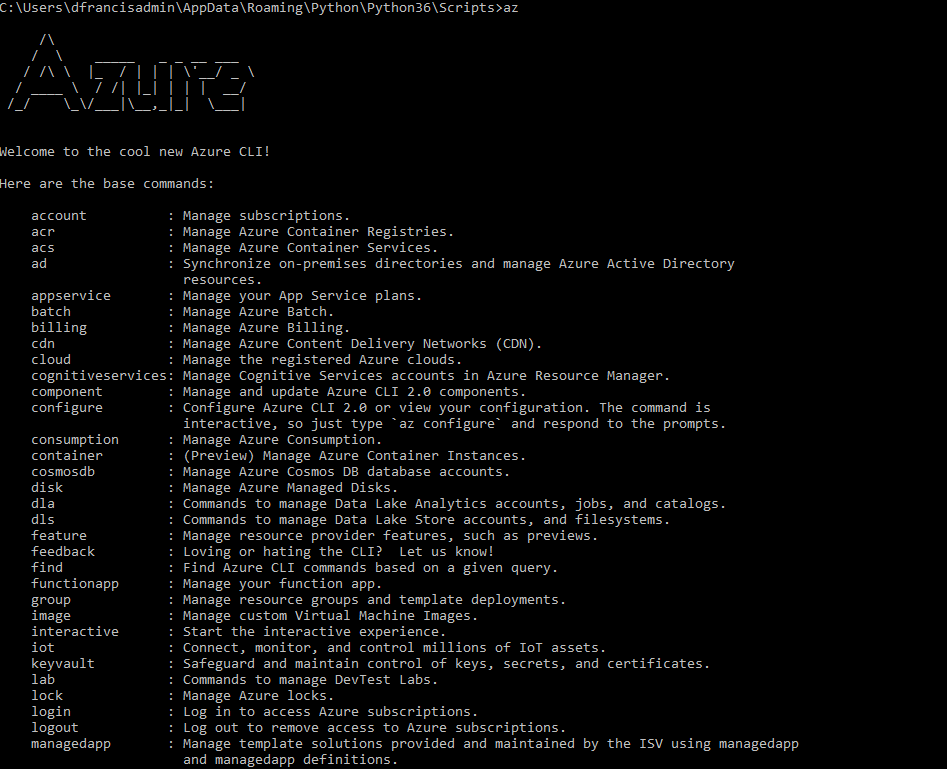
6) Once it is completed, move to C:\Users\[Admin User]\AppData\Roaming\Python\Python36\Scripts and run command az . This will verify the Azure CLI integration. If it needs to run from anywhere add it to the PATH.
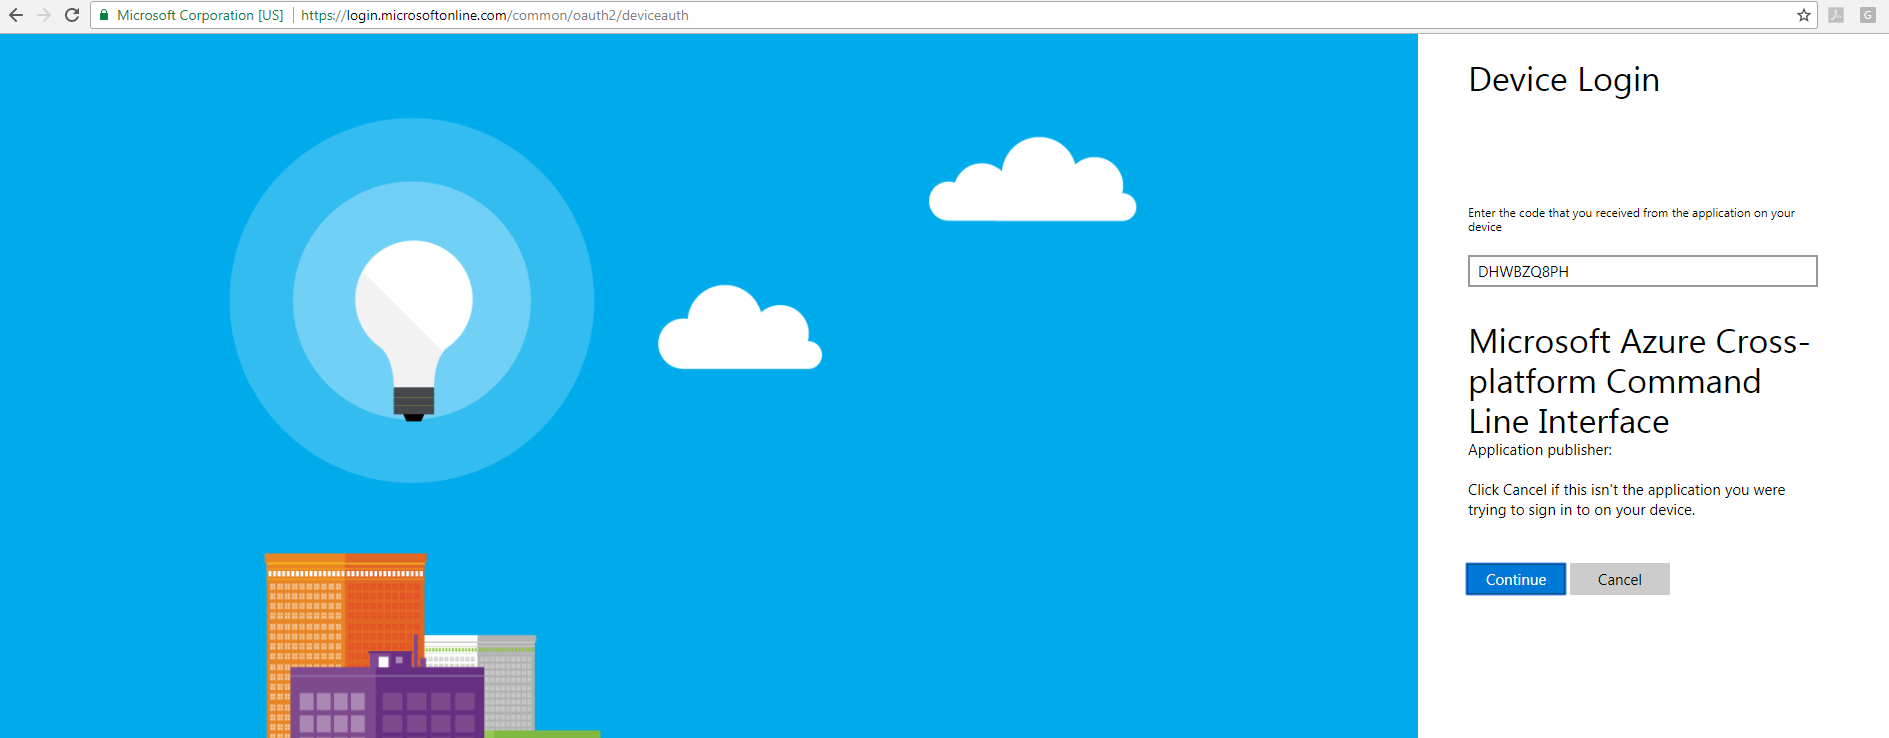
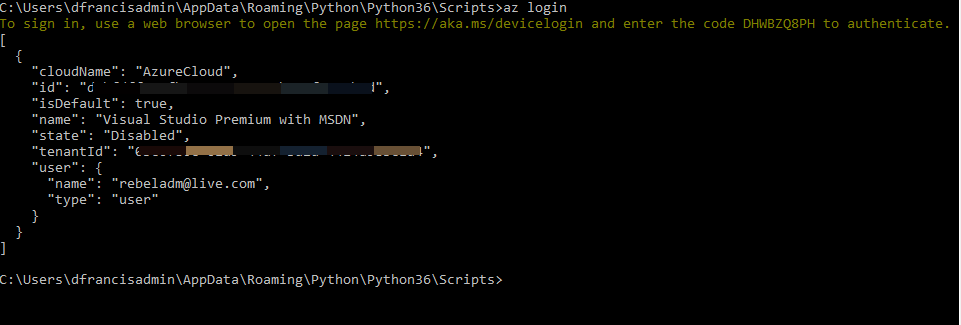
7) Now let’s try to log in to Azure using Azure CLI. In order to do that we can use az login -u azureusername -p password. the problem on this method is that password need to type in as clear text. Instead of that we can use browser based more secure login. To do that type az login in command-line.
The it gives a link and code to use for authentication.

8) Once it is open in browser it asks for the verification code. Once its enter click on Continue
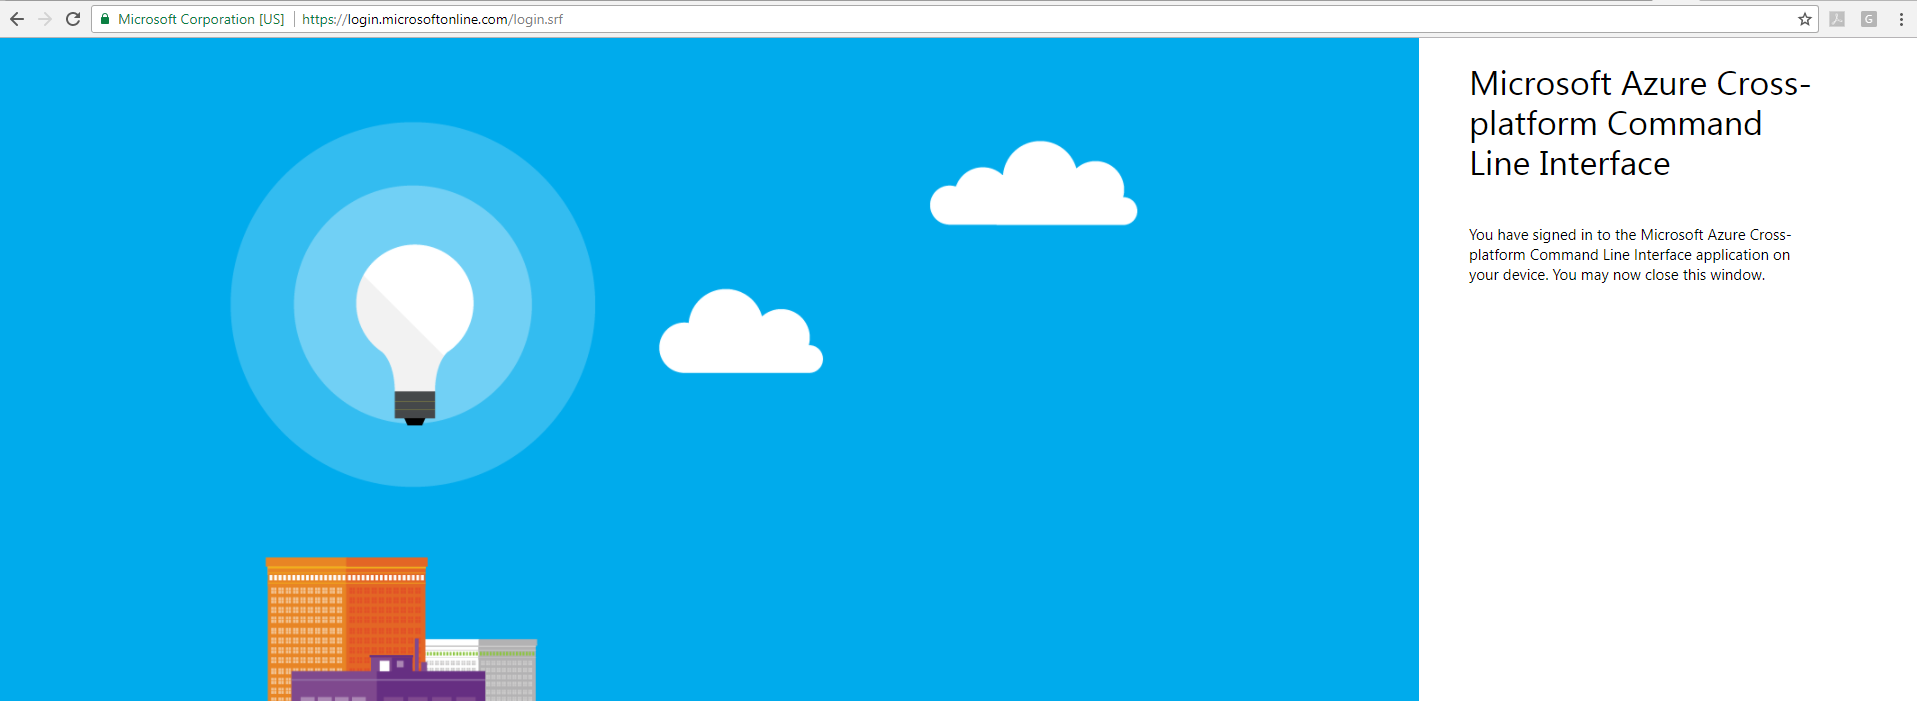
In next page, it verifies the Azure login and then confirm the connection.
When we go back to Azure CLI, we can see its successfully logged in and showing the subscription data.
This confirms the successful connection to Azure using Azure CLI. This is the end of this post and in next post let’s see how we can add, manage, remove azure resources via Azure CLI. Hoep this was helpful and if you have any questions feel free to contact me on rebeladm@live.com


2 Comments