
In my previous blog post I have explain what is Azure CLI and how we can integrate it with windows system. If you didn’t read it yet please look in to it before we continue on this post. You can find it on http://www.rebeladmin.com/2017/08/step-step-guide-start-azure-cli-2-0/
In this blog post I am going to demonstrate how we can create Azure VM using Azure CLI.
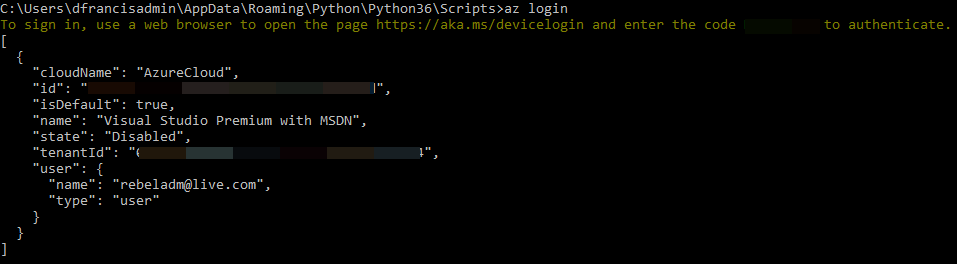
1) Log in to Azure CLI using az login (This is explained on my first blog. If you using cloud shell this is not necessary. All you need to do is launch it on the portal)
2) Next step on process is to create resource group. before we create we need to know the available locations. So, we can create resource group under relevant geographical location. To list down the locations, run az account list-locations
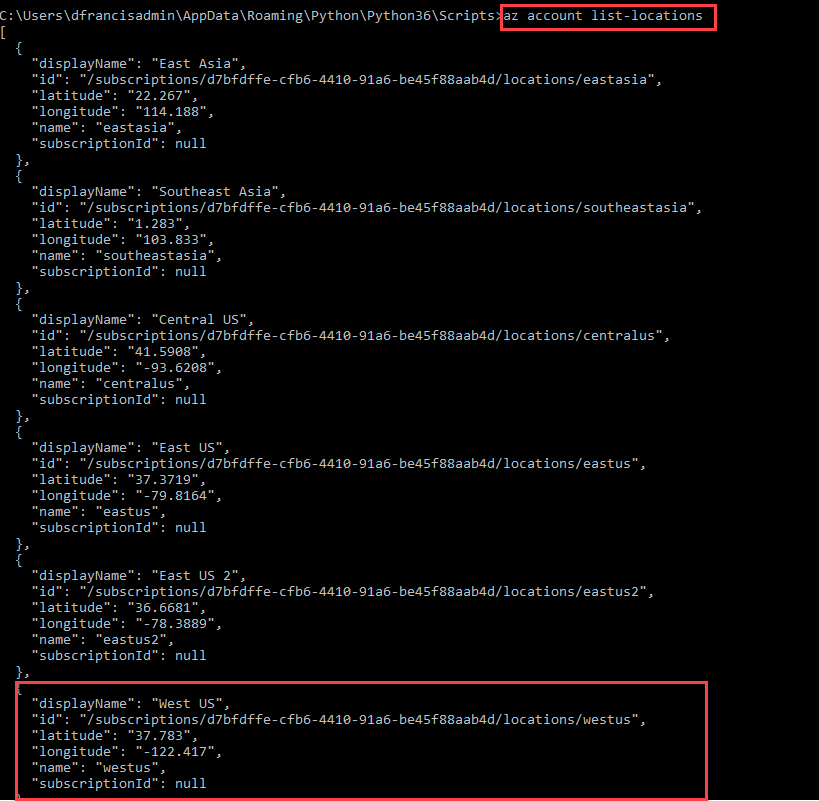
In my demo I am going to create resource group called “rebeladminrg01” under west us. The command for that task will be az group create --name rebeladminrg01 --location westus. In above –name specify the resource group name and –location specifies the geographical location.

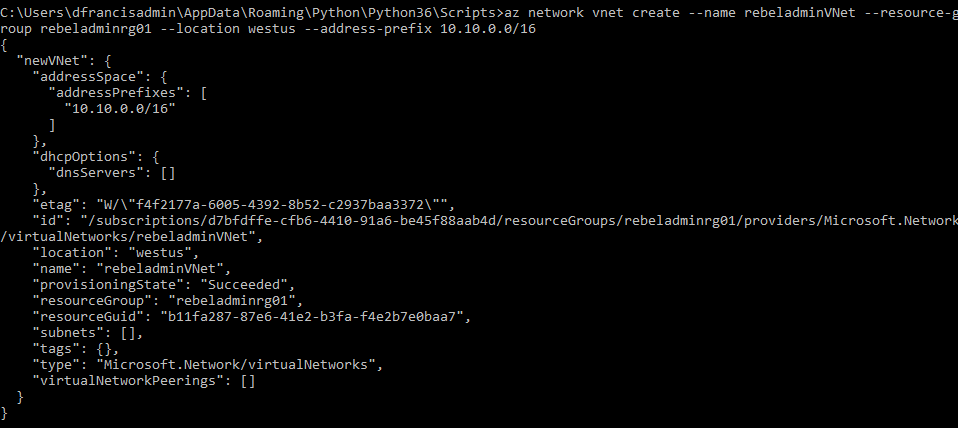
3) Next step is to create a virtual network under my new resource group. for that I am going to use
az network vnet create --name rebeladminVNet --resource-group rebeladminrg01 --location westus --address-prefix 10.10.0.0/16
In above command –name specify the virtual network name. in sample, it is rebeladminVNet. --resource-group defines the resource group it belongs to. In above –location specify the geographical location it belongs to. --address-prefix specify the address space associated with the virtual network.
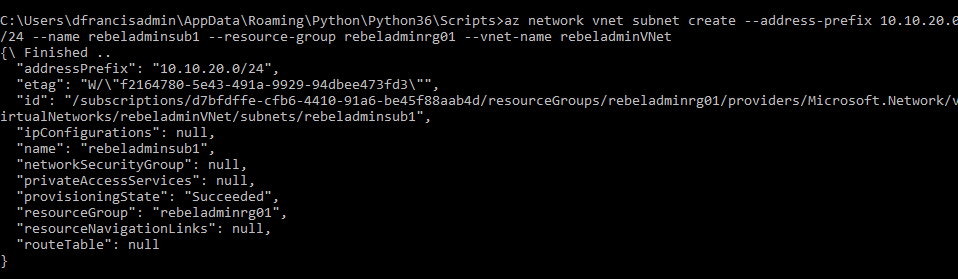
4) Now we have virtual network, next step is to create subnet 10.10.20.0/24 under the virtual network rebeladminVNet. In order to do that I am going to use,
az network vnet subnet create --address-prefix 10.10.20.0/24 --name rebeladminsub1 --resource-group rebeladminrg01 --vnet-name rebeladminVNet
in above, --address-prefix specify the address space for the subnet. –name specify the name of the subnet. --resource-group specify the resource group new subnet belongs to. --vnet-name specify the virtual network it is belongs to.
5) let’s also associate a new public IP address with virtual network, so we can use it to connect from external to new vm that we about to create.
az network public-ip create --name rebeladminpubip1 --resource-group rebeladminrg01 --location westus --allocation-method dynamic
In above –name specify the name of the public IP instance. --resource-group defines the resource group name it belongs to. –location specifies the georgical location resource belongs to. --allocation-method specifies the public IP allocation method. It can be static IP or dynamic Ip assignment. In this demo, I am going to use dynamic method.

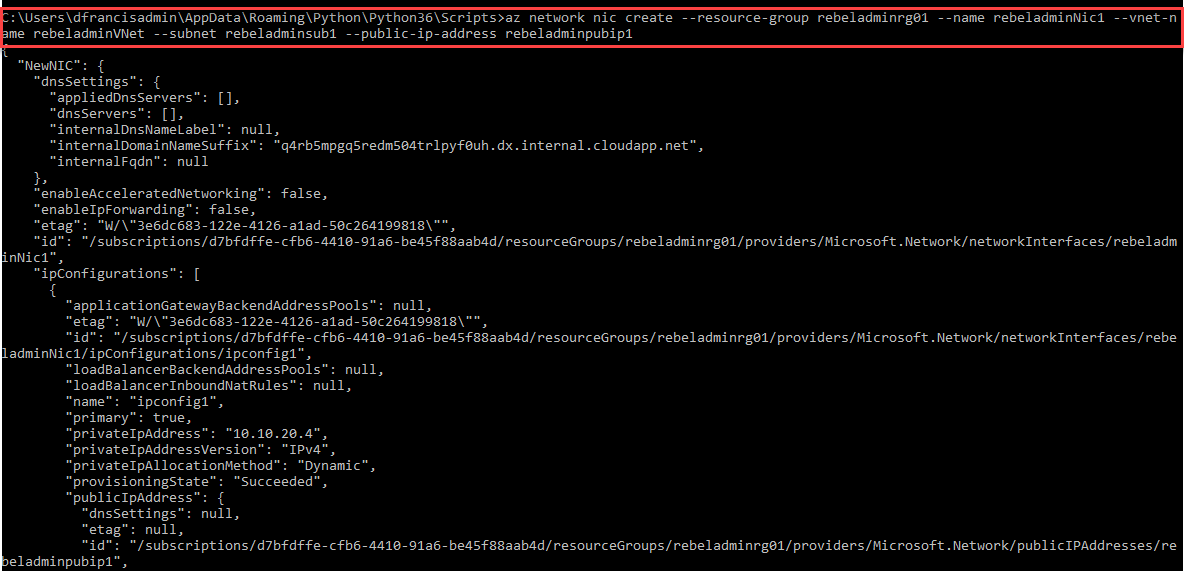
6) Next step on the process to create NIC so we can attach it to VM.
az network nic create --resource-group rebeladminrg01 --name rebeladminNic1 --vnet-name rebeladminVNet --subnet rebeladminsub1 --public-ip-address rebeladminpubip1
in above sample, --resource-group defines the resource group name it belongs to. --vnet-name specify the virtual network it is belongs to. –subnet specify the subnet it associated with. --public-ip-address specify the public ip address this NIC will associate with.
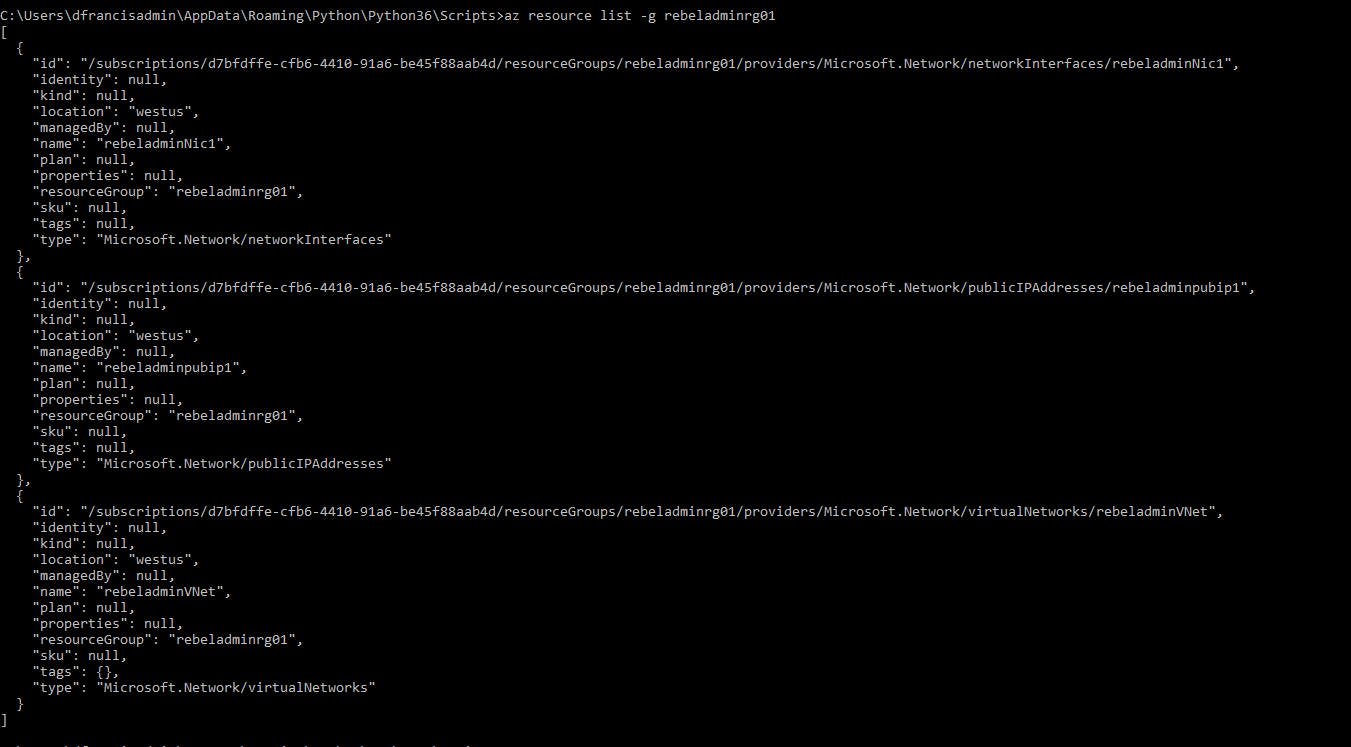
Now we have components needed for the vm (except storage, I will cover storage on different post. In here I will be using Azure managed disks). We can review the details about the resource we created using az resource list -g rebeladminrg01 this will list down the resource under resources group rebeladminrg01
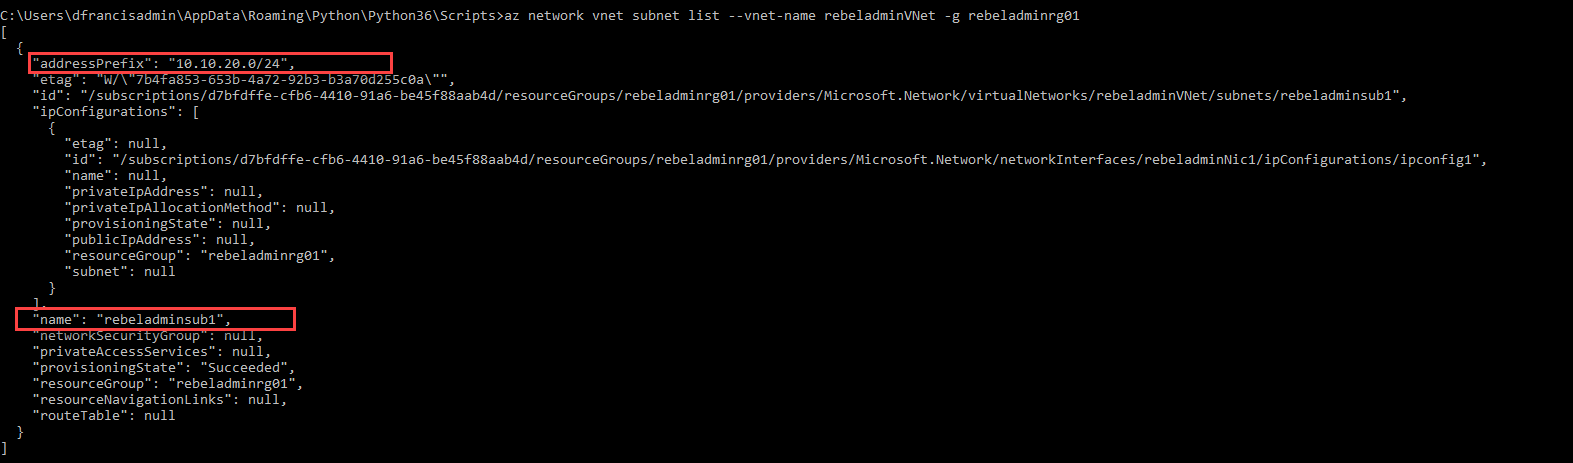
Some data such as subnet info will not display by using above command. Those can view using list command combine with resources group and parent resources. as an example, to view subnet info under the virtual network we can use,
az network vnet subnet list --vnet-name rebeladminVNet -g rebeladminrg01
in above --vnet-name specify the virtual network name and -g specify the resource group name.
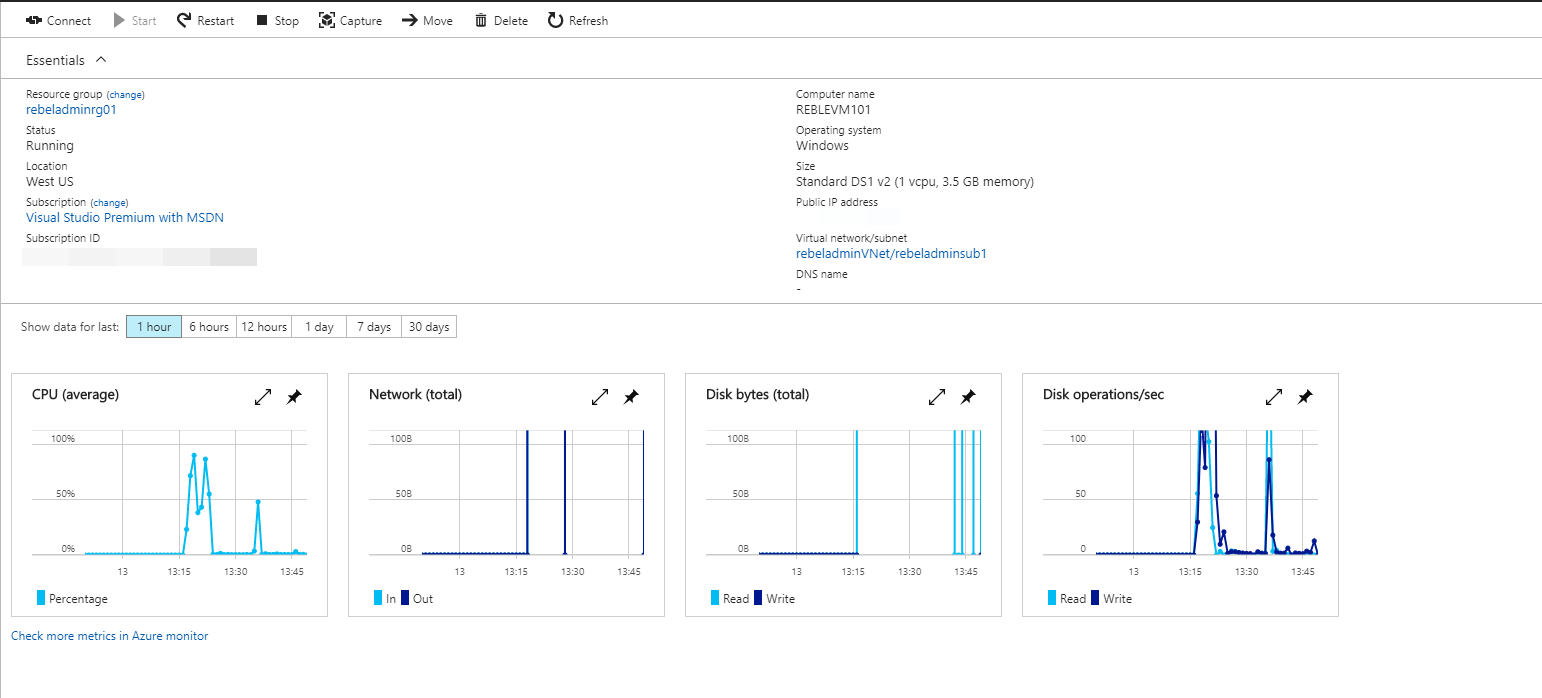
7) Now it’s all ready, lets create first windows VM using the resource we created on previous steps.
az vm create --resource-group rebeladminrg01 --location westus --nics rebeladminNic1 --name REBLEVM101 --image win2016datacenter --admin-username rebeladmin --admin-password Pa$$w0rd123456
in above, --resource-group specify the resources group VM belong to. –nics specify the network interface associated with the VM. –name is the VM name. –image specify the virtual machine image going to use with VM. You can get list of entire image list using az vm image list --output table –all
in sample --admin-username defines the admin user name for the new vm and --admin-password defines the VM password.

this creates the VM successfully.
In this demo, I explain how to create VM using azure cli. Hope this was useful and in next post on Azure CLI I will cover about storage. If you have any questions, feel free to contact me on rebeladm@live.com


thanks for your post !!