
Microsoft has already announced that windows server 2003 / windows server 2003 R2 versions support is coming to end in 14th July 2015 (http://support2.microsoft.com/lifecycle/search/default.aspx?sort=PN&alpha=Microsoft+Windows+Server+2003&Filter=FilterNO). It’s no wonder that some organizations still uses windows server 2003 versions in production environment.
If you still not plan for migration from legacy windows server versions, well time has come!!
This guide will explain how we can migrate AD CS from windows server 2003 to windows server 2012 R2.
In this demonstration I am using following setup.
|
Server Name |
Operating System |
Server Roles |
|
canitpro-casrv.canitpro.local |
Windows Server 2003 R2 Enterprise x86 |
AD CS ( Enterprise Certificate Authority ) |
|
CANITPRO-DC2K12.canitpro.local |
Windows Server 2012 R2 x64 |
– |
Backup windows server 2003 certificate authority database and its configuration
• Log in to Windows 2003 Server as member of local administrator group
• Go to Start > Administrative Tools > Certificate Authority
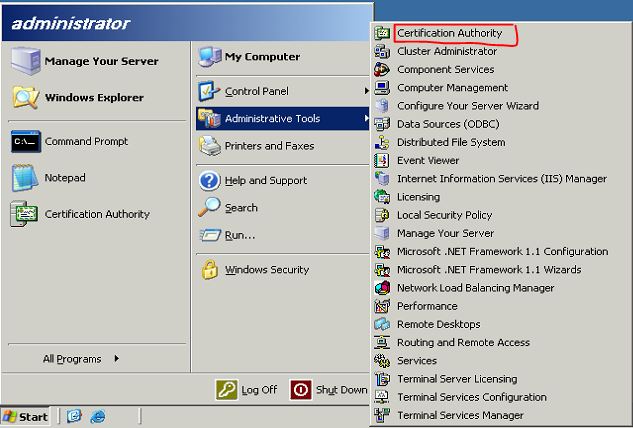
• Right Click on Server Node > All Tasks > Backup CA

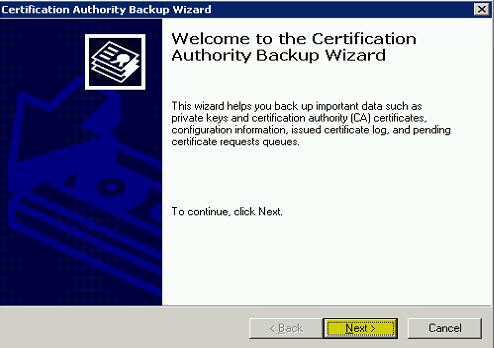
• Then it will open the “Certification Authority Backup Wizard” and click “Next” to continue
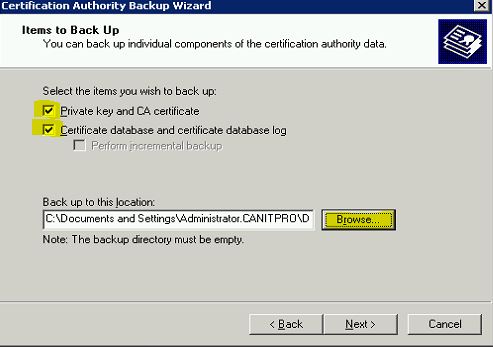
• In next window click on check boxes to select options as highlighted and click on “Brows” to provide the backup file path location where it will save the backup file. Then click on “Next” to continue
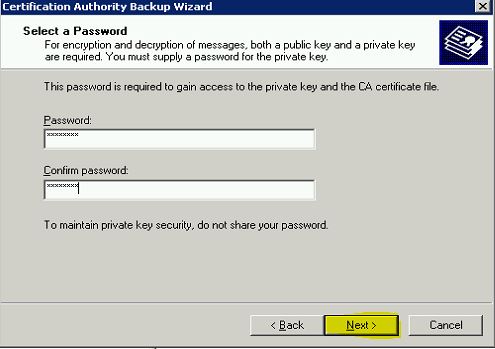
• Then it will ask to provide a password to protect private key and CA certificate file. Once provided the password click on next to continue
• In next window it will provide the confirmation and click on “Finish” to complete the process
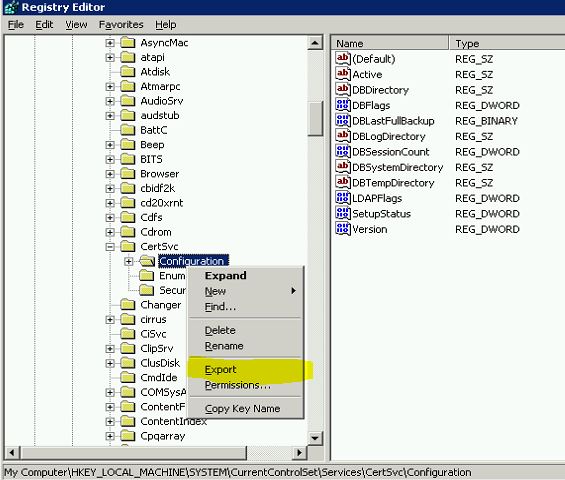
Backup CA Registry Settings
• Click Start > Run and then type regedit and click “Ok”

• Then expand the key in following path HKEY_LOCAL_MACHINE\SYSTEM\CurrentControlSet\Services\CertSvc
• Right click on “Configuration” key and click on “Export”
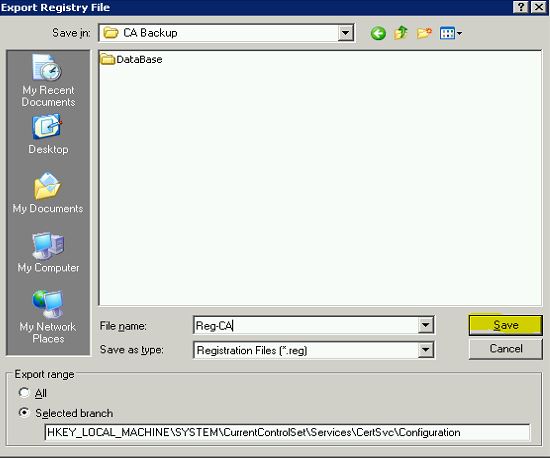
• In next window select the path you need to save the backup file and provide a name for it. Then click on save to complete the backup
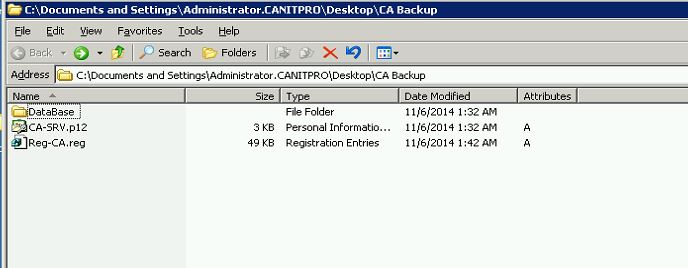
Now we have the backup of the CA and move these files to the new windows 2012 R2 server.
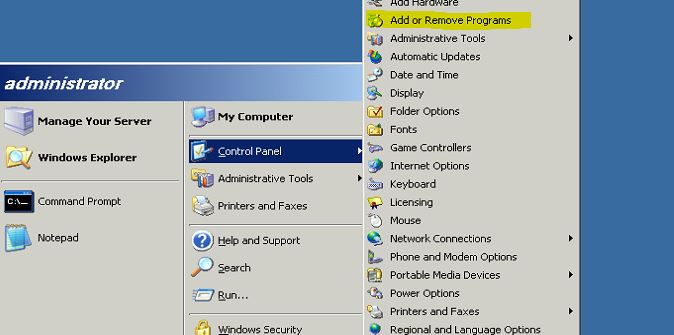
Uninstall CA Service from windows server 2003
Now we have the backup files ready and before configure certificate services in new windows server 2012 r2, we can uninstall the CA services from windows 2003 server. To do that need to follow following steps.
• Click on Start > Control Panel > Add or Remove Programs
• Then click on “Add/Remove Windows Components” button
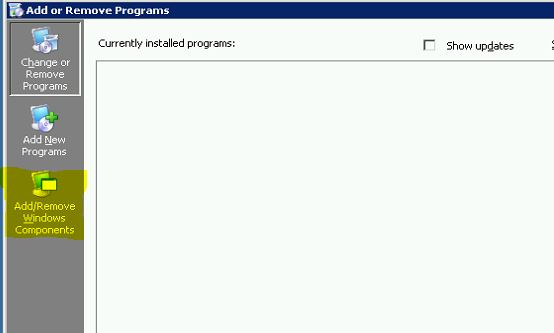
• In next window remove the tick in “Certificate Services” and click on next to continue
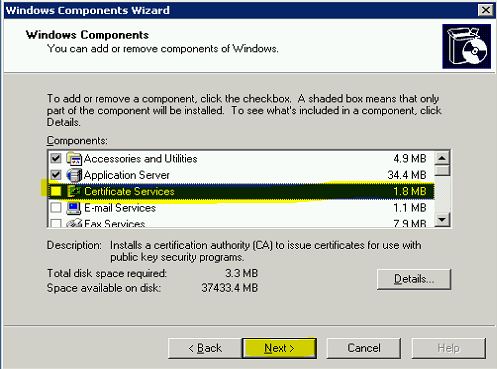
• Once its completed the process it will give the confirmation and click on “Finish”

With it we done with windows server 2003 CA services and next step to get the windows server 2012 CA services install and configure.
Install windows server 2012 R2 Certificate Services
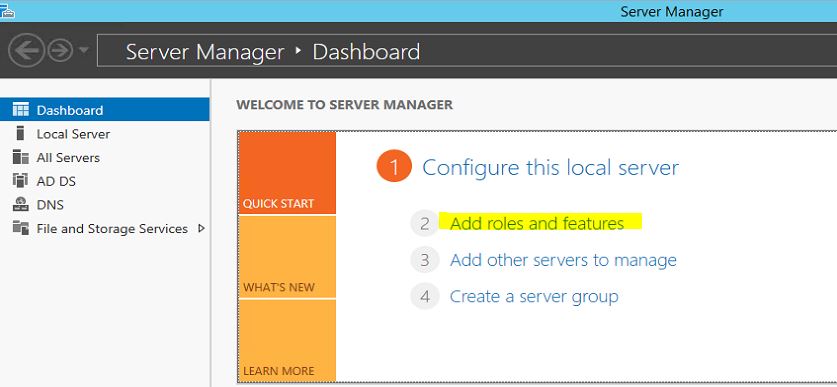
• Log in to windows server 2012 as Domain Administrator or member of local administrator group
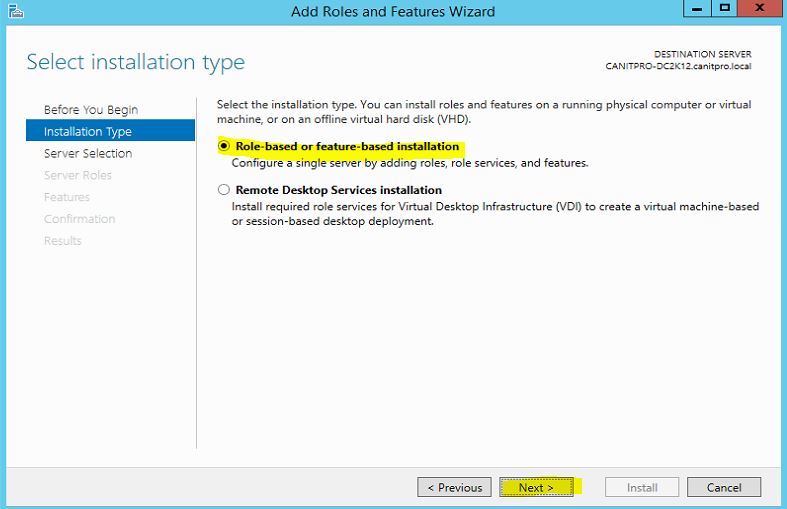
• Go to Server Manager > Add roles and features
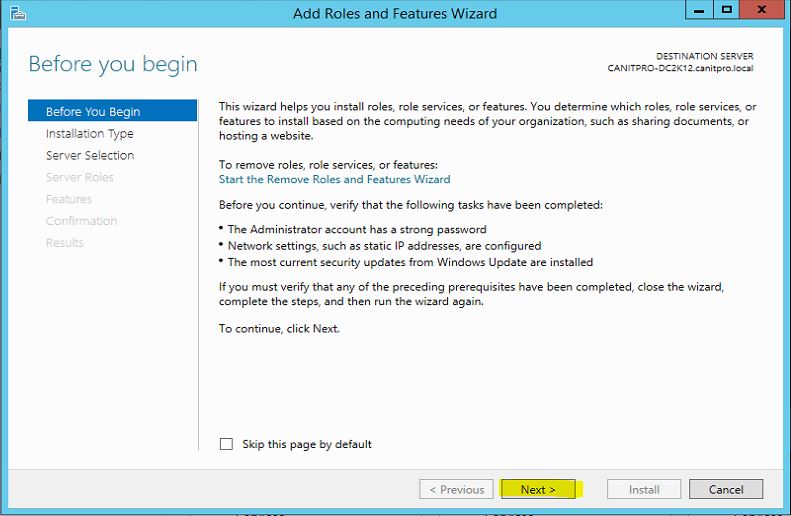
• It will open up “Add roles and feature” wizard and click on next to continue
• Then next window select “Role-based or Feature-based installation” and click next to continue
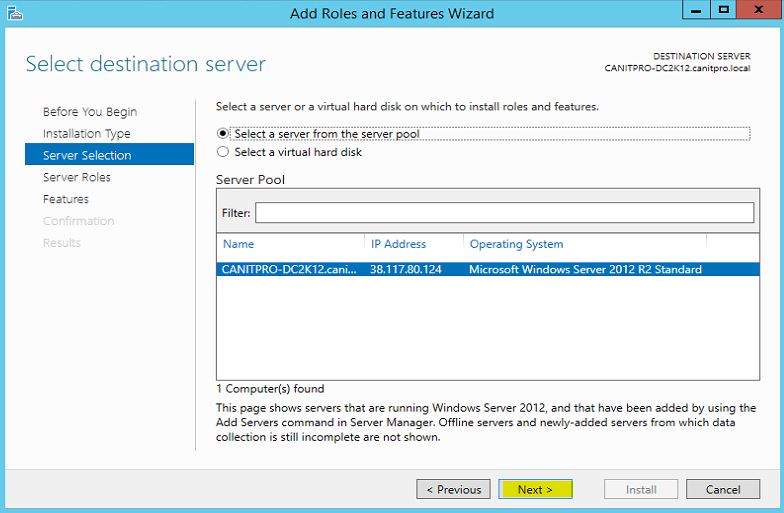
• From the server selections keep the default selection and click on next to continue
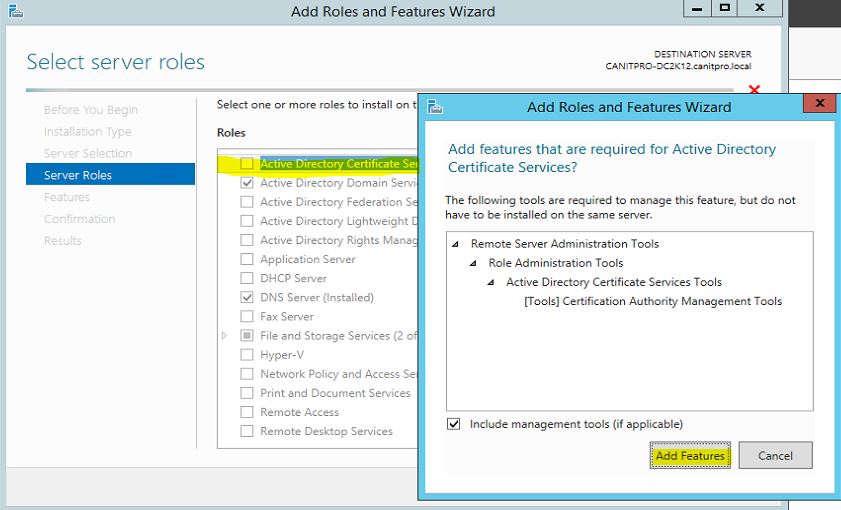
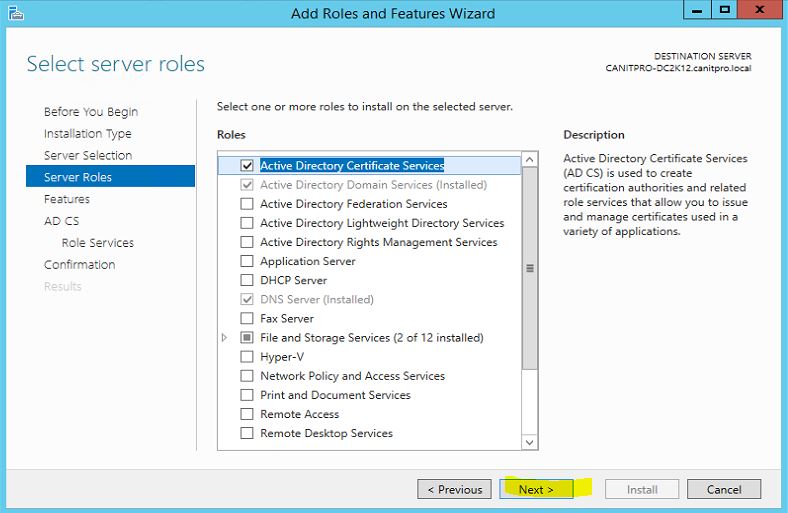
• In next window click on tick box to select “Active Directory Certificate Services” and it will pop up with window to acknowledge about required features need to be added. Click on add features to add them
• Then in features section will let it run with default. Click next to continue
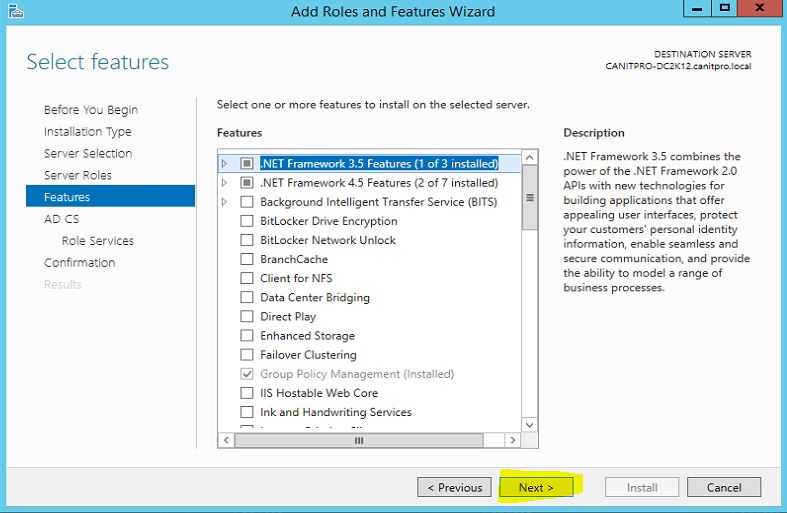
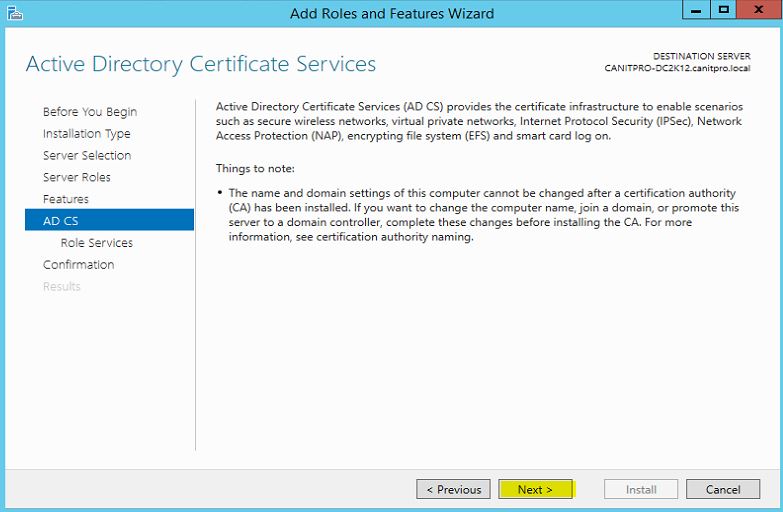
• In next window, it will give brief description about AD CS. Click next to continue
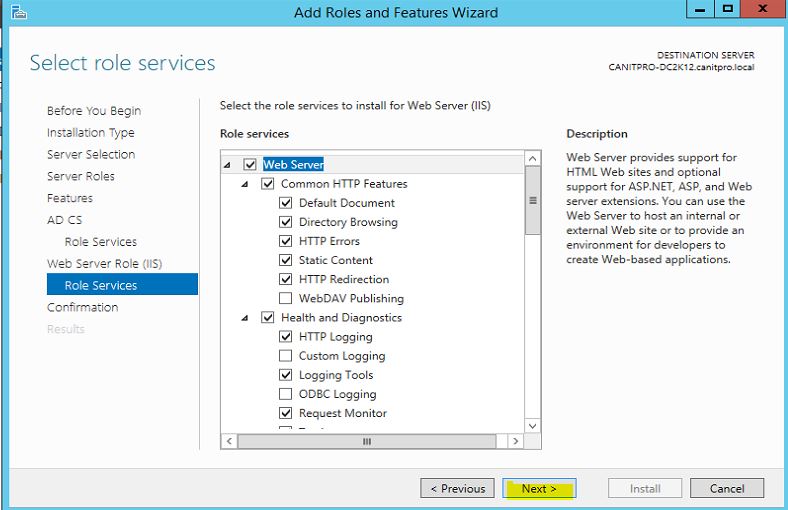
• Then it will give option to select roles services. I have selected Certificate Authority and Certification Authority Web Enrollment. Click next to continue
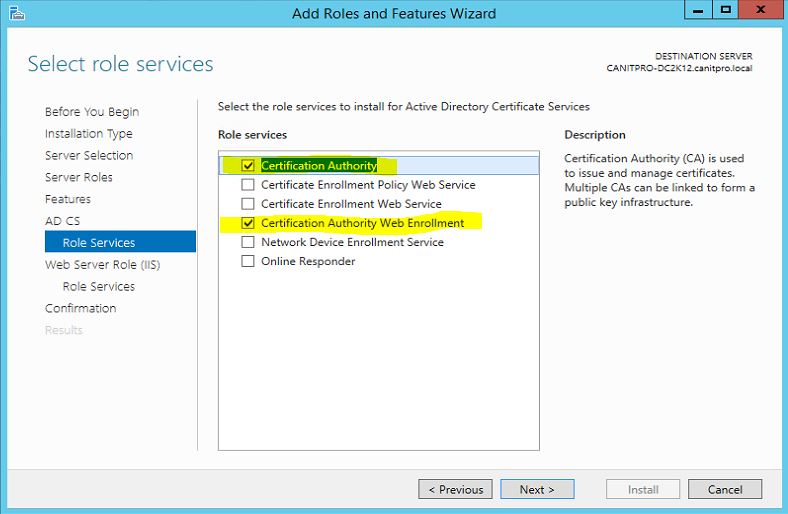
• Since Certification Authority Web Enrollment selected it will required IIS. So next window it will give brief description about IIS
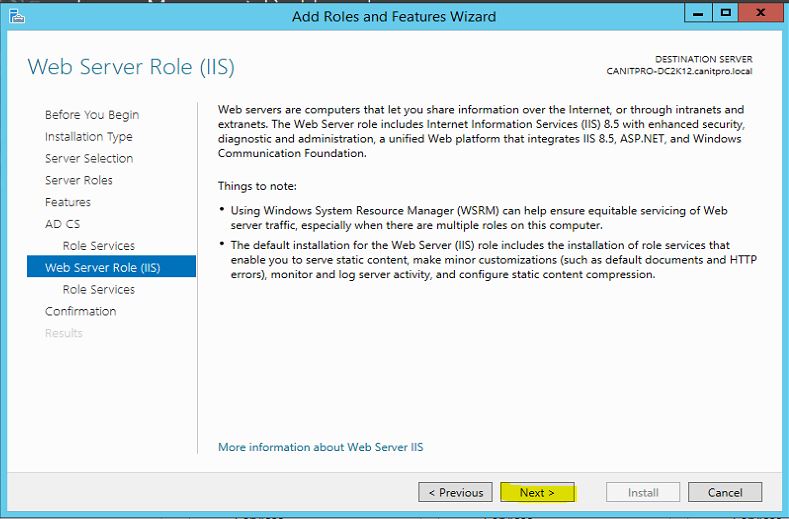
• Then in next window it gives option to add IIS role services. I will leave it default and click next to continue
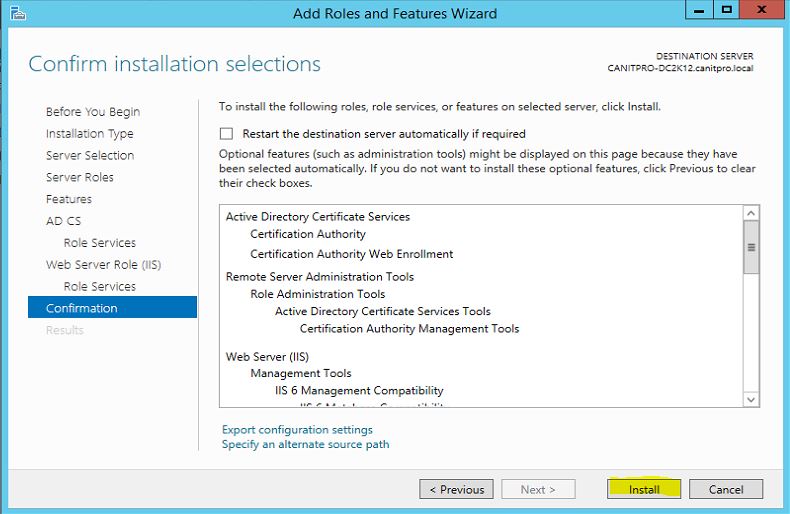
• Next window will give confirmation about service install and click on “Install” to start the installation process
• Once installation completes you can close the wizard.
Configure AD CS
In this step will look in to configuration and restoring the backup we created.
• Log in to server as Enterprise Administrator
• Go to Server Manager > AD CS
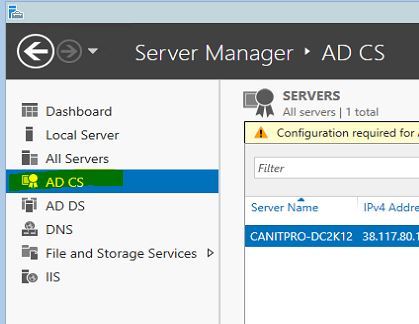
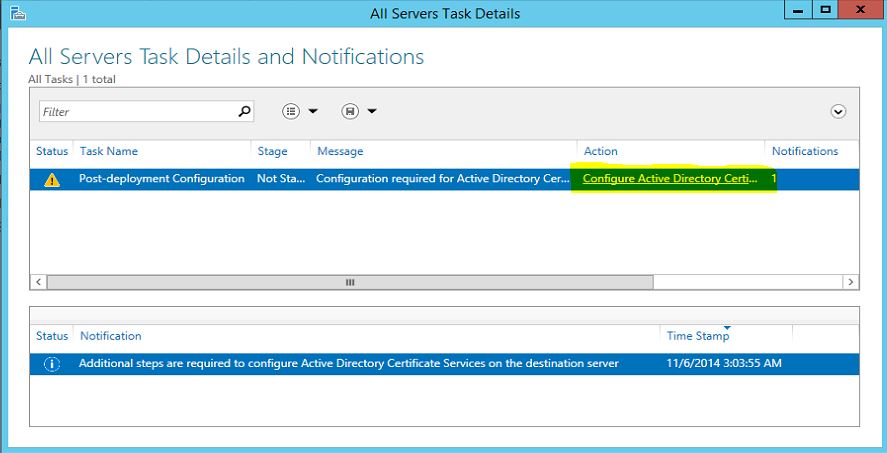
• In right hand panel it will show message as following screenshot and click on “More”
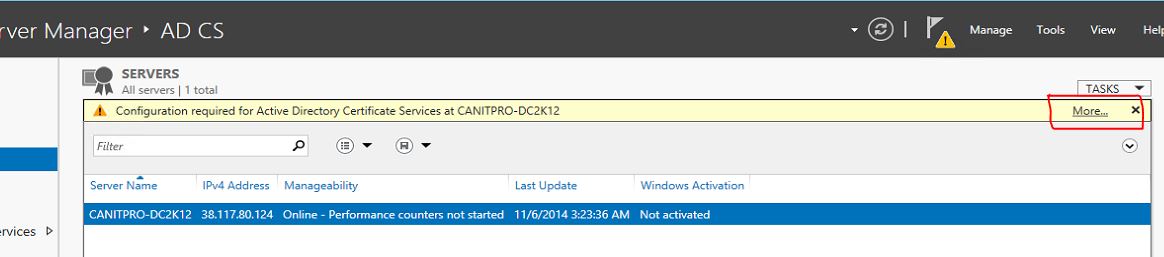
• It will open up window and click on “Configure Active Directory Certificate Service ……”
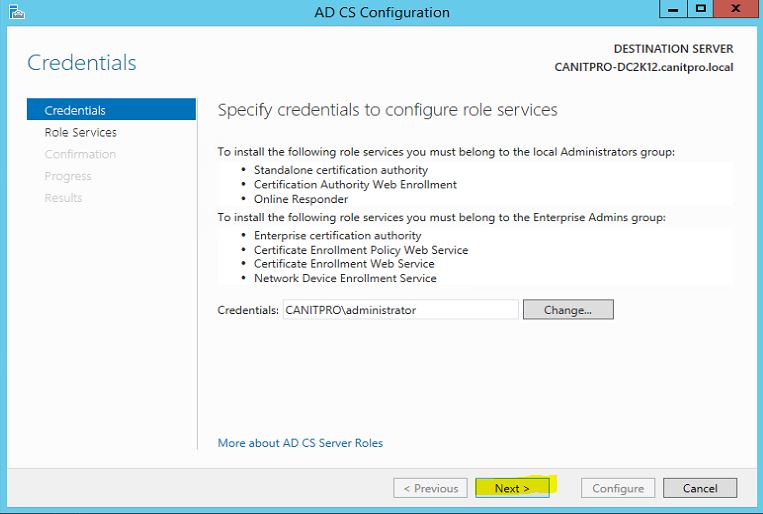
• It will open role configuration wizard, it gives option to change the credential, in here I already log in as Enterprise administrator so I will leave the default and click next to continue
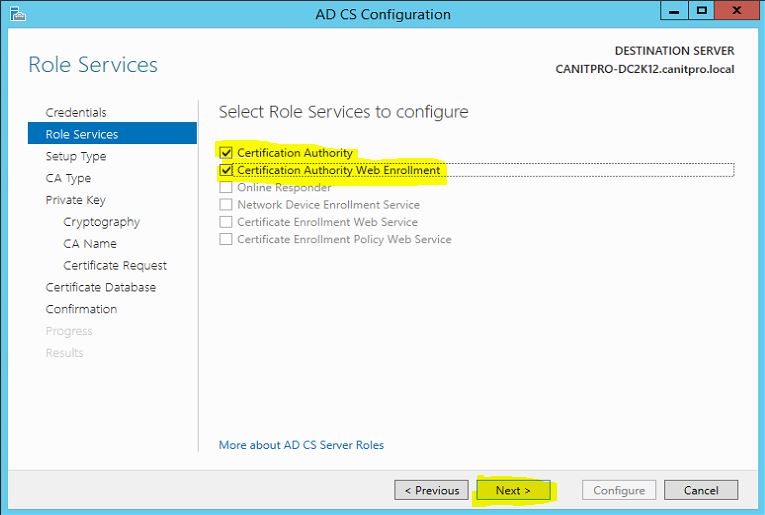
• In next window it asking which service you like to configure. Select “Certification Authority”, “Certification Authority Web Enrollment” options and click next to continue
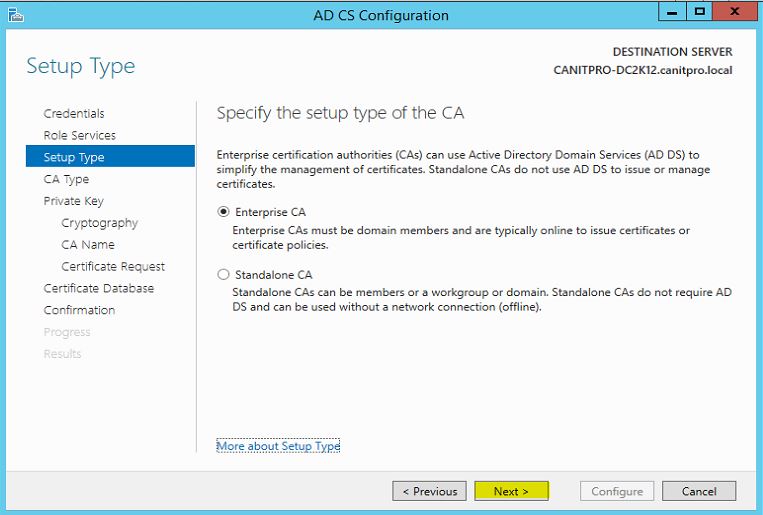
• It will be Enterprise CA so in next window select the Enterprise CA as the setup type and click next to continue
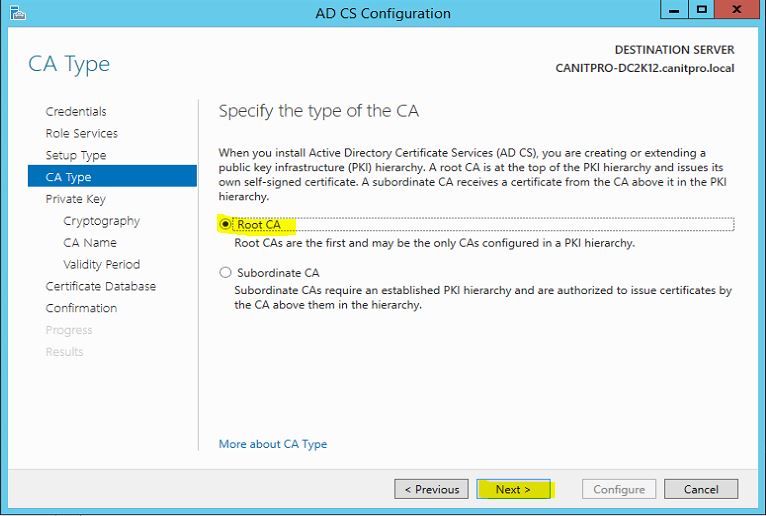
• Next window select “Root CA” as the CA type and click next to continue
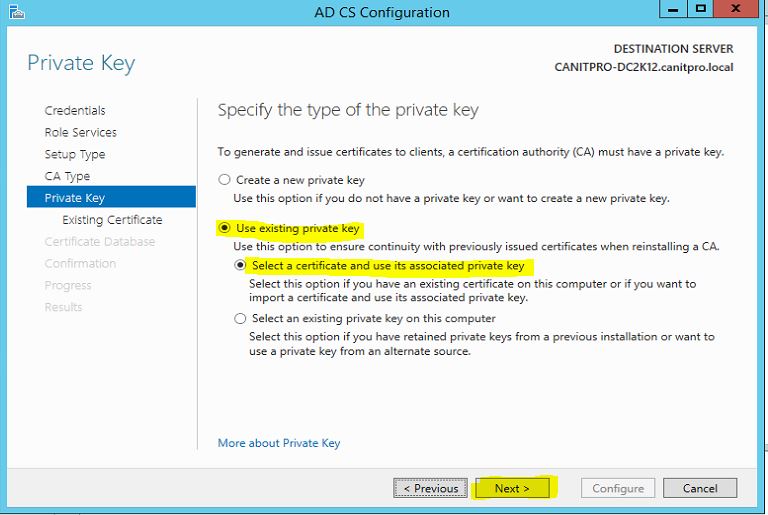
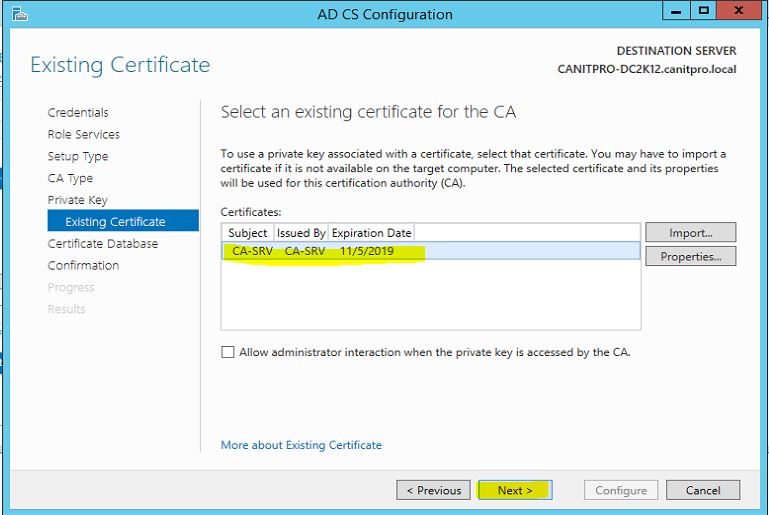
• The next option is very important on the configuration. If its new installation we will only need to create new private key. But since it’s a migration process we already made a backup of private key. So in here select the options as highlighted in screenshot. Then click on next to continue
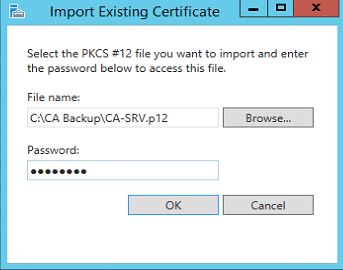
• In next window click on “Import” button
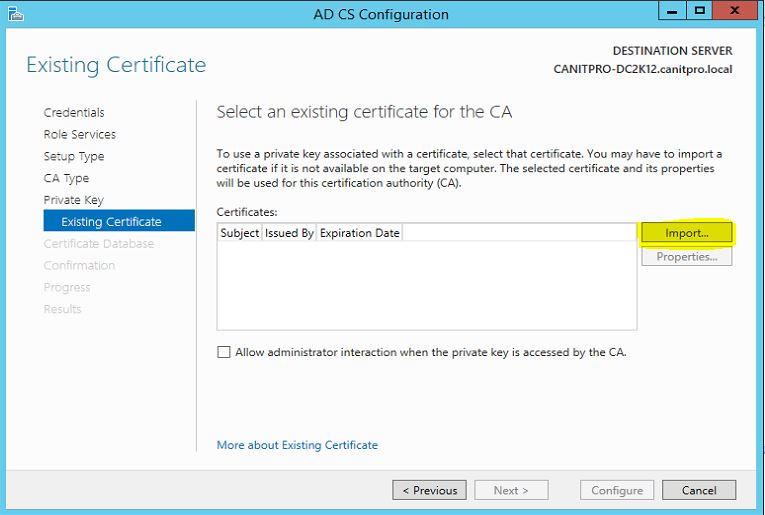
• In here it will give option to select the key we backup during the backup process from windows 2003 server. Brows and select the key from the backup we made and provide the password we used for protection. Then click ok
• Then it will import the key successfully and in window select the imported certificate and click next to continue
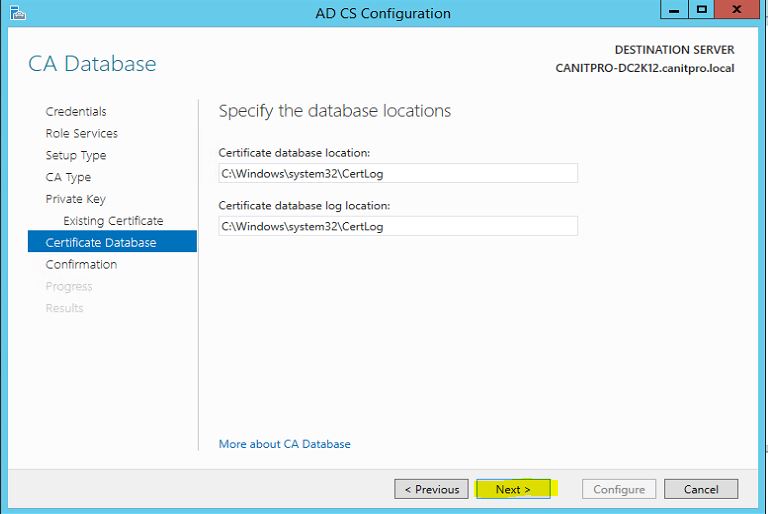
• Next window we can define certificate database path. In here I will leave it default and click next to continue
• Then in next window it will provide the configuration confirmation and click on configure to proceed with the process
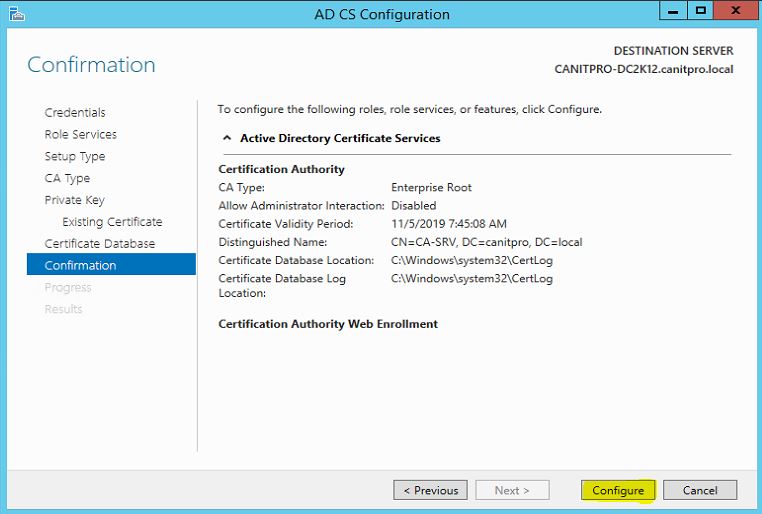
• Once its completed click on close to exit from the configuration wizard
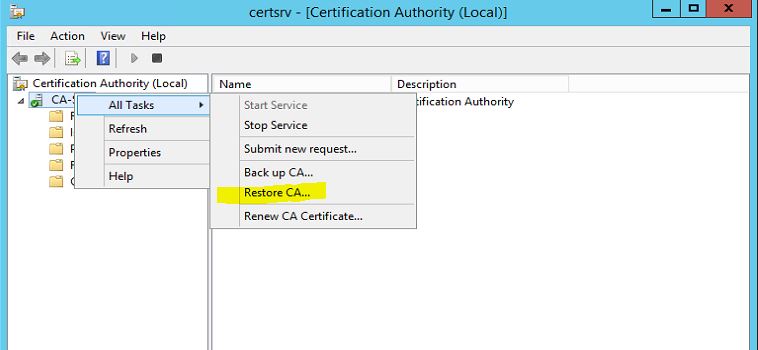
Restore CA Backup
Now it’s comes to the most important part of the process which is to restore the CA backup we made from windows server 2003.
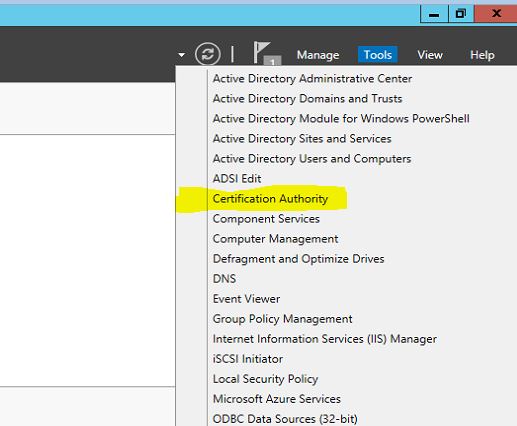
• Go To Server Manager > Tools > Certification Authority
• Then right click on server node > All Tasks > Restore CA
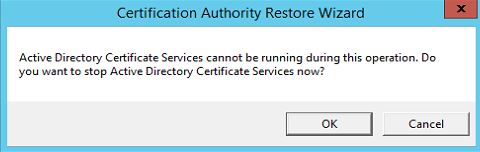
• Then it will ask if it’s okay to stop the certificate service in order to proceed. Click ok
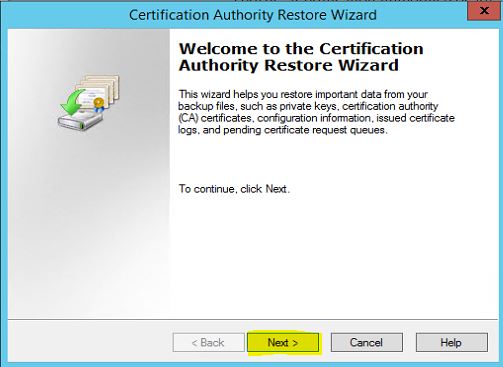
• It will open up Certification Authority Restore Wizard, click next to continue
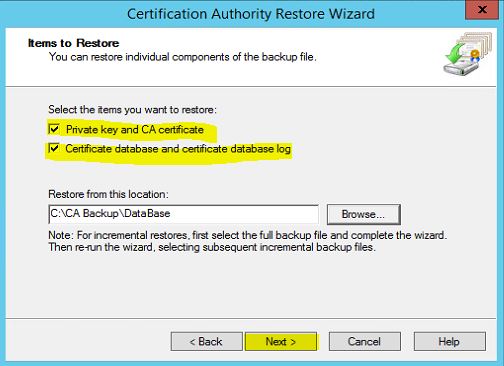
• In next window brows the folder where we stored backup and select it. Then also select the options as I did in below. Later click next to continue
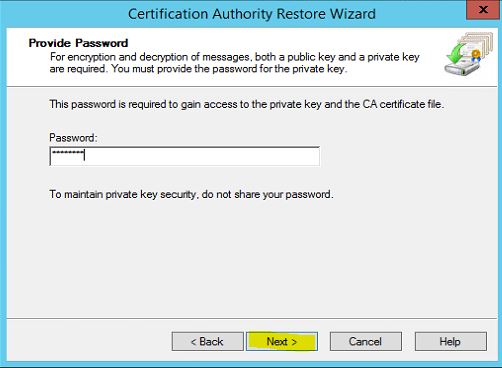
• Next window give option to enter the password we used to protect private key during the backup process. Once its enter click next to continue
• In next window click “Finish” to complete the import process
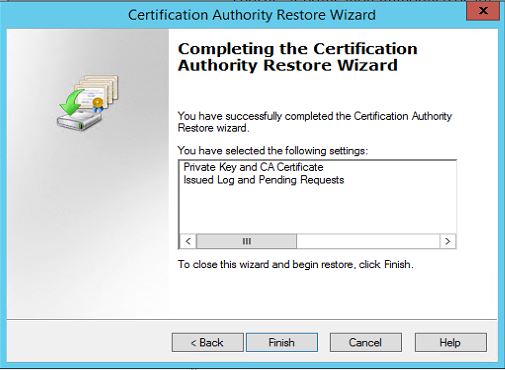
• Once its completed system will ask if it’s okay to start the certificate service again. Please proceed with it to bring service back online
Restore Registry info
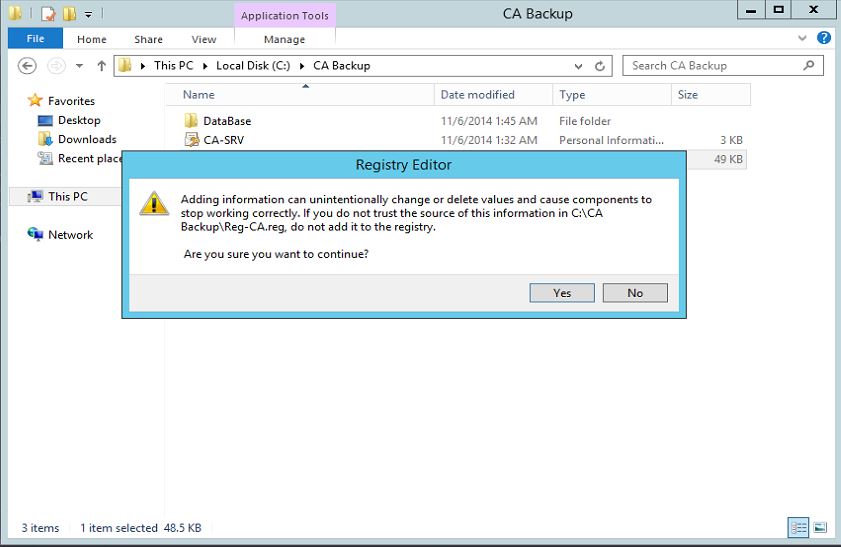
During the CA backup process we also backup registry key. It’s time to restore it. To do it open the folder which contains the backup reg key. Then double click on the key.
Then click yes to proceed with registry key restore.
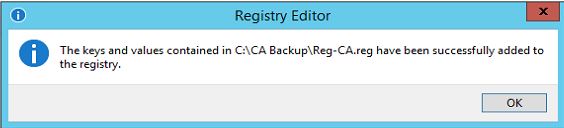
Once completed it will give confirmation about the restore.
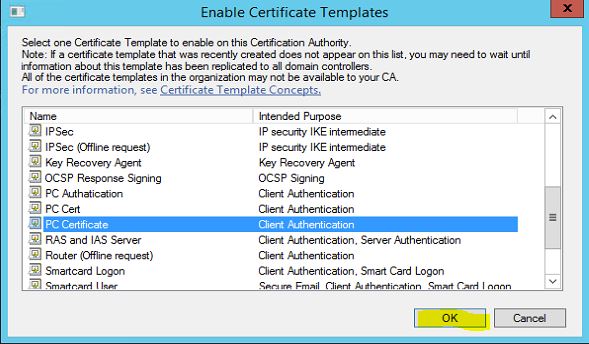
Reissue Certificate Templates
We have done with the migration process and now it’s time to reissue the certificates. I had template setup in windows 2003 environment called “PC Certificate” which will issue the certificates to the domain computers. Let’s see how I can reissue them.
• Open the Certification Authority Snap-in
• Right click on Certificate Templates Folder > New > Certificate Template to Reissue
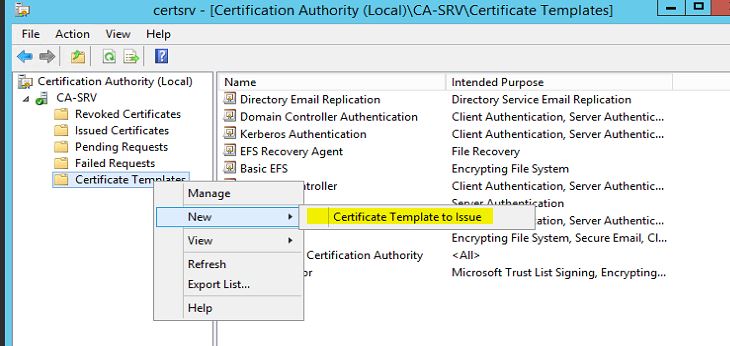
• From the certificate templates list click on the appropriate certificate template and click ok
Test the CA
In here I already had certificate template setup for the PC and set it to auto enroll. For the testing purposes I have setup windows 8 pc called demo1 and added it to canitpro.local domain. Once it’s loaded first time in server I open certification authority snap in and once I expanded the “Issued Certificate” section I can clearly see the new certificate it issued for the PC.
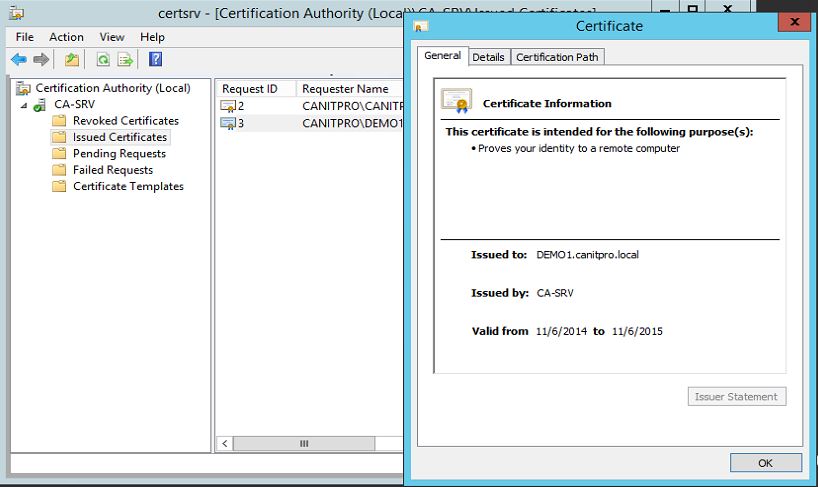
So this confirms the migration is successful.


Nice article Dishan,
Keep up the awsome work..!!!
Just a question. If the target server is a Windows 2008 R2 DC, can these steps be followed to migrate the CA?
MSS
Yes same method will apply for windows 2008 R2
Can the server have a different domain name?
Yes of cause, you can use any name
Hi !
NIce guide…, have googled alot to find some guide how to move from 2008 to 2012 but not find anyone.
But the question I have, i beginning you wrote that there are different server names on the sourec and target CA server, i just want to verify, there are no extra steps needed if the server names are diffrent as long as the CA server name will remain the same ?!
I have alst of customers wher they have SBS 2011 and im now migrating to server 2012 R2 and a 2-3 VM enviroment, and that goes nice and easy and there are alot of guides how to move exchange but verry litte how to move CA server.
I cant understand why MS cant give out any guides for this…
Best regards
Johan
Finland/Europe
Hi,
are you referring to the server FQDN ? it doesn’t matters the steps are same.
great guide ! thanks for doing this – Ive used it several times
may i migrate CA server from server 2012 R2 to 2016. has it have same steps above?
Yes it is. steps will be same
I too had the same questions regarding having the same host name on the new server. I followed Dishan's directions word for word and put the role on the new server with a different host name and all is well. Thanks for the article Dishan!
Hi Dishan,
Great article, just to clarify if we are restoring the CA database, private key and registry key to a new server then why are we re-issuing certificates as a last step?
Thanks,
Rahim
If the original ca server was a stand alone root, (on a domain controller) I can create the newly named server (Not a DC) as a stand alone root and restore the same way, correct?