
In privilege identity management, we can enforce MFA verification during the activation process. When this setting is in place, eligible users should have valid MFA claims to proceed with the role activation. But now we can use conditional access policies with PIM role activation. This will allow us to enforce more advanced controls than MFA on role activation. As an example, before the user activates high sensitive role, we can check if the user device is marked as complaint and if the device is Azure AD join. In this blog post, I am going to demonstrate how we can integrate conditional access policy with Azure AD PIM. The high-level tasks for the activity are as follows,
• Create Azure AD Conditional Access authentication context
• Setup Azure AD Conditional Access policy and assign it to the authentication context
• Tag authentication context in Azure AD PIM role settings
Create Azure AD Conditional Access authentication context
Authentication context is used to secure data and actions in applications such as SharePoint, MDCA ( Microsoft Defender for Cloud Apps), and Azure AD PIM. It also can use with your own custom applications or LOB applications. It works as a bridge to connect applications and conditional access policies. After the authentication context is created, we can assign a conditional access policy to it. Then within the application, we can tag the authentication context to apply the policy settings attached to it.
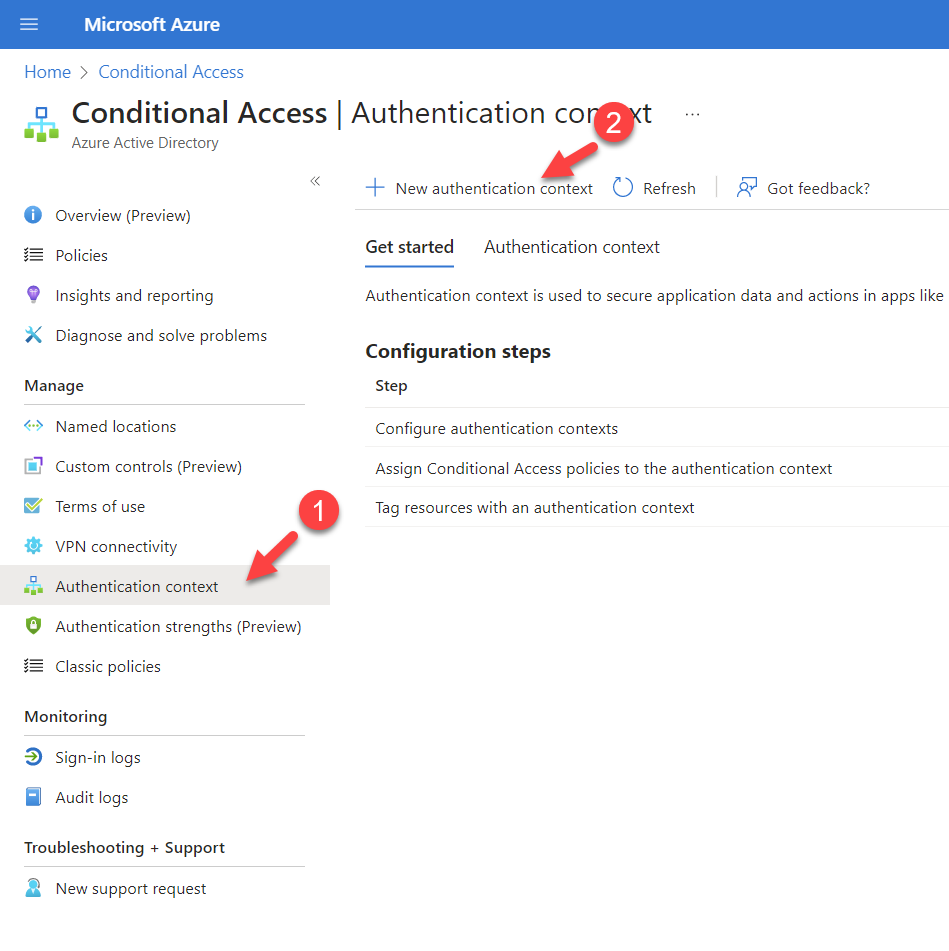
To create an access authentication context,
1) Log in to Azure portal https://portal.azure.com
2) Go to Azure AD Conditional Access | Authentication context and click on + New authentication context
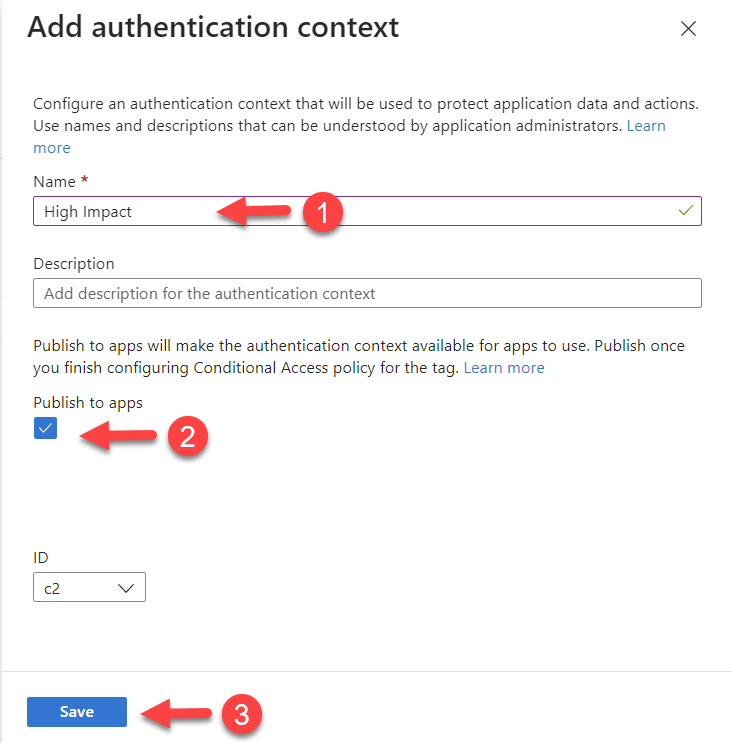
3) Then provide a name, and description for the authentication context. Make sure to select Publish to app option and that will allow using the authentication context in applications. Finally, click on Save to create the authentication context.
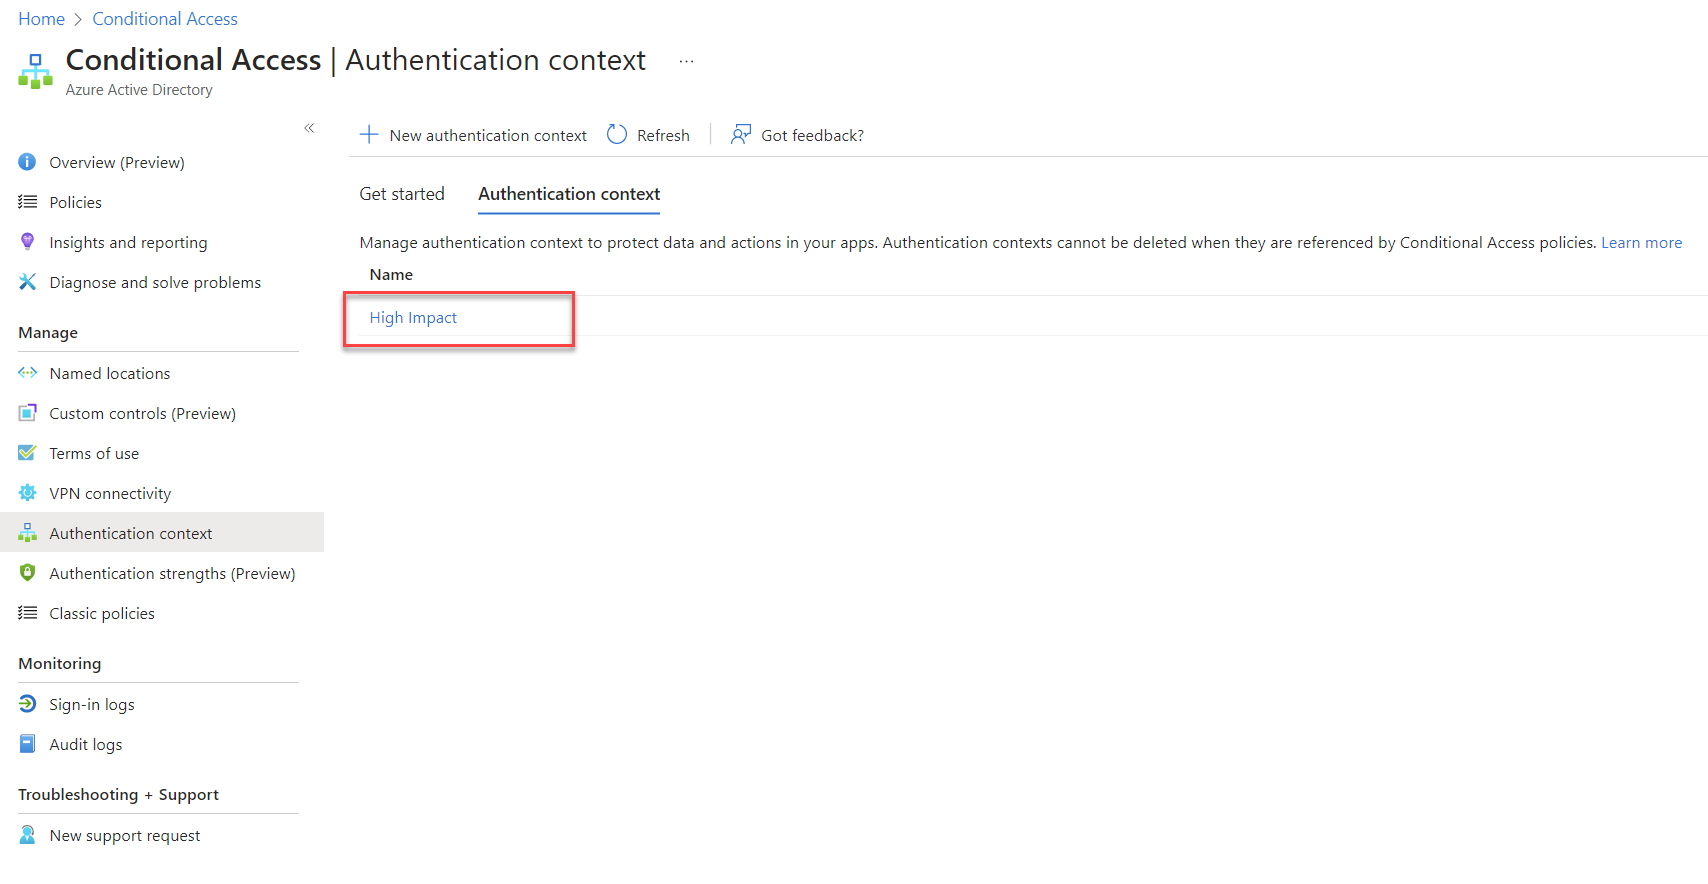
The next step of the configuration is to create an Azure AD conditional access policy.
Setup Azure AD Conditional Access policy and assign it to the authentication context
Now we have authentication context in place. Let’s go ahead and create Azure AD conditional access policy with relevant controls.
To do that,
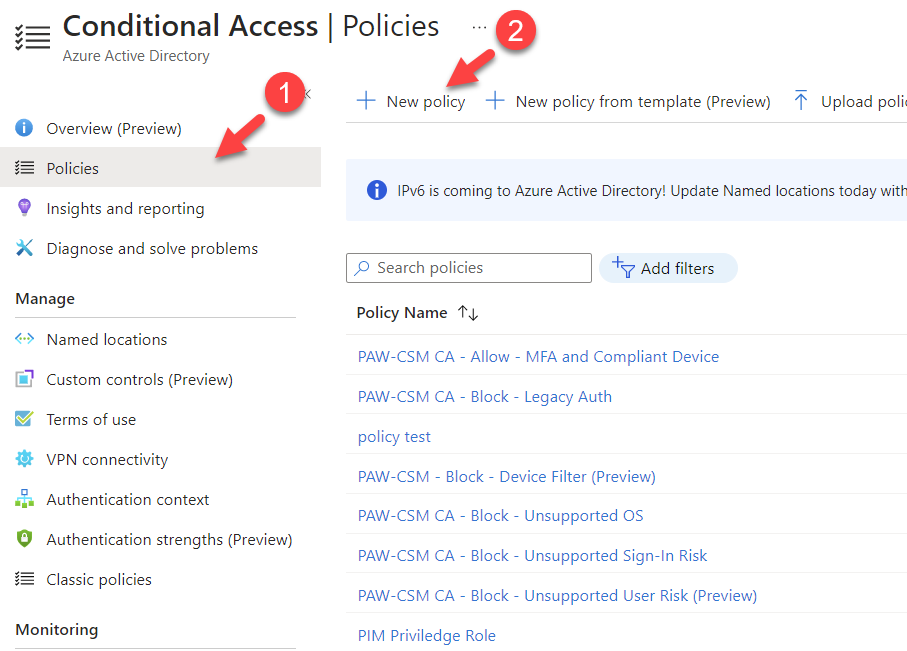
1) Log in to Azure portal https://portal.azure.com
2) Go to Azure AD Conditional Access | Policies and click on + New policy
3) In the policy configuration wizard, provide a name for the policy to start.
4) Then click on Users and select the scope. In this demo, I am going to apply it to all users.
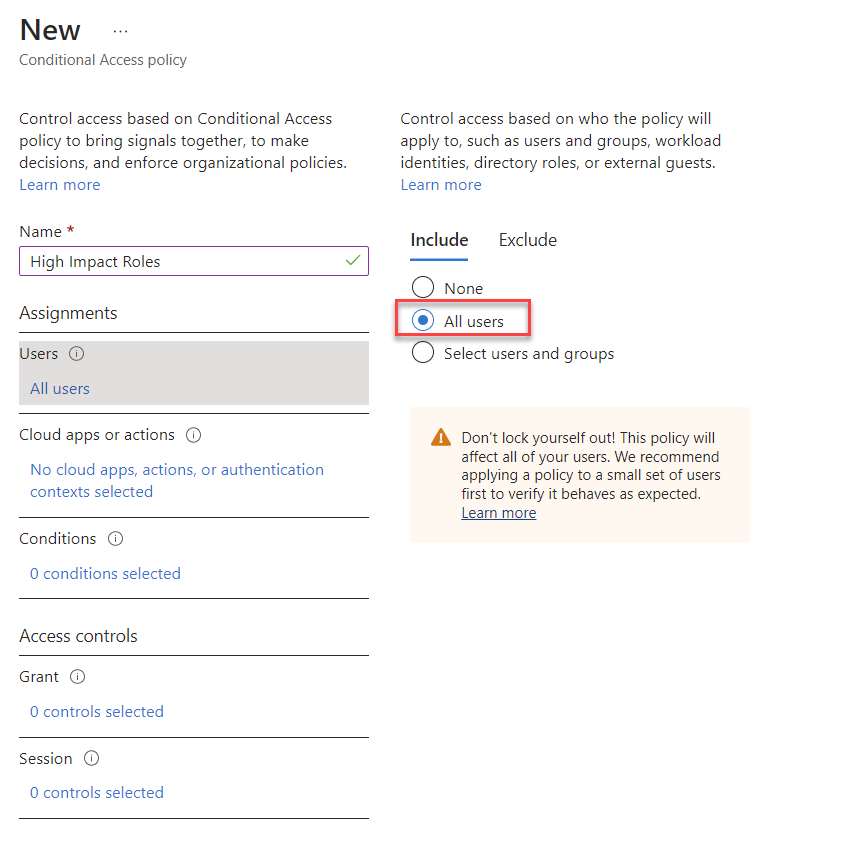
5) The next step is to assign the policy to the authentication context. To do that click on Cloud apps or actions and then from the drop-down select Authentication context
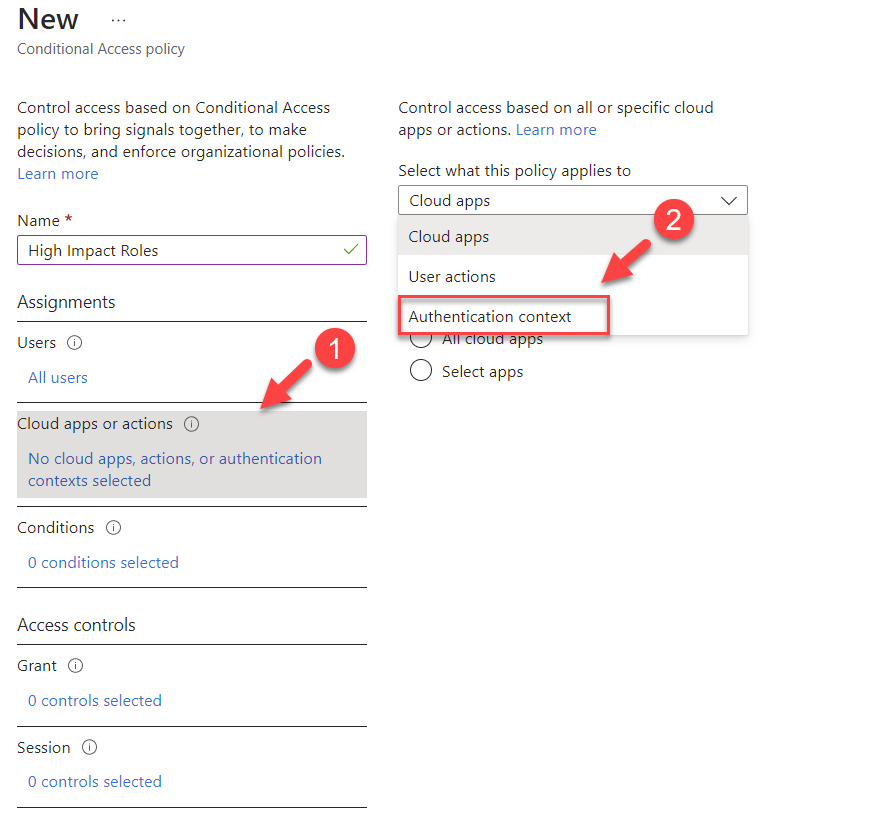
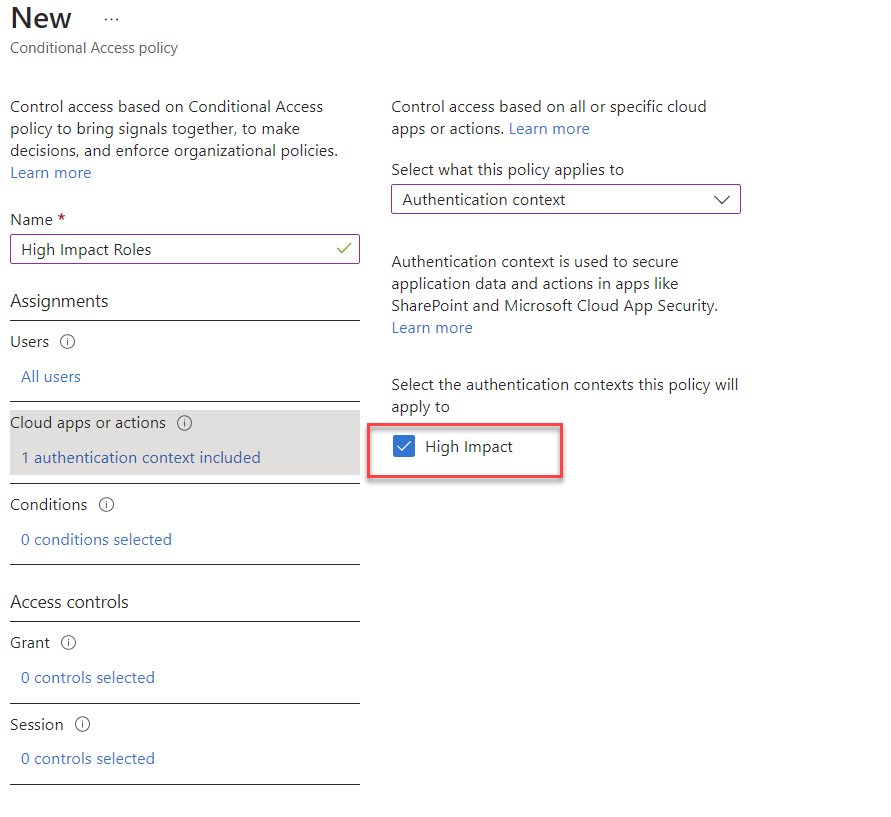
6) This will list down the authentication context we created under the previous section. Select it from the list.
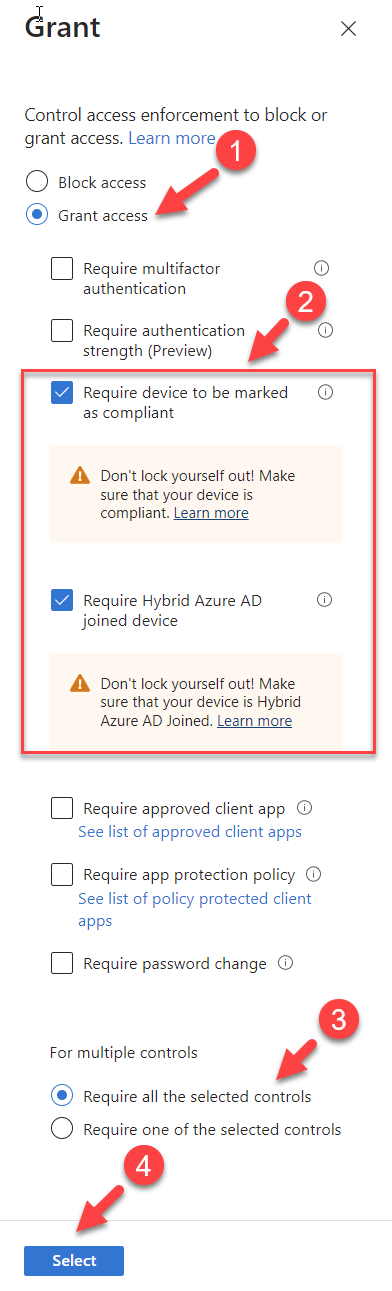
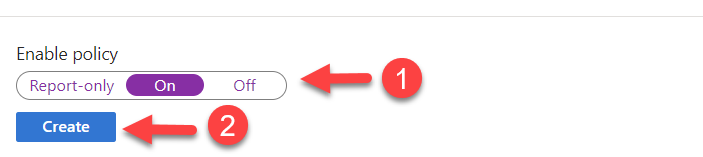
7) Then under access controls click on Grant. In this demo, I am going to allow access if the device is marked as compliant and Azure AD Join. Select the relevant controls as listed below and click Select.
8) Finally, change the policy mode to On and click on Create.
In the next section let’s see how we can integrate the conditional access policy with Azure AD PIM.
Tag authentication context in Azure AD PIM role settings
Now we have the authentication context as well as the conditional access policy. The next step is to tag this authentication context in PIM role settings to enforce the new controls.
In my demo environment, I already have PIM role configured. More info about PIM role configuration is available at https://learn.microsoft.com/en-us/azure/active-directory/privileged-identity-management/pim-how-to-add-role-to-user
To change the PIM settings,
1) Log in to Azure portal https://portal.azure.com
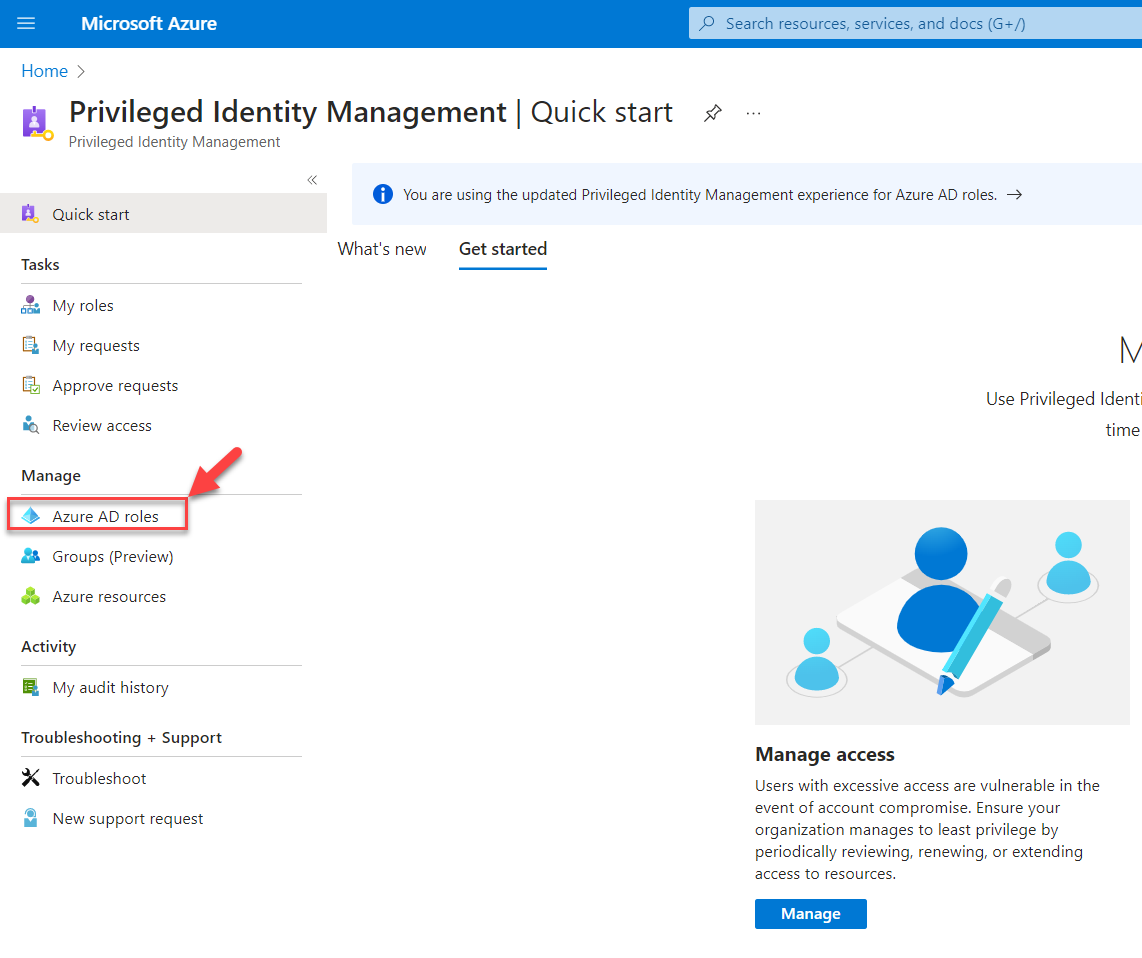
2) Then go to Privileged Identity Management | Azure AD Roles
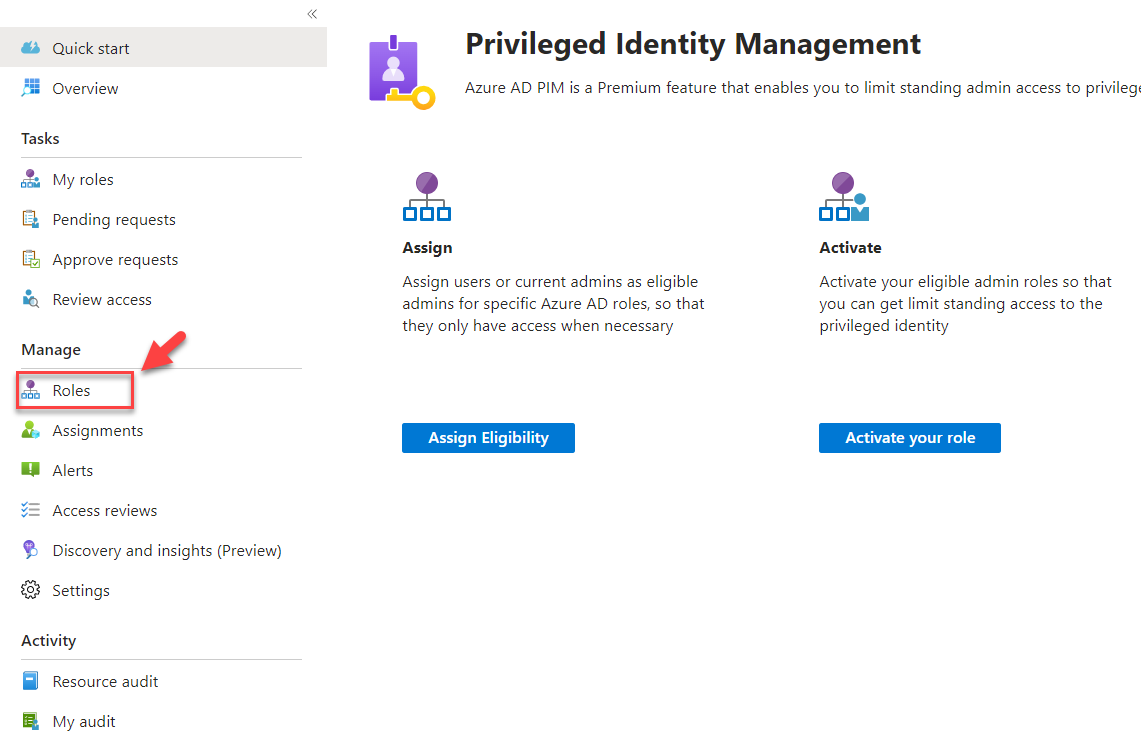
3) In the next window click on Roles under the Manage section
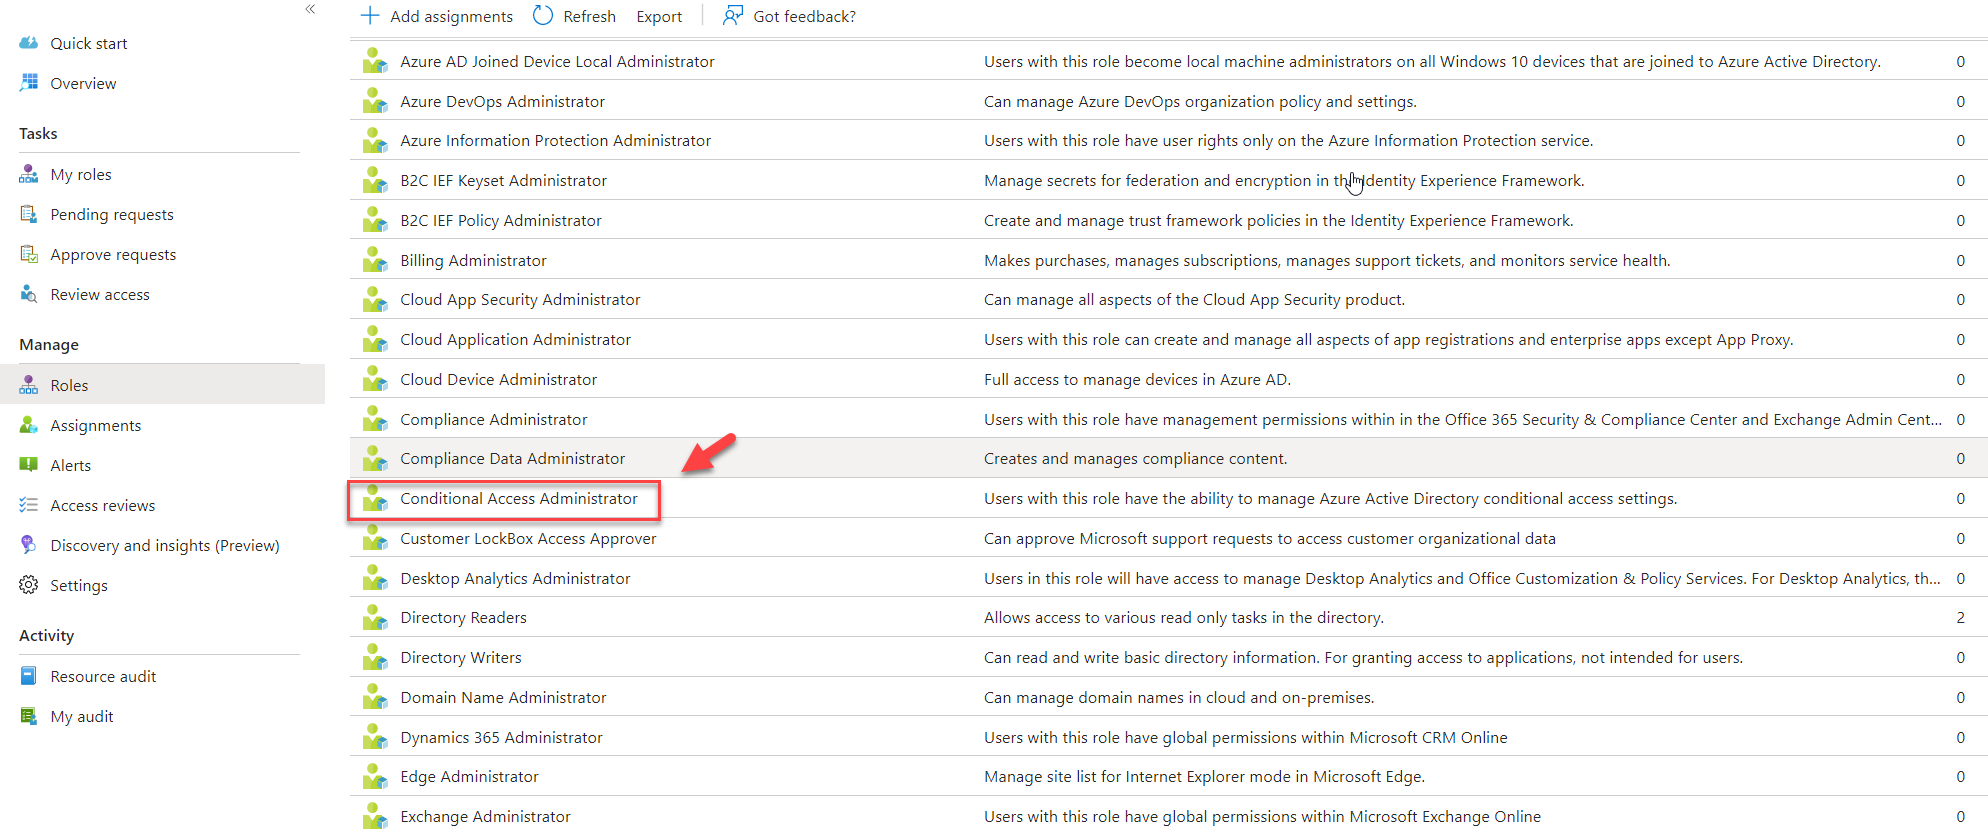
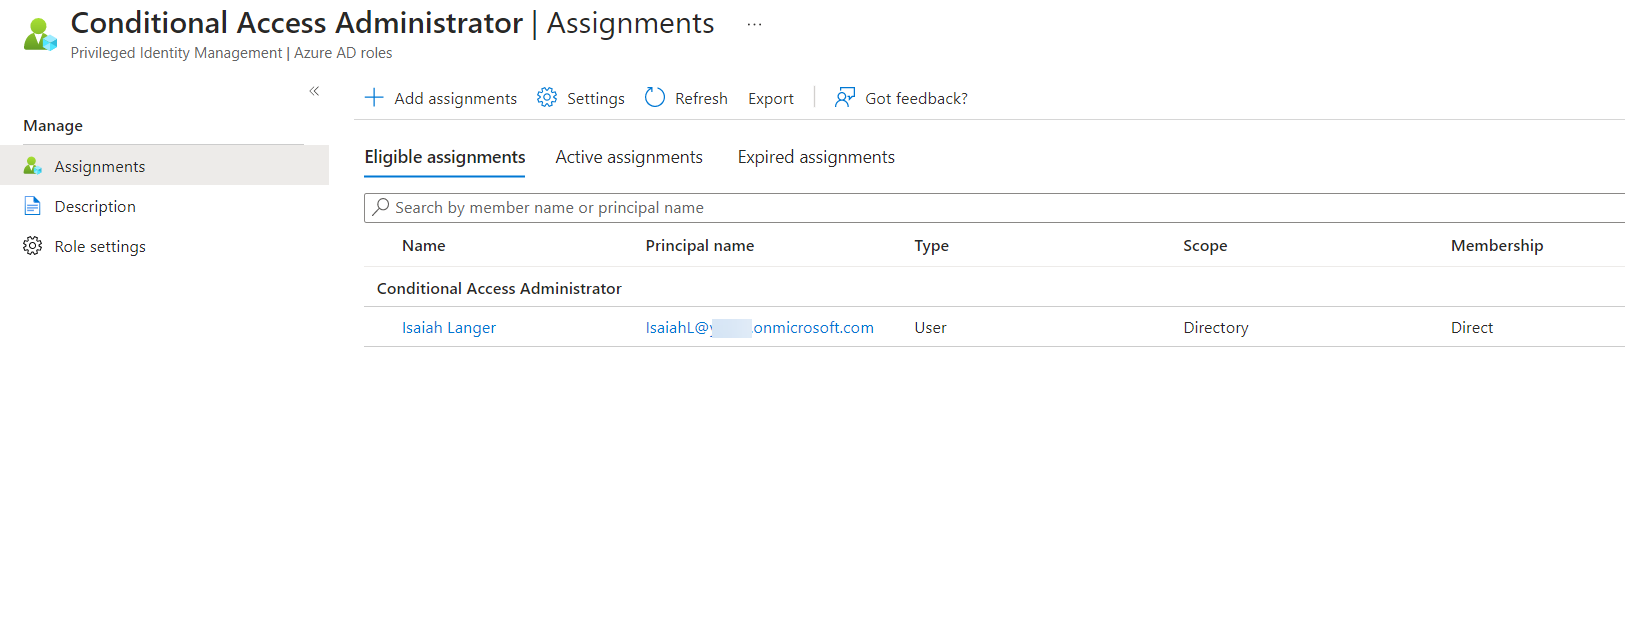
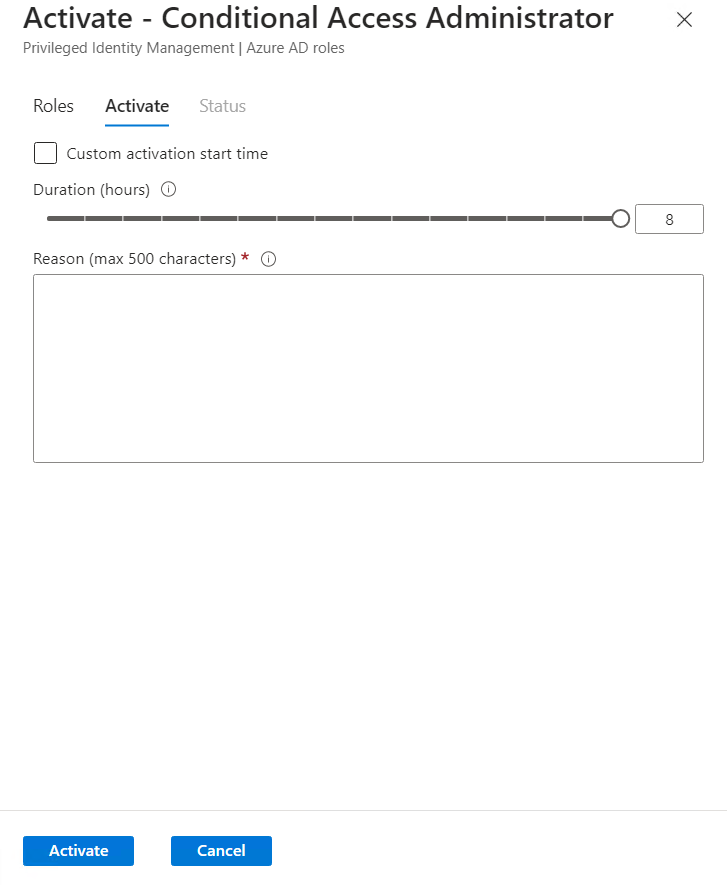
4) From the list, click on the role you selected. In this demo, I am going to use the Conditional Access Administrator role.
5) As we can see I already have an eligible assignment configured.
6) To change the settings click on the Role settings.

7) Then to change the settings click on Edit
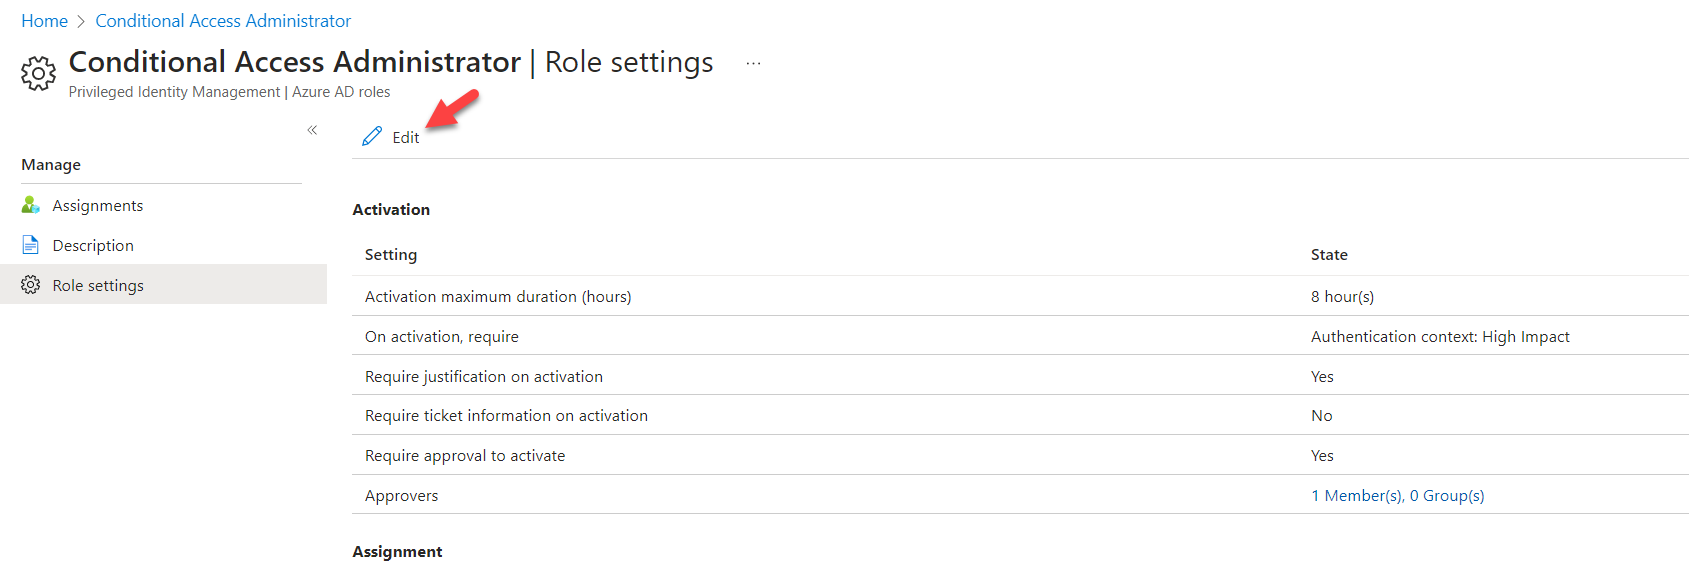
8) In there we can see the Azure AD Conditional Access authentication context (Preview) option under the activation settings. Click on that and then on the drop-down select the authentication context we created in the previous step.
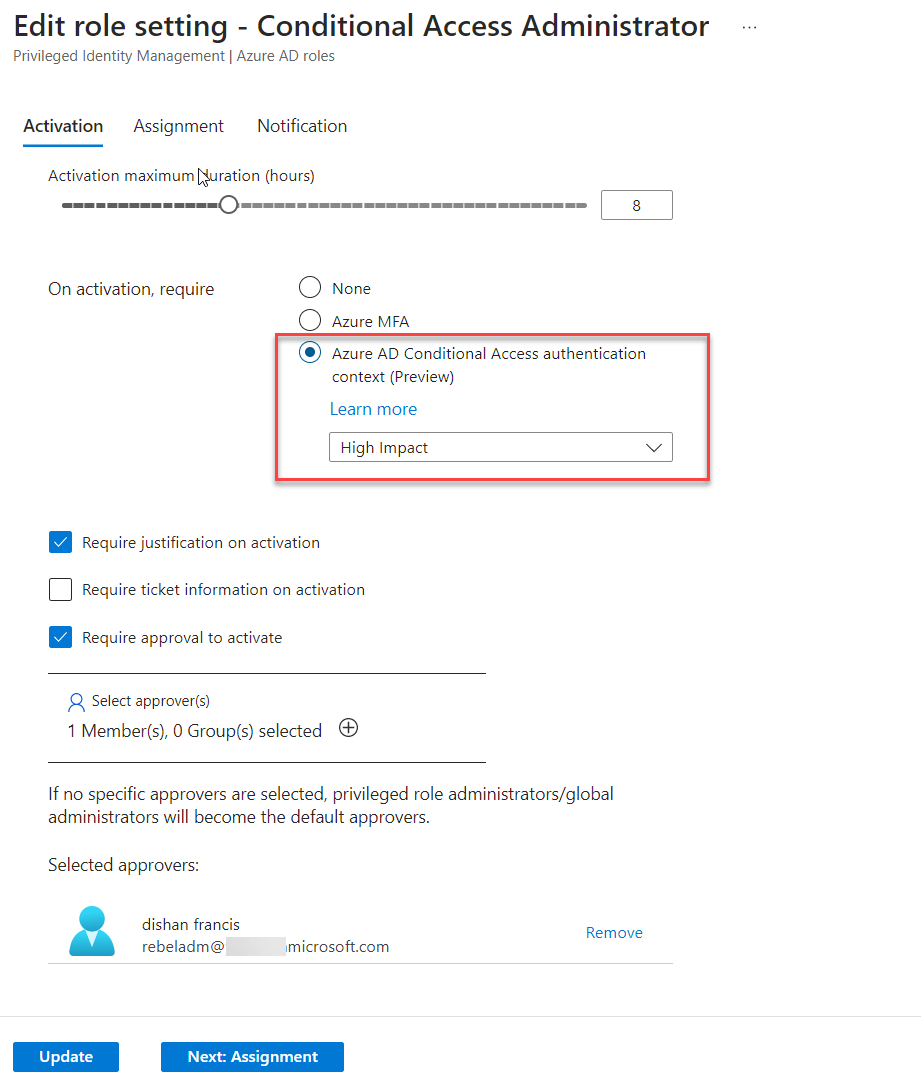
9) Finally, click on Update to apply the new changes.
This completes the configuration steps. The next step is to test this new configuration.
Testing
In my demo scenario, I want to make sure when an eligible user activates the role, he uses Azure AD joined compliant devices. For testing purposes, I am going to log in as an eligible user from a non-managed device and try to activate the role.
To do that,
1) I logged in to https://portal.azure.com as the test user
2) Then go to Privileged Identity Management | My roles
3) Under the roles select the relevant role and click on Activate

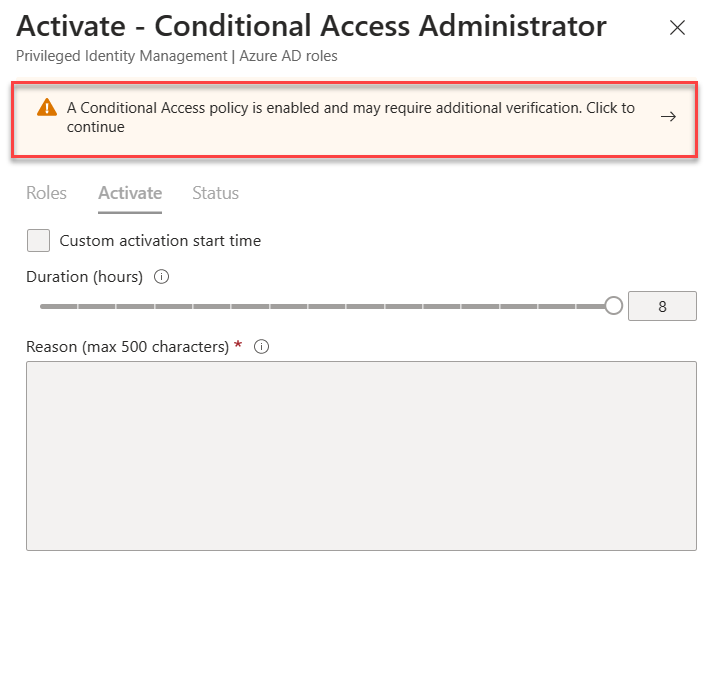
4) In the new window, now we can just directly go ahead and activate, there is a message in there saying “A Conditional Access policy is enabled and may require additional verification. Click to Continue”. To proceed please click on it.
5) As expected it issued an error saying the role only can activate from a managed device.

6) Also if I logged in from a managed device, now I can see the option to activate.
As we can see before PIM role activation the conditional access controls in place is verified. This marks the end of this blog post, If you have any further questions, feel free to contact me at rebeladm@live.com.

