
Attributes can explain an object more precisely. Active Directory object types have predefined attributes which can use to store values and use later (query) when required. Active Directory schema also accepts custom attributes. Based on business requirements some time organizations will have to introduce custom attributes to object classes. On most occasions, it is related to application integration requirements with Active Directory. If it’s a hybrid environment, it may also require syncing these custom attributes values with Entra ID. In one of my previous blog posts, I explained how we can sync custom Active Directory attributes with Entra ID – Step-by-Step Guide: How to sync Custom Active Directory Attributes to Azure AD?
But this is for corporate users. In certain situations, we may also need to collect attributes values for guest users. As an example, let’s assume we have an application that is open for guest access. We enable self-signup process for the guest users. Each guest user is issued with an organization id and unique user token value. We need to collect this information during sign-up so we can identify the users based on the organization. However, there are no such attributes available in Entra ID. Then how we can do this? We can create custom attributes in the Azure portal and use them with user flows now. This will allow collecting these custom attributes values during the guest user sign-up process and storing data in Entra ID. Then later we can use Microsoft Graph API to read/update these values as necessary. In this blog post, I am going to demonstrate how we can add custom attributes to user flow.
Create Custom Attributes
In my demo environment, I have an enterprise app(rebeladminapp01) which is allowed for guest user access. This is already configured as an enterprise app in Entra ID. During the guest user sign-up for the first time, I like to collect values for two attributes called, “Organization ID” and “User Token“. These will help later for the user identification process.
Before we use these custom attributes first, we need to add those to Entra ID. To do that,
1) Login into Azure as Entra ID Administrator
2) Go to Entra ID | External Identities
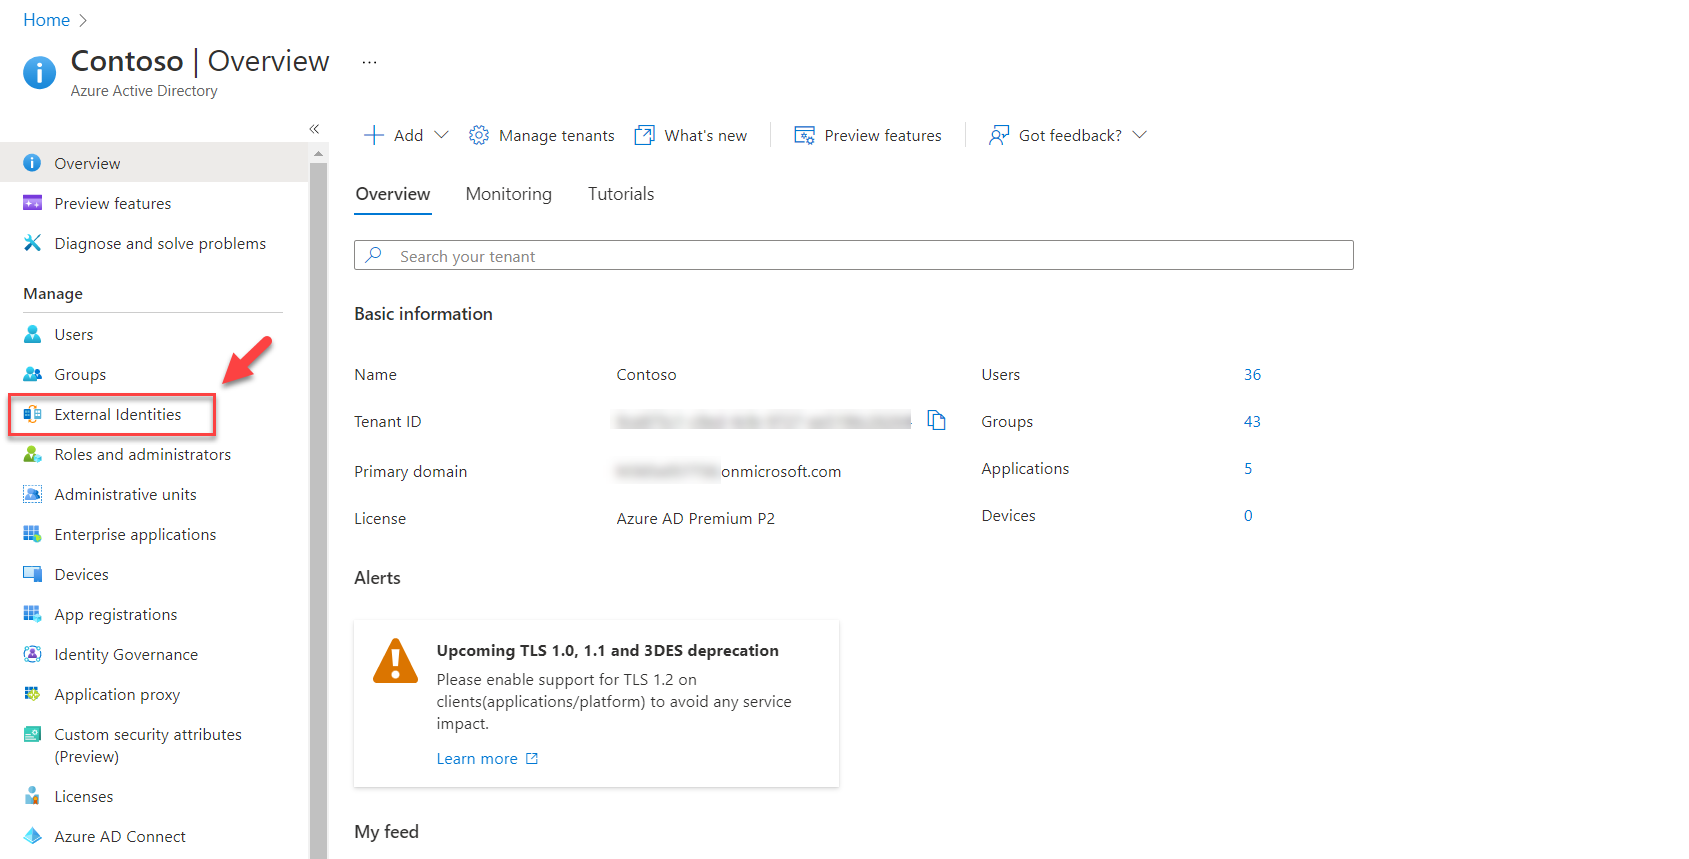
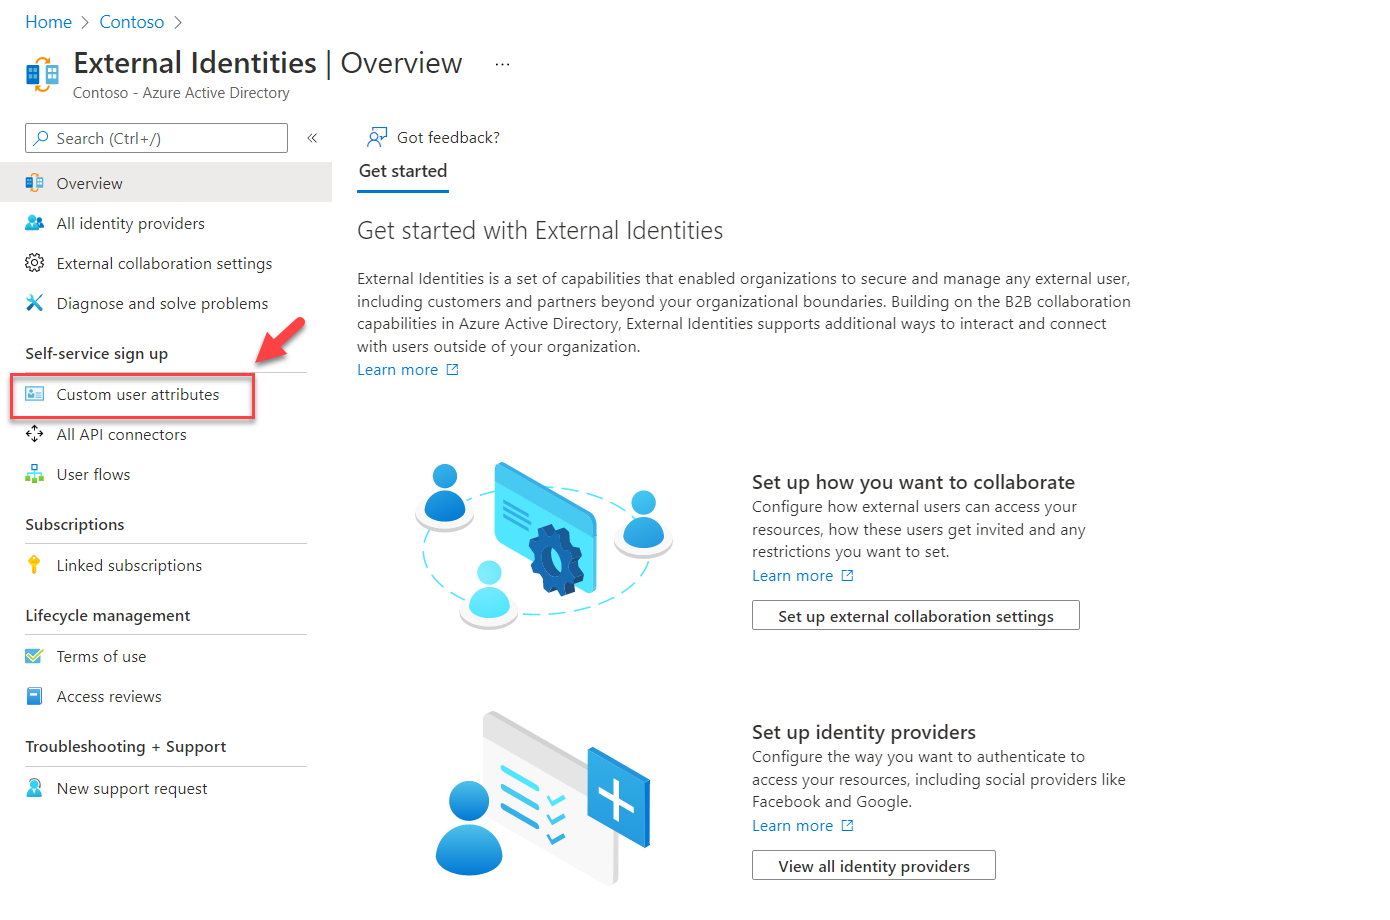
3) Then click on Custom user attributes
4) This will list down the list of built-in attributes. Click on + Add to create a new attribute.
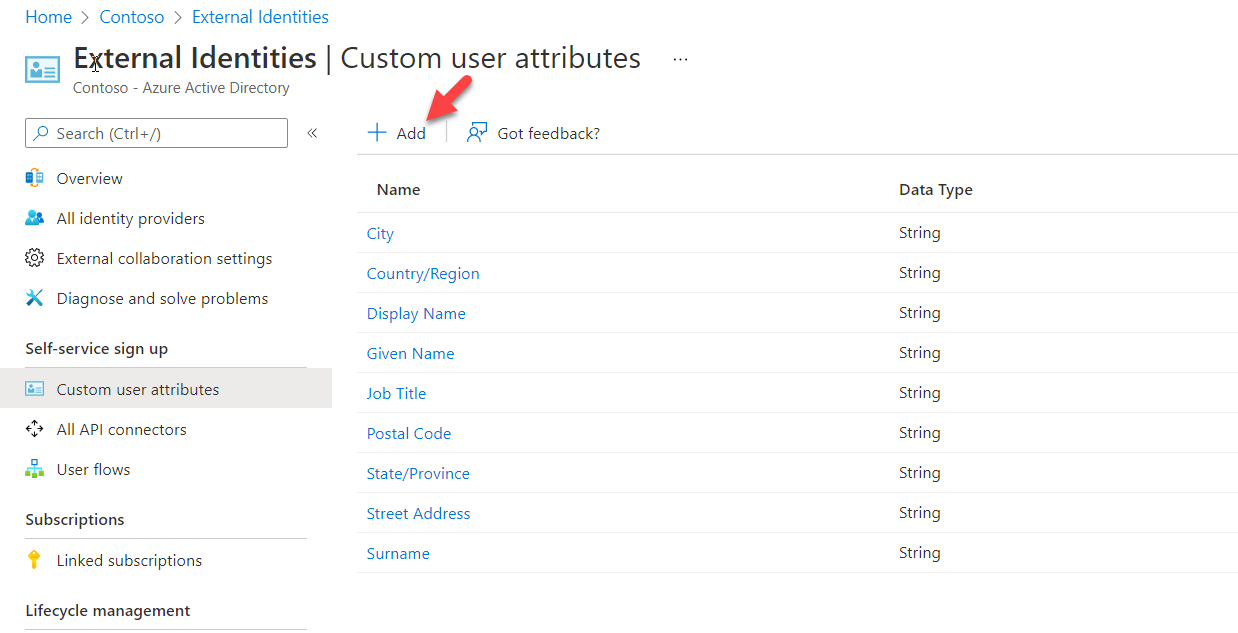
5) In the new window, type the name of the attribute and provide the data type. It is also recommended to a provided brief description of the attribute for future references.

After the settings are in place, click on Create.
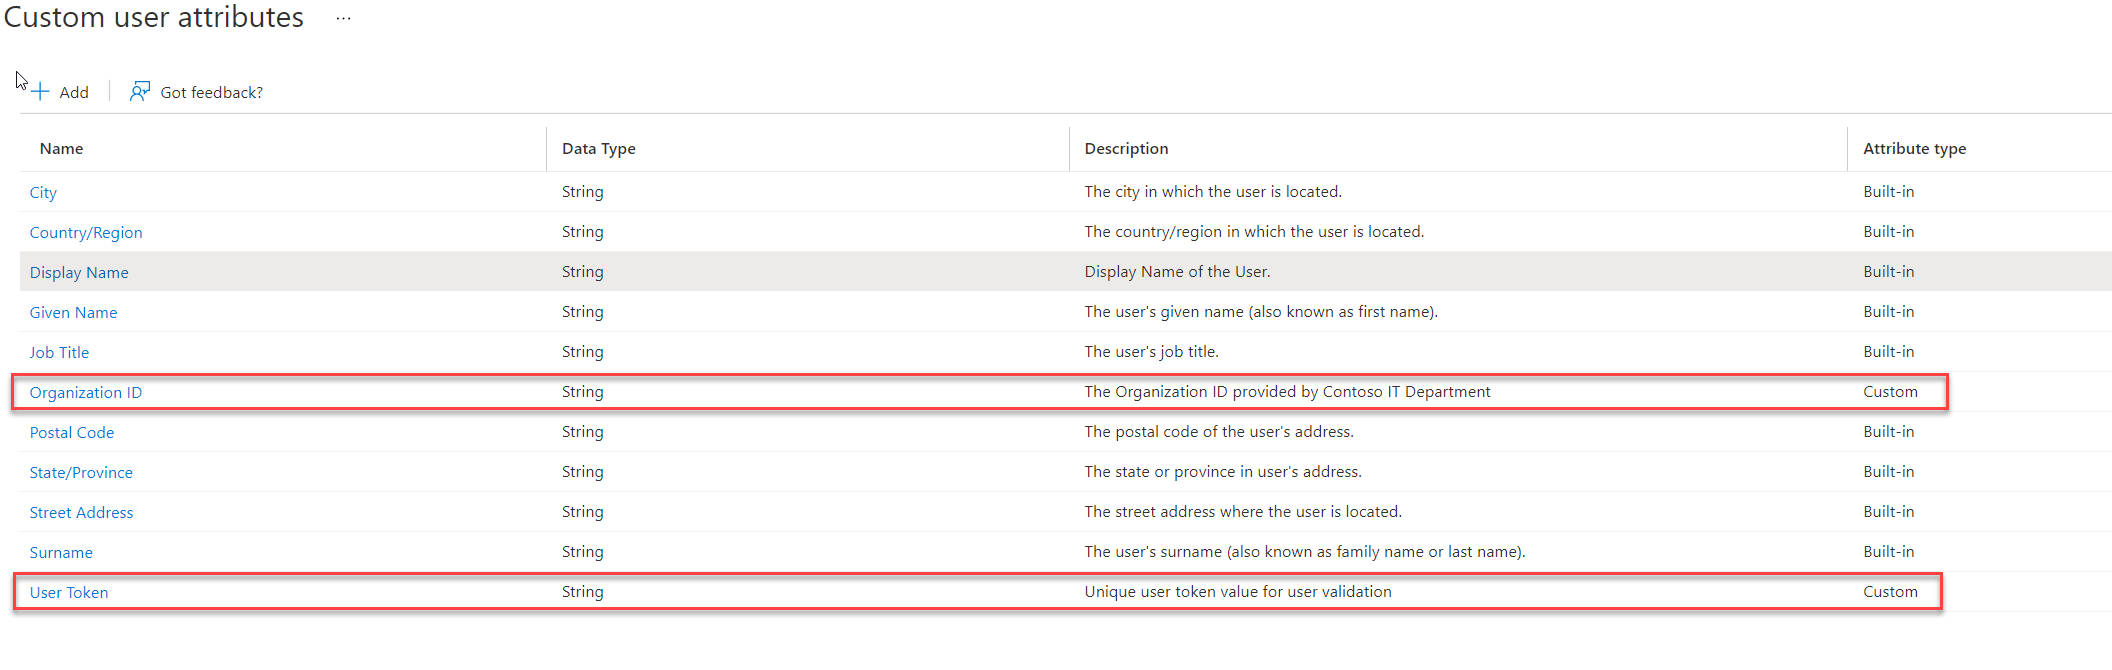
6) Using the same method, I created the second custom attribute I needed.
Enable Entra ID Self-service Sign up
By default, the guest user self-service sign-up feature is not enabled for the tenant. Before we go ahead and create user flow, we need to enable this feature. To do that,
1) Login into Azure as Azure AD Administrator
2) Go to Entra ID | External Identities
3) Then click on External Collaboration Settings
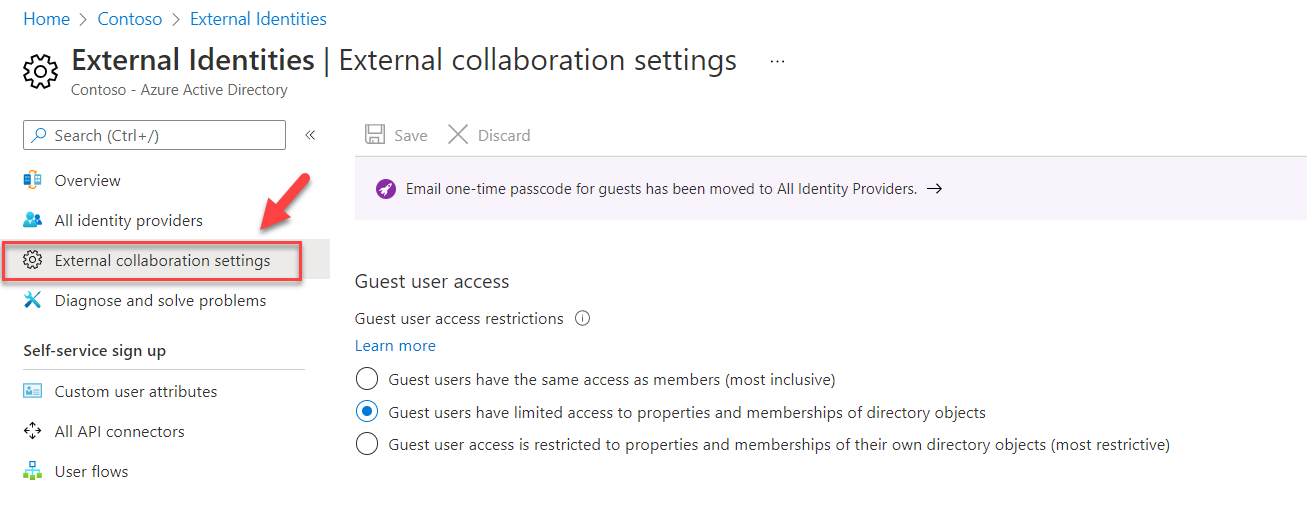
4) Then select Yes to Enable guest self-service sign up via user flows.
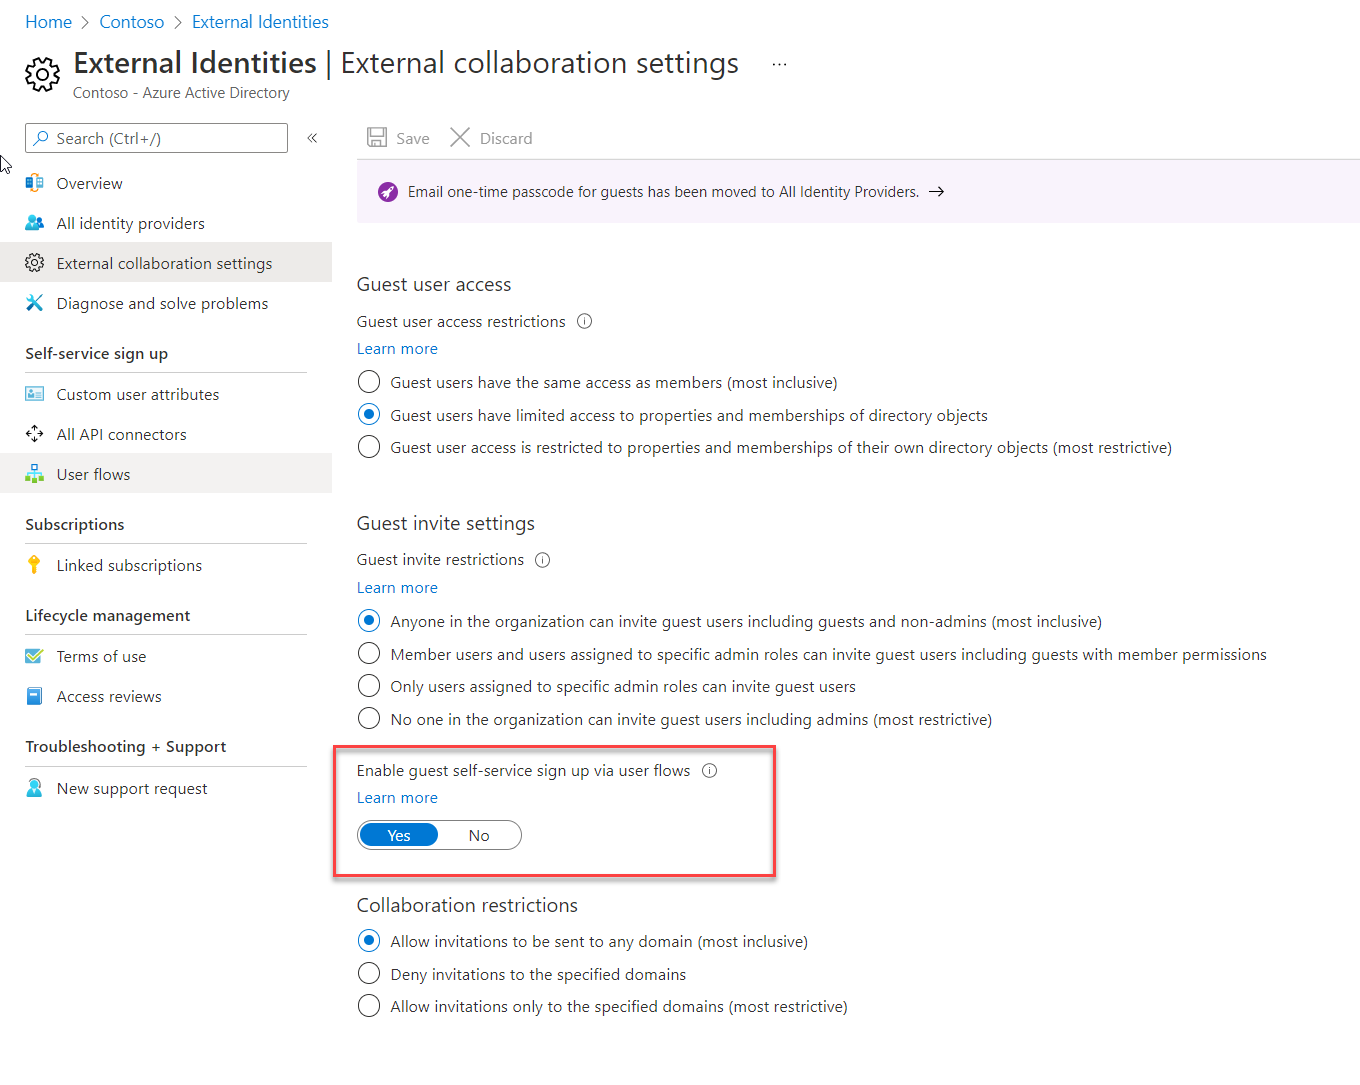
5) Finally, to apply changes click on Save.
Create User Flow
The next step of the configuration is to create a new user flow. Then we can associate relevant attributes and applications to it. To create user flow,
1) Login into Azure as Entra ID Administrator
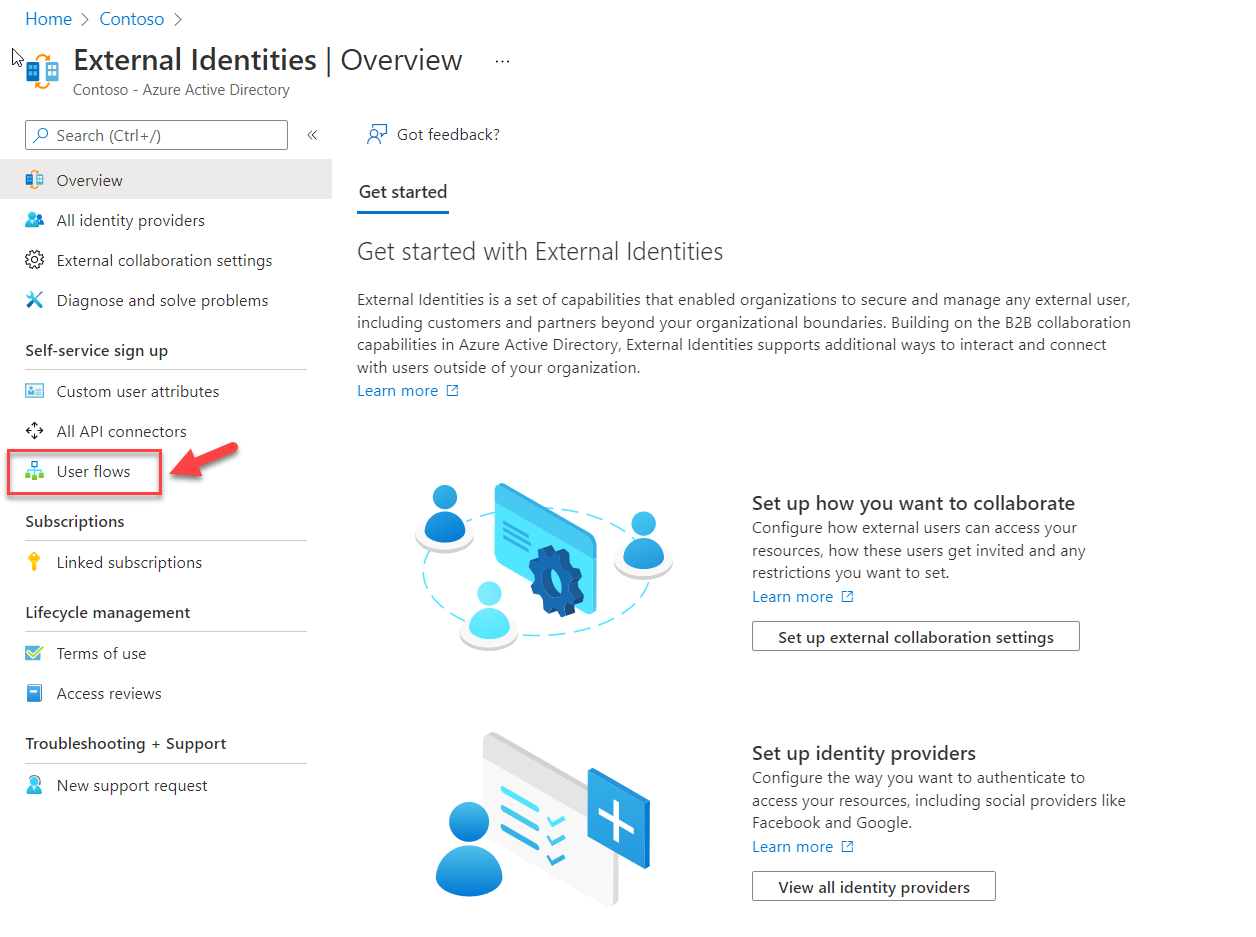
2) Go to Entra ID | External Identities
3) Click on user flows
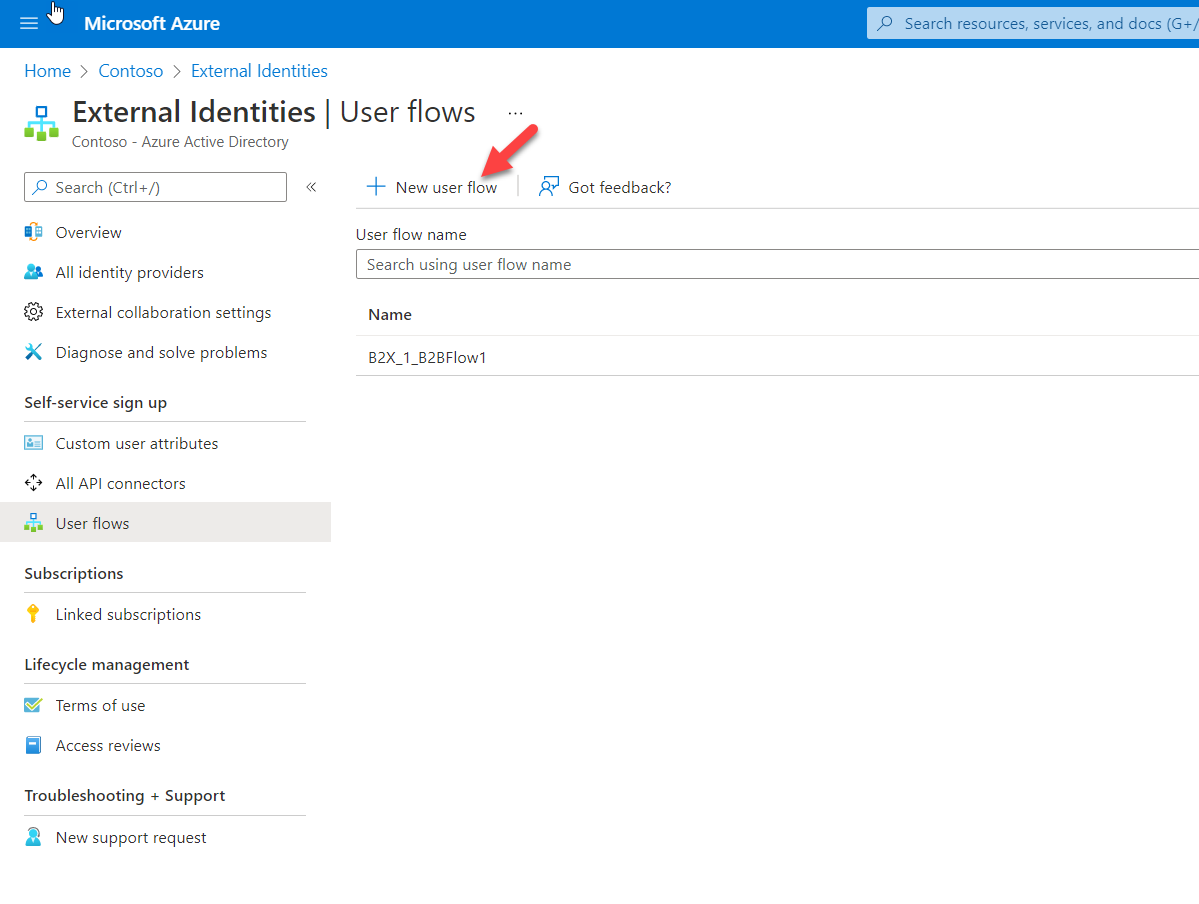
4) To create new user flow, click on + New user flow
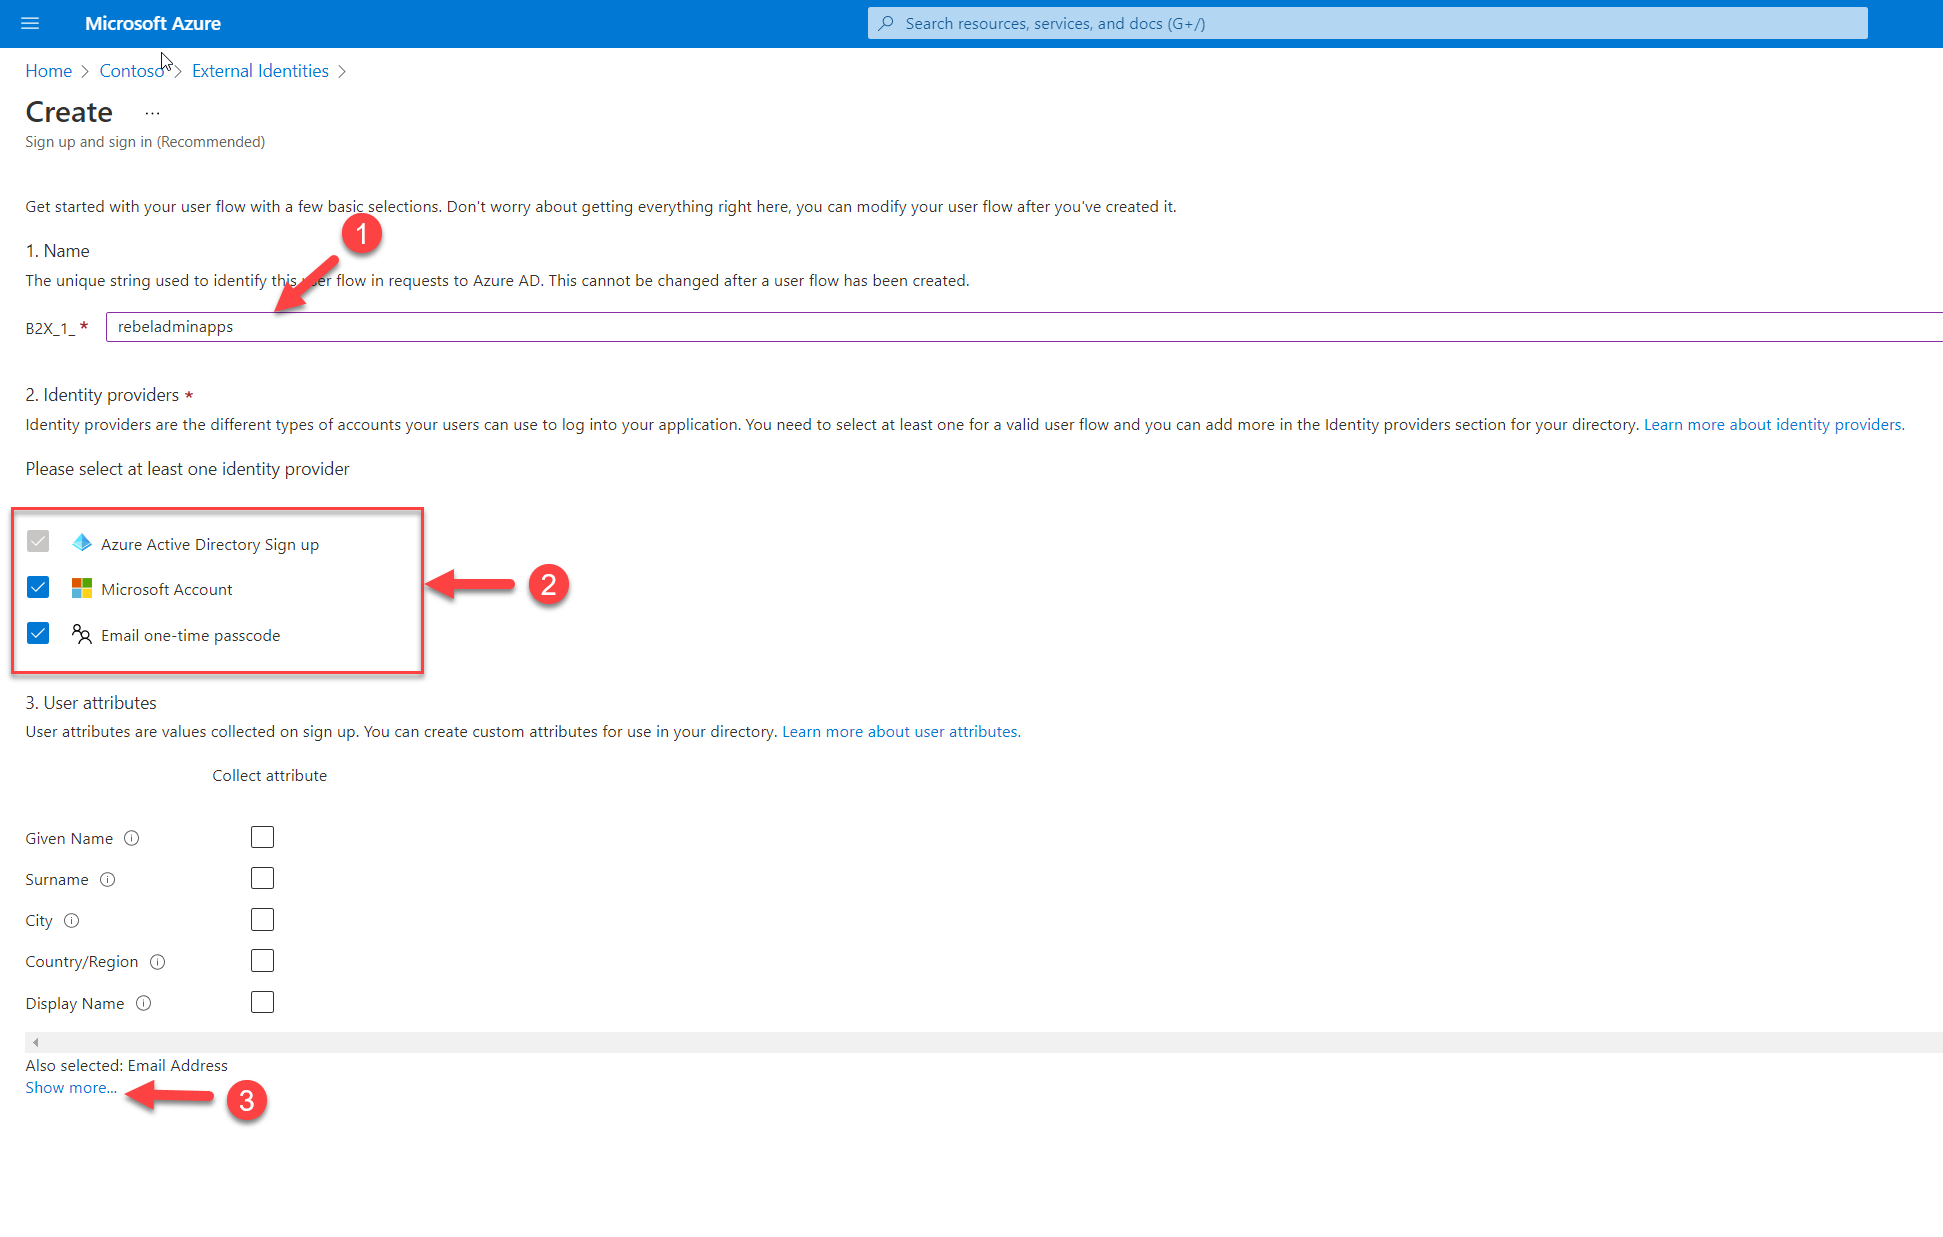
5) This will open up a new window. As the first step, provide a name for the user flow. Then under the identity providers section, select the providers as per organization requirements. At the end under the user attributes section click on Show more… to see the full list of attributes.
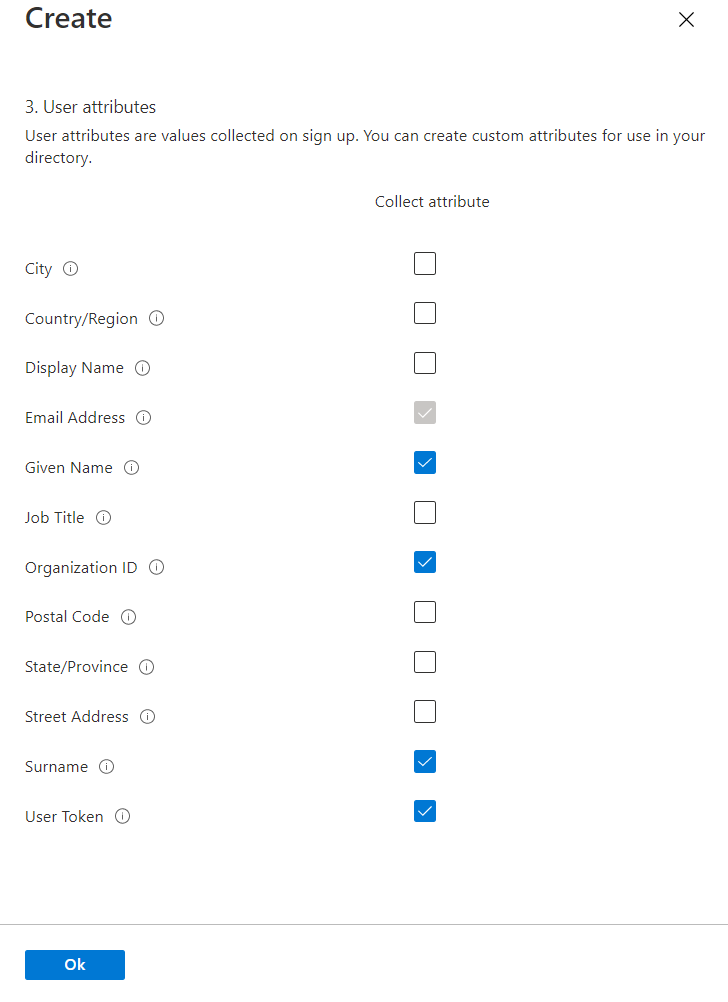
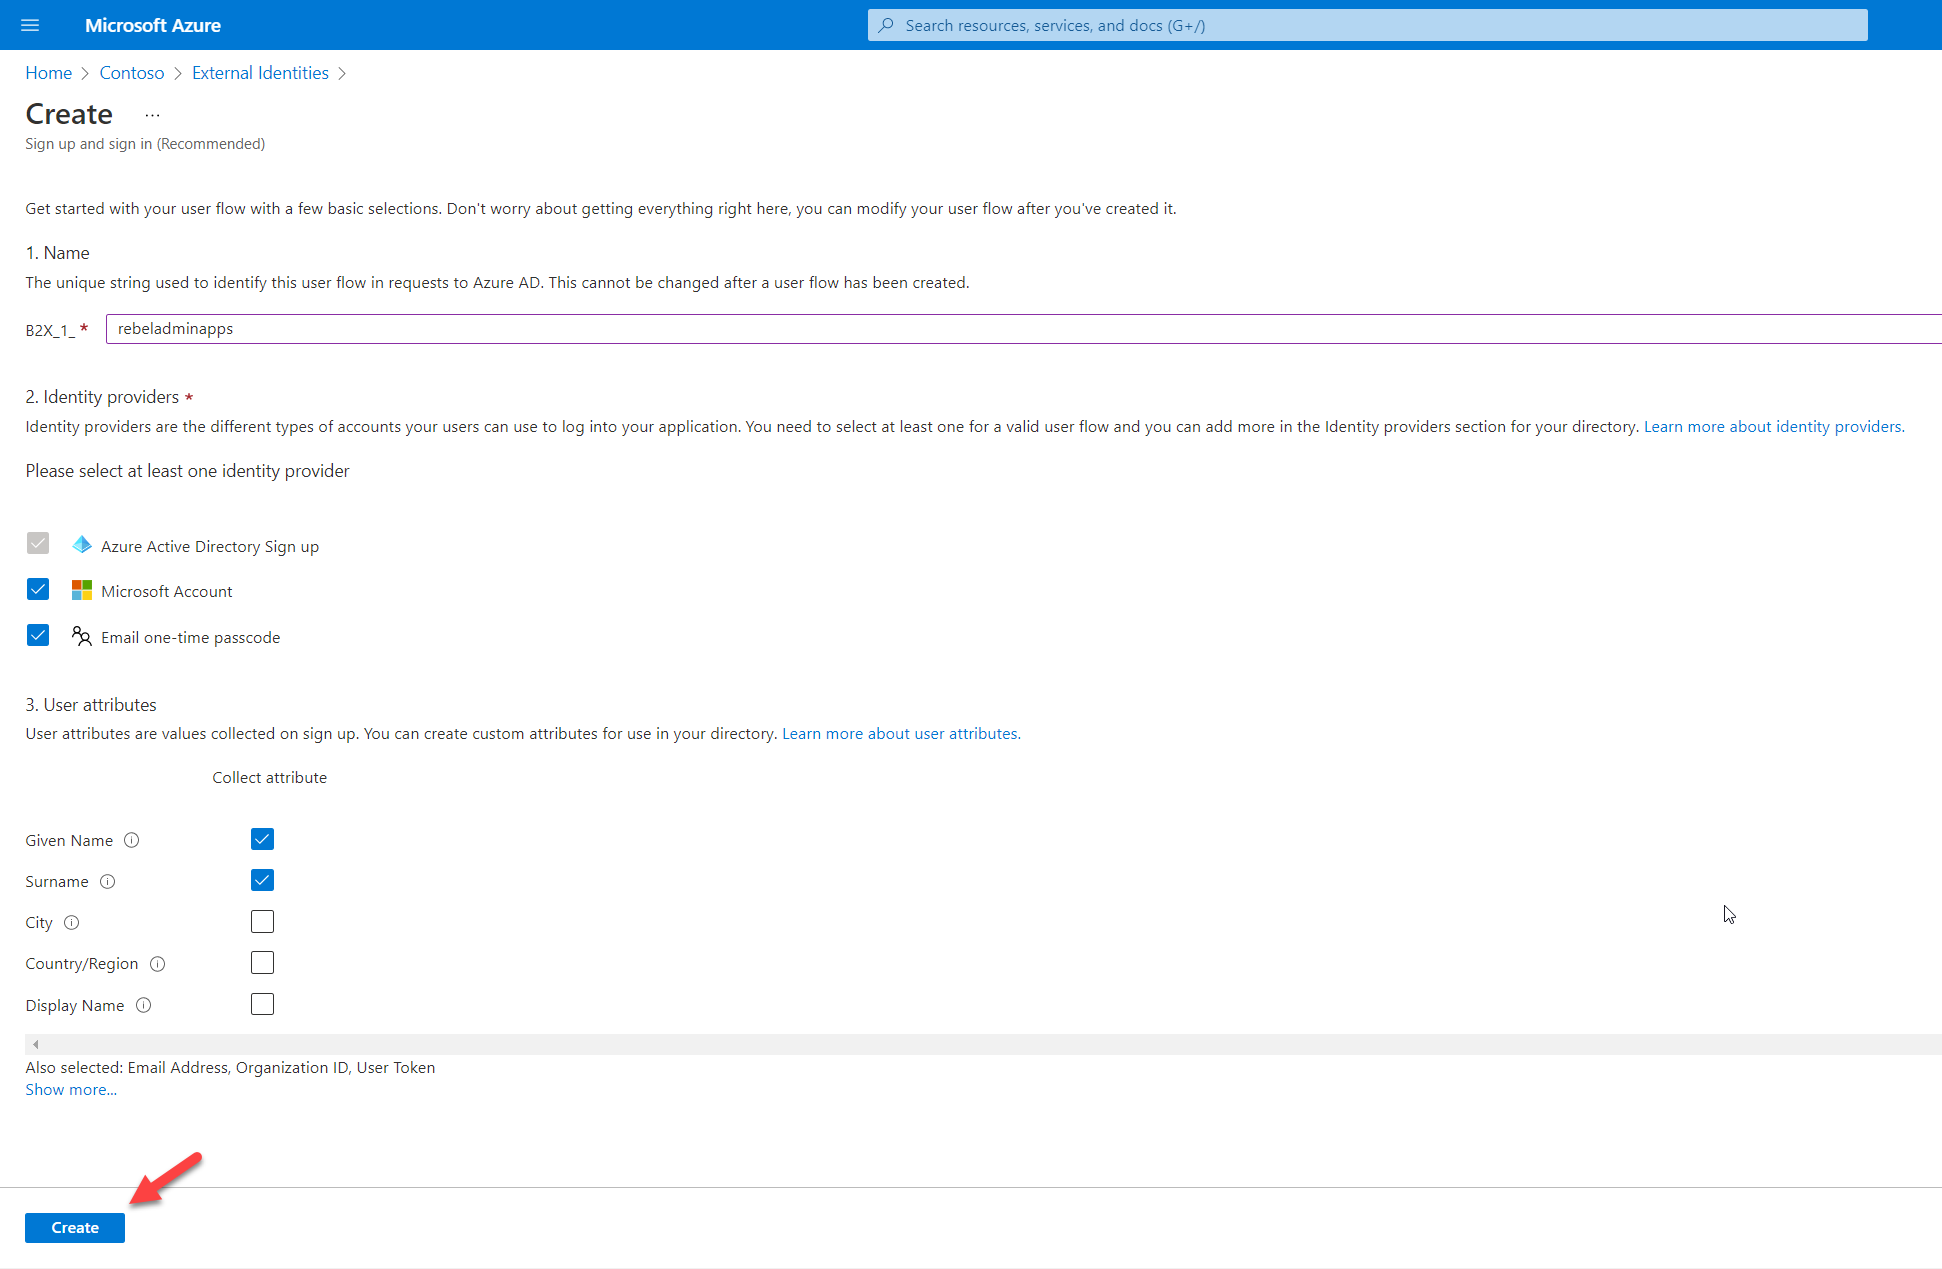
From the list, select the relevant attributes. In my demo, I like to collect Given name, Surname, Email Address (default), and two new custom attributes we created in previous steps which are Organization ID and User Token. Once the selection is done, click on OK to complete the process.
6) Finally. Click on Create to complete the task.
Add application to user flow
Now we have the user flow with relevant attributes. The next step is to add the enterprise application to the user flow. To do that,
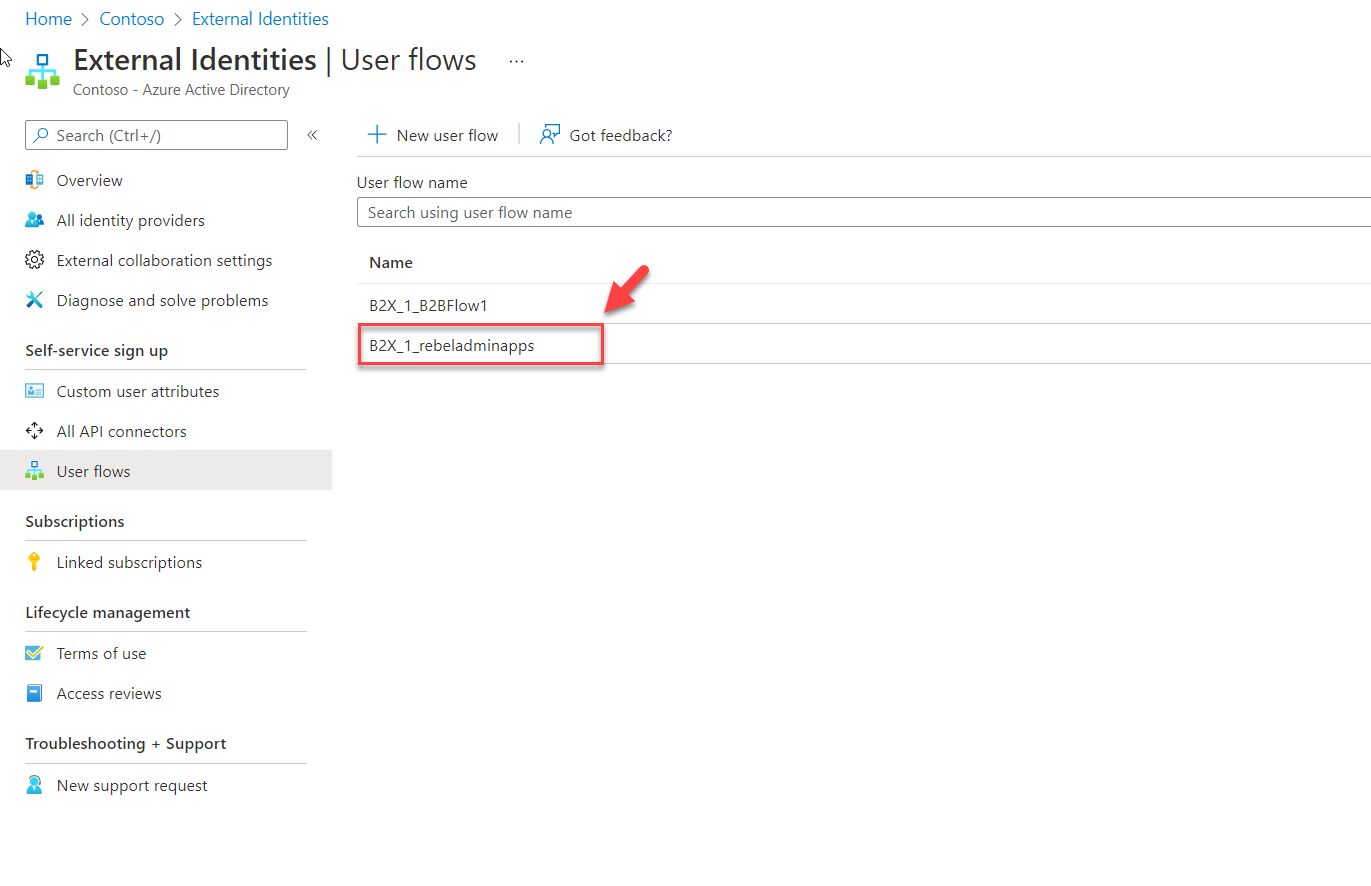
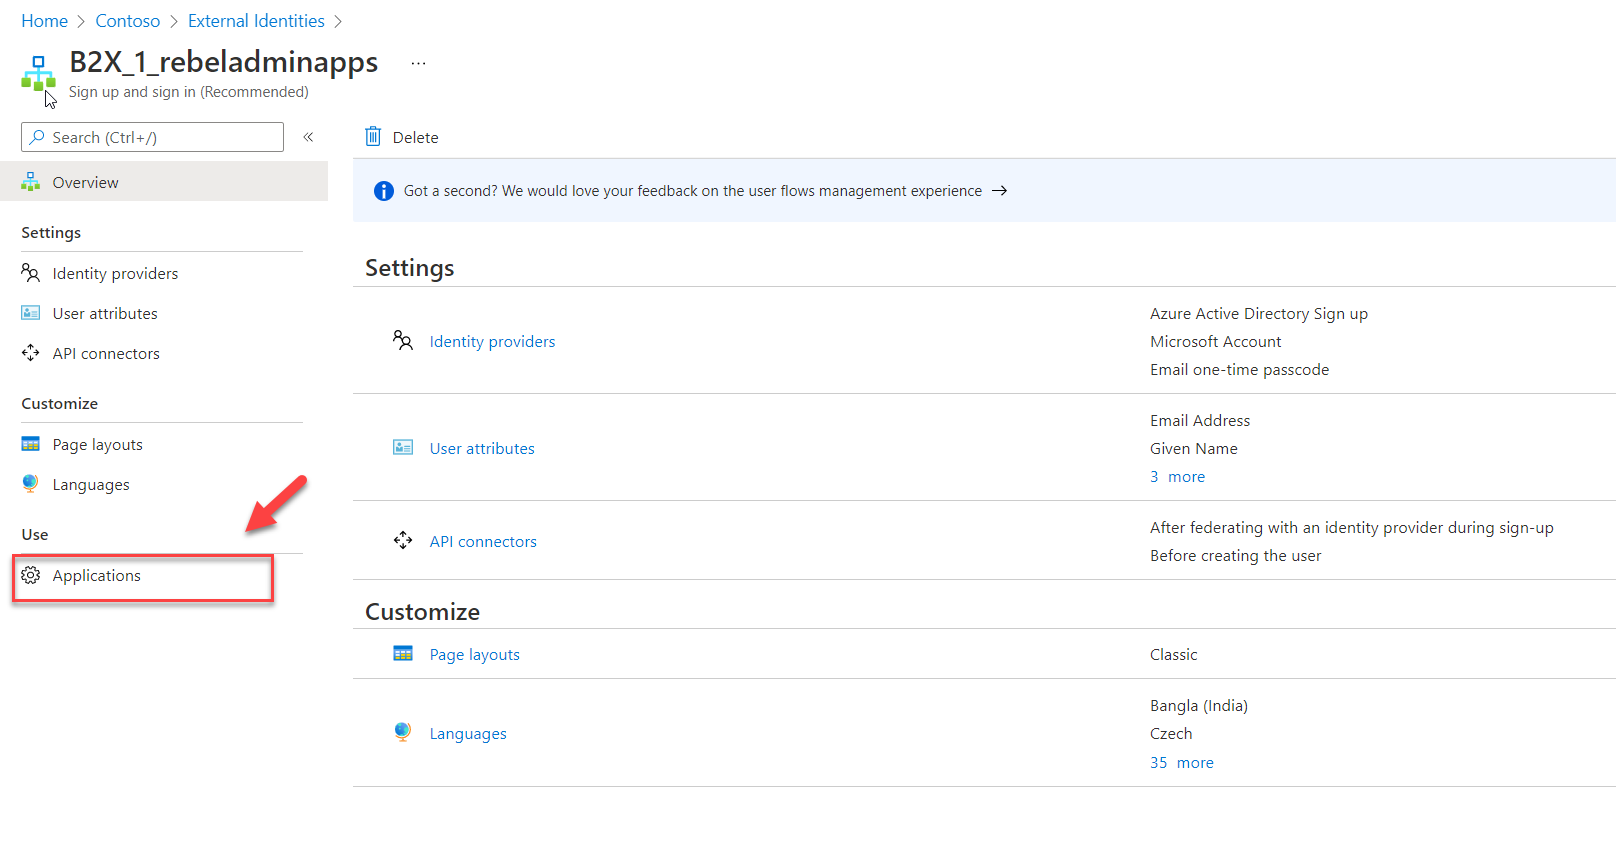
1) Click on the new user flow created in the previous step.
2) Then click on Applications
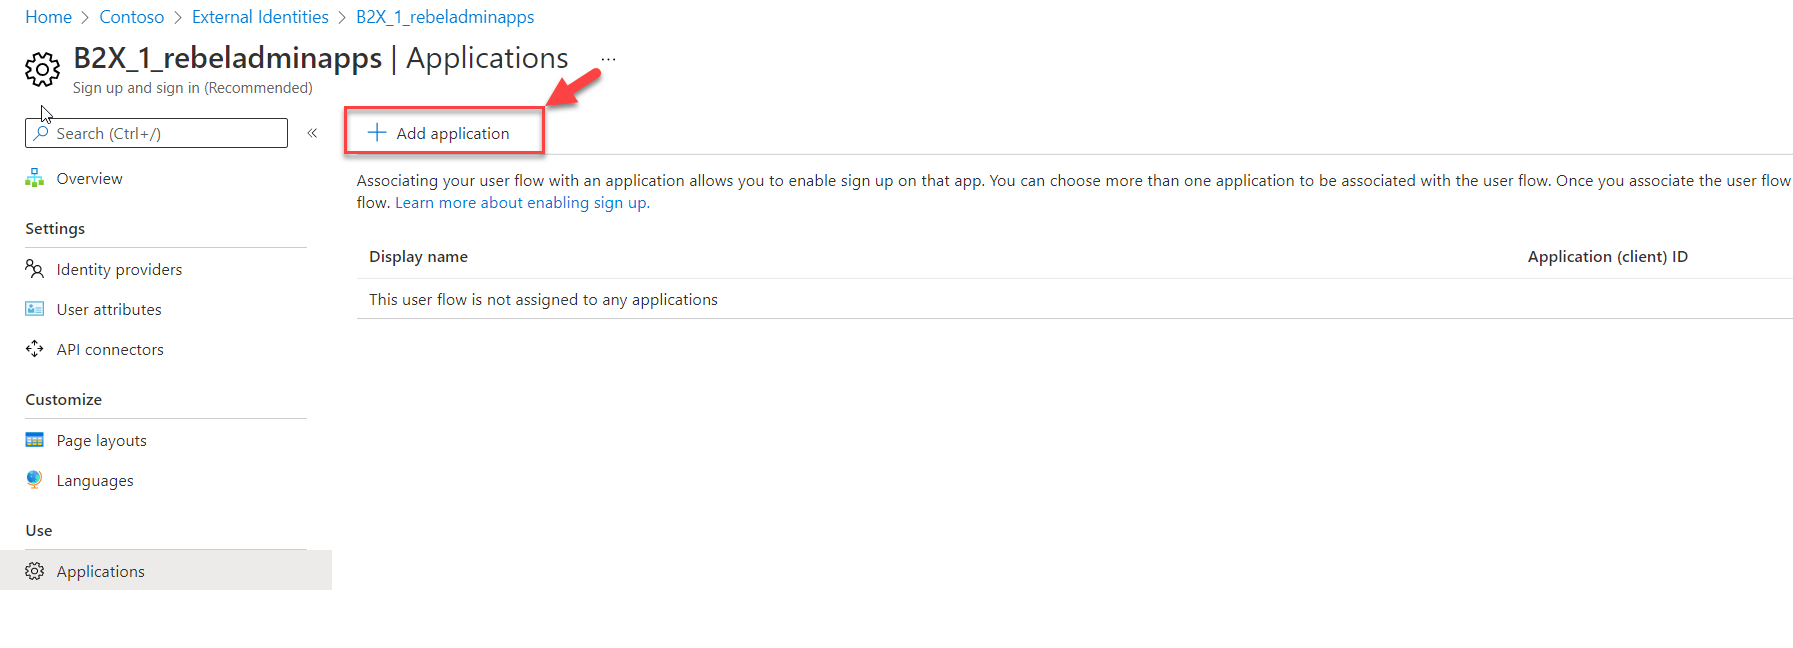
3) To add the application, click on + Add application
4) Then from the list of apps select the correct app and click on Select
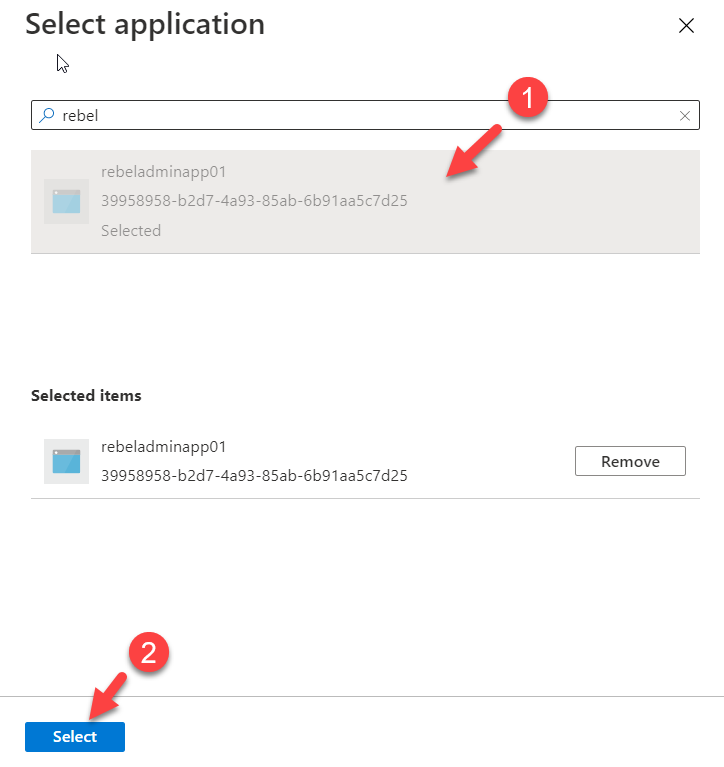
This will add the application to the user flow. One user flow can have multiple applications.
Testing
The configuration is now completed and the next step is to do some testing.
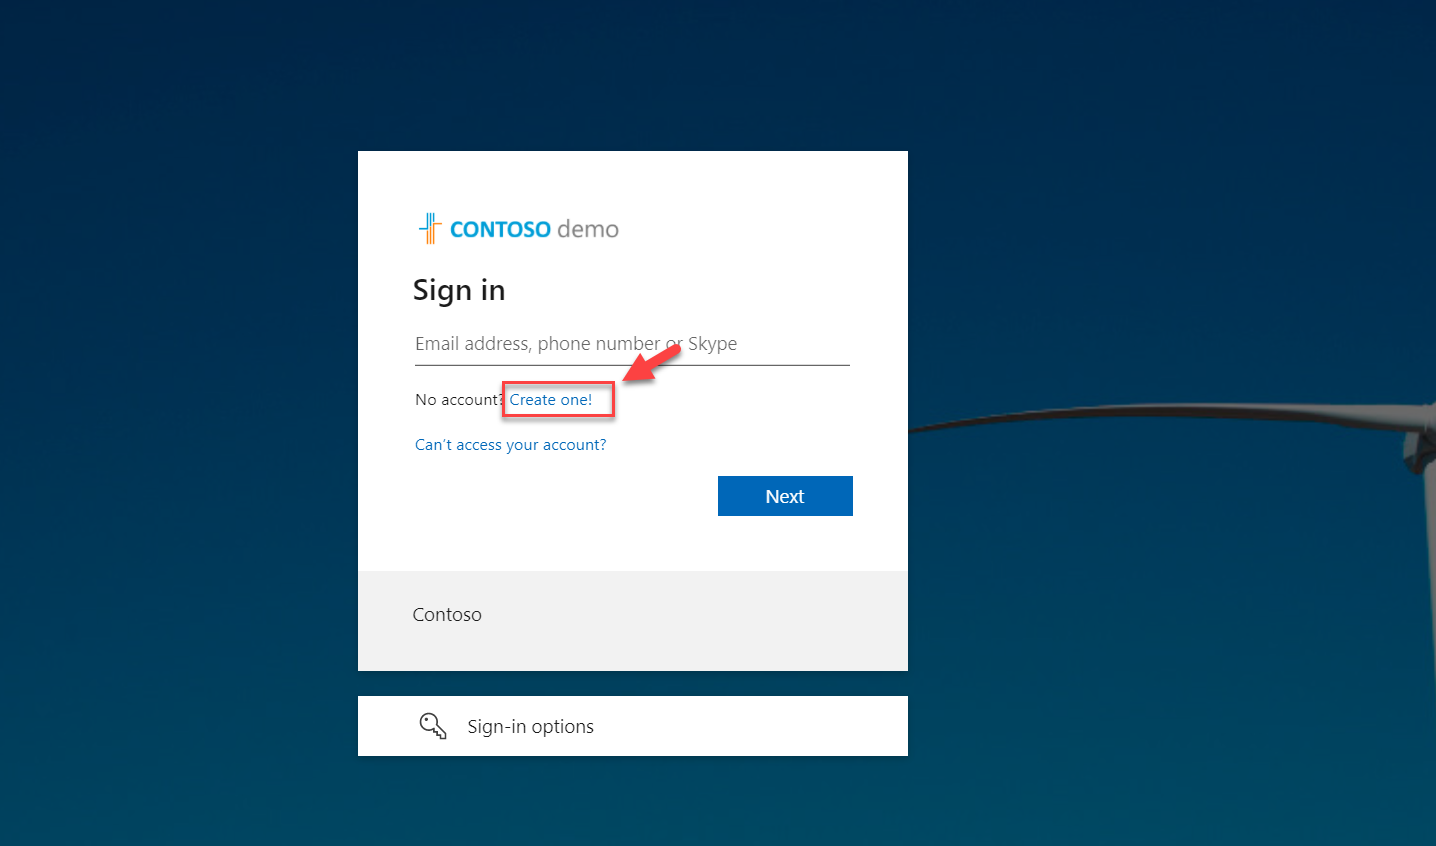
1) As the first step, I launch a web browser and type the application URL, and press enter.
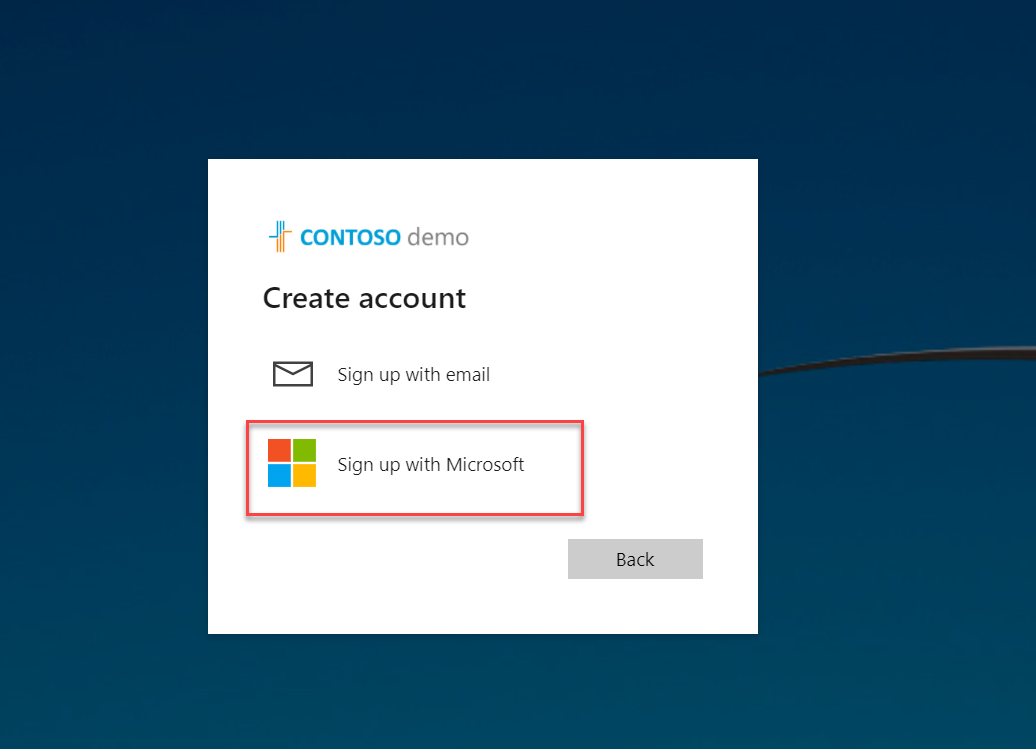
2) As this is my first time accessing this app as a guest user, I click on create account option.
3) In the next window, I select Sign up with Microsoft account option
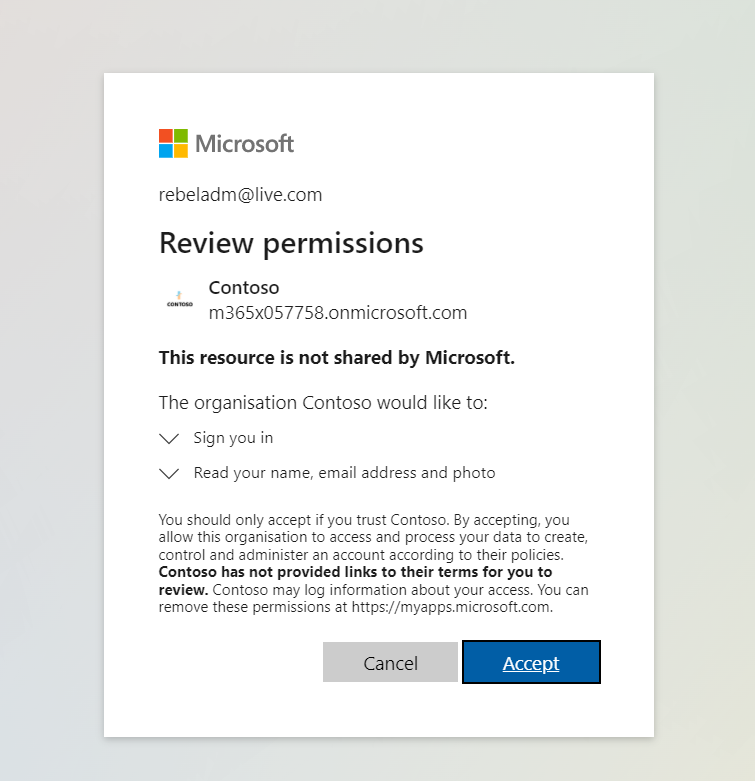
4) After I authenticate using my user name and password, I can see the application permission window. Click on Accept to proceed.
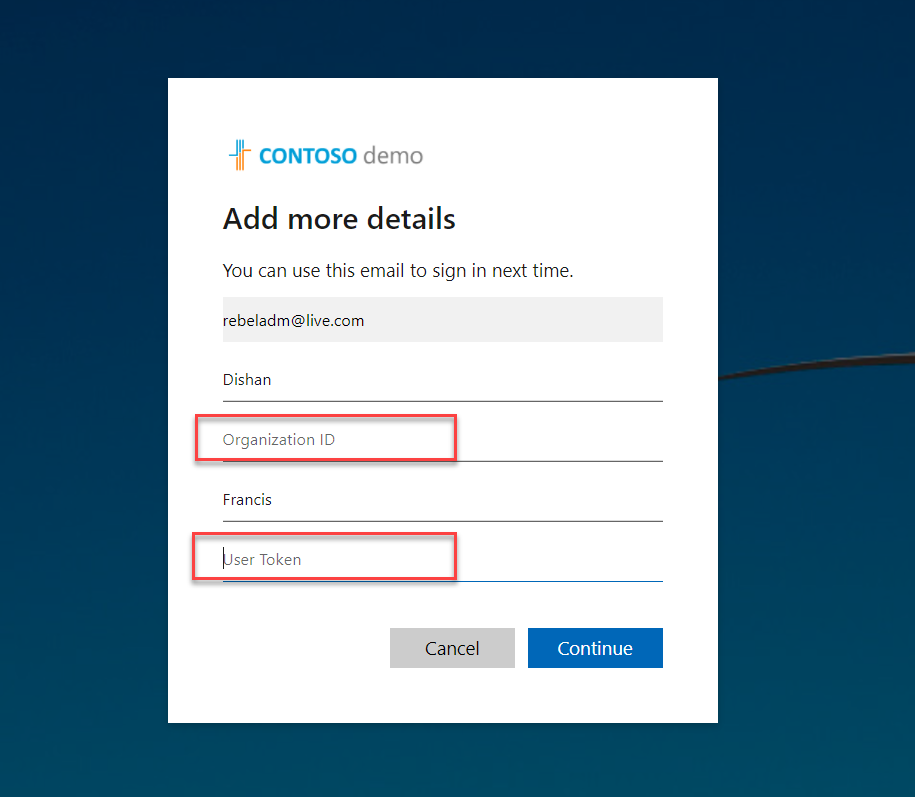
5) In the next window, as expected we can see the form with custom attributes. Type the relevant data and click on Continue to complete the sign-up process.
6) This creates a guest user in Azure AD with custom attributes. We can query these values using Graph API.
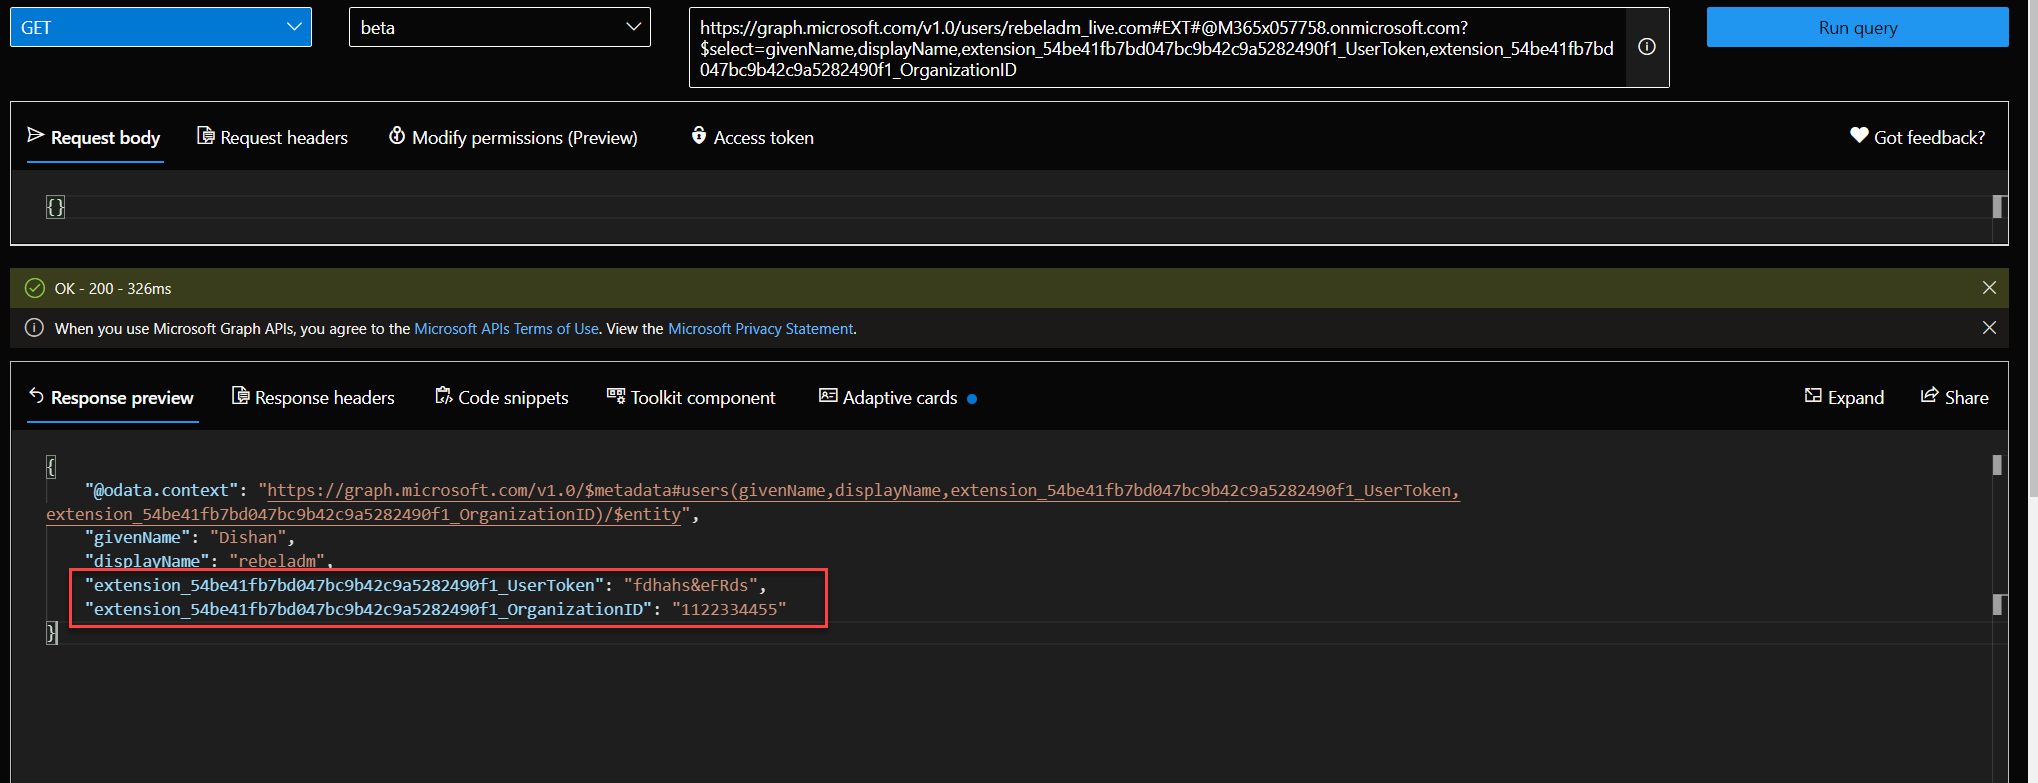
In above the attribute name has extension_54be41fb7bd047bc9b42c9a5282490f1_ . In here, 54be41fb7bd047bc9b42c9a5282490f1 is the app id of AAD extension app. This is used to store user data. You can find it under AAD app registrations.
These custom attributes also can be used with Access packages. I will talk about it in my next blog post.
As we can see above custom attributes are working with user flows as expected.
This marks the end of this blog post. If you have any questions feel free to contact me on rebeladm@live.com also follow me on Twitter @rebeladm to get updates about new blog posts.


Thank you for sharing the awesome article with us. that’s very useful. Provides much-needed knowledge.