
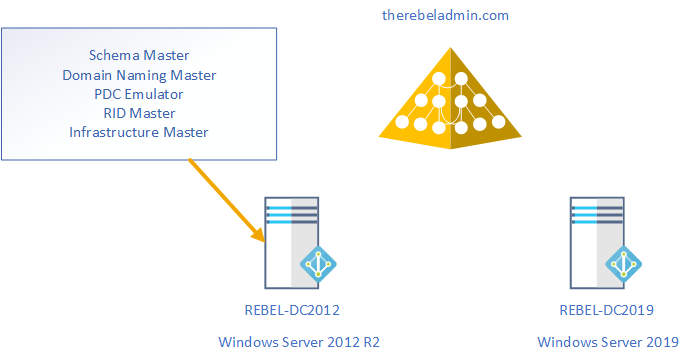
Windows server 2019 was available for public (GA) from early oct 2018. In past i have written many articles about domain migrations by covering different Active Directory versions. So, it is time me to write about AD 2019 migrations. In this demo I am going to demonstrate how to migrate from Active Directory 2012 R2 to Active Directory 2019. The same procedure is going to apply for any AD version from Windows Server 2008.
Migration itself is very straight forward task. But there are other things you need to consider before you do an AD migration. In below I listed a checklist you can use in many occasions.
• Evaluate business requirement for active directory migration
• Perform Audit on Existing Active Directory Infrastructure
• Provide Plan for implementation Process
• Prepare Physical / Virtual resources for Domain Controller
• Install Windows server 2019 Standard / Datacenter
• Patch Servers with latest Windows Updates
• Assign Dedicate IP address to Domain Controller
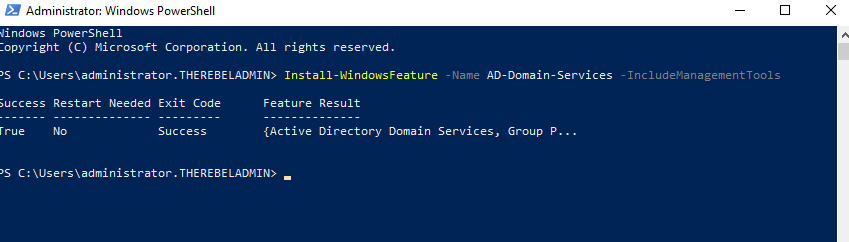
• Install AD DS Role
• Migrate Application and Server Roles from the Existing Domain Controllers.
• Migrate FSMO roles to new Domain Controllers
• Add New Domain controllers to the Existing Monitoring system
• Add New Domain controllers to the Existing DR Solution
• Decommission old domain controllers
• Raise the Domain and Forest Functional level
• On Going Maintenance


|
Argument |
Description |
|
Install-ADDSDomainController |
This cmdlet will install the domain controller in active directory infrastructure. |
|
-NoGlobalCatalog |
If you do not need to create the domain controller as global catalog server, this parameter can use. By default, system will enable global catalog feature. |
|
-SiteName |
This Parameter can use to define the active directory site name. the default value is Default-First-Site-Name |
|
-DomainName |
This parameter defines the FQDN for the active directory domain. |
|
-ReplicationSourceDC |
Using this parameter can define the active directory replication source. By default, it will use any available domain controller. But if need we can be specific. |
Once execute the command it will ask for SafeModeAdministrator Password. Please use complex password to proceed. This will be used for DSRM.
8. After configuration completed, restart the system and log back in as administrator to check the AD DS status.
Get-Service adws,kdc,netlogon,dns
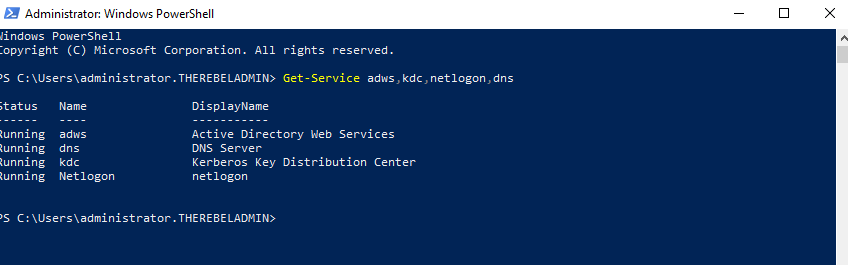
Will confirm the status of the AD DS service.
Get-ADDomainController -Filter * | Format-Table Name, IPv4Address, Site
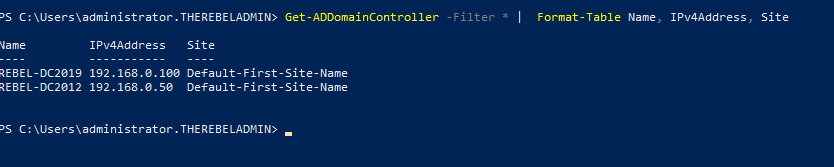
Will list down the domain controllers along with the IP address and Sites it belongs to.
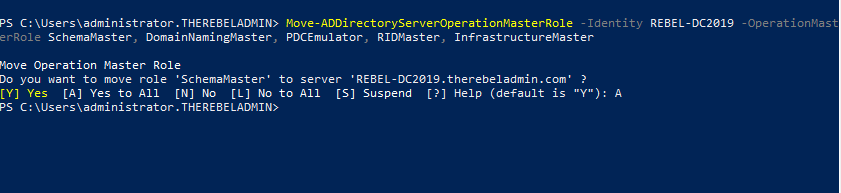
9. Migrate all five FSMO roles to the New domain controller using following command,
Move-ADDirectoryServerOperationMasterRole -Identity REBEL-DC2019 -OperationMasterRole SchemaMaster, DomainNamingMaster, PDCEmulator, RIDMaster, InfrastructureMaster
In above the REBEL-DC2019 is domain controller running with windows server 2019.
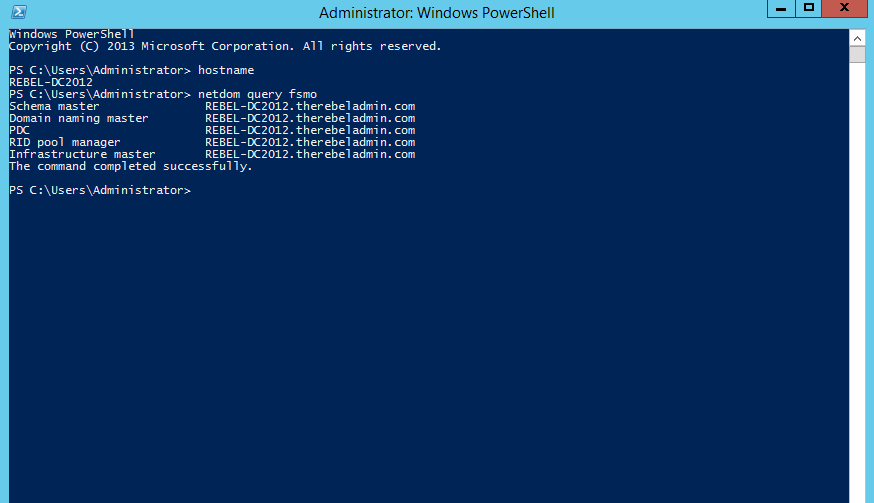
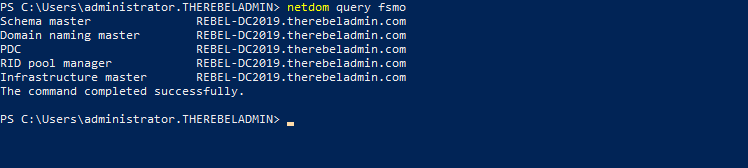
Once its completed, we can verify the new FSMO role holder using
Netdom query fsmo
10. The new step of the process is to decommission the old windows domain controller which running with windows server 2012 R2. To do that execute the following command as enterprise administrator from the relevant DC.
Uninstall-ADDSDomainController -DemoteOperationMasterRole -RemoveApplicationPartition
After execute the command it will ask to define password for the local administrator account.

Once its completed it will be a member server of the therebeladmin.com domain.
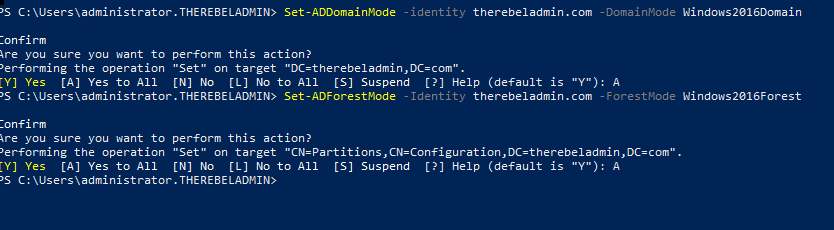
11. Next step is to raise the domain and forest functional level to windows server 2019. To do that can use the following commands.
To upgrade domain functional levels
Set-ADDomainMode –identity therebeladmin.com -DomainMode Windows2016Domain
To upgrade forest function levels
Set-ADForestMode -Identity therebeladmin.com -ForestMode Windows2016Forest
[su_note]With windows server 2019, there is no domain or forest functional level called windows2019. It is still 2016. [/su_note]
Now we have completed the migration from AD DS 2012R2 to AD DS 2019. Same steps apply when migrate from windows server 2008, Windows server 2008 R2, Windows server 2012 & Windows server 2016.
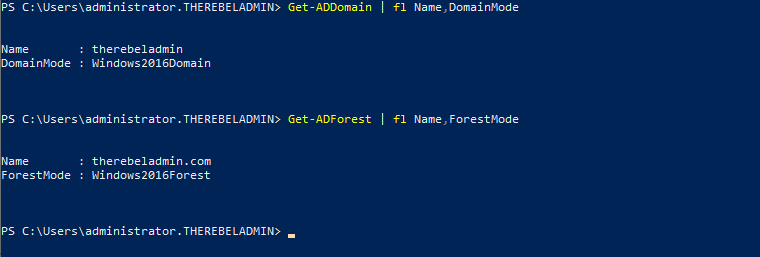
12. After the migration completes, we still need to verify if its completes successfully.
Get-ADDomain | fl Name,DomainMode
This command will show the current Domain functional level of the domain after the migration.
Get-ADForest | fl Name,ForestMode
Above command will show the current forest functional level of the domain.
This marks the end of this blog post. Hope this was useful. If you have any questions feel free to contact me on rebeladm@live.com also follow me on twitter @rebeladm to get updates about new blog posts.


Hi Dishan, Thanks a lot for the article. We are in the process of upgrading from Win 2008 R2 DCs to Win 2019 DCs. Following your advice of doing the Forest first.
Can we Upgrade the schema first of the Forest and then promote the 2019 server to DC ?
Nice Article, Thank you very much.
Very useful, thanks!
This is very useful article much appreciate your work.
Thank you so much for this detailed Blog post. It helped me immensely in planning and executing my upgrade from WS 2012 to 2019. Thanks to your post, the process went as smoothly as could have been expected.
The one problem I ran into was that after making my 2019 machine the Domain Controller, it required network reconfiguration: I had to make it take over DHCP and DNS from the 2012 machine. This also meant that I had to have the 2019 machine take over the Static IP of the 2012 machine (so that DNS traffic in the network would come to it now). Without that the decommissioning step would abort because the 2012 machine couldn’t find another Domain Controller on the network (so it wouldn’t downgrade itself).
Thanks again and keep up the good work!