
In previous part of this blog post I have explain what is Microsoft Advanced Threat Analytics (ATA) and what it is capable of. If you not read it yet you can find it in here http://www.rebeladmin.com/2017/05/microsoft-advanced-threat-analytics-ata-part-01/
In this part of the post I am going to demonstrate how we can setup ATA. Before we start I like to explain about the demo environment we going to use.
- This deployment is going to use AD environment which running AD DS 2016 with Forest and Domain functional levels set to Windows Server 2016.
- All the servers used in the demo is running with windows server 2016 with latest updates.
- The Server which is going to use as ATA center has two IP addresses assigned which is 192.168.0.190 and 192.168.0.191
- In demo, we are going to use ATA Lightweight Gateway, which will be installed on domain controller directly. There for no port mirroring or separate gateway server required.
- All the SSL used in deployment are self-signed certificates.
- We will be using separate service account to connect ATA center with Domain Controller.
First Step of the setup is to get ATA center setup,
Deploying Microsoft Advanced Threat Analytics (ATA) Center
1) Log in to the server which is planned to use as ATA center as domain and or enterprise administrator.
2) Download ATA Center Installation files. It is allowing to use 90 days’ trial as well.
3) Then run Microsoft ATA Center Setup.exe as Administrator
4) Then In the first window select the relevant language and click Next.
5) In next window, it shows license terms. Read and click on Next to continue
6) Then it asks how you like to know about updates. It is recommended to use Microdot Updates for that. Choose option Use Microsoft Update when I check for updates and then click Next.
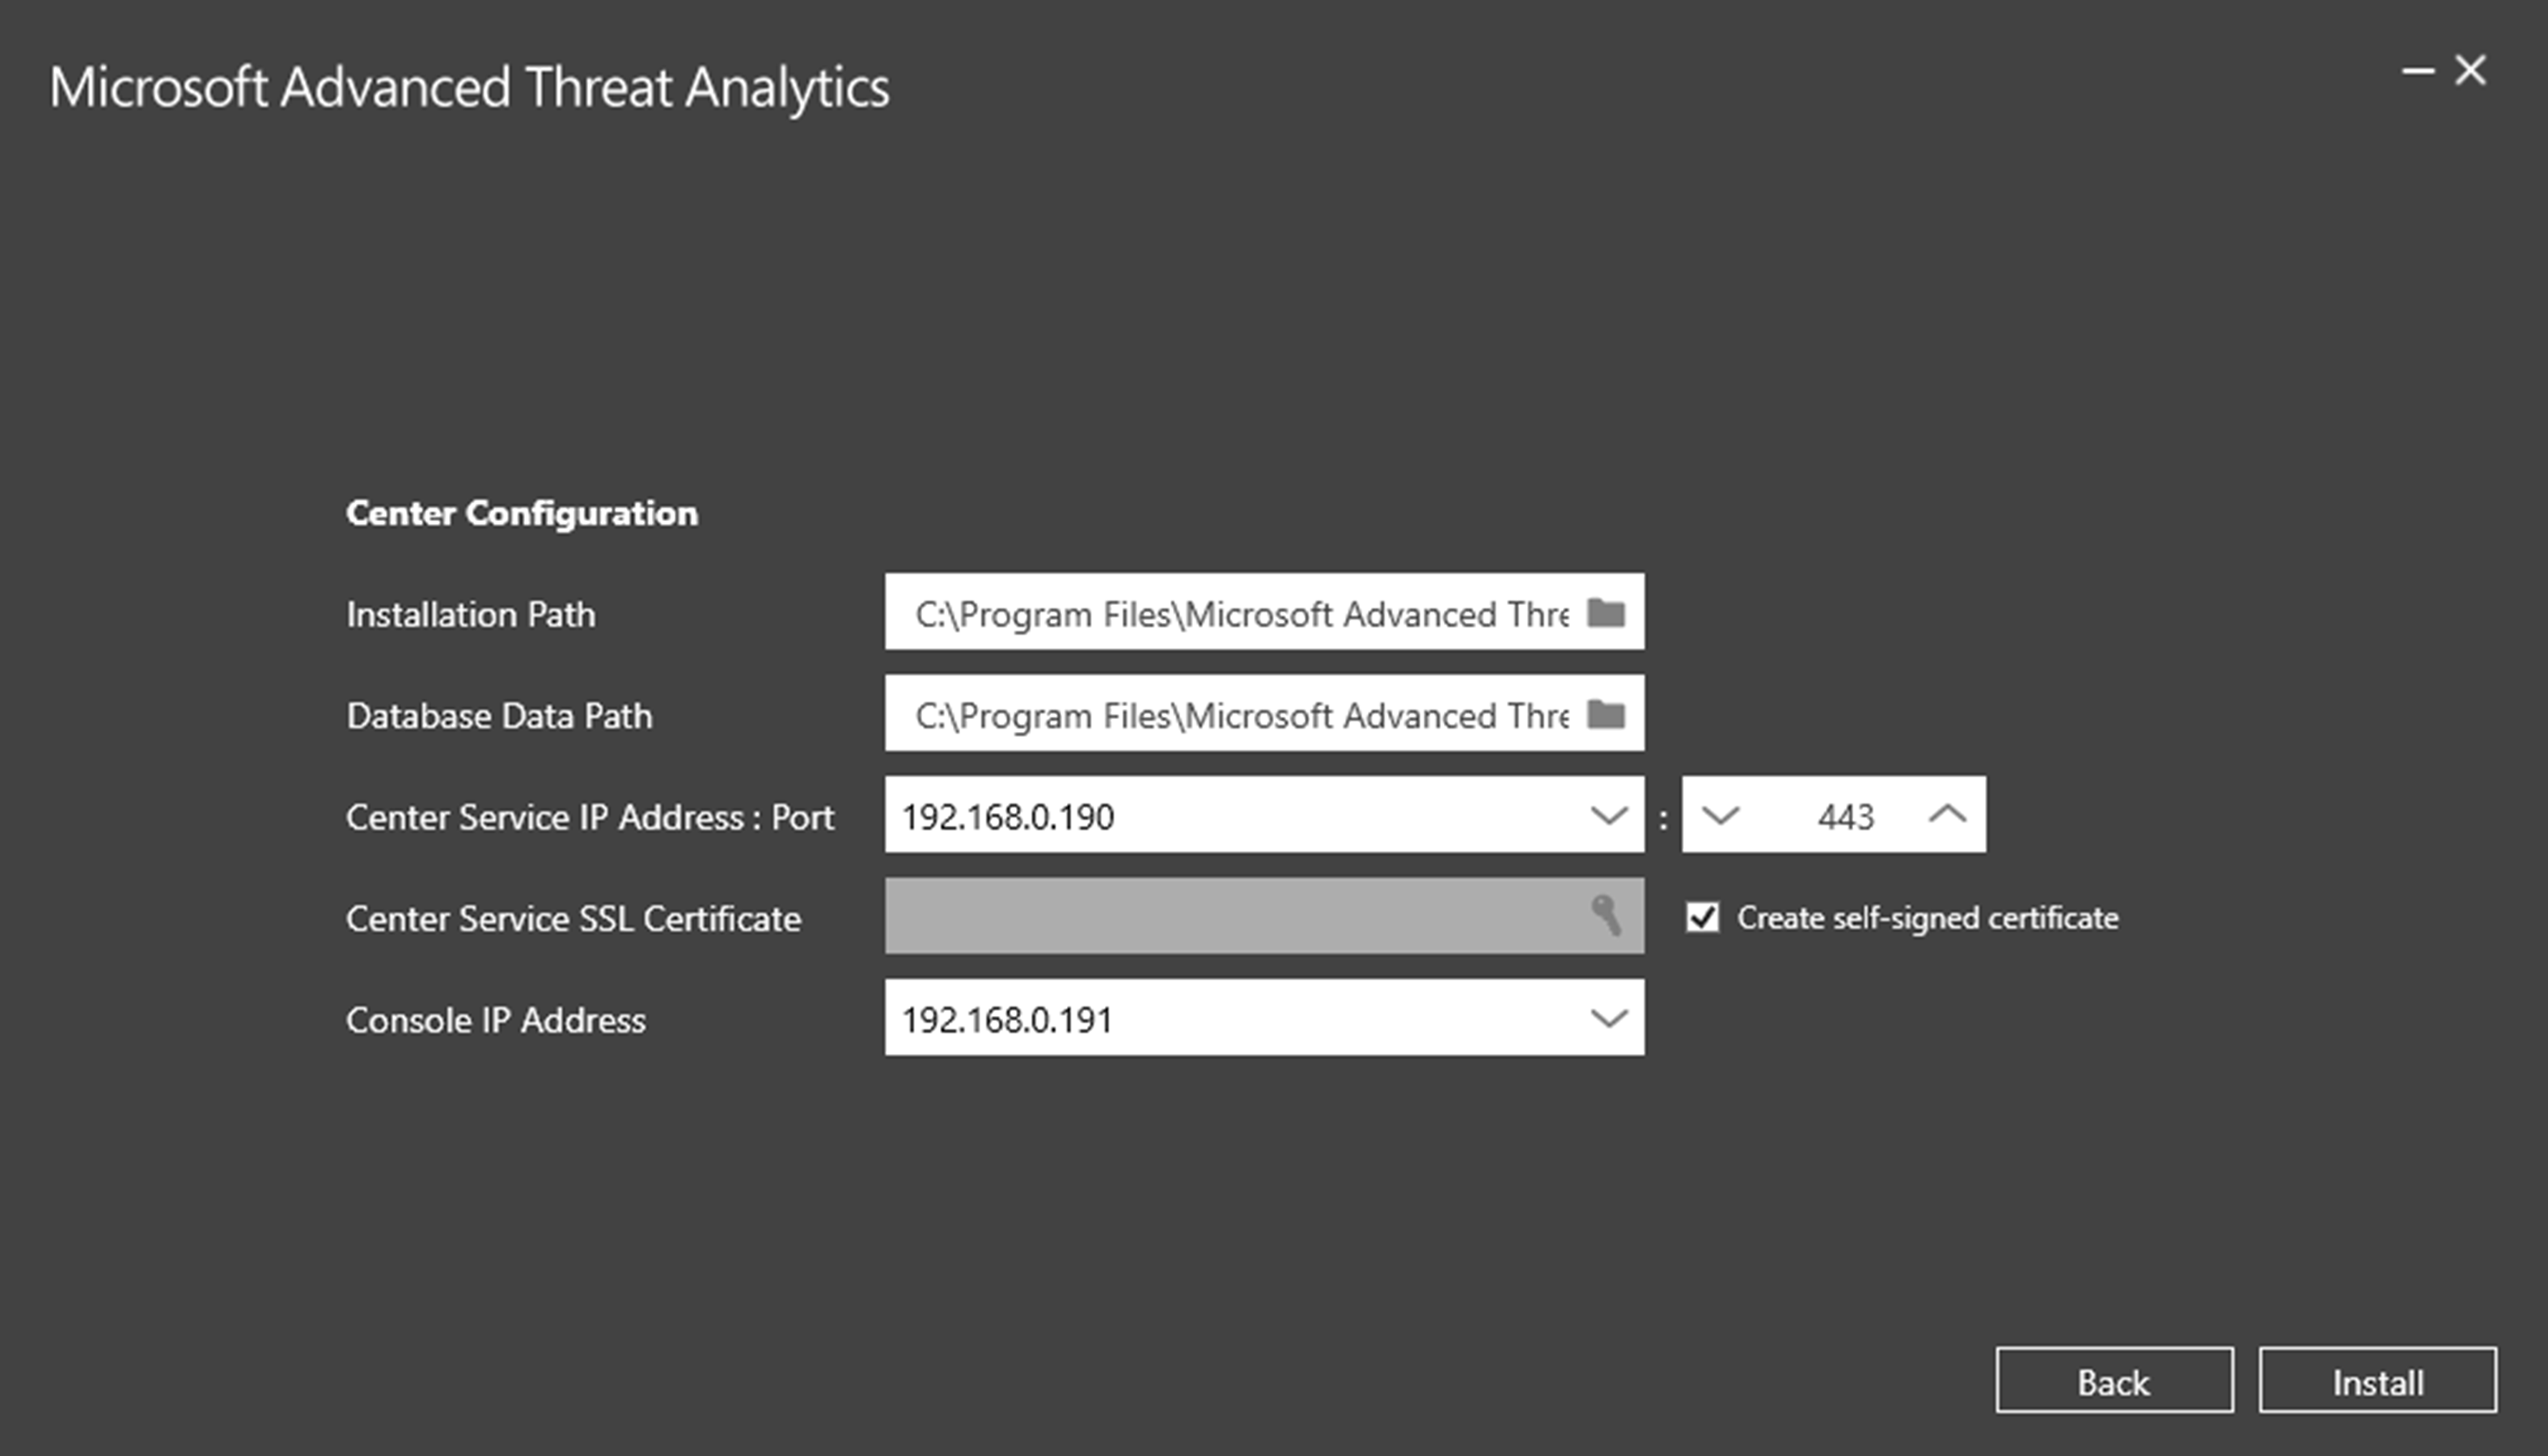
7) Then in next window we can define application installation paths, database path, center service IP address and port, SSL certificates, Console IP address. After changes, click on Install to begin the installation.
8) Once installation finished, it will give option to launch the ATA center.
9) After launch ATA center, log in to it using the account used to install ATA center. If you need later you can add additional administrator accounts.
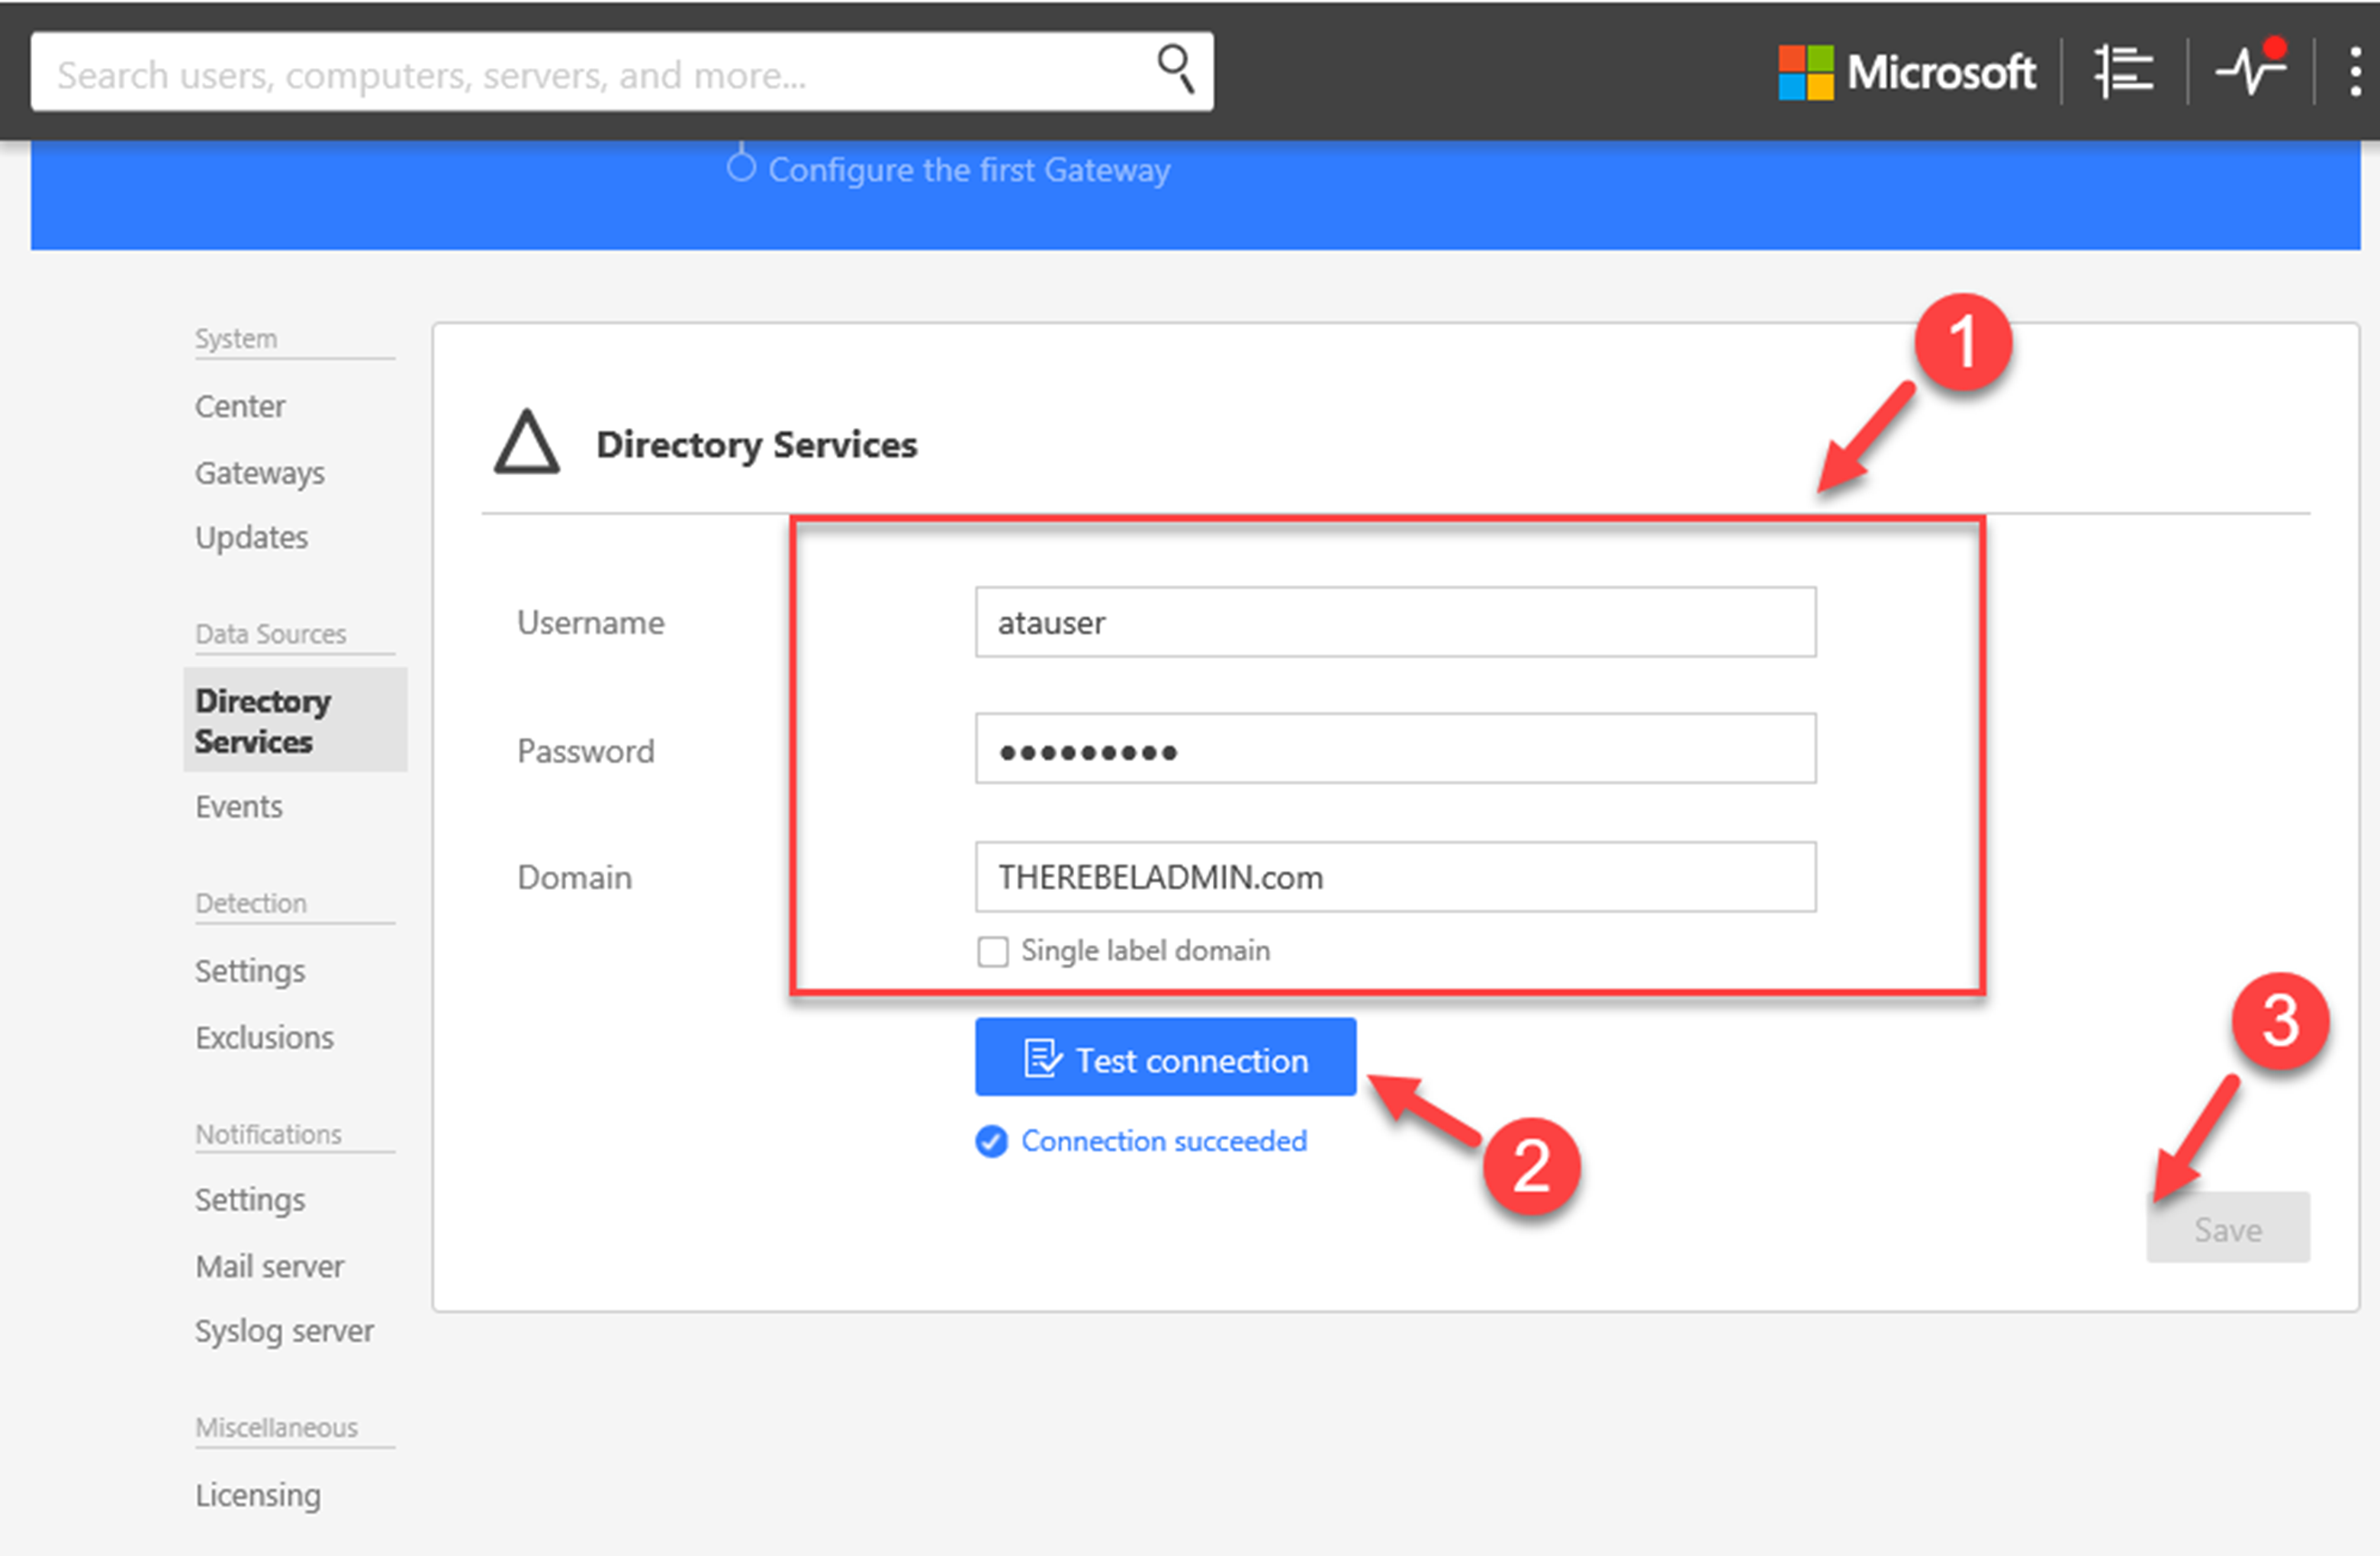
10) As soon as login, it gives window to provide account and domain info to connect to Active directory. Type the service account info you going to use for this. This account is just a typical user account and no additional permission needed (except read permission for all AD objects). once account details entered, click on test connection option to verify the connection and then click on Save.
Deploying Microsoft Advanced Threat Analytics Lightweight Gateway
1) Log in to the Domain Controller as Domain Admin or Enterprise Admin.
2) Launch IE and connect to ATA Center URL. It is via the console IP we specify during the ATA center installation.
3) Log in to ATA center as an Administrator.
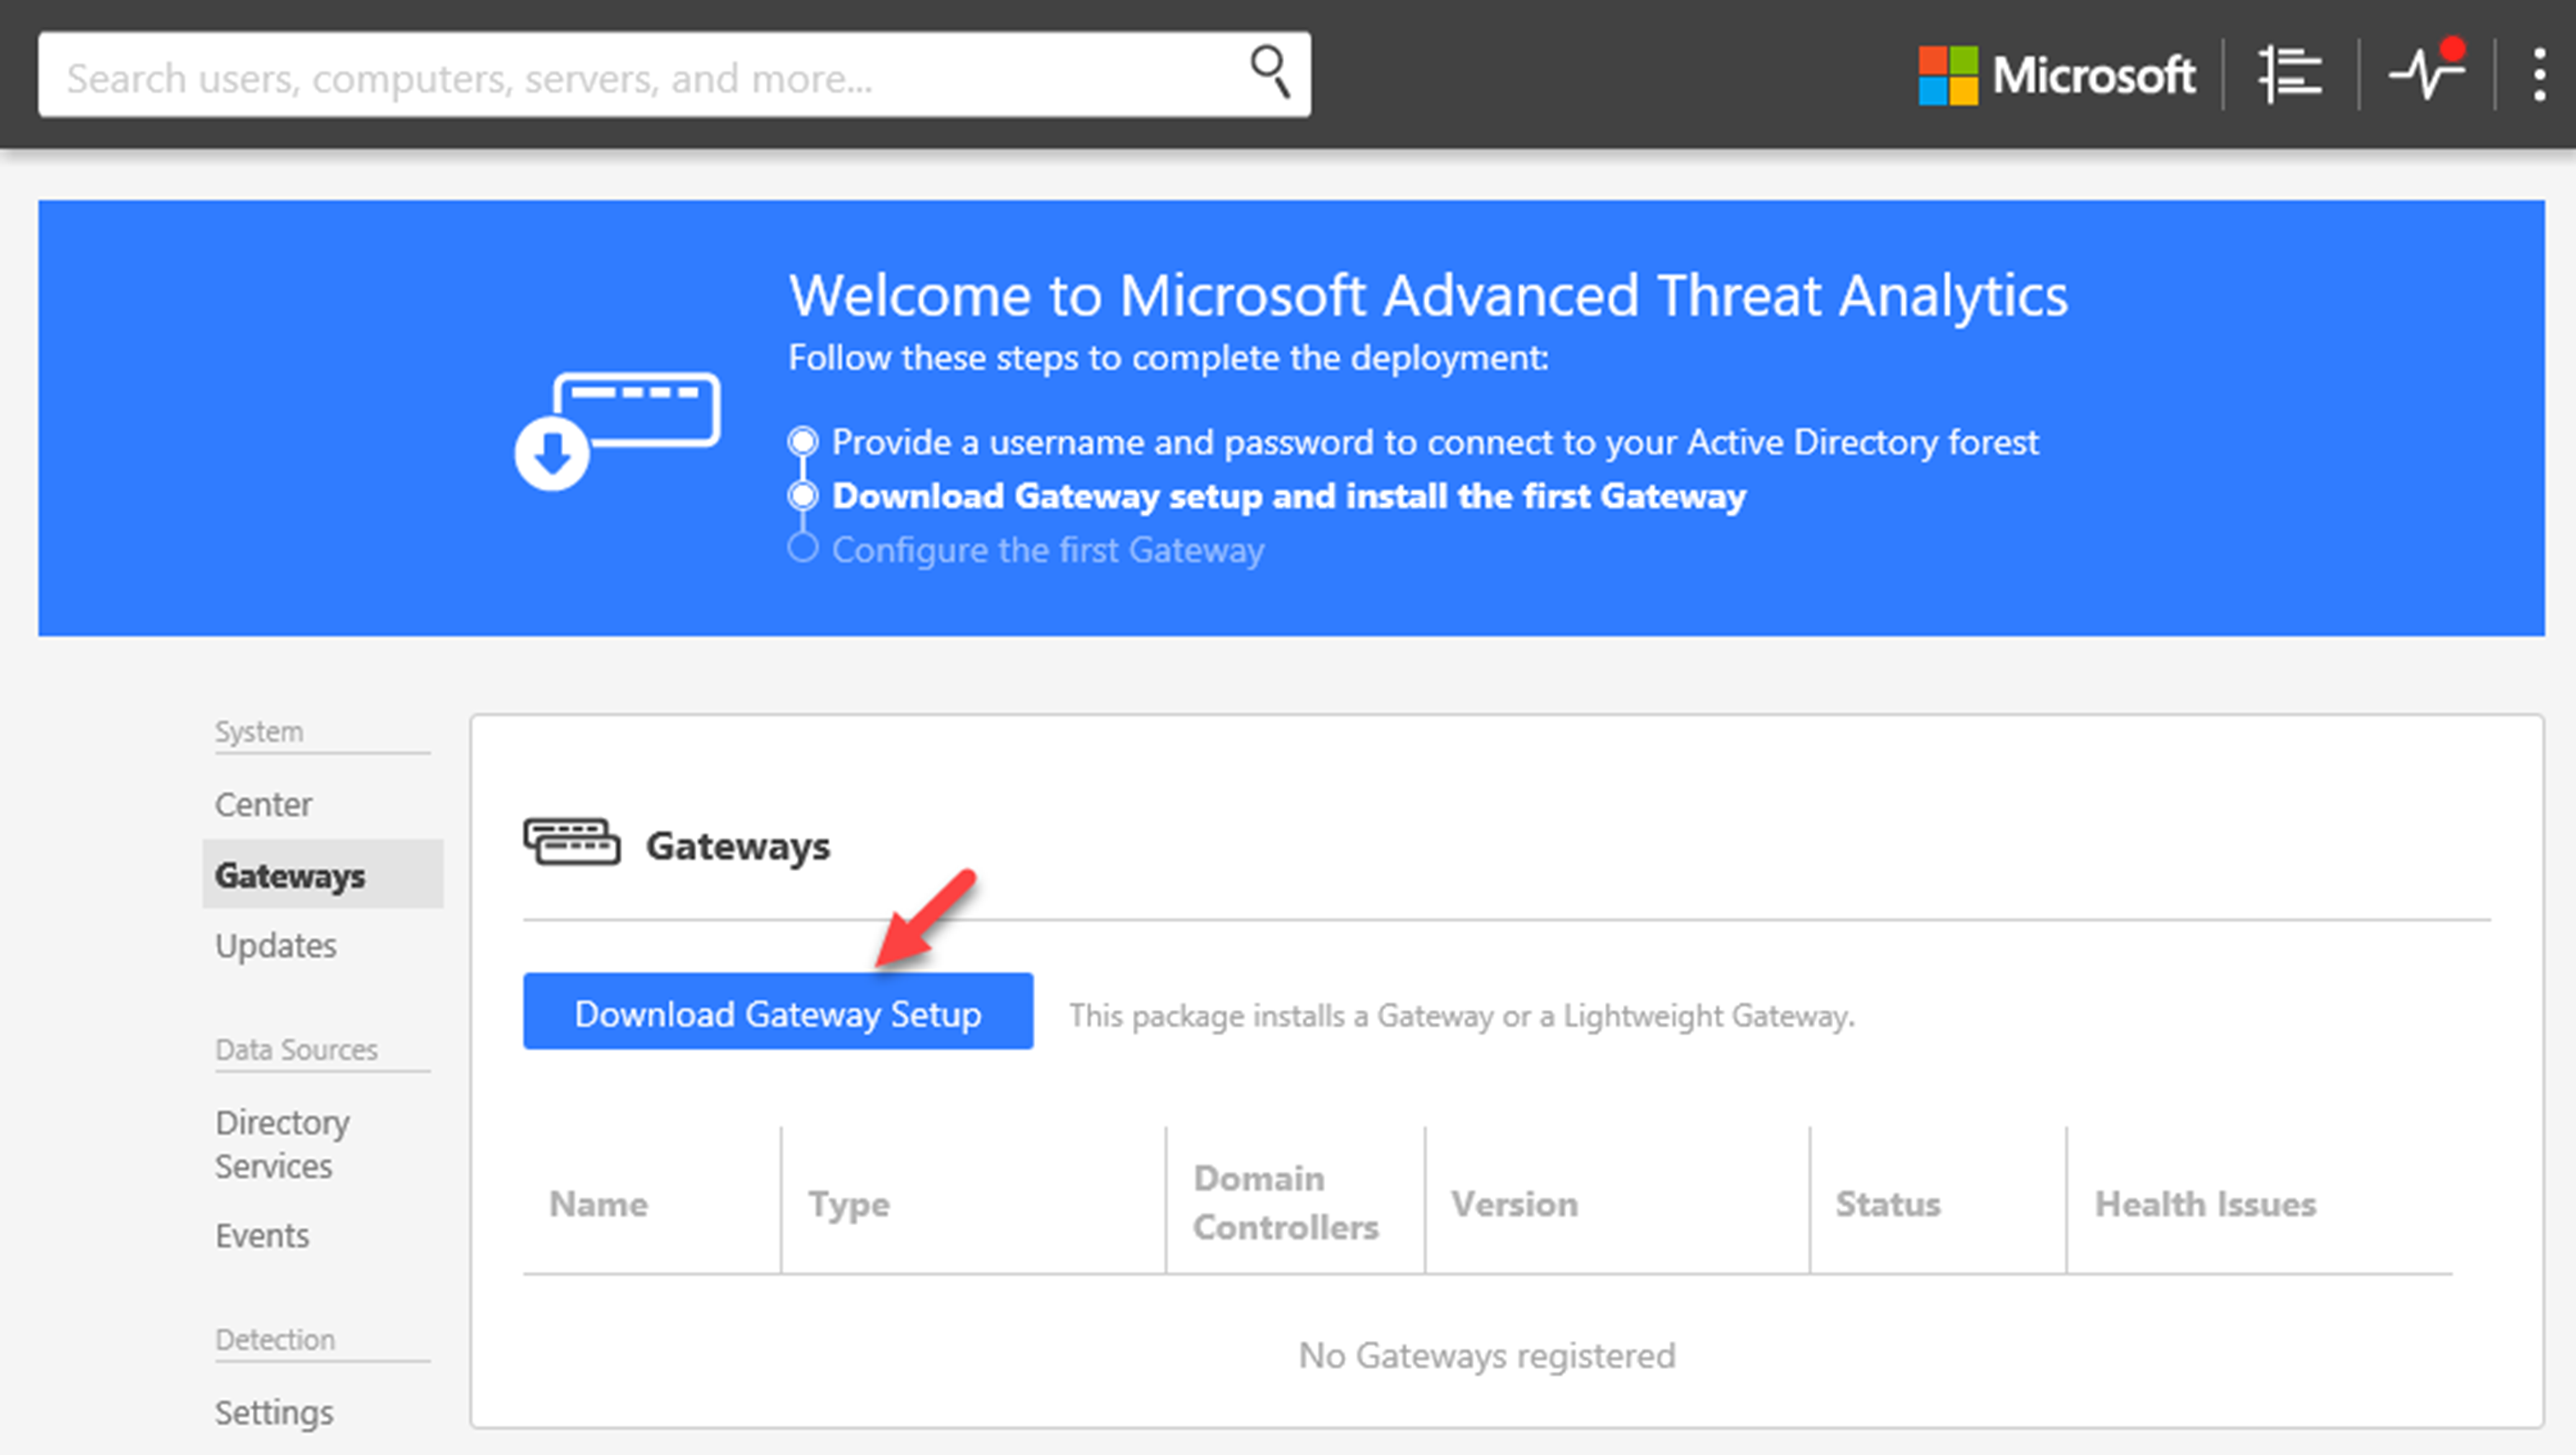
4) In initial page, it will look like following. Click on link Download gateway setup and install the first Gateway

5) In next page, it gives option to download the Gateway Setup files. Click on the download button to download the installation files.
6) After download completes, extract the file and run the Microsoft ATA Gateway Setup.exe
7) In language page, select the relevant language and click Next to continue.
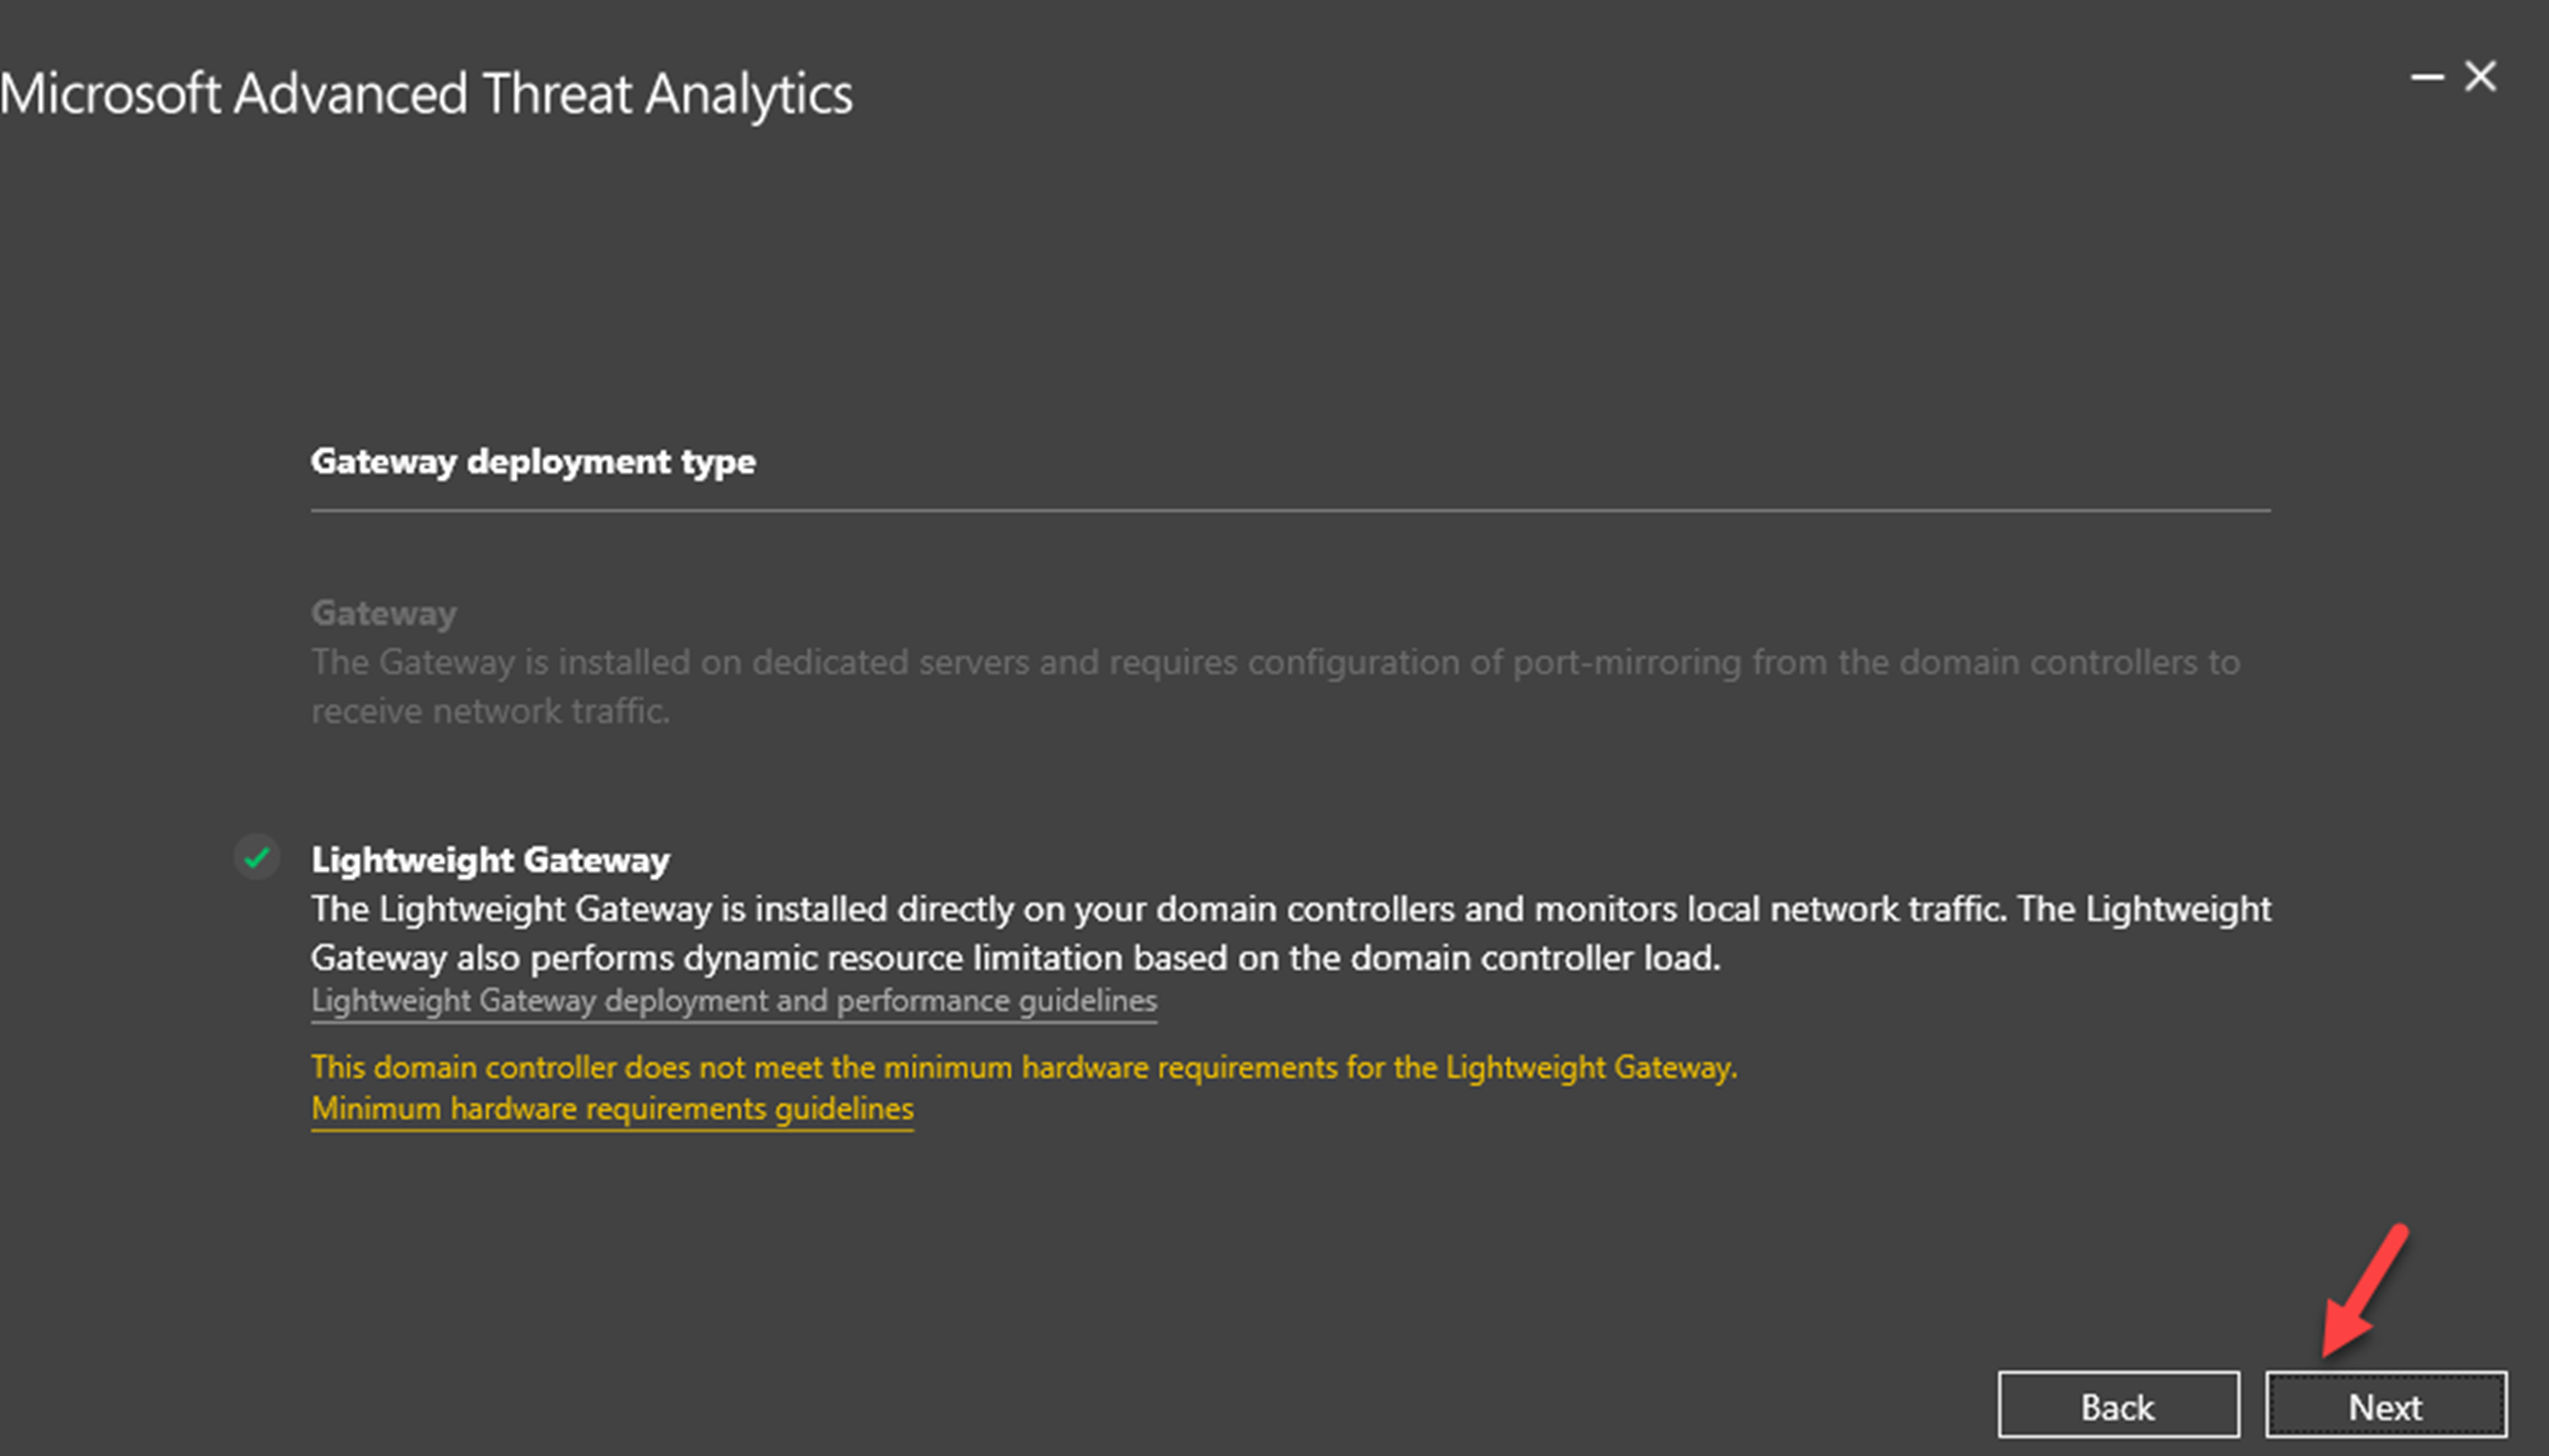
8) Then, it will give the confirmation about deployment type. By default, it detects the type as Lightweight Gateway. Click Next to proceed with the deployment.
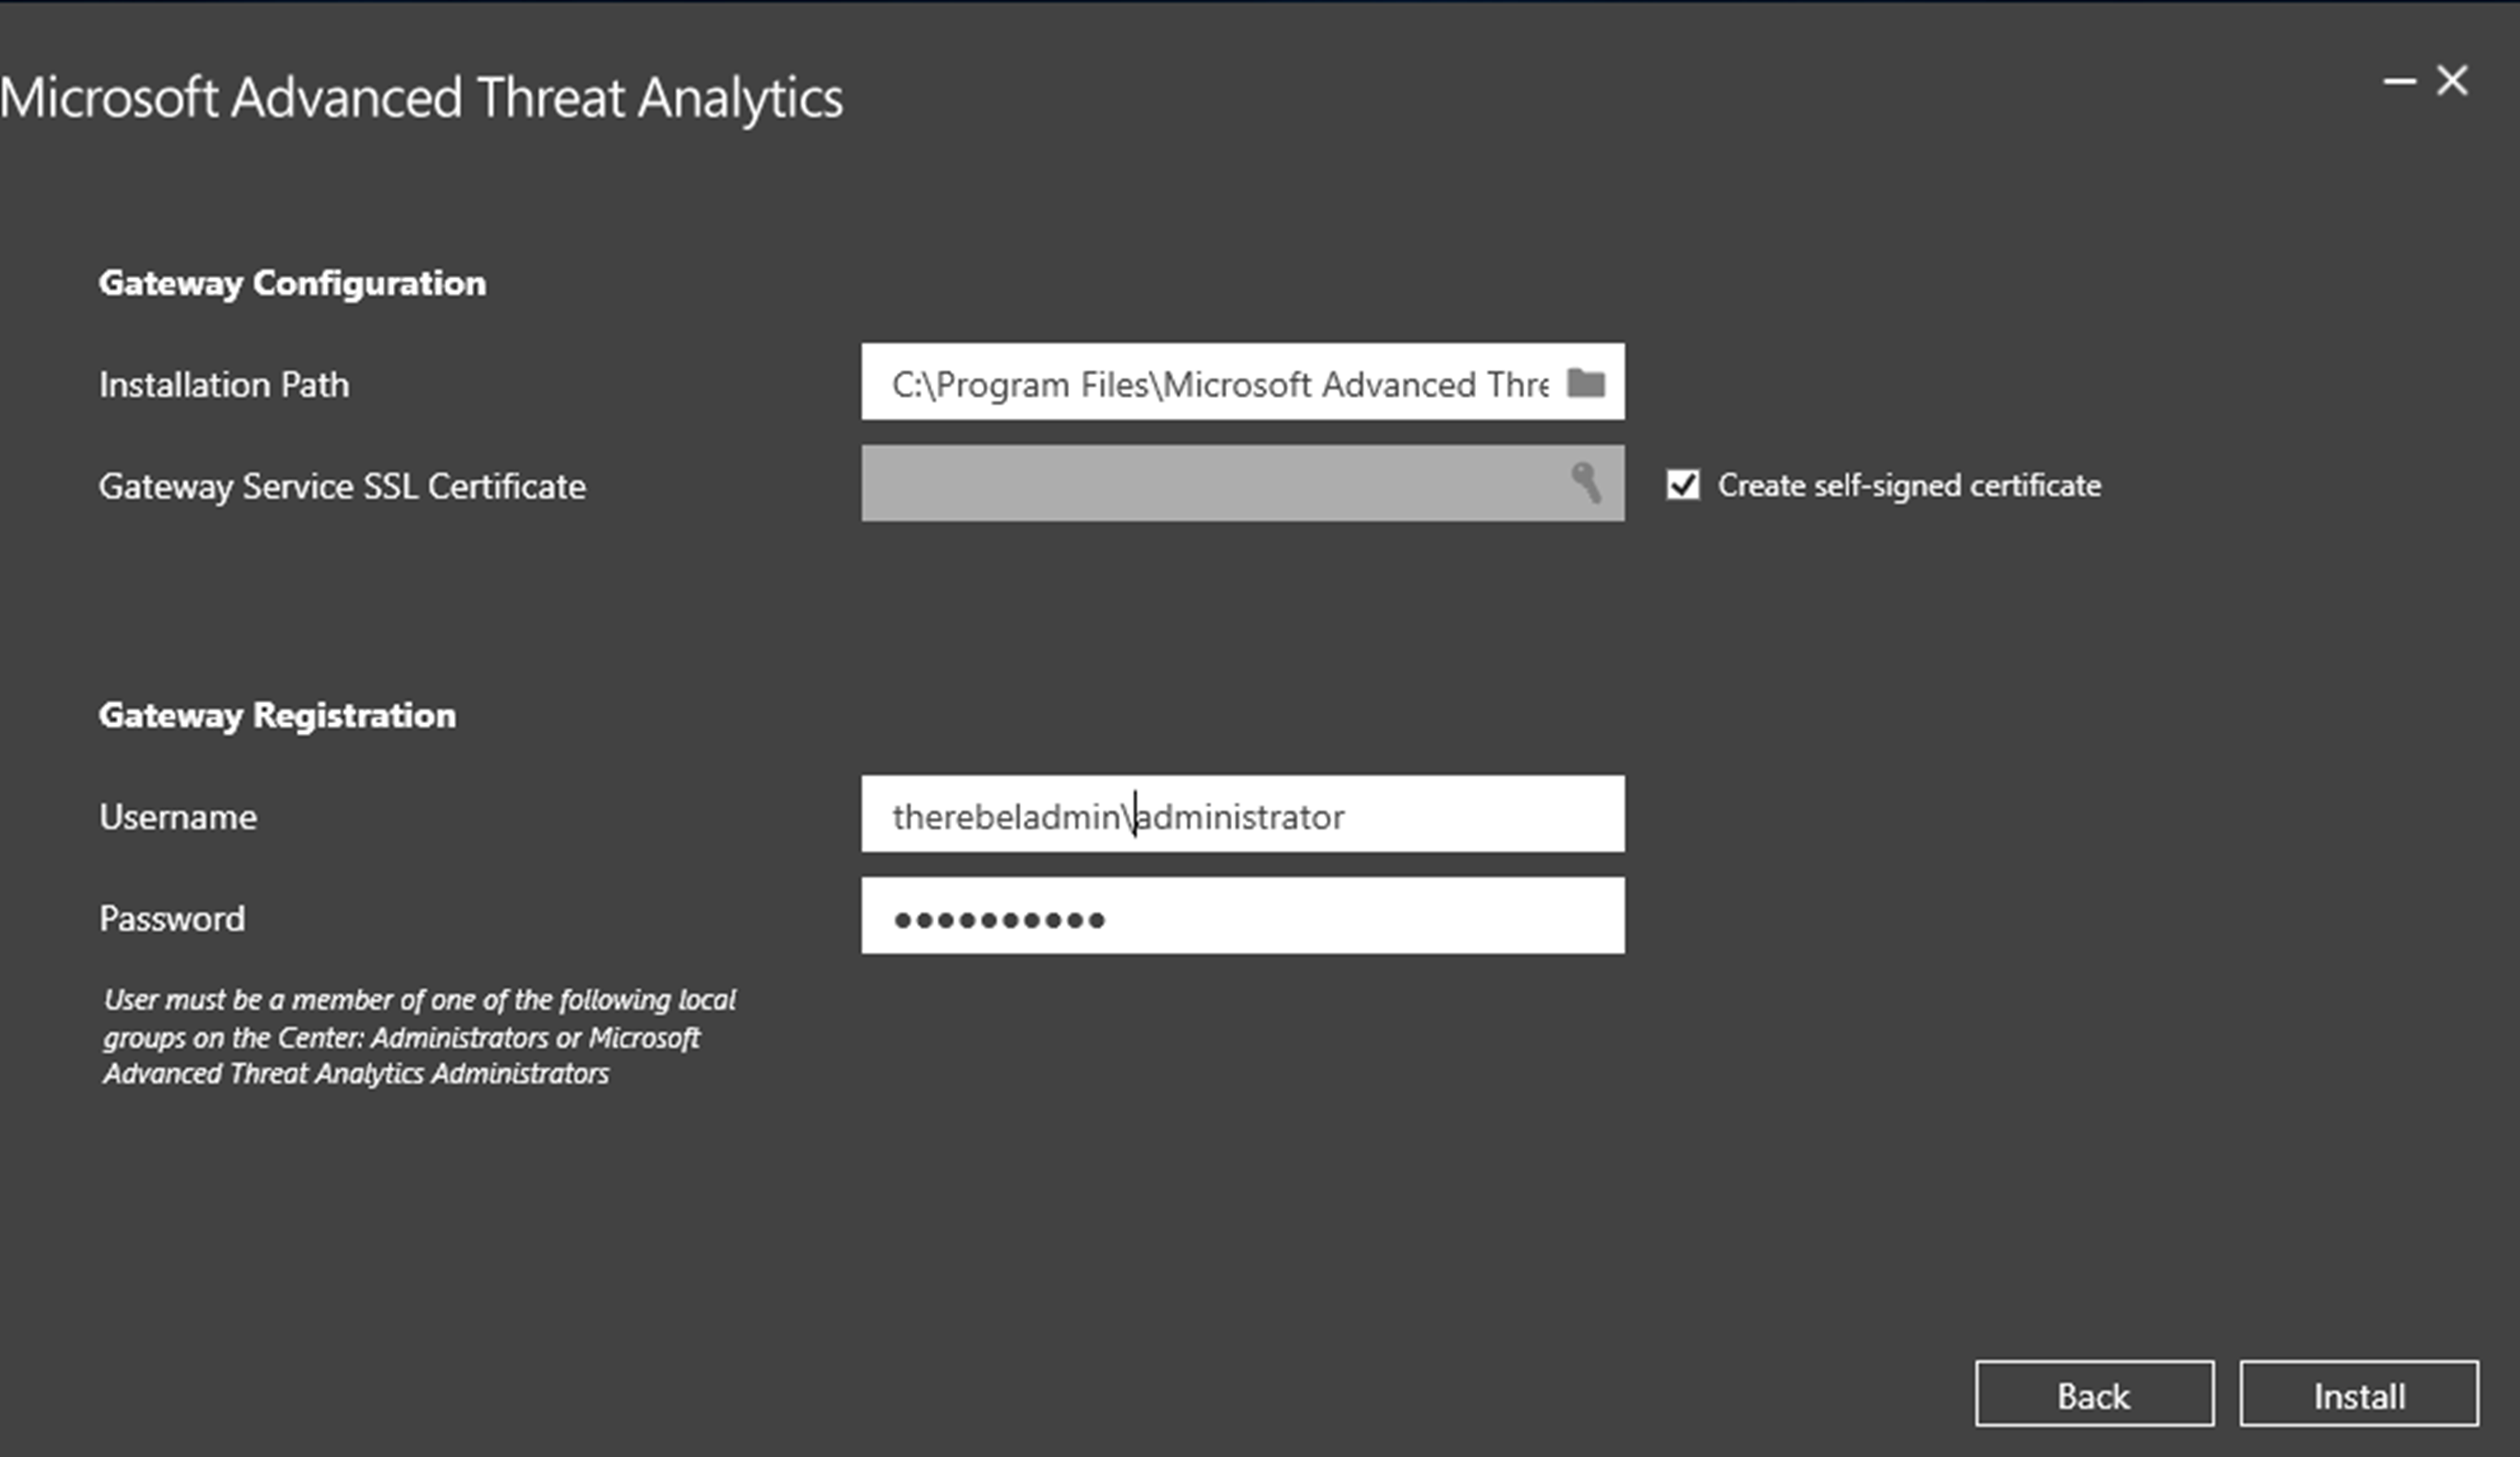
9) In next window, we can specify the installation path, SSL certificate information and account details to register the gateway with the ATA center. This account should be a member of ATA administrator group. once all typed in, click on Install to begin the installation.
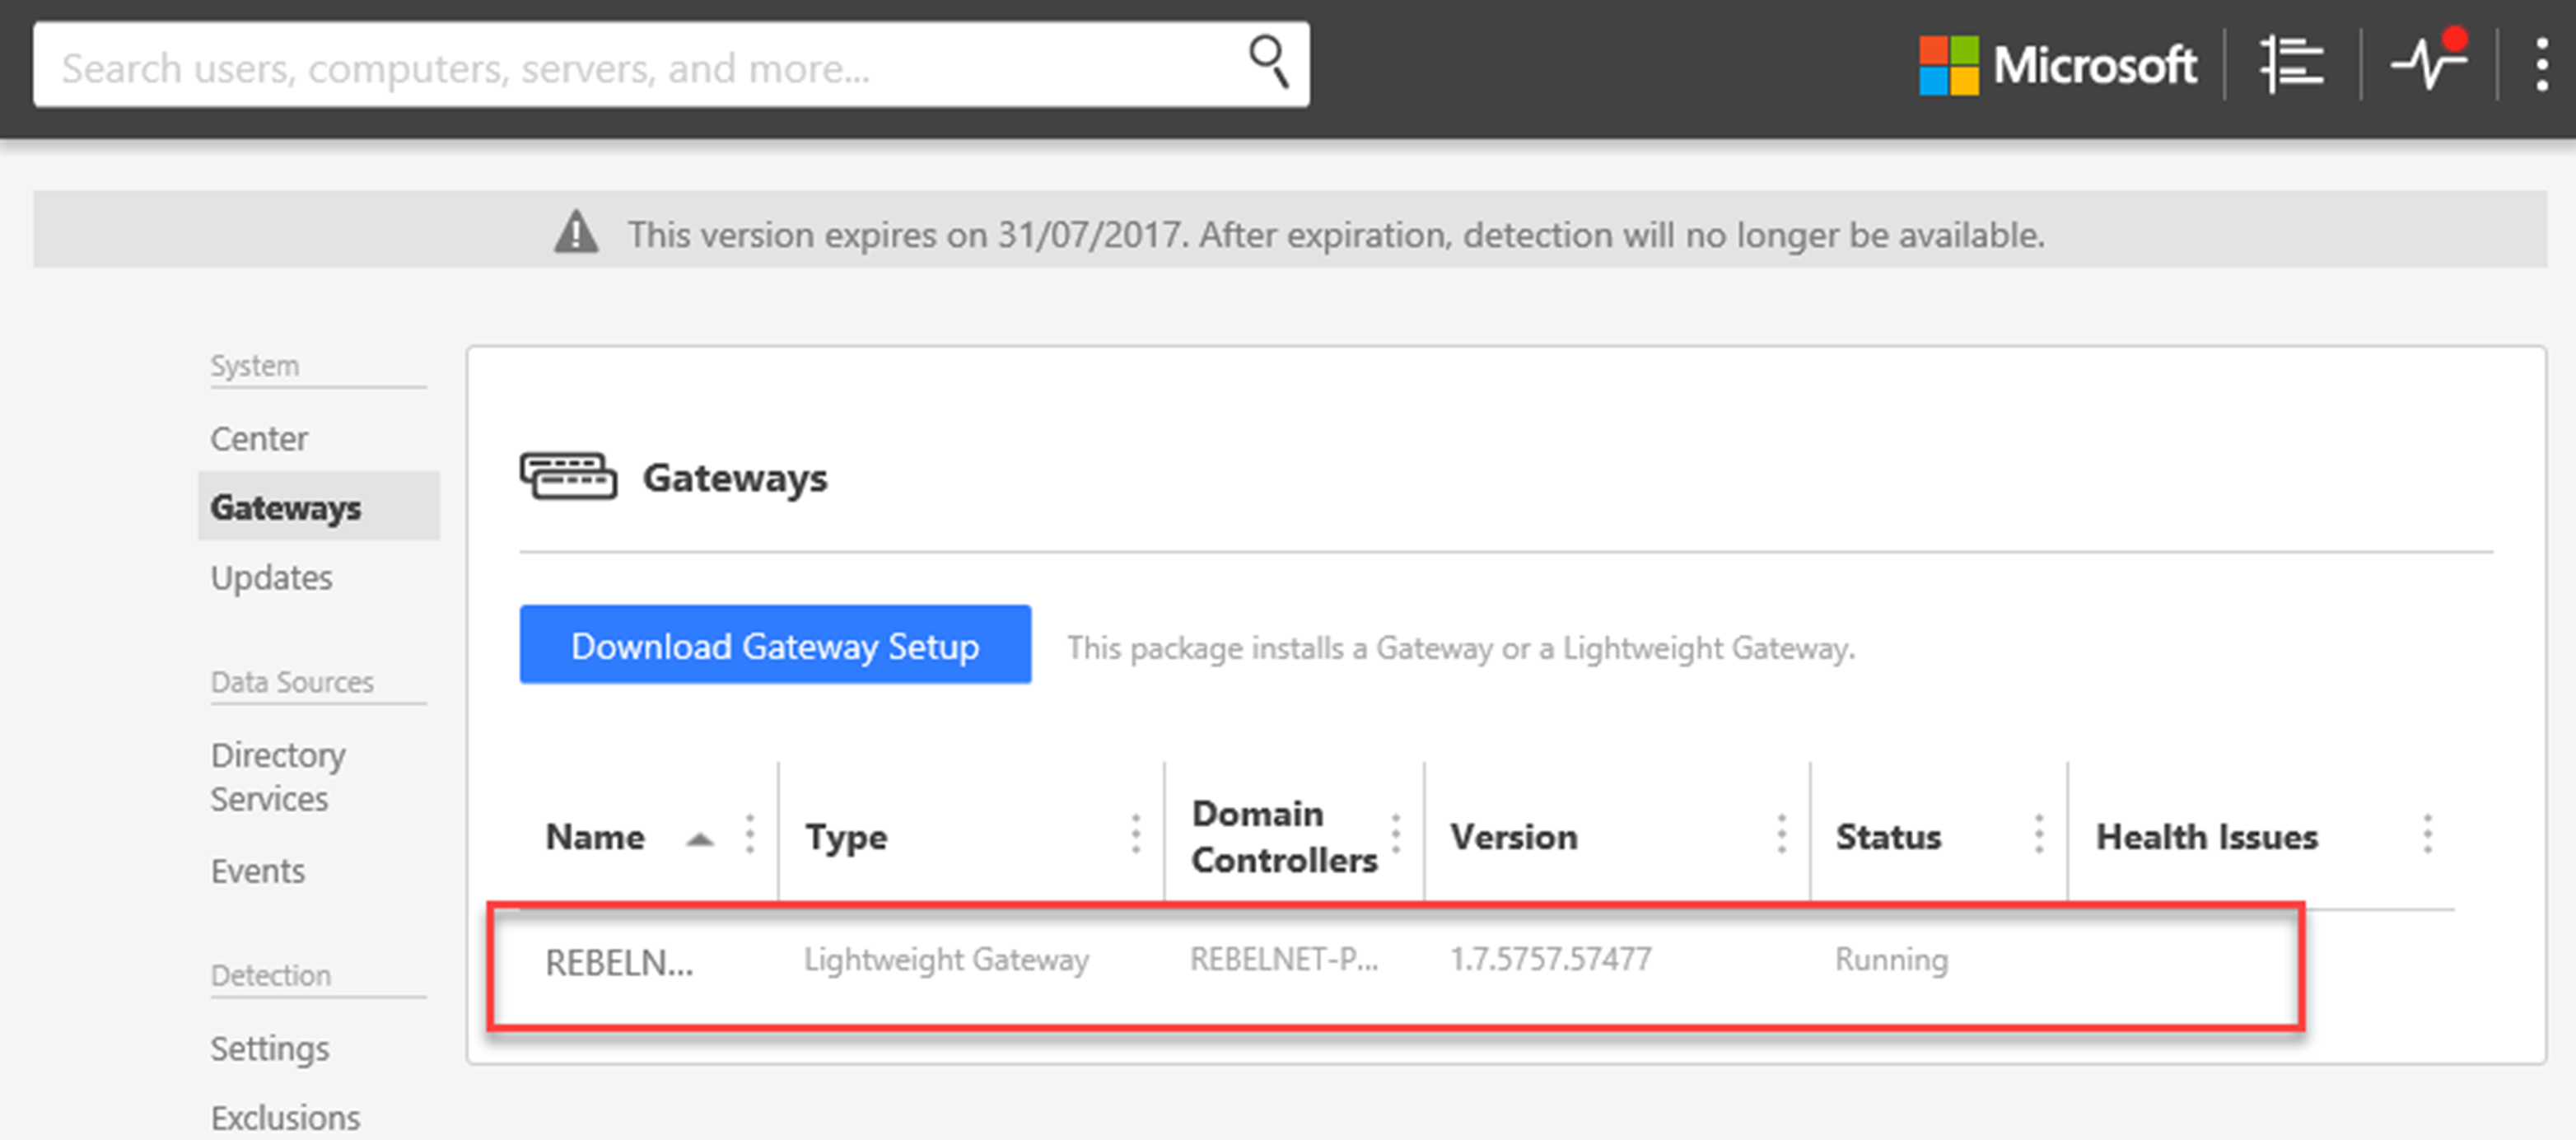
10) Once it completed, log in to ATA center and verify if you can see it is successfully registered.
Microsoft Advanced Threat Analytics Testing
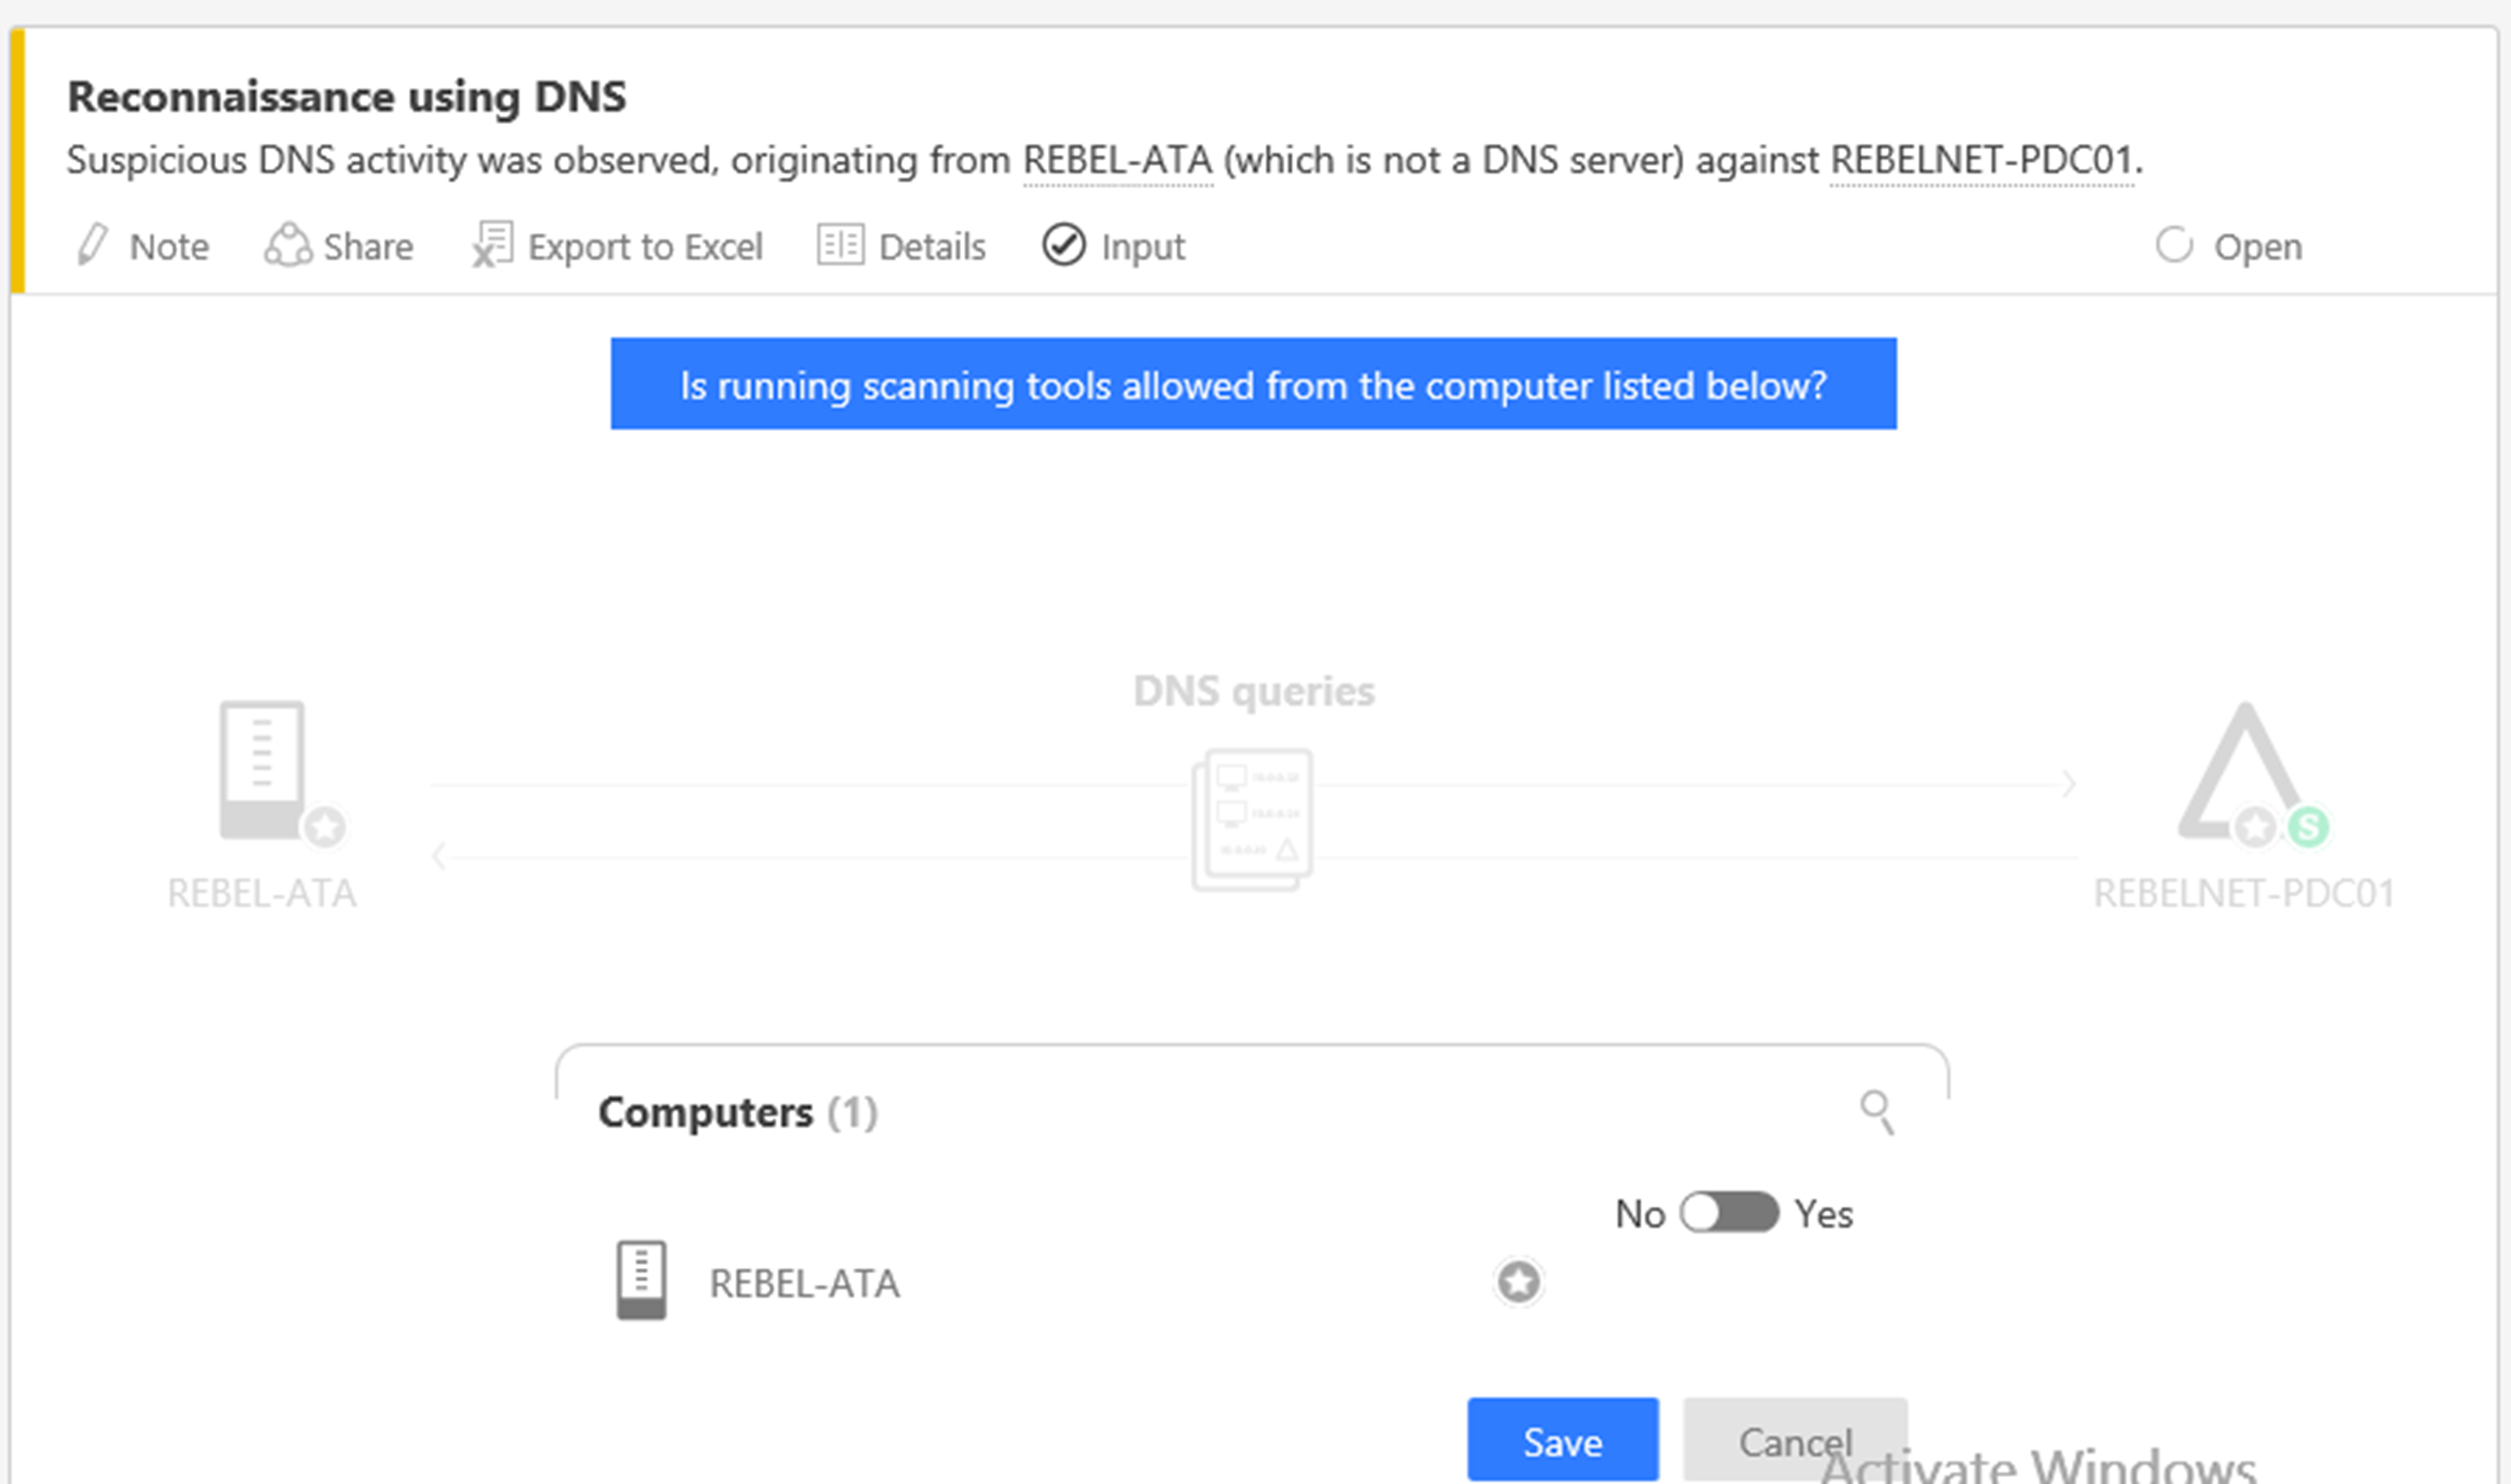
The easiest way to test the Microsoft Advanced Threat Analytics functions is to simulate a DNS reconnaissance attack. In order to do that,
1) Log in to a Domain Computer
2) Open the command prompt and type, nslookup – REBE-PDC01.therebeladmin.com and press enter. The server name can be replaced by any available domain controller FQDN.
3) The type ls msn.com
4) Then log in to Microsoft Advanced Threat Analytics center and check the timeline. There we can see the detected event.
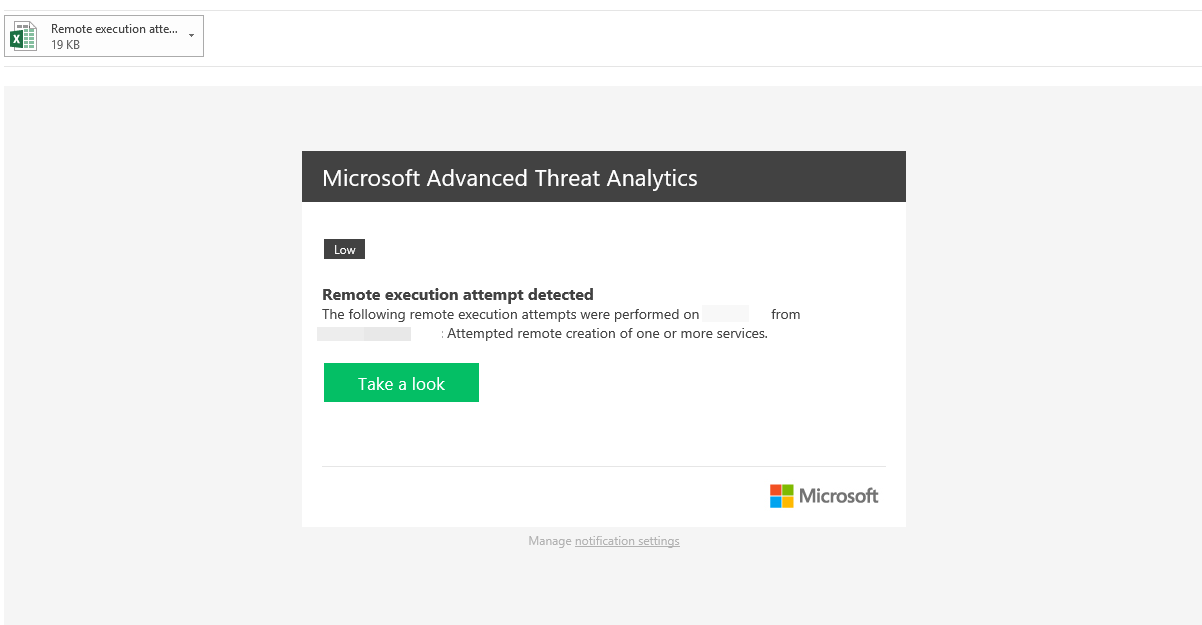
In here it is only display it as a time line entry, but Microsoft Advanced Threat Analytics also allows to send events as email alerts. This configuration can be done using ATA Center > Configuration > Mail Server Settings and Notification Settings
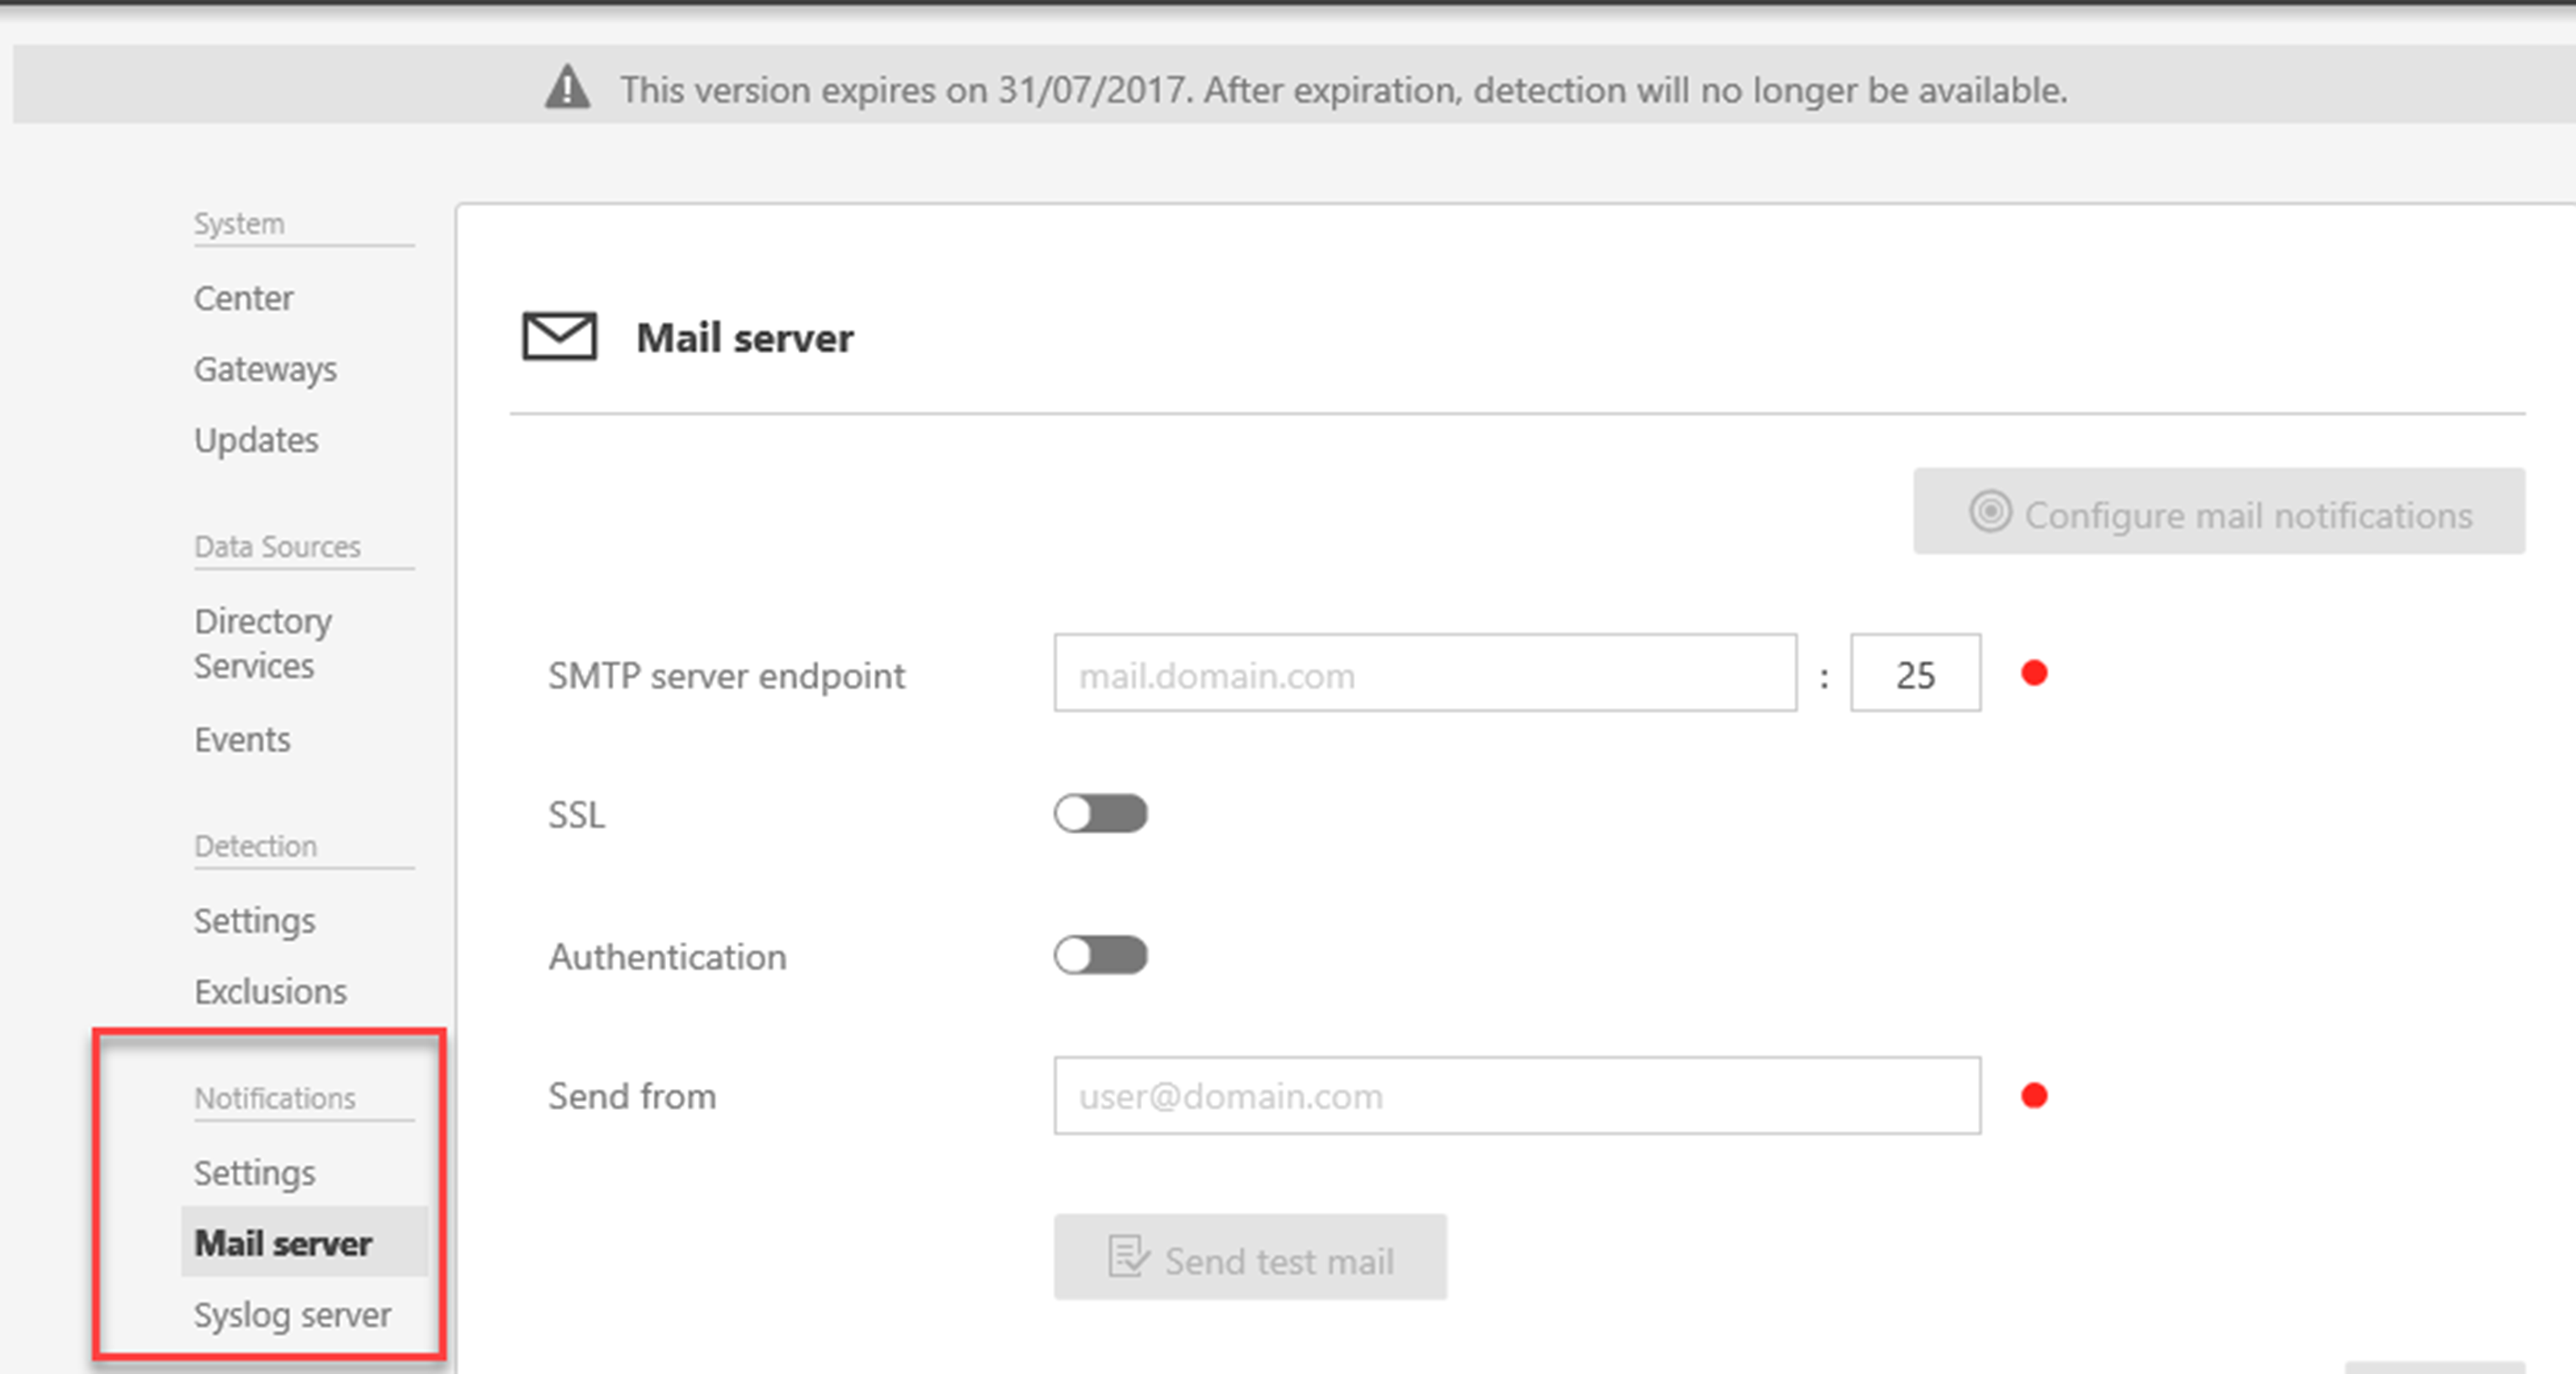
Then, once an event is raised it will sent out an email alert too.
This completes the Microsoft Advanced Threat Analytics deployment. If you have any questions feel free to contact me on rebeladm@live.com

