
This is the part 2 of series of articles which explains NLB cluster setup and its features. If you still not read the Part 1 you can find it here,
Network Load Balancing (NLB) – Part 1
In last post I explain how we can install the NLB feature in AD environment. In this post let’s look in to configuration of the NLB cluster.
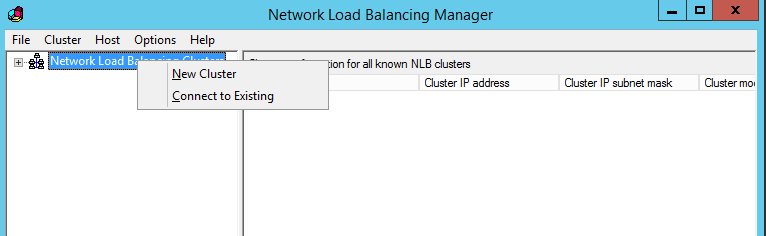
The configuration of NLB will be done via “Network Load Balancing Manager”. Once It’s open (Server Manager > Tools > Network Load Balancing Manager) right click on NLB cluster and select “New Cluster”.
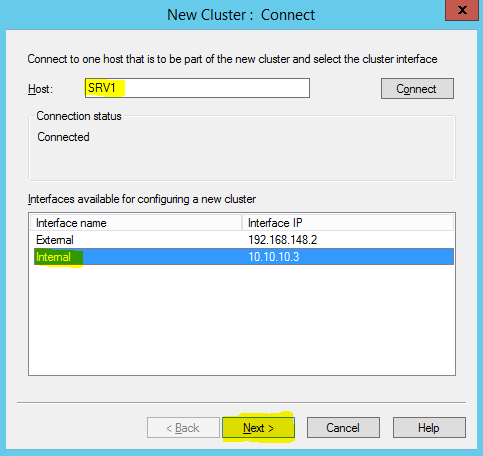
In Wizard it asks to connect to a server where NLB feature is installed. In cluster it always recommended to use separate network segment for its internal traffic. It’s best if you can add additional NIC and make separate VLAN for cluster. Once server is add to the list it will list down the available NIC. Select the appropriate NIC and click next.
In next window it gives to 1-32 number to use for priority. It is a unique number to identify the server which will handle the network traffic. Number 1 will have the highest priority. If the highest priority server is offline, cluster will use the second highest priority server for network traffic.
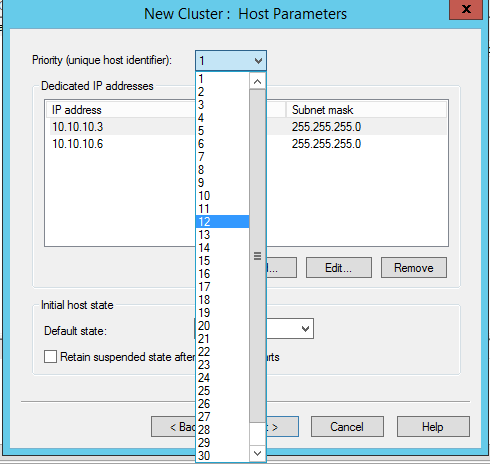
In same window we can select the dedicated ip for the cluster. This is important if system uses more than one ip address. Also make sure these servers not using DHCP for IP addressing.
In same window we also can select the initial state of the host. It can be started, stopped or suspended. If needs also can set the system to retain suspended even after restart. Once configuration is done click next to continue.

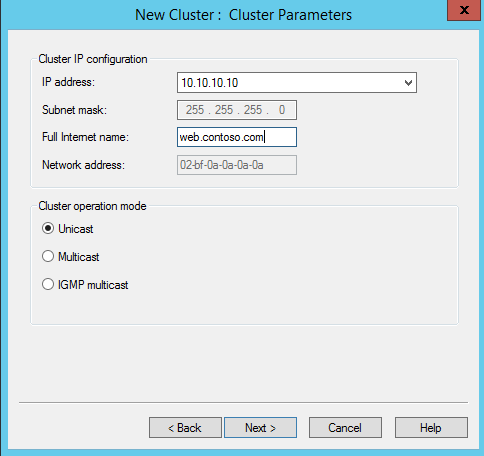
As I mentioned before, if someone connects from external the cluster will looks like a one server. Users will connect to entire cluster with one particular ip address. It must be a valid ip address and also should be in same ip subnet as the cluster. This can define in next window. Once input the details, click on next to continue.

In next window, under cluster ip configuration section using full internet name, can define the FQDN which can use for the cluster. Same time make sure this entry match with external DNS and firewall ip forwarding rules. Under the cluster operation mode it gives 3 options to select with. By default its unicast and it allows NLB cluster’s mac address to replace with each host NIC mac address. Unfortunately some NIC vendors do not allow this.
On multicast, it allows to keep each NIC’s mac addresses as it is. NLB’s cluster mac address act as multicast address.
On option IGMP multicast it allows to configure multicast in ip address level. To do this the switch which cluster hosts are connected must be able to handle IGMP multicast.
Once configuration done, click on next to continue.
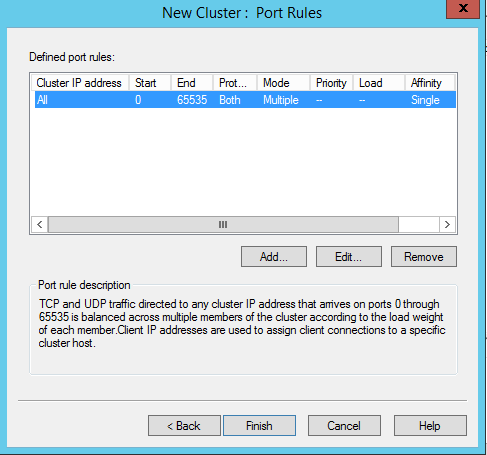
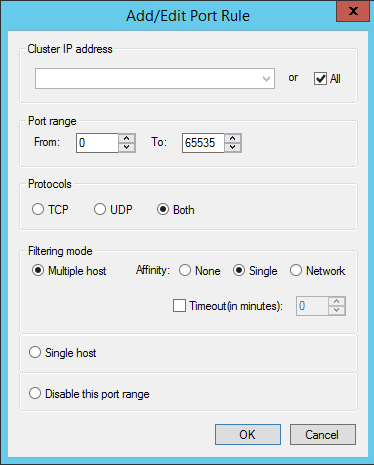
In next window it gives option to configure port rules. By default its create port rule which allowing TCP/UDP port 0 to 65535. These rules helps NLB cluster to identify the traffic which will handle by the cluster. Incoming packet can only have one particular port rule. You can’t use multiple rules for that. In real world my recommendation is to keep the default rule. If you needs to change it, select the rule and click edit.
Once done, click finish and it will create the cluster.
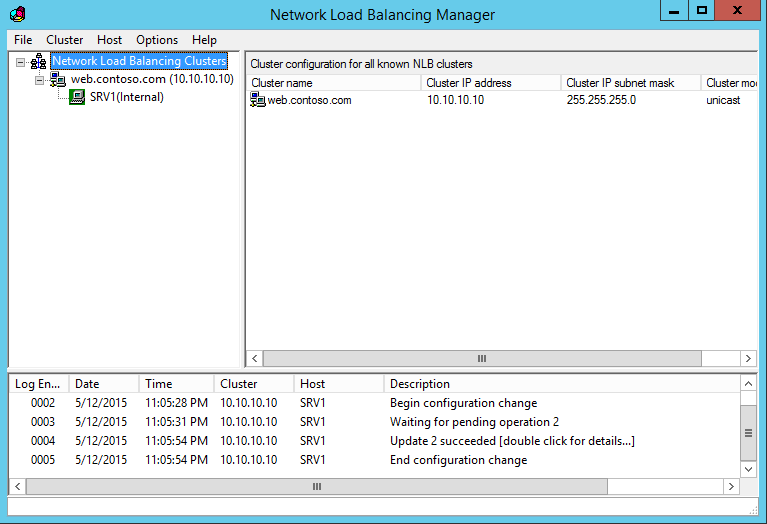
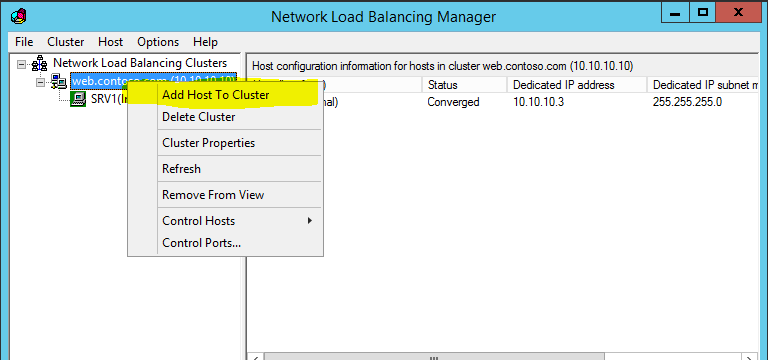
Once its successfully created, we can add hosts to the cluster. To do that right click on the cluster name and select add host to cluster.
This is the end of NLB cluster series and if you have any questions about post feel free to contact me on rebeladm@live.com

