
There are lots of ways that you can configure DHCP Services. Most of the modern day Routers, Switches are comes with inbuilt DHCP server which can simply configure for network. Also we can configure operating system level DHCP servers on windows, Linux environments.
As demo I will be setting up DHCP on Router level. For demo I will be using Cisco Packet Tracer as simulator.
In setup I will be configuring 10.10.10.0/24 IP Range.
Let’s look in to the some of the commands that will be using in router to configure this.
All These commands should be running from global configuration mode.
|
Command |
Description |
|
ip dhcp pool xxxxx |
This will be creating dhcp instance on the router. You can define your own name for the DHCP pool |
|
network 10.10.10.0 /24 |
Using this you can define the ip range that will be use by the DHCP clients. You can define this range as you wish. |
|
domain-name mydomain.com |
This defines DNS domain name for the client. This is optional and you can just ignore if you don’t need to configure it. |
|
dns-server 10.10.10.1 |
Using this you can define the DNS server settings that DHCP client will use. This is must as this helps for the proper communication. |
|
default-router 10.10.10.1 |
This command defines the default gateway settings for the dhcp clients. This is the ip they will get as gateway in there NIC. |
|
lease |
This will defines the lease time of the ip from the DHCP pool. For ex- we can set lease time to 2 days and the host will have same ip for 2 days before it connect to DHCP server again. |
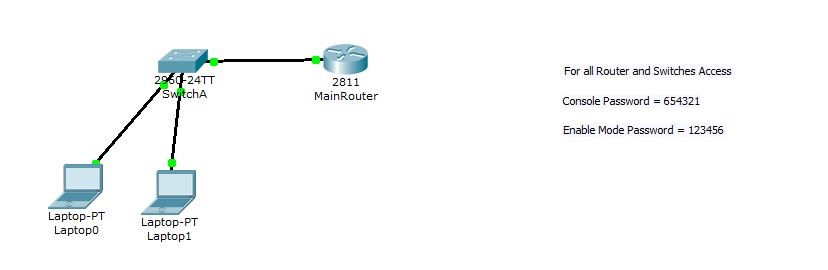
In demo I will be using following
|
Device |
IP |
|
Cisco Router 2811 |
10.10.10.1 |
|
Cisco Switch 2960 |
10.10.10.2 |
|
DHCP Pool Range |
10.10.10.0/24 |
|
2 Laptops |
Will get ip address from the DHCP |
In here in the configuration we have done the initial configurations on the switch and the router as I explained in details in previous question. It will have basic security setup and IP assign to it.
To configure the DHCP on the Router we need to use following commands in global configuration mode.
> ip dhcp pool Greenwich-DHCP ( this set the name of the DHCP pool to Greenwich-DHCP)
> network 10.10.10.0 255.255.255.0 ( this defines the DHCP ip range that DHCP clients will using )
> dns-server 4.4.4.4 ( This defines the DNS Server for the dhcp clients. Here I used open DNS for now )
> default-router 10.10.10.1 ( This defines the default gateway for the dhcp clients )

Here I cannot use some commands due to the limitations of the cisco packet tracer.
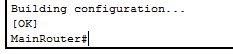
After these you need to save the configuration of the router to the running config. Otherwise it will disappear with power cycle.
Now we need to test if it’s providing the IP addresses to the Laptops that connected to the switch as we wanted.
To do that, I have configured one of pc to use DHCP and check the results.

As we can see it’s got the DHCP ip address from the router.

