
This is the part 3 of the series of articles which explains complete setup of VPN in windows server environment.
Configure Logs
To maintain the security and the monitor the issues involve with the remote access it’s important to configure proper logs. NPS keeps separate logs for this process. In below I will demonstrate how to configure these logs.
1. Open the network policy server mmc.
2. In the console click accounting.
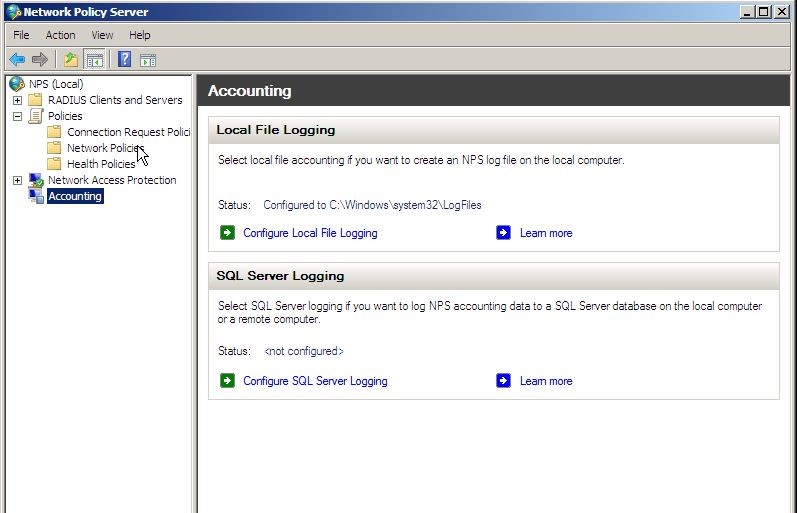
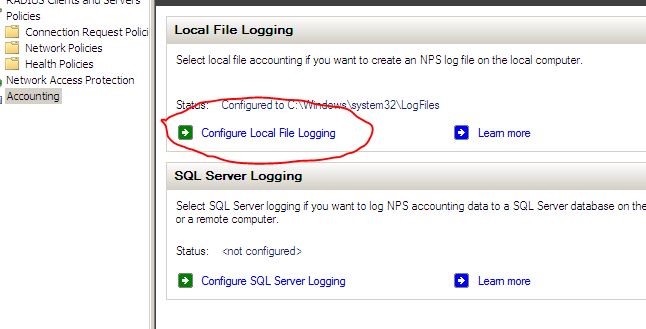
3. In the detail panel click configure local file logging. Then local file logging box will open.
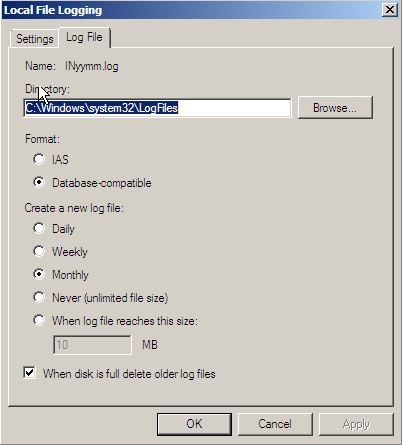
4. On the log file tab, it is possible to define the directory the log files should store. Also by selecting “database-compatibility” the files will be save on IAS format which allow to open it from database level.
Also there we can define the log intervals such as daily, weekly or monthly. Also the log file size, what to do if log is full etc. allow to adjust. Then click ok to apply new changes.
For monitor the VPN connections can use the “Routing and Remote Access” mmc. In their clicking on “Remote Access Clients” will list down the active VPN connections.

Setup VPN Client
So far I have configured all the server side configurations which required for VPN connection. Now it’s time to look how to setup a client pc to connect with VPN. Following demo explains how to do this on windows 7 client pc.
1. Go to network sharing center by Start > control Panel > Network Sharing Center
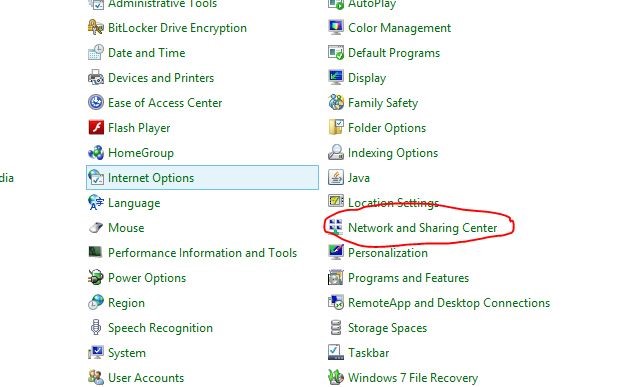
2. Under change your networking settings section click “set up a new connection or network”. Then in choose connection option click connect to a work place and then click next.

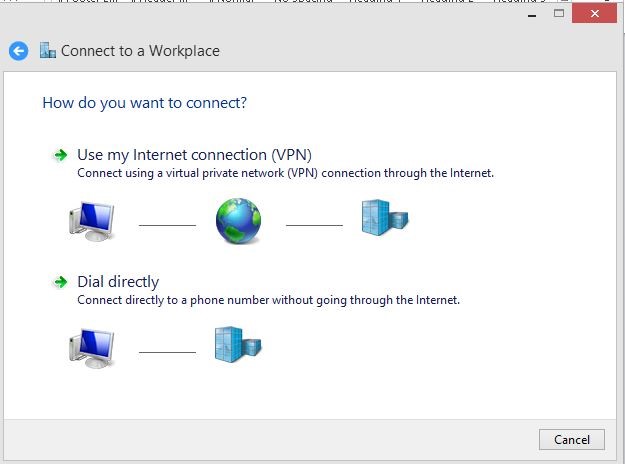
3. In the connection to workplace dialog box, select the use my internet connection(VPN) option. When prompt select “I’ll setup internet connection later”
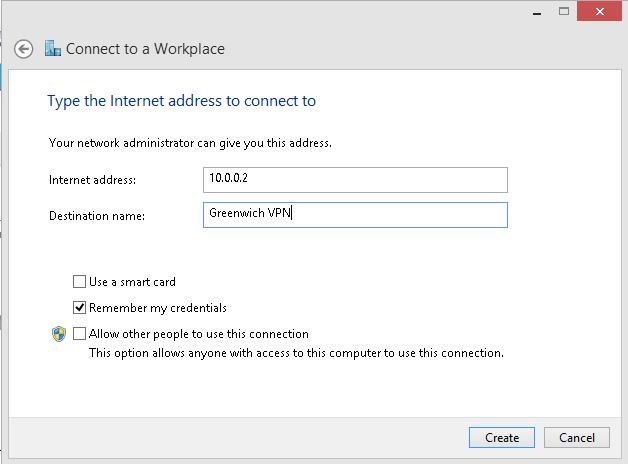
4. In the next window specify the ip address of the public interface I assign for the public interface of the VPN server and click create.
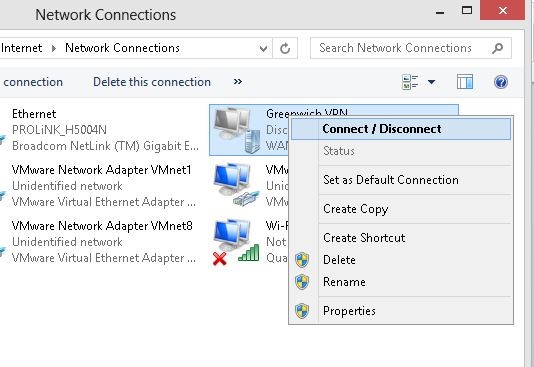
5. Then go back to network sharing center > change adapter settings. Then right click on the new VPN called “Greenwich VPN” which is created and click connect.
6. In the authentication window need to provide the login details of a user account allowed for the VPN. ( due to practice issues with public ip address cannot demonstrate it further )
So this is the end of long 3 parts post which explain complete setup of VPN server in windows server environment. if you have any question please send email to rebeladm@live.com


Like!
like