Last Updated on August 14, 2020 by Dishan M. Francis
The latency between two servers located in two regions is normally higher than the latency between two servers located in the same data center or the same rack. High latency between application servers has a direct impact on the overall performance of the application. By placing applications servers in the same physical location, we can reduce the latency. When it comes to Azure VMs, we can reduce the latency between servers by placing those in the same Azure region or in the same availability zone. But this doesn’t mean the servers are running from the same data center. As Azure grows a region can have multiple data centers. But now with proximity placement group, we can co-locate Azure VMs to the same data center.
The proximity placement group can have stand-alone VMs, VM scale sets or VM availability sets. Once the proximity placement group is created, we can deploy new servers to it or move existing servers to it. It is recommended to use accelerated networking with the virtual machine in proximity placement group to further reduce the latency. Also, if possible, use one VM template for virtual machines in the same proximity placement group. This is because some datacentres only support certain VM SKUs and sizes.
In this demo, I am going to demonstrate how we can create a proximity placement group and deploy a virtual machine to it. I also going to demonstrate how to move the existing virtual machine to the proximity placement group.
For the configuration process, I will be using PowerShell. Therefore, please make sure you have an Azure PowerShell module installed. More info about it can find here.
Create proximity placement group
Let’s start the configuration process by creating a new resource group.
1. Launch PowerShell console and connect to Azure using Connect-AzAccount as Global Administrator
2. Then create a new resource group using,
New-AzResourceGroup -Name REBELRG1 -Location “East US”
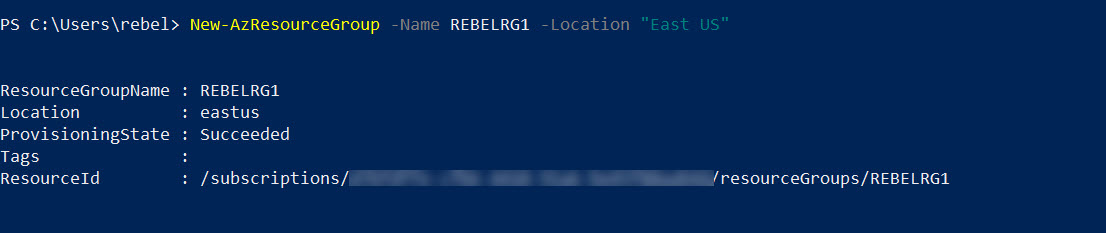
In the above, REBELRG1 is the resource group names and East US is the Azure region.
3. The next step is to create a new virtual network under REBELRG1 resource group.
$vmsubnet = New-AzVirtualNetworkSubnetConfig -Name vmsubnet -AddressPrefix “10.0.2.0/24”
New-AzVirtualNetwork -Name REBELVN1 -ResourceGroupName REBELRG1 -Location “East US” -AddressPrefix “10.0.0.0/16” -Subnet $vmsubnet

In the above, REBELVN1 is the new virtual network name. It has 10.0.0.0/16 address space. It also has a new subnet 10.0.2.0/24 (vmsubnet) for virtual machines
4. As the next step of the configuration, let’s go ahead and create proximity placement group using,
New-AzProximityPlacementGroup -Location “East US” -Name rebelpggrp01 -ResourceGroupName REBELRG1 -ProximityPlacementGroupType Standard

In the above, I created a ppg called rebelpggrp01. The group type is set to standard.
5. Now we have the ppg, the next step is to create a VM in this group. Before we do that, we need to get the proximity placement group ID value.
$pggrp1 = Get-AzProximityPlacementGroup -Name rebelpggrp01 -ResourceGroupName REBELRG1
$pggrp1.id

In the above, we can see the value of the group id. Let’s go ahead and create a VM inside the ppg.
$mylogin = Get-Credential
New-AzVm -ResourceGroupName REBELRG1 -Name “REBELTVM01” -Location “East US” -VirtualNetworkName “REBELVN1” -SubnetName “vmsubnet” -addressprefix 10.0.2.0/24 -PublicIpAddressName “REBELVM01IP1” -OpenPorts 3389 -Image win2019datacenter -Size Standard_D3_v2 -ProximityPlacementGroup $pggrp1.id -Credential $mylogin
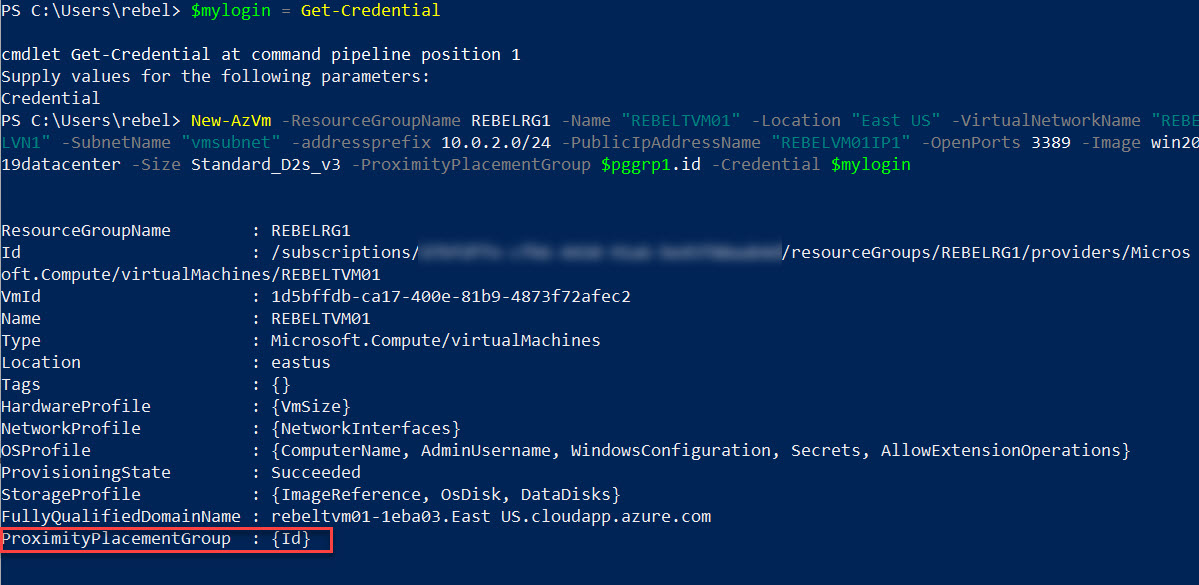
In the above, I am creating a virtual machine called REBELTVM01 in East US Azure region. It is running windows server 2019 data center edition. I have specified it using -Image parameter. It also using Standard_D3_v2 vm size to support accelerated networking later in the config. For networking, it uses REBELVN1 virtual network and subnet 10.0.2.0/24. By using -ProximityPlacementGroup I have assigned the VM to the ppg created in the previous step.
Move the existing VM to the proximity placement group
I also created a VM which is not in the proximity placement group but the same region.

I need to move REBELTVM02 VM to the proximity placement group.
Let’s start with some variables.
$vm2 = Get-AzVM -Name REBELTVM02 -ResourceGroupName REBELRG1
$rebelpg1 = Get-AzProximityPlacementGroup -Name rebelpggrp01 -ResourceGroupName REBELRG1
Then stop the VM.
Stop-AzVM -Name $vm2.Name -ResourceGroupName $vm2.ResourceGroupName
The next step is to update the VM config and add the VM to the proximity placement group.
$vm2.ProximityPlacementGroup=$rebelpg1.Id
$vm2 | Update-AzVM
Then start the VM,
Start-AzVM -Name $vm2.Name -ResourceGroupName $vm2.ResourceGroupName
We can confirm the change as follows.
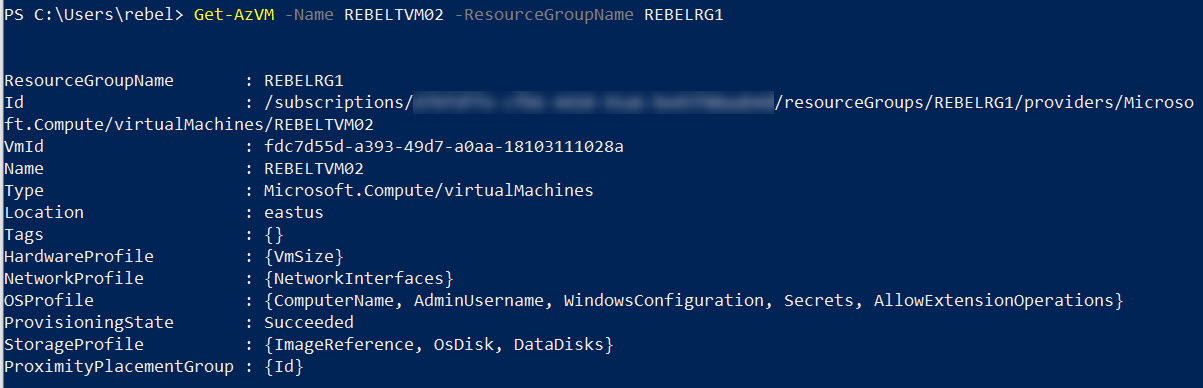
Testing
Apart from creating a ppg and adding virtual machines to it, I also did the following tests.
I created two virtual machines in the same Azure region (East US) and the same resource group (REBELRG1). Both machines have the exact same configuration (Standard_D3_v2). Then I did a latency test using https://gallery.technet.microsoft.com/Latte-The-Windows-tool-for-ac33093b and got the following results.
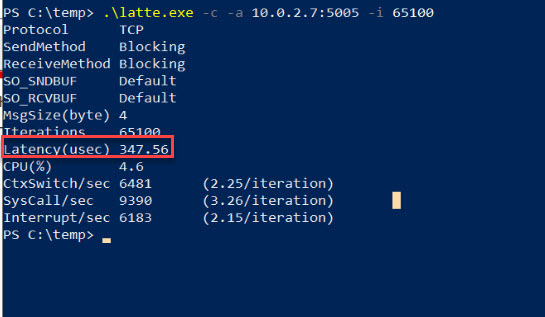
As we can see above, Latency(usec) is recorded as 347.56.
Then I did the same test using two virtual machines in proximity placement group. These two VMs are also in the same Azure region (East US) and the same resource group (REBELRG1). Both machines have the exact same configuration (Standard_D3_v2).
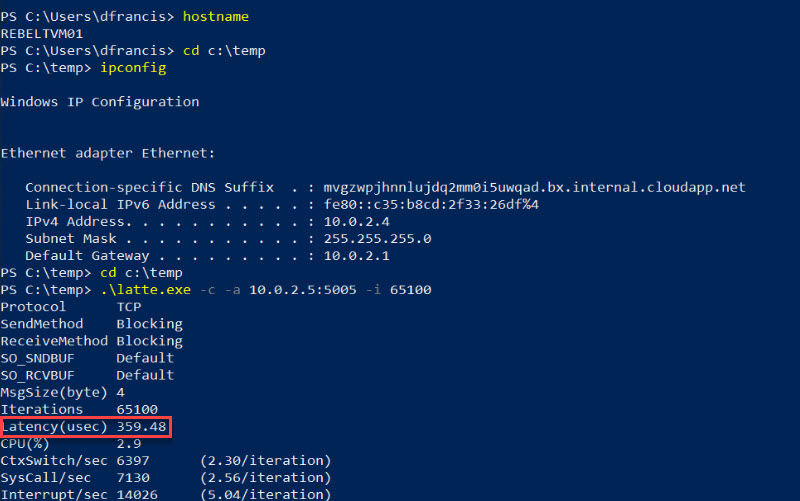
Even it is in the proximity placement group, the Latency(usec) is recorded as 359.48
As we can see there is not much difference. This is because when we create VMs in the same Azure region. it is possible these VMs are ended up in the same data center.
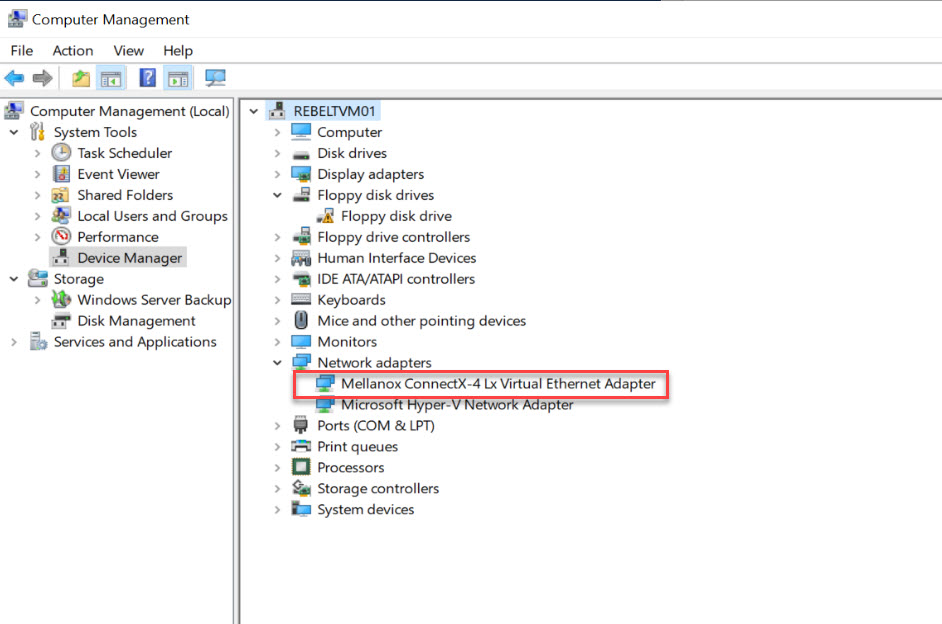
It is recommended to use accelerated networking with the ppg. So, let’s see what will happen if we upgrade the VMs in the group with accelerated networking.
To do that, first, we need to stop the VM.
Stop-AzVM -ResourceGroup “REBELRG1” -Name “REBELTVM01”
Then update the NIC config using,
$nic1 = Get-AzNetworkInterface -ResourceGroupName “REBELRG1” -Name “REBELTVM01”
$nic1.EnableAcceleratedNetworking = $true
$nic1 | Set-AzNetworkInterface
Finally, start the VM using,
Start-AzVM -ResourceGroup “REBELRG1” -Name “REBELTVM01”
More info about accelerated networking is available on https://docs.microsoft.com/en-us/azure/virtual-network/create-vm-accelerated-networking-powershell
I went ahead and did the same for REBELTVM02.
Then I ran the test again,

It is recorded Latency(usec) as 118.67. As we can see it is three times faster than the previous test.
As per the above test I can confirm, by simply placing VMs in proximity placement group will not improve the performance much. We need to enable accelerated networking for VMs to get the best out of it. Also, the proximity placement group is like insurance. It confirms the virtual machines in the group stays in the same data center.
This marks the end of this blog post. I hope now you have a better understanding of using proximity placement group in Azure. If you have any further questions about this feel free to contact me on rebeladm@live.com also follow me on twitter @rebeladm to get updates about new blog posts.