
Last Updated on March 14, 2020 by Dishan M. Francis
In my previous blog posts, I explained about two types of Azure solution to load balance web traffic.
• Azure Traffic Manager – If you are looking for DNS level load balancing which can distribute traffic to global endpoints, Azure traffic manager will be the product to look at. More info about deployment can be found on https://www.rebeladmin.com/2020/02/step-by-step-guide-dns-based-traffic-load-balancing-with-azure-traffic-manager/
• Azure Load Balancer – Azure load balancer works in layer 4 (transport layer) and can distribute network traffic to endpoints in the same Azure region. It can use to distribute internet traffic as well as internal traffic. More info about deployment can be found on https://www.rebeladmin.com/2020/01/step-step-guide-setup-azure-load-balancer-powershell-guide/
However, if you looking for Layer 7 (Application Layer) load balancing solution, Azure Application Gateway is the answer. Azure Application Gateway has the following features,
• Secure Sockets Layer (SSL/TLS) termination
• Autoscaling
• Zone redundancy
• Static VIP
• Web Application Firewall
• Ingress Controller for AKS
• URL-based routing
• Multiple-site hosting
• Redirection
• Session affinity
• Websocket and HTTP/2 traffic
• Connection draining
• Custom error pages
• Rewrite HTTP headers
• Sizing
More info about these features are available on https://docs.microsoft.com/en-us/azure/application-gateway/features
In this demo, I am going to show how we can setup URL-based routing using Azure Application Gateway.
To do that I will need to do the following tasks,
1. Setup new resource group
2. Create Virtual Networks
3. AG IP and frontend port configuration
4. Create Backend pool
5. Create listener and AG routing rule
6. Create Azure Application Gateway
7. Add Backend pools for videos and images
8. Add frontend port for the pool
9. Create Backend Listener
10. Create URL path map
11. Create routing rule
12. Create virtual machines
13. Add Web Content
14. Testing
For the configuration process, I will be using Azure PowerShell. Therefore, please make sure you have Azure PowerShell module installed. More info about it can find under https://docs.microsoft.com/en-us/powershell/azure/install-az-ps?view=azps-2.6.0
Setup new resource group
Launch PowerShell console and connect to Azure using Connect-AzAccount
Then create a new resource group using,
New-AzResourceGroup -Name REBELRG1 -Location “East US”
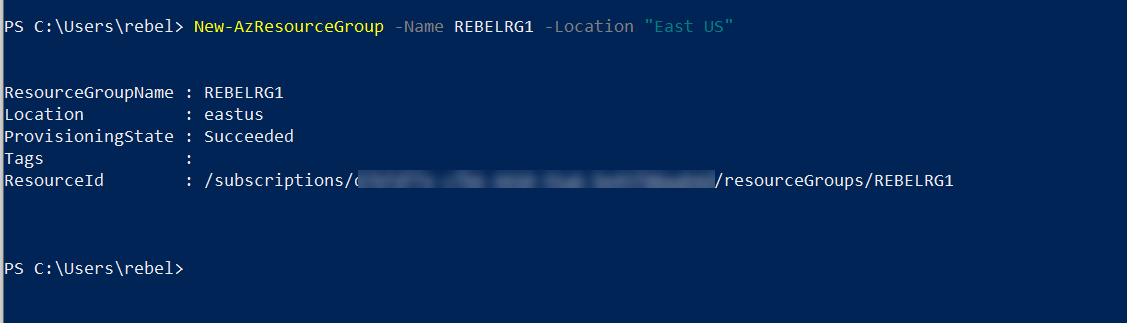
In the above, REBELRG1 is the resource group name and East US is the resource group location.
Create Virtual Networks
In this demo, I am going to use two back end servers. Before VM setup, let’s go ahead and create a new virtual network in REBELRG1 resource group.
$vmsubnet = New-AzVirtualNetworkSubnetConfig -Name vmsubnet -AddressPrefix “10.0.2.0/24”
$agsubnet = New-AzVirtualNetworkSubnetConfig -Name agsubnet -AddressPrefix “10.0.3.0/24”
New-AzVirtualNetwork -Name REBELVN1 -ResourceGroupName REBELRG1 -Location “East US” -AddressPrefix “10.0.0.0/16” -Subnet $vmsubnet, $agsubnet
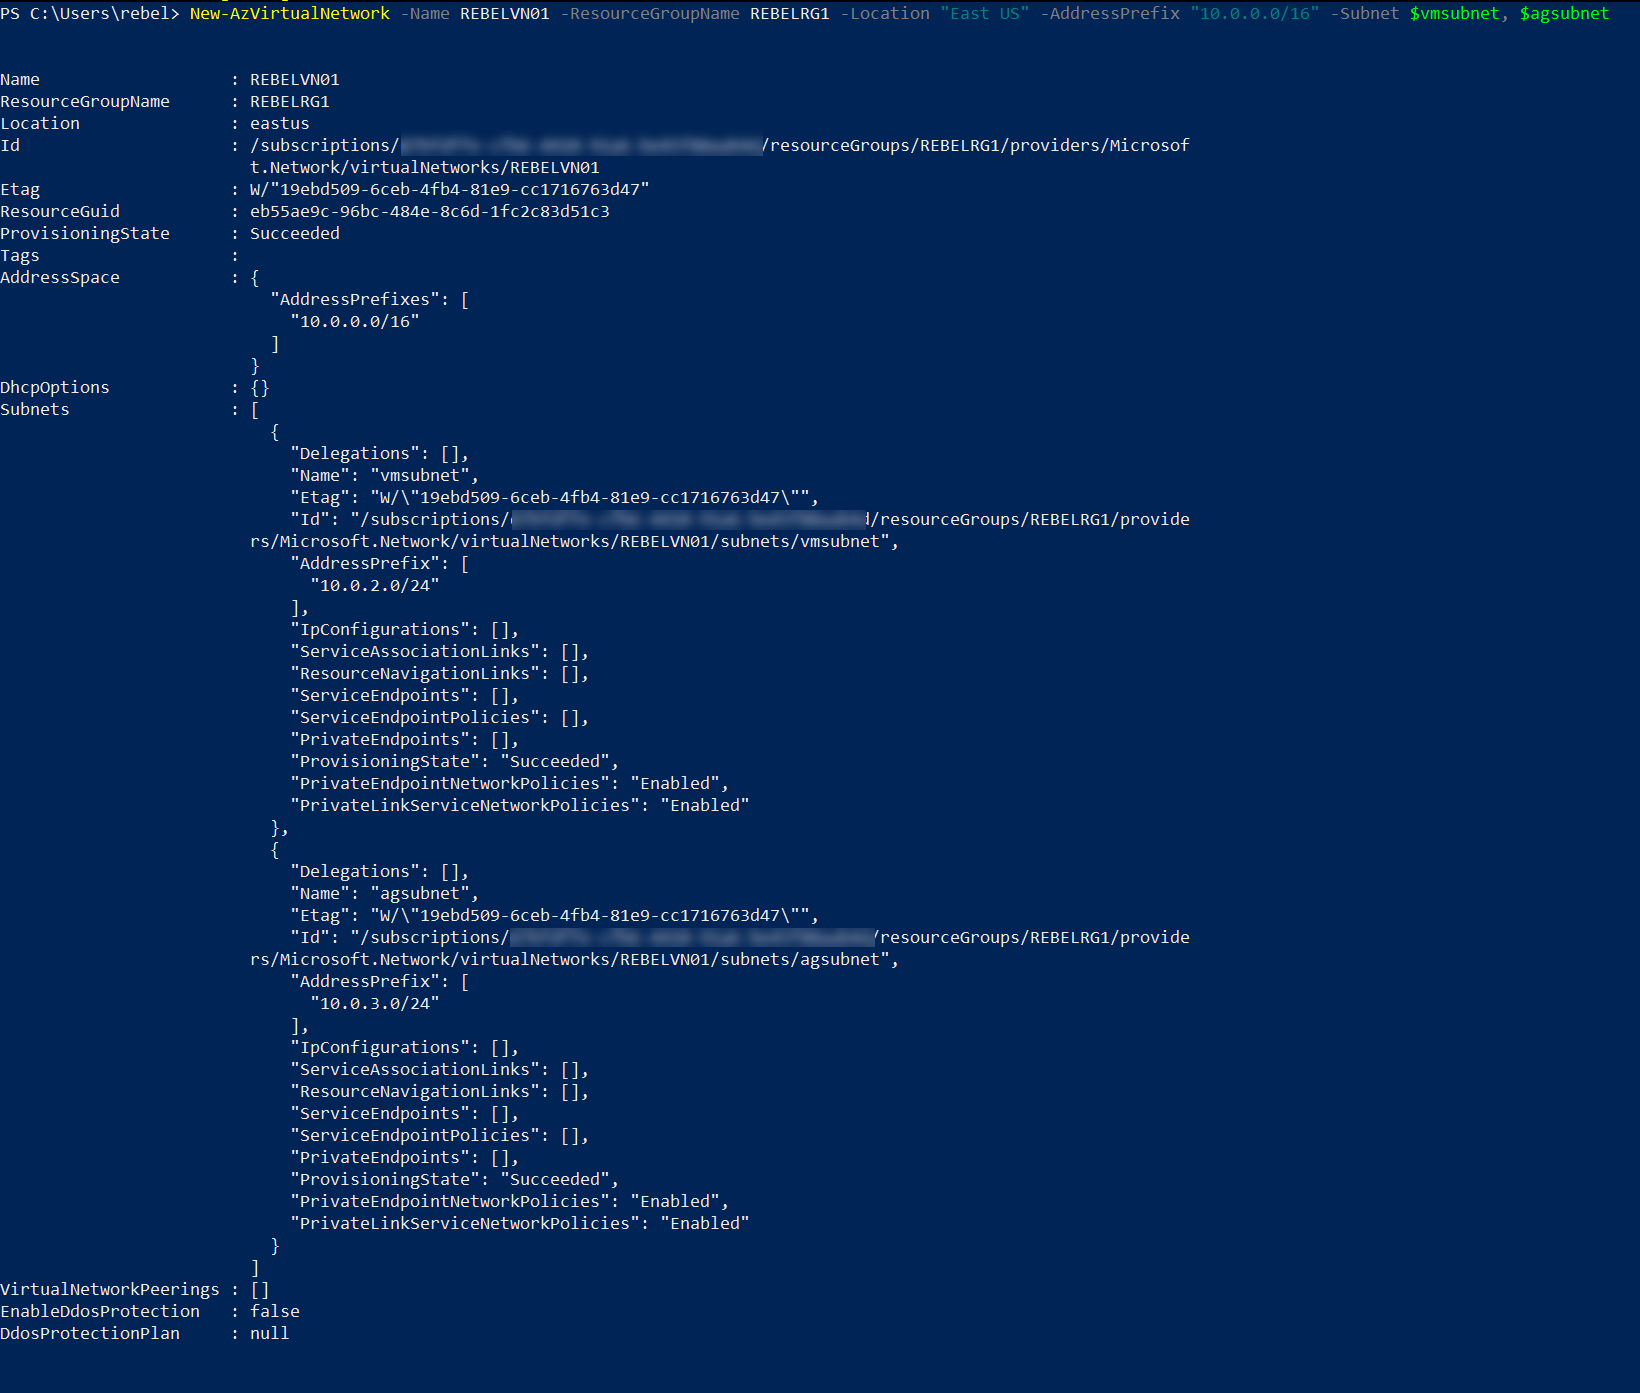
In the above, REBELVN1 is the new virtual network name. It has 10.0.0.0/16 address space. It also has a new subnet 10.0.2.0/24 (vmsubnet) for virtual machines and 10.0.3.0/24 subnet (agsubnet) for the application gateway.
Create new public IP address
We require public ip address for Azure Application gateway. This will be the external contact point for the gateway. To create that,
New-AzPublicIpAddress -ResourceGroupName REBELRG1 -Location “East US” -Name REBELPublicIP01 -AllocationMethod Static -Sku Standard
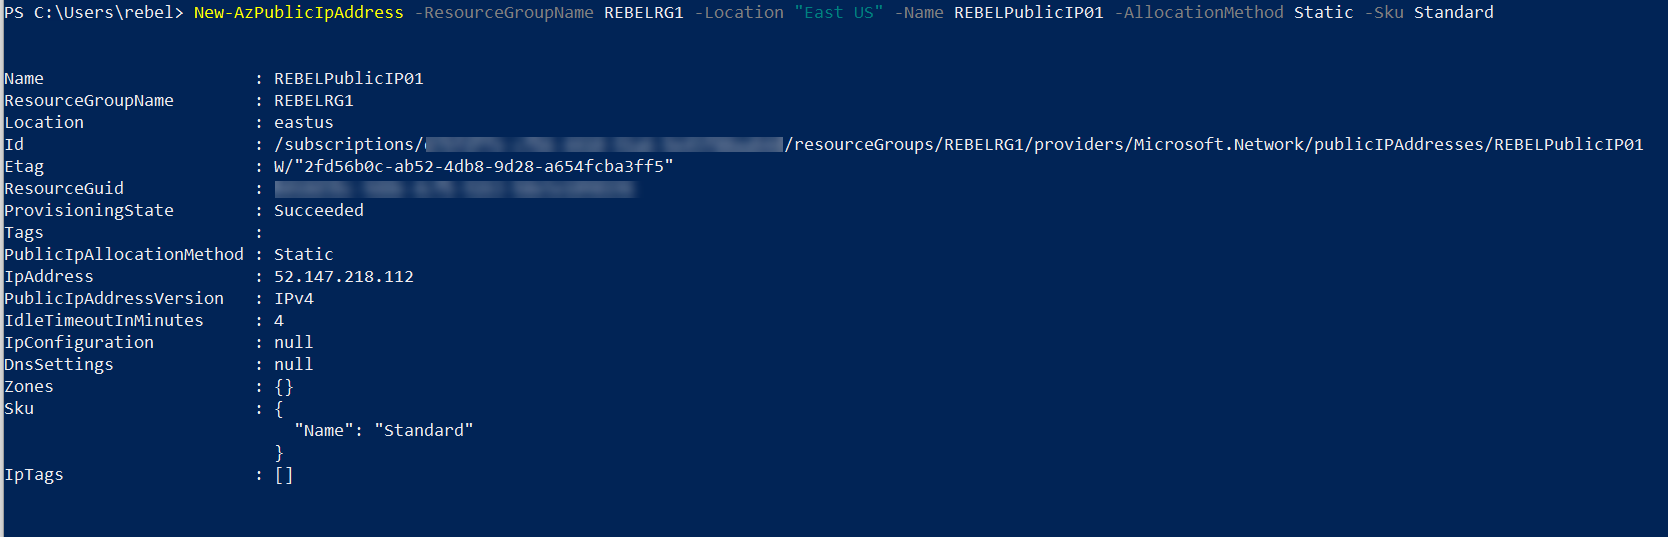
In the above, we are creating a public IP address called REBELPublicIP01 with standard SKU.
AG IP and frontend port configuration
The next step of the configuration is to assign AG gateway subnet and public IP address to Application gateway and create frontend port to use for external connectivity. To do that,
$net = Get-AzVirtualNetwork -ResourceGroupName REBELRG1 -Name REBELVN1
$subnet=$net.Subnets[1]
The above commands will grab the subnet information from the virtual network REBELVN1.
$rpublicip = Get-AzPublicIpAddress -ResourceGroupName REBELRG1 -Name REBELPublicIP01
Then I went ahead and gather information about the public IP address we created in a previous step.
The next step is to assign the subnet info to AG configuration.
$agipconfig = New-AzApplicationGatewayIPConfiguration -Name REBELAGIPconf -Subnet $subnet
After, we need to assign public ip to gateway’s front-end configuration.
$frontipconf = New-AzApplicationGatewayFrontendIPConfig -Name REBELAGfrontconf -PublicIPAddress $rpublicip
In this demo, we will be connecting to web services via TCP port 80. We need to add it to the AG frontend configuration.
$frontport = New-AzApplicationGatewayFrontendPort -Name REBELAGFrontendP -Port 80

Create Backend pool
The next part of the configuration is to set up a back end pool for the new Azure application gateway with relevant settings.
$backendpool = New-AzApplicationGatewayBackendAddressPool -Name REBELAGBackendPool
$backendpoolconf = New-AzApplicationGatewayBackendHttpSetting -Name REBELAGBackendPoolconf -Port 80 -Protocol Http -CookieBasedAffinity Enabled -RequestTimeout 120
In the above, we create a backend pool called REBELAGBackendPool with cookie-based affinity and request time out 120.
Create listener and AG routing rule
Application gateway use listeners to route traffic to backend pool. So, we also need to create one for the new AG.
$rebellistener = New-AzApplicationGatewayHttpListener -Name REBLEAGListener -Protocol Http -FrontendIPConfiguration $frontipconf -FrontendPort $frontport
Then we also need to setup rule to say how the incoming traffic will handled.
$routingrule = New-AzApplicationGatewayRequestRoutingRule -Name REBELAGrule1 -RuleType Basic -HttpListener $rebellistener -BackendAddressPool $backendpool -BackendHttpSettings $backendpoolconf
Create Azure Application Gateway
Now we have all the required configuration settings to create Azure application gateway. Let’s go ahead and create it.
$agsku = New-AzApplicationGatewaySku -Name Standard_v2 -Tier Standard_v2 -Capacity 2
$appgw = New-AzApplicationGateway -Name REBELAG1 -ResourceGroupName REBELRG1 -Location “East US” -BackendAddressPools $backendpool -BackendHttpSettingsCollection $backendpoolconf -FrontendIpConfigurations $frontipconf -GatewayIpConfigurations $agipconfig -FrontendPorts $frontport -HttpListeners $rebellistener -RequestRoutingRules $routingrule -Sku $agsku

Add Backend pools for videos and images
In this demo I am going to use two back end pools for music and videos. This way I can route traffic to different pools. To do this,
Add-AzApplicationGatewayBackendAddressPool -ApplicationGateway $appgw -Name musicBackendPool
Add-AzApplicationGatewayBackendAddressPool -ApplicationGateway $appgw -Name videoBackendPool

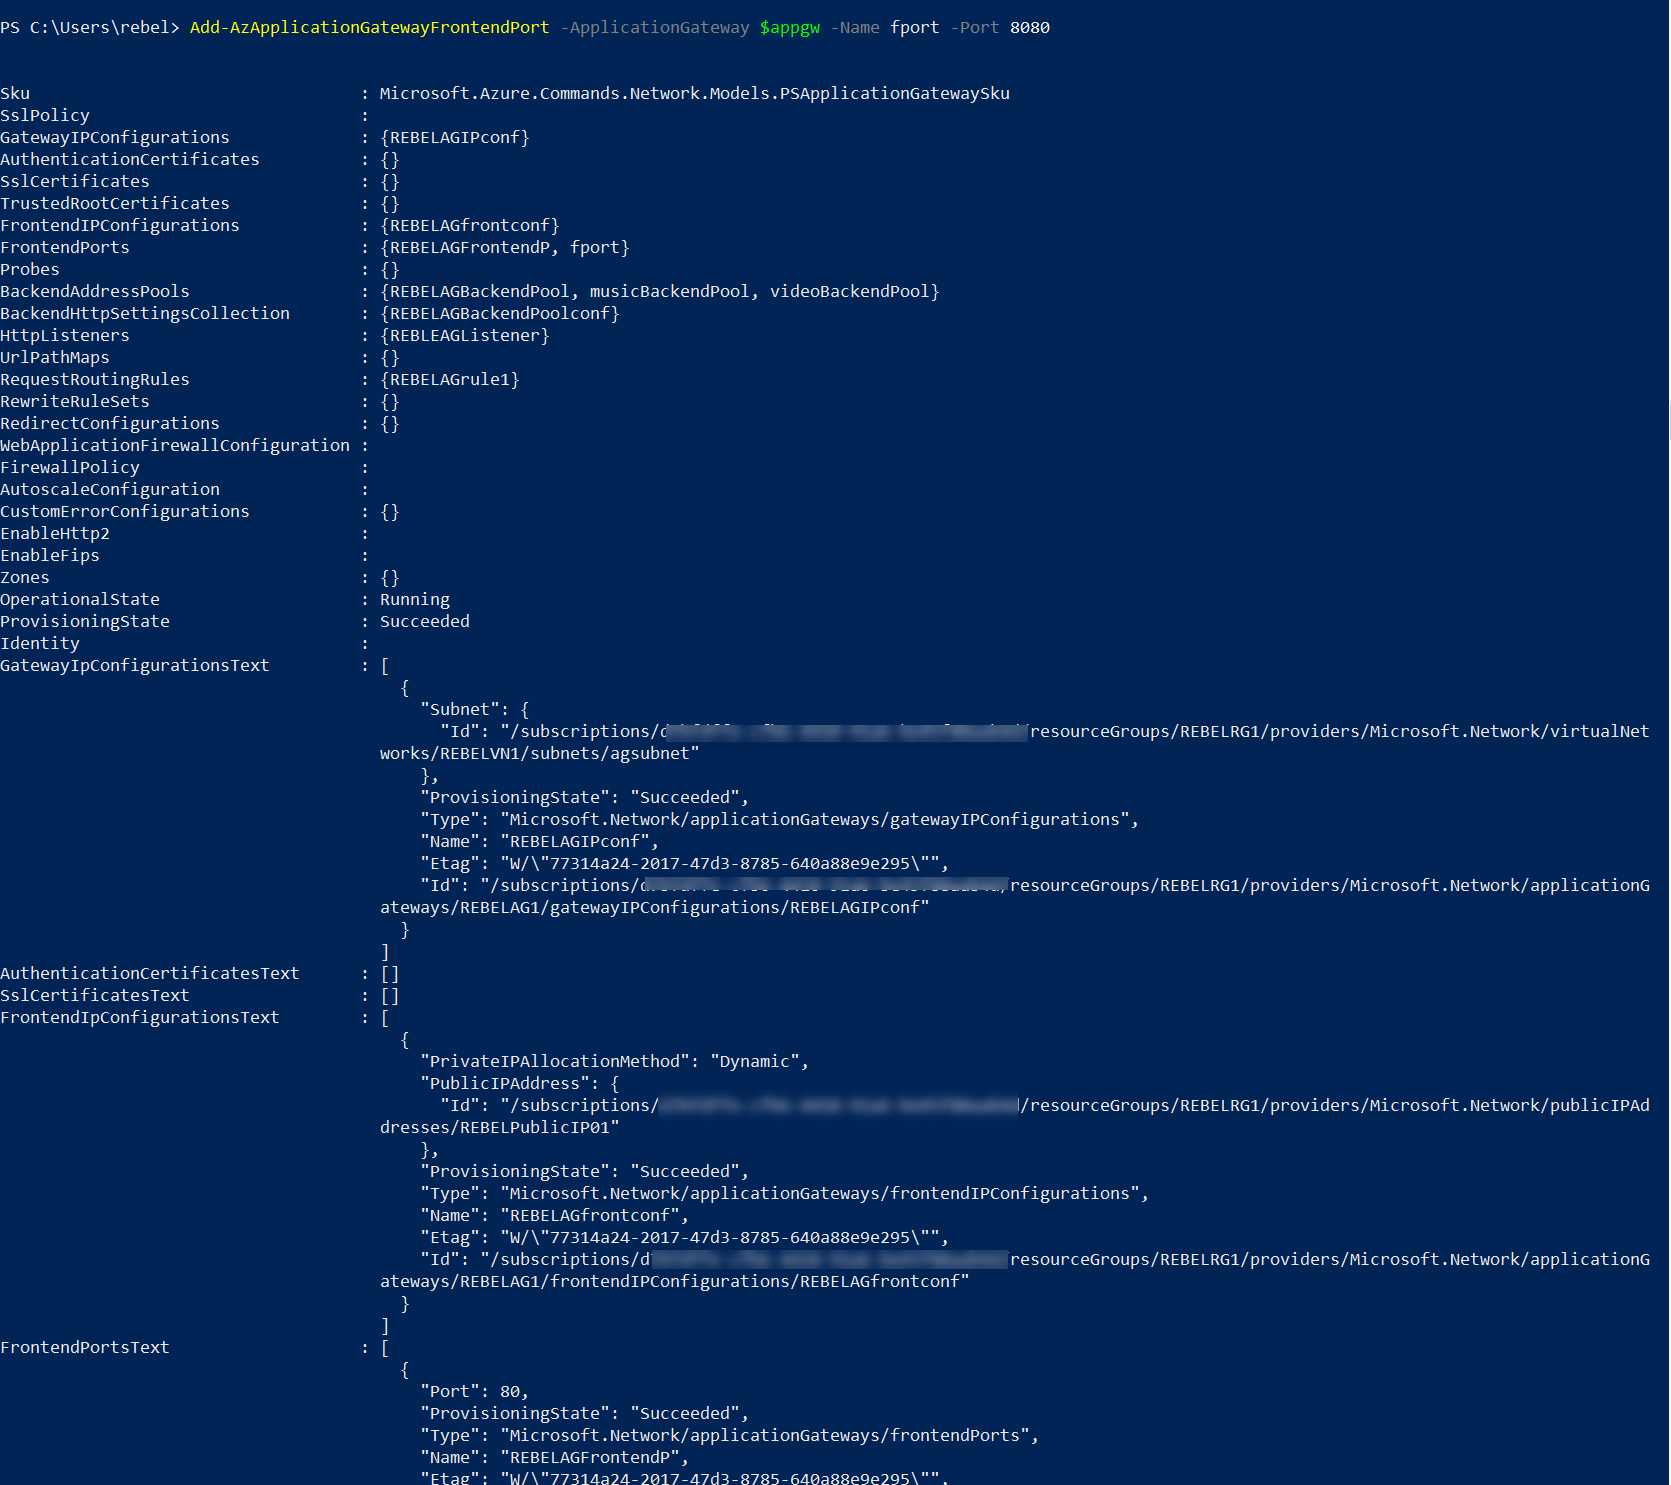
Add frontend port for the pool
As the next step of the configuration, we need to add front end port to the pool. To do that we can use,
Add-AzApplicationGatewayFrontendPort -ApplicationGateway $appgw -Name fport -Port 8080
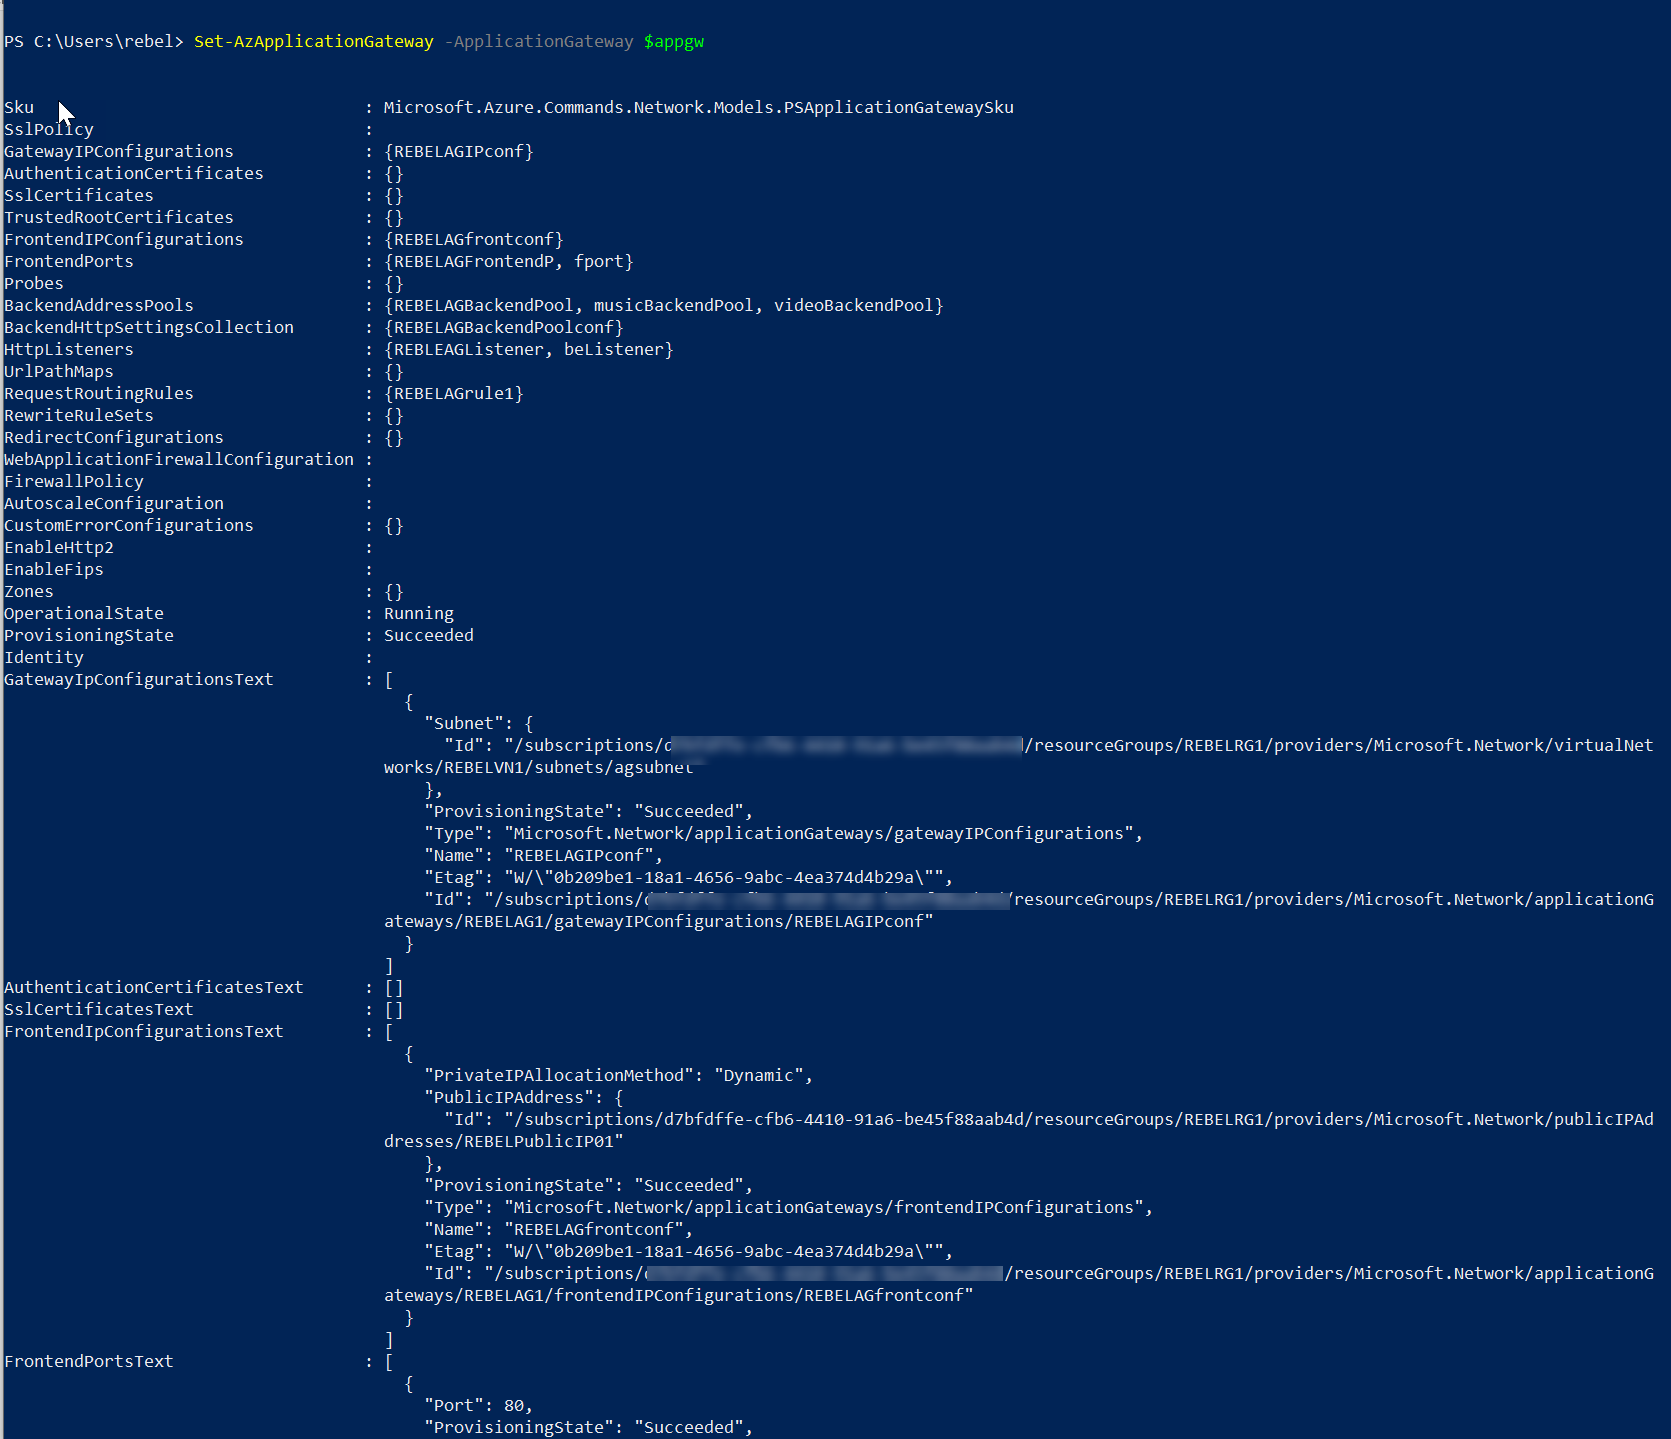
After that, we need to apply above changes to the application gateway using,
Set-AzApplicationGateway -ApplicationGateway $appgw

Add backend listener
The next step of the configuration is to add a new back end listener. This is required for traffic routing from AG to relevant pools.
$beport = Get-AzApplicationGatewayFrontendPort -ApplicationGateway $appgw -Name fport
$fipconf = Get-AzApplicationGatewayFrontendIPConfig -ApplicationGateway $appgw
Add-AzApplicationGatewayHttpListener -ApplicationGateway $appgw -Name beListener -Protocol Http -FrontendIPConfiguration $fipconf -FrontendPort $beport
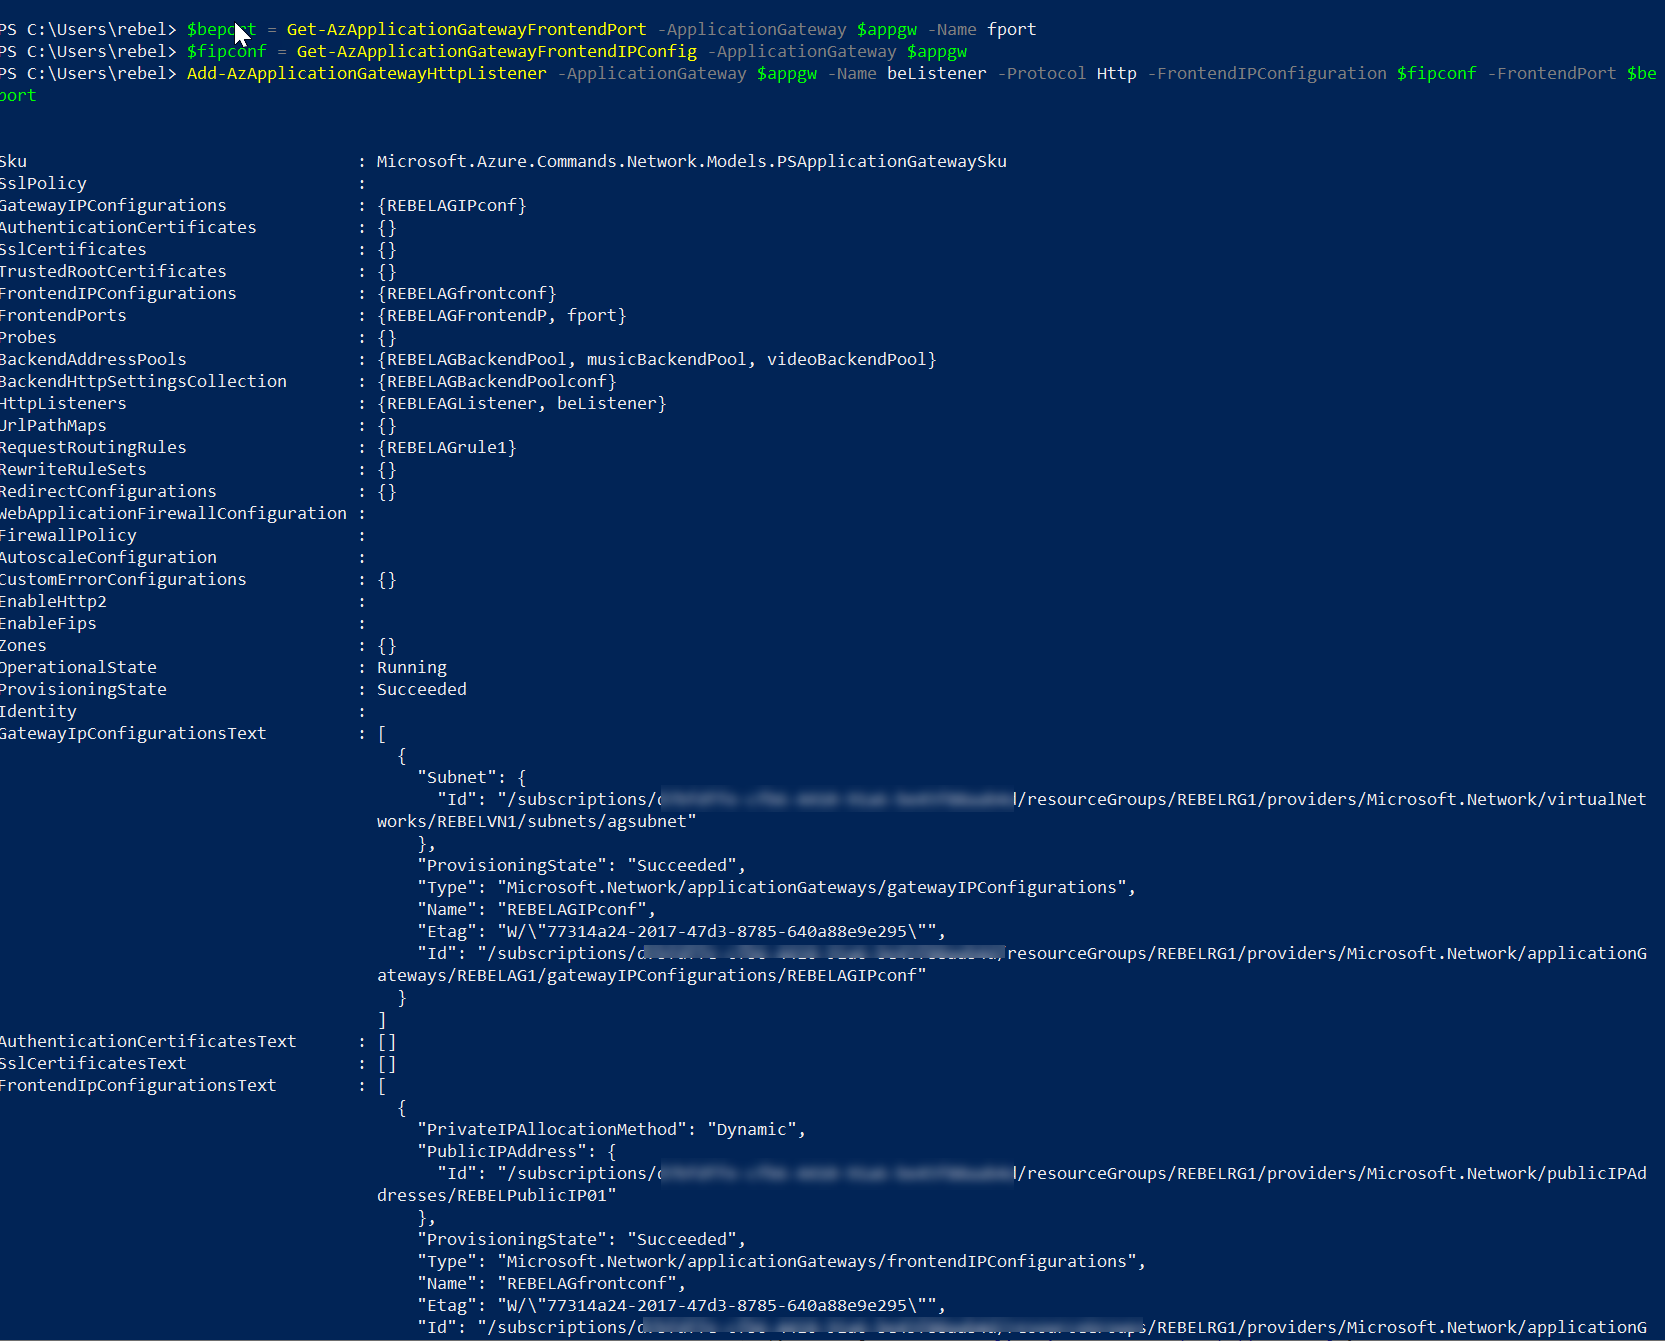
At the end we need to apply the configuration to AG using,
Set-AzApplicationGateway -ApplicationGateway $appgw
Create URL Path map
Now we need to create URL map so when user try to access http://agip/music , it is routed to music pool and when user try http://agip/video it is routed to video pool.
$poolconf = Get-AzApplicationGatewayBackendHttpSetting -ApplicationGateway $appgw -Name REBELAGBackendPoolconf
$musicpool = Get-AzApplicationGatewayBackendAddressPool -ApplicationGateway $appgw -Name musicBackendPool
$videopool = Get-AzApplicationGatewayBackendAddressPool -ApplicationGateway $appgw -Name videoBackendPool
$defaultpool = Get-AzApplicationGatewayBackendAddressPool -ApplicationGateway $appgw -Name REBELAGBackendPool
$musicrule = New-AzApplicationGatewayPathRuleConfig -Name musicpathrule -Paths “/music/*” -BackendAddressPool $musicpool -BackendHttpSettings $poolconf
$videorule = New-AzApplicationGatewayPathRuleConfig -Name videopathrule -Paths “/video/*” -BackendAddressPool $videopool -BackendHttpSettings $poolconf
Then we should create URL path map configuration using,
Add-AzApplicationGatewayUrlPathMapConfig -ApplicationGateway $appgw -Name urlpath -PathRules $musicrule, $videorule -DefaultBackendAddressPool $defaultpool -DefaultBackendHttpSettings $poolconf
After that we apply configuration to AG using,
Set-AzApplicationGateway -ApplicationGateway $appgw
Create routing rule
We need routing rule to point incoming traffic to relevant pools.
$backendlistener = Get-AzApplicationGatewayHttpListener -ApplicationGateway $appgw -Name beListener
$urlmap = Get-AzApplicationGatewayUrlPathMapConfig -ApplicationGateway $appgw -Name urlpath
Add-AzApplicationGatewayRequestRoutingRule -ApplicationGateway $appgw -Name routingrule -RuleType PathBasedRouting -HttpListener $backendlistener -UrlPathMap $urlmap

After that we should apply the configuration to AG using,
Set-AzApplicationGateway -ApplicationGateway $appgw
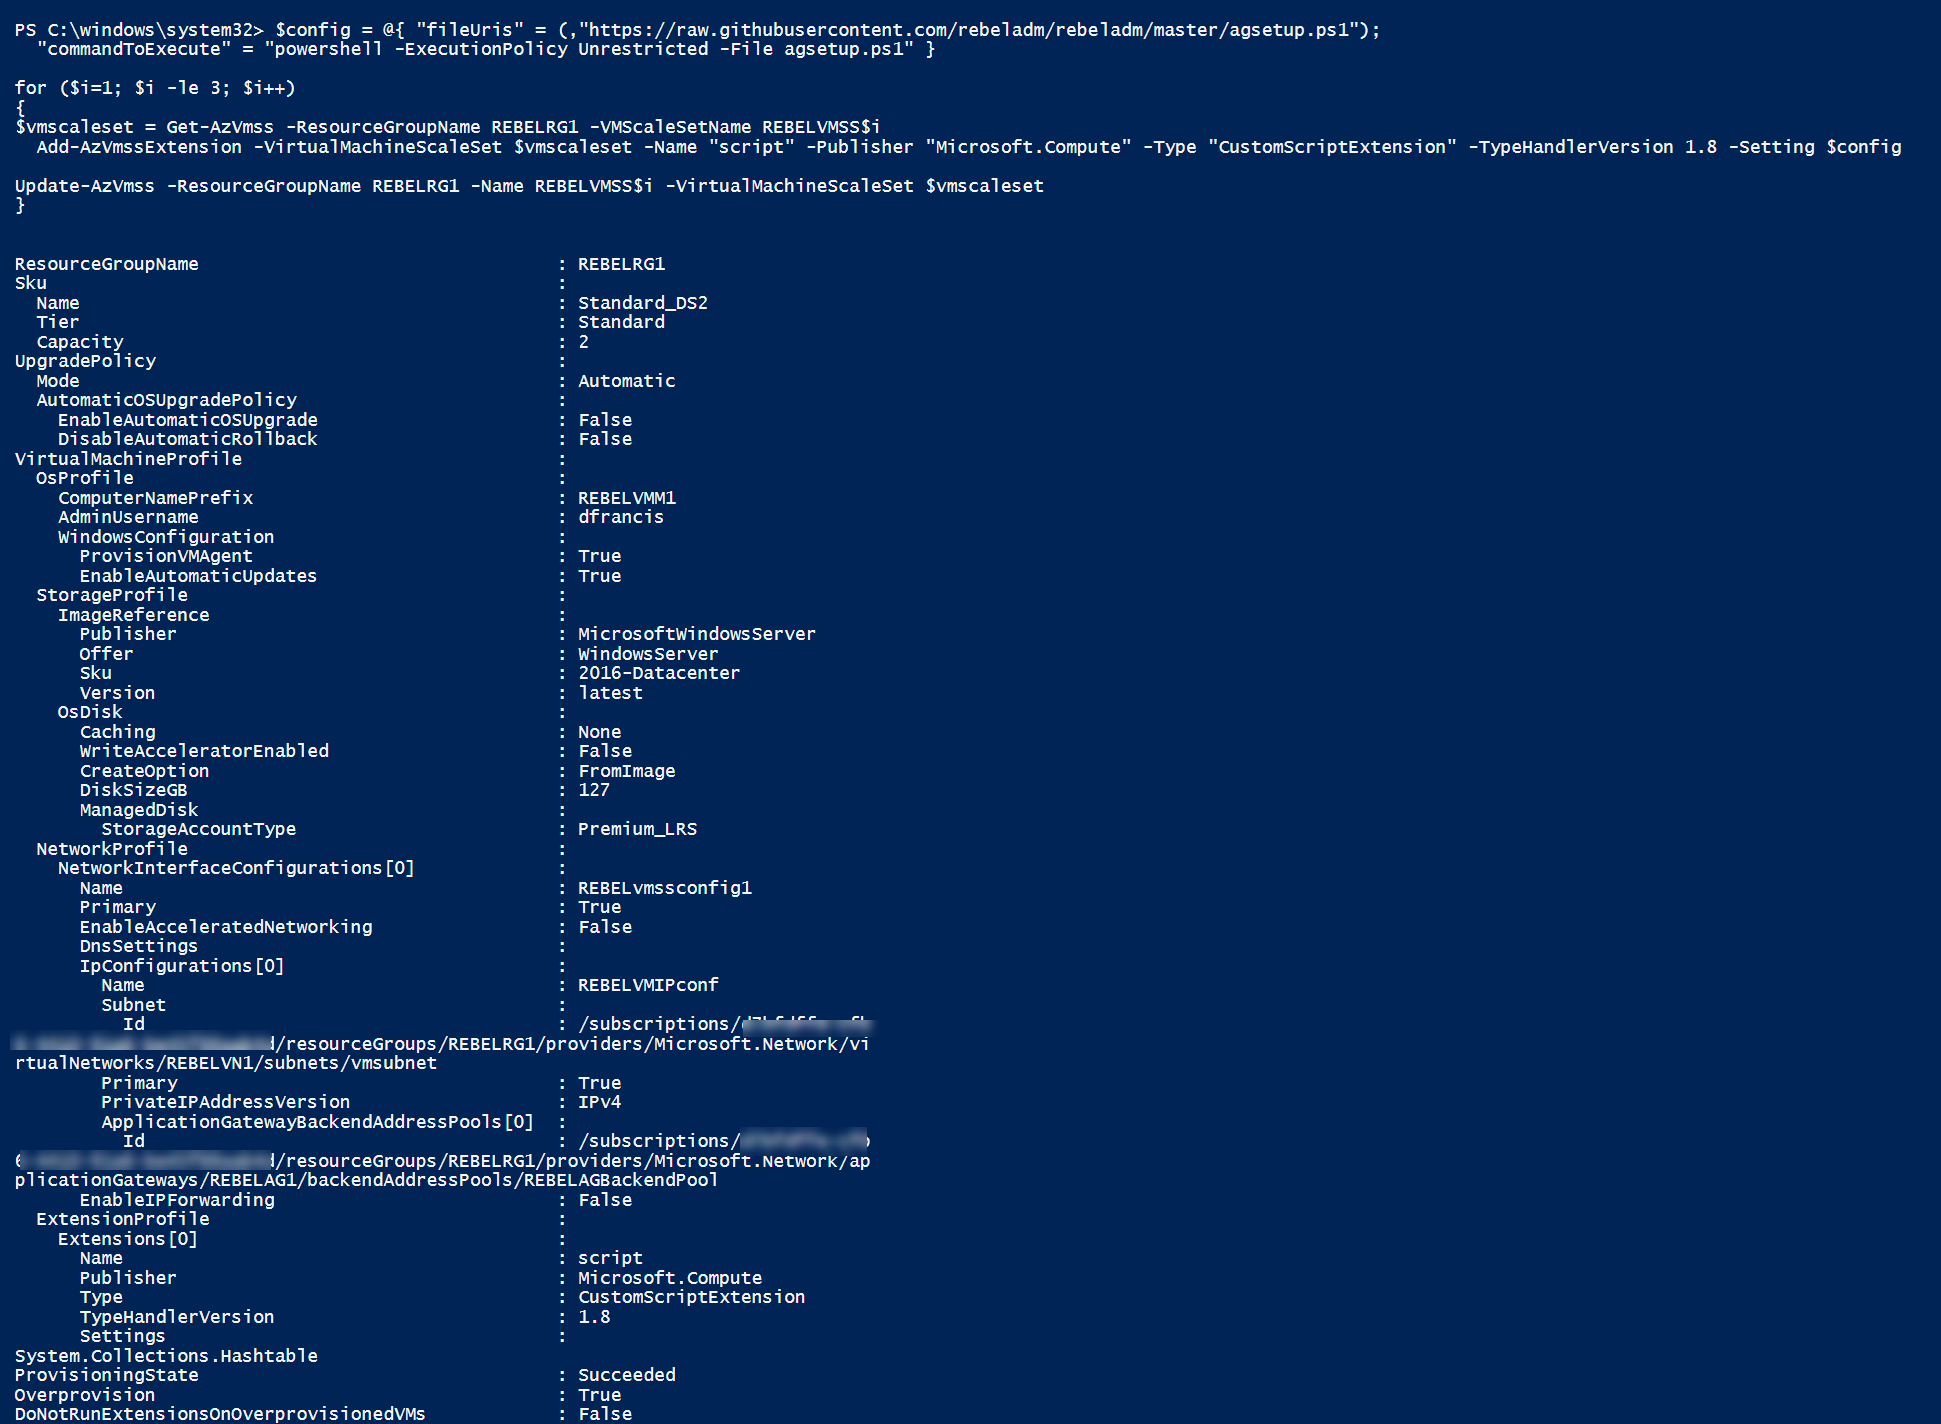
Create virtual machines
Now we have a working AG in place. The next step of the configuration is to create virtual machines in scale set so we can test it.
In this demo I am going to create 3 scale sets and add two virtual machines to each.
$net = Get-AzVirtualNetwork -ResourceGroupName REBELRG1 -Name REBELVN1
$appgw = Get-AzApplicationGateway -ResourceGroupName REBELRG1 -Name REBELAG1
$backendPool = Get-AzApplicationGatewayBackendAddressPool -Name REBELAGBackendPool -ApplicationGateway $appgw
$music = Get-AzApplicationGatewayBackendAddressPool -Name musicBackendPool -ApplicationGateway $appgw
$video = Get-AzApplicationGatewayBackendAddressPool -Name videoBackendPool -ApplicationGateway $appgw
for ($i=1; $i -le 3; $i++)
{
if ($i -eq 1)
{
$poolId = $backendPool.Id
}
if ($i -eq 2)
{
$poolId = $music.Id
}
if ($i -eq 3)
{
$poolId = $video.Id
}
$ipconfig = New-AzVmssIpConfig -Name REBELVMIPconf -SubnetId $net.Subnets[0].Id -ApplicationGatewayBackendAddressPoolsId $poolId
$vmssConfig = New-AzVmssConfig -Location eastus -SkuCapacity 2 -SkuName Standard_DS2 -UpgradePolicyMode Automatic
Set-AzVmssStorageProfile $vmssConfig -ImageReferencePublisher MicrosoftWindowsServer -ImageReferenceOffer WindowsServer -ImageReferenceSku 2016-Datacenter -ImageReferenceVersion latest -OsDiskCreateOption FromImage
Set-AzVmssOsProfile $vmssConfig -AdminUsername dfrancis -AdminPassword “WhitEpanda!” -ComputerNamePrefix REBELVMM$i
Add-AzVmssNetworkInterfaceConfiguration -VirtualMachineScaleSet $vmssConfig -Name REBELvmssconfig$i -Primary $true -IPConfiguration $ipconfig
New-AzVmss -ResourceGroupName REBELRG1 -Name REBELVMSS$i -VirtualMachineScaleSet $vmssConfig
}
Add web content
The next step of the configuration is to install IIS and push web content to instances running on virtual machine scale set.
Before we do that, we need a configuration file created and upload it to github. I have created https://raw.githubusercontent.com/rebeladm/rebeladm/master/agsetup.ps1 with the following configuration.
Add-WindowsFeature Web-Server
Remove-item C:\inetpub\wwwroot\iisstart.htm
Add-Content -Path “C:\inetpub\wwwroot\Default.htm” -Value $($env:computername)
New-Item -ItemType directory -Path “C:\inetpub\wwwroot\music”
New-Item -ItemType directory -Path “C:\inetpub\wwwroot\video”
$musicvalue = “Music: ” + $($env:computername)
Add-Content -Path “C:\inetpub\wwwroot\music\test.htm” -Value $musicvalue
$videovalue = “Video: ” + $($env:computername)
Add-Content -Path “C:\inetpub\wwwroot\video\test.htm” -Value $videovalue
Then I am using it to install iis and push content to VM scale set.
$config = @{ “fileUris” = (,”https://raw.githubusercontent.com/rebeladm/rebeladm/master/agsetup.ps1″);
“commandToExecute” = “powershell -ExecutionPolicy Unrestricted -File agsetup.ps1” }
for ($i=1; $i -le 3; $i++)
{
$vmscaleset = Get-AzVmss -ResourceGroupName REBELRG1 -VMScaleSetName REBELVMSS$i
Add-AzVmssExtension -VirtualMachineScaleSet $vmscaleset -Name “script” -Publisher “Microsoft.Compute” -Type “CustomScriptExtension” -TypeHandlerVersion 1.8 -Setting $config
Update-AzVmss -ResourceGroupName REBELRG1 -Name REBELVMSS$i -VirtualMachineScaleSet $vmscaleset
}
Testing
This completes the configuration process of the Application Gateway. Now its time for testing. To connect from external first we need to find the external IP of the Application gateway. We can find it using,
Get-AzPublicIpAddress -ResourceGroupName REBELRG1
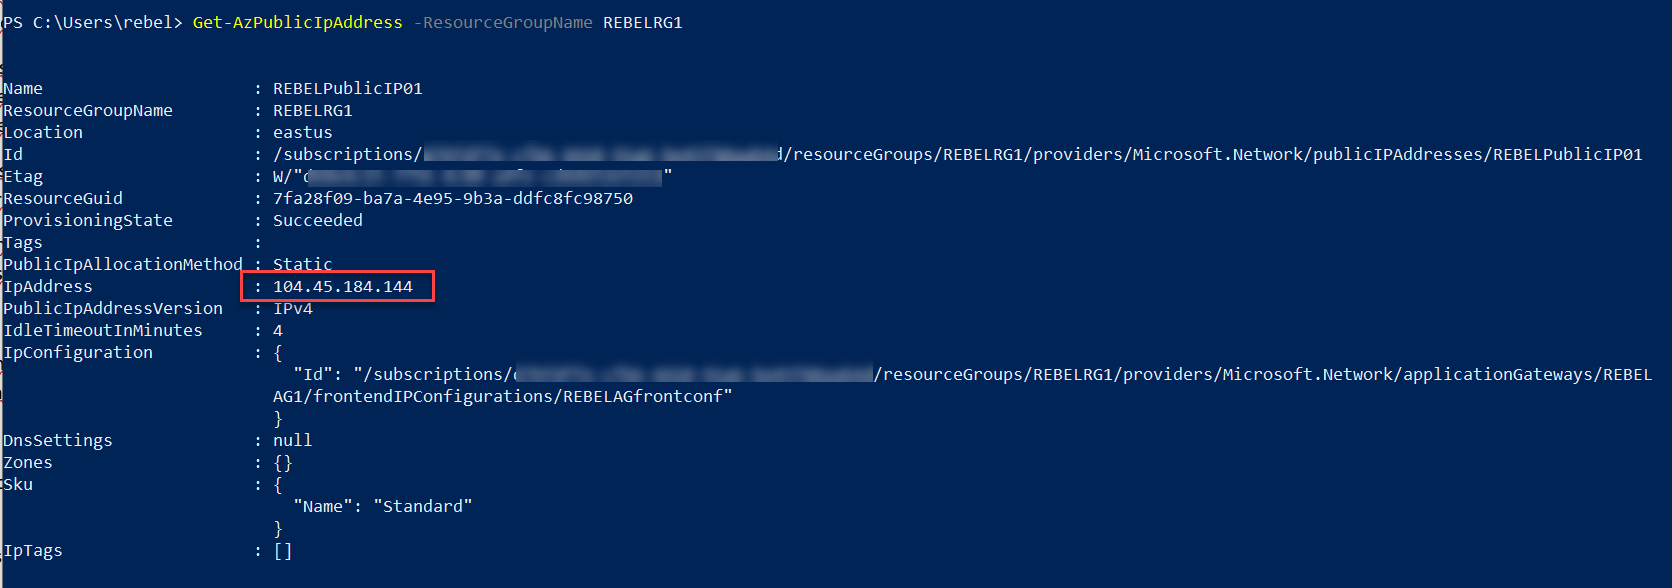
Now we know the frontend IP address. Let’s check the default pool first using, http://104.45.184.144/
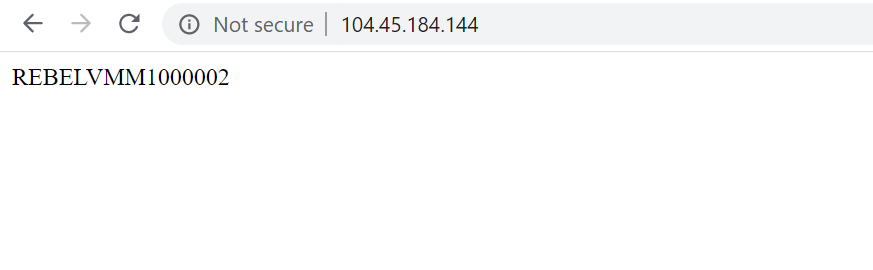
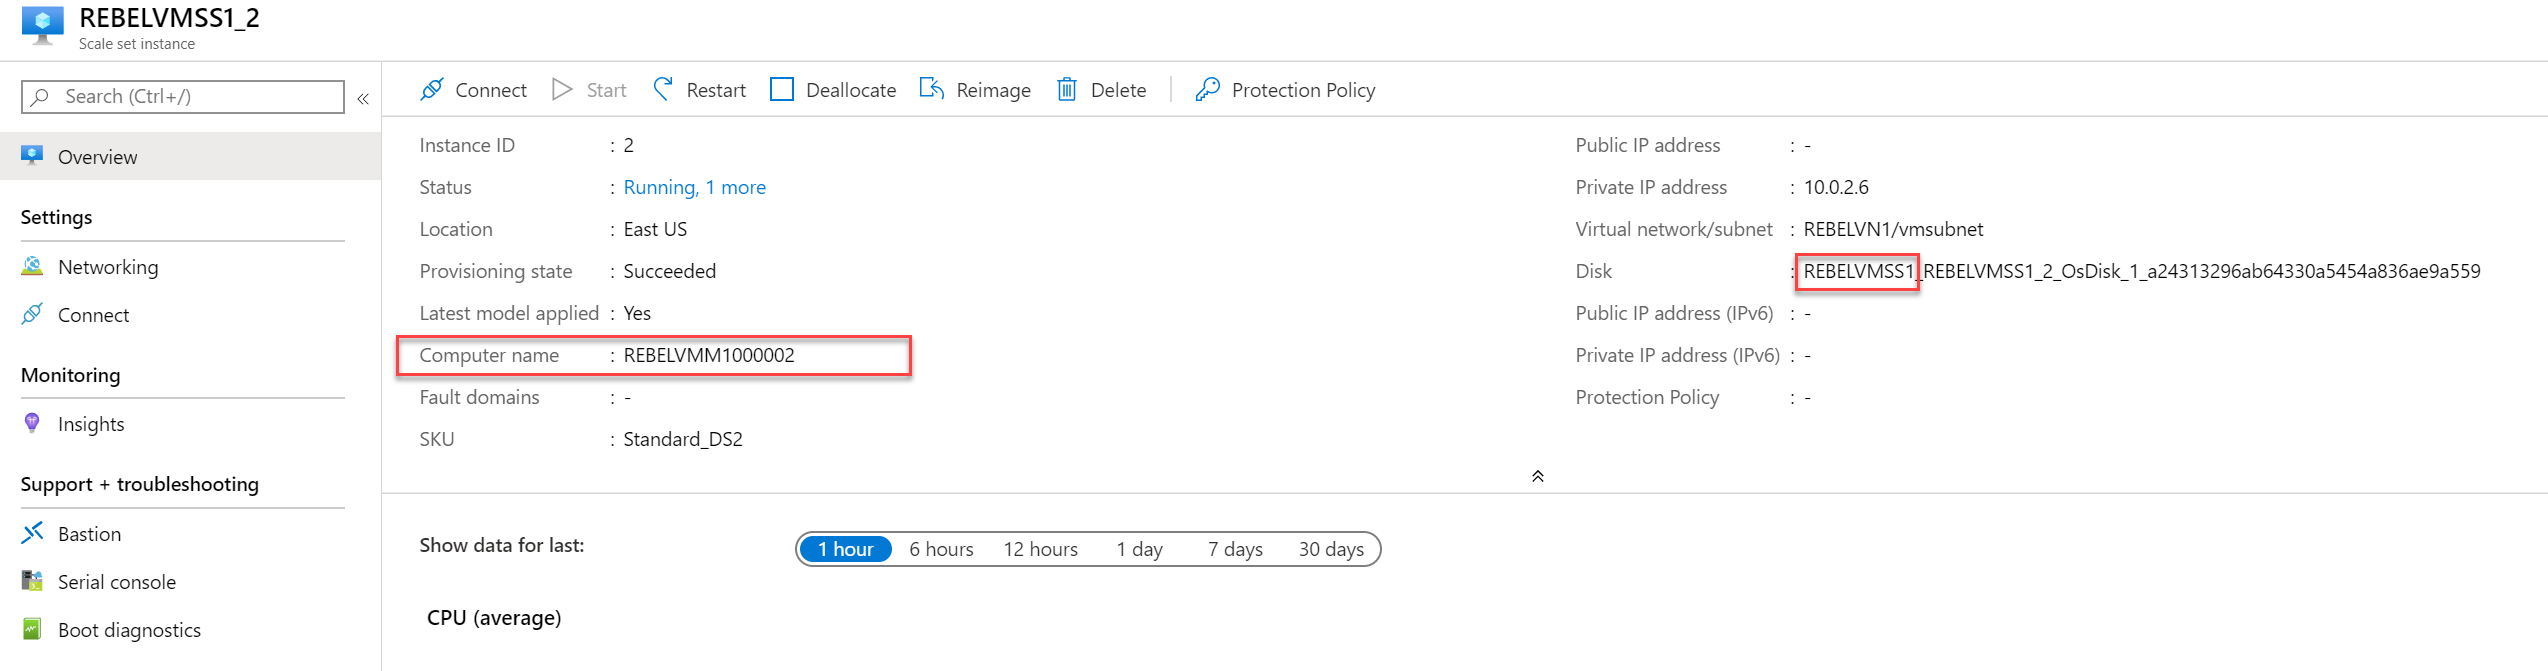
as expected, it is loading from an instance running on REBELVMSS1 scale set.
Then let’s go ahead and test the URL for music on http://104.45.184.144:8080/music/test.htm
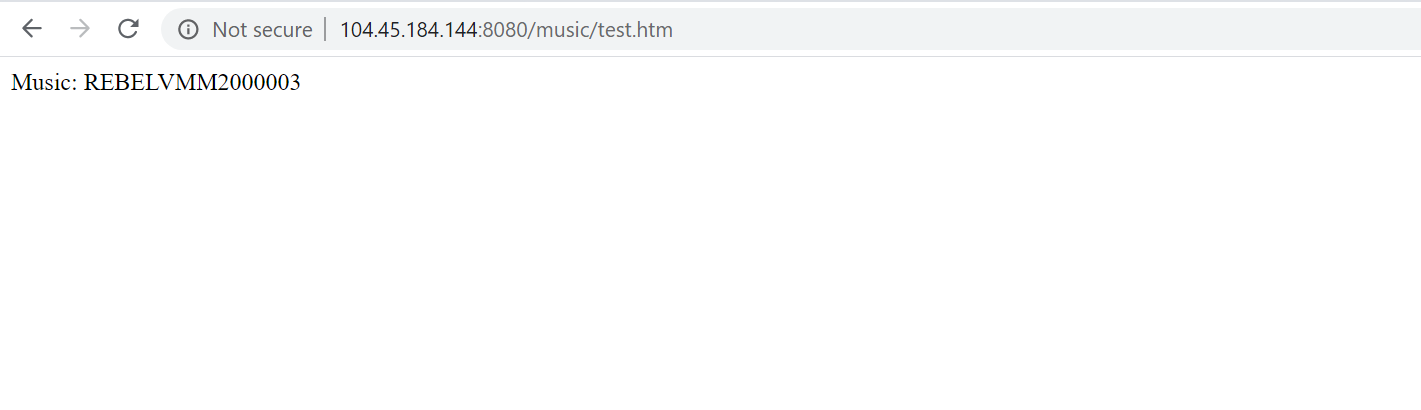
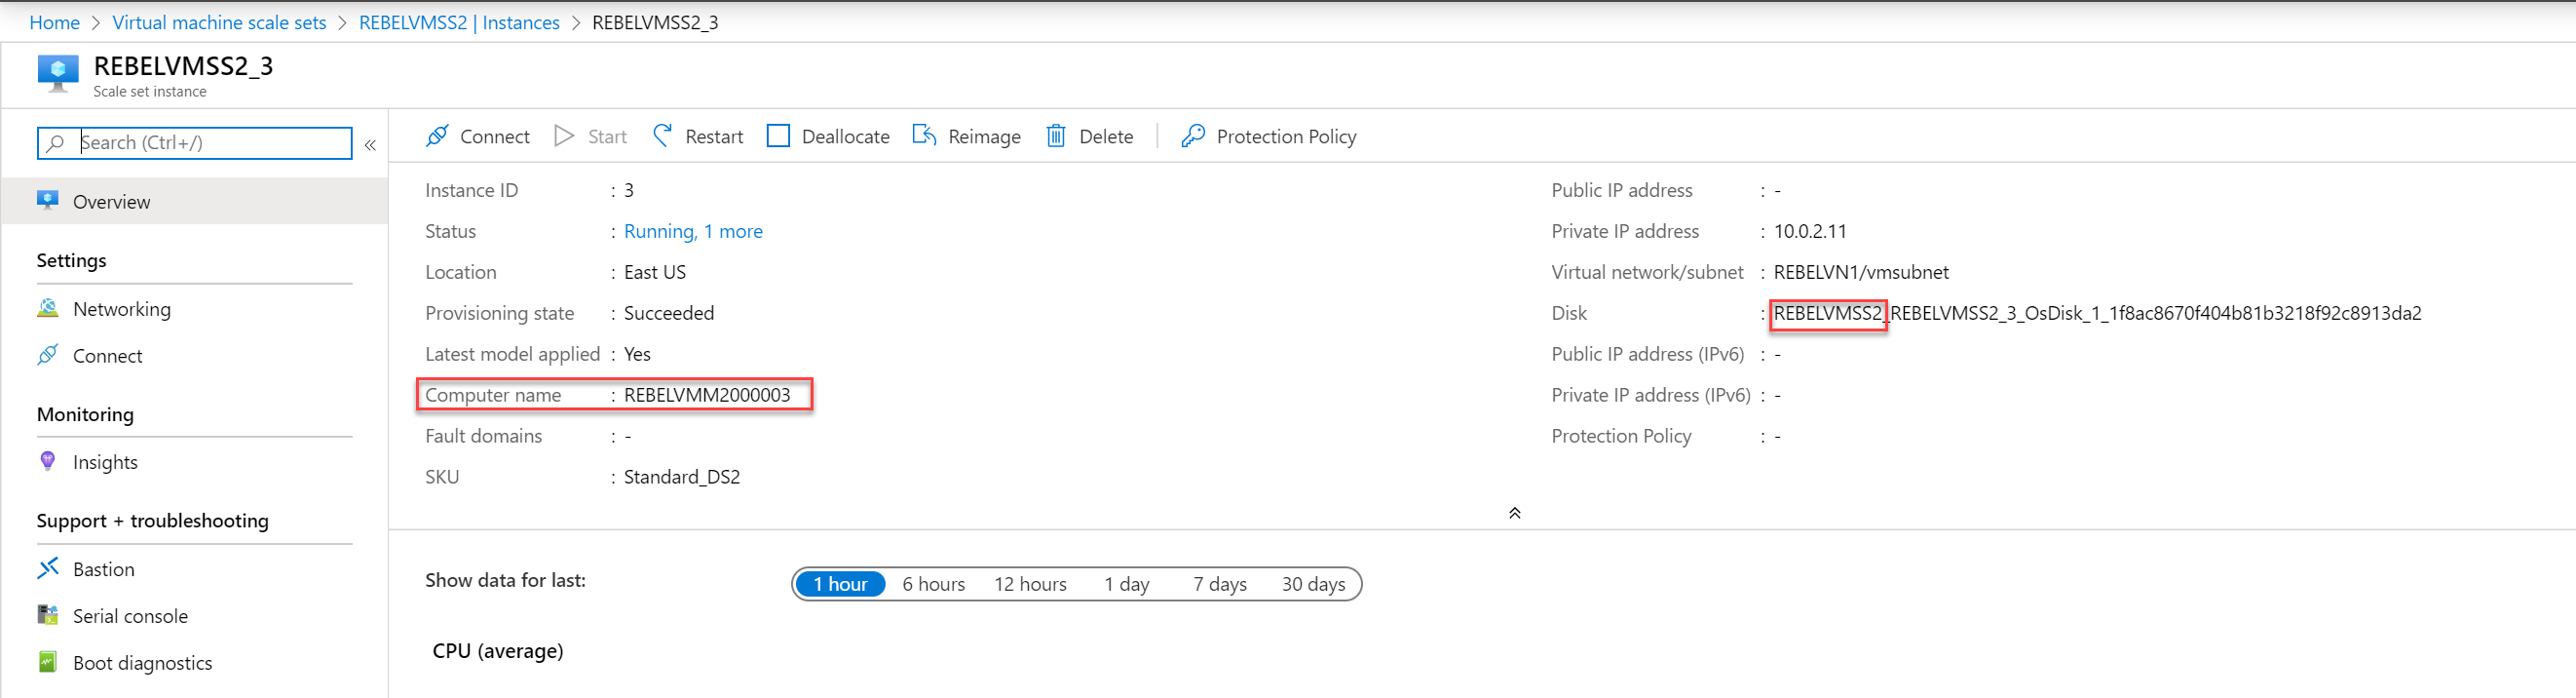
As expected, it is loading from REBELVMSS2 scale set.
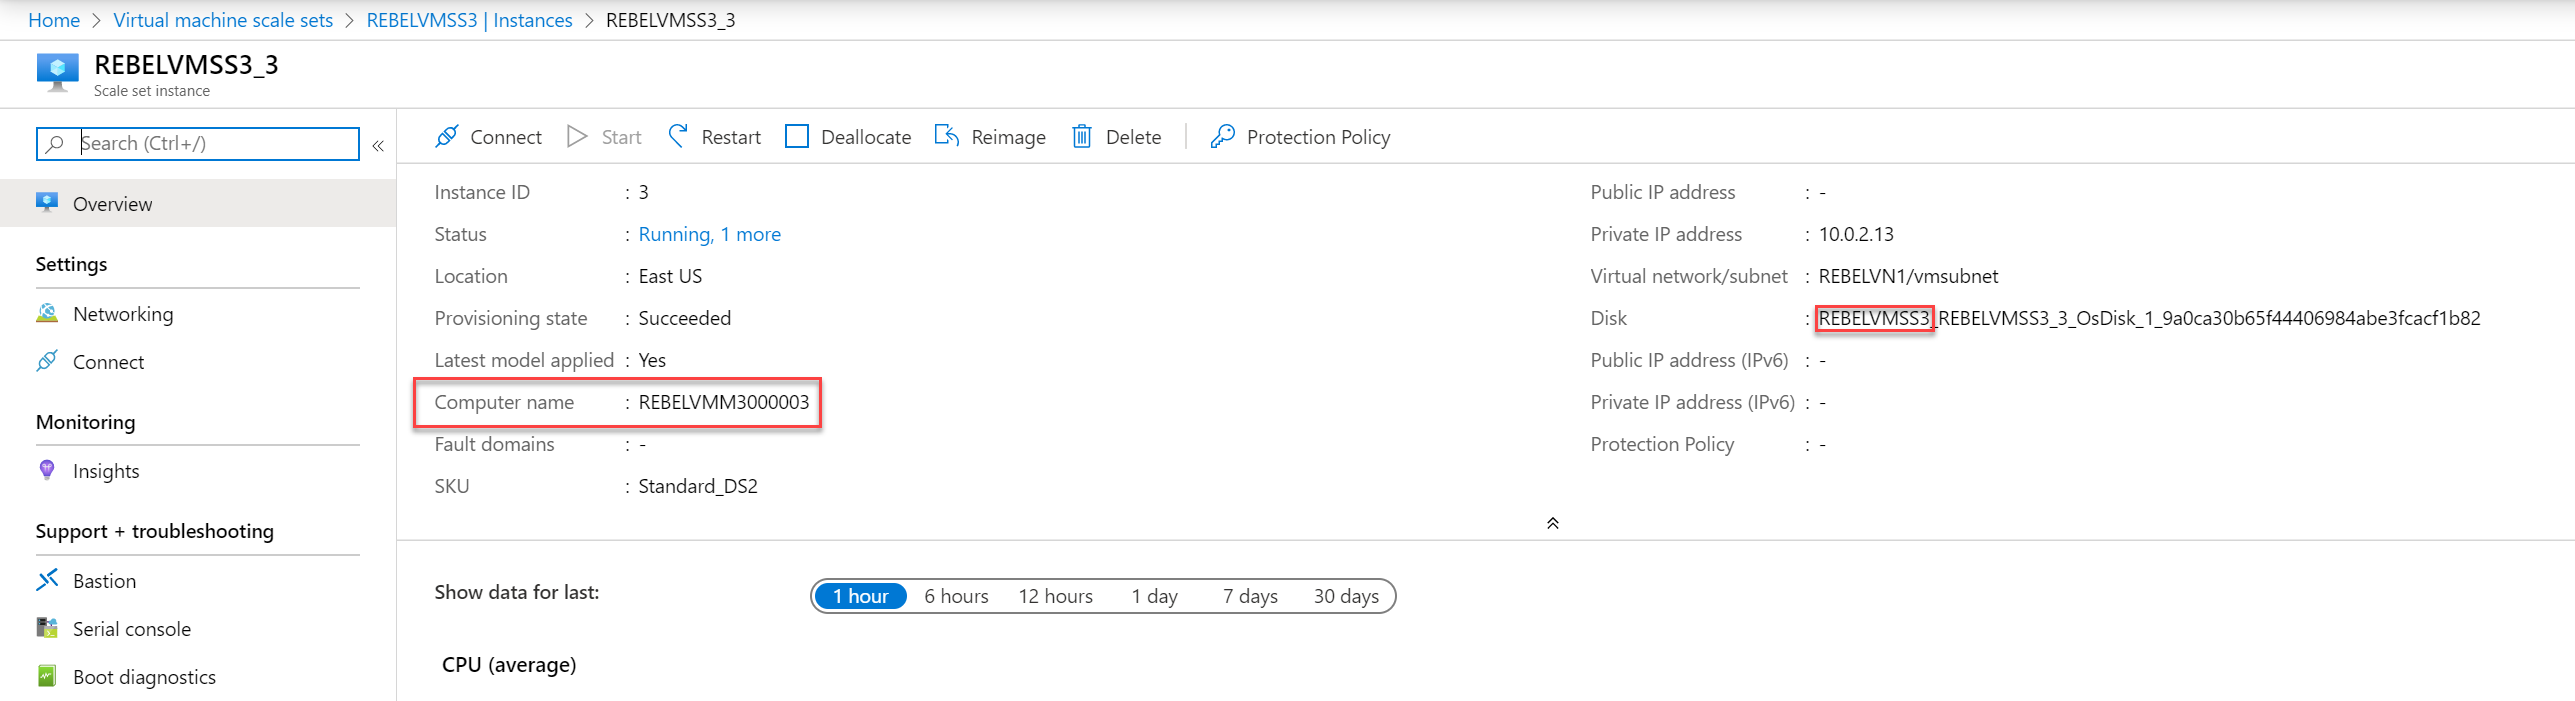
As of the last test, let’s try URL for video page using http://104.45.184.144:8080/video/test.htm
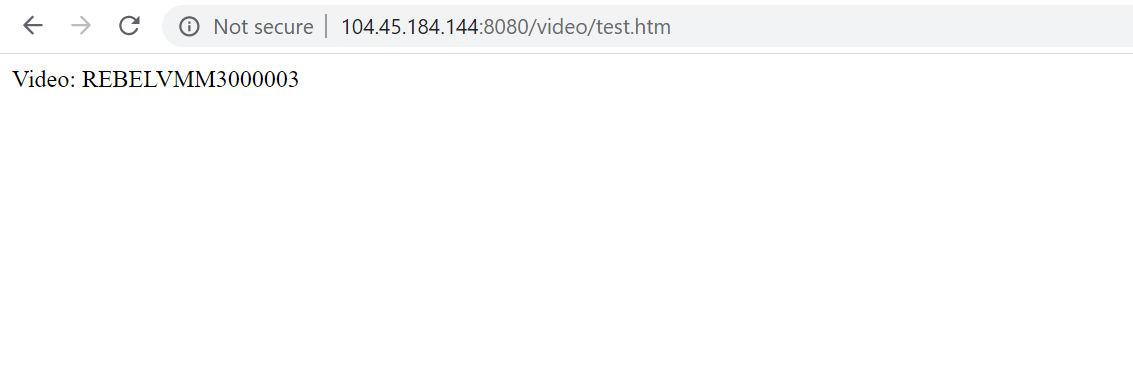
Again, as expected it is loading from REBELVMSS3 scale set.
As we can see the different URLs are routed to different server pools by Application gateway.
I hope you now have a better understanding of how application gateway works and how we can use it for layer 7 load balancing. This marks the end of this blog post. If you have any further questions about this feel free to contact me on rebeladm@live.com also follow me on twitter @rebeladm to get updates about new blog posts.


Those articles are really great and helpful with steps by steps and snapshots.