
Last Updated on February 1, 2020 by Dishan M. Francis
In my previous blog post, I explain how we can use Azure load balancer to distribute network traffic to endpoints in the same Azure region. It can be accessed using https://www.rebeladmin.com/2020/01/step-step-guide-setup-azure-load-balancer/ . But we can’t use the same method to distribute traffic to different Azure regions. For that, we have to use the Azure Traffic Manager.
The azure traffic manager is a DNS based traffic load balancer. It does have the following characteristics,
• Based on the traffic-routing method, it can route traffic to the closest endpoints to the user. This will improve the application/service performance.
• When an endpoint is not available, the traffic will automatically route to the most appropriate endpoint.
• Application/service maintenance can be done without any downtime. During the maintenance, traffic can redirect to other available endpoints.
In this demo, I am going to demonstrate how we can use Azure traffic managers to improve the application/service performance by pointing users to the closest endpoint. This demo includes the following tasks,
1. Setup two new resource groups (East US, UK South)
2. Setup two new windows VM (East US, UK South)
3. Setup IIS with sample web page
4. Create a Traffic Manager profile
5. Add endpoints to Traffic Manager profile
6. Testing
Setup two new resource groups (East US, UK South)
Let’s go ahead and start the setup process by creating a new Azure resource group.
For the configuration process, I will be using Azure PowerShell. Therefore, please make sure you have an Azure PowerShell module installed. More info about it can find under https://docs.microsoft.com/en-us/powershell/azure/install-az-ps?view=azps-2.6.0
1. Launch PowerShell console and connect to Azure using Connect-AzAccount
2. Then create a new resource group using,
New-AzResourceGroup -Name REBELRGEUS -Location “East US”
New-AzResourceGroup -Name REBELRGUKS -Location “UK South”

In the above, we are creating two resource groups. The first one called REBELRGEUS and it is created on East US Azure region.
The second group is called REBELRGUKS and it is created on UK South azure region.
Setup two new windows VM (East US, UK South)
1. In this demo, I am going to use two back end servers. Before VM setup, let’s go ahead and create a new virtual network in REBELRGEUS resource group
$vmsubnet = New-AzVirtualNetworkSubnetConfig -Name vmsubnet -AddressPrefix “10.0.2.0/24”
New-AzVirtualNetwork -Name REBELVN1 -ResourceGroupName REBELRGEUS -Location “East US” -AddressPrefix “10.0.0.0/16” -Subnet $vmsubnet
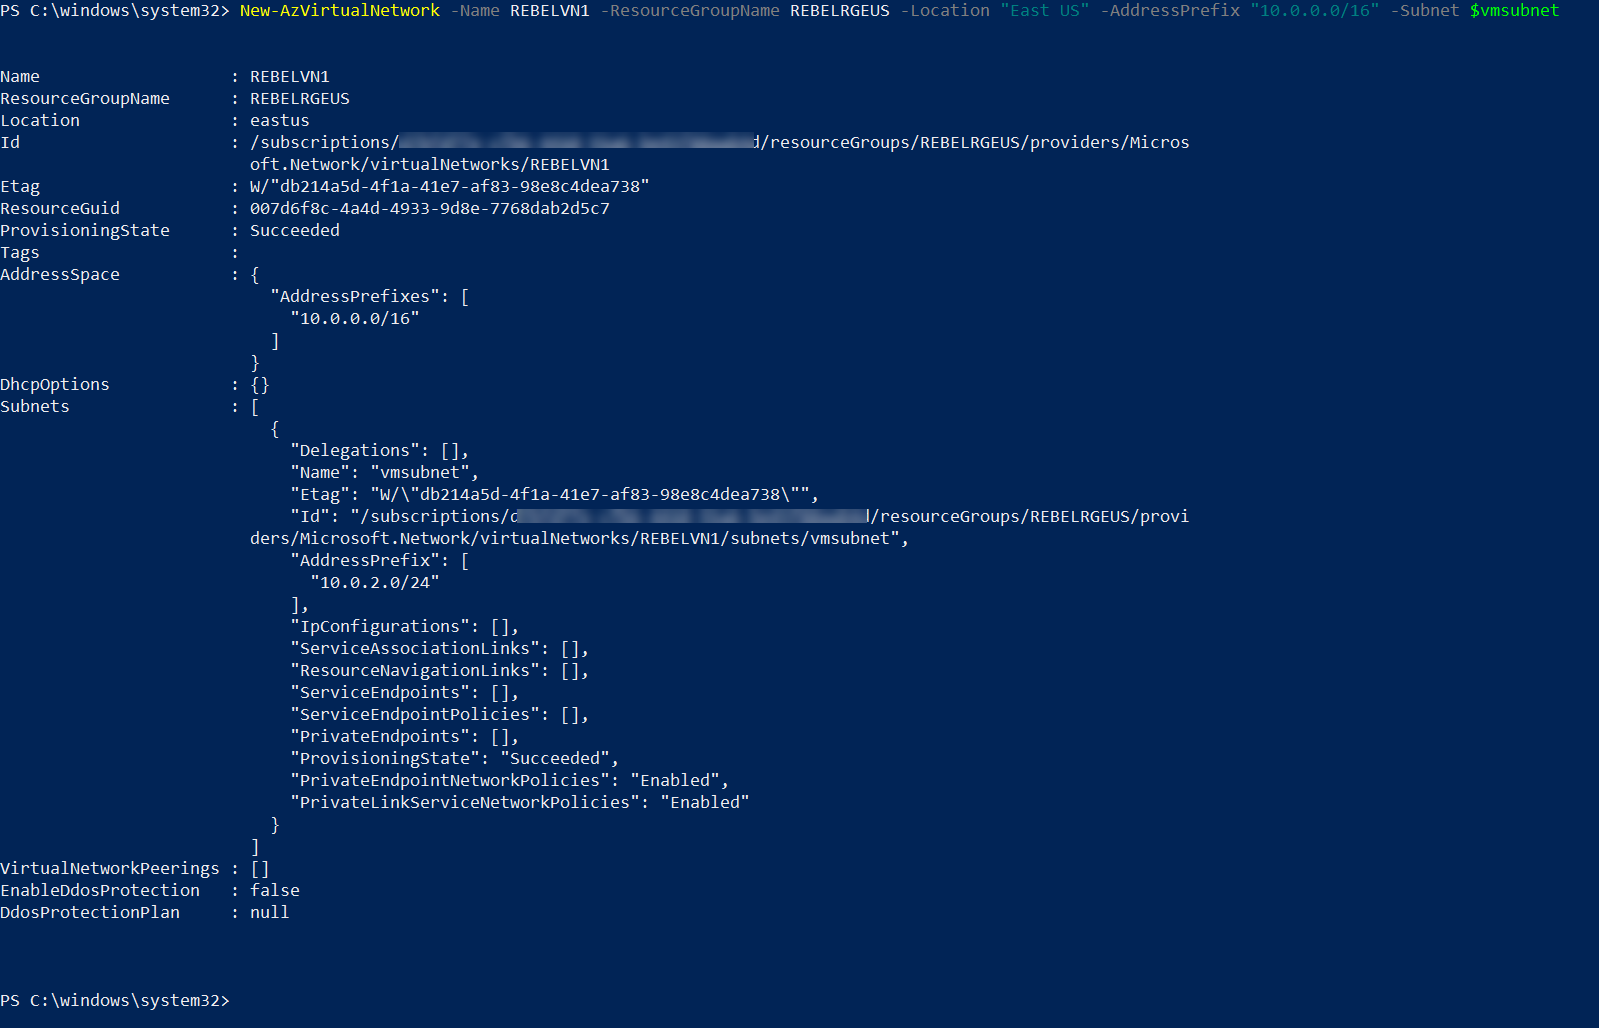
In the above, REBELVN1 is the new virtual network name. It has 10.0.0.0/16 address space. It also has a new subnet 10.0.2.0/24 (vmsubnet) for virtual machines.
2. Then let’s go ahead and create another virtual network under REBELRGUKS resource group.
$vmsubnet2 = New-AzVirtualNetworkSubnetConfig -Name vmsubnet2 -AddressPrefix “10.1.3.0/24”
New-AzVirtualNetwork -Name REBELVN2 -ResourceGroupName REBELRGUKS -Location “UK South” -AddressPrefix “10.1.0.0/16” -Subnet $vmsubnet2

In the above, REBELVN2 is the new virtual network name. It has 10.1.0.0/16 address space. It also has a new subnet 10.1.3.0/24 (vmsubnet2) for virtual machines.
3. As the next step of the configuration, I am going to create a new virtual machine under REBELRGEUS resource group. This will be used for testing purposes.
$mylogin = Get-Credential
New-AzVm -ResourceGroupName REBELRGEUS -Name “REBELTVMEUS” -Location “East US” -VirtualNetworkName “REBELVN1” -SubnetName “vmsubnet” -addressprefix 10.0.2.0/24 -PublicIpAddressName ” REBELTVMEUSIP1″ -OpenPorts 3389,80 -Image win2019datacenter -Size Standard_D2s_v3 -Credential $mylogin

In the above, I am creating a virtual machine called REBELTVMEUS. It is running windows server 2019 data center edition. I have specified it using -Image parameter. It also using Standard_D2s_v3 vm size. For networking, it uses REBELVN1 virtual network and subnet 10.0.2.0/24. I also open port 3389 and 80 for external connectivity.
4. Same way, I am going to create a new virtual machine under REBELRGUKS resource group. This will also be used for testing purposes.
$mylogin = Get-Credential
New-AzVm -ResourceGroupName REBELRGUKS -Name “REBELTVMSUK” -Location “UK South” -VirtualNetworkName “REBELVN2” -SubnetName “vmsubnet2” -addressprefix 10.1.3.0/24 -PublicIpAddressName “REBELTVMSUKIP2” -OpenPorts 3389,80 -Image win2019datacenter -Size Standard_D2s_v3 -Credential $mylogin

In the above, I am creating a virtual machine called REBELTVMSUK. It is running windows server 2019 data center edition. I have specified it using -Image parameter. It also using Standard_D2s_v3 vm size. For networking, it uses REBELVN2 virtual network and subnet 10.1.3.0/24. Same as other VM, we need to open port 3389 & 80 for external access.
In the end, we have two virtual machines with the following config.
| Virtual Machine | Resource Group | Virtual Network | VM Subnet | IP Address |
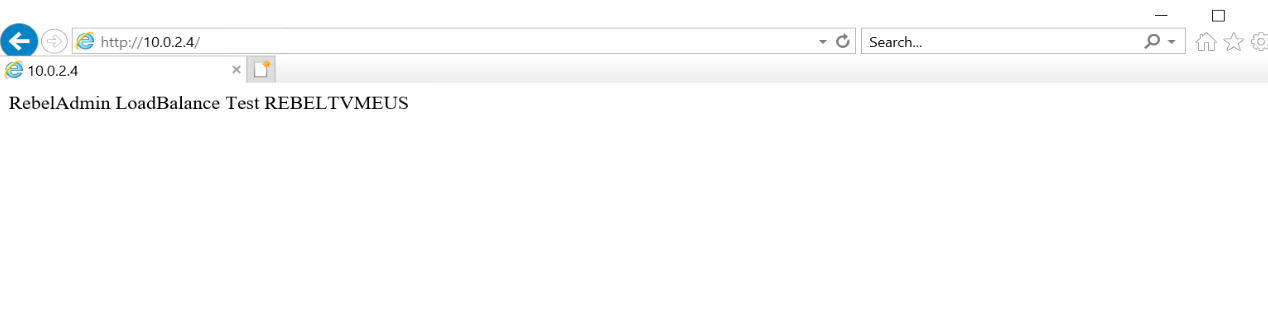
| REBELTVMEUS | REBELRGEUS | REBELVN1 | vmsubnet | 10.0.2.4 |
| REBELTVMSUK | REBELRG2 | REBELVN2 | Vmsubnet2 | 10.1.3.4 |
Setup IIS with sample web page
Now we have two VMs running. For testing purposes, I am going to set up a simple IIS web page in both VMs. To do that,
1. Log in to VM as a local administrator
2. Open PowerShell Console as Administrator
3. Run following to install the IIS role
Install-WindowsFeature -name Web-Server -IncludeManagementTools

4. Then remove default IIS page using,
remove-item C:\inetpub\wwwroot\iisstart.htm
5. As next step, create new content page using,
Add-Content -Path “C:\inetpub\wwwroot\iisstart.htm” -Value $(“RebelAdmin LoadBalance Test ” + $env:computername)
6. After that, we can test it via a web browser.
Create a Traffic Manager profile
The next step of the configuration is to create the traffic manager profile. To do this,
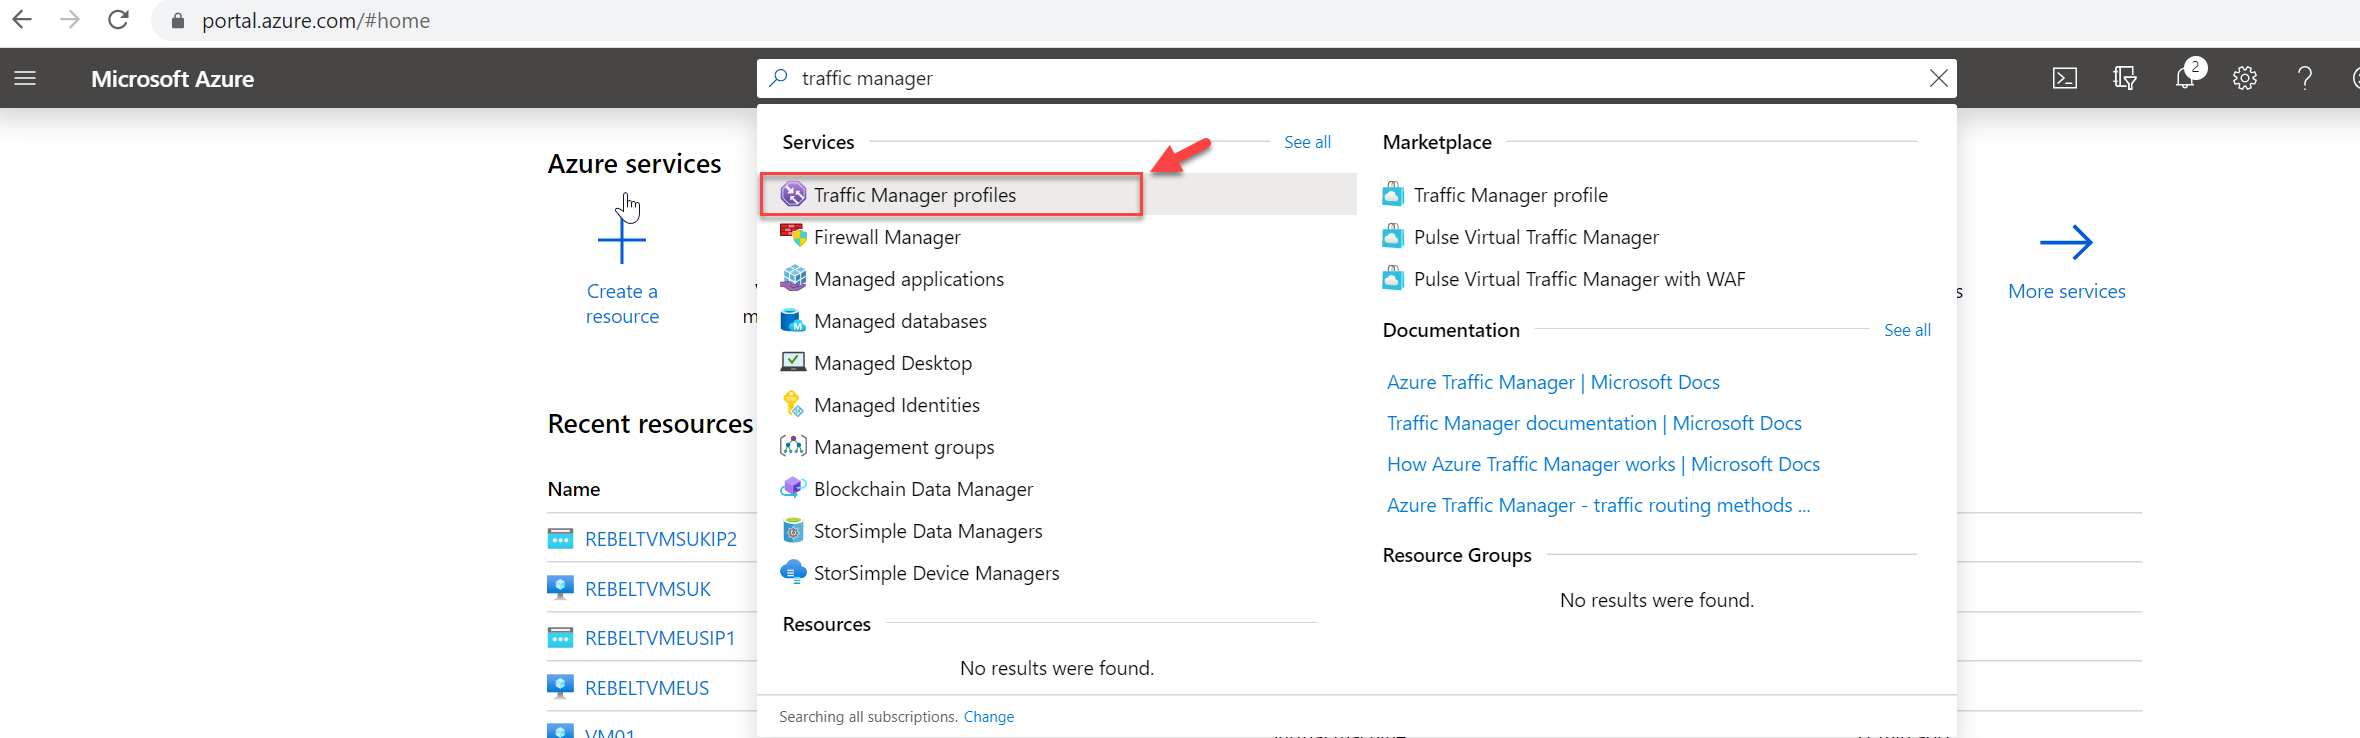
1. Log in to Azure Portal (https://portal.azure.com)
2. In search box type Traffic Manager and from list select Traffic Manager profiles
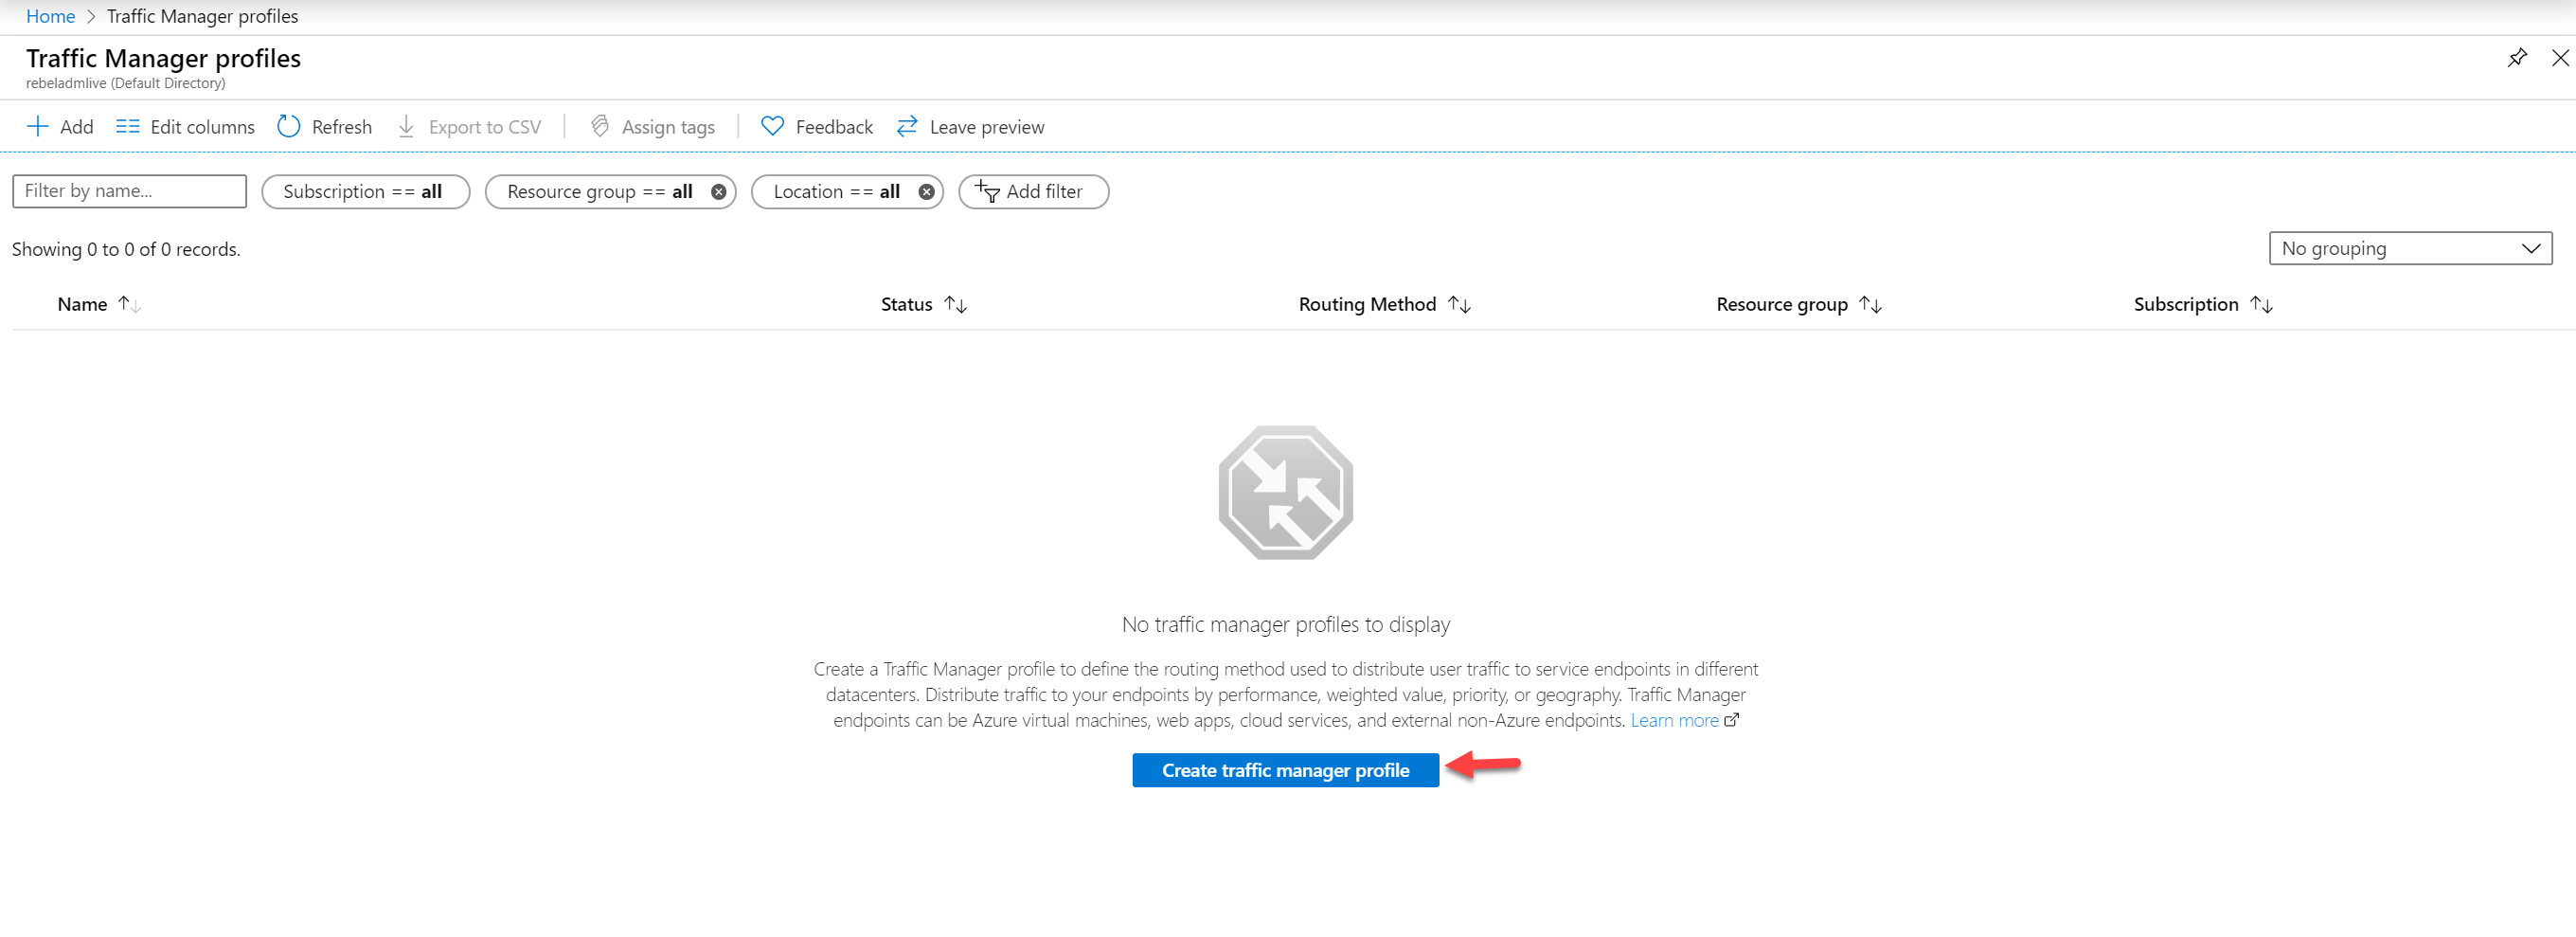
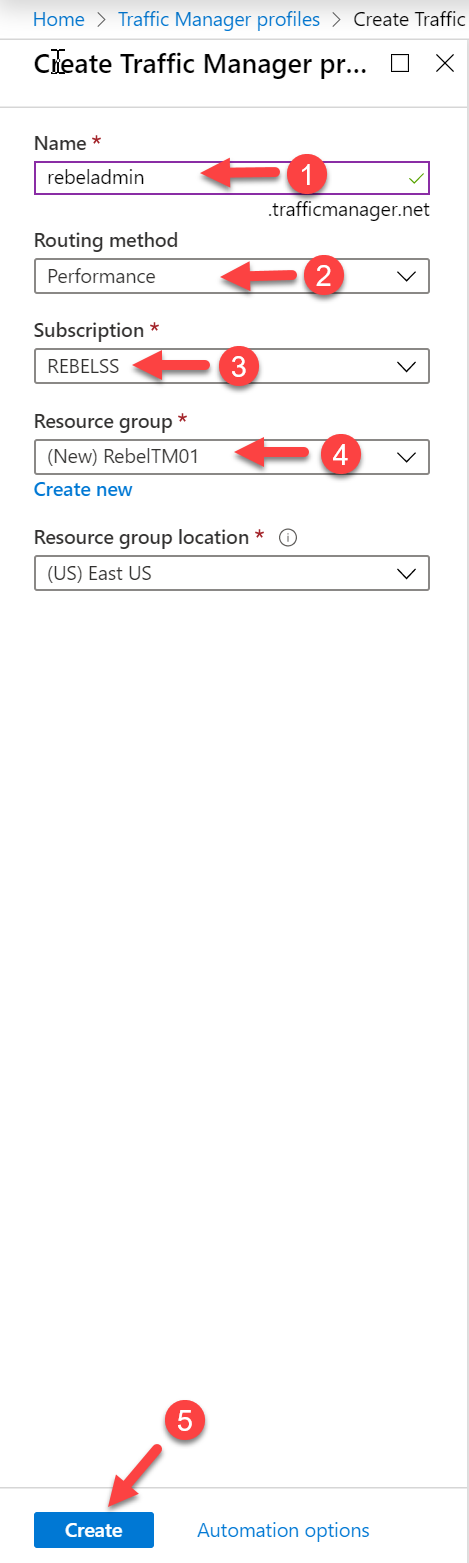
3. Then click on Create traffic manager profile
4. In the new window, provide a name for the traffic manage profile. This will be the name we will be using to connect to the profile. Then choose Performance as the routing method. Under the Subscription select the relevant subscription. We also need to define the Resource group and location. This setting doesn’t have an impact on traffic routing. Once settings are in place, click on Create.
Add endpoints to Traffic Manager profile
After profile configuration, we need to add endpoints we created before. To do that,
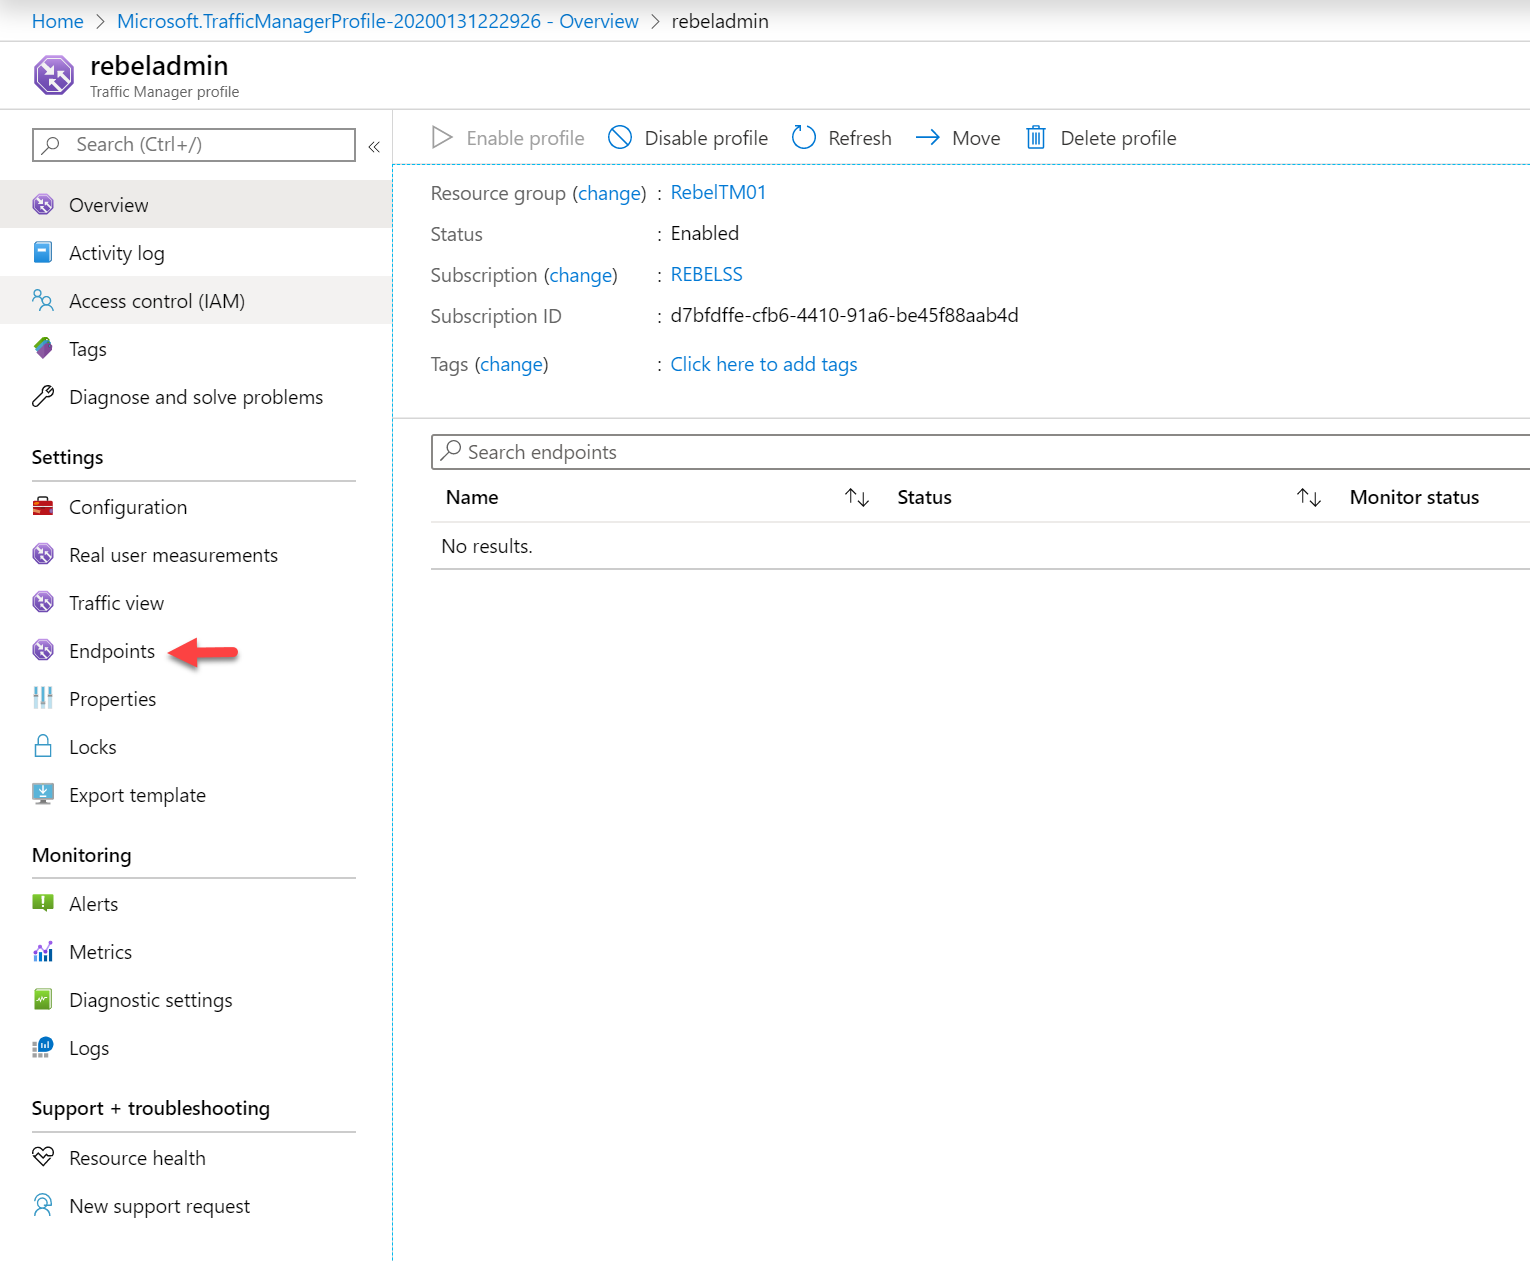
1. Click on the traffic manager profile we created in the previous section.
2. Then go to Endpoints
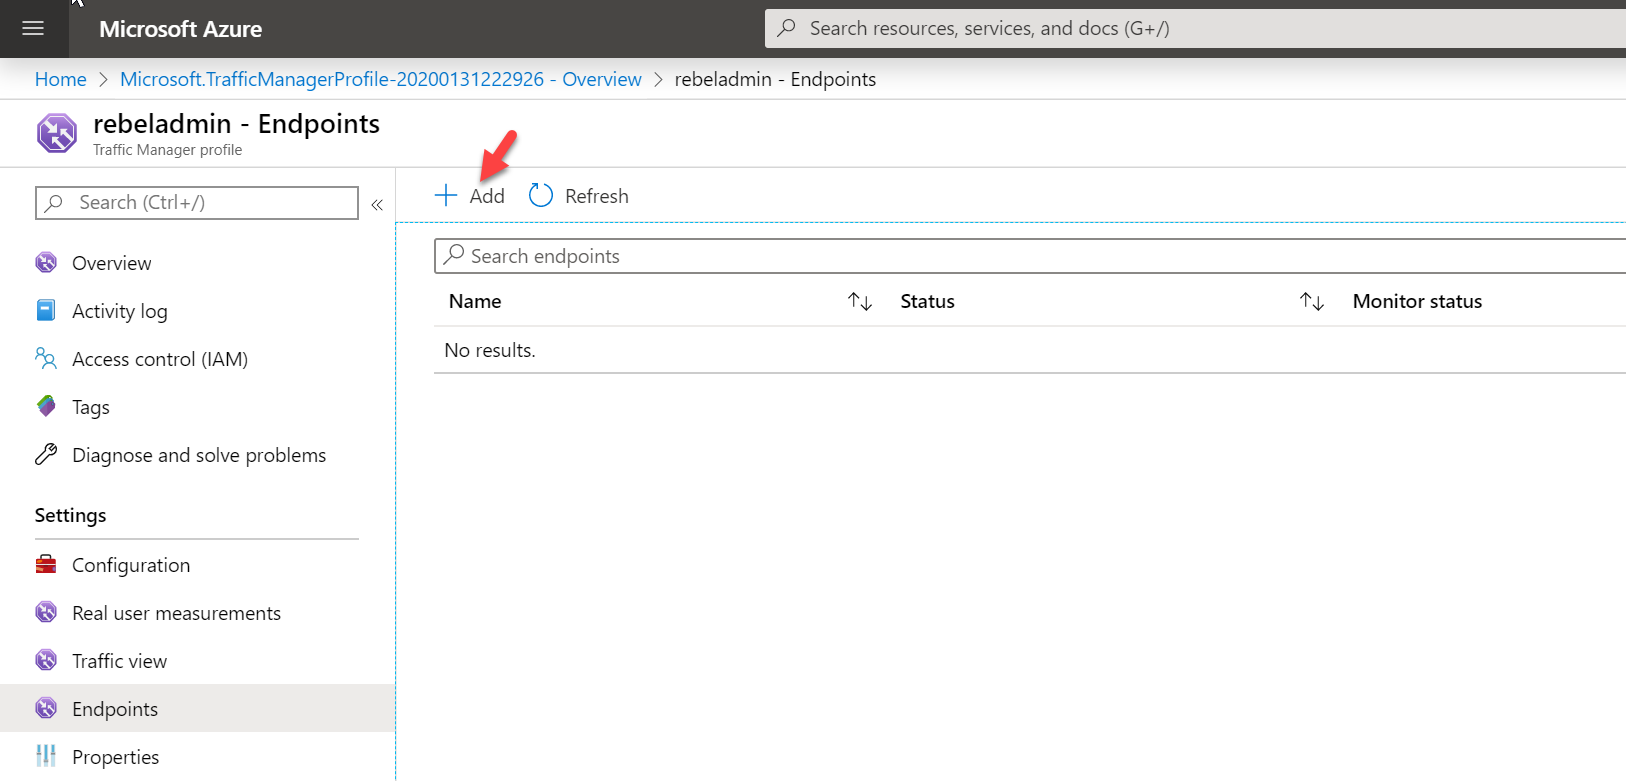
3. Then click on Add
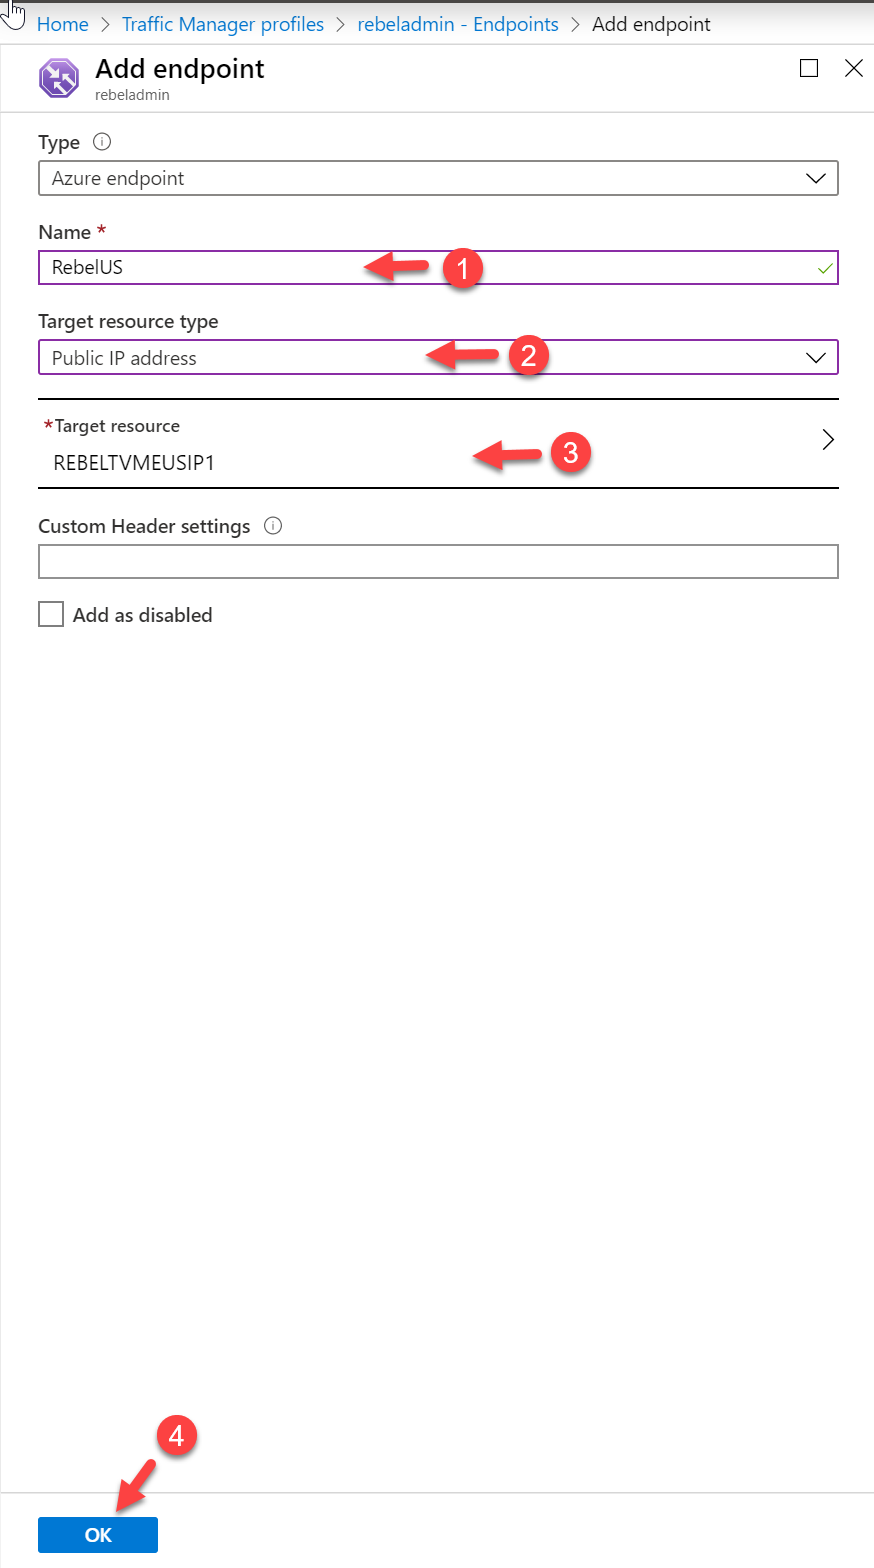
4. In the new window, provide a name for the endpoint first. Then select Public IP address as target resource type. In target resources, select the public ip address for the relevant endpoint. At the end click OK to add the endpoint.
5. Follow the same steps and add the other remaining endpoint to the same profile. Once the task I completed, make sure all the endpoints are online.
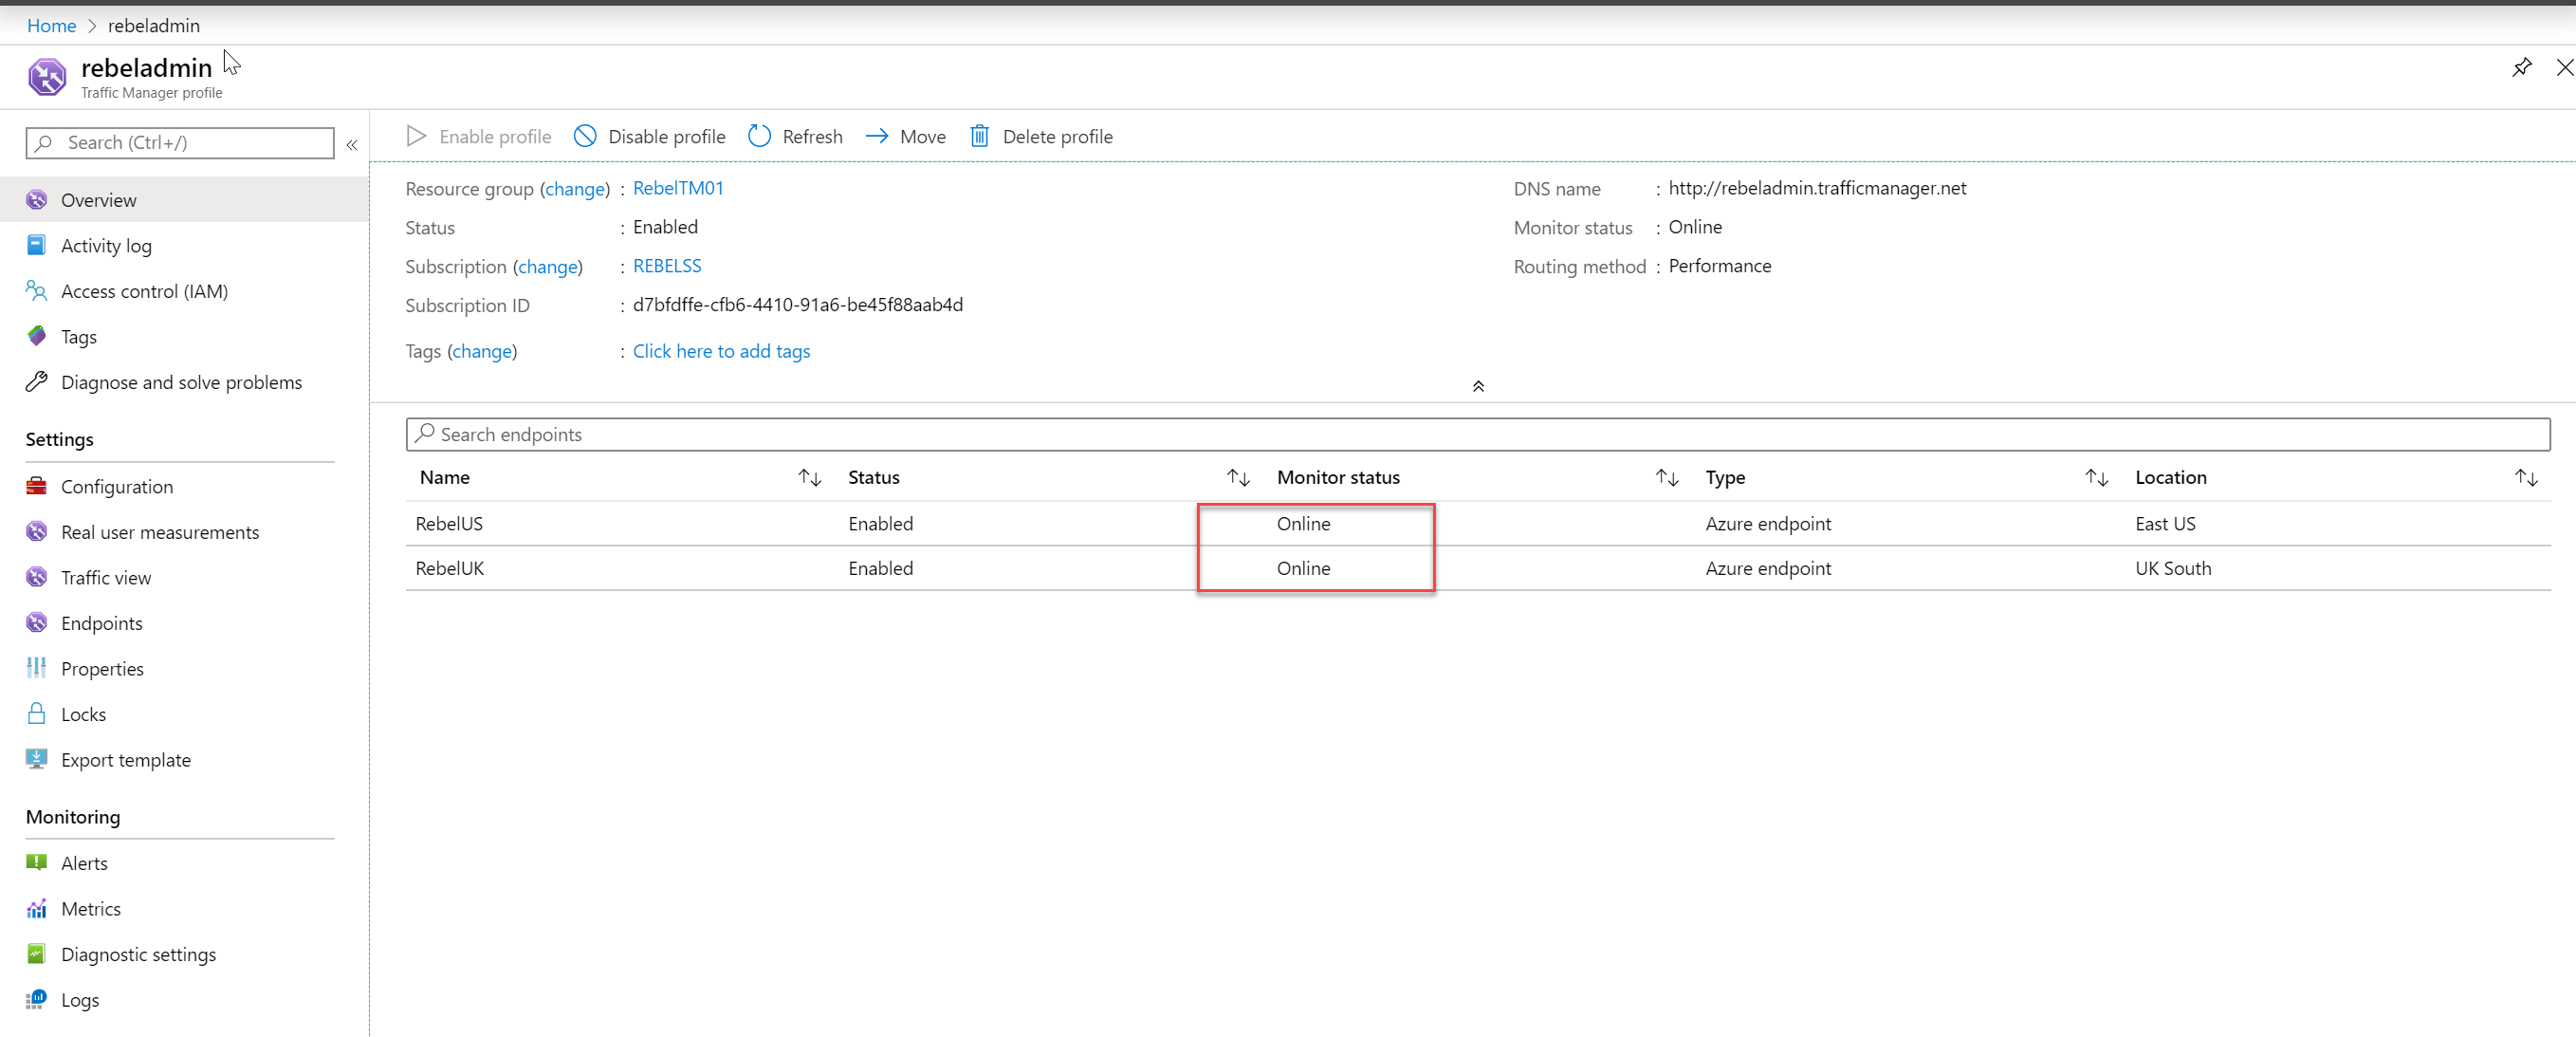
Testing
The configuration part is completed now. Let’s go ahead and check if it is working as expected.
First, we need to verify the traffic manager profile URL. This is the URL we need to use for testing.
We can find this URL in the traffic manager profile.

I have a pc which is connecting from UK.
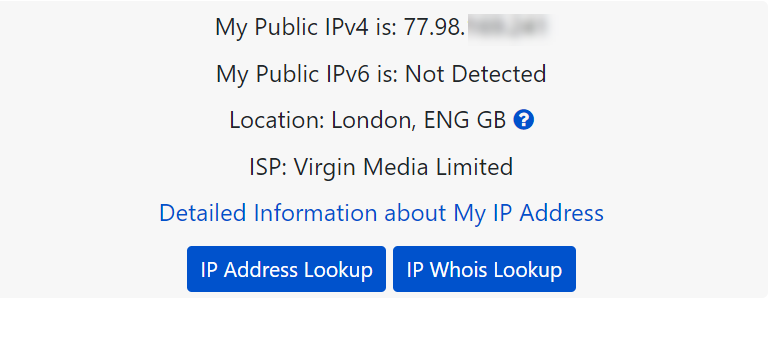
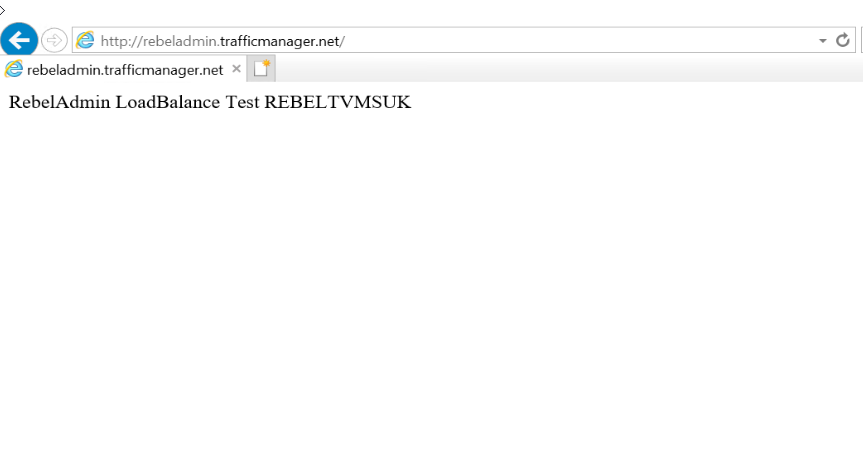
When I access the URL from this particular pc, I can see its loading page from the VM we created in UK South region.
I also have a VM running in East US region.
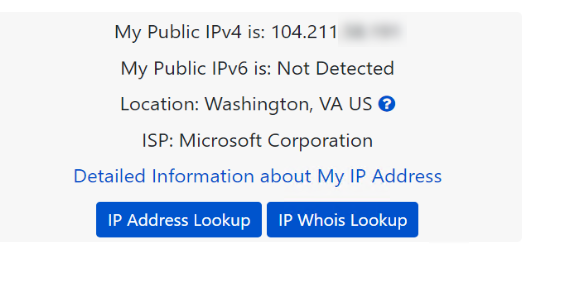
When I access the URL from this VM I receive a response from VM running in East US region.
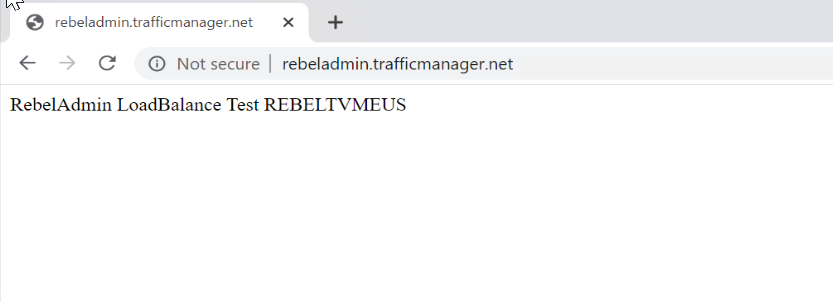
As we can see it is successfully directing traffic to the VM which has the lowest latency.
This marks the end of this blog post. If you have any further questions about this feel free to contact me on rebeladm@live.com also follow me on twitter @rebeladm to get updates about new blog posts.