

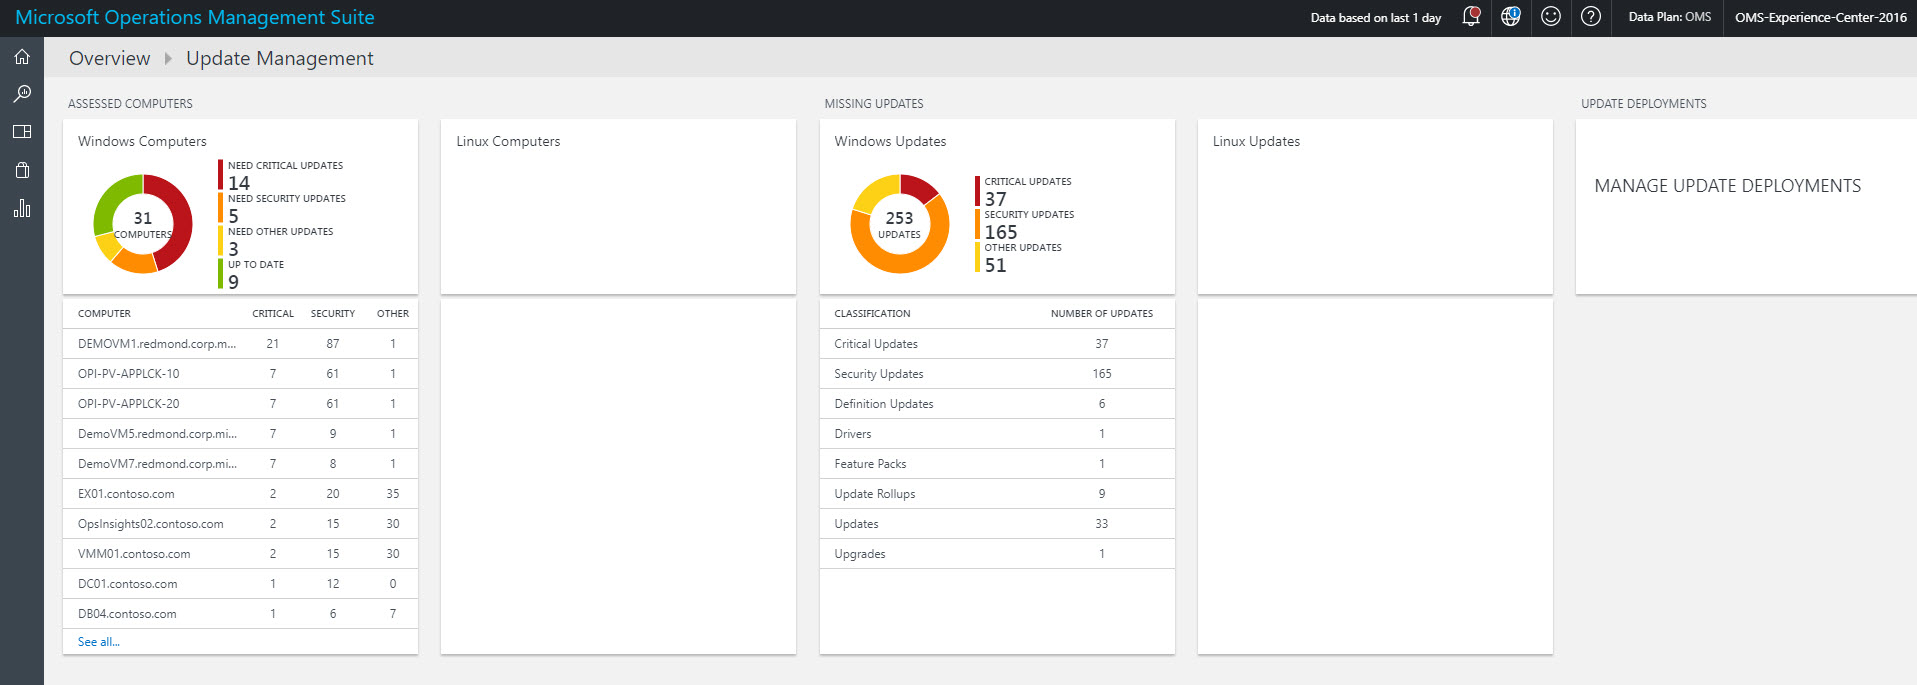
Keeping your operating systems up-to-date is critical as it will be the first step towards protecting your systems from emerging threats. it will also help to improve efficiency and user experience. Simplest way to update your windows operating systems to use “Windows Update” feature comes with every operating system. But this is not enough for corporates as it is important to manage windows updates in control manner. Microsoft has tools such as WSUS, SCCM to manage windows update in infrastructure. when it comes to hybrid or cloud only environment it is important update your virtual machines running on cloud as well. Microsoft Operation Management Suite (OMS)’s “Update Management” is a great way to manage updates in any environment (on-premises, cloud only or hybrid). It detects and report missing updates in your environment. It also allows to deploy those using Azure automation.
However, if you running an azure environment, now Microsoft have another solution which will help to manage updates for Azure VMs. This is NOT a replacement for OMS update management even though it works similar. it helps to manage updates in individual VM level or as group. This feature “Update Management” still in preview mode but it is not too early to try its capabilities.
There are few things I like about this feature.
1. No Agents or additional configuration – This feature can enable under a VM with few clicks and it doesn’t require any additional configuration inside the VM. It doesn’t need any agent installation or any other configuration such as firewall changes. It’s simple and efficient.
2. No need to log in to VM – This is ideal for MSPs as well. In order to manage updates, you do not need to log in to VM at all. No need to define passwords to install updates either.
3. Reporting – It list down missing updates and categories those based on type. It lists info about failed deployments. So, everything been logged and visualized in easy way to understand.
Let’s see how we can get this setup.
1. In order to enable this feature, you need to log in to Azure as global administrator.
2. The click on Virtual Machines to list down VMs.
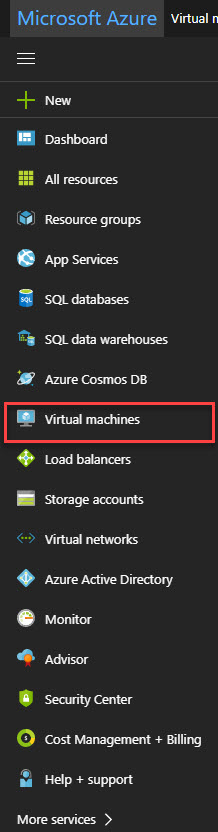
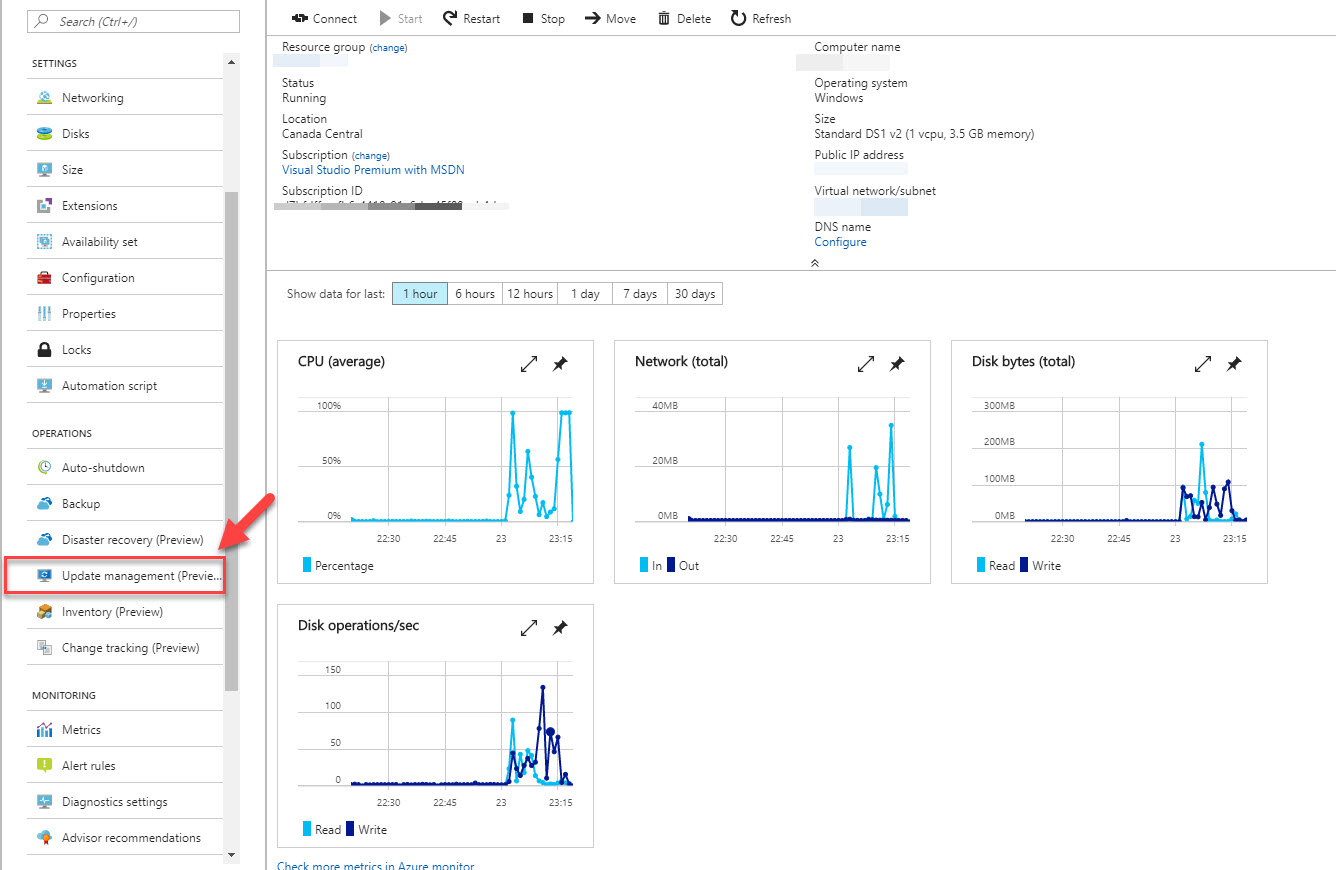
3. Then click on the VM which you choose.
4. From left hand side panel, click on Update Management (Preview).
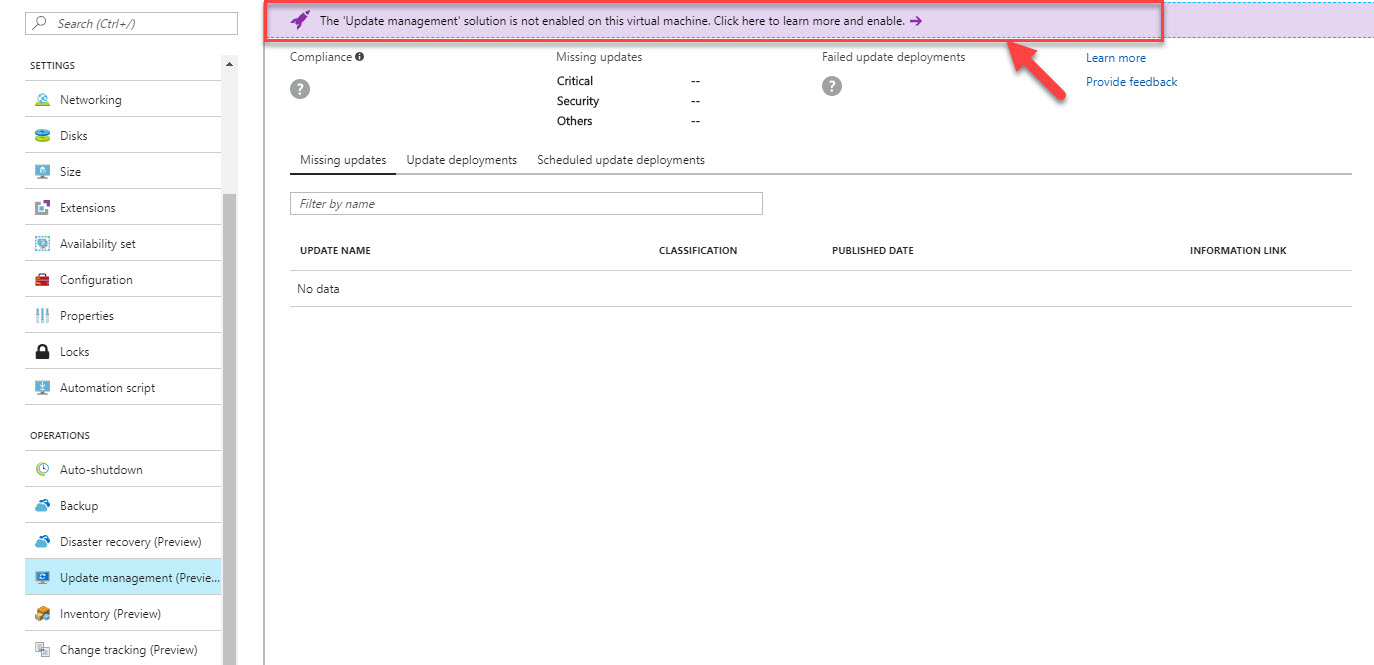
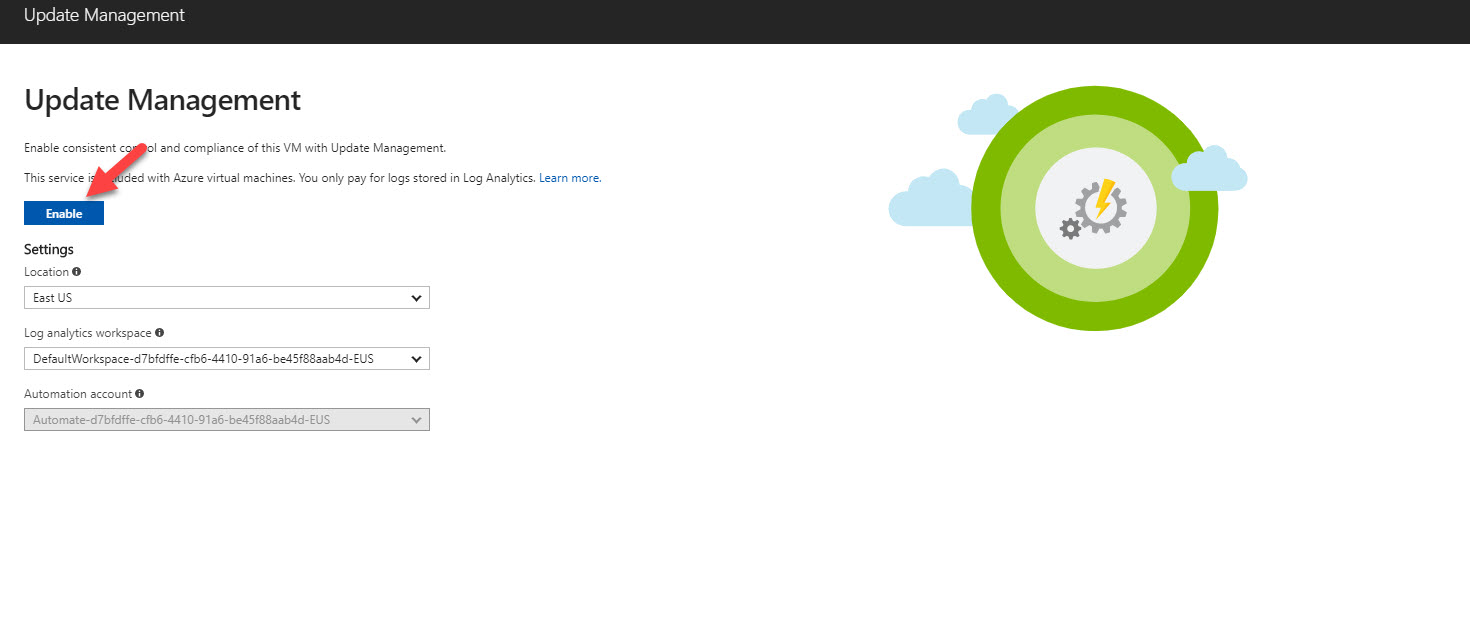
5. In next window click on purple bar (as in following image) to enable the feature.
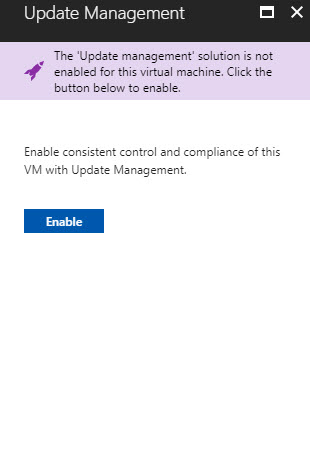
6. Then it will load the page to enable to feature. As we can see it is also creating log analytic workspace as well as automation account. Click on Enable to proceed.
7. Once it is enabled, it will take 15-20 minutes to gather information about updates. Once it is finish we can see new data under Update Management (Preview) panel.
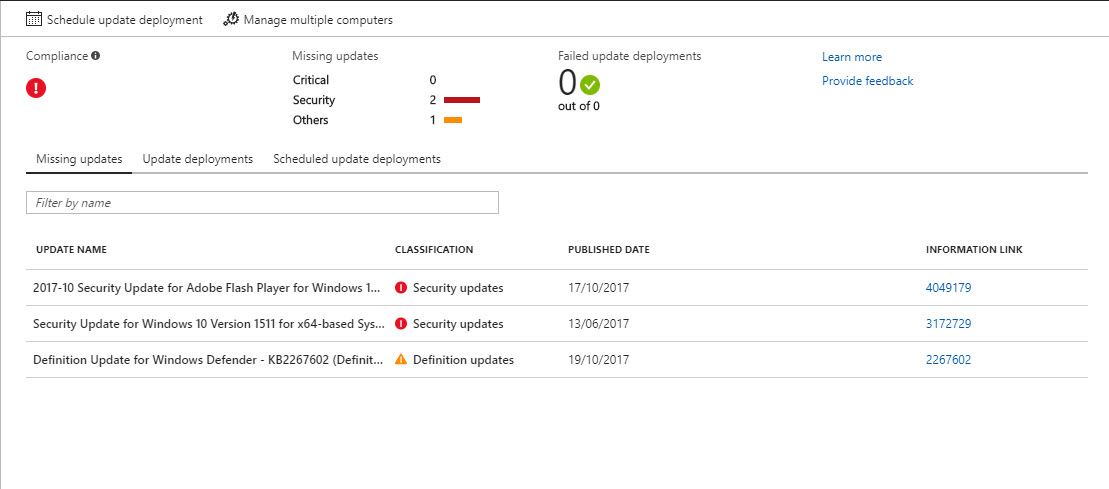
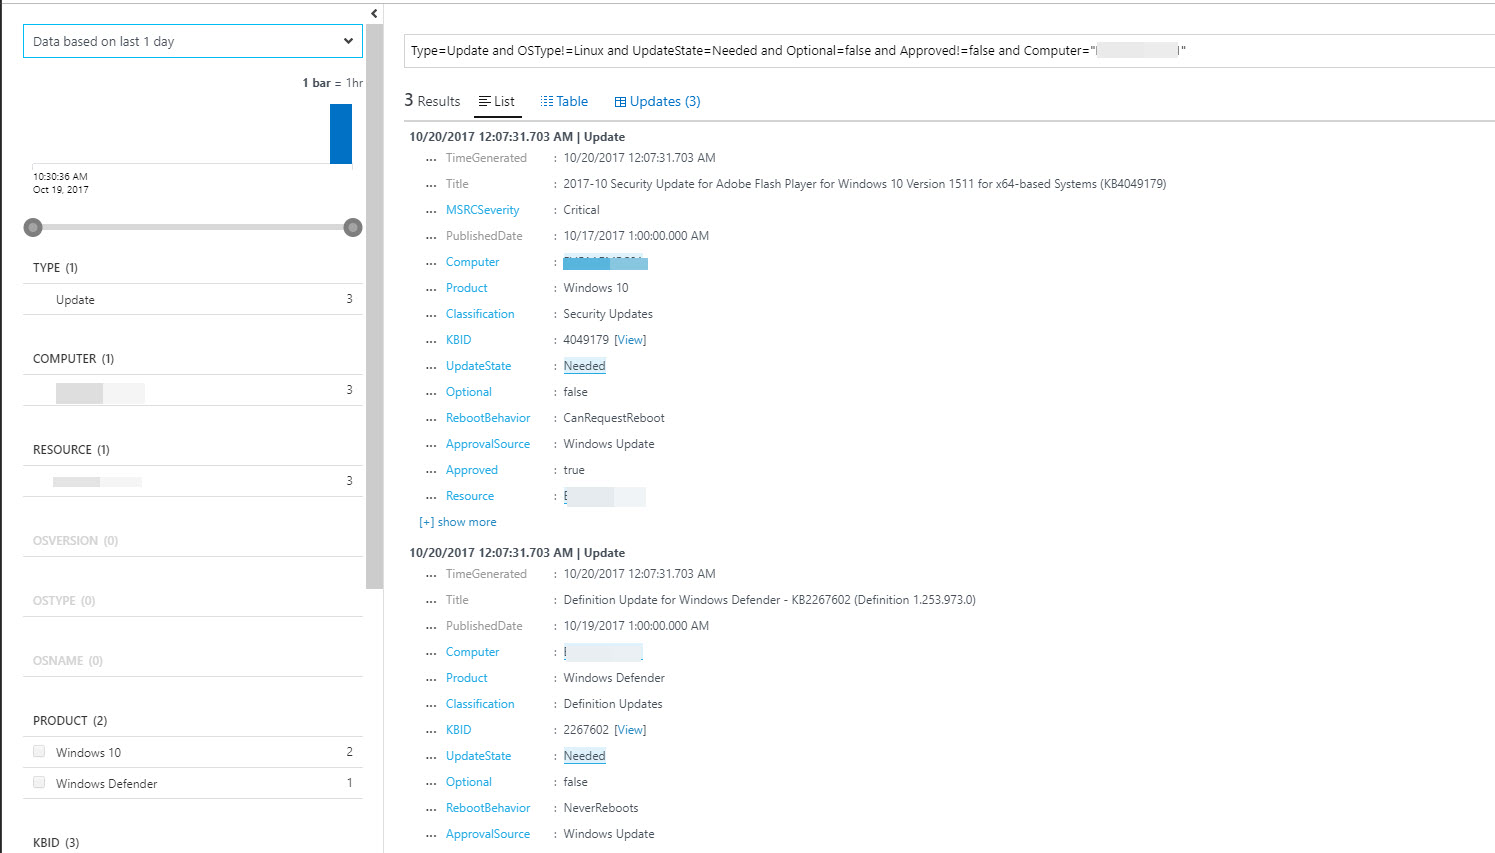
8. In Missing Update section, it shows update name, classification, published date and link to see more details about updates.

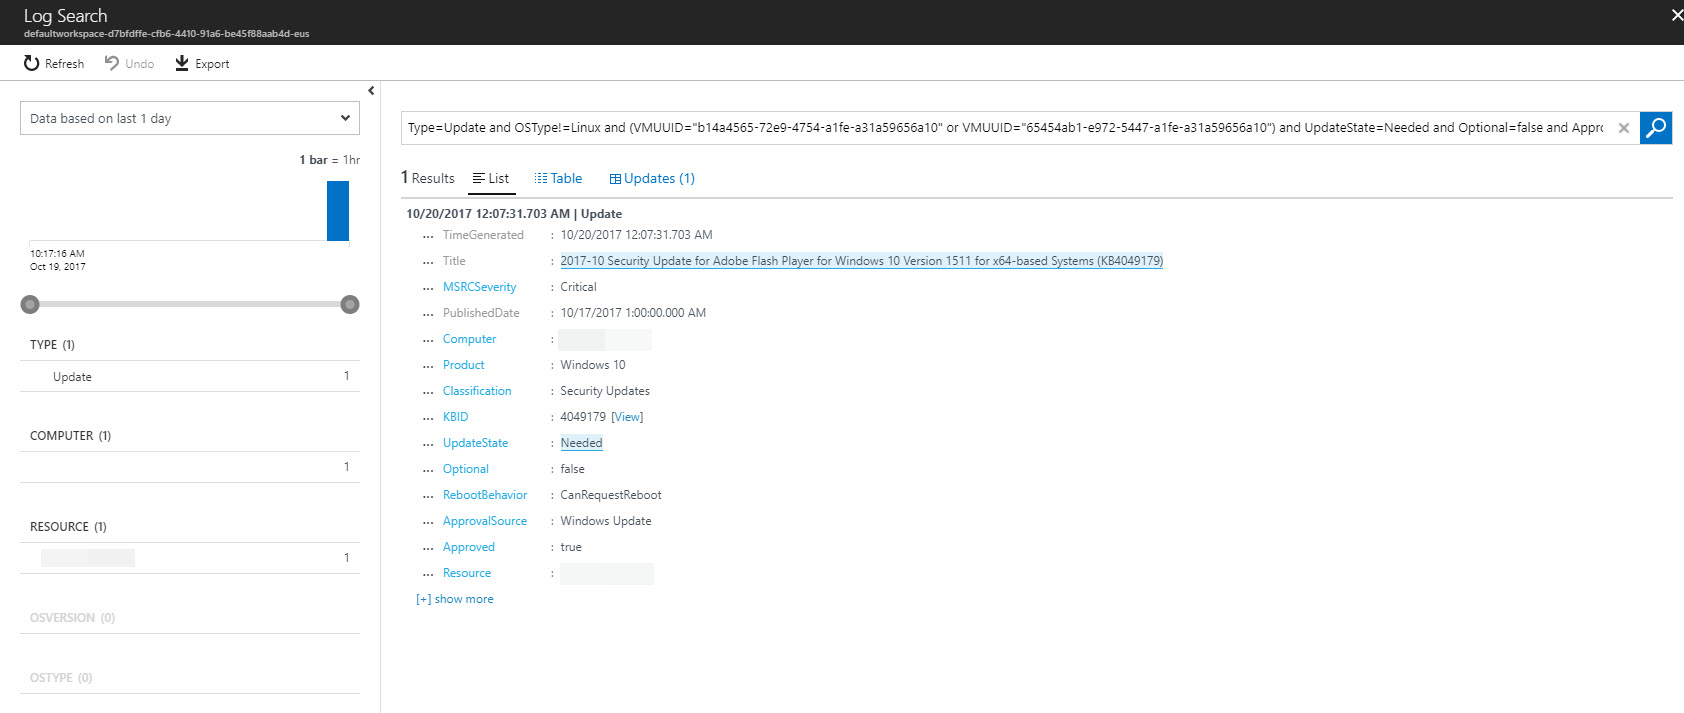
9. If we click on one of missing updates it will bring to us to the log search window and in there we can see more details about update.
10. In Update Management (Preview) panel, lets click Manage Multiple Computers Option.
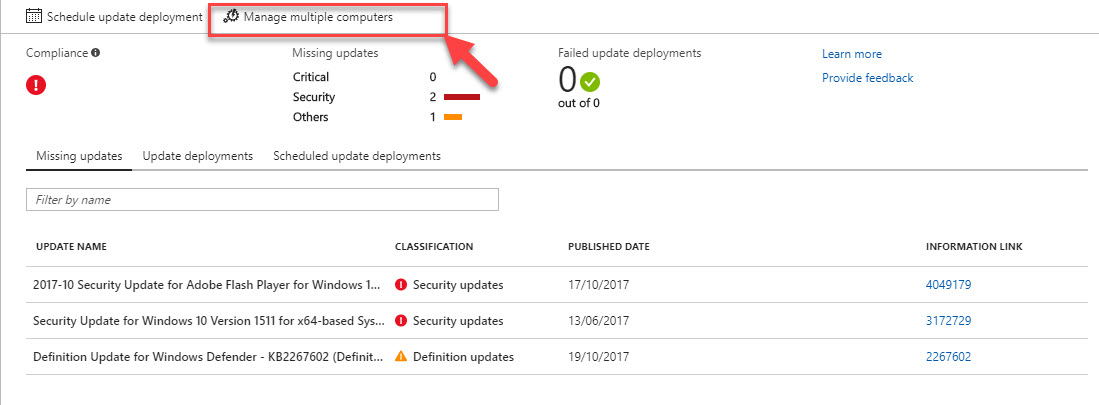
11. In that window, we can see all the computers which have this feature enabled and their compliance status.
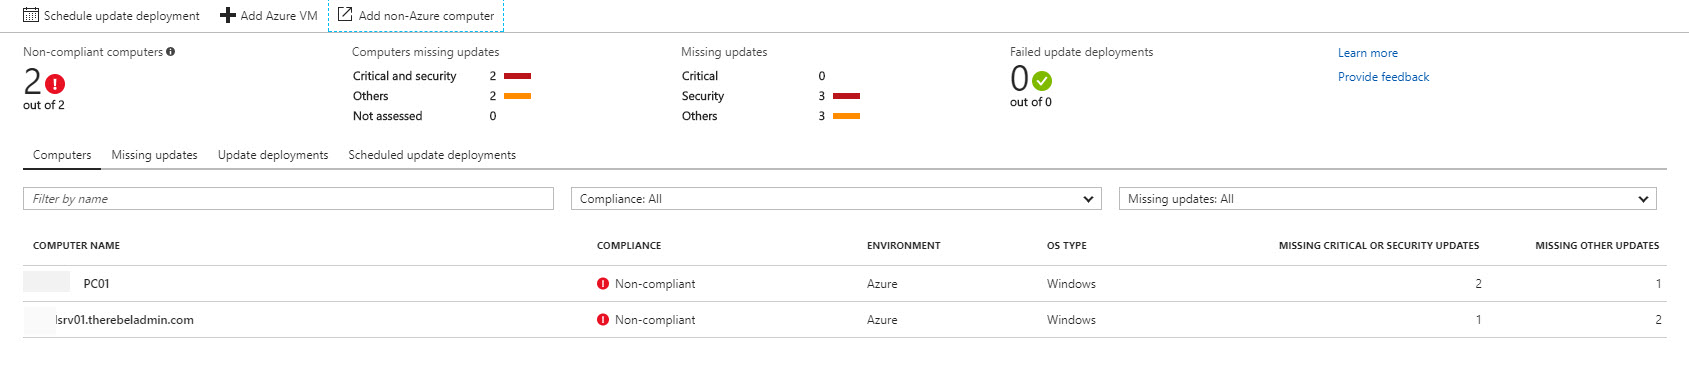
12. By clicking on each computer in list, we can see more detail about it using log search window.
13. We also can add Azure VM to update management. To do that click on Add Azure VM option in Manage Multiple Computers panel.
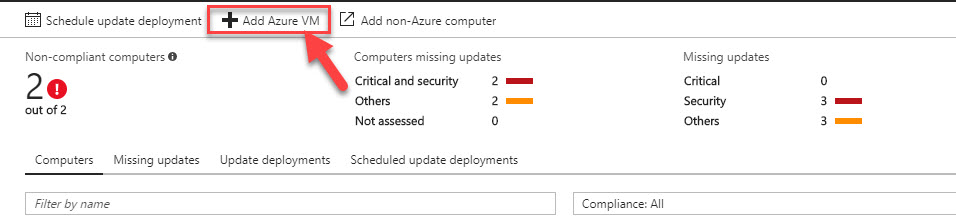
14. It will list the VMs in account and click on the relevant VM you like to add. Then we can enable the feature under it.
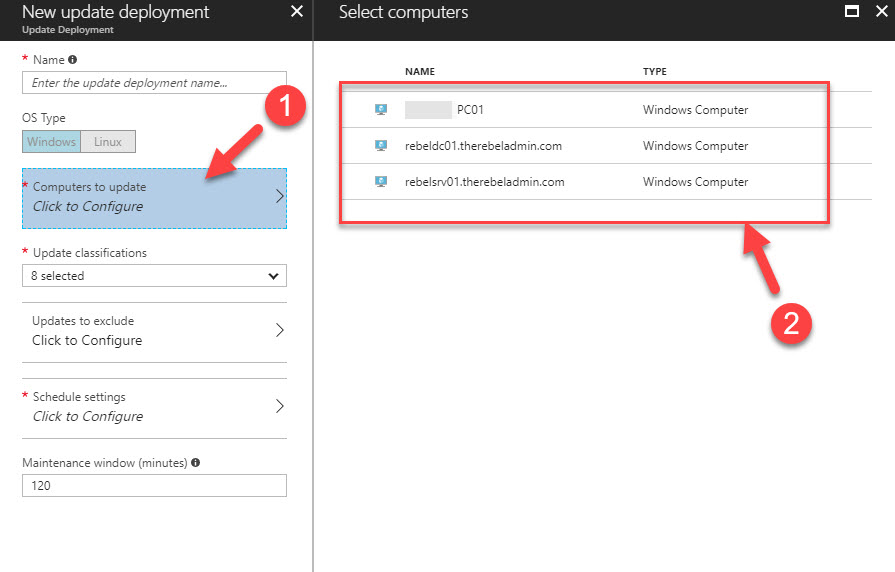
15. Now we have list of missing updates. Next step is to schedule update. In order to do that go back to Update Management (Preview) panel and click on Schedule update deployments option.

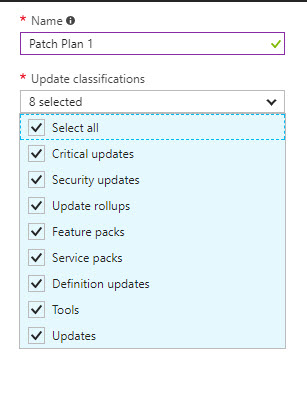
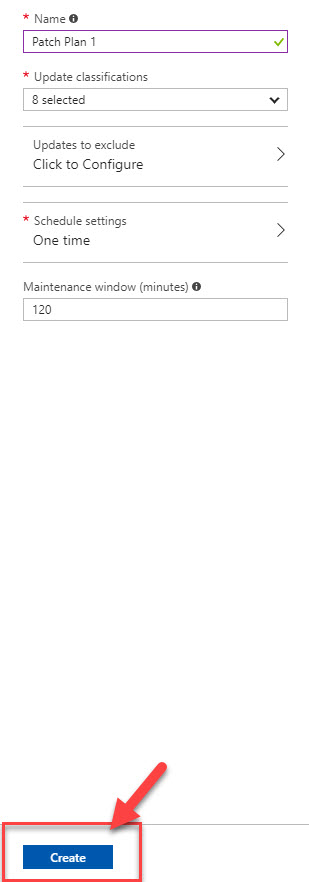
16. In new window, first thing is to define name for the job. Under Update classification we can select which updates to consider for the schedule.
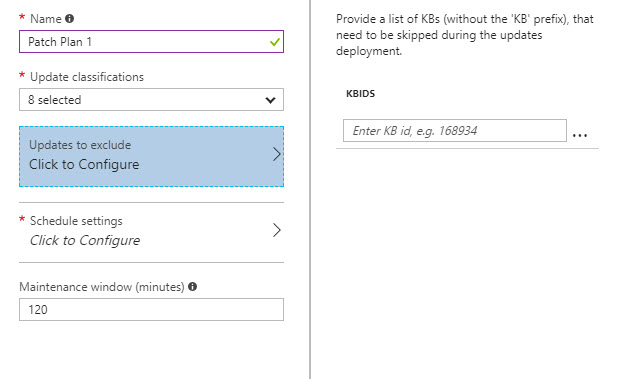
17. If need to exclude any updates, we can do that using updates to exclude option. In there we need to define relevant KB numbers.
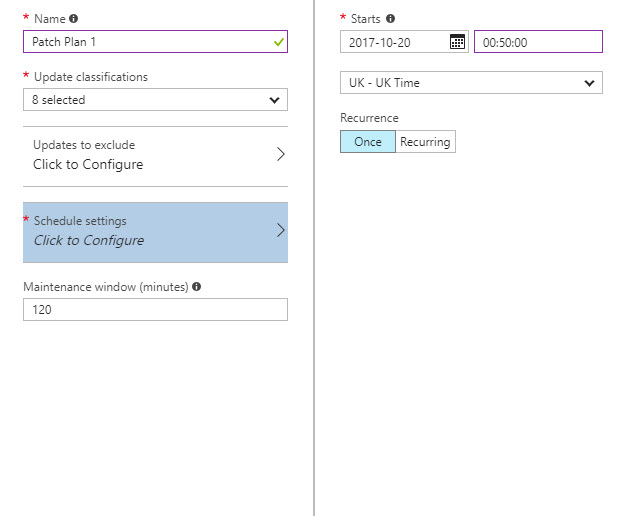
18. Under the schedule settings we can define the time to apply updates. It can be either one time or recurring job.
19. Using maintenance window option we can set how long it should be in maintenance mode.
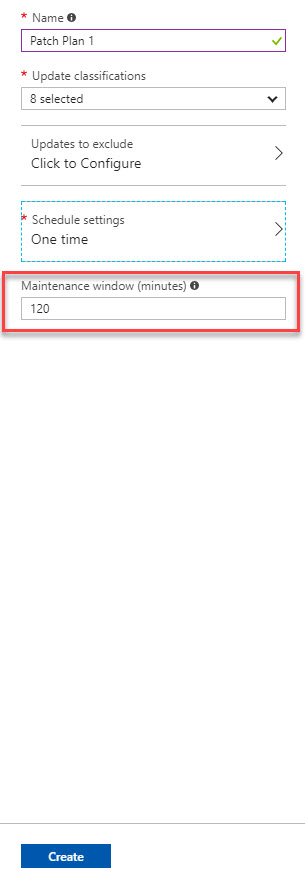
20. Once it’s done click on Create to create the schedule.
21. If you use the same Schedule update deployments option under Manage Multiple Computers window, we can create schedule for multiple computers.
22. Once schedule is created we can see it under Scheduled update deployments tab.
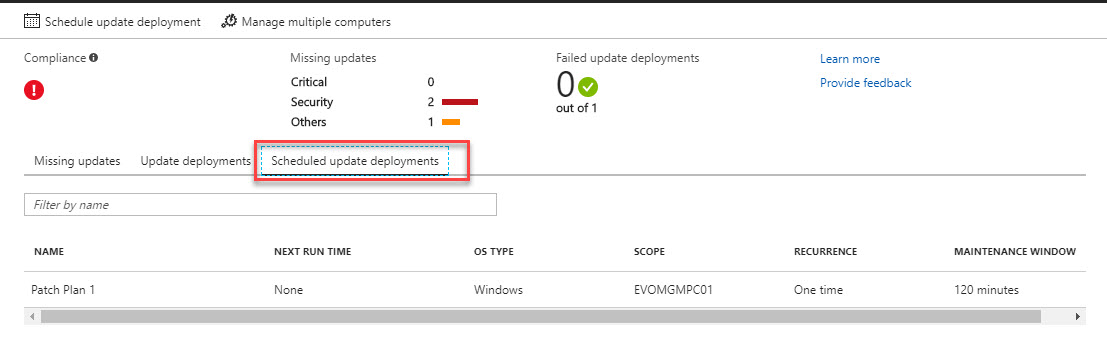
23. This completes the configuration part and once schedule run, we can verify it using Update Management (Preview) panel
This marks the end of the blog post and hope it was useful. If you have any questions feel free to contact me on rebeladm@live.com also follow me on twitter @rebeladm to get updates about new blog posts.