

MFA, I am sure it’s not a new concept today for IT administrators. Its additional layer of security to confirm the user identity. It can be in form of PIN verify, phone call, smart cards, biometrics etc.
This feature is mainly used in infrastructure when its release, extending its services to “internet face”. There are lot of MFA service providers in market. You can either use it as on-premises service or cloud based service.
When it comes to azure the same security concerns applies. If you integrated it with on-premises active directory security is more concerned as it will extend the security boundaries of the infrastructure.
In this article I will demonstrate how “easily” you can enable multi-factor authentication for azure user.
In my demo I have a windows server 2016 TP4 on-premises AD configured to sync with azure ad. I am going to enable MFA for an azure user account which is sync from on-premises AD.
1) Log in to your azure portal
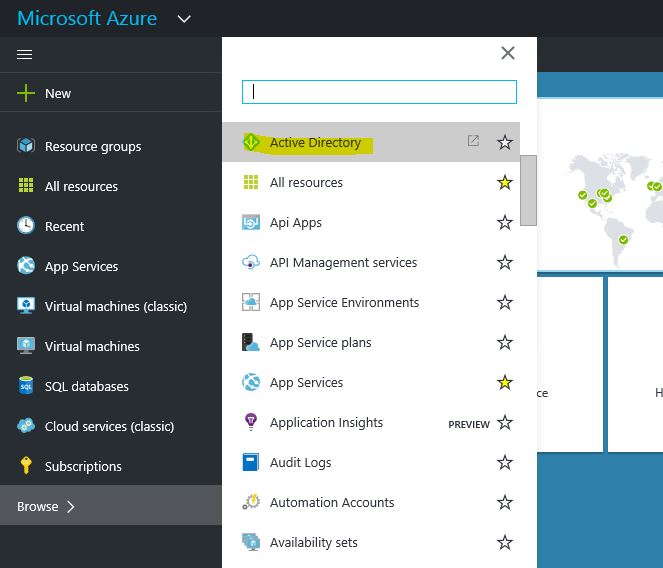
2) Then brows > Active Directory
3) Load your AD directory and go to users

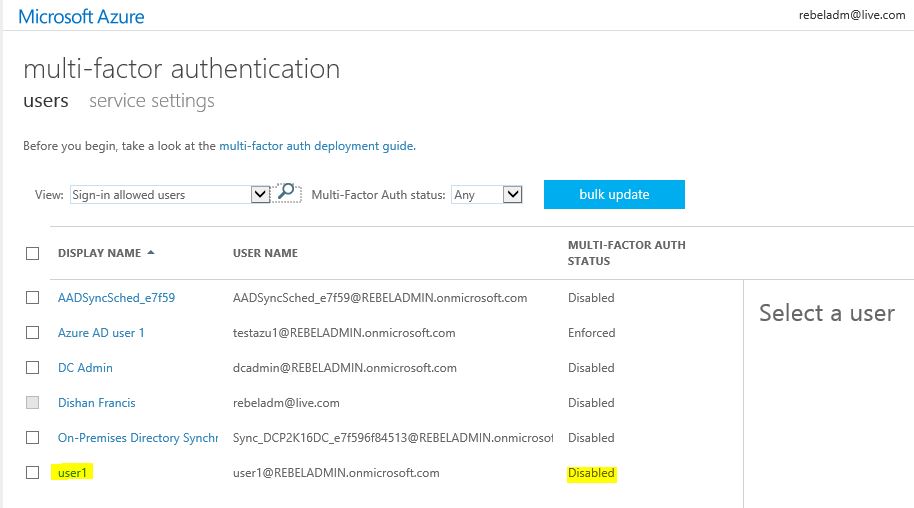
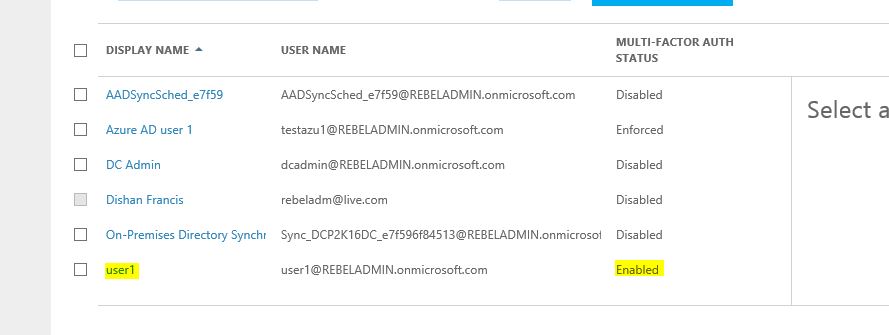
4) For my demo I am using user account “user1”, this user account is sync from local active directory
5) Select the user account and click on “manage multi-factor authentication”

6) Then it will load a new page to manage MFA. As you can see currently for “user1” MFA disabled
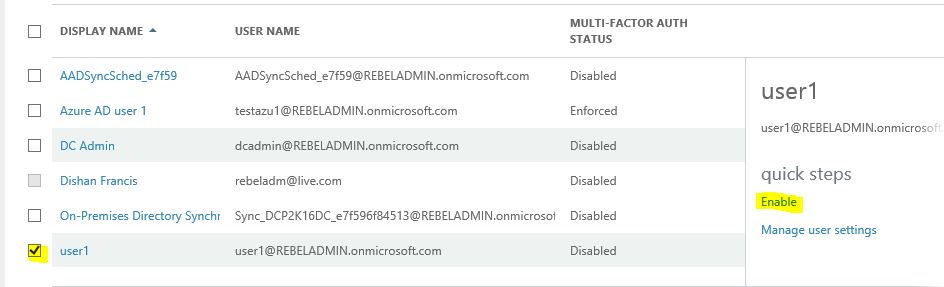
7) To enable, click on tick box next to “user1” and click on option ”enable” in right hand panel
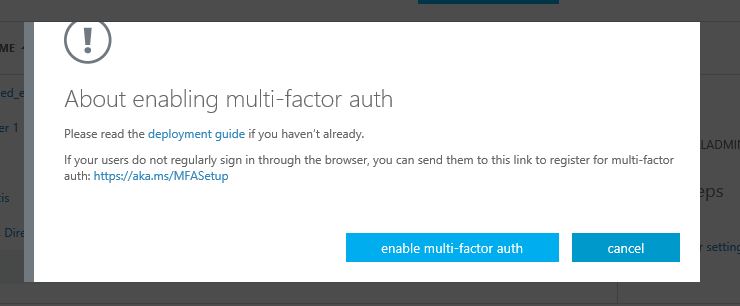
8) Then it will open a pop up window with help options. Click on “enable multi-factor auth”
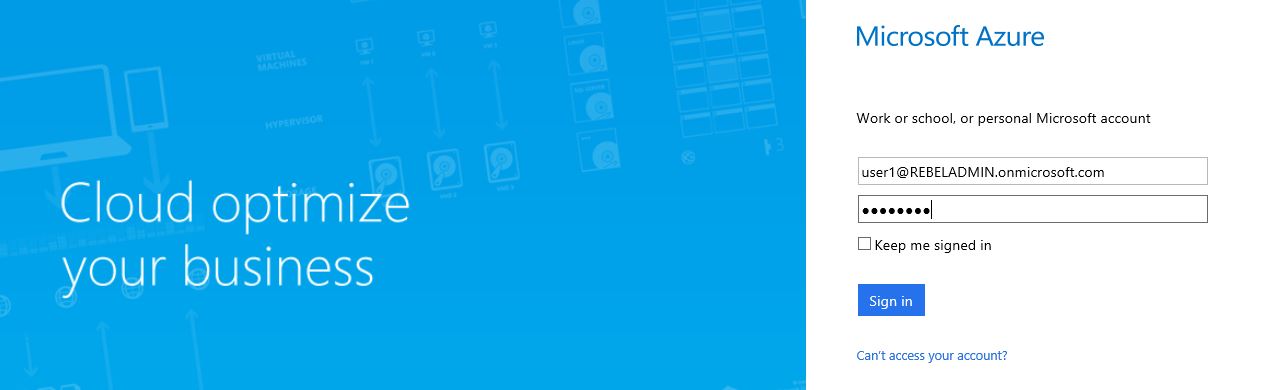
9) Now it’s enabled. Let’s try to log in azure portal as the use to see.
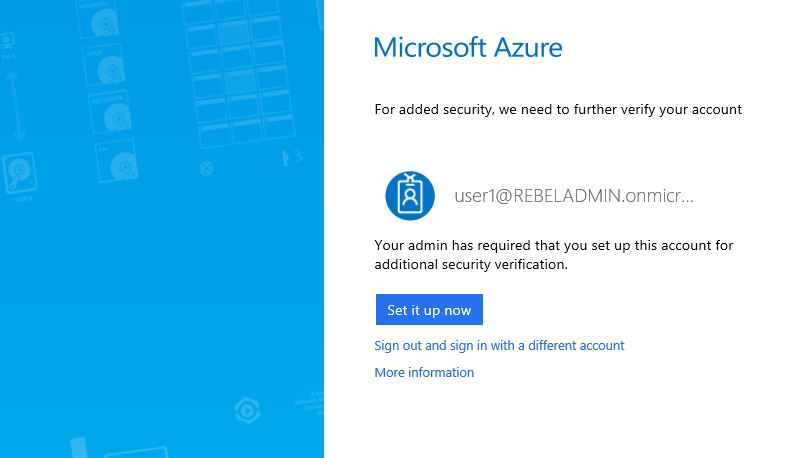
10) Then it saying MFA is enabled and it need to setup. Click on “setup now” to proceed
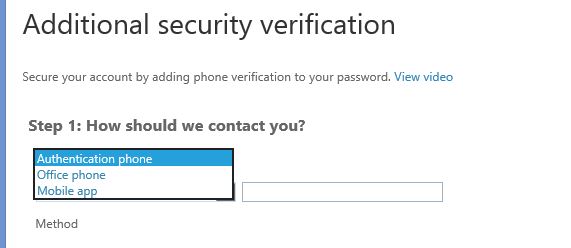
11) Then in next page it gives option to select the authentication method.
12) There is 3 ways to authenticate
Authentication phone – This will send SMS or also can setup to call back to the given number. Please note if you use this option SMS and call charges will be added.
Office Phone – This option is to request contact using office phone specified by admin
Mobile App – With this option you can install mobile application (Azure Authenticator) on your phone and it can set to send notification via app when try to login or to use verification code
13) Once select the option and its settings, click on setup
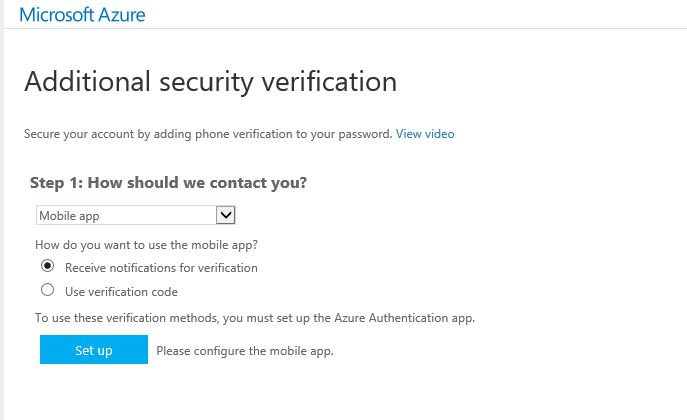
14) In my demo I used mobile app option. Once its completed the setup (you need to follow different options to setup based on your selection) let’s check the login page again
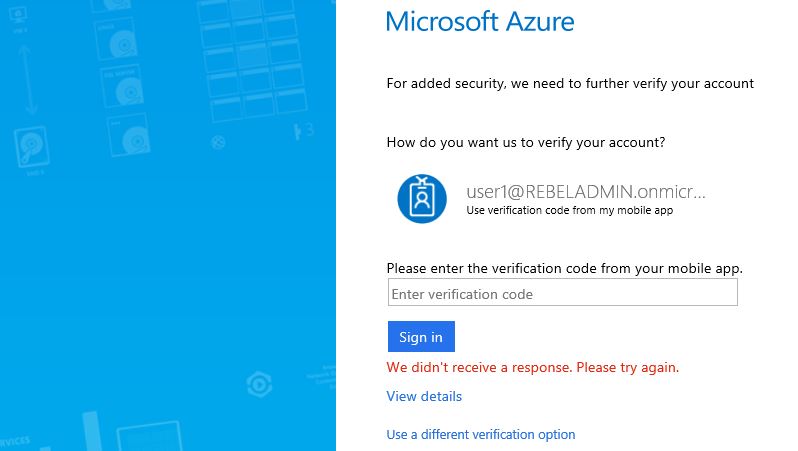
15) Now it’s asking for the PIN verification before login.
As we can see now MFA is enabled for the selected azure ad user.
In future post I will explain how we can change settings for MFA.
If you have any question feel free to contact me on rebeladm@live.com