

Let’s see how we can configure DHCP server in a Windows Server Environment. For the demo I will be using Windows 2008 R2 Server.
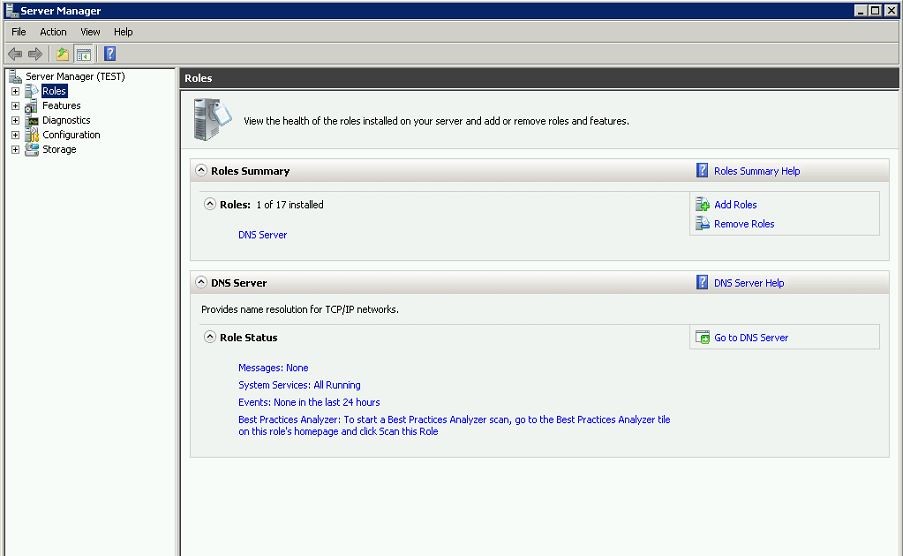
To start first need to log in to the server with administrator privileges. Then start the “server Manager” by clicking on “Server Manager” icon on task bar. Then go to “Roles”
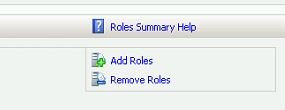
Then click on “Add Roles” option to open Add roles Wizard.
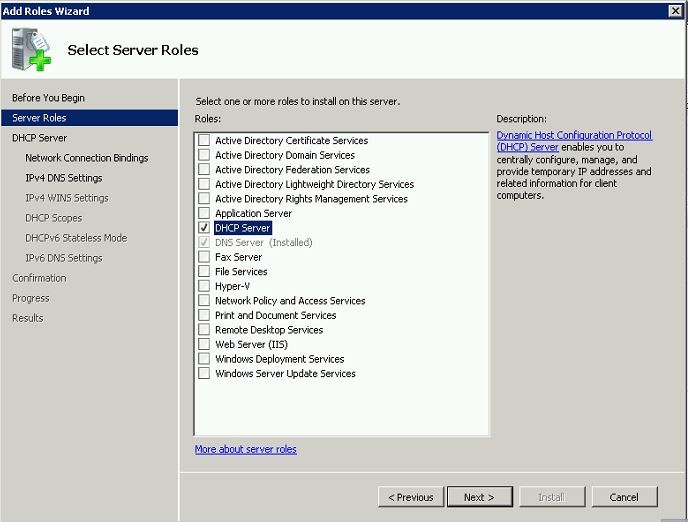
Then it will load the Roles Wizard and select the “DHCP Server” From the list and click next to continue.
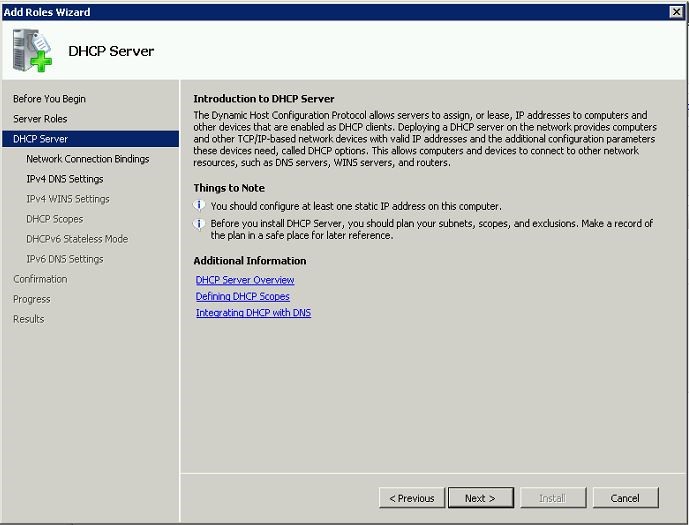
Then it will give description about the role. Click next to continue.
Next window is asking to use which interface to serve DHCP clients. If server has multiple NIC with multiple IP you can add them also to serve DHCP clients.

In next window it will give opportunity to add DNS settings that should apply for DHCP clients.

Next window is to define the WINS server details.

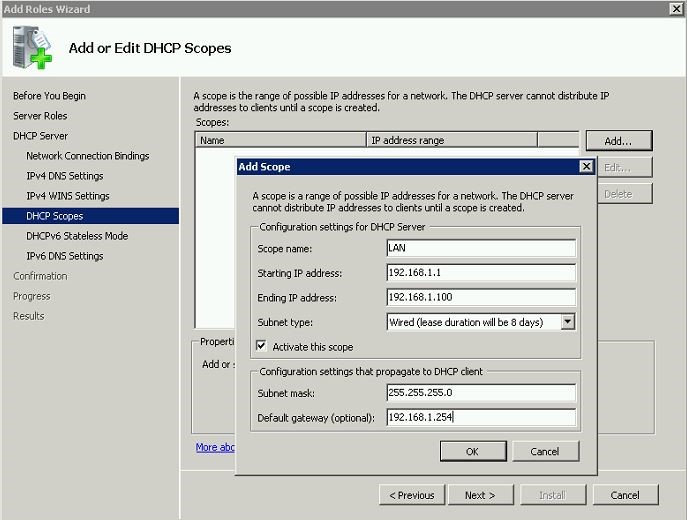
In next window we can add the scope, the Starting IP, End IP of the DHCP range, subnet mask, default gateway, leased time etc.
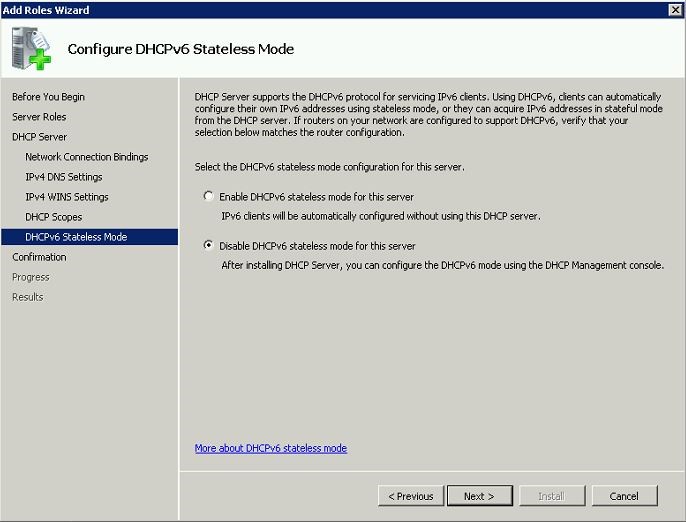
In next Window it can configure to support IPv6 as well.
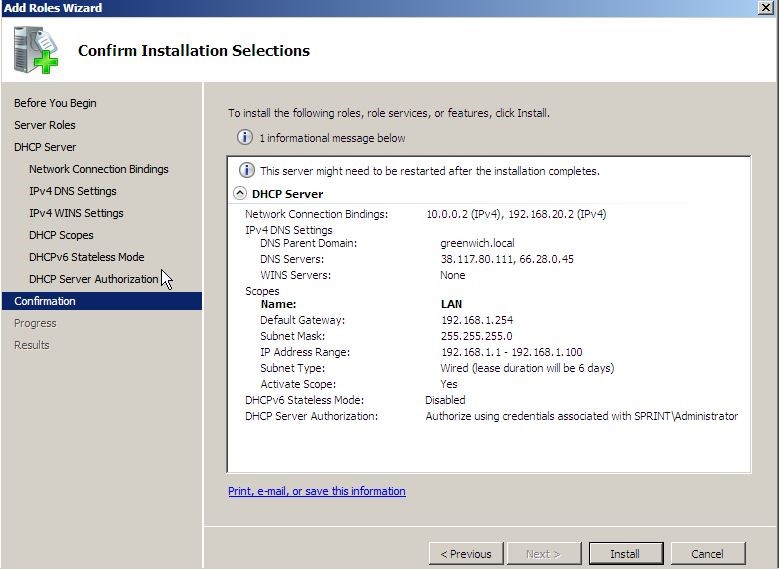
Then it will give the confirmation window before begin the install. Click on “Install”
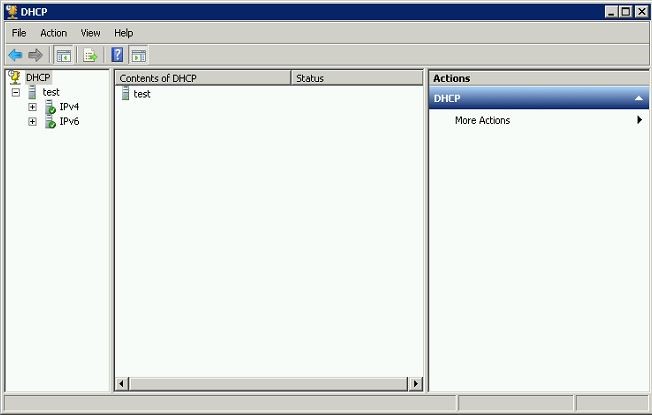
Once installation finishes DHCP server interface can open from Start > Administrative Tools > DHCP
Using the DHCP it is possible to even configure multiple Scopes configurations to the network. In a network there can be different network segments. It is waste to setup different DHCP servers for each segment. Instead of that it is possible to create different Scopes to issue DHCP for them.