
Last Updated on October 30, 2019 by Dishan M. Francis
Operating system updates include feature updates, bug fixes, and security improvements. It is important to update operating systems periodically. This is applying to desktop computers as well as servers. If it is windows operating systems, there are many tools out there that can use to manage the update process. But when it comes to Linux, we struggle as not many tools support Linux system updates. Luckily in Azure, we can manage updates for Linux VMs without any 3rd party tool.
In this post, I am going to demonstrate how to enable patch management for Linux VM and how we can automate the patch deployment task.
In my demo environment, I do not have any Linux machine. Let's go ahead and create one.
[su_note]For the configuration process, I will be using PowerShell. Therefore, please make sure you have Azure PowerShell module installed. More info about it can find under https://docs.microsoft.com/en-us/powershell/azure/install-az-ps?view=azps-2.6.0[/su_note]
1. Launch PowerShell console and connect to Azure using Connect-AzAccount
2. Then create a new resource group using,
New-AzResourceGroup -Name REBELRG -Location "East US"
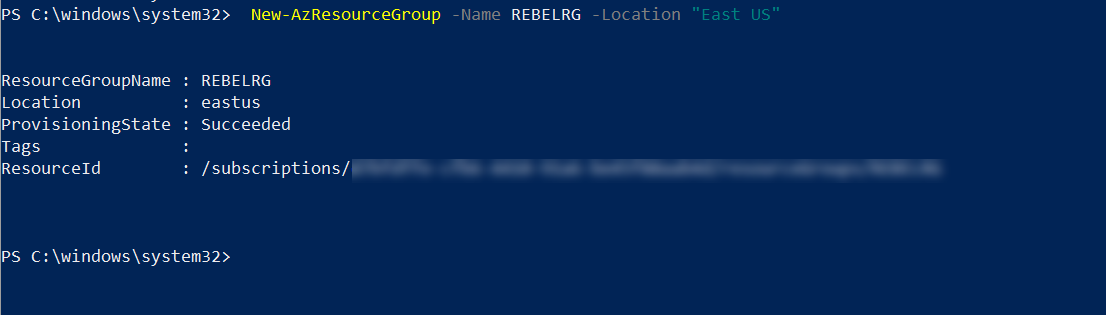
In the above, REBELRG is the resource group name and East US is the resource group location.
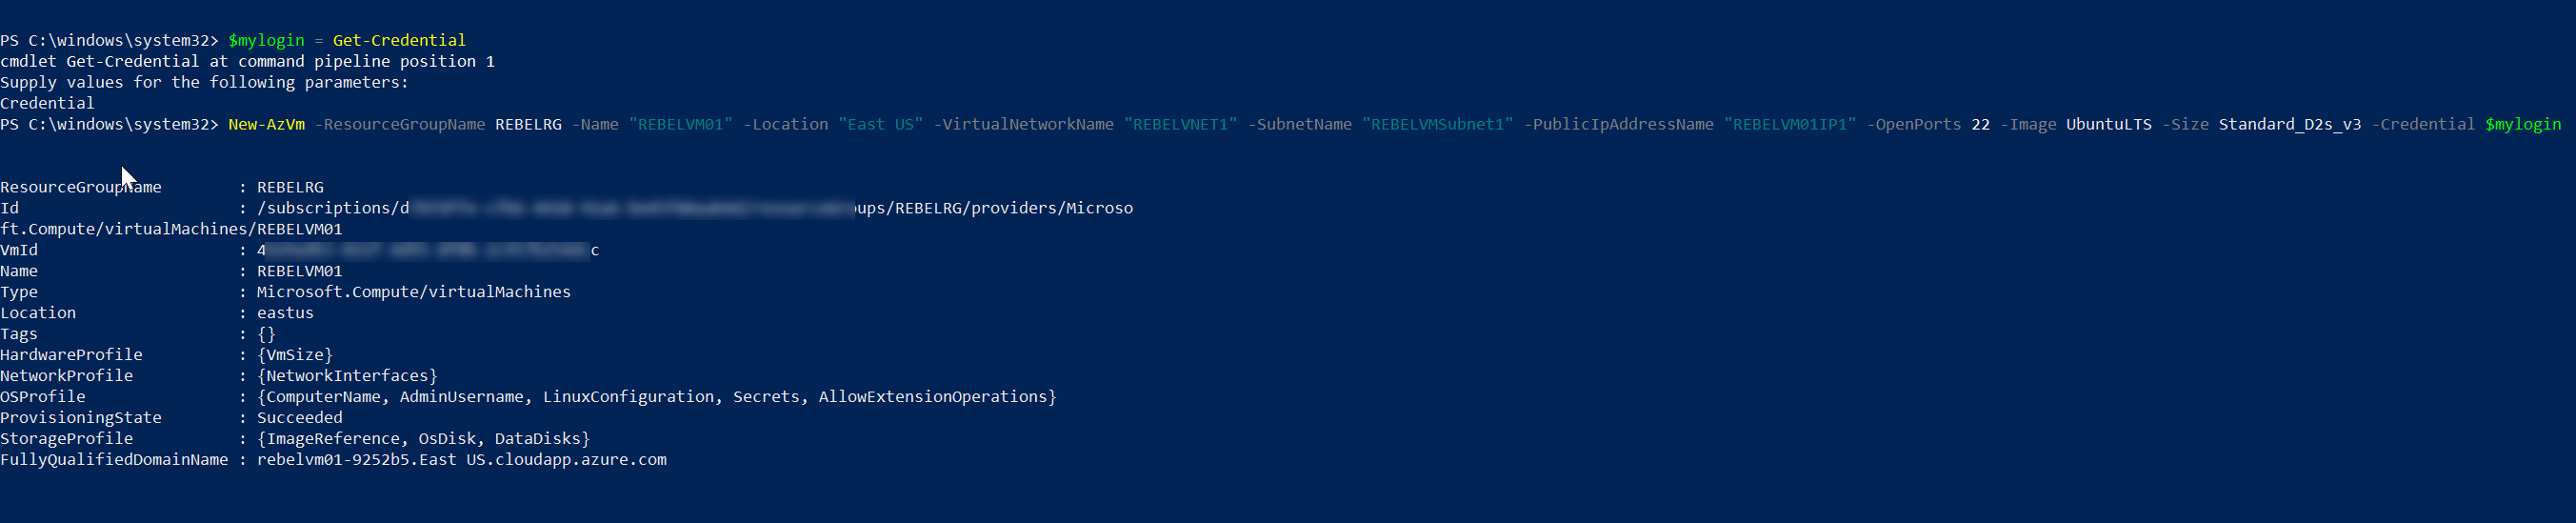
3. Then we need to create a new Linux VM. In this demo, I am going to create one with Ubuntu operating system.
$mylogin = Get-Credential
New-AzVm -ResourceGroupName REBELRG -Name "REBELVM01" -Location "East US" -VirtualNetworkName "REBELVNET1" -SubnetName "REBELVMSubnet1" -PublicIpAddressName "REBELVM01IP1" -OpenPorts 22 -Image UbuntuLTS -Size Standard_D2s_v3 -Credential $mylogin
In the above, REBELVM01 is the VM name. It is running UbuntuLTS edition. I have specified it using -Image parameter. It also using Standard_D2s_v3 vm size. This also has SSH connection enabled.
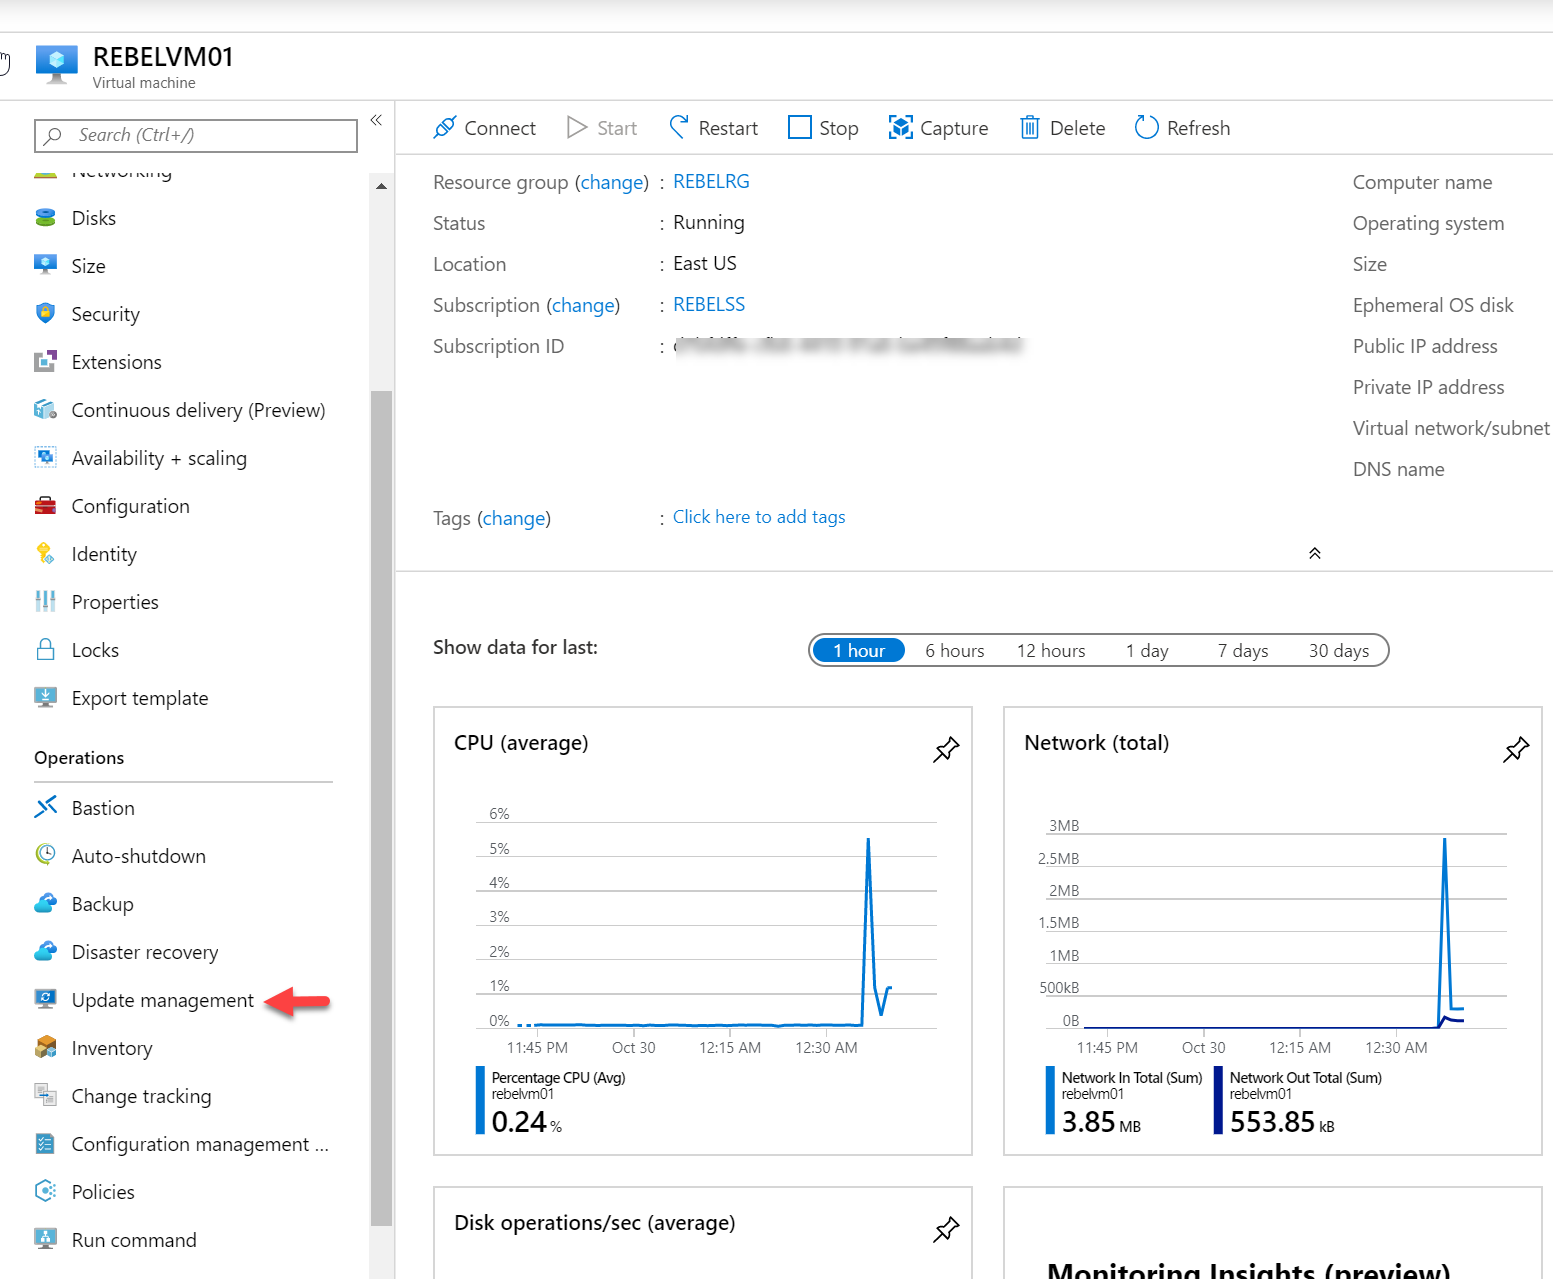
Now we have the Linux VM, next step is to configure the update management feature. To do that,
4. Log in to Azure Portal (https://portal.azure.com) as Global Administrator.
5. Search for the REBELVM01 VM and click on it.
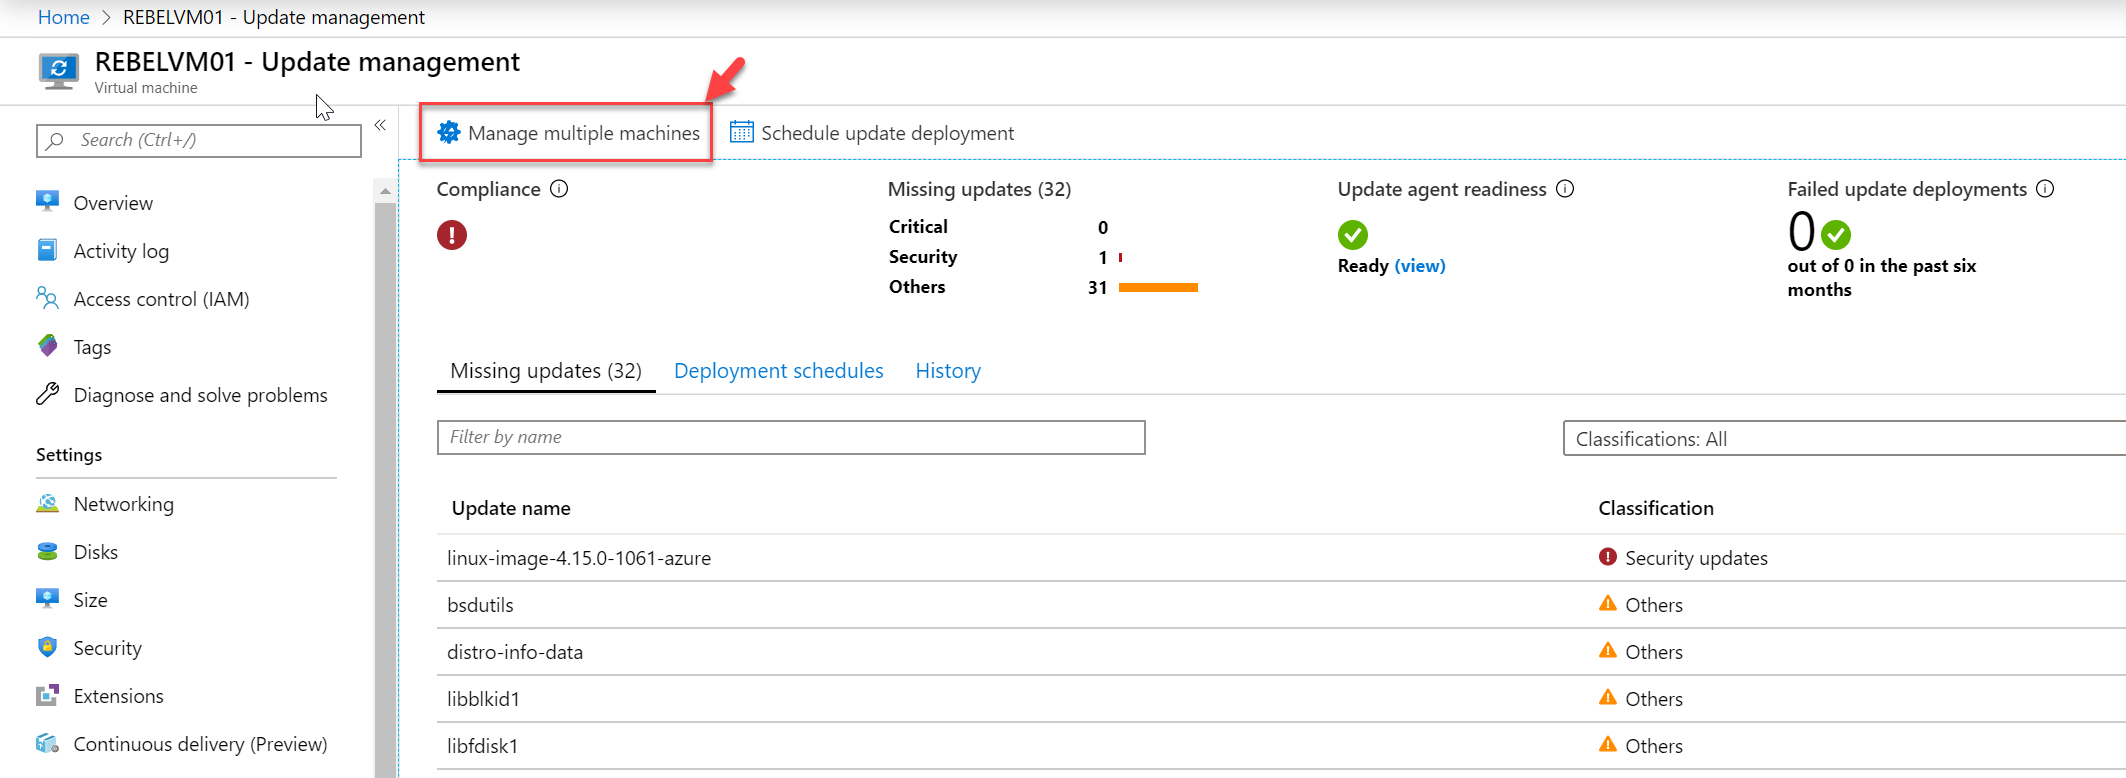
6. Then under the operations section click on Update management.
7. Then select Enable for this VM option to enable update management only for REBELVM01. After that specify the log analytic workspace and Azure automation account details. Don't worry if you do not have already created one. You still can create a new one as part of this exercise. Once selections are made click on Enable.
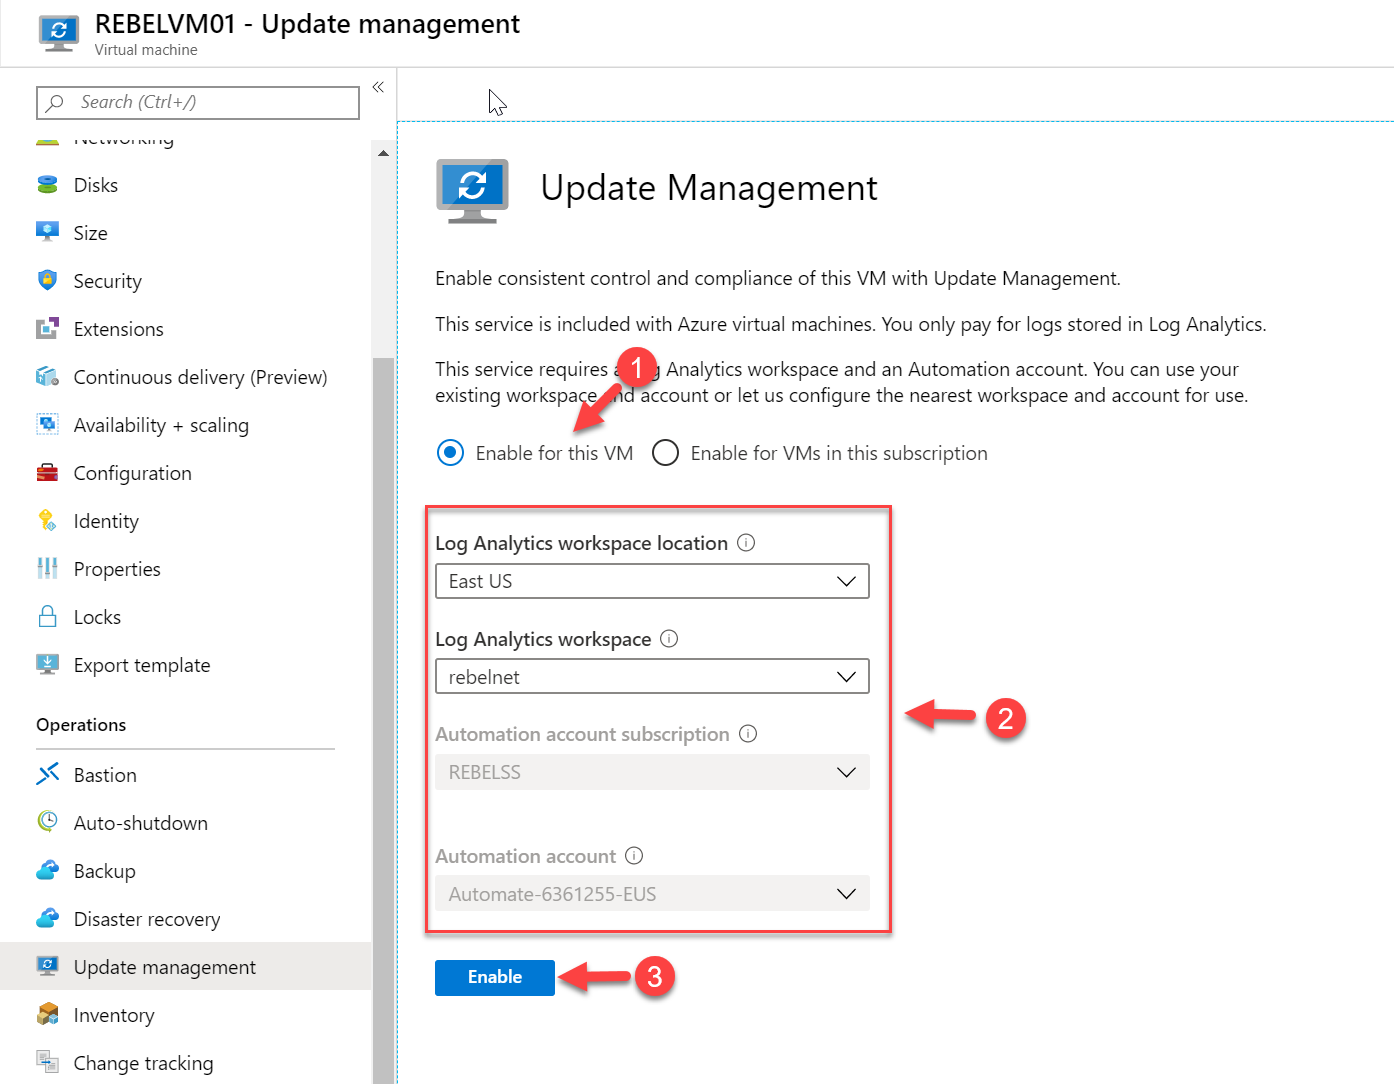
8. This can take about 15 minutes to complete the process. Once update management is enabled, the system will automatically check for updates. Also, it will install the required agents (hybrid runbook worker).
9. Once the initial scan is completed, we can see the missing updates.
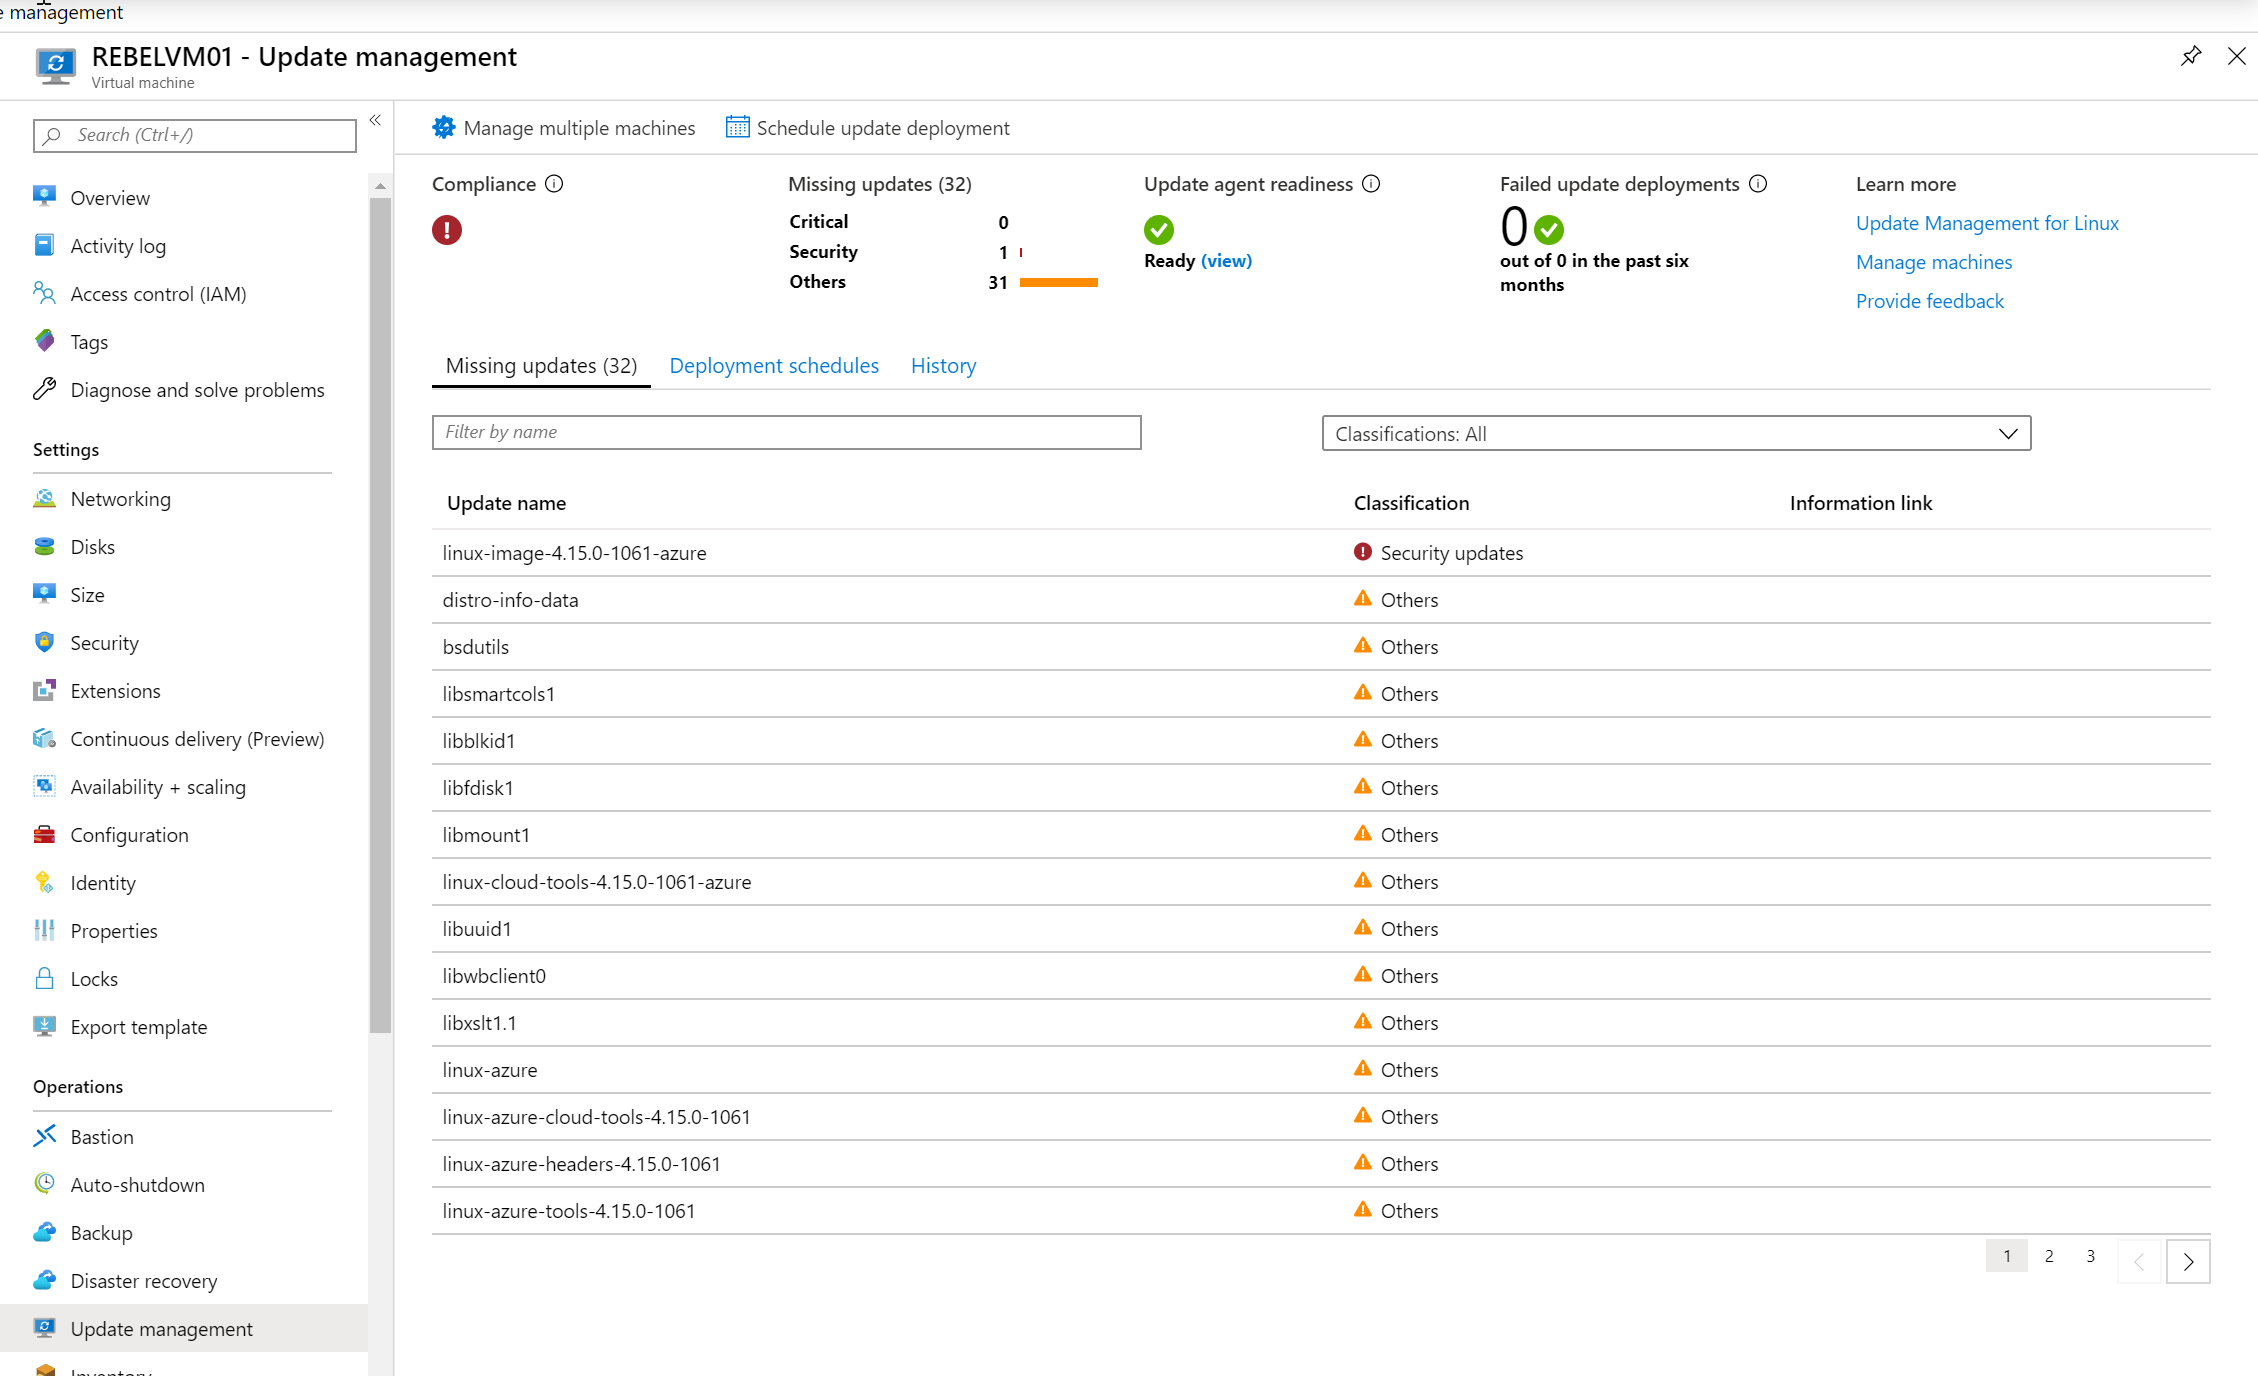
10. The next step of the configuration is to schedule update deployment. To do that click on Schedule update deployment option on the update management window.

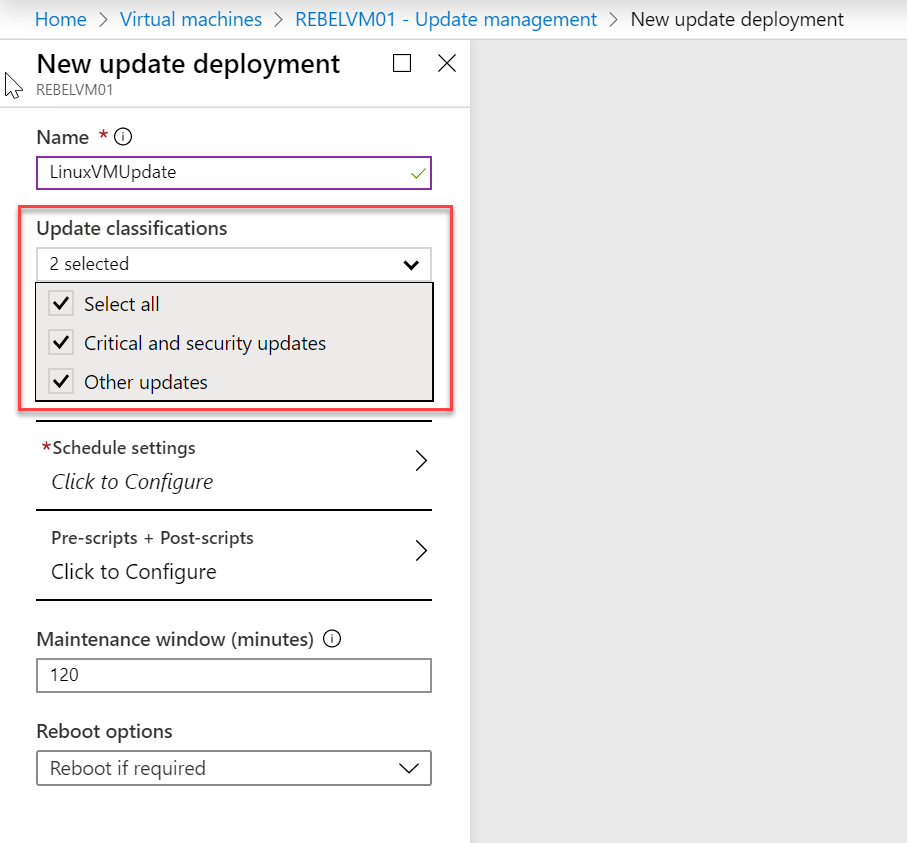
11. In the new wizard, under update classifications, we can select which type of updates to target for the schedule. In this demo, I am targeting all updates.
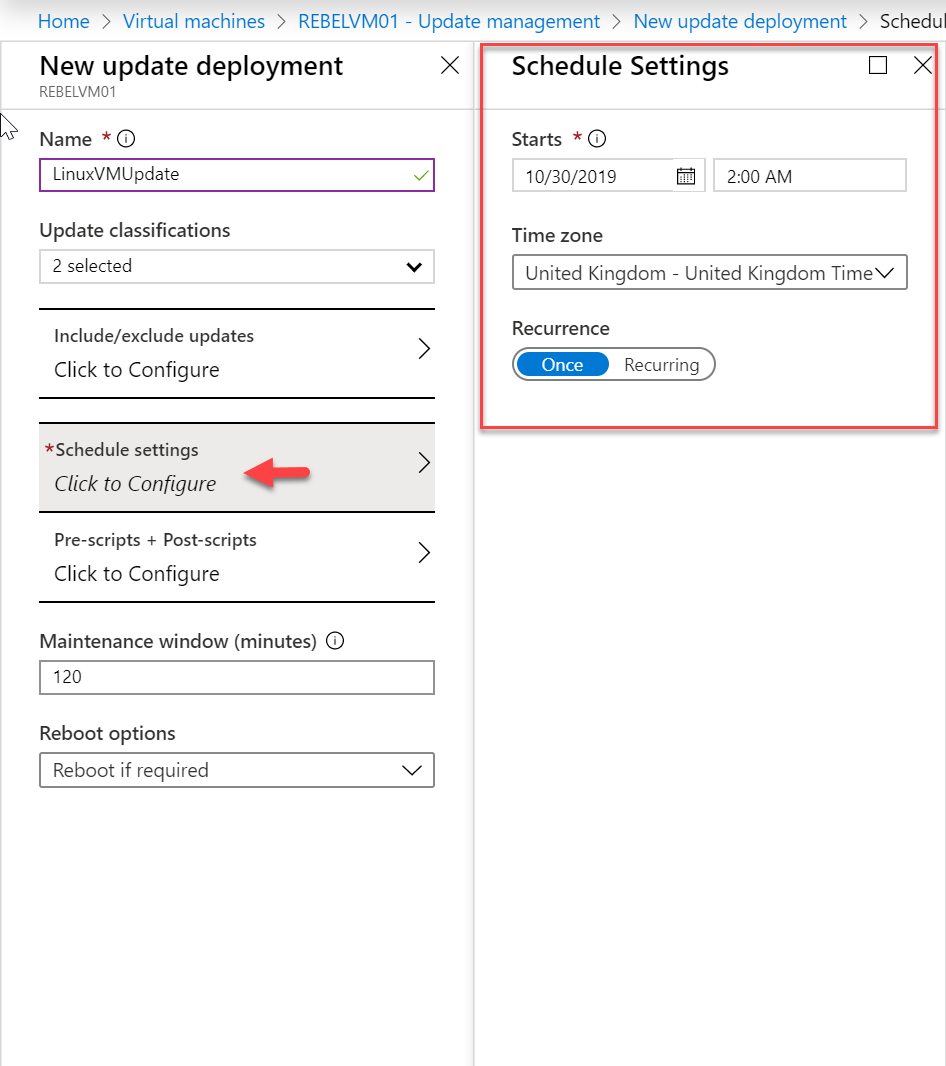
12. Then under Schedule settings, we can define the time, time zone and recurrence.
13. Under Pre-scripts + Post-scripts option we can define scripts that execute before patching and after patching.
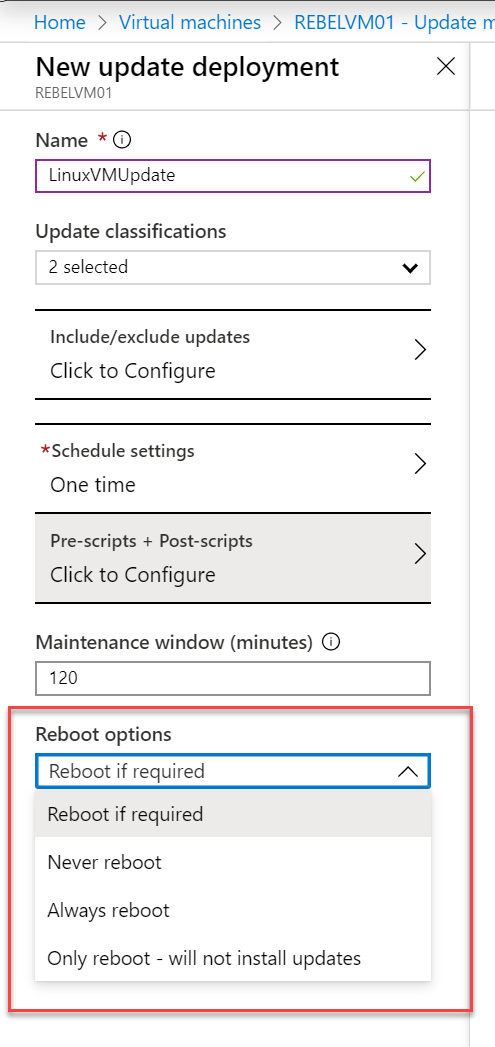
14. Under Reboot options, we can specify the way the system should handle the system reboot.
15. Once selections are done, click on Create to complete the schedule configuration process.
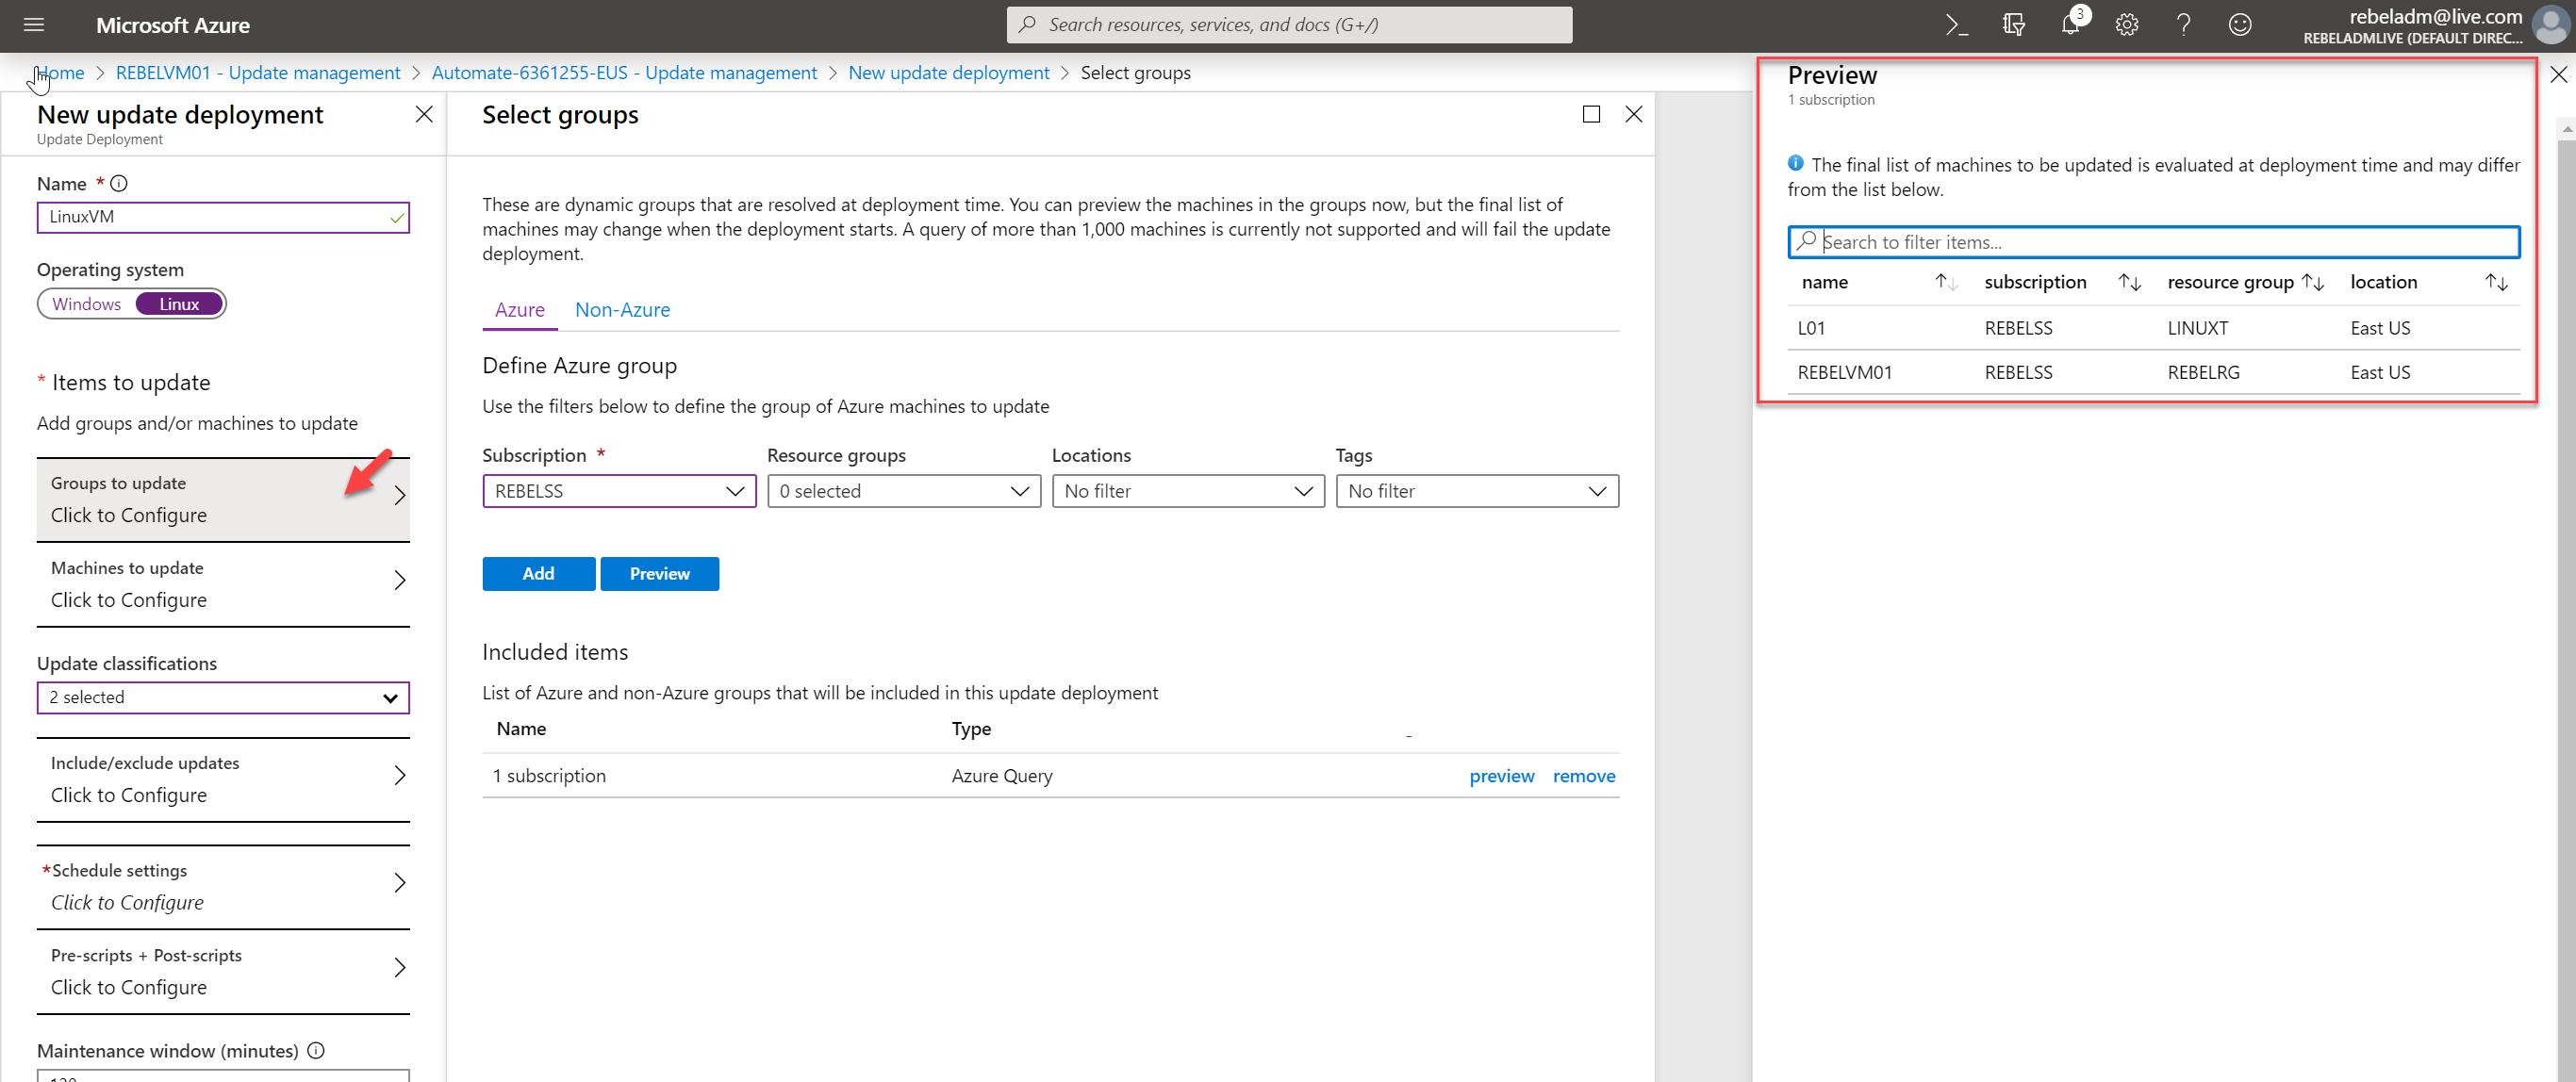
16. If we need to patch multiple Linux servers using one update schedule, create an update deployment schedule using Manage multiple machines option.
This allows selecting machine groups or individual machines as targets.
17. Once the system process the update schedule, we can see the results under History tab.
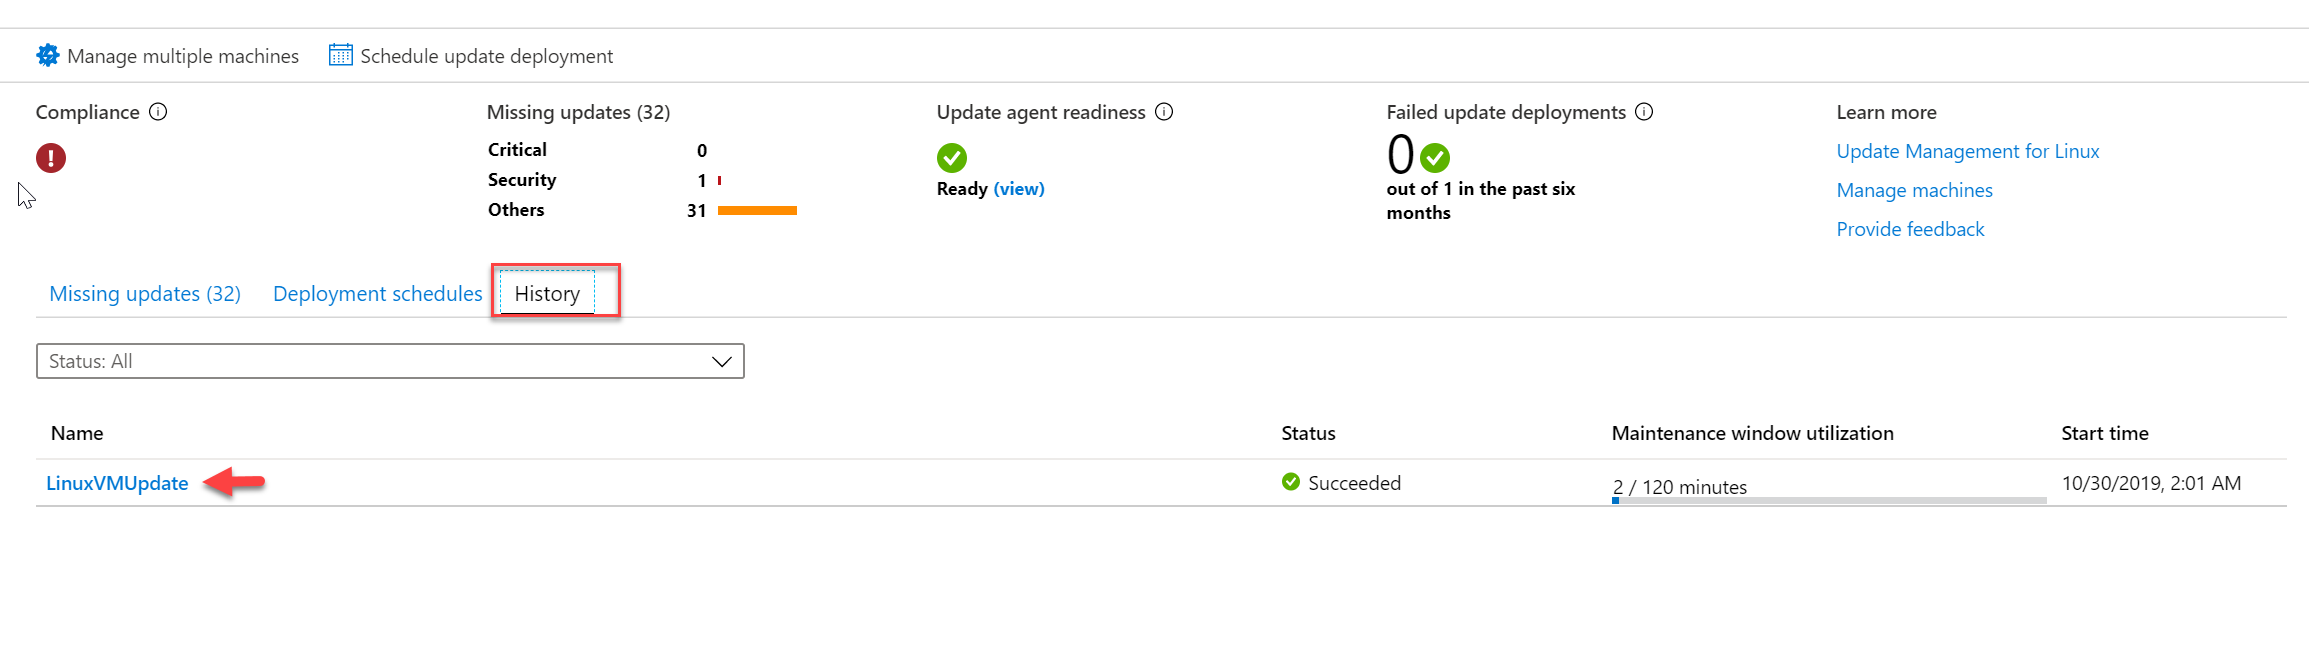
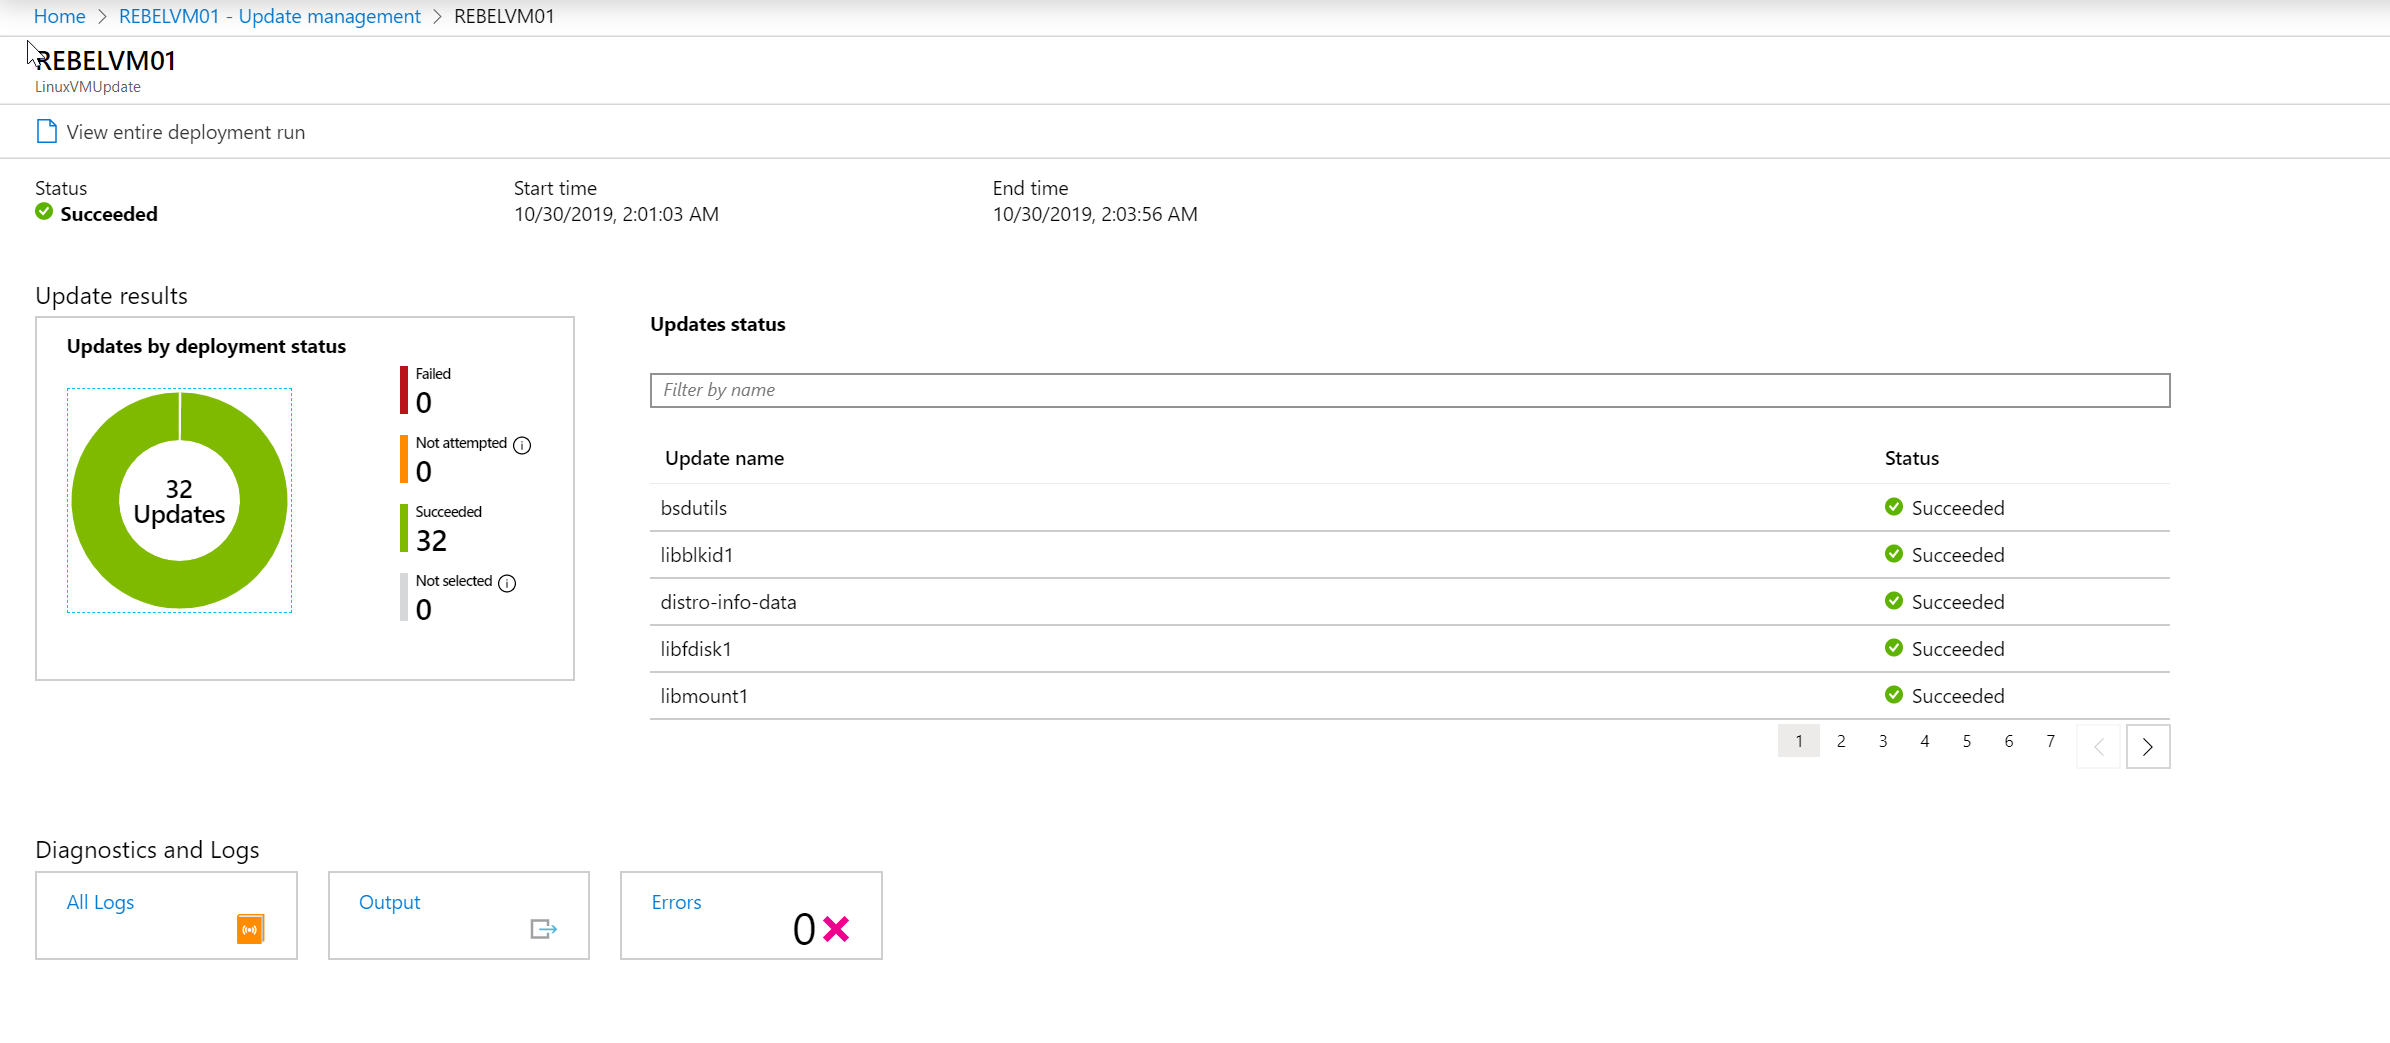
As we can see, all the updates are installed successfully. This marks the end of this blog post. If you have any further questions feel free to contact me on rebeladm@live.com also follow me on twitter @rebeladm to get updates about new blog posts.


Hi Dishan,
Good article,
I have one question, how is it possible to connect private repository as mention in the below link. Under Linux sub topic
https://docs.microsoft.com/en-us/azure/automation/update-management/update-mgmt-overview
Regards
Suraj
YOu can do this using run book method https://docs.microsoft.com/en-us/azure/automation/update-management/update-mgmt-enable-runbook
Thanks
One more question, I am having hard time installing agent in Linux.
and is not successful.
Hi
I cloud not get an option to integrate private repository using the above link
can you send me content of your runbook to rebeladm@live.com so i can have a closer look ?
Hi,
Do you have any another blog for windows servers.